



Twisted styles have become a cornerstone of natural hair care, offering protection, versatility, and effortless beauty that works for virtually any hair texture and lifestyle. Whether you’re looking for a low-manipulation style that keeps your hair healthy, a look you can sleep in for weeks, or something you can dress up or down depending on the occasion, twist variations deliver on all fronts. The truth is, mastering a few different twisted styles opens up a whole world of possibilities—you’re not locked into one look, and you can adapt each style to match your mood, the season, or your current hair goals.
The beauty of twists lies in their flexibility. You can create them thicker or thinner, wear them out or pinned up, keep them in for weeks or take them down after a few days. Some styles work best with a perm relaxant to smooth out the twists and make them look sleek and defined, while others thrive on the texture of natural, unrelaxed hair. Understanding the different twist categories and how to execute them—or what to ask for at the salon—helps you make confident choices about what suits your hair type, your styling time, and your aesthetic preferences. Let’s dive into the most popular perm twist styles that actually deliver, with the specific details you need to recreate them or maintain them yourself.
1. Classic Two-Strand Twists
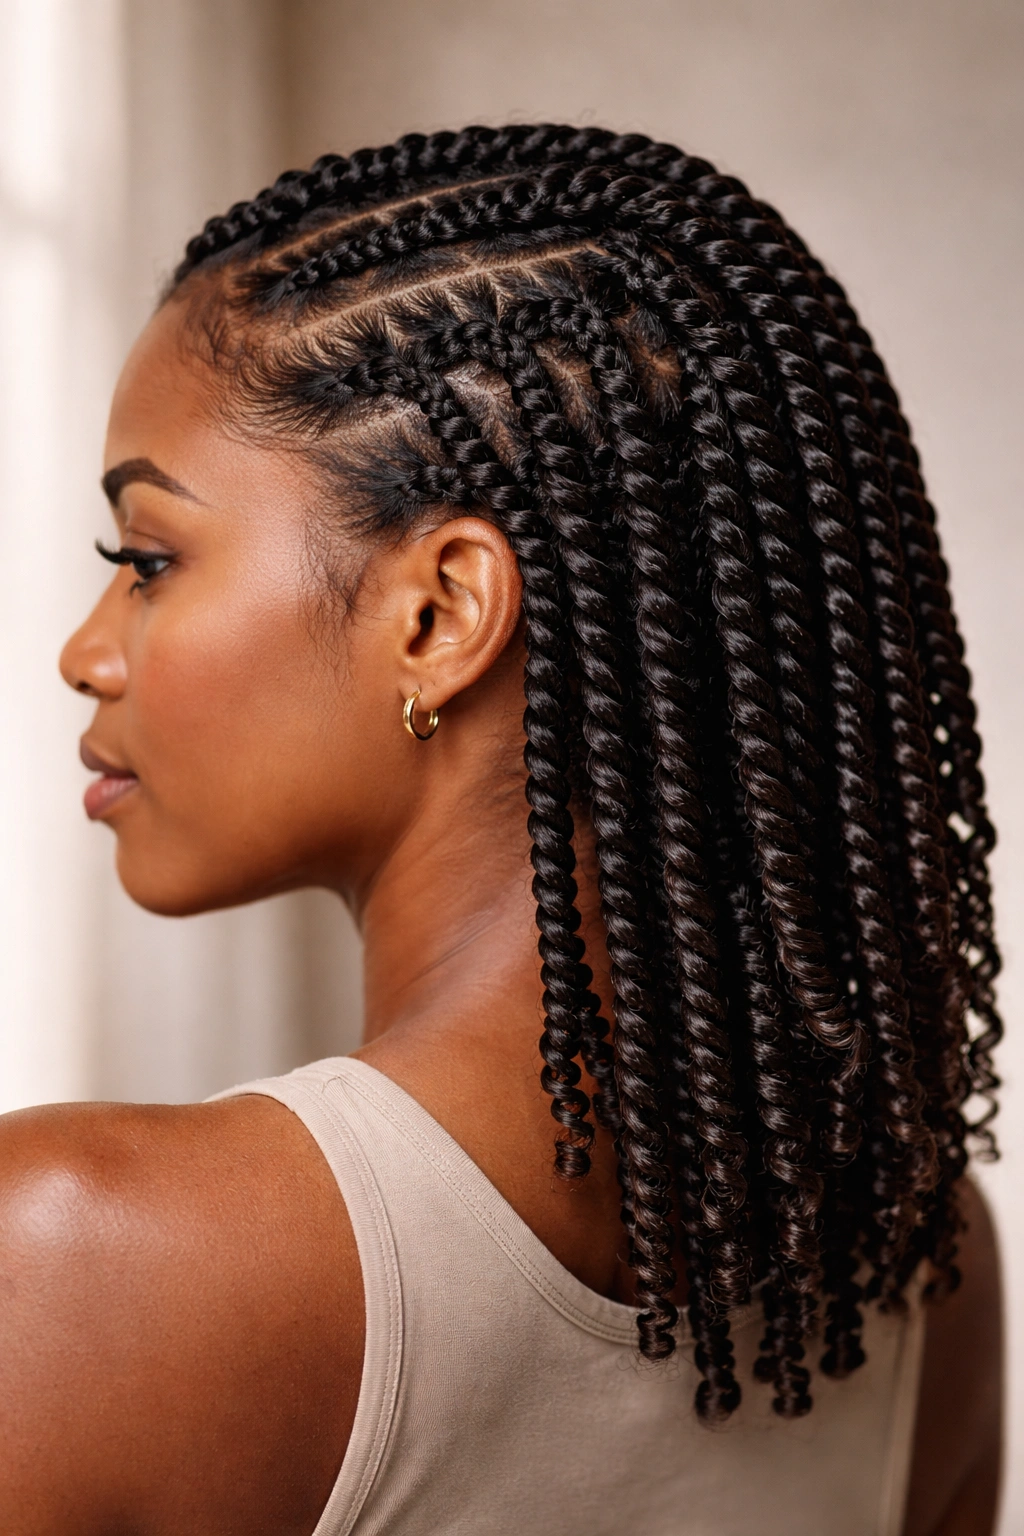
Two-strand twists are the foundation of twisted styling, and for good reason. You take two sections of hair, twist them around each other in a rope-like pattern, and secure the ends. With a perm relaxant applied first, these twists come out smooth, sleek, and polished—a far cry from the texture they’d have on completely natural, unrelaxed hair. The finished look is refined enough for a professional setting but casual enough to wear on a weekend.
Why This Style Stands Out
Two-strand twists work beautifully because they define your curl pattern without the bulk of larger styles. Each twist sits close to the scalp, showing off the actual shape of your head and face rather than hiding it under dense rope. The individual twists catch light and create dimension, especially when you apply a lightweight oil or sheen spray to them. This style doesn’t require elaborate or expensive products—just a good leave-in conditioner and a light oil.
What You Need to Know
- Installation time: 2-4 hours depending on hair thickness and length (thicker twists go faster than micro twists)
- How long they last: 2-4 weeks before they start to look fuzzy at the roots and lose definition
- Maintenance: Retwist the roots every 3-4 weeks using the same twisting technique; sleep in a satin or silk bonnet or on a silk pillowcase to protect them
- Best for: Hair that’s shoulder-length or longer; looser to medium curl patterns; anyone who wants a polished, defined look
- Styling versatility: Wear them down, pin them into a half-up style, wrap them into a high bun, or create a crown effect by pinning them around your head
Pro tip: The key to two-strand twists that actually hold is tension. You want them tight enough that they don’t unravel from the weight of your hair, but not so tight that you feel constant tension at the roots. Start by practicing on damp hair rather than soaking wet—damp twists hold their shape better during installation.
2. Thin Senegalese Twists
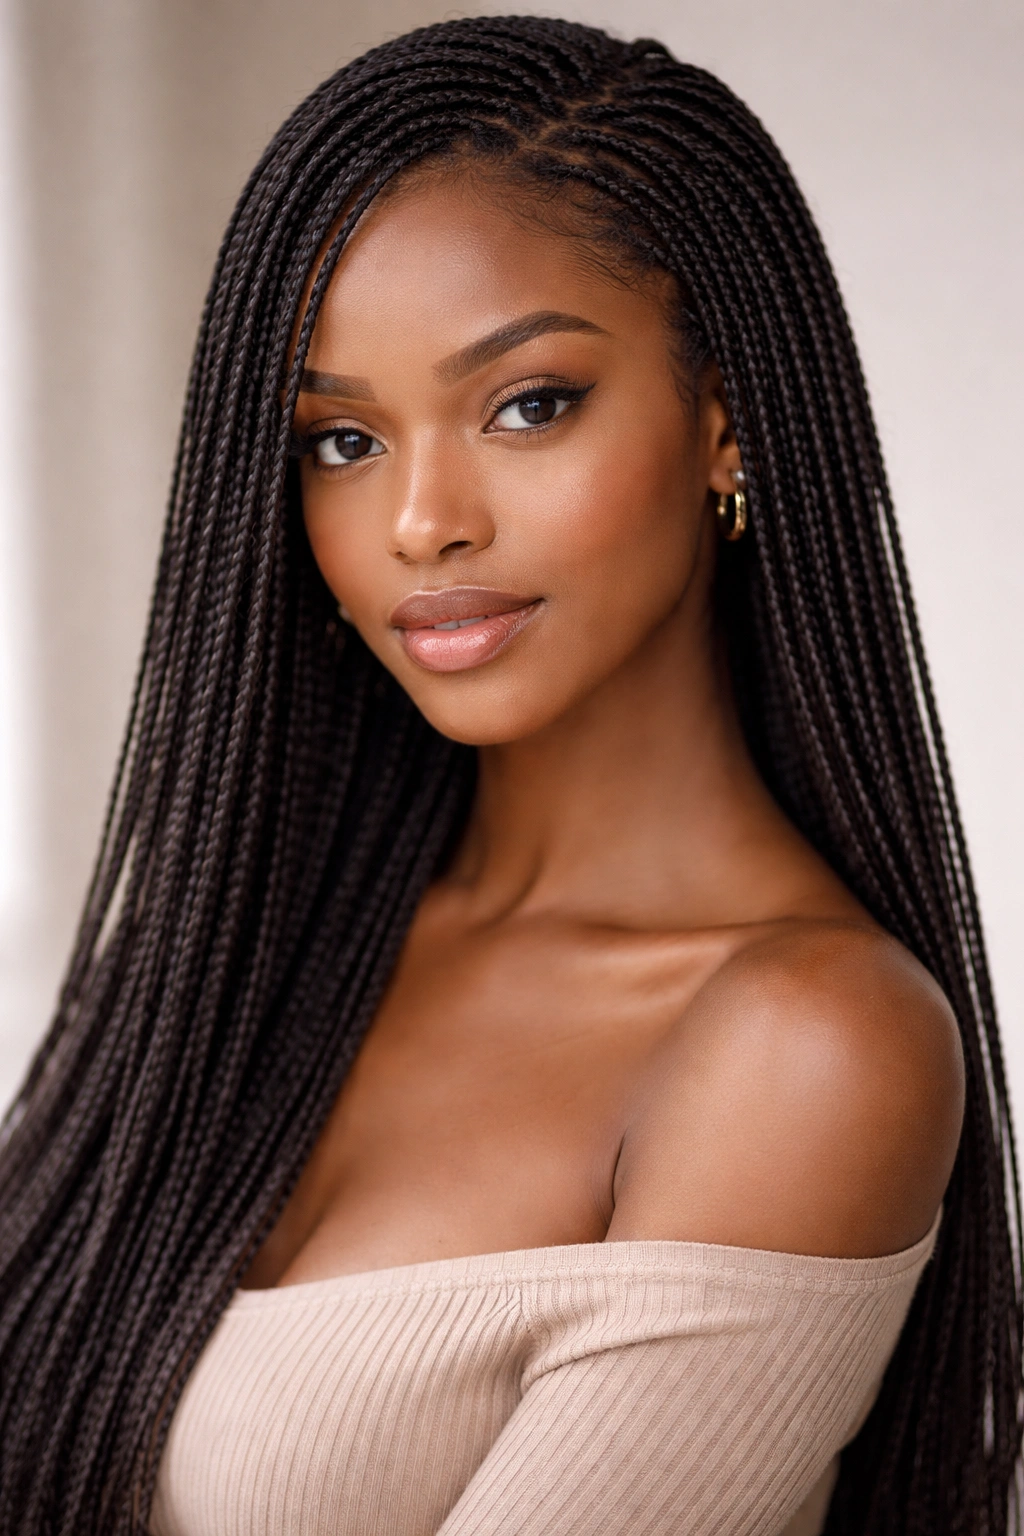
Senegalese twists sit at the ultra-fine end of the twist spectrum. Each individual twist is thin—almost hair-like—which means you can fit dozens of them on your head. The result is a style with incredible density and visual impact, almost like an explosion of texture around your face and shoulders. These are particularly flattering if you have a smaller head or a delicate frame, because the fine twists don’t overwhelm your features the way thick twists sometimes can.
How This Style Differs from Standard Twists
The magic of Senegalese twists is partly structural. Instead of twisting your hair with nothing else, you’re typically twisting your hair with added synthetic hair or thread woven throughout, which allows you to create dozens of thinner strands from the same amount of hair volume. This creates a lightweight, bouncy feeling—your head doesn’t feel heavy even though your hair is fully covered. A perm applied before installing Senegalese twists makes them look incredibly smooth and refined, with a polished rather than textured appearance.
The Practical Details
- Installation time: 4-6 hours (these take longer because there are so many individual twists)
- How long they last: 6-8 weeks if cared for properly—the thinness actually helps them last longer because there’s less frizz compared to thicker twists
- Root touch-ups: You’ll need to retwist roots around the 4-week mark; some people prefer to just let them frizz naturally for a more casual vibe
- Styling options: Pull them into a high pony, wrap them into an elegant low bun, create a faux hawk down the center, or wear them loose and flowing
- Sleeping considerations: These actually hold up well overnight without needing a bonnet, though you’ll want to pineapple them (gather them on top of your head) to prevent breakage and frizz
Worth knowing: Synthetic hair used in Senegalese twists can feel stiff or scratchy at first, but it softens with wear and washing. If you’re sensitive to that feeling against your scalp, ask for human hair or a softer synthetic blend instead, though that will cost more and won’t last as long.
3. Thick Rope Twists
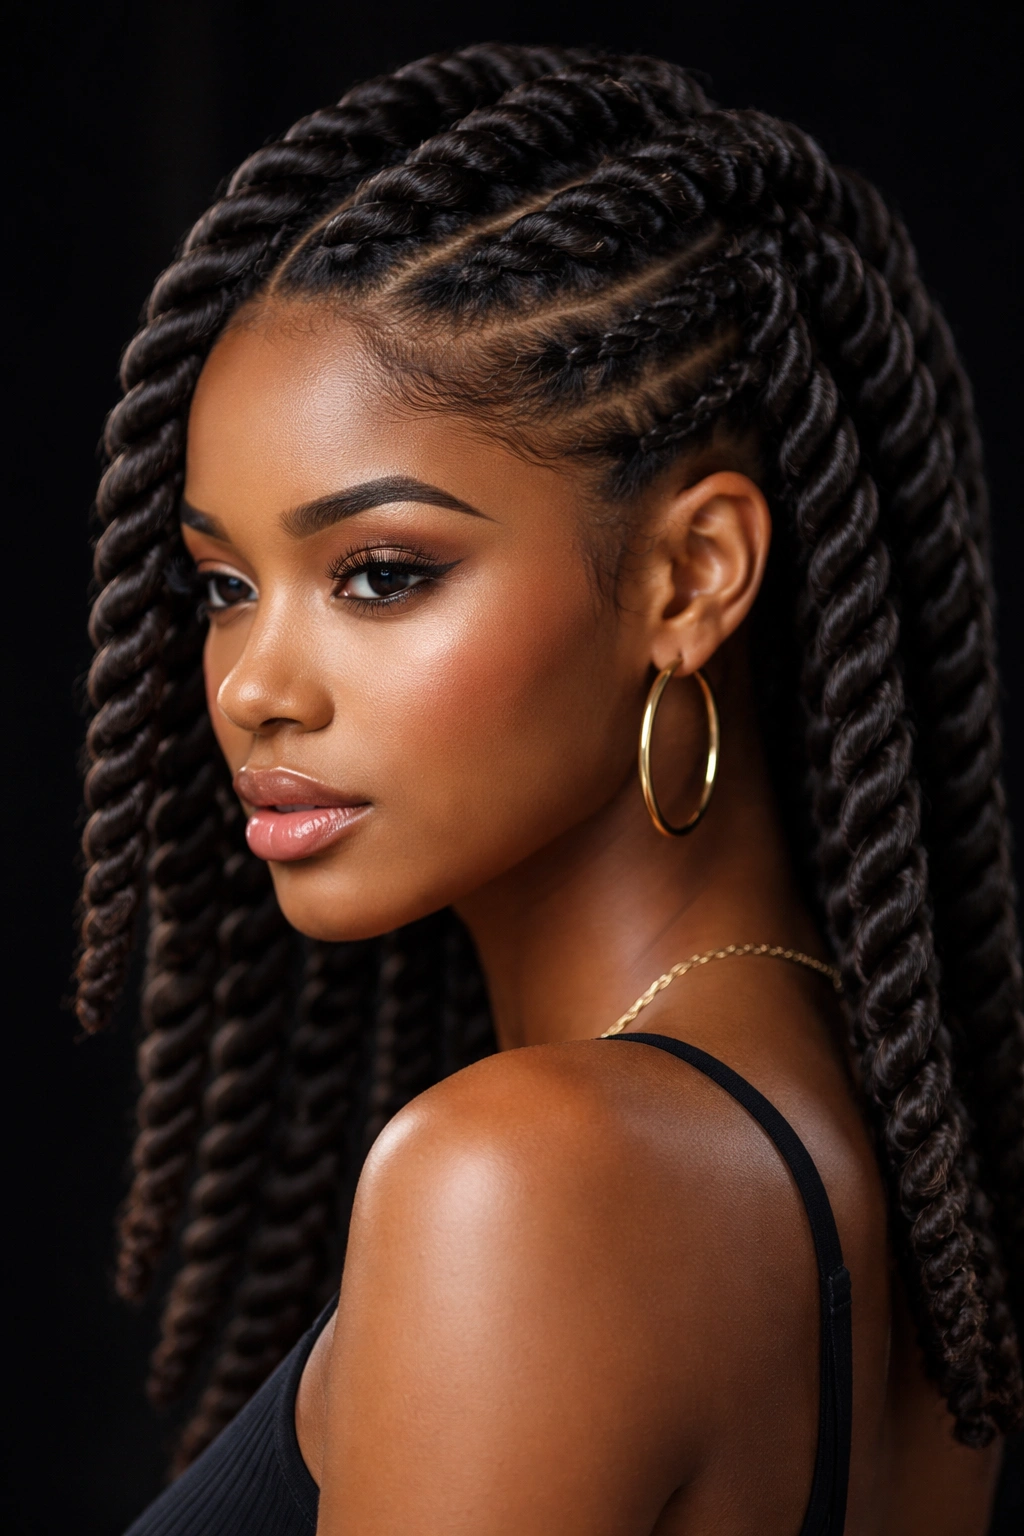
Thick rope twists make a bold visual statement. Each twist is substantial—sometimes as thick as a pencil or thicker—which means fewer total twists and a style that comes together relatively quickly. These are the twists that turn heads. They have real sculptural presence, and when you apply a perm relaxant first, they catch the light in a way that thinner twists simply can’t.
Why They Create Such Impact
The thickness itself is the styling element. Because each twist is so substantial, the negative space between them becomes part of the design. You’re not just seeing twisted hair; you’re seeing the architectural interplay between the twists and the gaps. A perm makes these twists smooth and defined, so the edges are clean and crisp rather than soft and blended. This creates a really modern, intentional look that photographs beautifully.
Practical Implementation
- Styling time: 1-2.5 hours for a full head (the fastest type of twist to install)
- Longevity: 3-5 weeks before they start to mat at the roots and lose their individual definition
- Maintenance between appointments: Retwist roots every 2-3 weeks; thick twists are prone to matting, so regular manipulation keeps them fresh
- Best hair types for this style: Longer hair (waist-length or closer), thicker or coarser textures that can hold up the weight, people who don’t mind more maintenance
- Wearing them: These look stunning pinned into an elaborate updo, swept to one side, or worn in a half-up crown style; wearing them completely down can feel dramatic but works for the right occasion
Insider note: Thick twists are actually less damaging to your edges than finer styles because they distribute weight across fewer sections. If you have fragile edges, thick twists can actually be a good protective choice compared to micro twists.
4. Three-Strand Twists
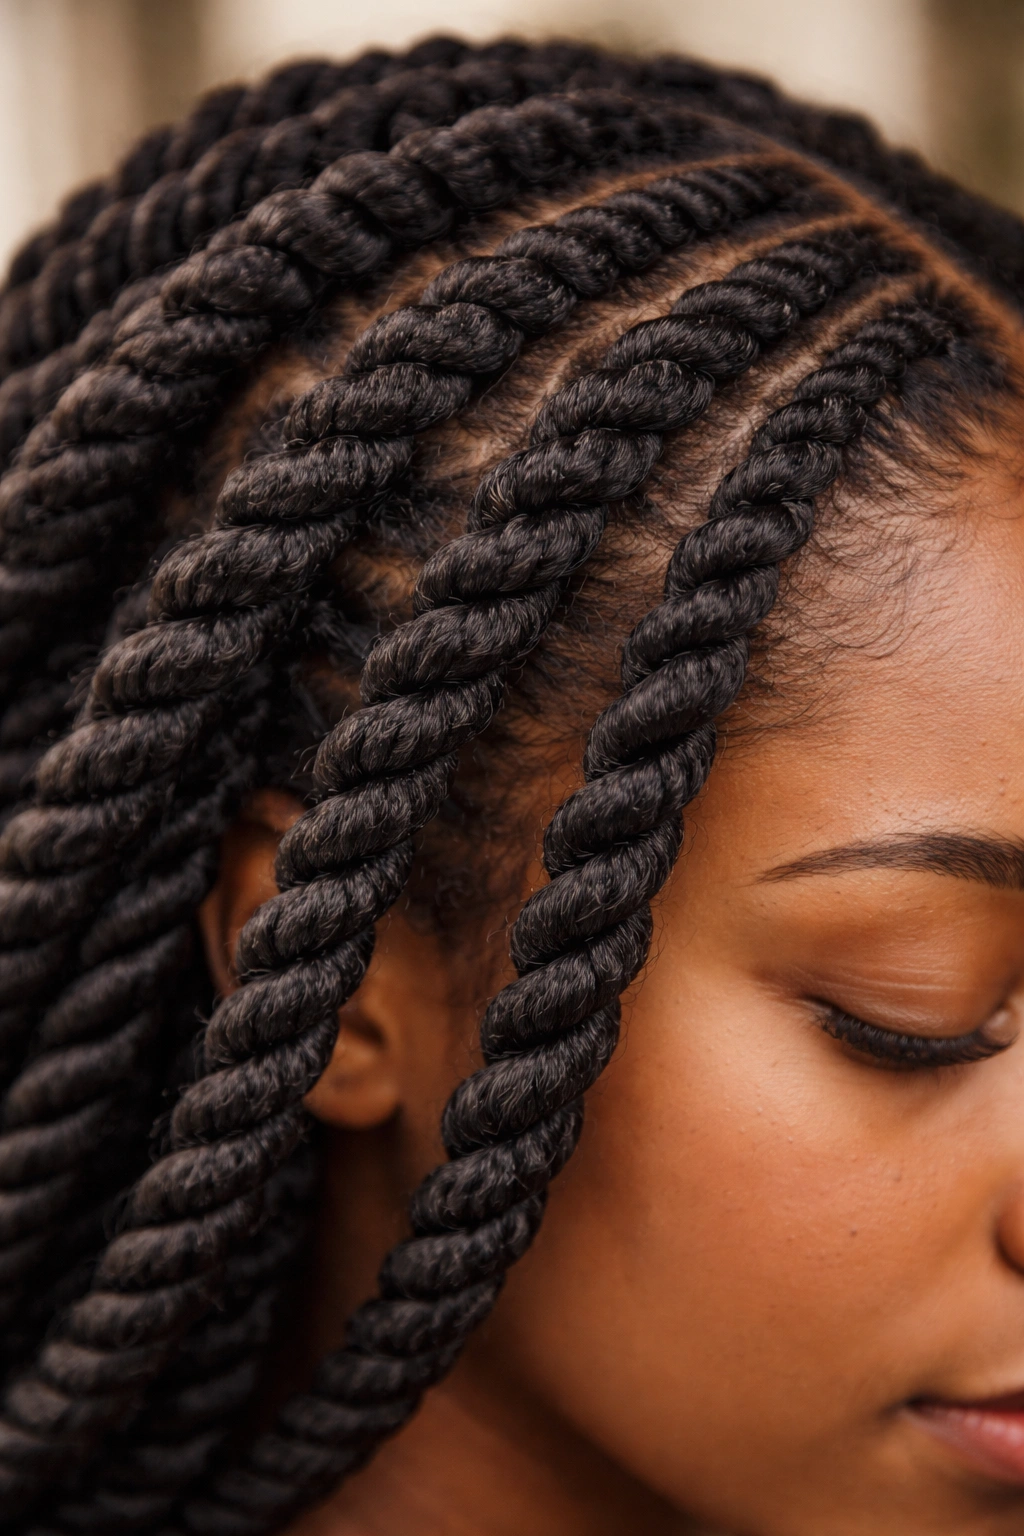
Three-strand twists are technically braids, but they sit in that beautiful middle ground between braids and twists. You’re dividing the hair into three sections and twisting them together, which creates a rounder, fuller strand than a two-strand twist. They have more texture and grip, which means they hold their shape longer and have more visual interest up close. With a perm applied beforehand, three-strand twists look incredibly refined and sculptural.
What Makes Three-Strand Unique
The mechanics are different. Each three-strand twist is denser because you’re working with three sections instead of two, which means less hair is needed to create the same thickness. The finished texture is rounder and fuller—almost like a miniature rope of hair. These don’t unravel as quickly as two-strand twists because the three-section structure is more stable. They also create interesting shadow and highlight play as light hits the different angles and curves of the twists.
Styling Considerations
- Installation time: 3-5 hours depending on your thickness preference
- How long they last: 4-6 weeks because the three-strand structure is naturally more stable than two-strand
- Retwisting schedule: Every 3-4 weeks, though these can often go a bit longer before looking fuzzy at the roots
- Perfect for: Creating an updo, pinning into a wrap-around crown, or styling half-up; these look especially elegant in these configurations
- Hair length and texture: Best on hair that’s at least shoulder-length; works on all curl patterns
- Sleeping strategy: Pineapple them or use a silk bonnet to prevent frizz; the rounder shape means they’re less likely to crease awkwardly
Pro tip: Three-strand twists actually look better a week or two in, after they’ve had time to settle and the fiber has relaxed slightly. Don’t judge them the day you get them—let them mature.
5. Flat Twists
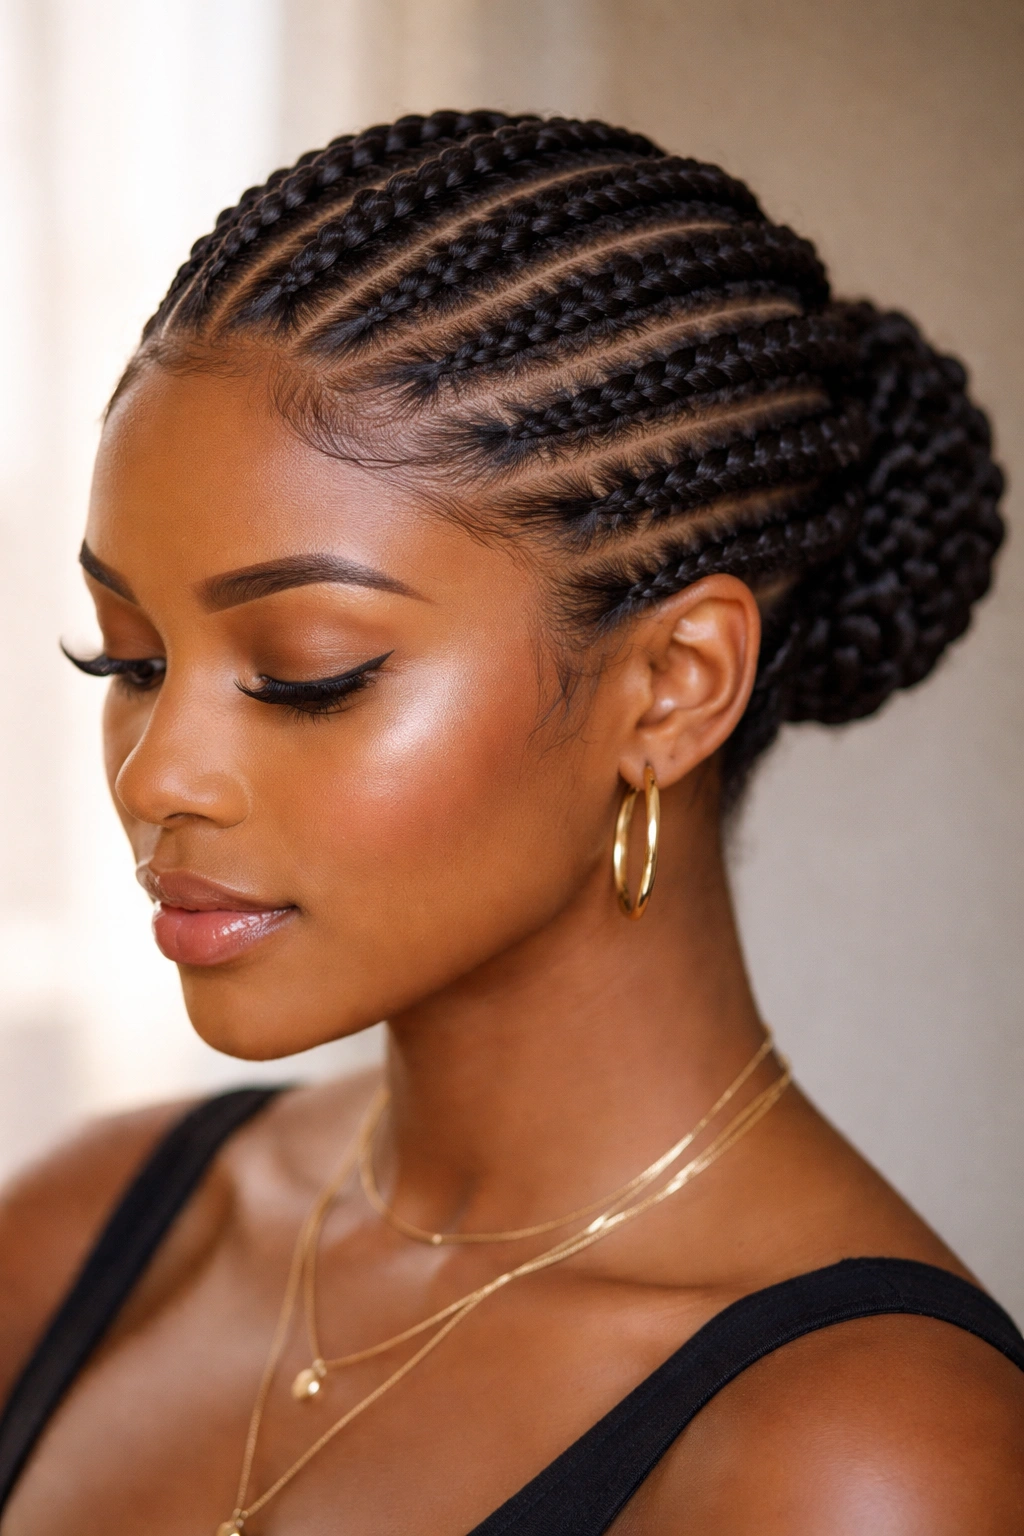
Flat twists are twisted close to the scalp, sitting against your head in a flat, cornrow-like pattern rather than hanging loose. They’re created by parting your hair into rows and twisting those sections so they lay flat against the scalp. The effect is architectural and intentional, almost like a crown of twisted braids framing your face and head. With a perm applied first, flat twists look incredibly polished and defined.
The Visual and Practical Appeal
Flat twists offer incredible styling versatility because they sit close to the head, showing off your face and head shape rather than obscuring it. You can create them in rows that follow your natural hair growth pattern, or you get creative with the pattern—spiraling twists, twists that frame the face, geometric designs. They’re practical because they keep your hair off your face and neck, making them perfect for hot weather or situations where you need hair secured. They’re also protective because the twists sit close to the scalp, meaning less tension on your hairline.
The Details You Need
- Installation time: 3-6 hours depending on how complex the flat twist pattern is
- How long they last: 4-6 weeks if you’re careful; the close-to-scalp positioning means they don’t get as much tension and manipulation as loose twists
- Maintenance: Retwist the front every 2-3 weeks as needed; the roots are visible and mat more quickly with this style than with loose twists
- Styling flexibility: Wear them out as a complete style, gather the ends into a bun, sweep them to one side, or wear them with the ends twisted loosely to create a hybrid style
- Best for: Showcasing your face shape, keeping hair off your neck, creating intricate, intentional-looking styles, protecting your edges
- Sleeping: These are actually ideal for sleeping because they won’t move around much; you don’t need to wrap them
Worth knowing: Flat twists create a slightly raised texture on the scalp due to the twisting. Some people find this uncomfortable during installation, but it settles down after a few days. If you have a very sensitive scalp, give yourself time to adjust or ask your stylist to keep them a bit looser than the tightest possible tension.
6. Mini Twists
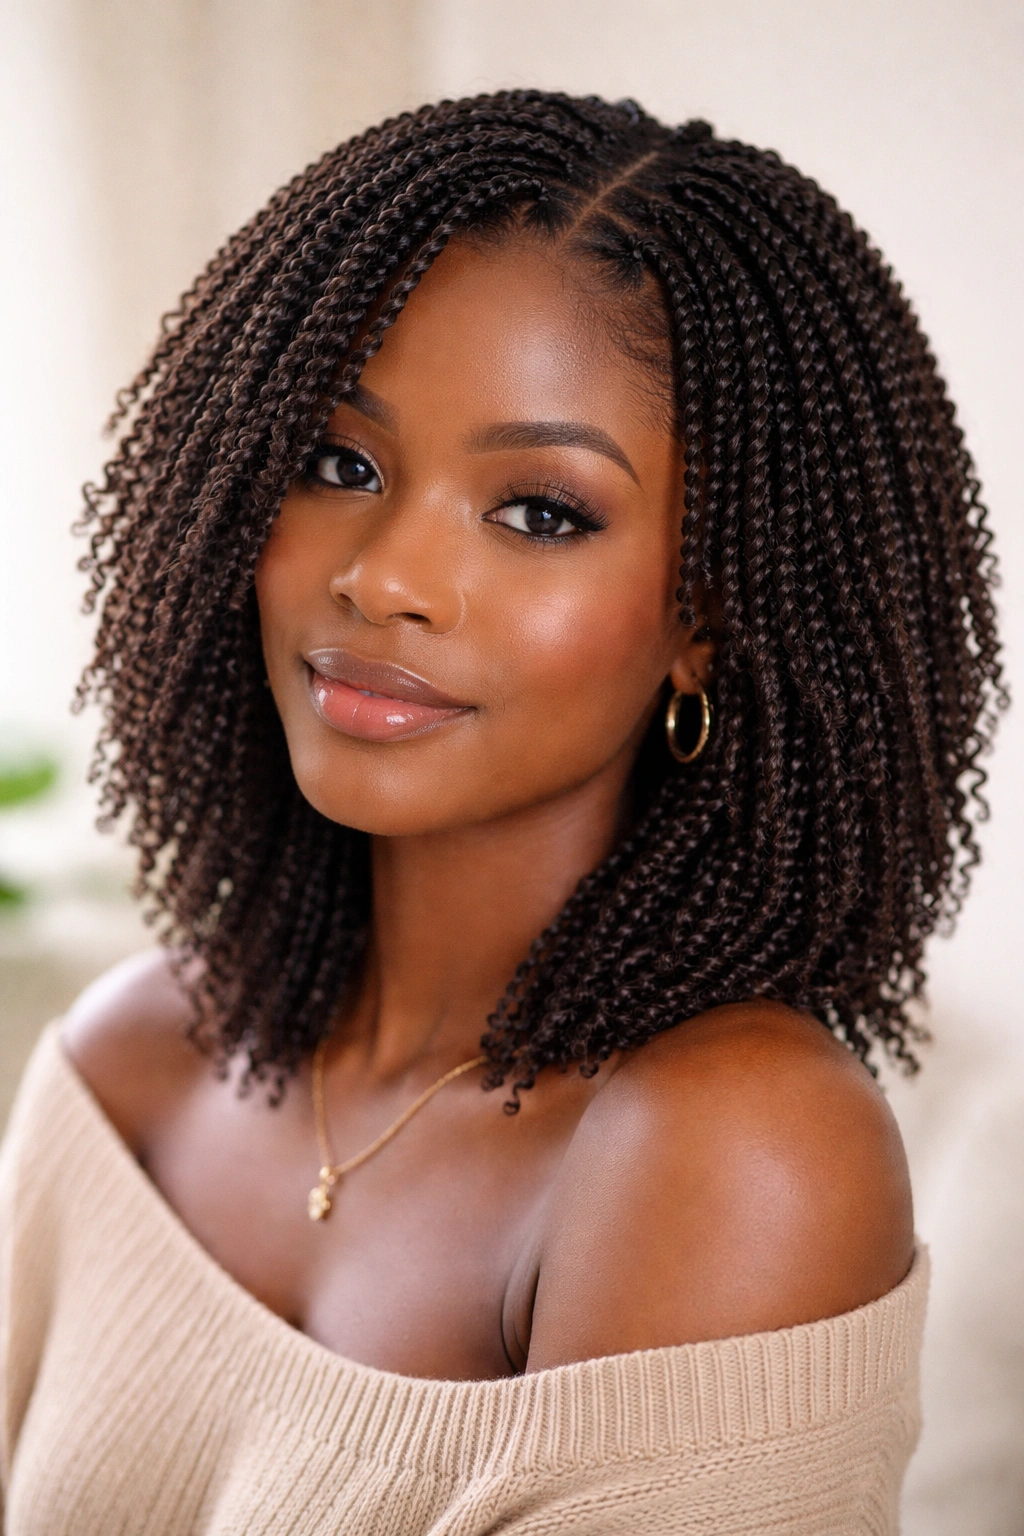
Mini twists occupy the micro-fine territory of twisted styles—thinner than classic two-strand twists but usually thicker than true micros. They create a style that’s dense, detailed, and visually complex. You can fit 100+ mini twists on your head depending on your hair thickness and length. The effect is incredibly full and textured, almost like a halo of twisted strands. With a perm relaxant applied first, mini twists look incredibly smooth and refined despite their number.
Why People Love This Style
Mini twists offer the best of both worlds—enough density that your hair looks full and protective styling is obvious, but thin enough that the style doesn’t feel overwhelming or matted. Each twist is distinct and visible, so you see the actual artistry of the style. There’s also something meditative about the look of mini twists—they have an almost hypnotic visual quality. They work beautifully both worn down and pinned up, and because each individual twist is thin, they style easily into updos without creating bulk.
What to Expect
- Installation time: 5-8 hours (these take the longest because there are so many individual twists)
- Longevity: 6-10 weeks is possible if you take good care of them; the thinness helps them last longer because individual twists don’t accumulate as much weight
- Root maintenance: Retwist every 4-5 weeks; because there are so many twists, root touch-ups can take 2-3 hours
- Styling options: These excel as updos—you can wrap them, pin them into elaborate styles, create braided crown effects, or wear them flowing down your back
- Best for: People who love detail, those who want a long-lasting protective style, anyone who plans to style most of the time rather than wearing twists loose every day
- Scalp sensitivity: With this many twists at once, make sure your scalp is healthy and not irritated before installation; 100+ twists means significant pulling
Pro tip: Mini twists actually look better after a week or two than they do the day you get them installed. The initial installation creates visible separation between each twist, but after a few days and some sleeping on them, they blend together slightly and look more seamless and refined.
7. Crochet Twists
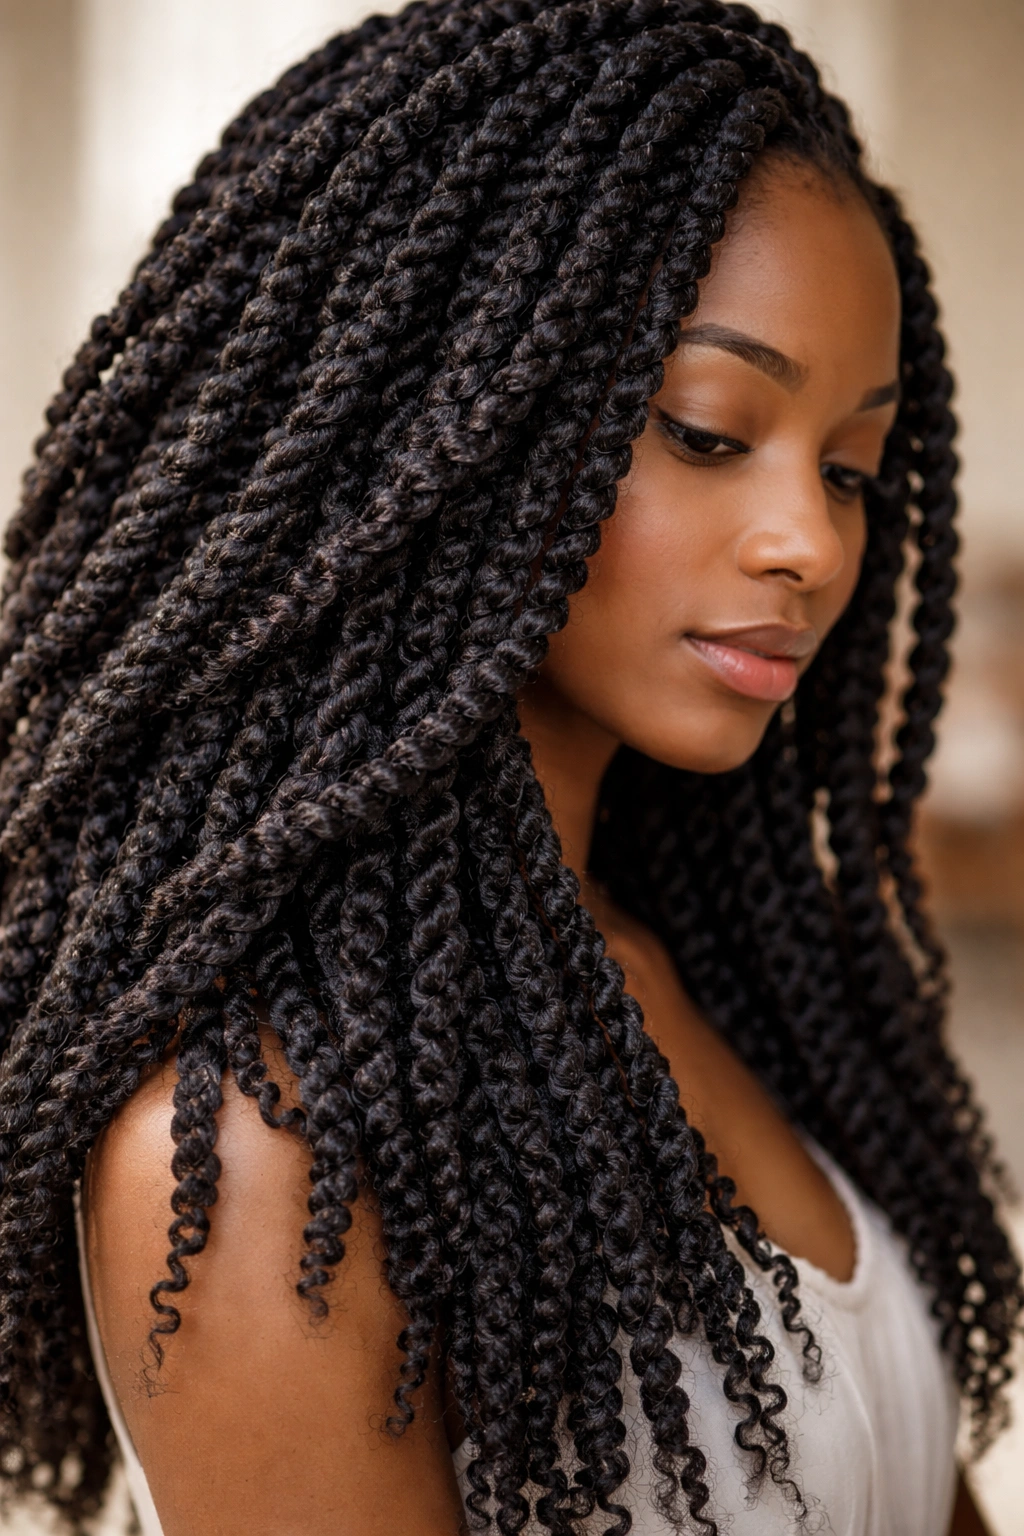
Crochet twists combine twisting with crochet braiding techniques. Your natural hair is twisted, but added hair (synthetic or human) is crocheted into the base twists to extend them, add volume, or change the texture. The result is a twisted style that’s fuller, longer, and more voluminous than you could create with just your natural hair alone. With a perm applied to your natural hair first, the base twists look smooth and defined, and the added hair creates beautiful texture contrast or a matching smooth finish, depending on the hair type you choose.
How This Differs from Standard Added-Hair Twists
Crochet twists offer more control over the final look because you’re choosing exactly how much and what type of hair to add. You can create a style that’s mostly your natural hair with just a bit of added texture, or you can create a much fuller, dramatically different look. The crochet method is gentler on your hair during installation and removal compared to twisting added hair throughout—the crocheting creates a secure hold without requiring the tight twisting that can sometimes be harsh on your own hair.
The Technical Details
- Installation time: 3-5 hours depending on the size of the twists and amount of added hair
- Longevity: 6-10 weeks if you use quality added hair; some people keep them in longer because the added hair protects your own hair from environmental stress
- Maintenance: Retwist your natural hair roots every 4-6 weeks; the crocheted sections don’t need maintenance as they don’t root out
- Best practice for installation: Get this done at a salon unless you’re experienced with crochet braiding; improper crochet technique can cause breakage
- Styling: Wear them down for maximum volume and beauty, pin them into an updo, or split them into twists and faux locs for a hybrid style
- Hair care during: Use a light leave-in conditioner; with added hair, regular product application becomes more important for moisture balance
Worth knowing: The quality of the added hair matters significantly. Synthetic hair is cheaper and holds style better, but human hair feels more natural and breathes better against your scalp. If you’re keeping crochet twists in for longer than 6 weeks, investing in human hair is usually worth it for scalp health.
8. Faux Locs With a Twisted Base
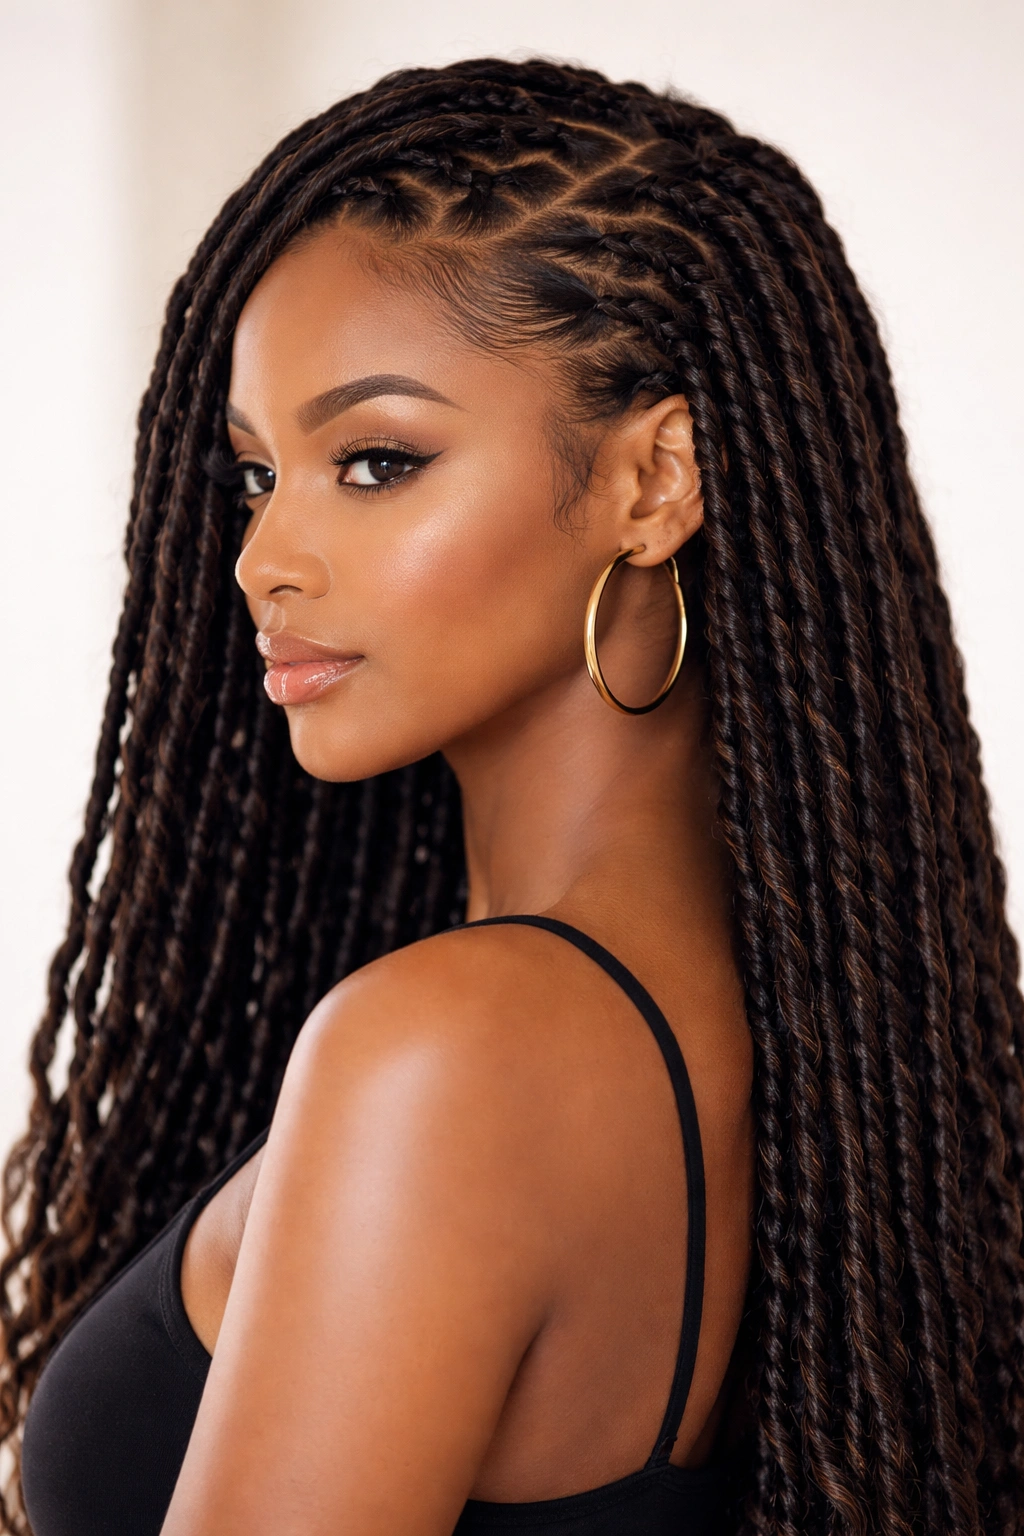
Faux locs created with a twisted base give you the visual impact and protective benefits of locs without the commitment of real locs. You’re creating a twisted foundation that’s then wrapped and finished to look like a loc. These are distinct from other twisted styles because the twists are means to an end—you’re not keeping them as twists; you’re finishing them into a loc-like appearance. With a perm applied first, the base twists are smooth and defined, and the finished faux locs have a sleek, refined look.
Why This Is Popular
Faux locs look incredibly stylish. They have the visual weight and drama of real locs but without the multi-year commitment and the specific maintenance routine locs require. You can wear them for 6-8 weeks and then take them down with no permanent changes to your hair. They’re protective because the wrapped structure keeps individual hairs bound together and minimizes manipulation. They’re also versatile—you can braid faux locs together, pin them up, wrap them, or wear them loose in multiple configurations.
What You Need to Know
- Installation time: 4-6 hours for a full head
- Longevity: 6-8 weeks is typical; the wrapped structure keeps them together longer than unfinished twists
- What they look like when fresh: Individual faux locs with clean, finished edges; if done well, they’re difficult to distinguish from real locs from a distance
- How they look after a few weeks: They naturally develop a slightly fuzzy appearance at the roots as new growth comes in and the wrapped sections relax slightly; this is normal and expected
- Maintenance: Retwist or rewrap the roots every 4-5 weeks; you can also refresh the look by using mousse or gel to smooth down any frizz
- Styling options: Wear loose, create a high pony using faux locs as your base, wrap them into an elegant bun, braid sections together, or even dye sections for creative color
- Sleeping: Sleep on a silk pillowcase or wrap them in a silk scarf to keep them looking fresh
Insider note: The finishing method matters. Some stylists wrap the twisted base with thread or yarn, others use additional hair to wrap it, and others use a combination. Ask your stylist which method they use, as it affects how long they last and how they look over time.
9. Side-Swept Twisted Crown
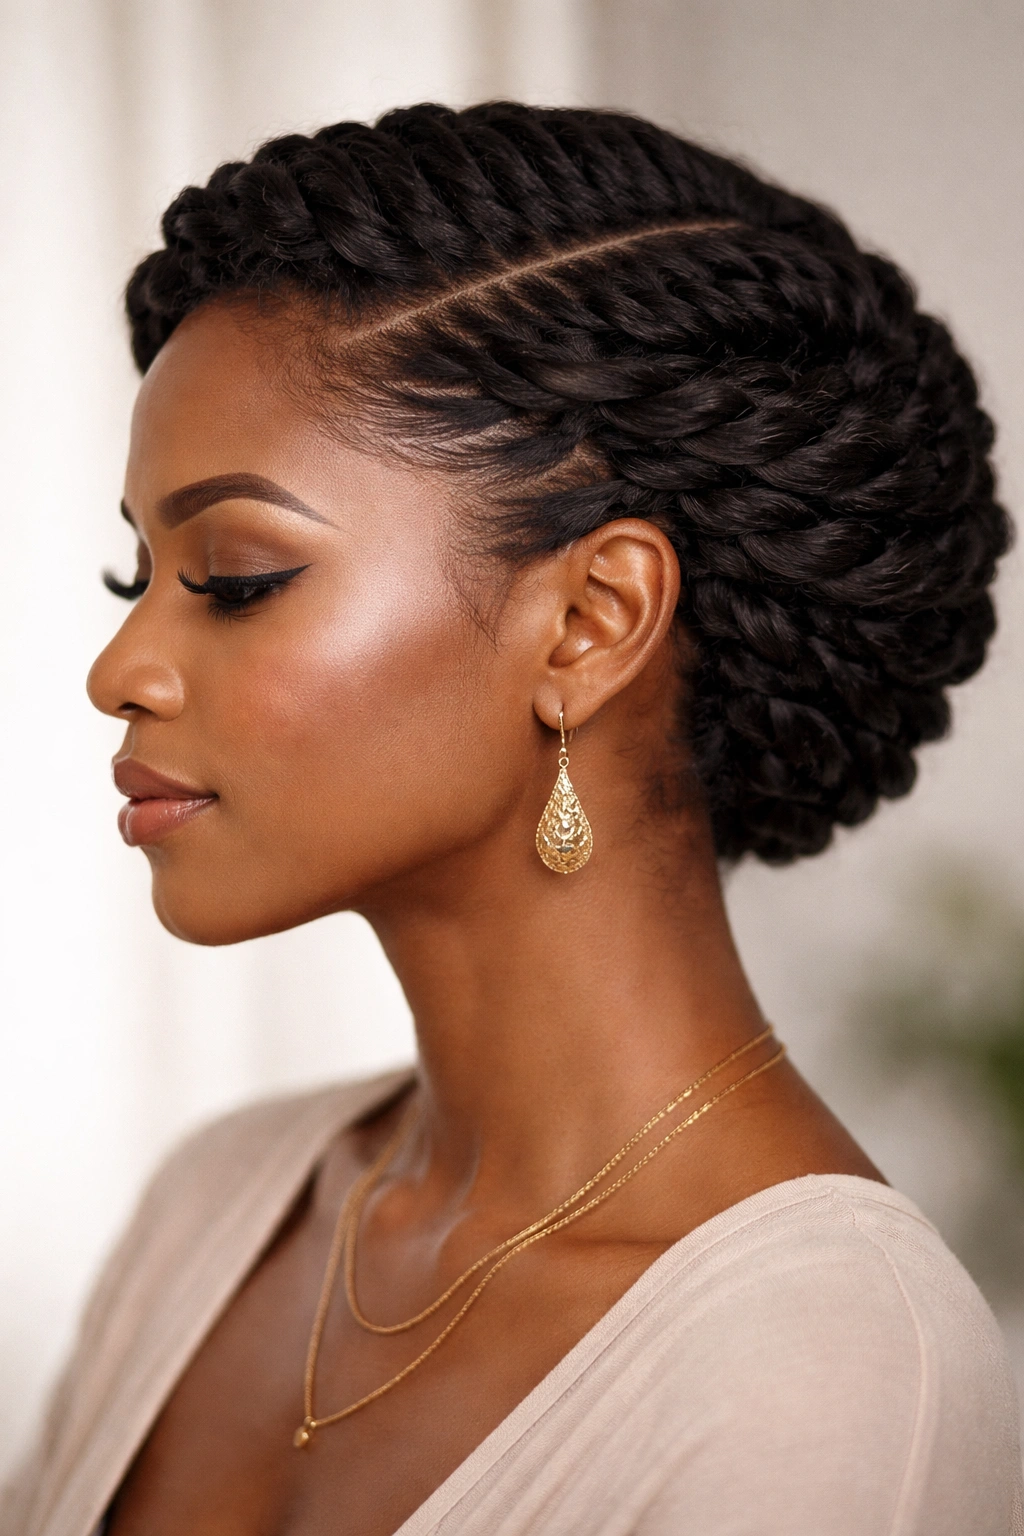
A side-swept twisted crown is a hairstyle design created using flat twists that start at one side of your head and sweep across to the other side, creating a crown-like effect that frames your face beautifully. It’s simultaneously protective and elegant, suitable for professional settings, casual wear, or even special occasions. With a perm applied first, the flat twists are smooth and refined, and the overall effect is polished rather than casual.
Why This Style Works for So Many Occasions
The twisted crown creates an optical effect that’s incredibly flattering. By sweeping twists across the top of your head from one side to the other, you’re creating a lifting, lengthening effect that makes your face look slimmer and your features look more defined. It shows off your edges and your face shape. It keeps hair off your neck, making it perfect for hot weather or when you want to show off your shoulders. It’s also genuinely practical—the twists are secured with pins, so they stay in place throughout the day without requiring any touch-ups or adjustments.
Creating and Maintaining This Style
- Installation time: 2-4 hours depending on how many twists comprise your crown and how intricate the pattern is
- Longevity: 3-5 weeks before you’ll need to retwist the roots
- How it works: Typically 3-6 flat twists are created, starting at one temple or side of your head and sweeping across toward the opposite side; the remaining hair hangs loose, is pinned into an updo, or is left out for additional styling
- Styling the rest of your hair: The loose hair can be left as is, twisted further, pinned into an elegant low bun, or styled however you prefer
- For the smoothest look: Apply smoothing cream or gel to each twist as you create it; this keeps flyaways in place and makes the twisted crown look intentional and polished
- Sleeping: Gently wrap the crown in a silk scarf before bed; the loose hair can be managed however you normally manage your twists overnight
- Occasions: Office appropriate, date night appropriate, wedding guest appropriate; this style elevates regular twists into something special
Pro tip: The side-swept crown looks dramatically better if you spend an extra minute on each twist to make sure they’re smooth and even in thickness. Asymmetrical thickness looks intentional, but sloppy installation just looks unfinished. Take your time with this one.
10. Twisted Updo and Protective Styling
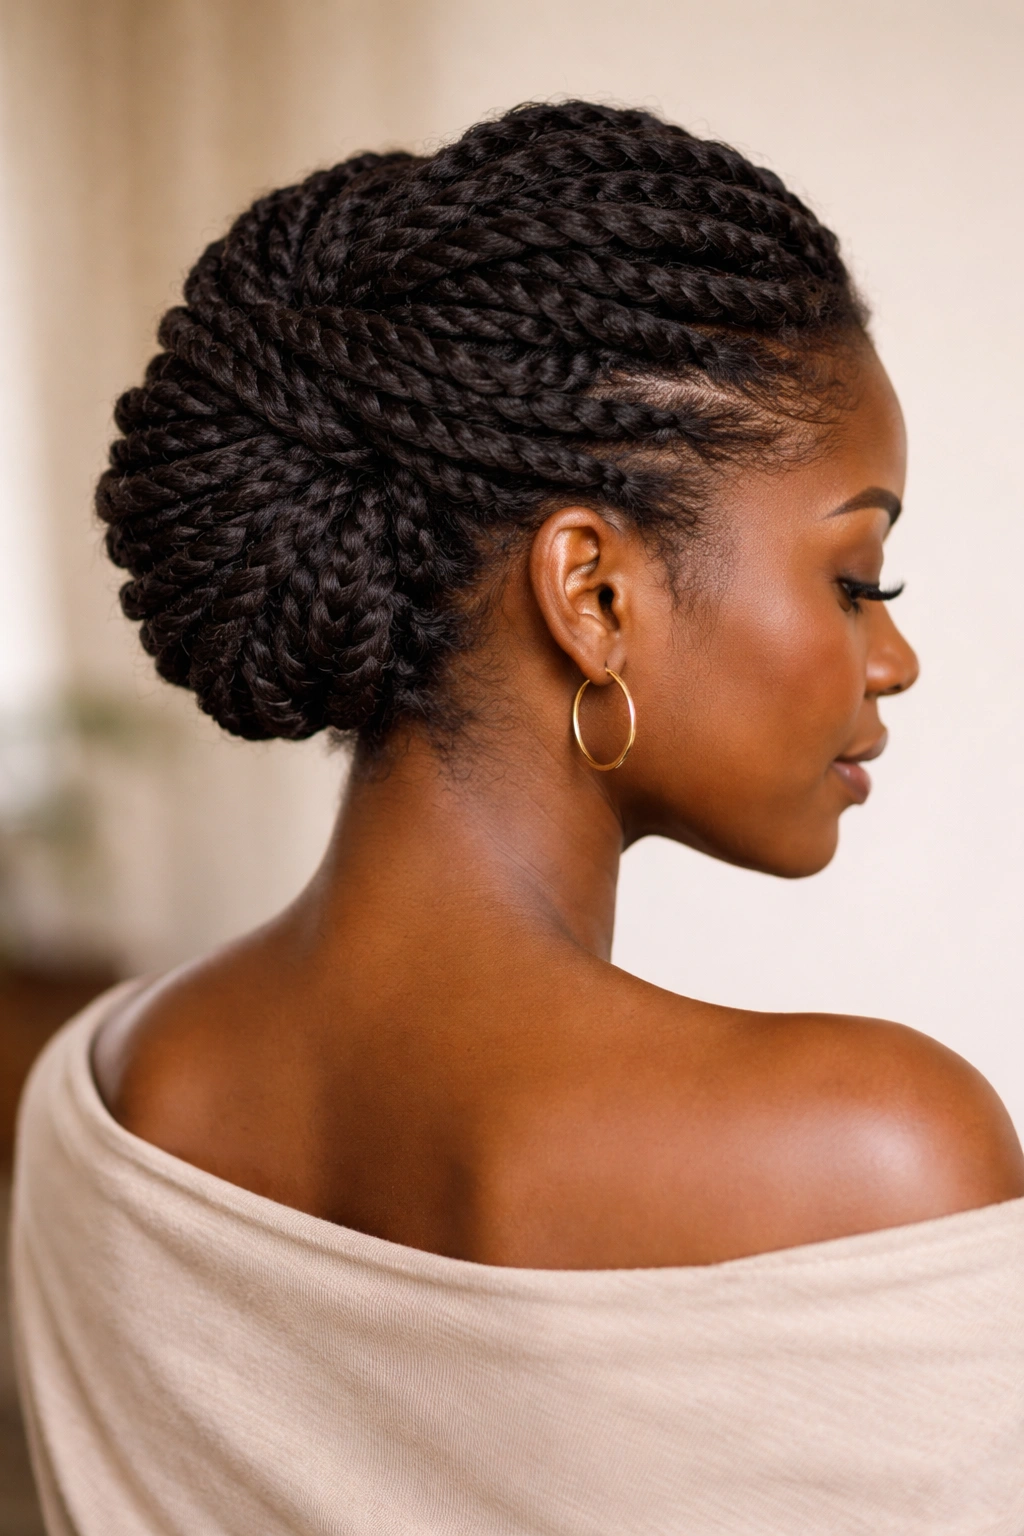
A twisted updo is exactly what it sounds like—twisted strands that are pinned, wrapped, or secured against the head in an updo configuration. This is genuinely protective styling because the ends of your hair are tucked away and secured, minimizing manipulation and environmental exposure. You can create a twisted updo using loose twists that you pin after installation, or you can use flat twists as your base and tuck the ends. With a perm applied first, the twists are smooth and defined, and the finished updo is incredibly polished and intentional-looking.
The Protective and Practical Benefits
Protective styling is one of the most important practices for maintaining healthy natural hair. A twisted updo minimizes the stress on your edges because the weight of your hair is distributed across the updo rather than pulling down your hairline. It keeps your hair tucked away from collars, shoulders, and the elements. You can wear a twisted updo for 1-2 weeks or even longer if you’re careful, providing true protective benefits. Because the twists are contained in an updo, they don’t get as much friction from pillows at night or from moving around during the day, so they last longer and look fresher longer.
How to Create and Style
- Installation approach: Create loose twists throughout your head (full head of twists is typical), then sweep them up and pin them into an updo configuration, or create flat twists and secure the ends into an updo
- Styling variations: A low bun made from twisted strands; a twisted spiral knot at the back of the head; multiple twisted loops pinned against the back of the head (looks like flowers or a rose garden); a high twisted bun with some twists left loose for a romantic effect
- How long to wear it: 1-3 weeks without retwisting, or up to 5 weeks if you’re willing to do root touch-ups every 2-3 weeks
- Sleeping in an updo: This is actually ideal for protective styling; your hair is secure and you don’t need to manipulate it at night
- Refreshing the look: If you’re wearing the updo for longer than a week, use a light smoothing cream and a fine-tooth comb to gently smooth down any frizz around the updo
- Taking it down: Take down one section at a time and gently separate each twist with your fingers; rushing this process can cause breakage, so be patient
- Re-using the twists: If your twists still look good, you can take down just the updo and restyle them loose, then put them back up a few days later
Worth knowing: The style of updo you create should account for your face shape, the occasion, and how long you plan to wear it. A sleek, tight updo looks professional but creates tension on your edges; a loose, romantic updo is gentler on your hair but might look too casual for certain settings. Choose based on your needs for that particular time period.
Final Thoughts

Twisted styles in their many forms are genuinely some of the most versatile, protective, and beautiful options available for natural hair. Whether you choose the quick installation of thick rope twists, the longevity of mini twists, the elegance of a twisted crown, or the sophistication of a faux locs style, you’re choosing a protective styling approach that keeps your hair healthy while allowing you to express yourself and feel confident. The key is understanding what each style offers—the installation time, the longevity, the maintenance commitment, and the occasions where it works best—so you can choose what actually fits your life and your hair needs.
Real talk: the best twisted style is the one you’ll actually maintain properly. There’s no point choosing mini twists that last 10 weeks if you hate the 6-hour installation process and won’t take the time to keep them fresh. Similarly, thick rope twists might be your aesthetic, but if you know your edges are fragile and sensitive, thinner styles might actually be the better choice for your hair health right now. Being honest about your styling preferences, your maintenance tolerance, and your hair’s specific needs means you’ll choose a style that genuinely works for you—and that’s when you actually see the benefits of protective styling in your hair’s health, growth, and overall feel.
The beautiful thing about twists is that you don’t have to commit to one style forever. You can experiment with different thicknesses, different patterns, different added-hair options, and different styling approaches. Most twists last 4-8 weeks, so you can try something new multiple times per year and build a repertoire of styles you love. The more styles you master or know how to ask for, the more confidently you can navigate your hair journey and keep your natural hair thriving.
