You know that feeling when a ponytail just… doesn’t have the volume you want? You’re not alone. Whether you’re working with thin hair, hair that’s gone through years of styling, or you simply want that fuller, more dramatic look, mid-height weave ponytails are a total game-changer. These styles sit somewhere between a high pony and a traditional low pony, giving you the perfect sweet spot for creating dimension, adding texture, and making your hair look genuinely thicker and bouncier than it actually is.
The beauty of mid-height weave ponytails is that they combine two powerful techniques: the strategic placement that flatters most face shapes, and the weaving method that creates built-in texture and optical fullness. When you weave sections of hair as you’re pulling the ponytail together, you’re essentially creating a three-dimensional effect that tricks the eye into seeing way more volume than what’s actually there. It’s not just about pulling your hair back—it’s about how you pull it back.
The styles I’m about to walk you through aren’t just random ponytail ideas. They’re designed specifically to maximize volume at the crown and throughout the style, and each one brings a different vibe to the table. Whether you want something sleek enough for the office, textured enough for the weekend, or elevated enough for an event, there’s a mid-height weave ponytail here that’ll become your new signature style. Let’s dive into the techniques and variations that actually work.
1. The Sculpted Crown Weave Pony
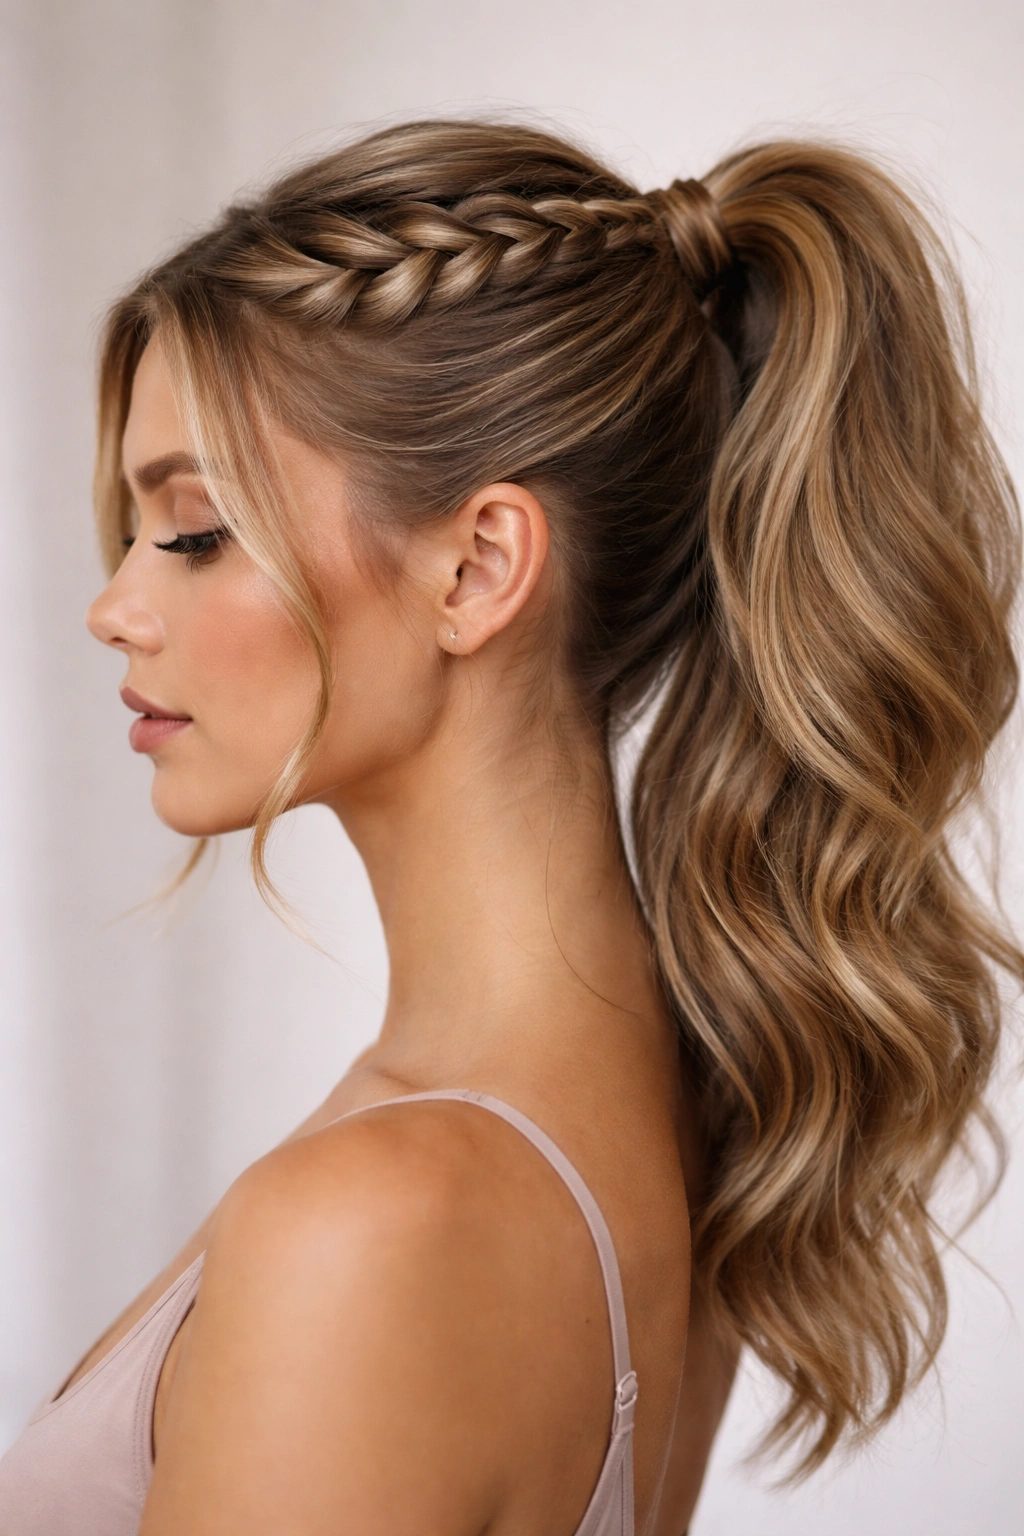
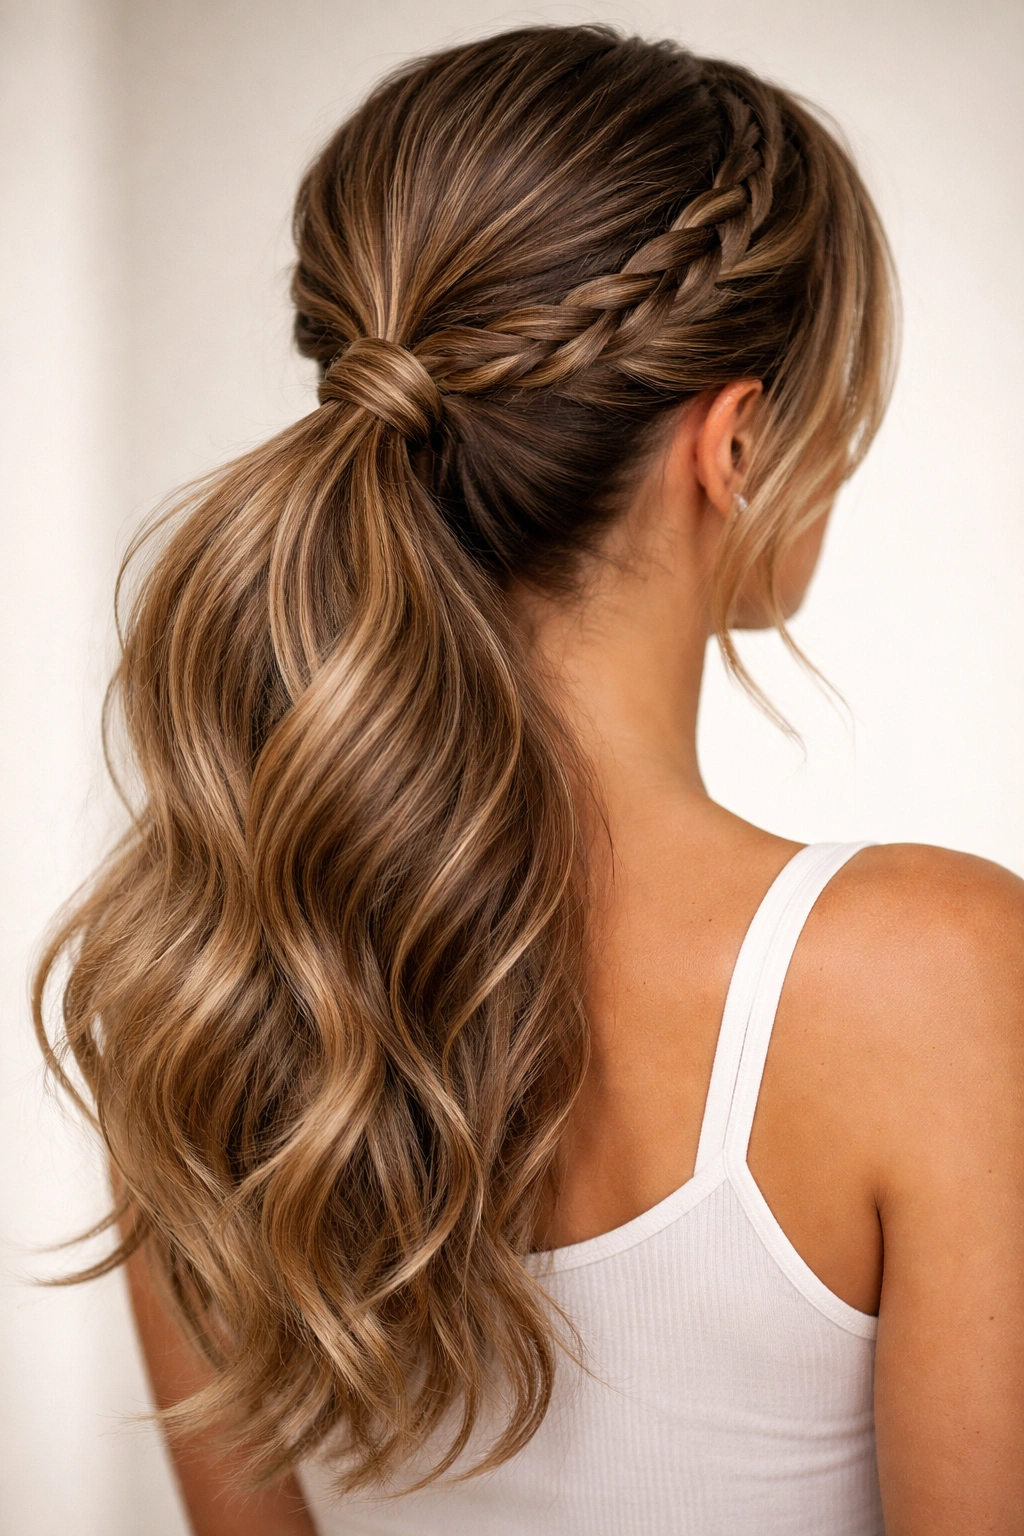
This style starts with a technique that immediately builds volume at the very top of your head. Take a small section of hair from your crown—about two inches wide—and split it into two pieces. Instead of doing a standard braid, you’re doing a reverse braid (also called a Dutch braid) that sits on top of your crown. This braid catches and lifts hair as you go, creating instant height without needing any backcombing or teasing.
How to Create Maximum Lift
Once your reverse braid reaches about two inches past your crown, you’ll stop braiding and gather this braid along with the rest of your mid-length hair into a ponytail positioned about one to two inches above where your ear meets your head. The magic happens when you gently pull the sides of the braid to make it wider and fluffier. This creates a textured, sculptural effect at the crown that anchors the whole style and makes everything below look fuller by comparison.
Essential Tips for This Look
- Use a texturizing spray or dry shampoo before starting—it gives your hair grip and makes the braid hold its shape much better
- Don’t make the braid too tight; looser braids automatically look fuller and create better dimension
- The reverse braid should feel like it’s sitting on top of your head, not sunk into it
- Once your ponytail is secured with an elastic, flip your head upside down and gently tease the base of the ponytail with a fine-tooth comb for even more lift
Pro tip: If your hair is freshly washed and slippery, blow-dry it with your head upside down first. The texture created by that technique actually helps the braid hold better and gives you a head start on volume.
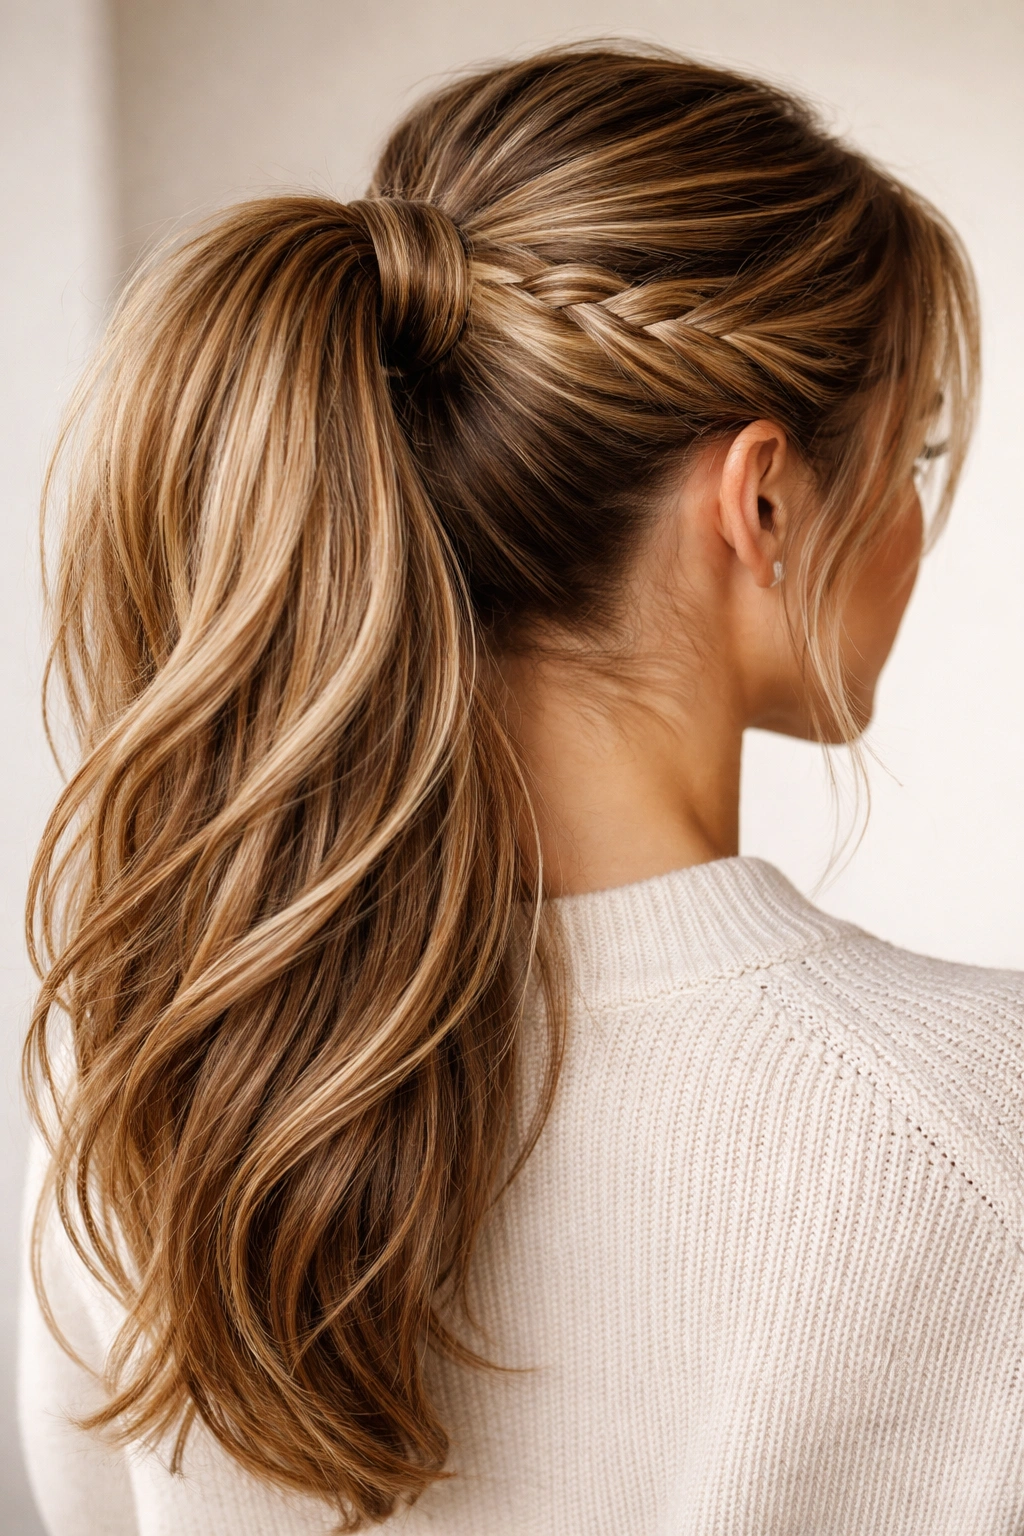
2. The Double-Twist Mid-Length Pony
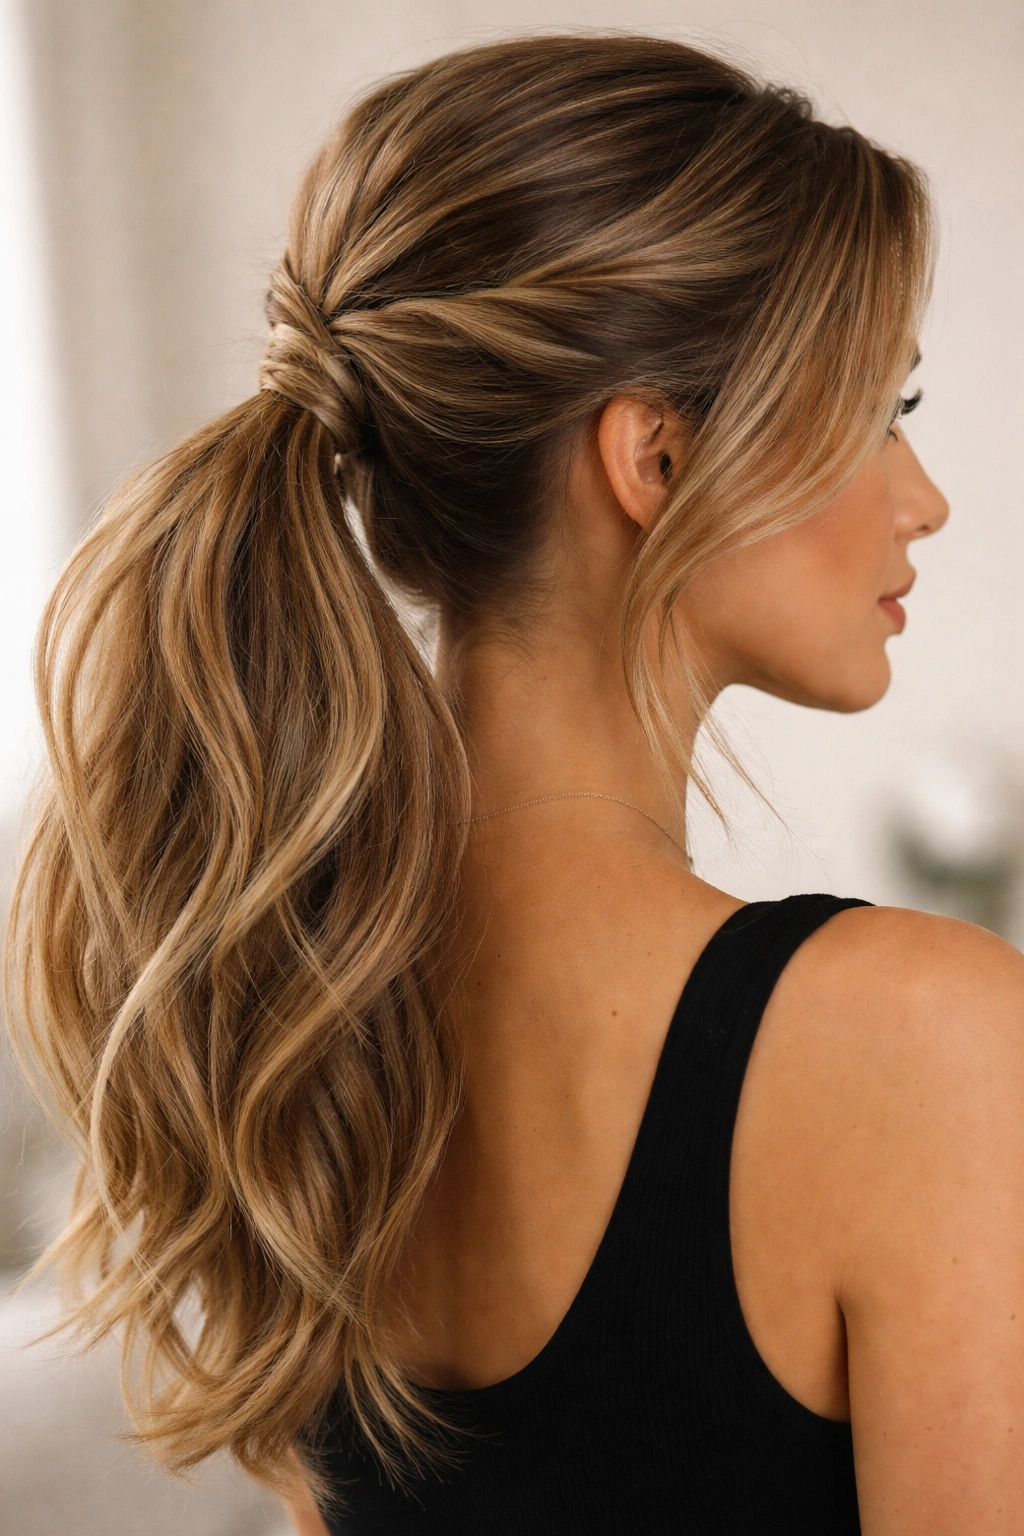
The double-twist method is deceptively simple, but it creates serious volume because you’re working with two sections of hair instead of one, and each twist catches and gathers hair differently. Start by taking a small section from one side of your head near your temple and twist it toward the back of your head. Then take a section from the other side and do the same thing.
Building Fullness Through Strategic Twists
What makes this different from just a basic twist-back style is that your twists need to be slightly loose and positioned so they’re picking up hair from different layers of your head as they travel backward. When both twists reach the mid-height position where you want your ponytail (typically around ear level or slightly higher), you’ll secure them together with a small elastic, and they’ll already look fuller because of how the twists have gathered and stacked the hair.
Making the Twists Look Luxurious
- Start your twists higher than you think you need to—they naturally drop as you move, so begin near your temple or cheekbone
- Don’t twist too tightly; aim for a loose, casual twist that still has some texture visible
- As you twist, occasionally pull the outer edge of each twist slightly to widen it and create a piecy, voluminous look
- The two twists should cross slightly at the back before you secure them, which creates a subtle weave effect and adds visual interest
Insider note: After you’ve secured your twists into the ponytail, take a fine-tooth comb or even your fingers and gently backcomb just the underside of each twist where it meets the elastic. This creates a hidden cushion of texture that makes your ponytail sit higher and fuller.
3. The Feed-In Weave with Loose Waves
This technique uses the feed-in method, where you’re gradually incorporating more hair into a weave as you go, rather than dividing your hair into sections all at once. It takes a little more time than some other methods, but the payoff is incredible volume because you’re literally layering hair throughout the style.
The Feed-In Technique Explained
Begin with a small two-by-two-inch section at your crown. Create a basic three-strand braid and secure it temporarily with a clip. Then, starting from one side, you’re going to unclip it and begin incorporating new sections of hair as you braid downward toward your mid-length point. Each time you bring in a new section, you’re adding thickness to the braid itself, which means the finished ponytail will have an incredibly full base.
Achieving That Coveted Textured Look
- Use extensions or add-on pieces if your hair is on the thinner side—weaving with extensions mixed into your natural hair creates a genuinely fuller appearance
- Feed in slightly thicker sections as you braid downward; this creates a graduated look that’s flattering and full
- Pull and loosen the braid gently as you go, not just at the end; this prevents the tight, slicked look and instead gives you a piece-y, textured result
- Once you’ve woven to mid-length and secured your ponytail, wrap a small section of hair around the base of the elastic to hide it and add polish
Worth knowing: Feed-in weaves hold their fullness longer than standard ponytails because the structural weaving is doing the work, not just an elastic. This means your style will look fresh and voluminous even at the end of the day.
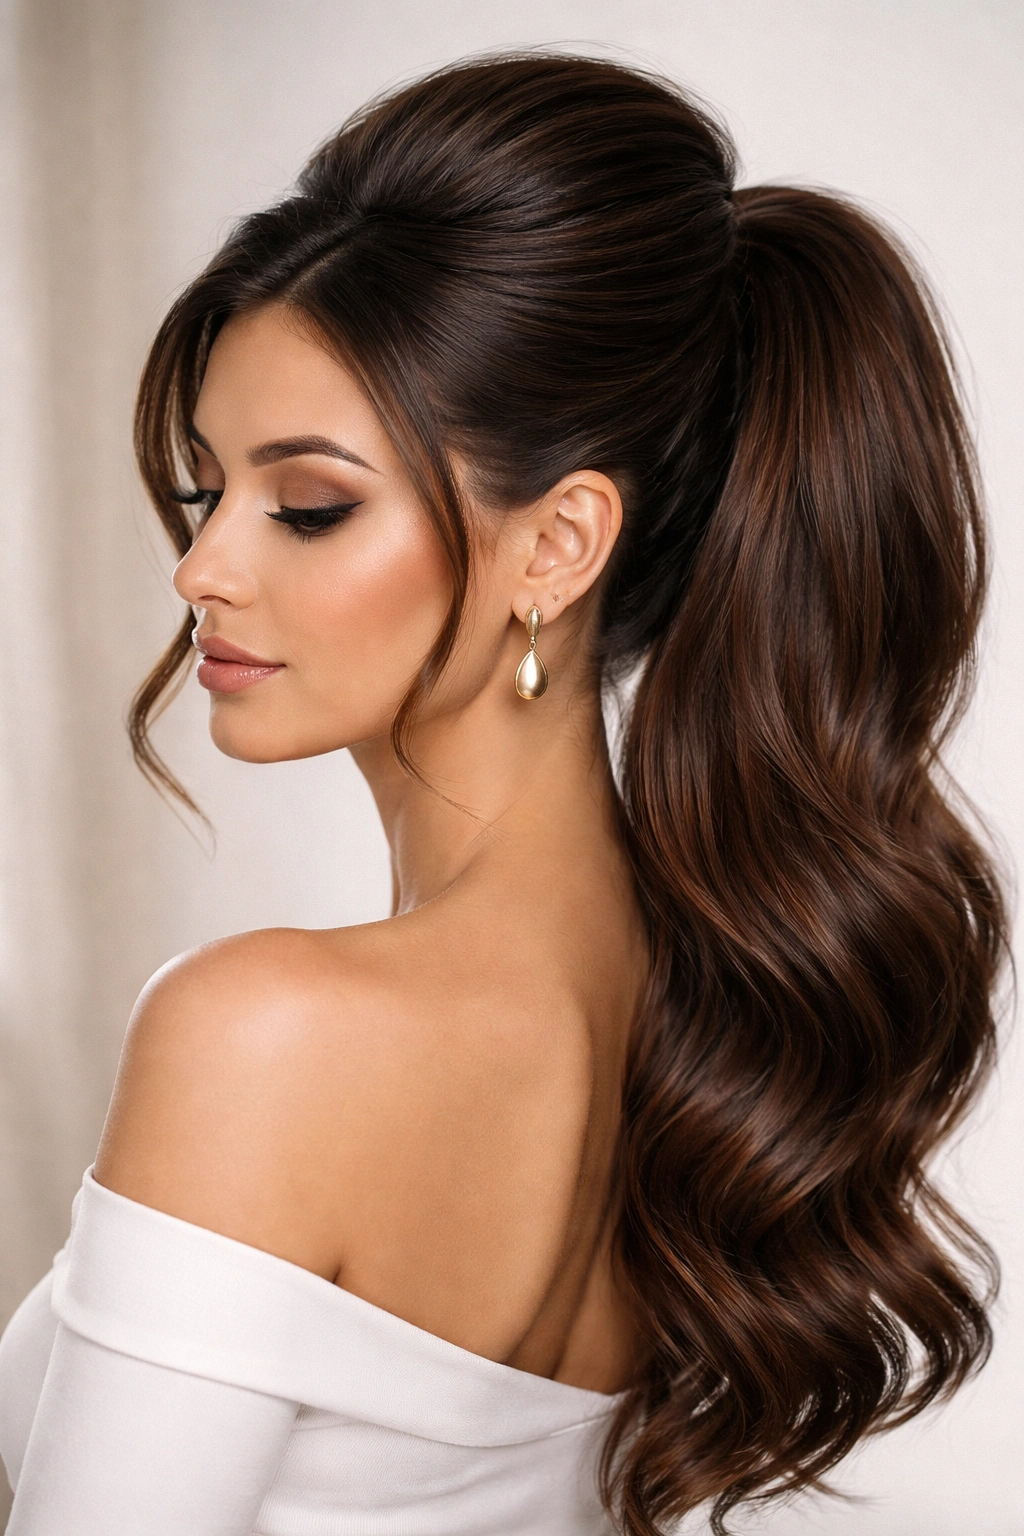
4. The Stacked Crown Pony with Texture
This method uses stacking, a technique where you create multiple sections of hair that sit slightly on top of each other, rather than all being pulled straight back. It’s the key to that Instagram-worthy volume that seems to defy physics. You’re essentially creating layers of height at the crown by how you position and secure different sections.
Creating Layers of Dimension
Start by creating a small, high ponytail at your very crown using just the top section of your hair. Secure it loosely. Then, create a second ponytail just below it using the next layer of hair from that same area. Finally, create a third small ponytail using another layer. Once all three are secured separately, take the elastic out of the top ponytail and gather all three together into one elastic positioned at mid-height. This stacking technique makes it look like your hair is exploding with volume from the crown downward.
Making the Stacks Appear Fuller
- Each individual ponytail should be secured with a clear elastic, and you can remove these once you’ve gathered them all together
- Tease gently at the base of each section before securing it; this adds grip and prevents slipping
- Don’t pull the stacks too tight—there should be a slight softness and curve to them
- Pull out a few face-framing pieces before you finish; this softens the style and adds dimension
5. The Rope Braid Mid-Pony
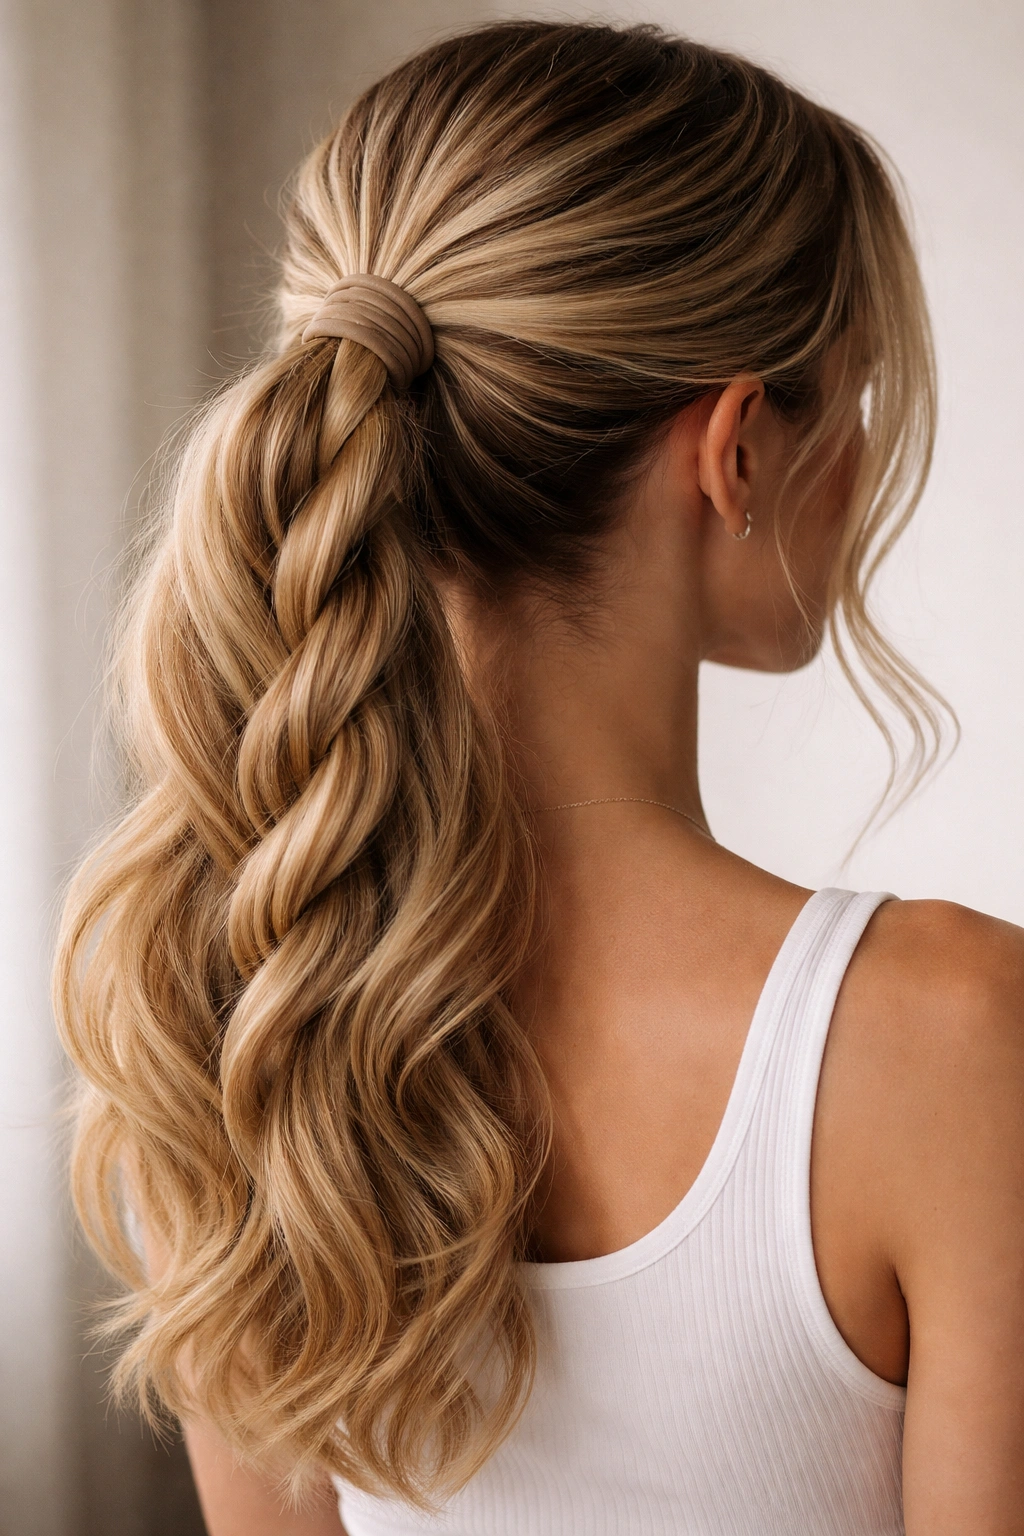
A rope braid is different from a traditional three-strand braid because you’re using two sections instead of three, which changes how the texture looks and creates a flatter, wider braid that photographs beautifully and reads as fuller. Start by dividing hair into two equal sections and twisting each section away from you. Then twist the two sections around each other toward you, and repeat this pattern as you move toward your mid-length point.
Why Rope Braids Create Volume Illusion
The rope braid naturally creates a wider braid than a three-strand version would, and wider automatically reads as fuller. Additionally, because you’re only working with two sections, the braid itself is less structured and more piece-y, which adds texture and dimension. When you gather your rope-braided hair into a ponytail at mid-height, the style has an inherent softness and fullness that slicked-back styles simply can’t match.
Perfecting Your Rope Braid Technique
- Your two sections should be equal thickness for an even, balanced rope
- Twist each section consistently—either always away from you or always toward you, then switch the direction for the crossover
- Don’t twist so tightly that the rope becomes rigid; loose rope braids look far fuller
- Once you’ve completed your rope braid down to mid-length, gently pull the edges to widen and soften it
- Combine two rope braids on either side of your head for a fuller, more dramatic effect
Pro tip: The rope braid is actually easier to grip and control than a three-strand braid, which makes it perfect for adding extensions or creating styles on hair that’s freshly washed and slippery.
6. The Crown Puff Weave Pony
This style uses a technique borrowed from textured hair styling, but it works beautifully on all hair types and creates a genuinely voluminous, eye-catching look. You’re creating a small puff of textured hair at your crown using backcombing and weaving, then securing it into a mid-height ponytail beneath it.
Building the Crown Puff
Start by taking a section of hair about three inches wide at your crown and tease it thoroughly with a fine-tooth comb. You’re not trying to create a messy, tangled look—you want a smooth, controlled backcombed section that has density and body. Once teased, smooth the surface with your comb and then you can gently weave a small braid or twist through the center of this section. Secure the puff with bobby pins, then gather all your hair (including the puffed section) into a mid-height ponytail beneath it.
Styling the Puff for Maximum Impact
- Backcomb in short, controlled strokes; this creates texture without creating damage
- Use a light smoothing cream or pomade on the outside of the puff to smooth the surface while keeping the interior voluminous
- The puff should sit on top of your head like a decorative element, not disappear into your hairline
- Your ponytail beneath should be smooth and sleek to contrast with the textured puff above
- This style works best when you pin the puff in place separately from the ponytail elastic, giving you more control and a more polished look
7. The Zig-Zag Parting Mid-Pony

This technique seems simple but creates dramatic visual fullness because of how it plays with proportion and balance. Instead of using a straight center part or side part, you create a zig-zag part from your forehead all the way back to where you want your ponytail. This irregular line naturally creates a wider appearance at the crown and makes your ponytail look fuller by comparison.
Creating the Perfect Zig-Zag
Use a fine-tooth comb or even the pointed end of a teasing brush to create a zig-zag pattern from your hairline back toward your crown. Don’t make the zigs and zags too pronounced—they should be subtle but visible. Once your zig-zag is in place, you’re going to gather all your hair into a ponytail at mid-height, positioning it at the point where your zig-zag would naturally center if continued backward.
Maximizing the Visual Impact
- Use texturizing spray along your part line to make it more visible and defined
- The zig-zag works especially well when combined with any of the weaving or braiding techniques above
- Create your zig-zag while your hair is slightly damp, then blow-dry it in place for longevity
- Pair this technique with a small puff or crown braid for extra fullness
Insider note: This technique is brilliant for those days when your hair feels flat because the zig-zag part naturally creates the illusion of volume without you actually having to do much at the crown.
8. The Wrap-Around Weave Mid-Pony
This method involves creating a weave that literally wraps around your head from one side to the other, traveling through your mid-length area. It’s more complex than some other styles, but the result is incredibly full and elegant. Start by taking a small section from one temple and creating a braid or weave that travels diagonally across the back of your head toward the opposite side.
The Wrap-Around Pattern
As your weave travels across the back, you’re continuously feeding in hair from the middle and lower sections of your head. By the time your weave reaches the opposite temple, you’ve incorporated enough hair that the back of your head looks significantly fuller. You’ll secure this wrap-around weave with bobby pins, then gather your remaining hair into a mid-height ponytail that sits above where the weave ends.
Creating a Cohesive, Full Look
- Map your wrap-around path mentally before you start; it should create a diagonal line that follows the natural curve of your head
- Feed in hair gradually rather than all at once; this creates a smoother, fuller appearance
- Tease lightly at the base of your ponytail before securing it; this prevents the weave and ponytail from looking separated
- Pull and loosen your weave as you go; tightness is the enemy of the full look you’re going for
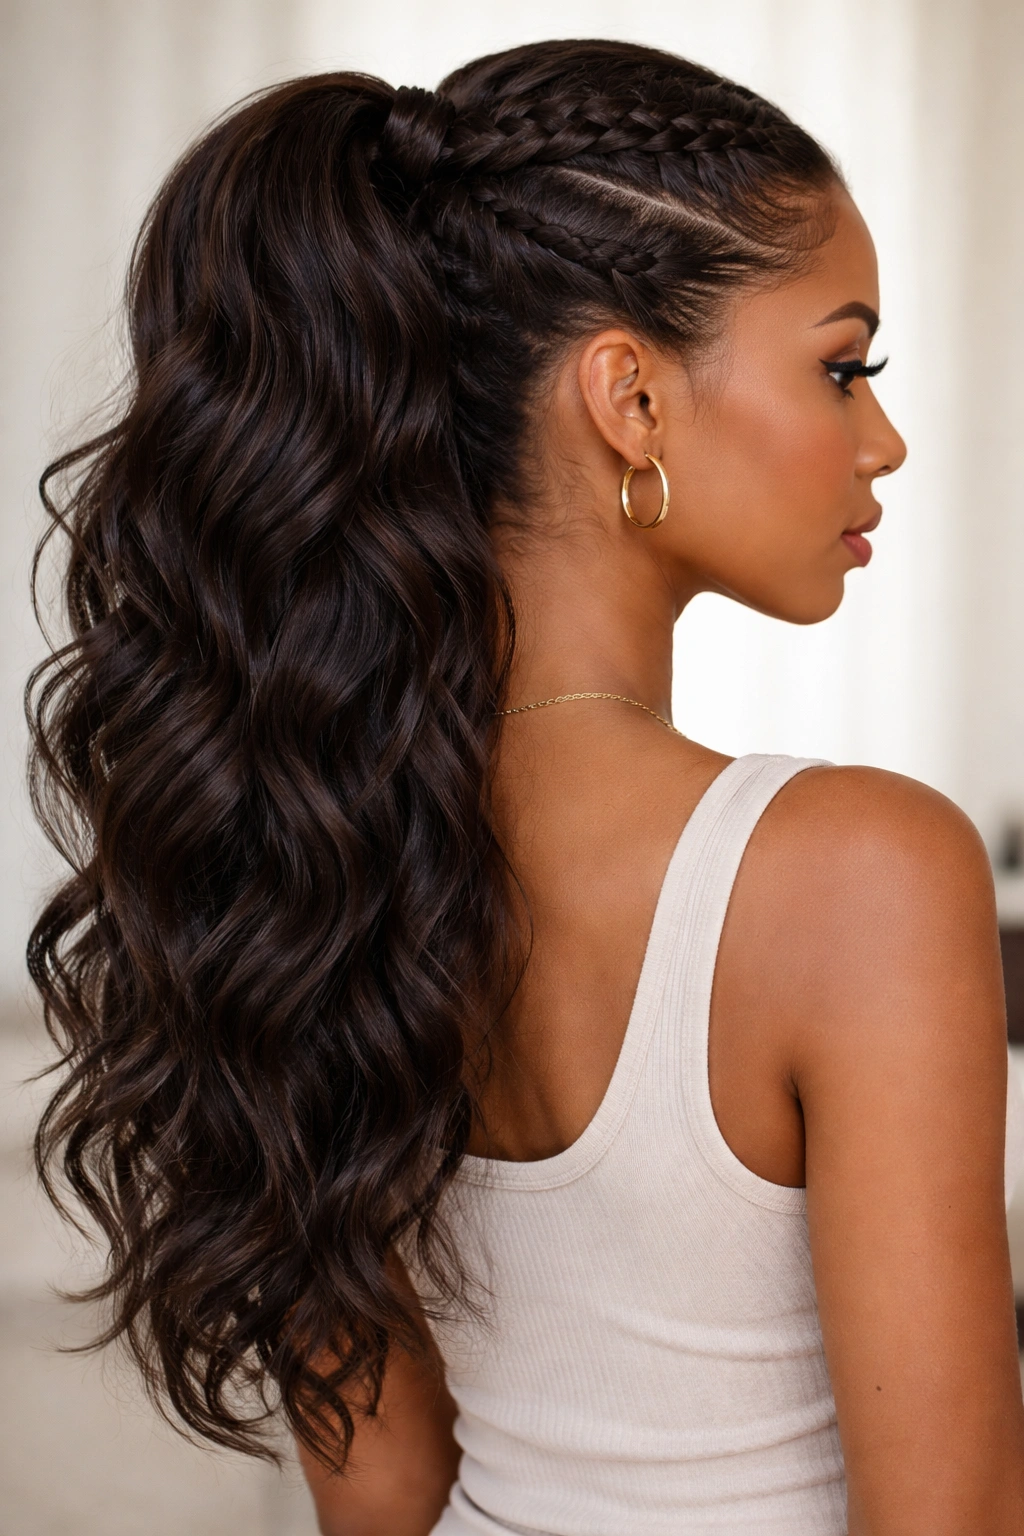
9. The Braided Base Mid-Height Pony
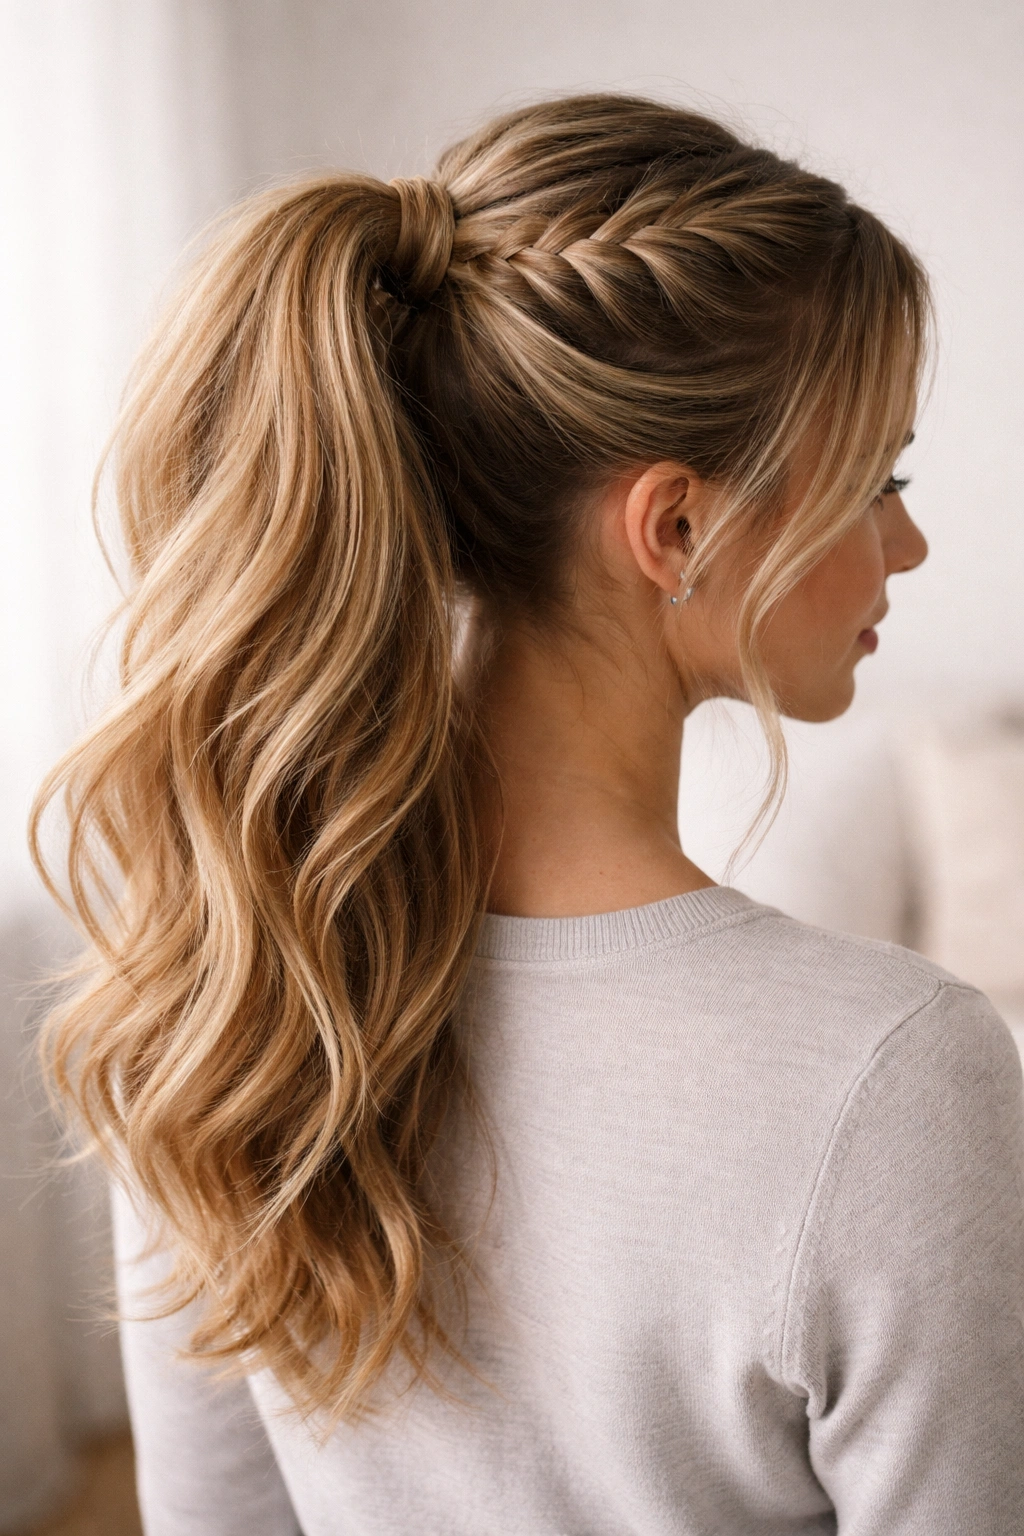
This style uses a technique where you create a solid, textured base at your crown using braiding, and then your mid-height ponytail emerges from that braided foundation. It’s structural, it’s full, and it’s surprisingly quick once you get the hang of it.
Building a Strong Braided Foundation
Create a Dutch braid (reverse braid) that starts at your crown and travels diagonally down toward one side of your head. Secure this braid loosely and then gather it along with the rest of your hair into a mid-height ponytail. The braid serves as both a structural element and a visual anchor that makes your entire ponytail look fuller because it’s emerging from this textured base.
Enhancing the Braided Base
- Your braid should be slightly loose so you can see the texture clearly
- Pull gently on the braid to widen it and create a fluffier appearance
- Add a second braid if you want an even fuller effect
- The contrast between the textured braid and your smooth or wavy ponytail creates dimension and depth
Worth knowing: This style holds incredibly well throughout the day because the braid is doing structural work. Even if your ponytail starts to loosen slightly, the braid keeps everything anchored and full-looking.
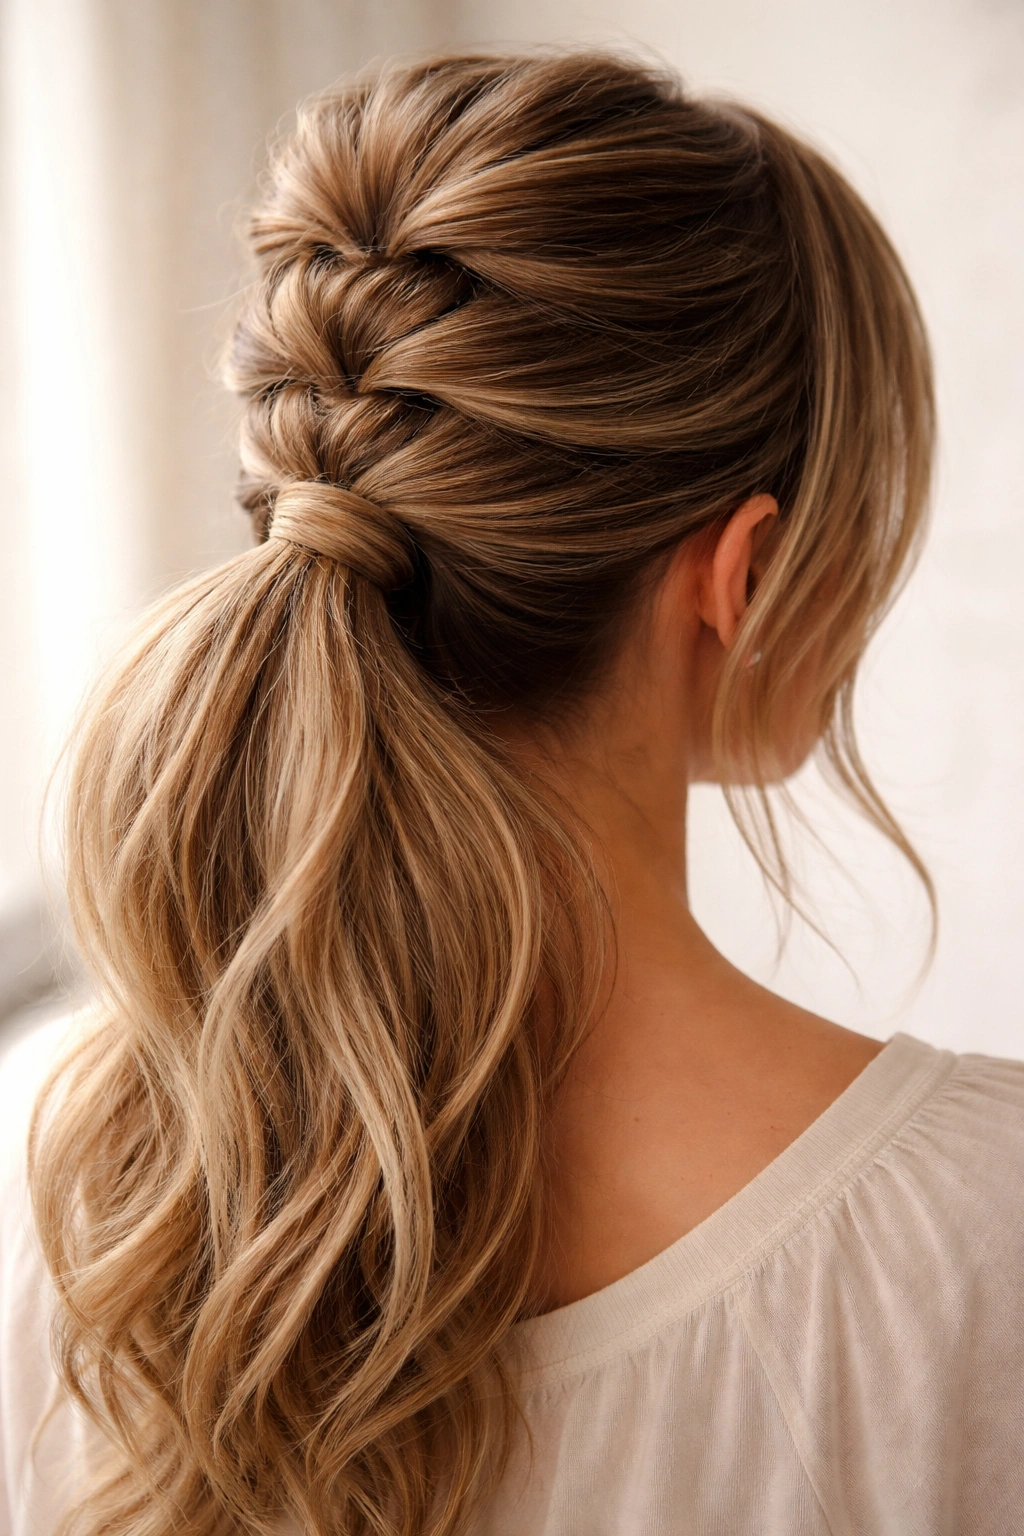
10. The Hybrid Twist-and-Weave Mid-Pony
This final style combines twists and weaves to create maximum fullness and texture. You’re using both techniques in one style, which means you’re getting the benefits of both the width of a weave and the visual interest of twists. Start with a twist on one side of your head and a weave or braid on the other side, allowing both to incorporate and gather hair as they travel toward your mid-length point.
Combining Techniques for Maximum Effect
A twist naturally creates one type of texture and catches hair at a slightly different angle than a weave does. By combining both in the same style, you’re creating multiple layers of visual fullness. As your twist and weave meet at the back of your head, they’ll intertwine slightly before you secure them together in your mid-height ponytail.
Making the Hybrid Style Work
- Start your twist and weave at slightly different heights so they travel on different paths toward the back
- Don’t worry if they don’t intertwine perfectly; some natural variation actually adds to the textured, full appearance
- Use bobby pins to secure where your twist and weave meet, then secure everything together with your ponytail elastic
- Pull and loosen both your twist and weave once they’re secured; the fuller and more textured they are, the better
Pro tip: If you’re newer to styling your own hair, practice this style with your head slightly tilted forward. This changes your perspective and makes it easier to see what you’re doing at the back of your head.
Final Thoughts
The transformation that happens when you switch from a basic ponytail to a mid-height weave pony is genuinely surprising. You’re not just changing your hairstyle—you’re changing how full, textured, and voluminous your hair appears, and that affects your whole look and confidence. The key to making any of these styles work is understanding that looseness and texture are your friends. Tight, slicked ponytails can work beautifully, but they don’t create the optical fullness that slightly loose, piece-y, textured styles deliver.
Start by experimenting with whichever technique feels most accessible to you. If you’ve never done a Dutch braid, try the Sculpted Crown style. If twists feel more natural, go for the Double-Twist or Hybrid style. You don’t need to master all ten variations—finding two or three that you love and can execute confidently is actually better than spreading yourself too thin trying to perfect every single one.
The other thing worth remembering is that these styles work on every hair type and thickness. If you have thin hair, texturizing sprays and strategic backcombing become your secret weapons. If you have thick hair, you might find that looser braids and weaves work better because you’re starting with more hair to work with. Play with what you have, adjust the techniques to suit your hair, and don’t be afraid to combine elements from different styles to create your own signature version. That’s how you end up with a mid-height weave ponytail that feels uniquely yours and gives you that full, voluminous look you’re after.