Curly hair and braids are practically a match made in heaven—the texture naturally grips the braid strands, keeping everything in place longer than it would in straight hair, while braids add structure and definition to those beautiful curls. The problem is figuring out which braided ponytail style actually works with your curl pattern, how to prep your hair so the braid lasts all day, and which techniques won’t leave your curls flattened or frizzy once you take it down. If you’ve ever pulled your curls into a regular ponytail only to have them fall flat halfway through the day, or tried a braid that just wouldn’t hold, you know exactly what I’m talking about.
What makes braided ponytails so powerful for curly hair is that they’re a practical solution that actually enhances your curls instead of fighting them. Whether you’re looking for a sleek, polished look for work, a protective style that lets your curls breathe, or something intricate and textured for a weekend vibe, there’s a braided ponytail out there that fits your hair type and your life. The key is understanding which styles work best for different curl patterns, how to braid without disrupting your curl formation, and how to style the braid so it looks intentional and beautiful rather than accidental.
The styles in this guide range from simple and quick (perfect for a busy morning) to more intricate braids that become a statement on their own. Each one is tested on actual curly hair, not on the impossibly smooth hair you see in tutorials. You’ll get specific techniques that work, not vague instructions that leave you frustrated. Let’s dive into the braided ponytail styles that will actually transform how you style your curls.
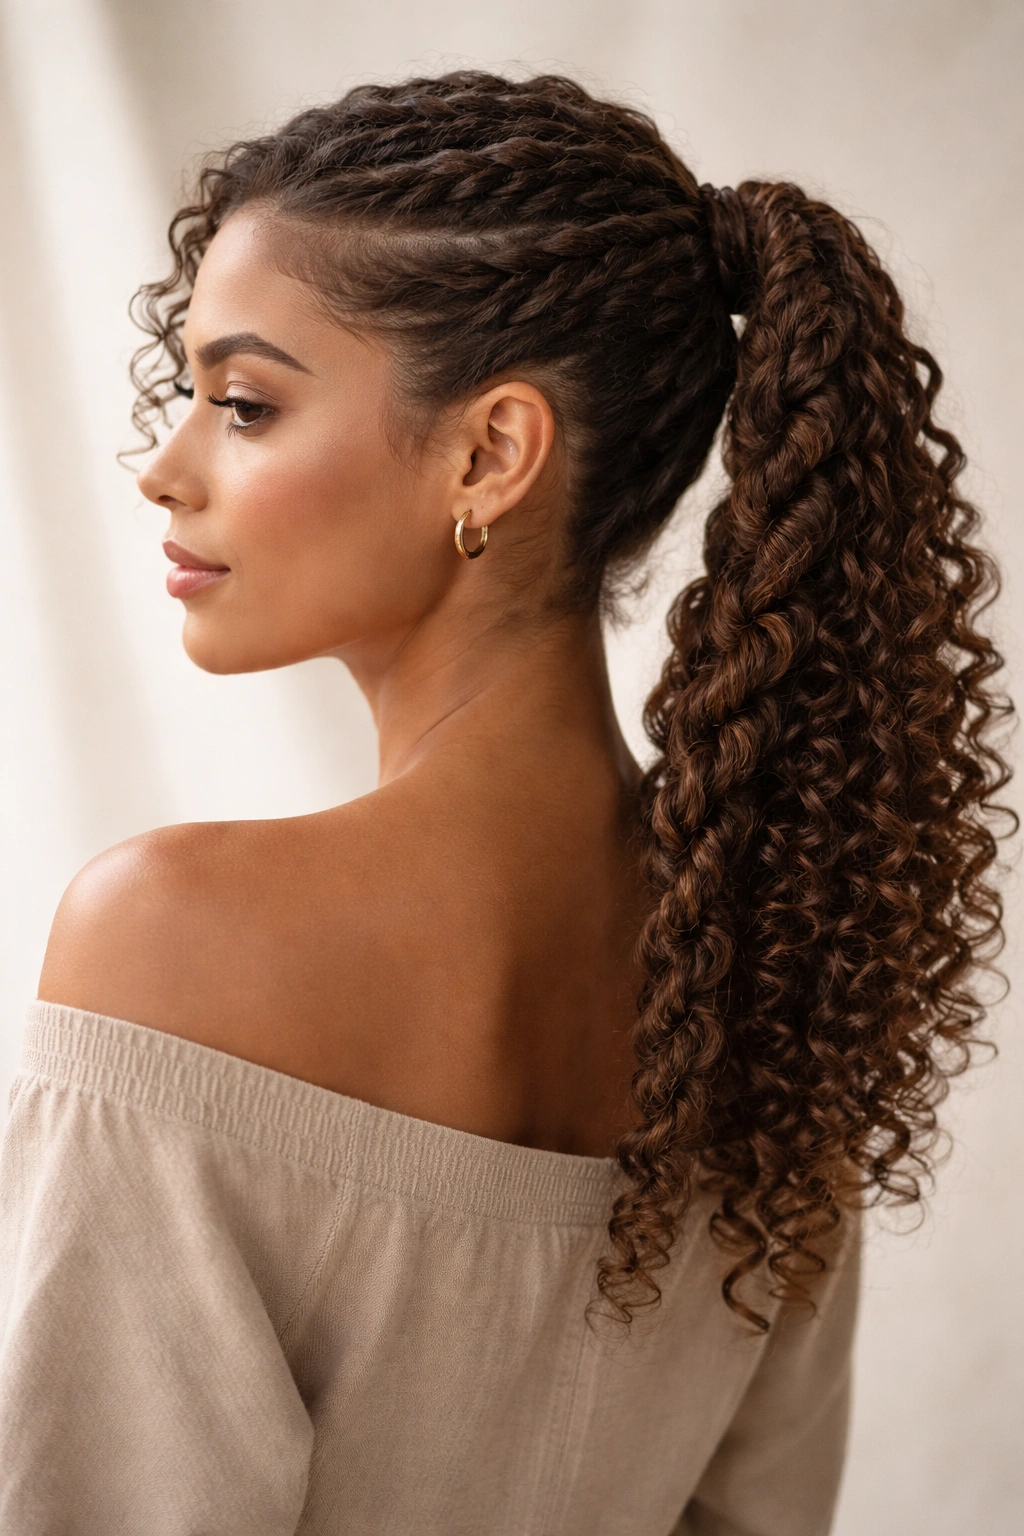
1. The Classic Twisted High Ponytail
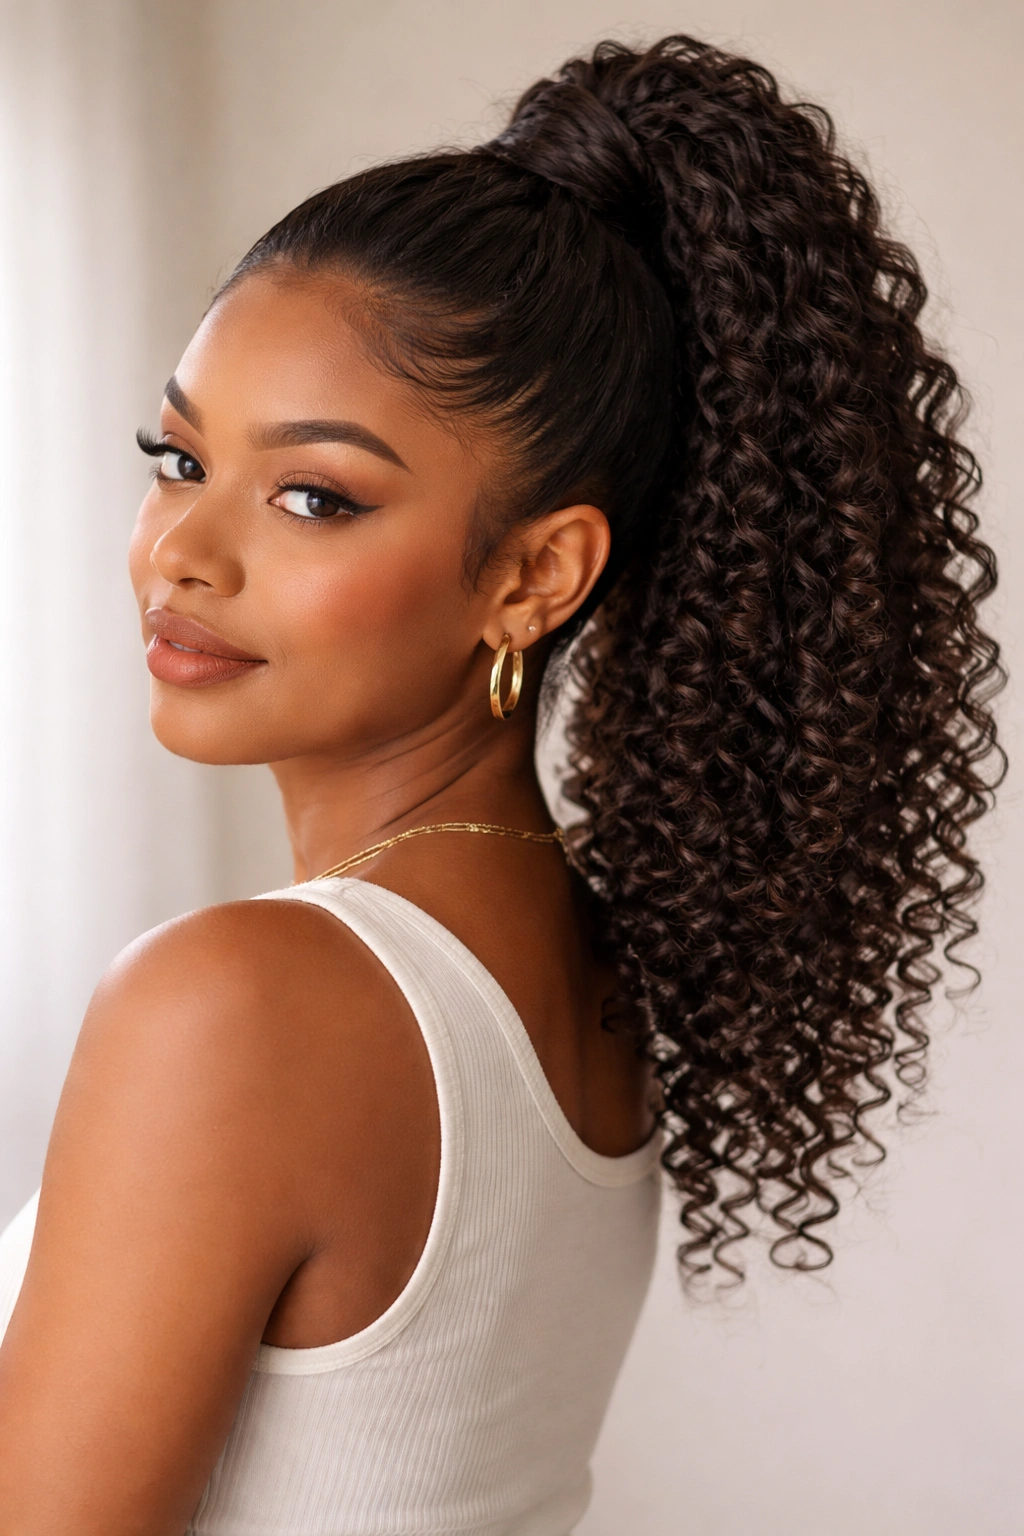
A twisted ponytail is technically not a braid, but it delivers all the benefits of one while being significantly faster and more forgiving on delicate curls. Instead of weaving three sections together, you simply divide your ponytail into two sections and twist them around each other until they reach the base, then secure. This creates a beautifully textured look that actually showcases your curls rather than compressing them.
Why Twisted Styles Work Best for Tighter Curls
The twisting action wraps your curl strands around each other without flattening them the way traditional three-strand braiding can. The gentle spiral actually emphasizes your natural curl pattern, making each curl more visible and defined. This style is particularly effective for 3C to 4C curl types where you want to maintain volume at the crown.
How to Execute a Flawless Twist
- Start with curls that have been scrunched with a lightweight gel or mousse—this gives grip without adding weight that would drag your curls down
- Gather your hair into a high ponytail (aim for just above the crown so it sits confidently) and secure loosely with a hair tie
- Divide the ponytail into two equal sections, then twist each section clockwise while wrapping them around each other
- As you twist, keep your fingers close to the scalp and maintain even tension—too tight and you’ll disrupt the curl; too loose and it unravels within hours
- Once you reach the end, secure with a small elastic and smooth any flyaways with a curl-defining cream
Pro tip: If your twist keeps coming undone, try using a velvet hair tie instead of elastic—the friction keeps the twist anchored without slipping.
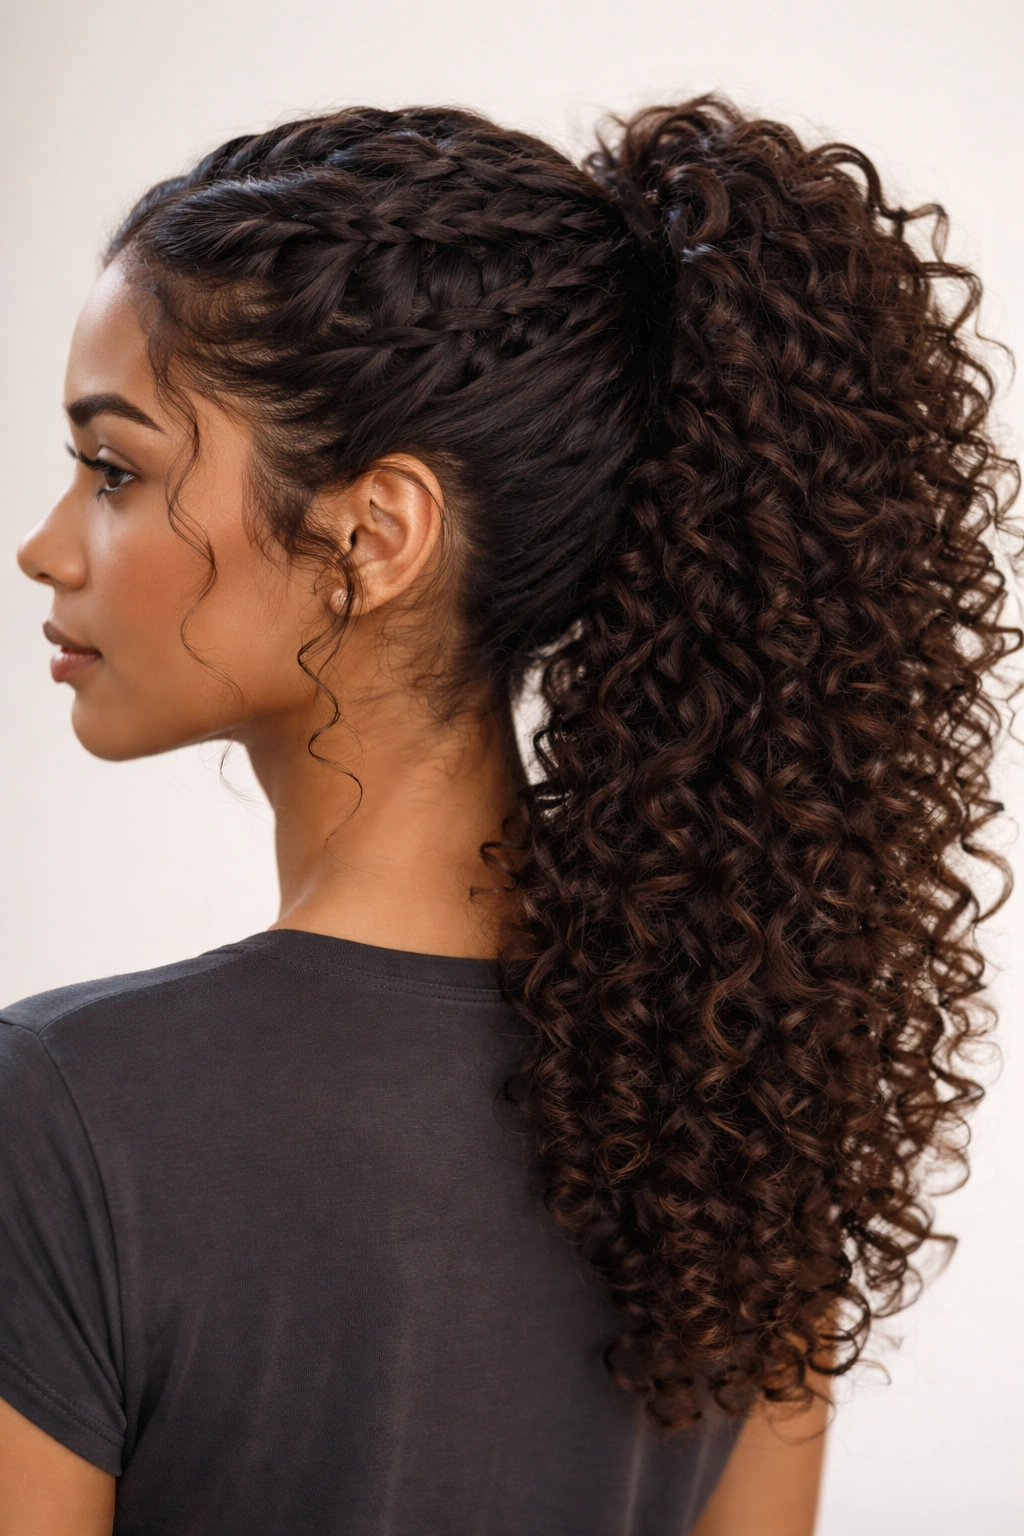
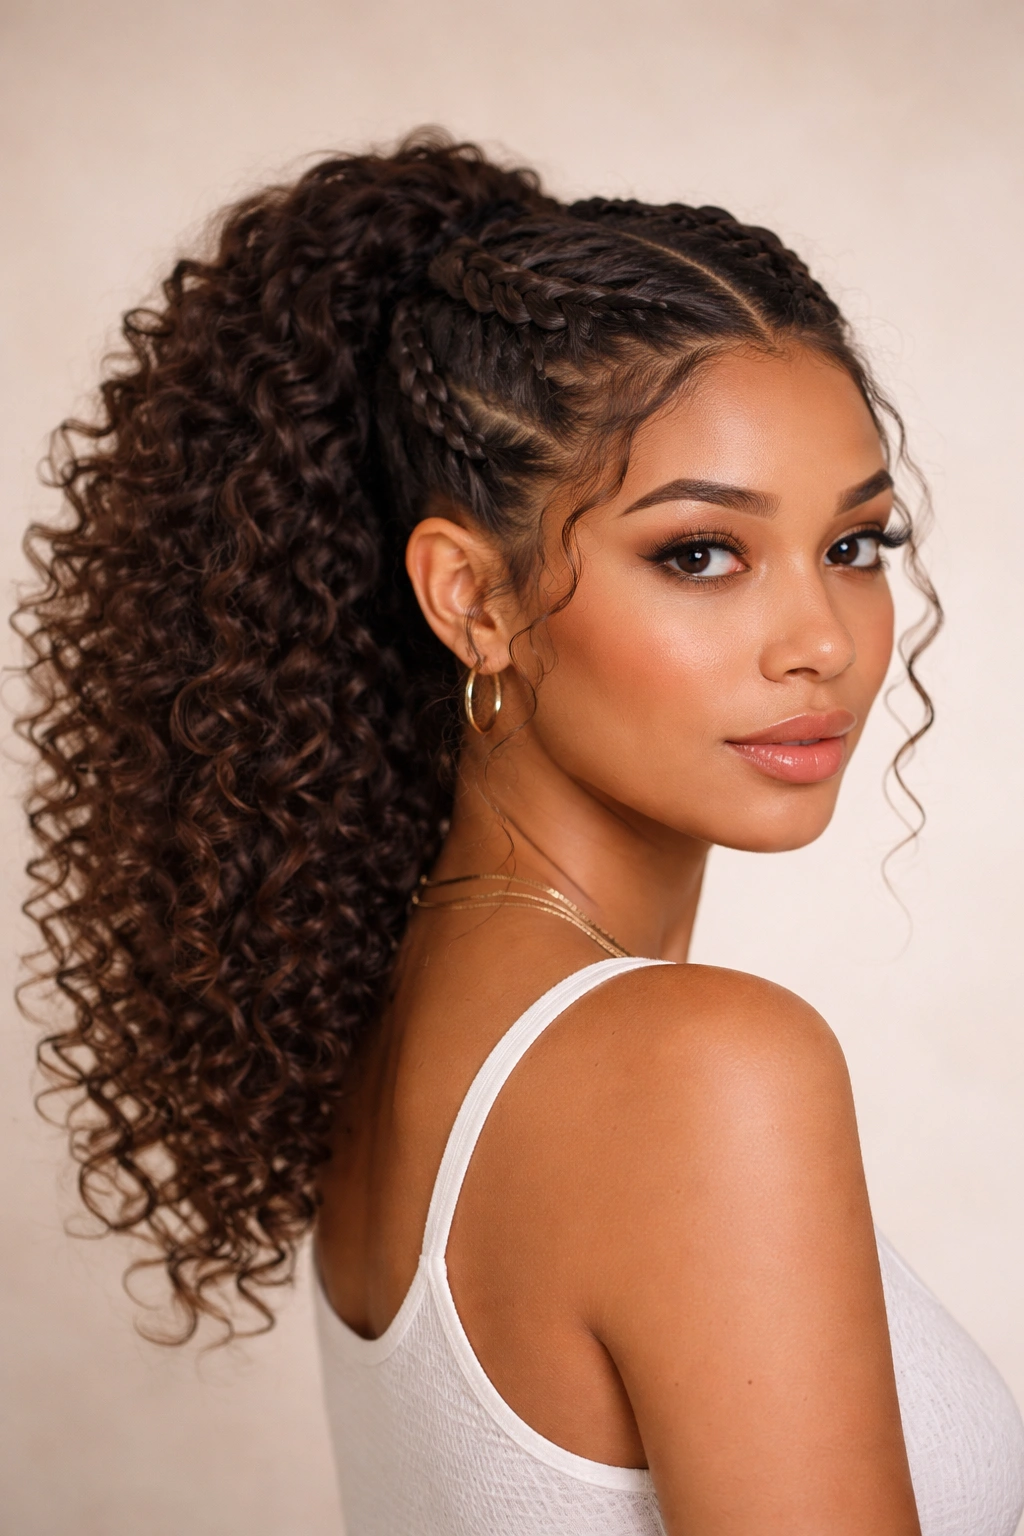
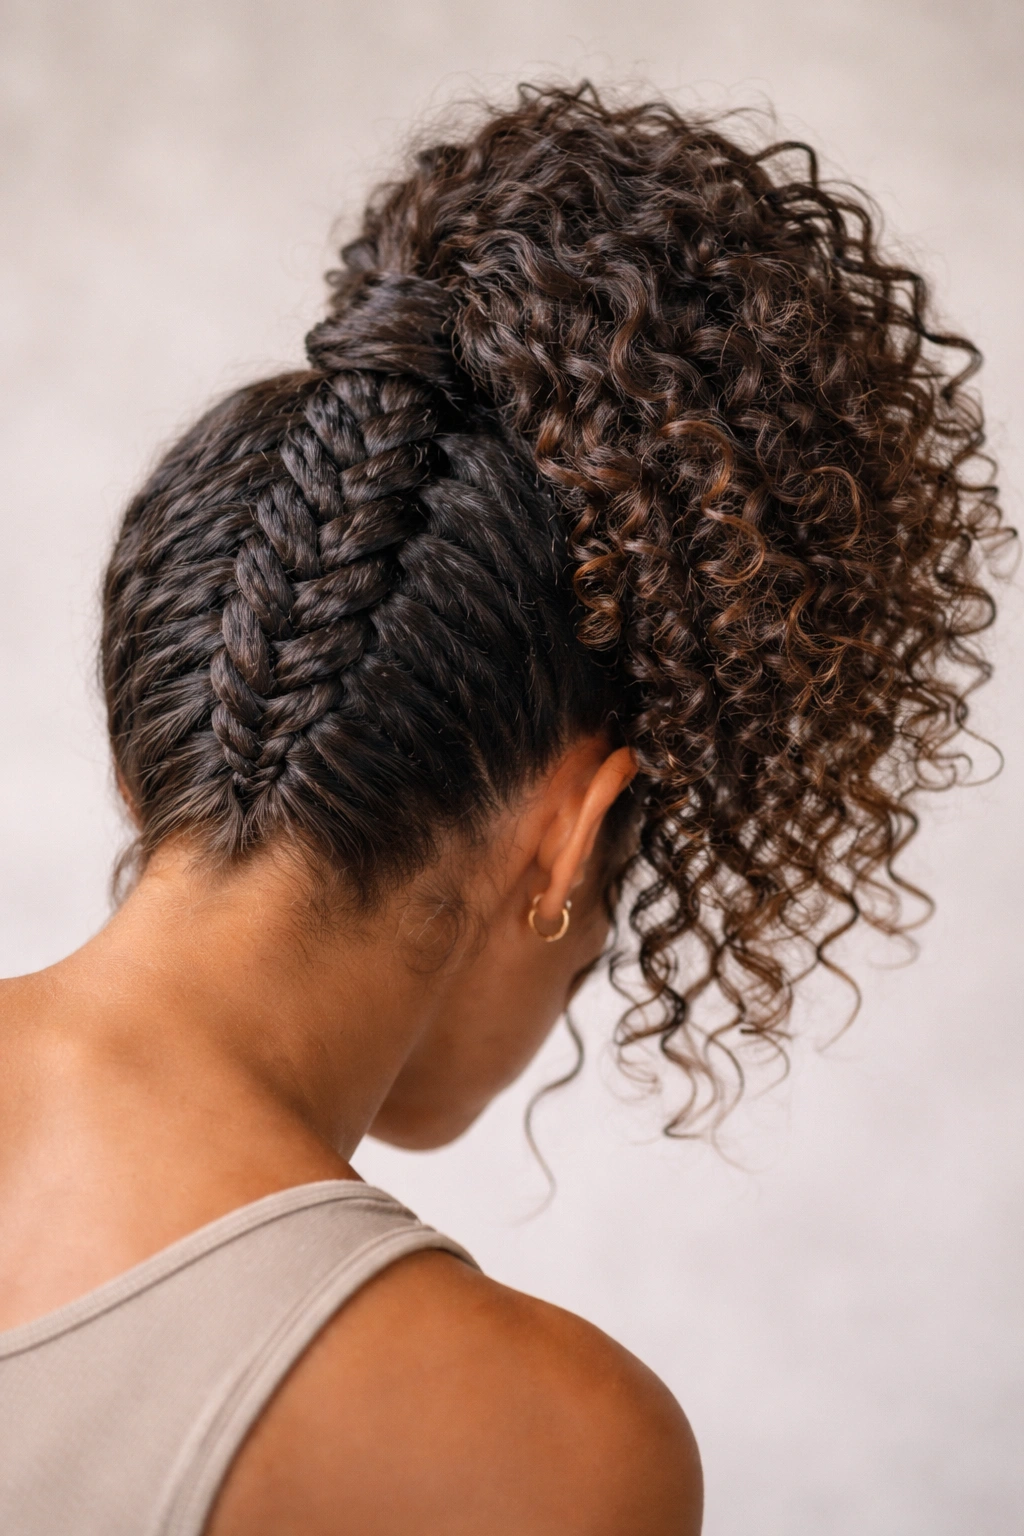
2. The Dutch Braided Ponytail
Dutch braiding (where you braid under instead of over) creates beautiful texture and visual depth in curly hair, especially when you let some of the braid show and some of the curls peek through. The under-braid structure seems to interact with curls differently than traditional three-strand braiding, creating a more dimensional effect that looks intentional and styled.
How Curls Interact With Dutch Braid Structure
When you braid under with curly hair, the curl strands naturally create little loops and pockets within the braid itself. Instead of fighting this and trying to make a sleek braid, you lean into it—the texture is the whole point. The curls actually prevent the braid from looking too tight or severe, which is exactly what you want for a style that feels both polished and effortless.
Step-by-Step Dutch Braid Technique
- Apply a leave-in conditioner or styling cream to damp curls and let them air-dry to about 70% (this gives you defined curls that hold better than completely wet hair)
- Start the braid at the crown with three small sections, then cross each outer section under the middle section rather than over
- As you braid, take small sections from the sides as you go down, continuing to feed hair in while maintaining tension
- The braid should sit closer to the scalp than a regular braid, creating a raised pattern on top of your head
- Once you reach the base of your neck, gather all remaining hair into a ponytail and secure the entire look with a hair tie that matches your hair color
Worth knowing: Dutch braids show the braid texture much more dramatically than French braids, so if you have loose curls (2A-3A range), the braid definition is even more striking.
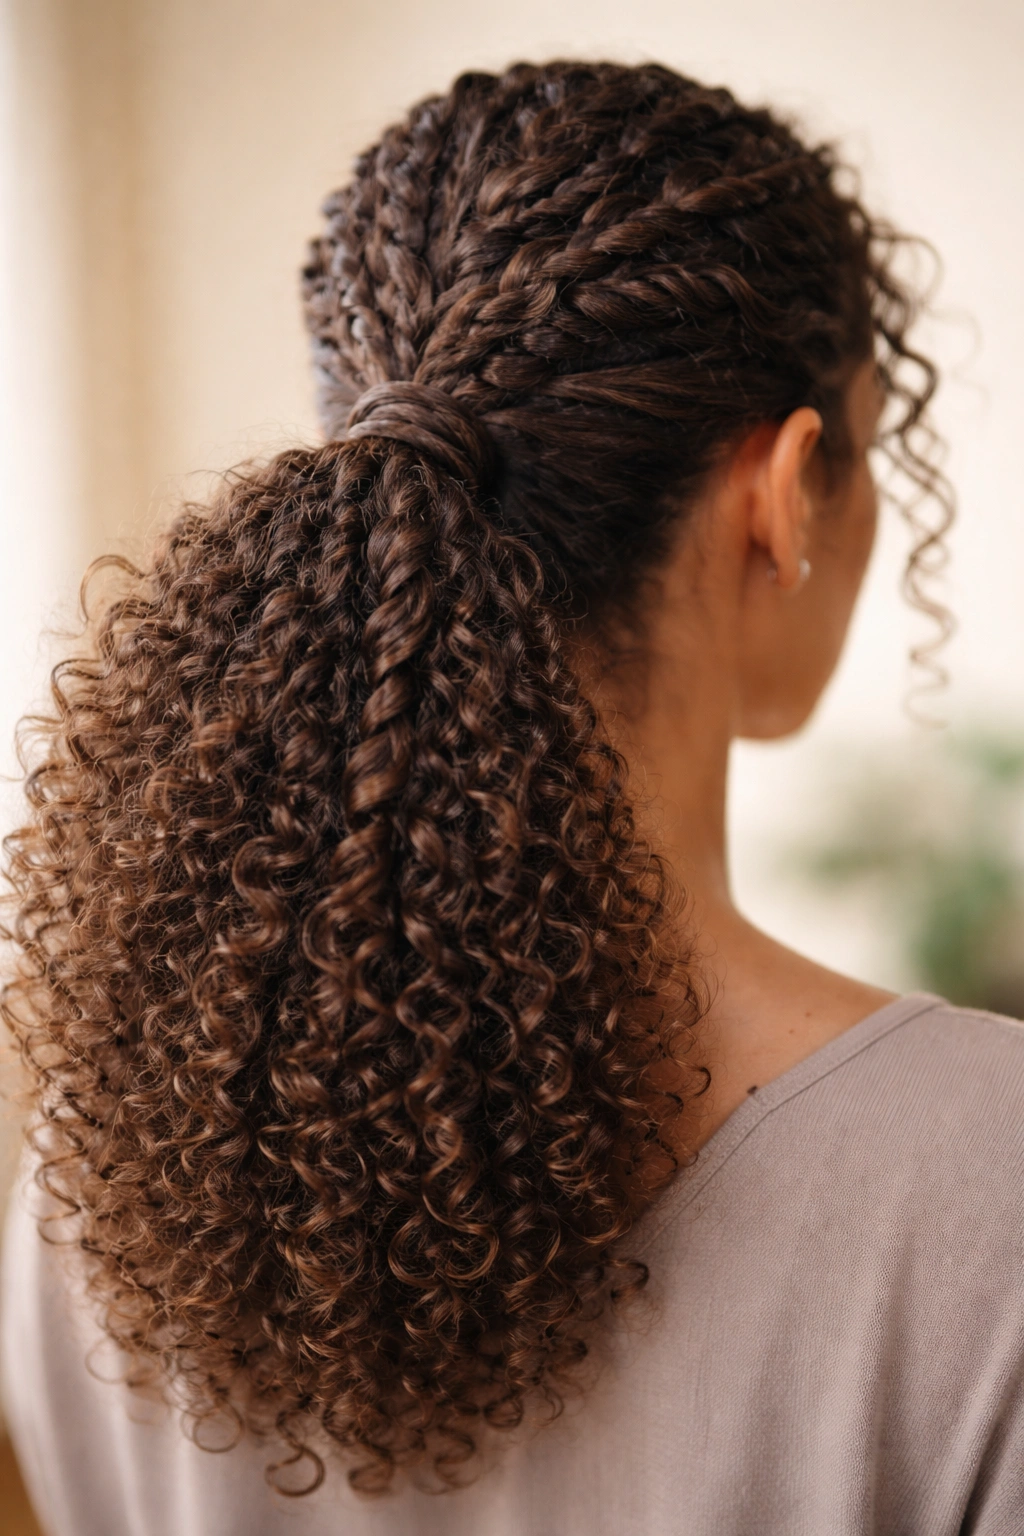
3. The Cornrowed Crown Ponytail
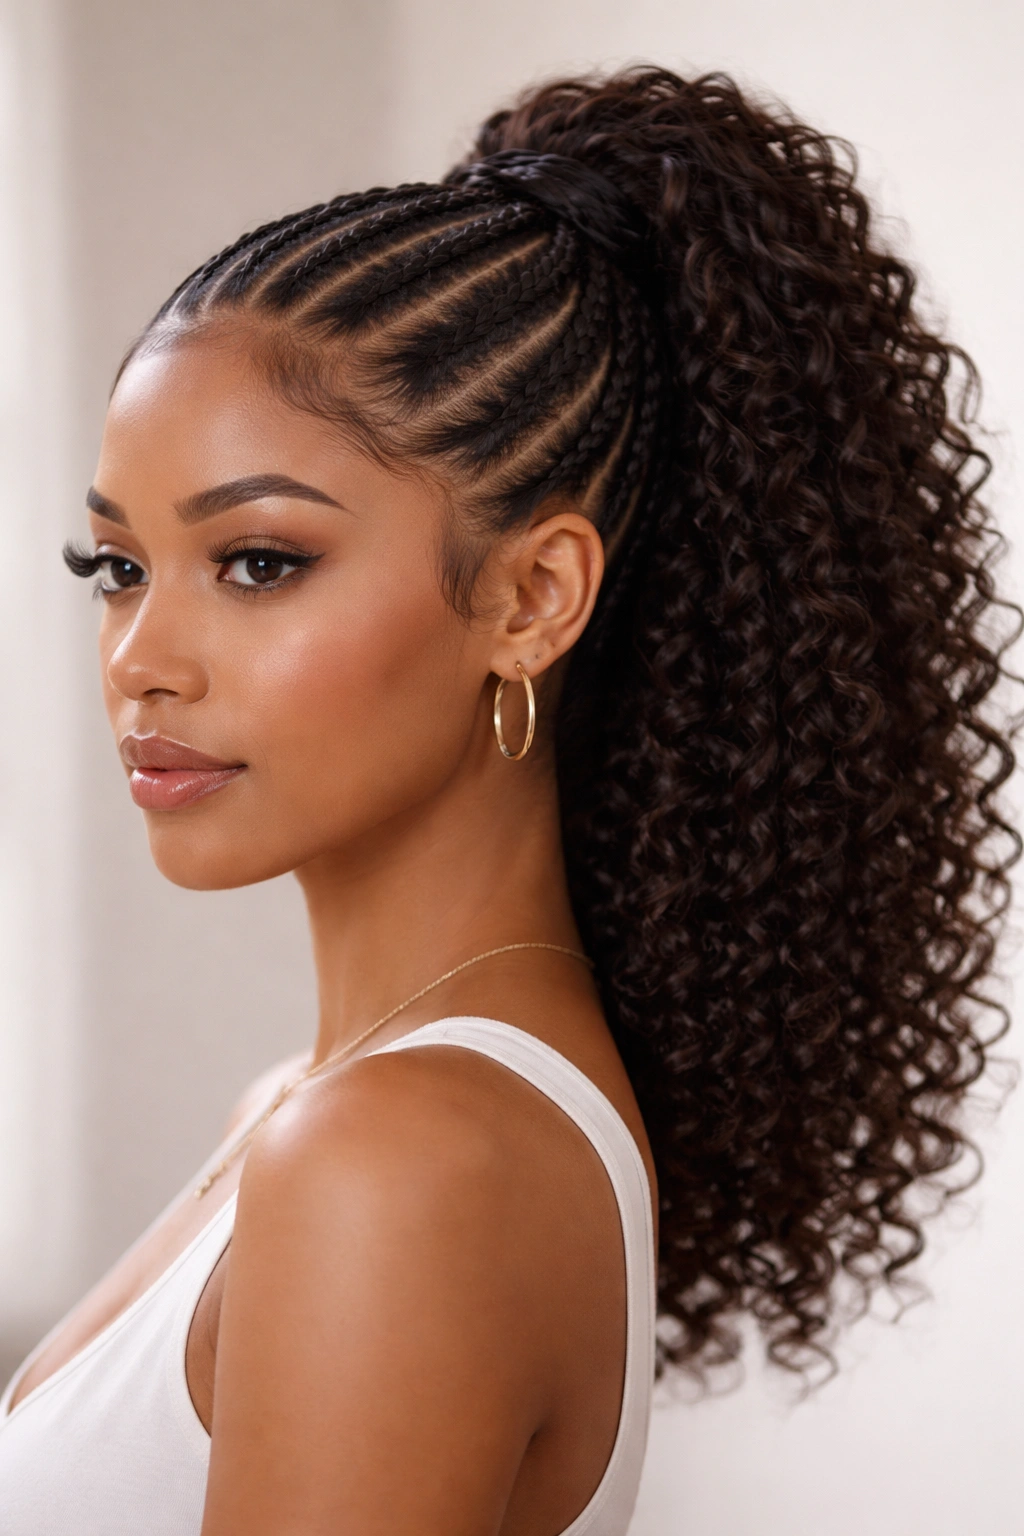
Cornrows pulled into a sleek, high ponytail at the back of your head give you an undeniably polished appearance while keeping your edges smooth and controlled. This is a protective style that requires some skill to execute (or you might want to visit a pro your first time), but once you master it, it becomes your go-to for days when you need everything off your face and neck.
The Structural Advantage for Curly Hair
Cornrows are essentially braids that sit flat against your scalp by design. They don’t tug on individual curls the way loose ponytails sometimes do. The accumulated result of many small braids feeding into one ponytail means weight is distributed across your entire scalp rather than concentrated at one point. This makes the style more comfortable for thick, heavy curly hair and more sustainable for several days.
Styling Cornrows Into a Unified Ponytail
- Section your hair into 4-6 parts (depending on the thickness of your hair and how defined you want the braids) using clips to keep sections separate
- Start each cornrow at the hairline and braid straight back, taking thin subsections as you go to keep rows neat and even
- Guide each row slightly inward so they naturally converge at the base of your neck
- Once all cornrows reach the nape of your neck, gather the remaining curls and braids into a single high or mid-height ponytail
- Secure with an elastic and use bobby pins to tuck any loose ends under the main ponytail
Quick fact: Cornrowed ponytails can last 4-5 days without needing to be redone, making them ideal for busy weeks or travel. Just refresh the edges each morning with a little edge control and your ponytail still looks intentional.
4. The Halo Braid With Cascading Curls

A halo braid is a two-strand twist (or sometimes a loose braid) that starts at one side of your head, wraps around the crown like a crown, and ends on the opposite side. From there, the remaining curls cascade down into a ponytail. This style is stunning for medium-length curly hair (shoulder-length or longer) and creates an incredibly romantic, put-together appearance.
Why This Works For Textured Hair
The halo positioning means the braid sits on top of your curls rather than trying to contain them. You’re not fighting your natural texture—you’re framing it. The cascading curls below look soft and romantic rather than frizzy, because the halo actually anchors them and creates a defined boundary between the braided section and the free-flowing section below.
Creating the Halo Braid Effect
- Start with second-day curls (curls with a little bit of texture and hold already established; first-day curls can be too bouncy to control)
- Brush a small section of curls from one temple area and begin a loose two-strand twist or simple three-strand braid
- Wrap the braid around the back of your head, following the natural crown line and keeping it positioned near the top of your head
- Once the braid reaches the opposite temple, secure the end with a small elastic
- Gather all remaining curls (from both sides and the back) into a low ponytail directly underneath the halo braid, securing with a second elastic
- Optional: wrap a small curl or a piece of ribbon around the base of the ponytail to hide the elastic and add visual interest
Pro tip: The halo braid looks best when you let some face-framing curls escape in front of your ears—it softens the look and adds dimension.
5. The Waterfall Braid Ponytail
A waterfall braid traditionally falls vertically down the back or side of your head, with sections of hair “cascading” out of the braid itself. When you anchor this down into a ponytail, you get a style that’s visually intricate without feeling overly formal or complicated. The cascading sections actually integrate beautifully with curly hair, becoming part of the textured whole rather than looking like loose threads.
The Visual Magic of Waterfall Braids in Curls
Each section you drop from the waterfall braid creates a little burst of curl definition and texture. Instead of a sleek, uniform cascade, you get this wonderfully organic, layered effect where curls are visible at different depths. This is genuinely one of the most flattering braided styles for people with medium to tight curls.
Executing a Waterfall Braid Into a Ponytail
- Start the braid at one temple or ear, taking three small sections to begin your initial three-strand braid
- As you braid, take a new section of hair from the top (near your part line) and weave it into the braid—this becomes one of your three working sections
- The section you were braiding with before gets dropped out of the braid and left hanging—this is your “waterfall”
- Take a new section from below to replace the section you dropped, then continue the braid pattern
- Keep going until the braid reaches the back of your head, dropping sections as you go
- Gather the braid, all the dropped curl sections, and any additional curls into one ponytail at the nape of your neck or lower
Quick fact: Waterfall braids are best done on hair that’s been styled with some hold (a gel or mousse) but not completely dried yet—damp curls are more pliable and easier to work with.
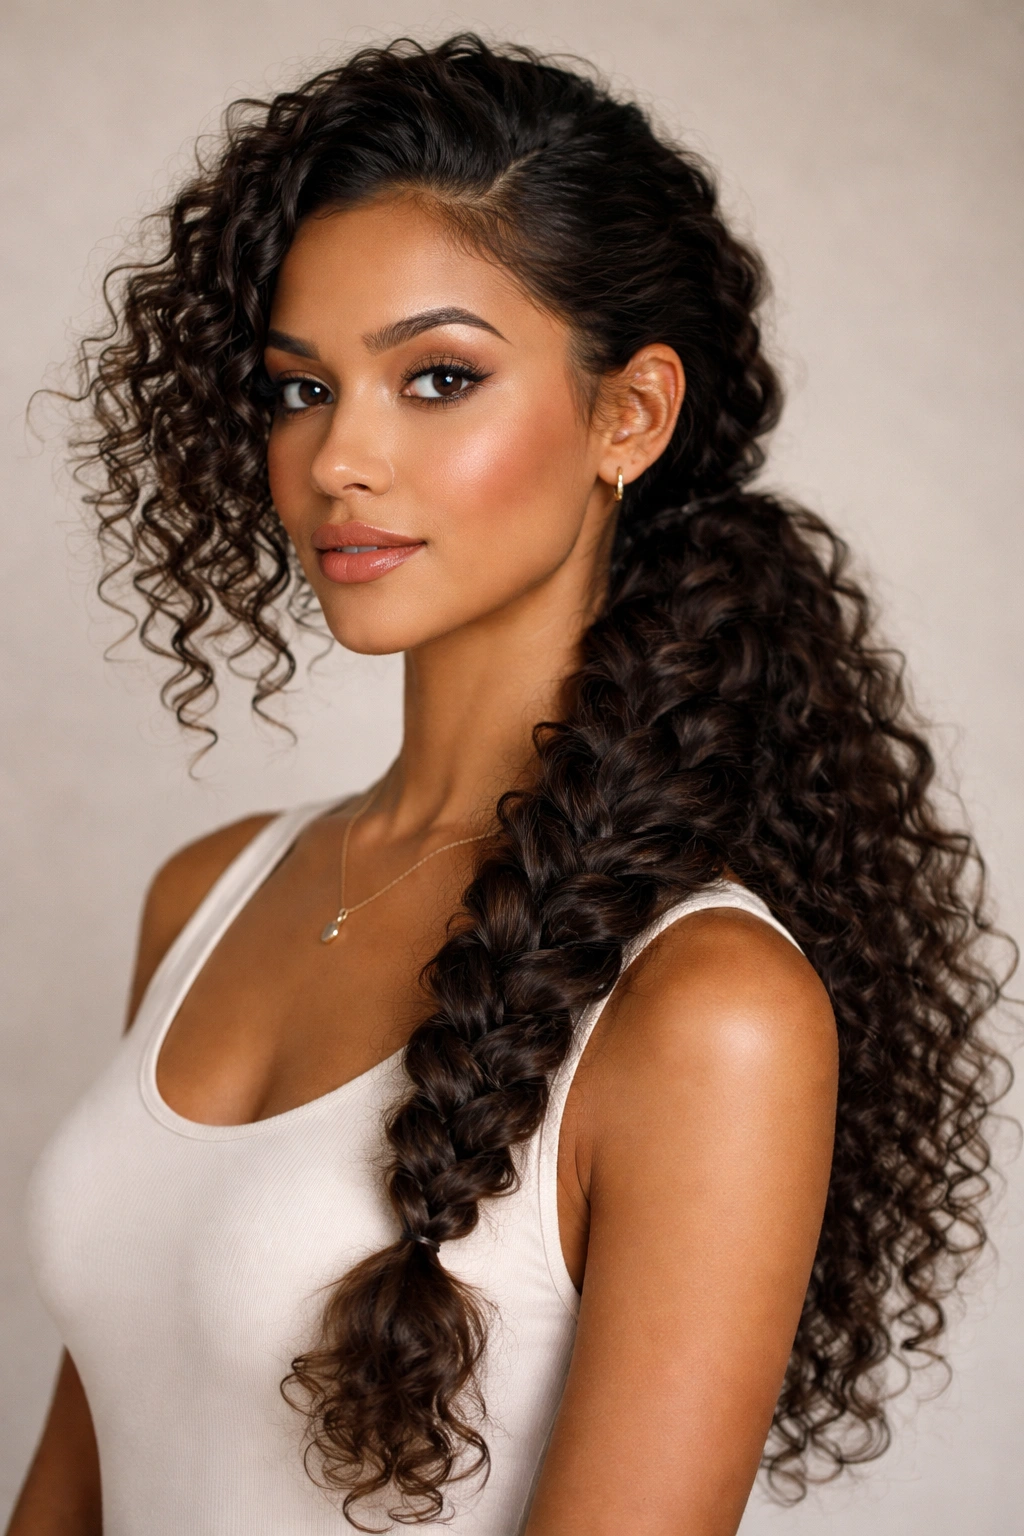
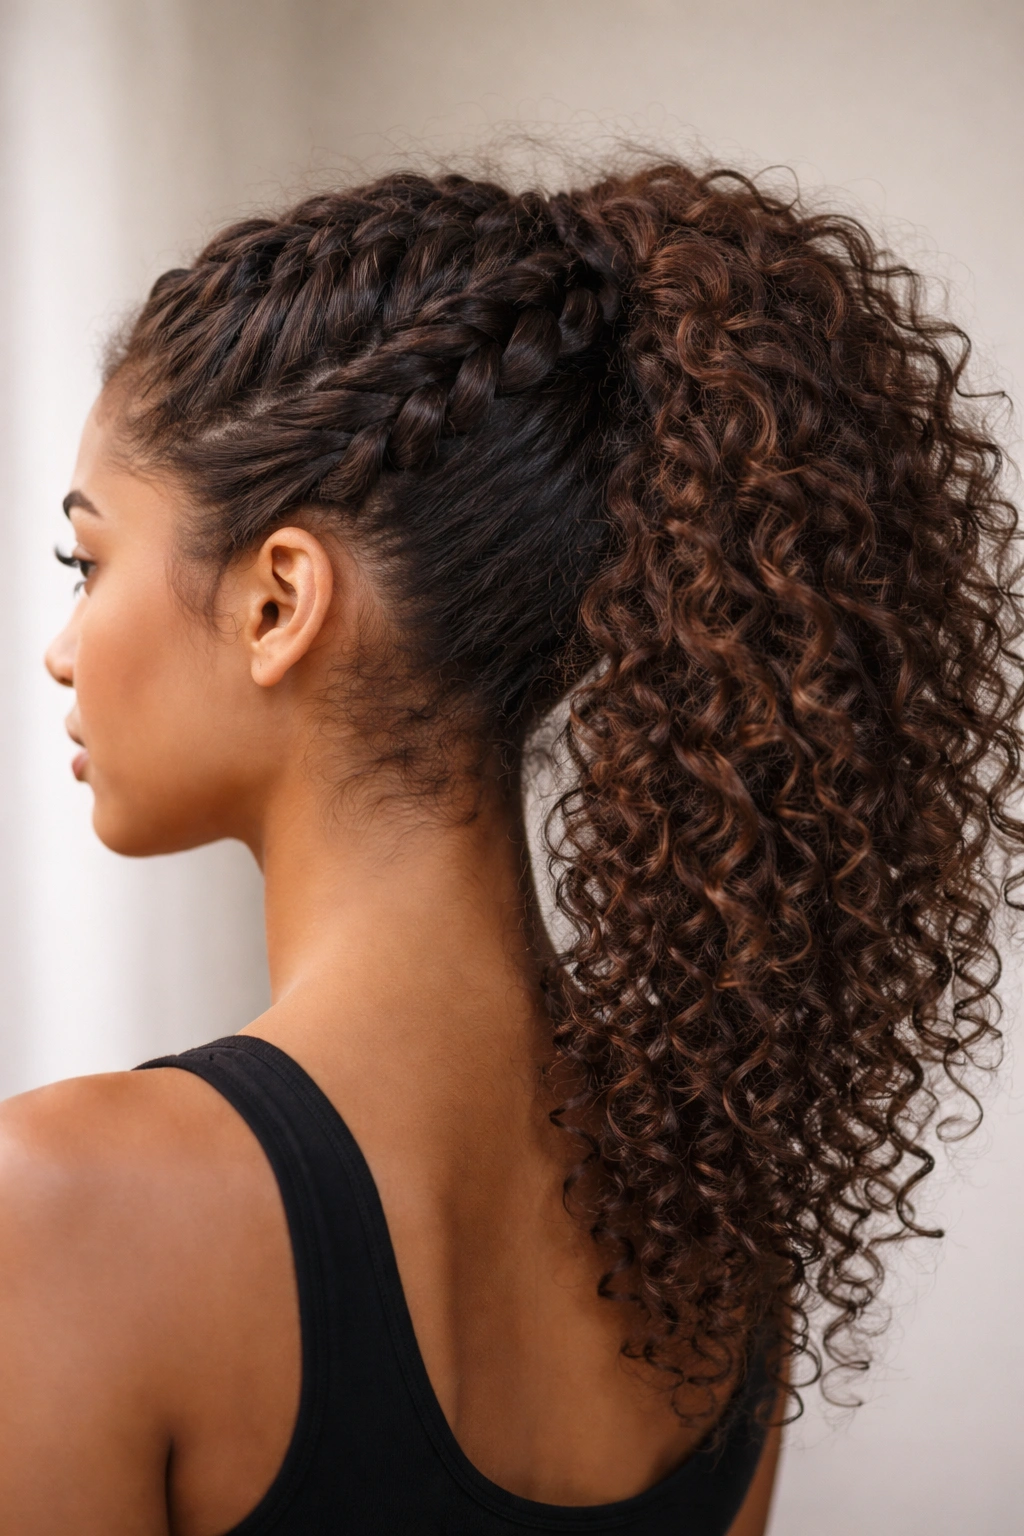
6. The Double Braid Ponytail
Instead of one braid feeding into a ponytail, start two braids on opposite sides of your head and have them meet at a ponytail at the back or bottom. This creates incredible visual impact and somehow feels more intentional and designed than a single braid. The symmetry is also deeply satisfying to look at.
Styling Considerations for Thick Curly Hair
When you’re working with curly hair, especially thick, voluminous curls, starting with two braids actually makes the style easier to manage than trying to wrangle everything into one massive braid. Each braid handles less overall hair volume, so you maintain better braid definition and structure. The result is a style that looks more refined than it actually is to execute.
How to Construct Dual Braids Into One Ponytail
- Create a center part from your hairline to the nape of your neck, clipping one side away
- Working with the unclipped side, start a three-strand braid (French or Dutch, whichever you prefer) at the temple and braid toward the back of your head
- Guide the braid to curve slightly inward as you braid so it naturally meets where the second braid will be
- Repeat on the opposite side, creating a mirror image
- Once both braids reach the meeting point (typically at the nape of your neck or just above), gather both braids plus any additional curls into one low or mid-height ponytail
- Secure and use small bobby pins to hide the elastic and any loose sections
Worth knowing: Double braids look particularly striking with curl definition—they emphasize the symmetry of your braiding while the curls add visual interest that keeps the style from feeling too geometric or harsh.
7. The Side Braided Ponytail
Pull all your hair to one side of your head and braid it, then secure the braid as your ponytail. This asymmetrical style is surprisingly easy to execute, incredibly flattering, and feels casual yet intentional. It’s perfect for days when you want to style your curls but don’t have much time.
Why Side Ponytails Suit Curly Hair Especially
When hair is pulled to one side, the volume and texture of curls are showcased rather than compressed. A side ponytail with curls doesn’t flatten your curl pattern—instead, it frames your face and emphasizes the movement of your curls. The asymmetry is also more forgiving with curly hair; any slight unevenness in your braiding becomes part of the textured appeal rather than a noticeable mistake.
Creating a Side Braid Ponytail
- Begin with curls that have been refreshed with a curl cream or spray and scrunched for definition
- Part your hair deeply on one side so that approximately 80% of your hair falls to that side
- Take a section from near the front hairline on the fuller side and begin a three-strand braid, angling it diagonally down toward the opposite ear
- As you braid, incorporate hair from both the top and bottom to create a fuller braid
- Continue braiding until you reach the nape of your neck or the length you want
- Gather the braid and any remaining loose curls into a side ponytail (positioning it where the braid ends) and secure with an elastic
- Leave some face-framing curls loose in front if you want a softer appearance
Pro tip: A side braid ponytail looks extra polished if you use an elastic that matches your hair color and finish with a small accessory like a clip or hair jewelry near the base of the ponytail.
8. The Rope Twist Ponytail With Woven Details
A rope twist is created by taking two small sections of hair, twisting each one separately (so both sections are individually twisted), and then twisting the two twisted sections around each other. This creates a thicker, ropelike texture with wonderful dimension. When you feed this into a ponytail, the result is textured and interesting without requiring the technical skill of a traditional braid.
Why Rope Twists Minimize Frizz
Because you’re working with pre-twisted sections rather than loose strands being woven together, the overall structure is slightly tighter and more defined. This actually contains frizz better than a loose braid would, especially in humid conditions. The ropelike texture also visually reads as intentional styling, not accidental messiness.
Building a Rope Twist Ponytail
- Apply a lightweight styling cream or gel to damp curls and allow them to air-dry until they’re about 75% dry (this timing is important; too wet and the twist won’t hold, too dry and it’s hard to manipulate)
- Take a section of hair from one side (near the temple) and twist it tightly around your finger until it forms a coil
- Take another section from the opposite side and twist it the same way
- Now twist the two twisted sections around each other as if you’re creating a double helix
- As you create this rope effect, gradually feed additional hair in from the sides (similar to how you’d create a French braid, but with rope twisting instead of three-strand braiding)
- Continue this all the way to the nape of your neck, then gather everything into a ponytail and secure
Quick fact: Rope twist ponytails hold longer than regular braids in humid weather—the tighter structure resists humidity-induced frizz more effectively.
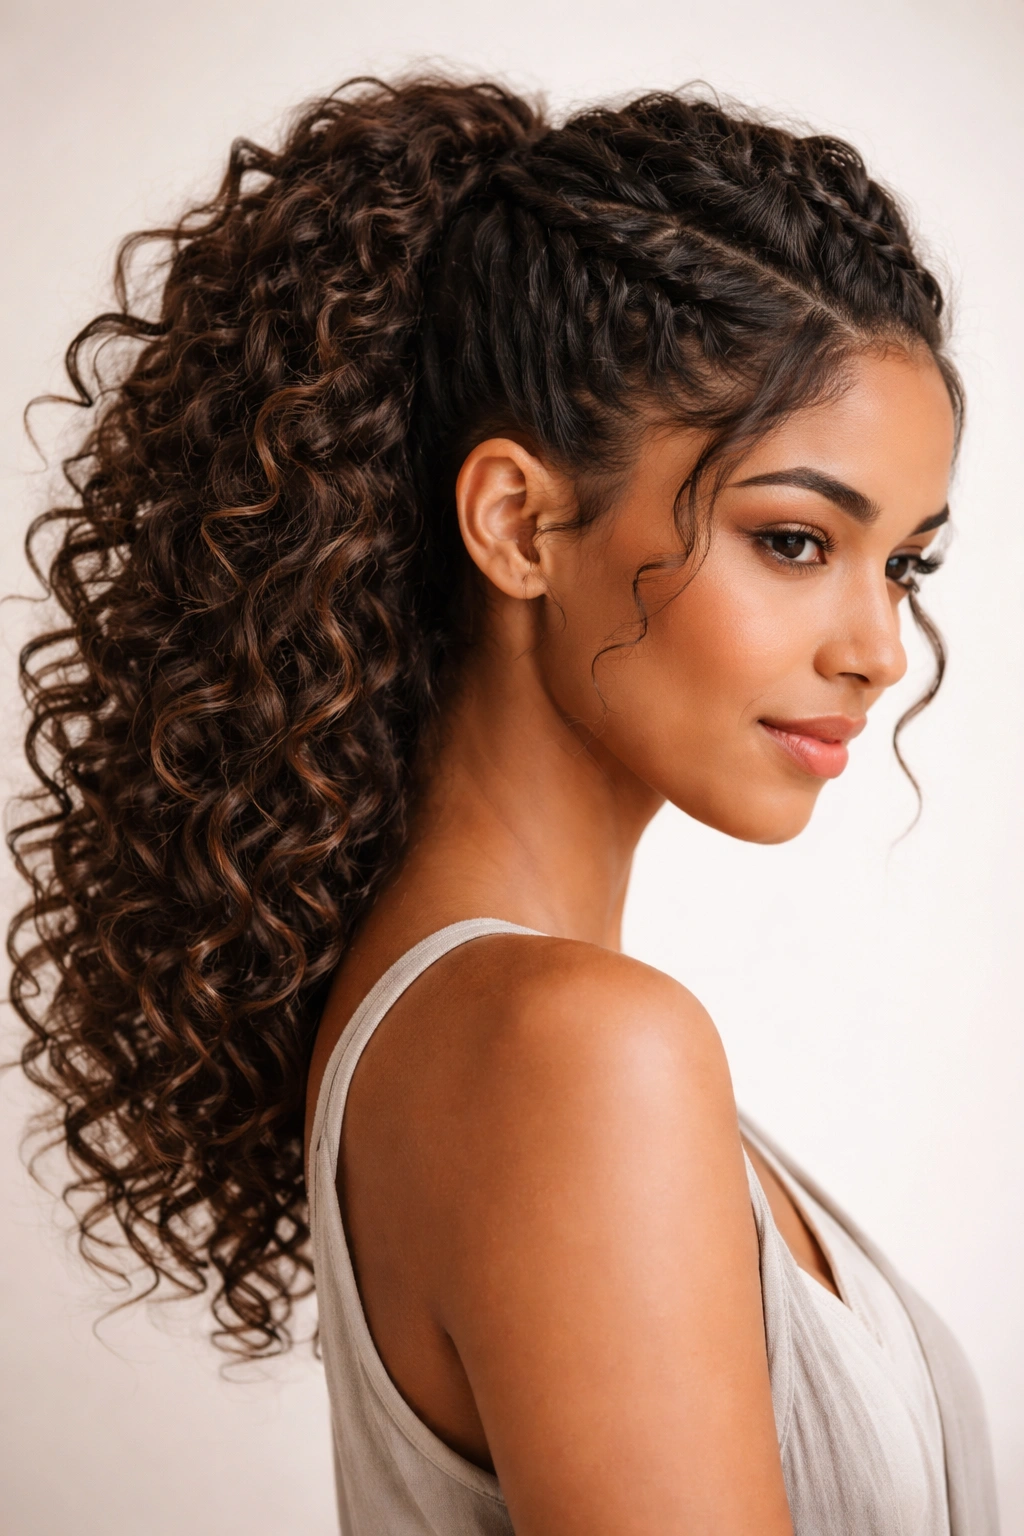
9. The Crown Braid Ponytail
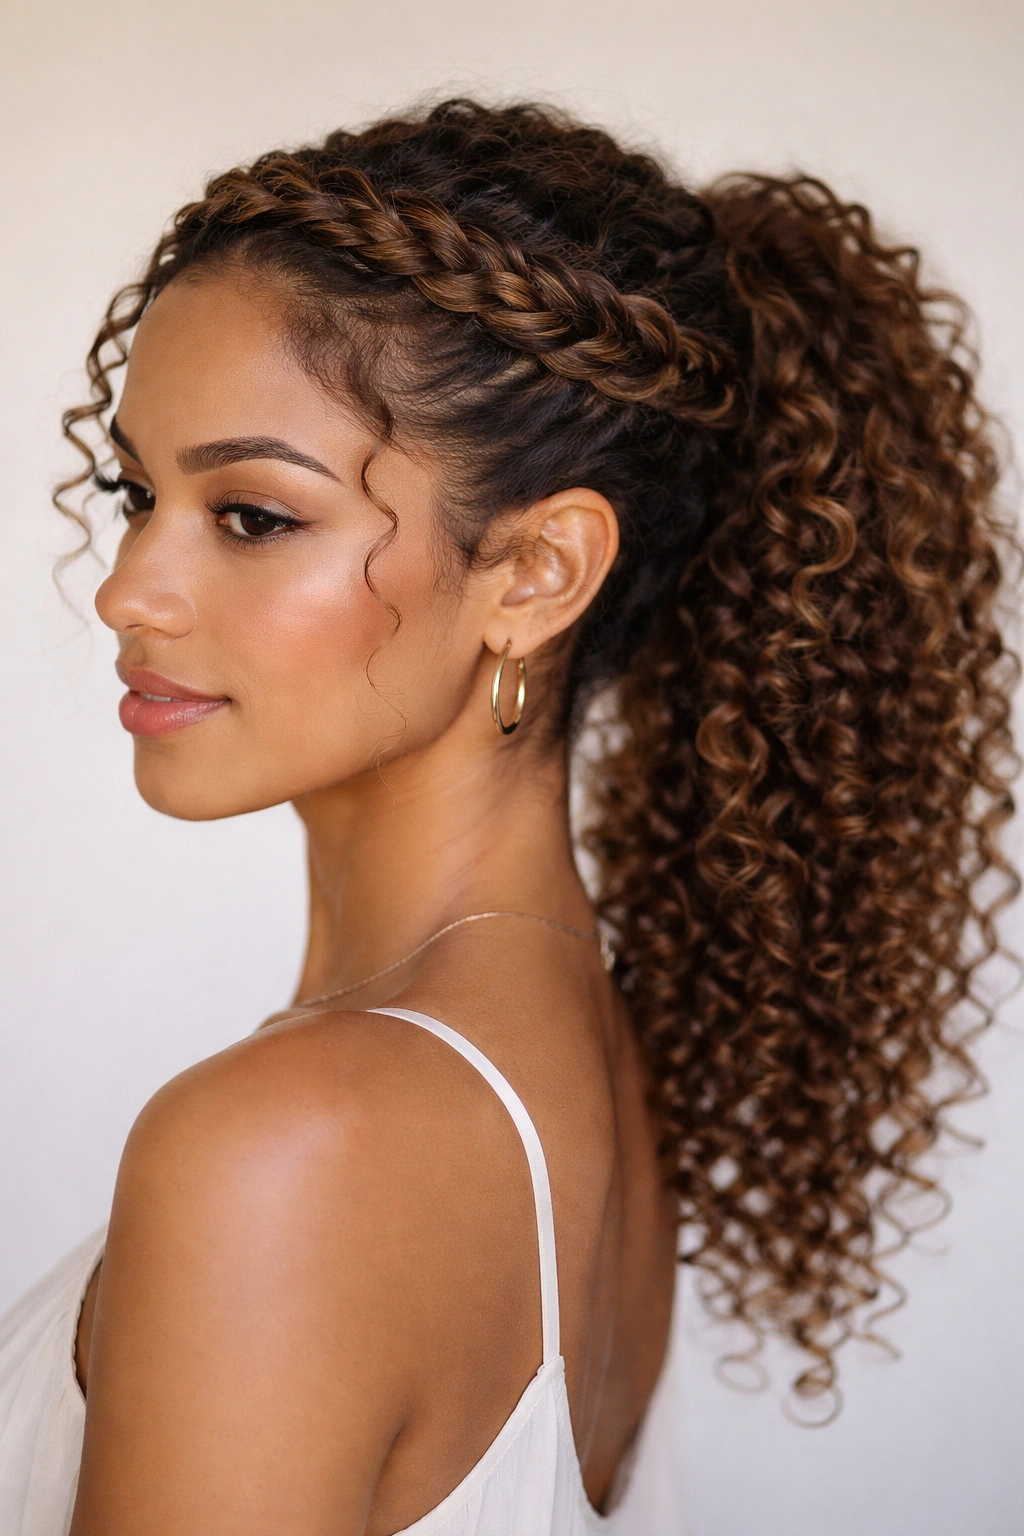
A crown braid wraps around your head like a tiara or halo, but instead of a simple two-strand twist, it’s a full three-strand braid. This can feel incredibly formal or, depending on how loose and textured you make it, completely casual. When you anchor it into a ponytail at the back, you get a style that works for everything from weekend brunch to special occasions.
Executing Crown Braids in Curly Hair Without Tension
The biggest challenge with crown braids in curly hair is not pulling too tightly. Tension headaches are real, and overly tight braids can cause breakage. The solution is to braid loosely and deliberately let some curl texture show through the braid itself. This actually looks better than a sleek crown braid would anyway.
Steps for a Crown Braid Ponytail
- Start with curls that have some hold established (use a gel or mousse if you have very loose curls)
- Begin at one temple and create a loose three-strand braid, angling it upward and backward
- Add small sections of hair as you go, incorporating curls from the crown area into the braid
- Follow the crown line, wrapping the braid around the back and top of your head toward the opposite temple
- Once you reach the opposite temple, finish the braid and secure it with a small elastic
- Gather all remaining curls from the bottom of your head and the area below the crown braid into a low or mid-height ponytail
- Position the ponytail elastic so it’s just below where the crown braid ends, creating a unified look
Worth knowing: Crown braids photograph beautifully and look especially striking with slightly undone, textured curls—the loose elements add character rather than looking unfinished.
10. The Braided Upside-Down Ponytail
Instead of braiding from your hairline down, start the braid at the nape of your neck and braid upward toward the crown. You’ll flip your head upside down to do this, which might feel awkward at first, but the result is a style with incredible texture and an almost three-dimensional appearance. Once you braid up to the crown, you secure the braid and any remaining curls into a ponytail.
The Texture-Enhancing Benefits
Braiding upside down actually creates more texture and definition in curly hair than braiding in the traditional direction. Because you’re working against gravity, the individual curl sections have more space and definition within the braid. The resulting ponytail has more movement and less compression than a traditionally braided ponytail would.
How to Braid Upside Down Into a Ponytail
- Flip your head upside down (lean forward so your head hangs down)
- Start a three-strand braid at the nape of your neck, working with a small starter section
- As you braid, gradually add sections of hair from both sides, feeding them into the braid
- Keep the braid loose rather than tight—you want texture and movement
- Continue braiding upward until you reach the crown (this should be about two-thirds of your hair length)
- Flip your head back upright
- Take the loose braid and any remaining hair from the crown and secure it all into a high ponytail
- Gently tug on the braid strands to loosen and expand the braid texture
Pro tip: This style works best on hair with some texture already established—second or third day curls that have a little natural wave are ideal.
11. The Fishtail Braid Ponytail
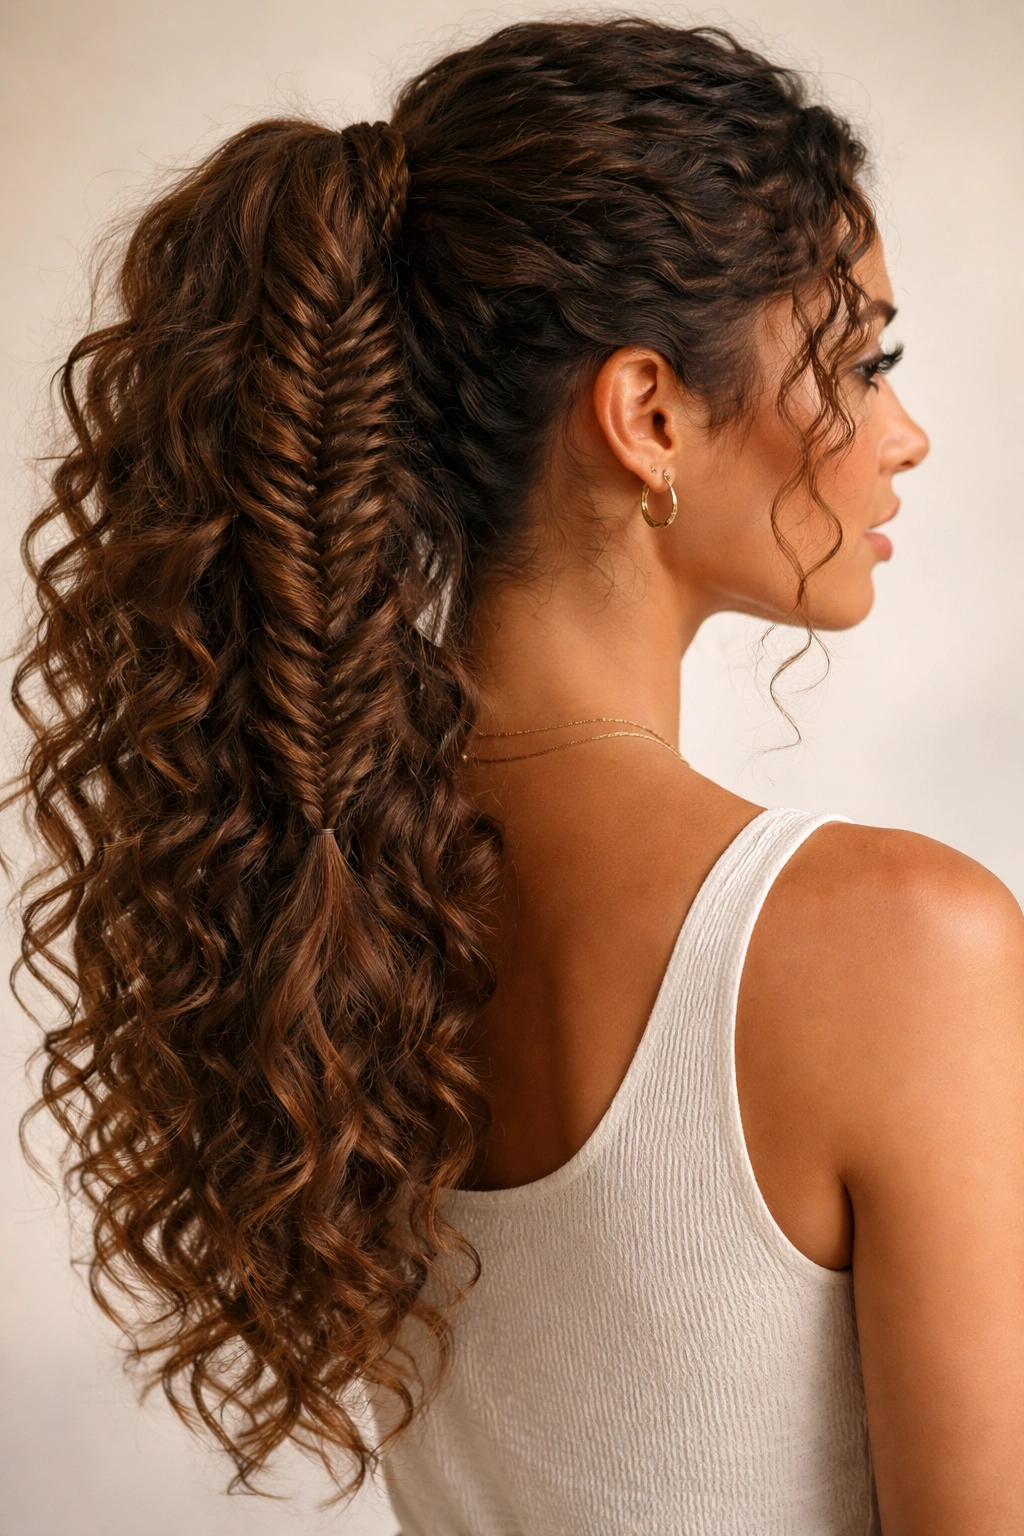
A fishtail braid uses only two sections of hair instead of three, making it technically simpler than a traditional three-strand braid, yet it creates a delicate, intricate appearance. You take small sections from the outer edge of each of your two main sections and cross them over to the opposite side, repeating until you reach the end. In curly hair, the small sections create beautiful definition without requiring the technical precision of a three-strand braid.
Why Fishtail Braids Shine in Textured Hair
The fishtail technique naturally creates a wider, more textured appearance than traditional braiding. In curly hair, this is a huge advantage—the braid looks fuller and more visually interesting, and it’s much more forgiving of slight imperfections in technique. A slightly imperfect fishtail actually looks intentionally boho and styled rather than sloppy.
Constructing a Fishtail Braid Ponytail
- Begin with curls that have been scrunched with product and allowed to dry (about 70-80% dry for easier handling)
- Divide your hair into two main sections
- Take a small section (about a quarter-inch) from the outside edge of the right section and cross it over to the left section, merging it with the left hair
- Take a small section from the outside edge of the left section and cross it over to the right section
- Repeat this alternating pattern, keeping sections small and tension even
- As you near the end, you can either continue to your hair ends or stop partway and gather everything into a ponytail
- Secure the braid with an elastic, then gently pull on the braid edges to expand it and create texture
Quick fact: Fishtail braids look stunning when slightly loosened and undone—gently tugging on the sides of the braid makes it wider and more visually dramatic.
12. The Reverse French Braid Ponytail (Inverted Braid)
A reverse French braid is braided on the underside of your hair, creating a raised, almost sculptural effect rather than a braid that sits flat against your scalp. When you bring this braid down into a ponytail, you create a style with serious visual impact and undeniable skill. Yes, it requires practice, but once you nail it, you’ll feel genuinely proud every time you execute it.
The Bold Visual Statement
Reverse French braids (also called inverted braids or Dutch braids) create a braid that’s raised above your head instead of flush with the scalp. In curly hair, this elevated structure means the curl texture is visible both within the braid and around it. The three-dimensional quality is striking and commands attention.
Mastering the Reverse French Braid
- Start at your hairline with three small sections
- Cross the right section under the middle (instead of over, which is what you do in a regular French braid)
- Cross the left section under the middle
- Now, pick up a new section of hair from the right side and add it to the right working section, then cross that combined section under the middle
- Repeat on the left side
- Continue this pattern, building the braid down the back of your head
- As you braid, slightly pull the braid sections apart to create height and texture
- Once you reach the nape of your neck, gather the braid and any remaining curls into a ponytail
- Use bobby pins to secure the base and neaten any flyaways
Worth knowing: Reverse French braids show curl texture incredibly beautifully—every individual curl pattern is visible and emphasized. If you have tight or medium curls, this style showcases them gorgeously.
Final Thoughts
Braided ponytails transform how you can style curly hair—they’re protective, practical, and genuinely beautiful when done with your specific curl pattern in mind. The key isn’t perfection; it’s understanding how braiding interacts with your texture and choosing a style that works with your curls instead of against them.
Every style in this guide becomes easier with practice. Your first twisted ponytail might feel clumsy, but your fifth one will feel natural. The braid that seems impossibly tight today will feel looser next month because your hands will learn the right tension. Most importantly, each of these styles protects your curls while letting them breathe and show off their natural definition and bounce.
Pick one style to master this week, and notice how it lasts throughout your day. Notice how your curls actually look better when they’re released from the braid. Then move to the next style. Before long, you’ll have a whole arsenal of options depending on your mood, the occasion, and what your curls need on any given day. That’s the real win—having the skills and confidence to style your hair intentionally rather than just throwing it in a regular ponytail because it’s the easiest option.