



Loose curls are a gift—when they land on the right cut. Too much weight in the wrong places and your curls flatten into a shapeless clump. Chop away the bulk carelessly and you’re left with frizzy wisps that defy gravity. The secret? Layering. A well-executed layered cut removes weight, creates movement, prevents bulk, and actually enhances your natural texture instead of fighting against it. The curl pattern comes alive when each layer is cut to work with your waves rather than against them.
Here’s what most people get wrong: they either ask for “lots of layers” without explaining how they want the cut structured, or they bring in a picture of a straight-haired model and expect it to translate directly to curly hair. Curly hair curves differently than straight hair, which means the cut has to account for how your curls will stack, shrink, and settle once they dry. A cut that looks balanced wet might look choppy or uneven when dry—unless it’s been designed with that curl movement in mind from the start.
The 10 cuts below aren’t just trendy—they’re specifically engineered for loose curly hair. Each one approaches layering differently, which means you’ll find something that matches your hair length, desired styling commitment, and face shape. The goal is to help you walk into your next appointment with a clear picture of what you’re asking for, and the confidence to know it’ll actually work with your curl pattern.
1. The Textured Shag
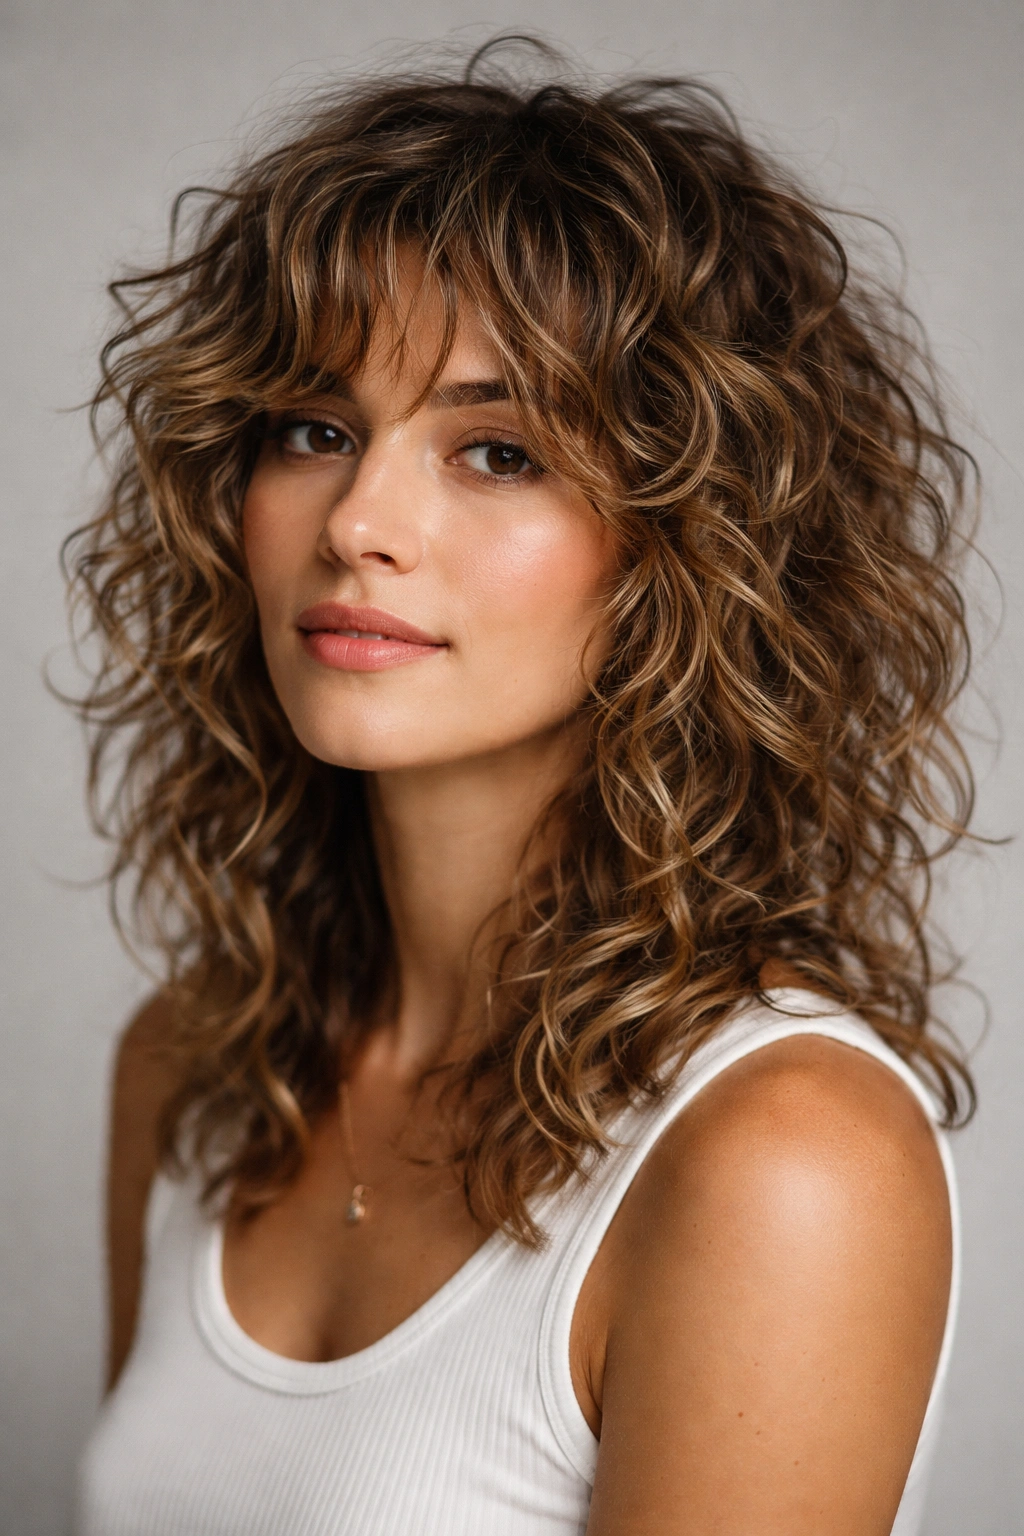
A shag cut brings rockstar energy to loose curls, and when it’s done right, it becomes an extension of your natural wave pattern rather than fighting it. This cut features choppy, piece-y layers throughout, shortest at the crown and gradually longer toward the bottom. The magic happens because each layer sits at a different length, which means your curls fall through the space created between layers, creating a lived-in texture that looks intentional and effortless.
Why Loose Curls Love This Cut
The shag thrives on movement, and loose curls have movement built in. Because the cut removes so much weight from the ends, your curls bounce back with more spring and dimension. The choppy texture also prevents the “helmet head” look that happens when curly hair sits too close to the scalp. Instead of a solid block of curl, you get individual pieces that separate and move independently.
How to Style It Best
- Wash your hair and apply a curl-enhancing cream or mousse to damp roots
- Scrunch the product upward rather than smoothing downward—this trains the curl to spring upward
- Blow-dry with a diffuser on low-medium heat, scrunching as you go, or air-dry for a more relaxed texture
- Once dry, rake your fingers through the layers to separate pieces and enhance the choppy effect
- Use a texturizing spray or dry shampoo if you need more grip and definition by day two or three
Maintenance note: This cut looks best when you’re getting it trimmed every 6-8 weeks, since the choppy ends are part of the style’s definition.
2. The Long Layered Wolf Cut
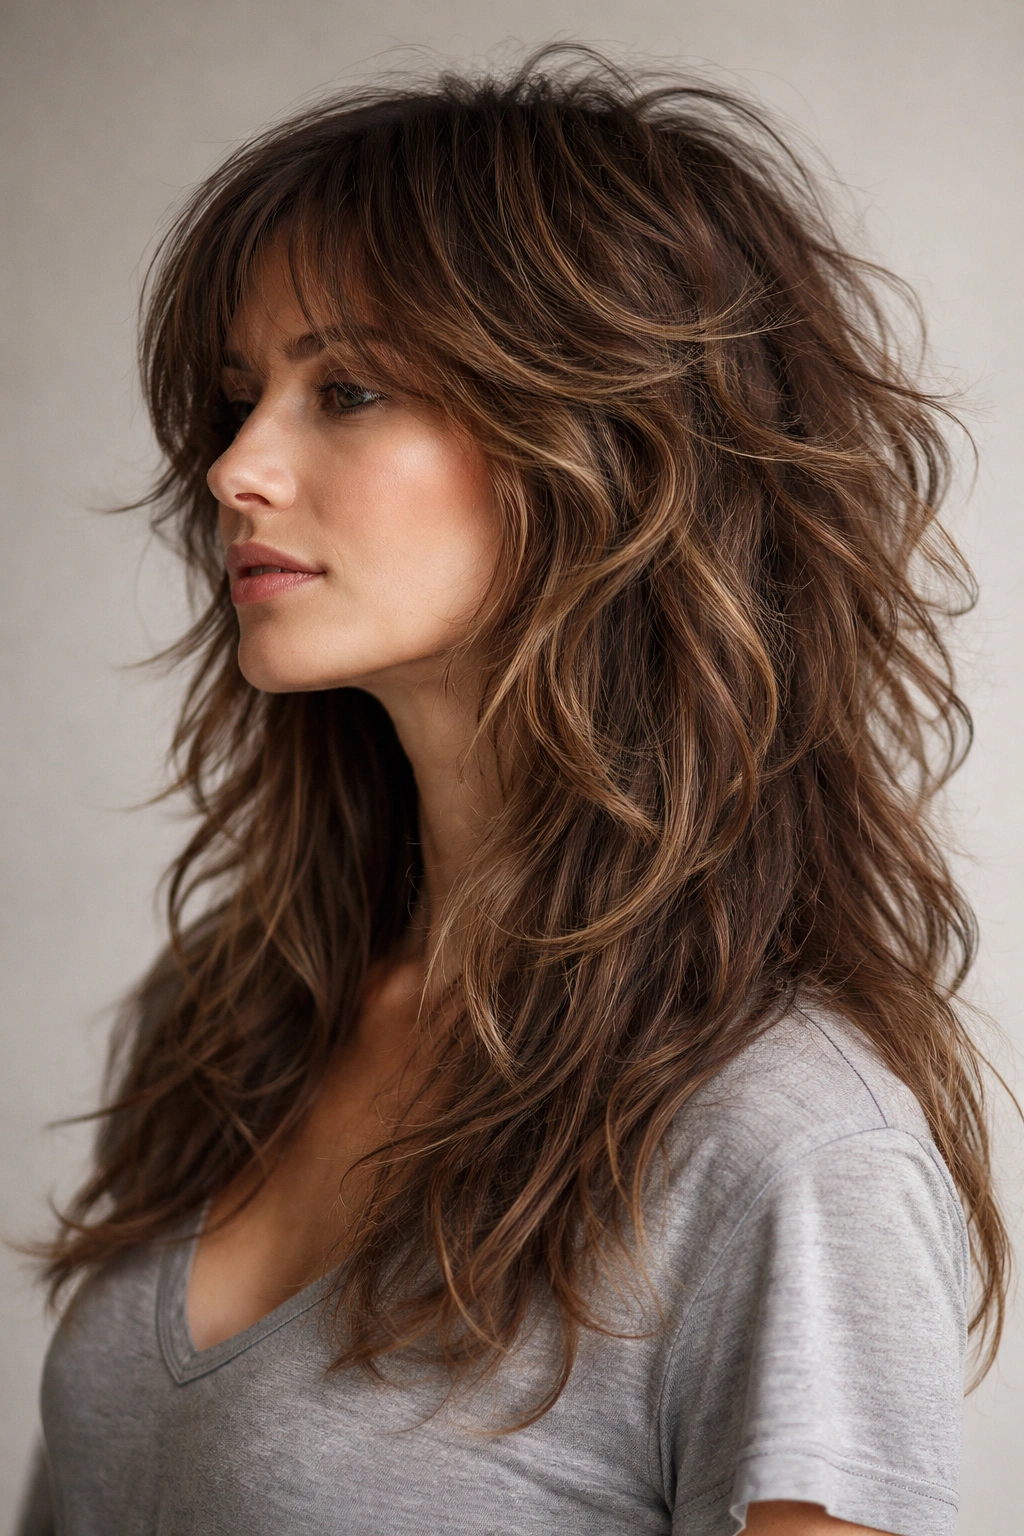
Think of this as a shag’s sleeker, more polished cousin. The wolf cut combines short, choppy layers at the crown with longer, blended layers underneath, creating a silhouette that’s narrow at the top and fuller below. It’s called a “wolf cut” because the crown has that spiky, tousled texture while the longer underneath layers flow. For loose curls, this means serious volume at the crown without the bottom becoming a frizzy triangle.
What Makes It Different From a Shag
A wolf cut is more intentional and structured than a shag. The layers are cut with a clear graduation plan—layers get progressively longer as you move down the head, rather than being randomly choppy. This creates a defined shape instead of just “texture everywhere.” It’s modern, it photographs beautifully, and it actually flatters a wider range of face shapes than a traditional shag does.
Styling and Maintenance Tips
- The crown layers are your focal point—blow-dry this area first with a diffuser, lifting as you dry to maximize volume
- Don’t overstyle the underneath layers; they’re meant to be softer and more relaxed than the textured top
- This cut can go from edgy and tousled (wet-look styling) to soft and romantic (touchably smooth) depending on how you finish it
- Expect to trim every 6-10 weeks to keep the graduation sharp and prevent the bottom from becoming too blunt
- This cut works especially well for people with thinner curls, since the graduated layers create the illusion of more density
3. The Shoulder-Length Choppy Layers
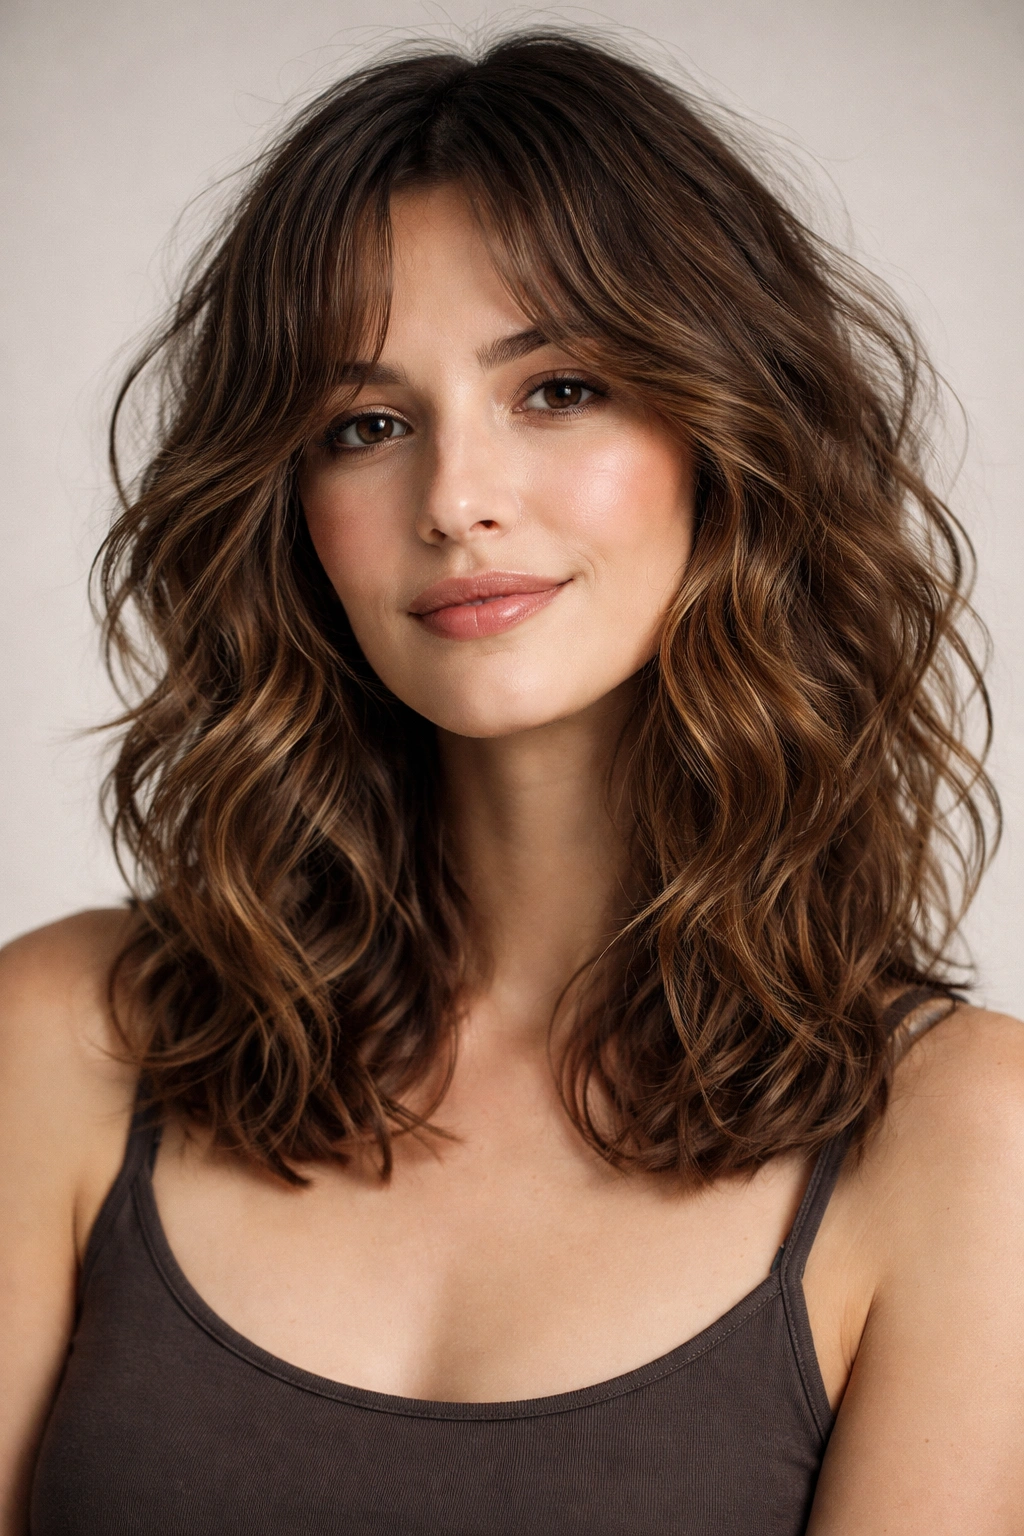
Sometimes you don’t need a dramatic cut to transform loose curly hair. A shoulder-length style with choppy, deliberately imperfect layers can create incredible dimension and movement without the high-maintenance factor of shorter styles. The key is that the layers are cut at different angles, which creates natural separation points where your curls can move and breathe.
Why This Length Hits the Sweet Spot
Shoulder length is long enough to weigh down excessive frizz at the ends, but short enough that the weight doesn’t crush your curls flat. The choppy layers remove bulk without creating that “I have too many layers and it’s too thin” feeling. For people who aren’t ready to commit to a pixie or shag, this is the Goldilocks of layered cuts—just right in terms of both length and texture.
How to Make It Look Its Best
- Apply a leave-in conditioner or curl cream to damp hair before styling—this weight helps layers stay separated
- Blow-dry upside down for the first 30-40% of drying to set volume at the roots, then flip right-side up and dry the rest normally
- Use a curl-defining gel or mousse on the wet hair before diffuser-drying if you want defined, springy curls
- Scrunch and pinch the hair as it dries to encourage each layer to form its own curl pattern
- This cut works well with a refresh spray on day two or three, which reactivates the product in your curls without rewashing
Face-shape note: The choppy layers can be angled to flatter different features—shorter in front and longer in back for a longer face, more uniform for a rounder face.
4. The Blunt-Bangs Layered Cut
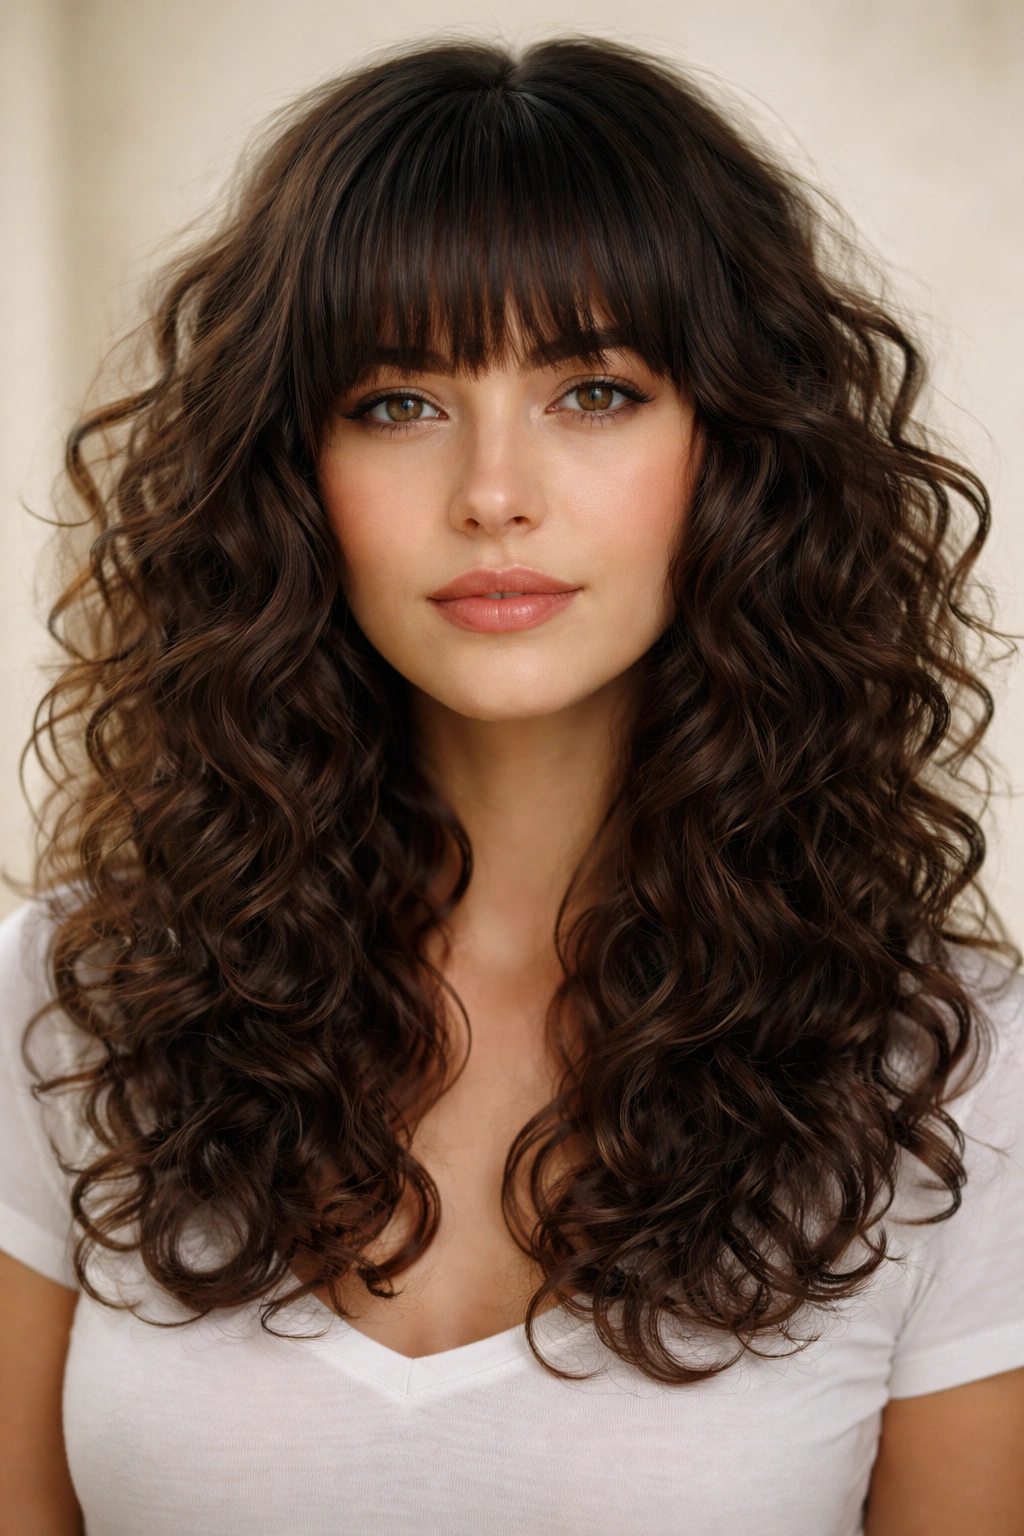
Pairing loose curls with blunt bangs might sound risky, but it’s actually a sophisticated move that’s gained serious traction. Blunt bangs create an immediate focal point at the face, while the layered cut underneath keeps the back light and textured. This creates a visual balance—the weight of the bangs is supported by the structure of the face-framing layers.
The Technical Reason Blunt Bangs Work on Curly Hair
When bangs are cut blunt on curly hair, they sit in a specific way that actually showcases your curl pattern rather than fighting it. The blunt line frames the face without the bangs needing to be styled perfectly straight—they can fall naturally and still read as intentional. The rest of the cut needs to be carefully layered so the hair under the bangs isn’t too bulky, and the layers around the face blend seamlessly with the bangs.
Styling Considerations
- Blunt bangs require a bit more daily attention than longer bangs; you’ll likely need to style them with a small brush and blow-dryer to keep them in place
- Apply anti-frizz serum specifically to the bang area if you live in a humid climate—you want them to maintain their blunt shape
- The layered back can be styled more casually; focus your styling effort on the bangs and face-framing pieces
- Trim your bangs every 4-6 weeks to maintain the blunt line, but don’t trim the longer layers as frequently (every 8-10 weeks)
- This cut looks stunning with a side part and the bangs swept slightly to one side for a softer take on the blunt-bang aesthetic
5. The Curtain Layers Cut
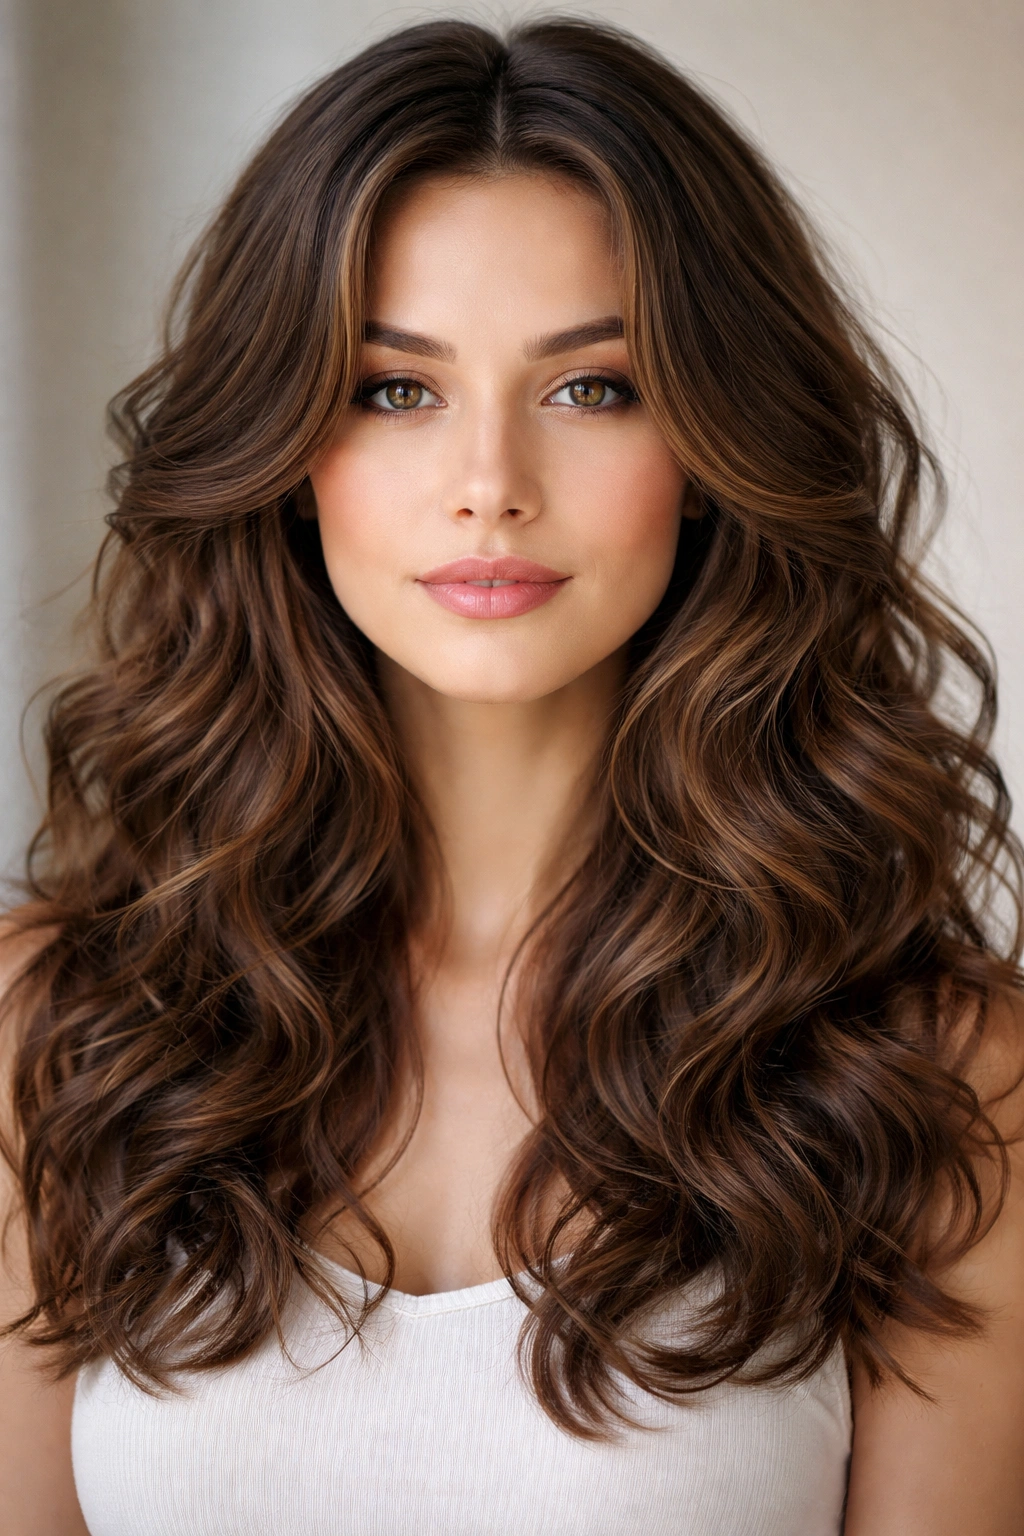
Curtain layers are having a major moment, and they’re perfect for loose curly hair because they frame the face while keeping the weight distributed evenly. This cut features shorter layers at the face that gradually get longer toward the back, creating a face-framing effect that’s flattering from multiple angles. The “curtain” effect comes from the way the layers fall—they naturally separate down the center and sweep back when you move your head.
What Makes This Cut Different
Unlike choppy layers that create deliberate texture, curtain layers are softer and more blended. The transition between layers is gradual, which creates a smoother silhouette while still removing weight from the bulkiest parts of your curl. This is a cut that works beautifully whether you’re wearing your curls natural and undone, or you’ve styled them into more defined waves.
How to Achieve the Curtain Effect
- The cut itself does 70% of the work, but styling the top layers away from your face is what creates that curtain separation
- Blow-dry the face-framing layers back and away from your face using a round brush or your fingers, directing the airflow back
- Use a lightweight mousse or sea salt spray to add texture and help the layers stay in their swept-back position
- You can also air-dry and just tuck the face-framing pieces behind your ears for a more relaxed version of the curtain look
- This cut works beautifully with minimal styling—it’s designed to look good whether you’ve spent 10 minutes or 30 minutes on your hair
6. The Layered Bob With Textured Ends
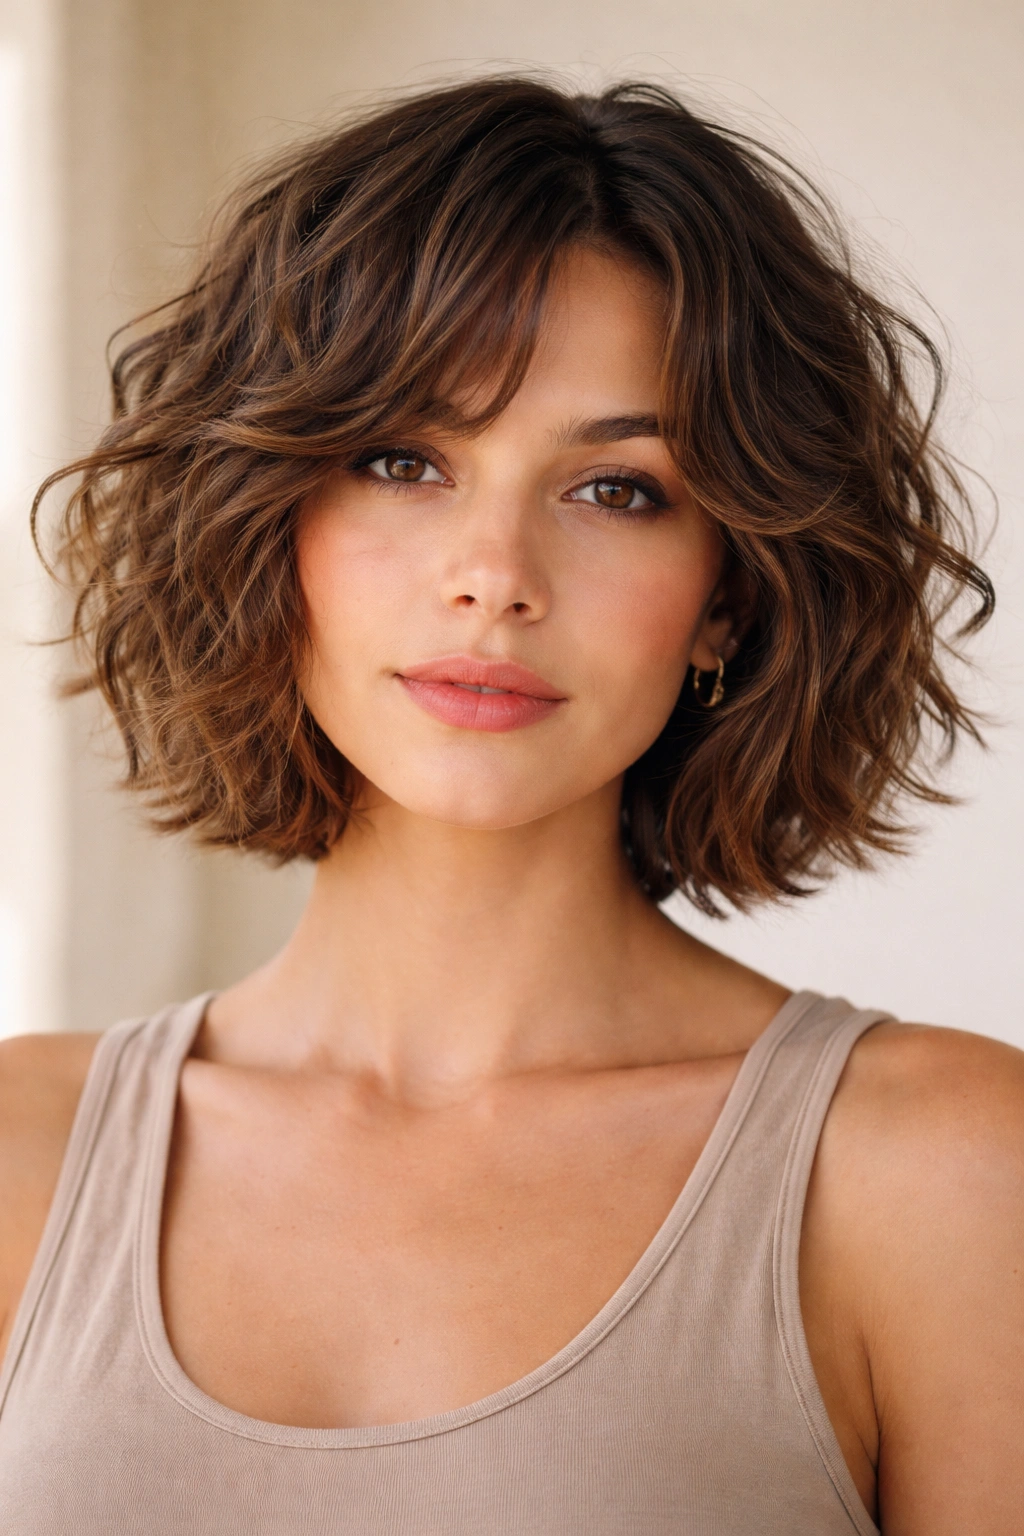
A textured layered bob sits somewhere between a blunt bob and a shag. The length hovers around chin or collarbone, the layers are strategically placed to create movement without sacrificing a defined shape, and the ends are deliberately choppy or textured rather than blunt. For loose curly hair, this is the move if you want a “real” bob that doesn’t rely on straight-hair styling to look good.
Why This Bob Suits Loose Curls Better Than a Blunt Bob
A completely blunt bob on loose curls can look heavy and compressed. The textured, layered version removes just enough weight from the ends that your curls maintain their lift and bounce. The layers prevent that solid wall-of-hair feeling, while the defined length keeps the cut looking intentional and shaped rather than just “layered.”
Styling and Shaping This Cut
- Blow-dry with a diffuser to maximize curl and prevent frizz, or air-dry with a curl cream for a more natural texture
- The choppy ends are meant to separate naturally—don’t over-comb or over-brush this cut, as that will erase the texture
- Apply a texturizing spray or dry texture spray after your hair is dry to enhance the separation at the ends
- This cut is incredibly versatile: wear it curly and tousled for a casual vibe, or diffuse-dry it smooth for a more polished look
- Trim every 6-8 weeks to maintain the textured ends and the layered shape
Styling option: This cut also works beautifully with a half-up style, since the face-framing layers are long enough to add dimension to an updo.
7. The Face-Framing Layers With Long Length
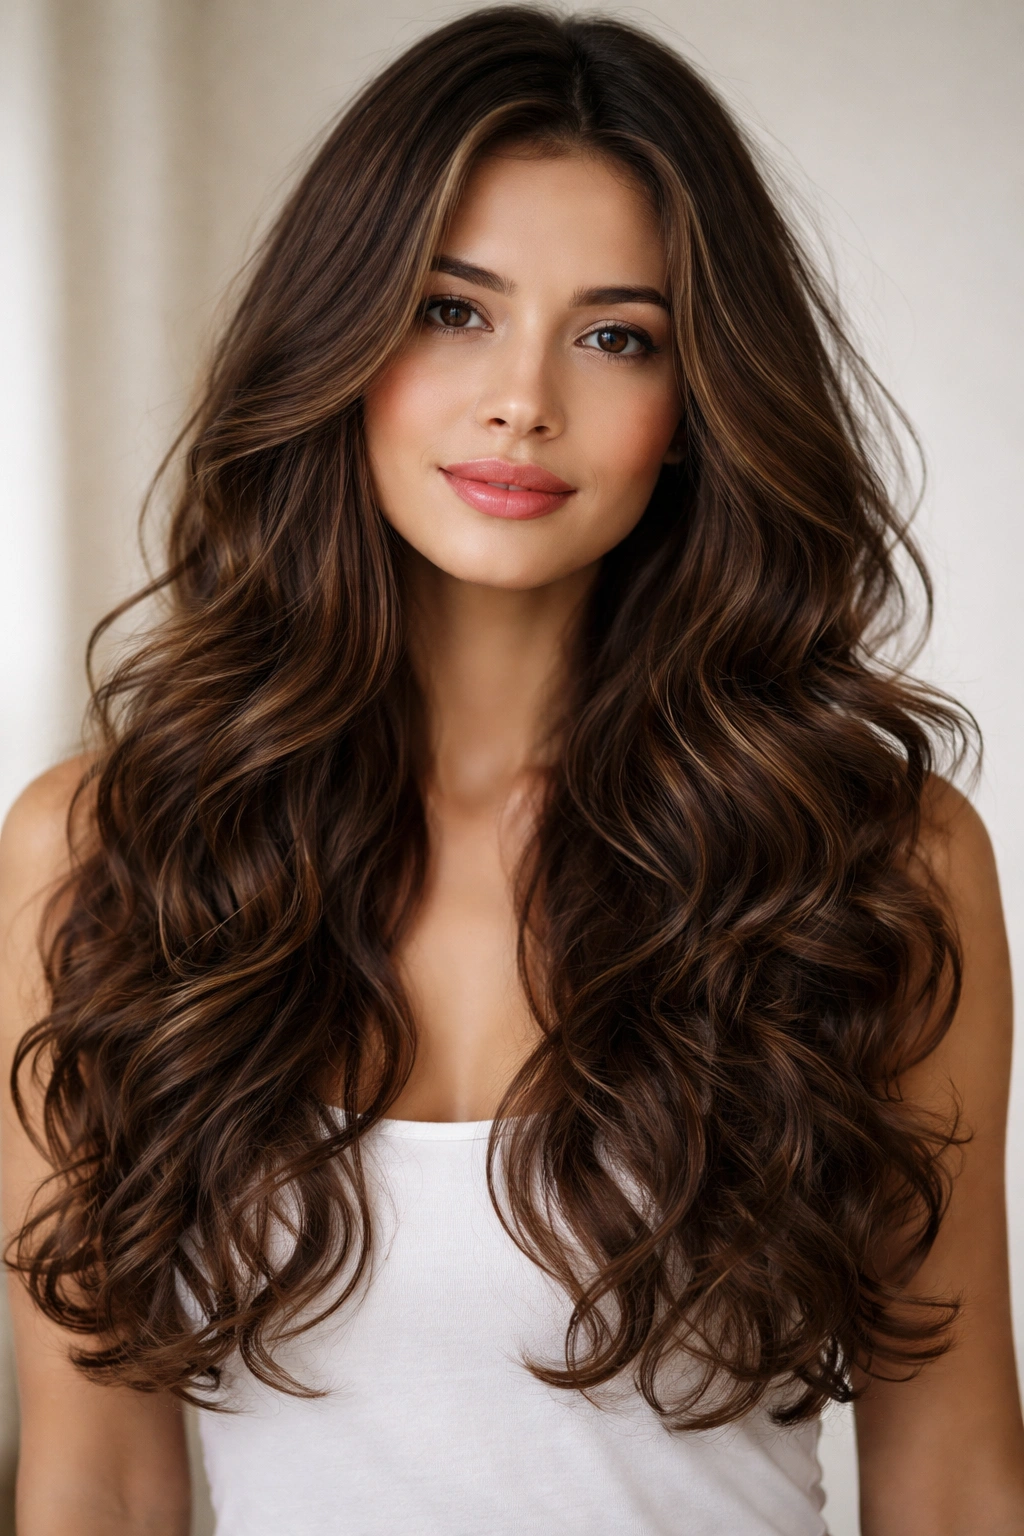
Not everyone wants to cut off significant length. If you’re committed to keeping your loose curls long, the secret to making long hair work with your texture is strategic face-framing layers that remove bulk without creating an overall choppy effect. These are typically just 2-3 layers strategically placed to frame your face and remove weight from the front sections, with the back remaining longer and fuller.
How to Cut This Without Overdoing It
This is a restraint cut—the stylist is adding just enough layering to improve movement and shape, without transforming the entire silhouette. The face-framing layers are usually 3-6 inches shorter than the back length, and they’re blended smoothly so they don’t look separated. The bulk of your hair remains long and full, but the strategically shortened front pieces create the visual impact of movement and prevent bulk right at the face.
Styling This Cut
- Long, loose curls with just a few face-framing layers look best with a relaxed, undone styling approach
- Apply a curl cream or leave-in conditioner to damp hair, then either air-dry or diffuse-dry for a natural, textured finish
- You can also style these layers into defined waves using a curling iron or wand for a more glamorous look
- The length allows for styling versatility: wear it down with the face-framers at your sides, pull it back in a ponytail with pieces out, or style it into braids
- Trim every 8-12 weeks, focusing on just the face-framing layers while leaving the back mostly untouched
Who this works for: People with very tight or complex curl patterns who want movement and dimension without losing significant length.
8. The Mullet-Inspired Layered Cut
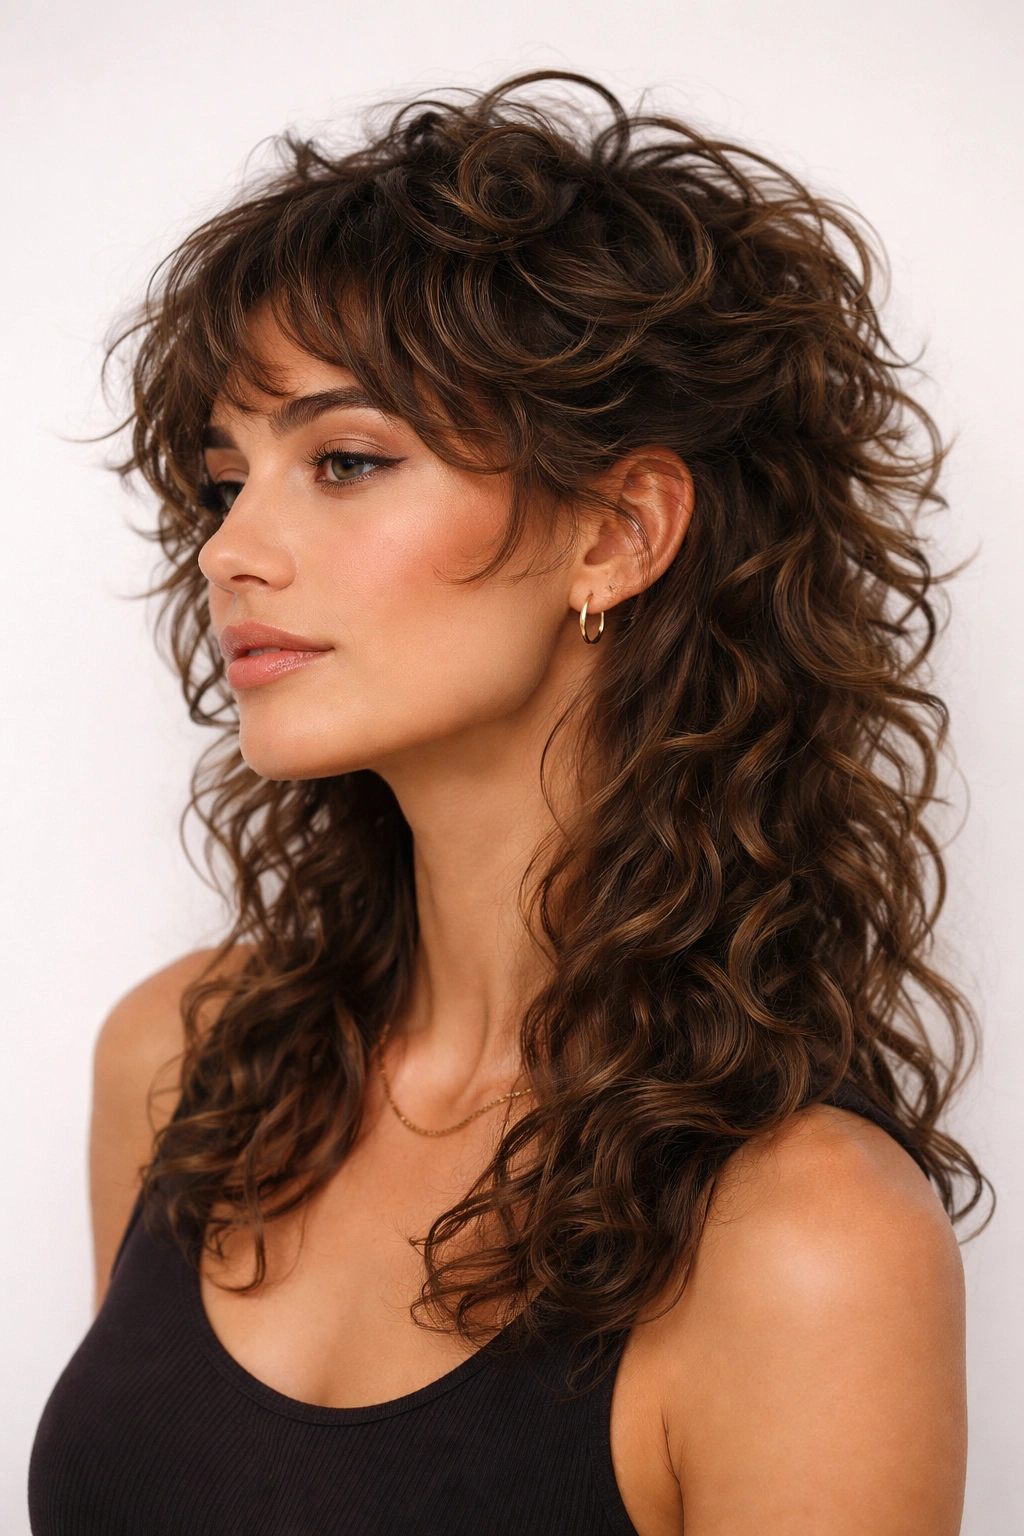
The modern mullet for curly hair is nothing like the 1980s version—it’s a sophisticated cut where the crown and front sections are shorter and textured, while the back is intentionally longer. It’s essentially an exaggerated version of a wolf cut. When done on loose curly hair, it creates stunning dimension: the shorter front curls have serious texture and bounce, while the longer back provides weight and flow.
The Modern Mullet Aesthetic
Today’s mullet is chic and intentional, not comedic. On loose curls, it’s actually stunning because your curl pattern naturally creates that front-to-back length progression look. The shorter front pieces have room to spring up and show texture, while the longer back showcases your curl pattern without weighing everything down. It’s a high-style cut that works for people who want to make a statement.
Making This Cut Work in Real Life
- Style the crown and front sections with texture and volume—these are your statement pieces
- The back can be styled either as one cohesive curl pattern or with more separation, depending on your preference and the occasion
- Use a curl mousse or definition cream on the crown sections to enhance their texture and lift
- The back sections can be styled more casually or even braided, depending on how you want to balance the cut
- This cut requires a skilled stylist who understands how to cut for curly hair specifically—it’s not a cut to trust to someone inexperienced with texture
Confidence factor: This is a cut for people who are ready to make a style statement and embrace being a little bit different.
9. The Pixie-Bob Hybrid
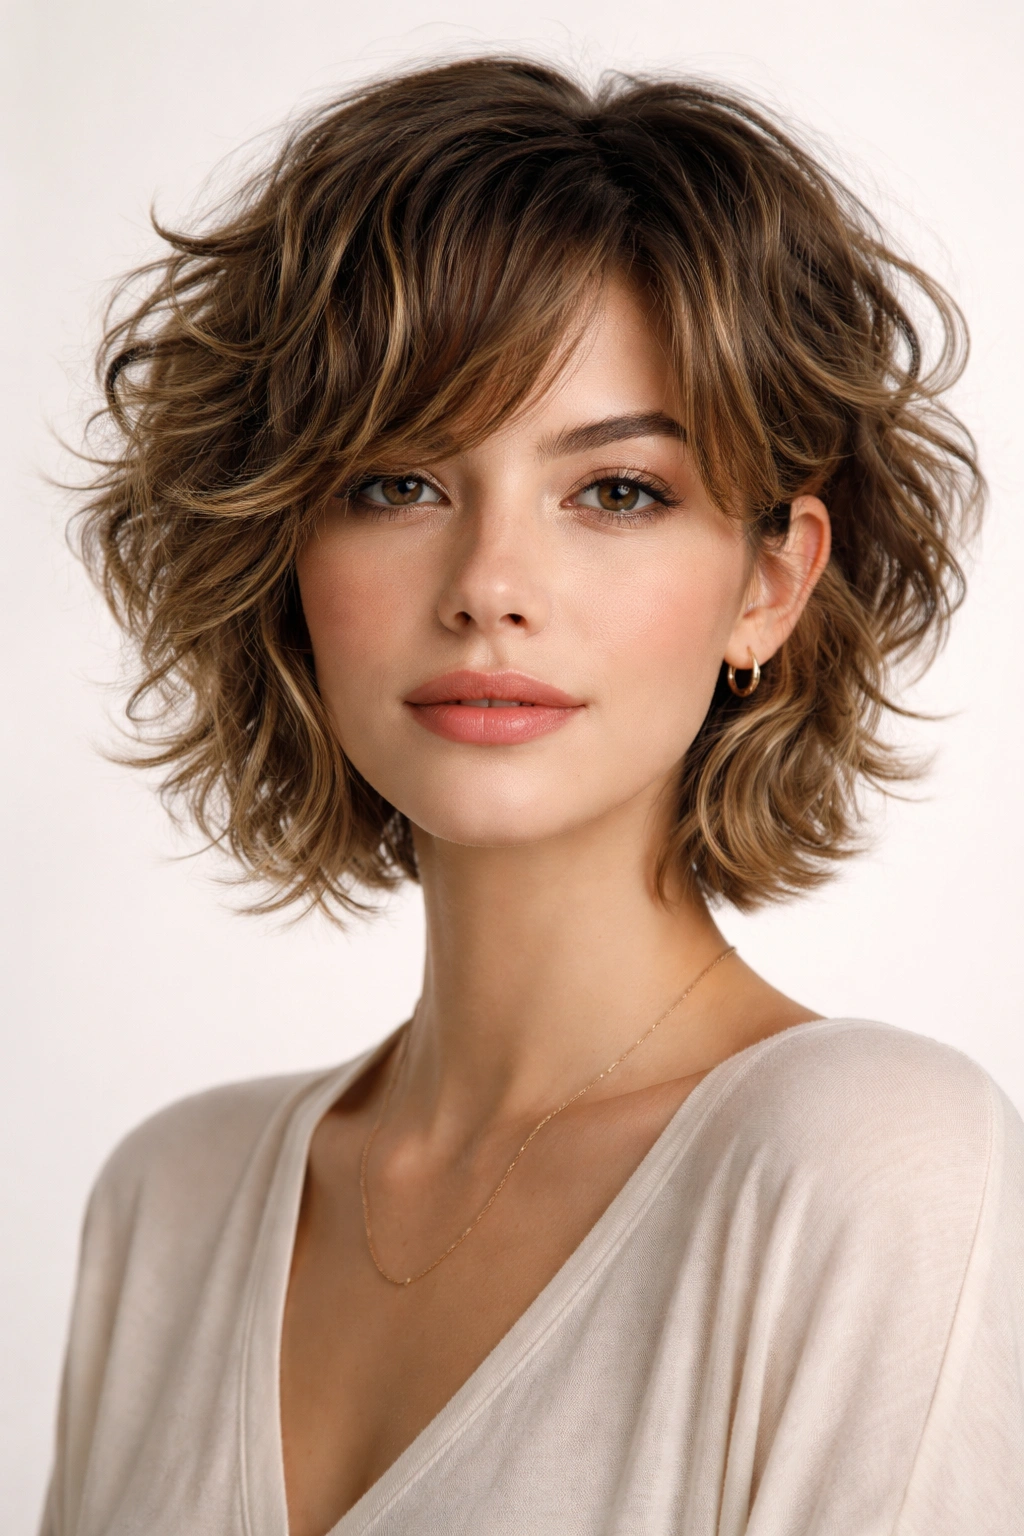
The pixie-bob (or “pixob”) blends a pixie’s short, textured crown with a bob’s longer face-framing pieces. It’s shorter overall than most of the cuts on this list, but the layering creates enough length variation that it’s more interesting than a traditional pixie. For loose curly hair, this cut is incredibly liberating—it’s low-maintenance, doesn’t require heat-styling, and your curl pattern is the whole point of the cut.
Why This Works for Loose Curls
Short, textured cuts on curly hair look effortlessly cool. The pixie-bob takes advantage of your natural texture while maintaining enough length that you have options for styling. The crown is short enough that it won’t flatten under its own weight, while the longer pieces frame your face and give you something to work with styling-wise.
The Low-Maintenance Reality
- This cut is truly wash-and-go, especially if you have naturally loose curls that don’t need extensive definition
- Apply a lightweight mousse or curl cream to soaking-wet hair and air-dry, or use a diffuser on low heat
- Style the front pieces with your fingers or a comb while the hair is still damp, directing them where you want them to sit
- No blow-drying required, no styling tools needed—your curls do the work
- Trim every 5-6 weeks to keep the crown from getting too long and losing its shape
Best for: People who want a bold, statement haircut and genuinely don’t want to spend time styling their hair.
10. The Layered Shullet (Short Mullet)
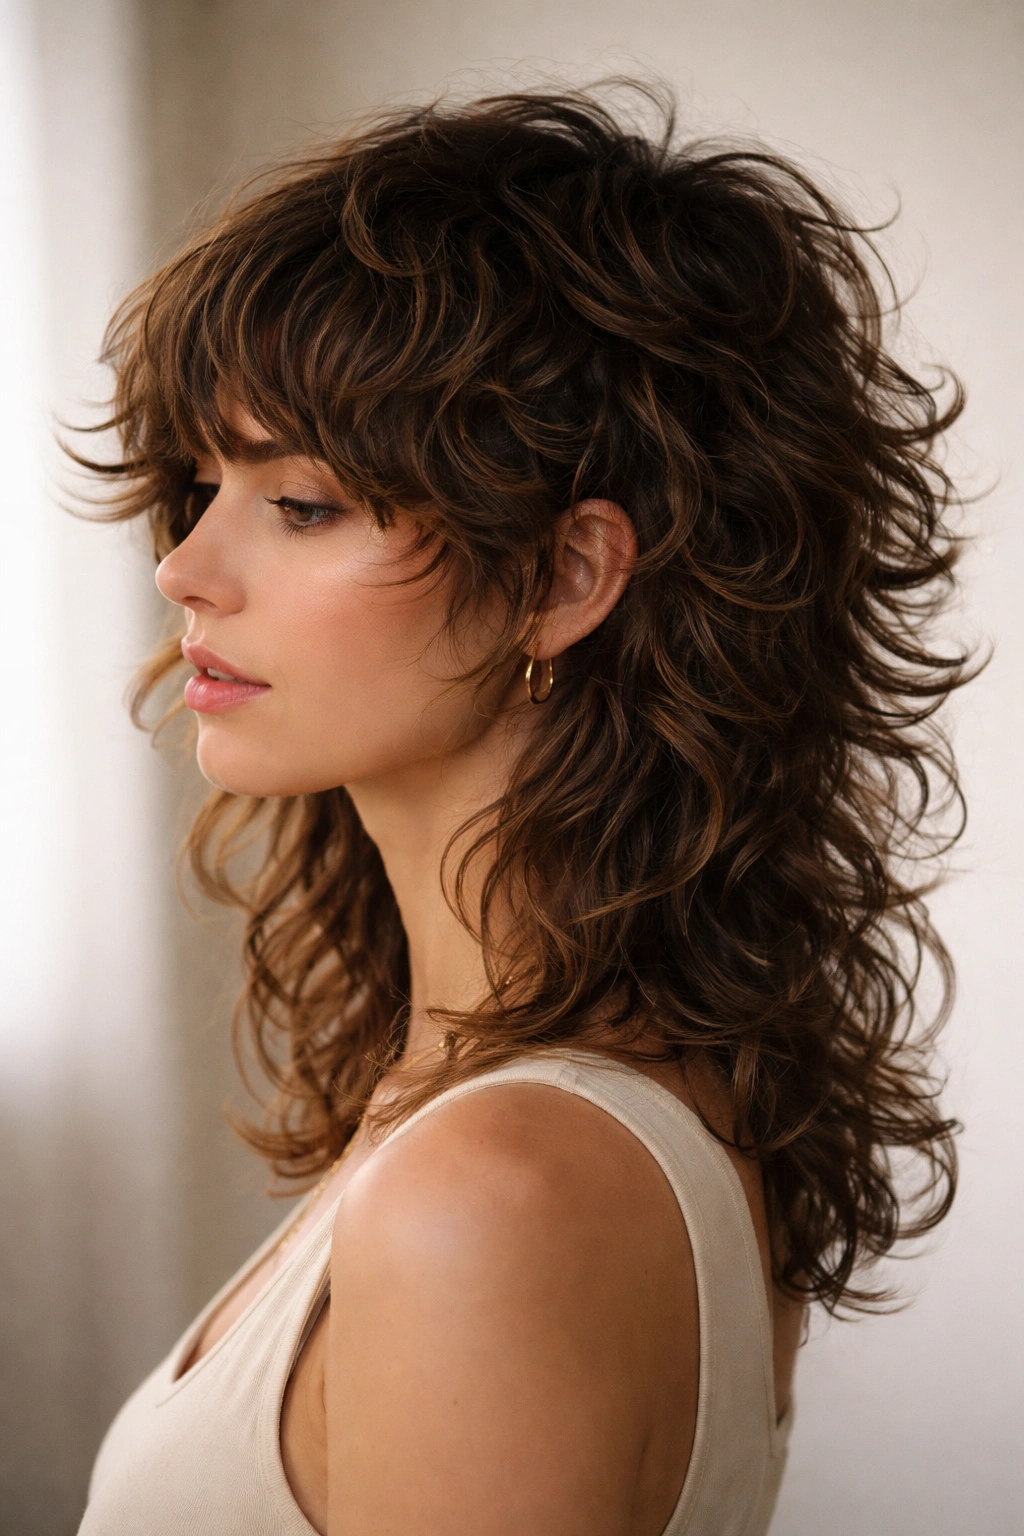
The shullet combines a shag with a mullet—short, choppy, textured layers throughout, with the back being noticeably longer. It’s edgy, modern, and perfect for people who want personality in their hair. The choppy layers throughout create serious movement, and the length variation is dramatic and intentional.
Why the Shullet Works for Loose Curls
A shullet on curly hair is genuinely cool. The choppy layers throughout mean that every inch of your hair is cut to move and flex with your curl pattern. The longer back gives you room to show off full, defined curls, while the shorter front and crown pieces create that textured, tousled vibe that’s so hard to achieve without layering.
Styling the Shullet
- This cut looks best with an embrace-the-texture approach to styling
- Apply a curl mousse or lightweight gel to soaking-wet hair and diffuse-dry, scrunching as you go
- You can also scrunch in a leave-in conditioner and air-dry for a more relaxed, natural texture
- The crown pieces will naturally stand up a bit due to their shorter length—this is the desired effect
- Use a texturizing spray or dry shampoo to enhance separation and texture if your curls are sitting too smooth
Personality factor: This is a cut for bold people who aren’t afraid to stand out. It photographs beautifully and makes a statement.
Final Thoughts
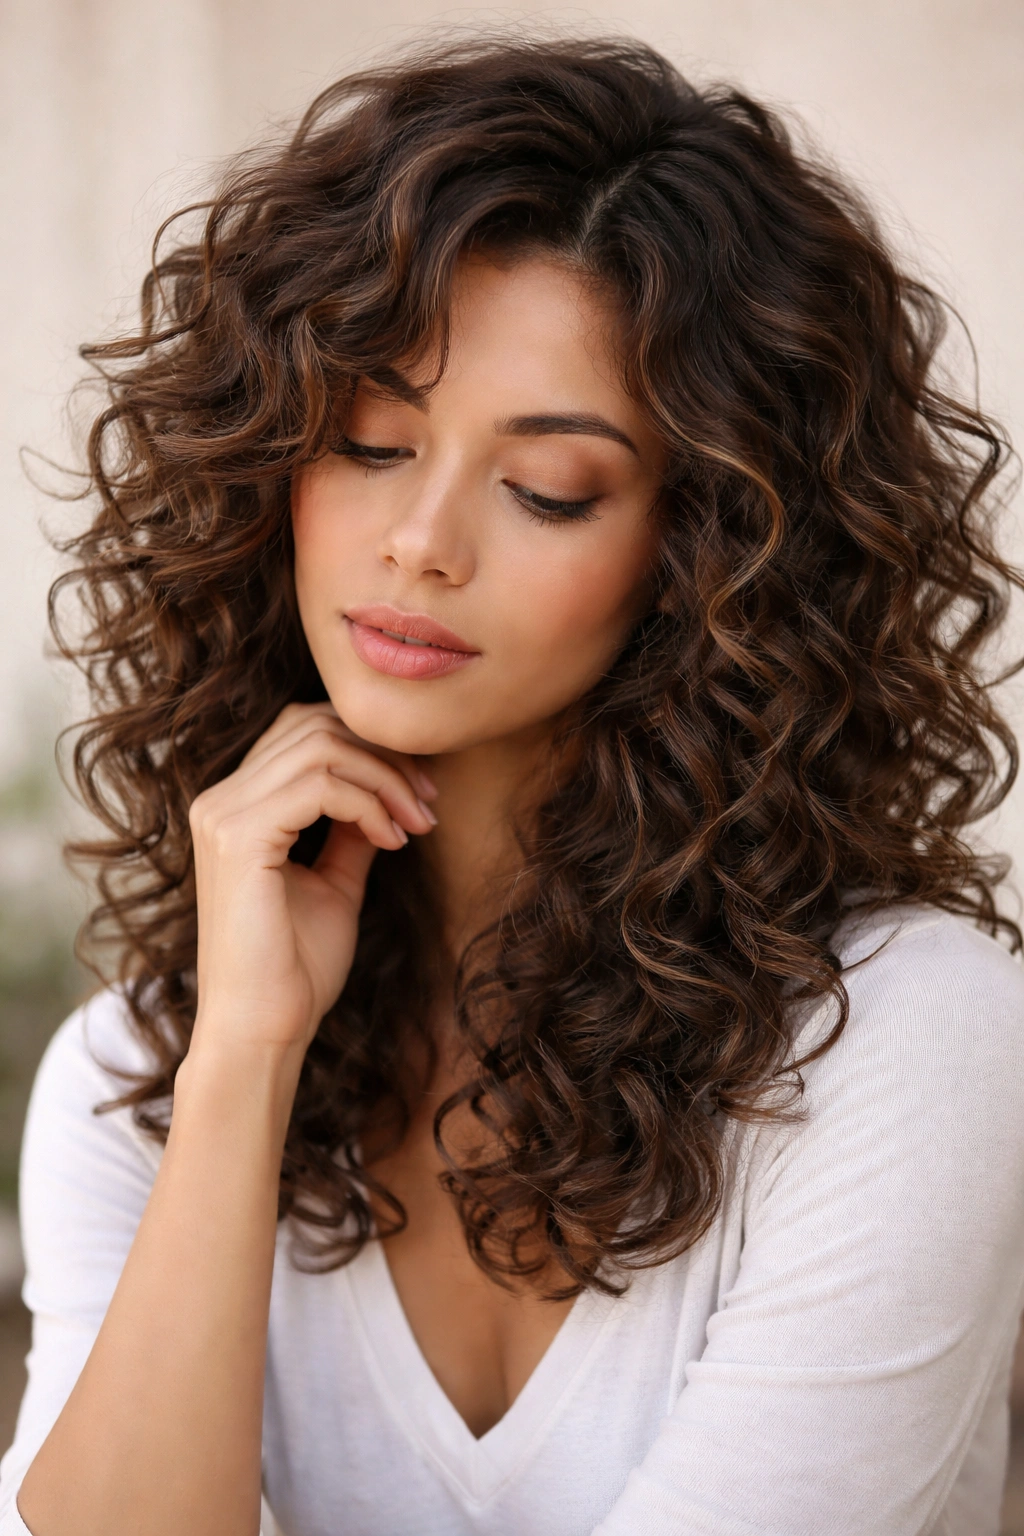
The right layered cut can transform how your loose curls look and feel. Weight isn’t the enemy of curly hair—unnecessary weight in the wrong places is. A good layered cut removes strategic bulk while preserving length and shape, and it works with your curl pattern instead of against it. Before booking an appointment, find pictures of the exact cut you want, show them to your stylist, and specifically mention that you have loose, curly hair. This one detail—mentioning your texture—makes all the difference between a cut that works and one that leaves you wondering why it looked so much better on the picture.
The best cut is also the one you can actually maintain and style in your daily life. Some of these cuts require trimming every 5-6 weeks to look their best, while others can stretch to 10-12 weeks. Consider your budget, your willingness to invest in styling time, and how much personality you want in your hair before committing. Your curls are beautiful—the cut just needs to let them shine.
