



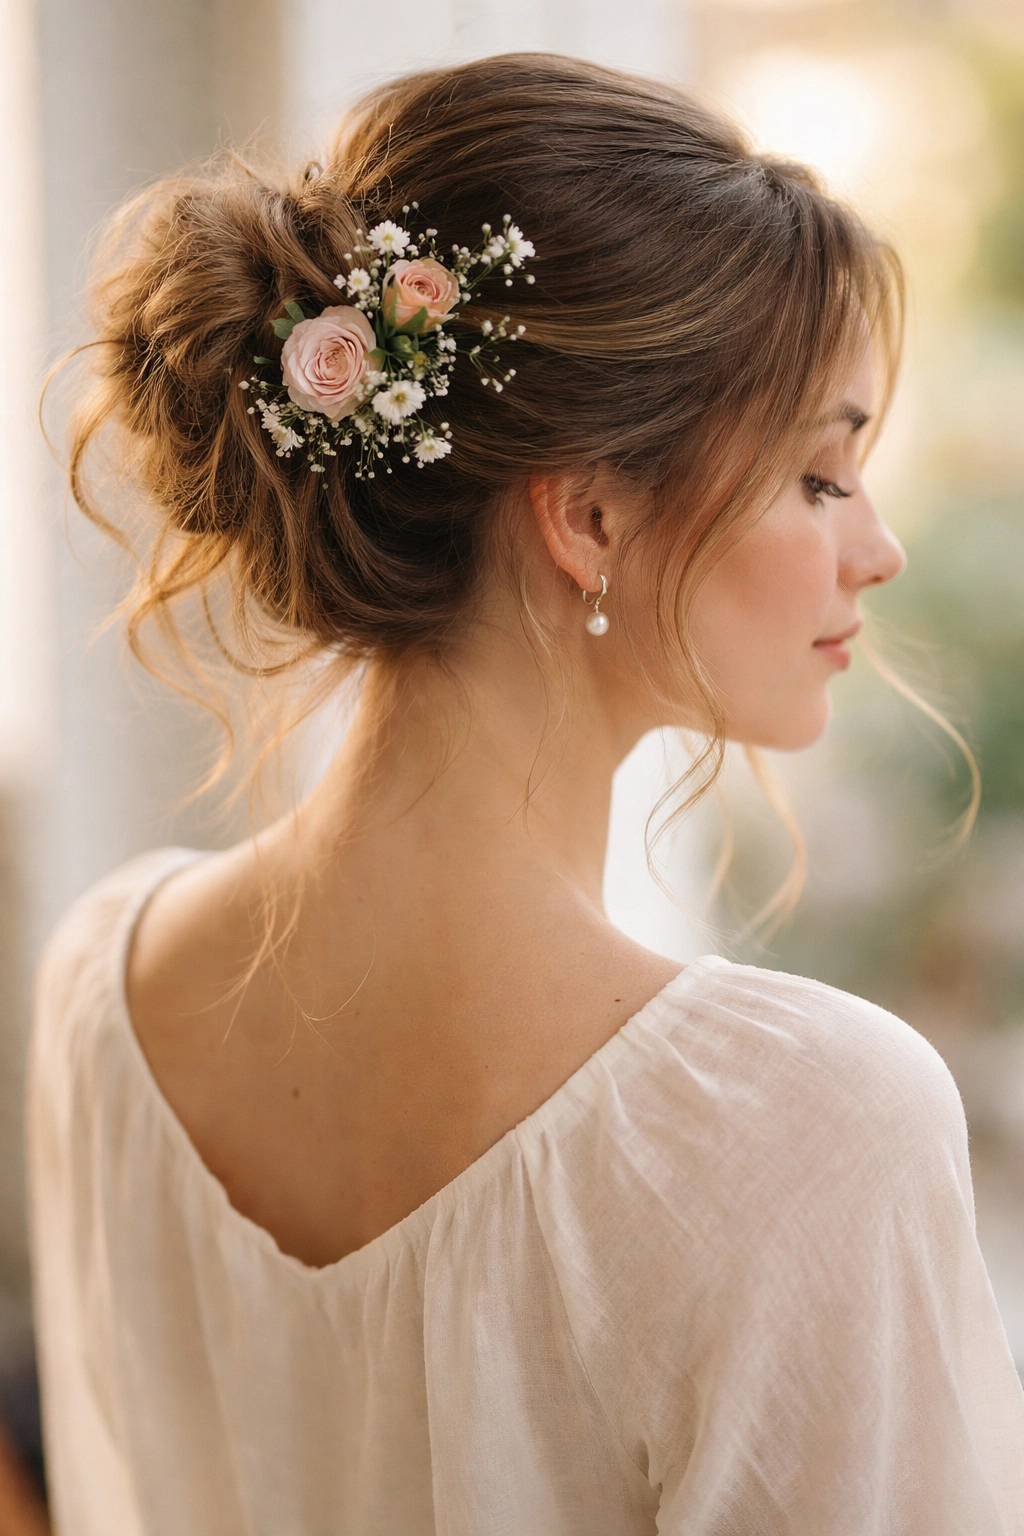
There’s something undeniably romantic about a messy bun studded with flowers. It’s the kind of hairstyle that looks effortlessly put-together while actually being a thoughtful styling choice — one that works equally well for a wedding, a garden party, an Instagram-worthy date, or simply a day when you want to feel more intentional about your appearance. The combination of the casual, undone texture of a messy bun with the structured beauty of fresh or faux flowers creates a compelling contrast that feels both whimsical and polished.
What makes this aesthetic so appealing is that it doesn’t demand perfection. The whole point of a messy bun is embracing a bit of texture, a few wispy strands, and an overall sense of ease. Layer in flowers and you’ve elevated the look without having to create a rigid, high-maintenance style. Flowers work with the messiness rather than against it — they add visual interest, color, dimension, and a touch of nature that makes even the simplest bun feel special and intentional.
The real beauty of styling messy buns with flowers is the flexibility. Whether you’re working with delicate baby’s breath, bold garden roses, tiny waxflowers, or statement-making ranunculus, the bun acts as the perfect canvas. You can go subtle and romantic, bold and artistic, or somewhere in between. The flowers also solve that common messy bun problem of wondering if it looks too undone or disheveled — the flowers instantly signal that you’ve put thought into your appearance, even if you’ve only spent ten minutes pulling it together.
Below are eight approaches to styling a messy bun with flowers, each offering a different mood, level of complexity, and aesthetic. Whether you’re preparing for a special event or simply want to refresh your everyday updo game, these styles offer concrete techniques you can replicate.
1. Loose Waves with Scattered Baby’s Breath
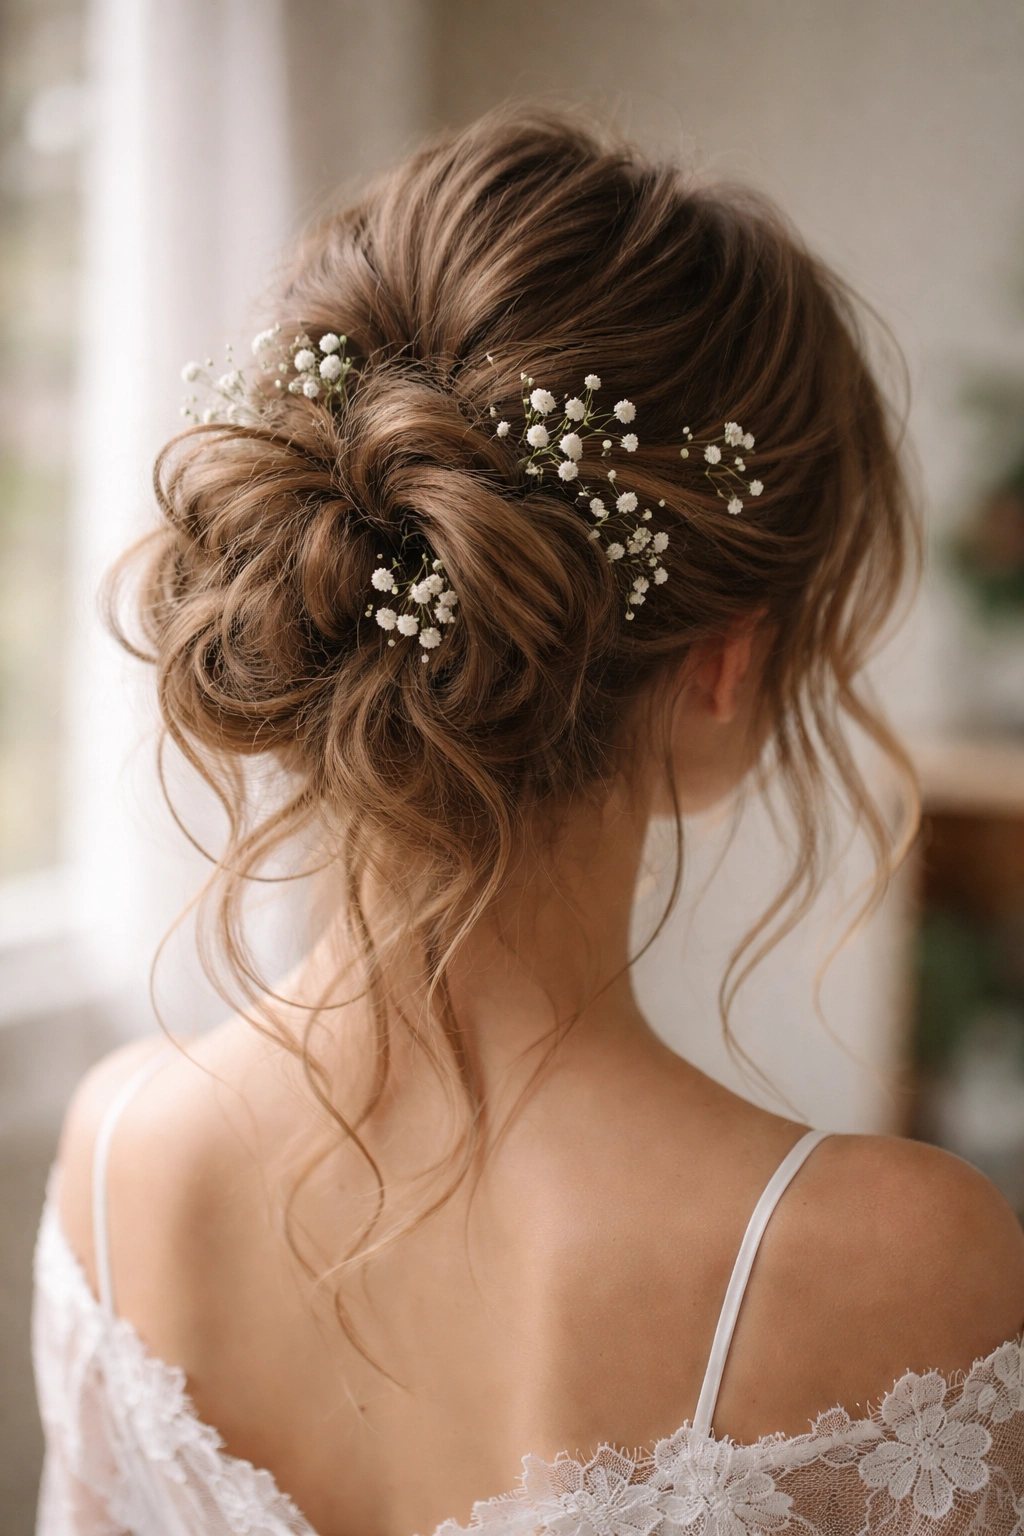
This is the epitome of effortless romance, and it works because baby’s breath is the most forgiving flower choice for a messy bun. The tiny delicate blooms fill in the gaps and softness of your bun without requiring any particular positioning or structure. Start with hair that has natural texture — either from waves created with a curling iron or from a loose braid you’ve let fall out. This textured base is essential because it gives the baby’s breath something to nestle into rather than looking like it’s just sitting on top of smooth hair.
How to Build This Look
Section your hair into a high or mid-level ponytail, but don’t pull it tight. Leave some face-framing pieces down intentionally — strands around your ears, a piece or two at your temples, and a few at the nape of your neck. Twist or loosely braid your ponytail, then wrap it around the base to form a relaxed bun shape. You’re not aiming for a tight, neat bun here; instead, you want visible texture with some bumps and curves. Once the basic bun is secure with bobby pins, begin tucking small sprigs of baby’s breath directly into the bun, using bobby pins or floral wire to secure them as needed.
The Styling Details That Make It Work
- Select baby’s breath that has been hydrated but has started to dry slightly — it’s easier to work with and holds its shape longer than freshly cut stems
- Break larger bunches into smaller sprigs of 3-5 blooms each rather than trying to tuck whole branches
- Distribute the flowers evenly around the bun rather than clustering them all in one spot; this creates visual balance and makes the overall effect feel more intentional
- Prepare 8-12 sprigs ahead of time so you’re not fumbling with flowers while trying to position them in your hair
Pro tip: Lightly mist your finished style with a flexible-hold hairspray (not a heavy, crunchy one) to help baby’s breath blooms stay in place throughout the day without weighing down the delicate flowers.
2. Romantic Rose Crown Messy Bun
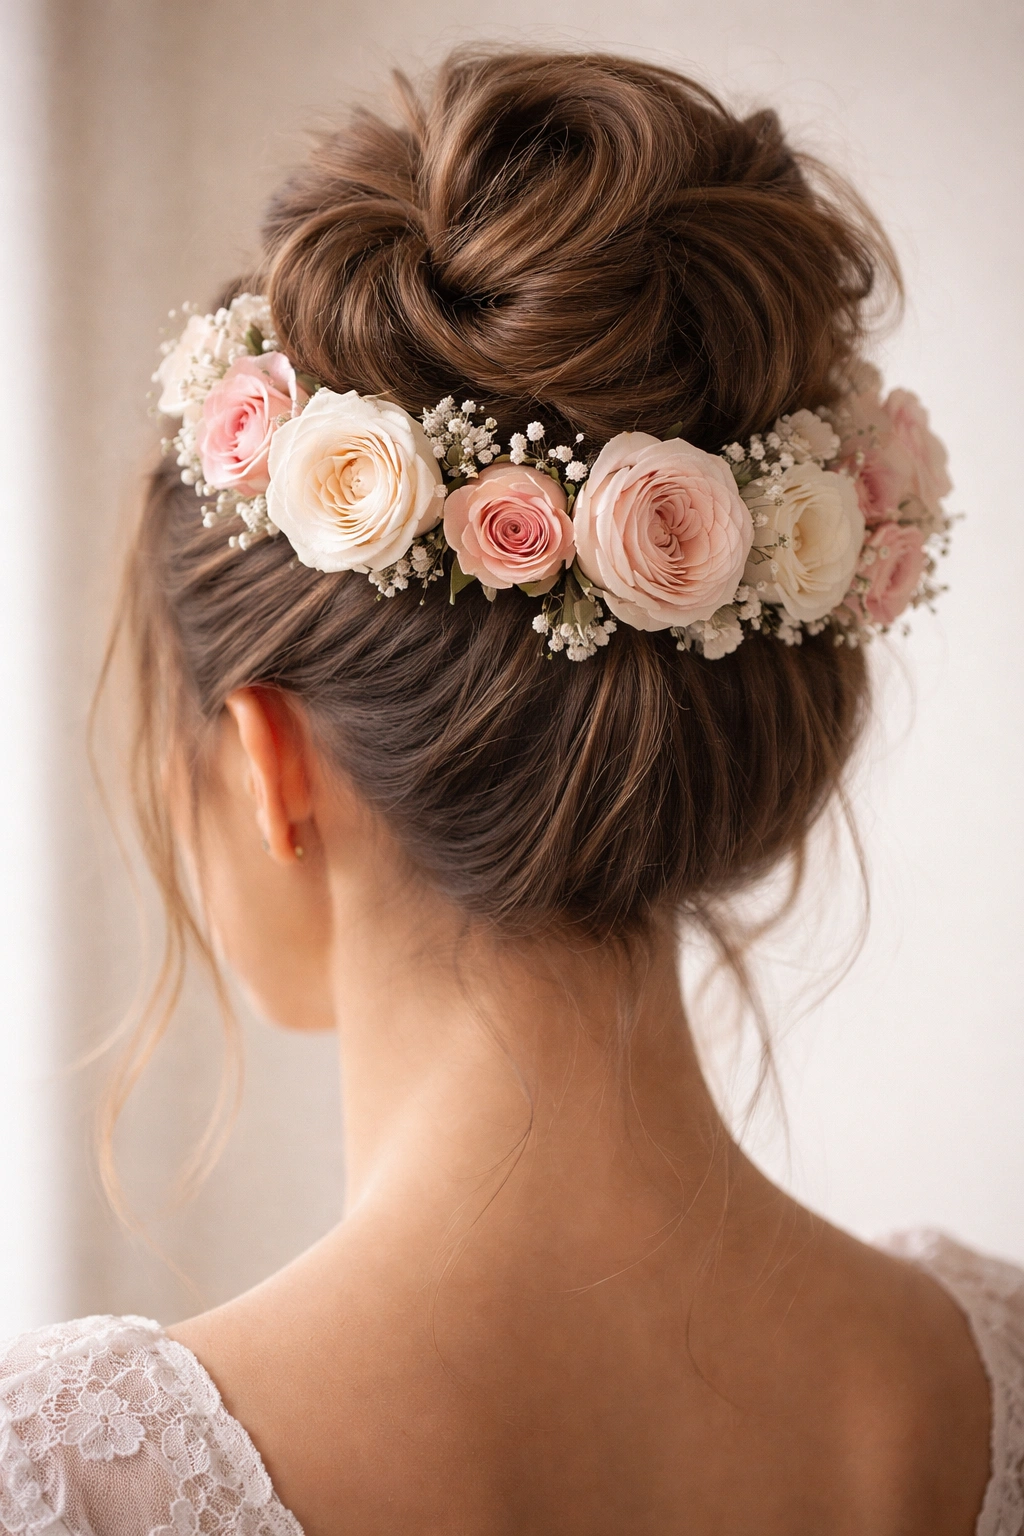
This style elevates the messy bun into truly special-occasion territory. Rather than scattering flowers throughout, you’re creating a defined crown effect with larger statement flowers — typically garden roses, spray roses, or ranunculus — positioned around the base and top of the bun. The larger blooms have more visual impact and create an immediately recognizable “bridal” or “dressed-up” aesthetic that works beautifully for weddings, engagements, anniversaries, or formal celebrations.
Creating the Rose Crown Effect
Begin with a structured base. Create a sleek, voluminous ponytail (smooth sides, but with height and movement at the crown), then twist it into a bun and secure it firmly with multiple bobby pins. This firm base is important because you’re going to be attaching heavier flowers to it, and you need the bun to stay put throughout the day. Using floral wire or tape, begin attaching roses around the perimeter of the bun — some positioned so their faces are visible, others angled so they blend seamlessly into the bun’s texture. Work your way around the entire bun, creating a continuous circle of blooms.
The Rose-by-Rose Approach
- Cut rose stems to 3-4 inches so they’re not poking into your scalp uncomfortably
- Use floral picks (the small pointed stakes florists use) or floral wire to secure each stem directly into the bun structure
- Grade your roses by size — place your largest, most open blooms at the front or sides where they’ll be most visible; use smaller buds and tighter roses at the back where they’ll blend with your actual hair
- Layer roses of varying heights so the crown has dimension and visual interest rather than sitting flat on top of your bun
Real-world insight: If you’re using fresh roses, ask your florist to prepare them the morning of your event, and mist the entire style with floral mist (the same product used for corsages) to keep petals fresh and hydrated throughout your day.
3. Bohemian Wildflower Garden Bun
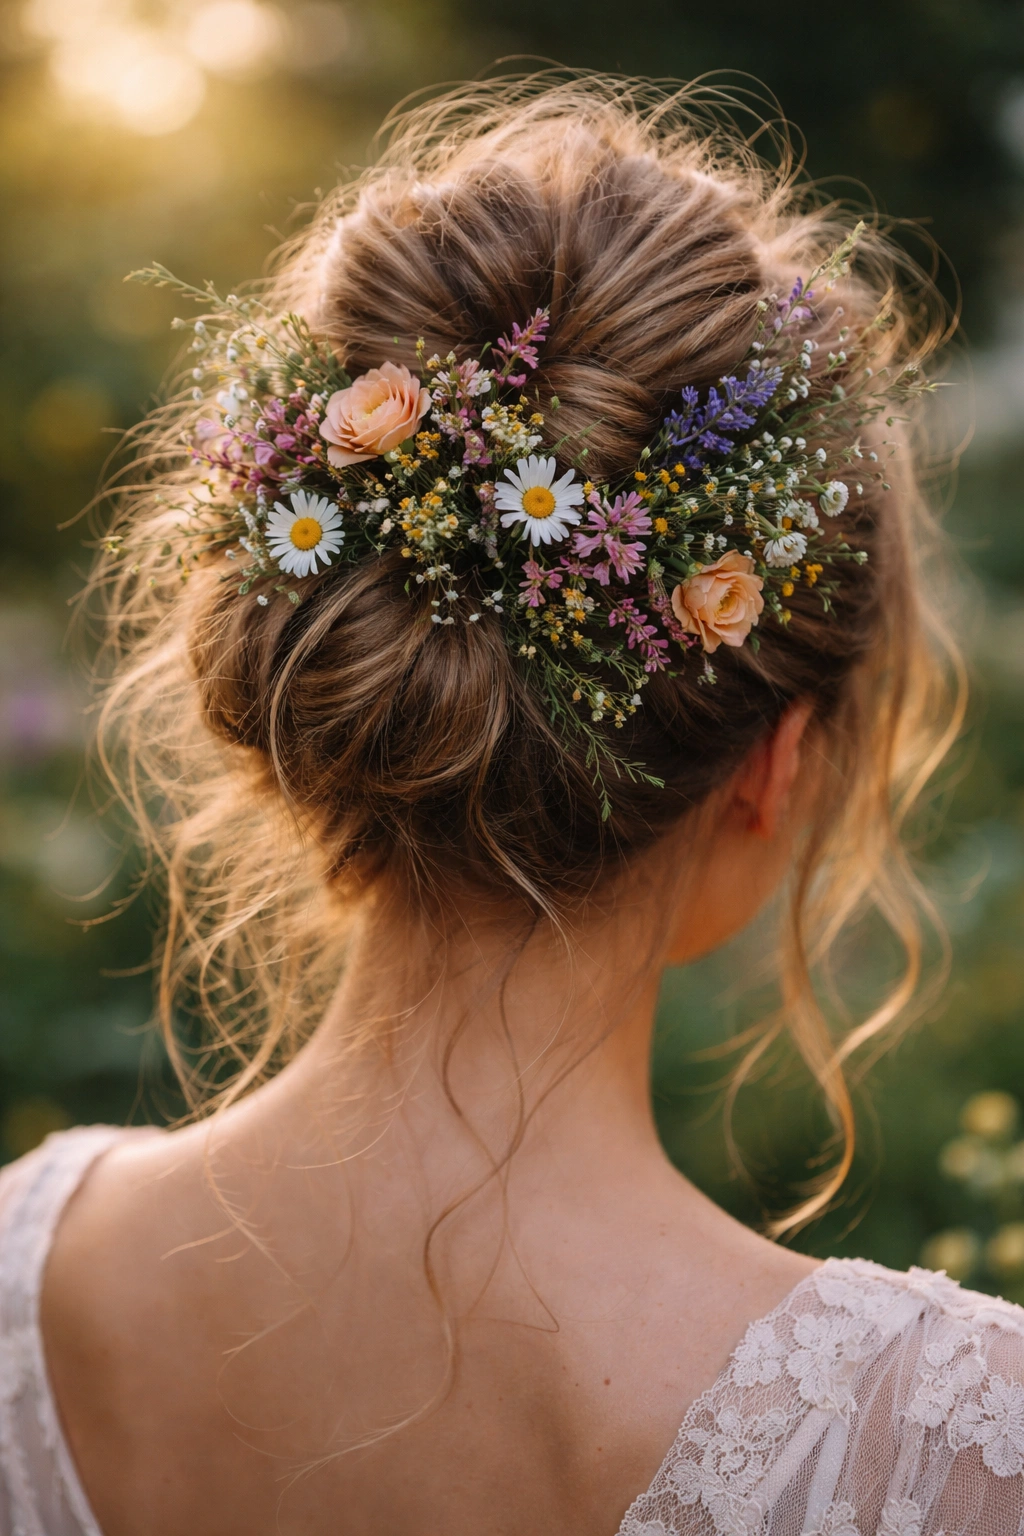
This style celebrates abundance and intentional randomness. Rather than using one type of flower or creating a structured crown, you’re combining multiple varieties — wildflowers, ranunculus, astilbe, waxflowers, eucalyptus, and filler greens — and layering them throughout your bun to create a lush, garden-like effect. It’s the messy bun taken to its most expressive and artistic conclusion.
Building Layers of Texture and Color
Start with a textured ponytail (waves, braids, or twists create the best base) positioned mid-to-high on your head. Create your bun loosely, with intentional bumps and curves — don’t smooth it out. Now, instead of using a single type of filler, gather 4-5 different flower and greenery varieties. Create small mixed bouquets with 3-5 stems of different flowers, then tuck these mixed bunches throughout your bun, securing them with bobby pins and floral wire. The key is varying the angles and positioning — some flowers face forward, others face backward, some point to the side. This randomness is what creates the “picked from a garden” effect.
Selecting Your Wildflower Palette
- Choose flowers in a cohesive but varied color palette — pastels, jewel tones, or warm earth tones work better than completely random colors
- Include texture varieties: delicate waxflowers, full-bodied ranunculus, feathery astilbe, and wispy filler greens like eucalyptus or ruscus
- Combine large, statement blooms with smaller filler flowers so the arrangement has visual interest at multiple scales
- Prepare 15-20 small mixed stems ahead of time; this style uses more flowers than other options, so having them prepped makes the process much faster
Worth knowing: This style works beautifully with both fresh and quality faux flowers. If you’re using silk flowers, you actually have an advantage — you can assemble it hours before you need to wear it, and it will look exactly the same all day long without any wilting or water concerns.
4. Sleek Half-Up Messy Bun with Cascading Petals
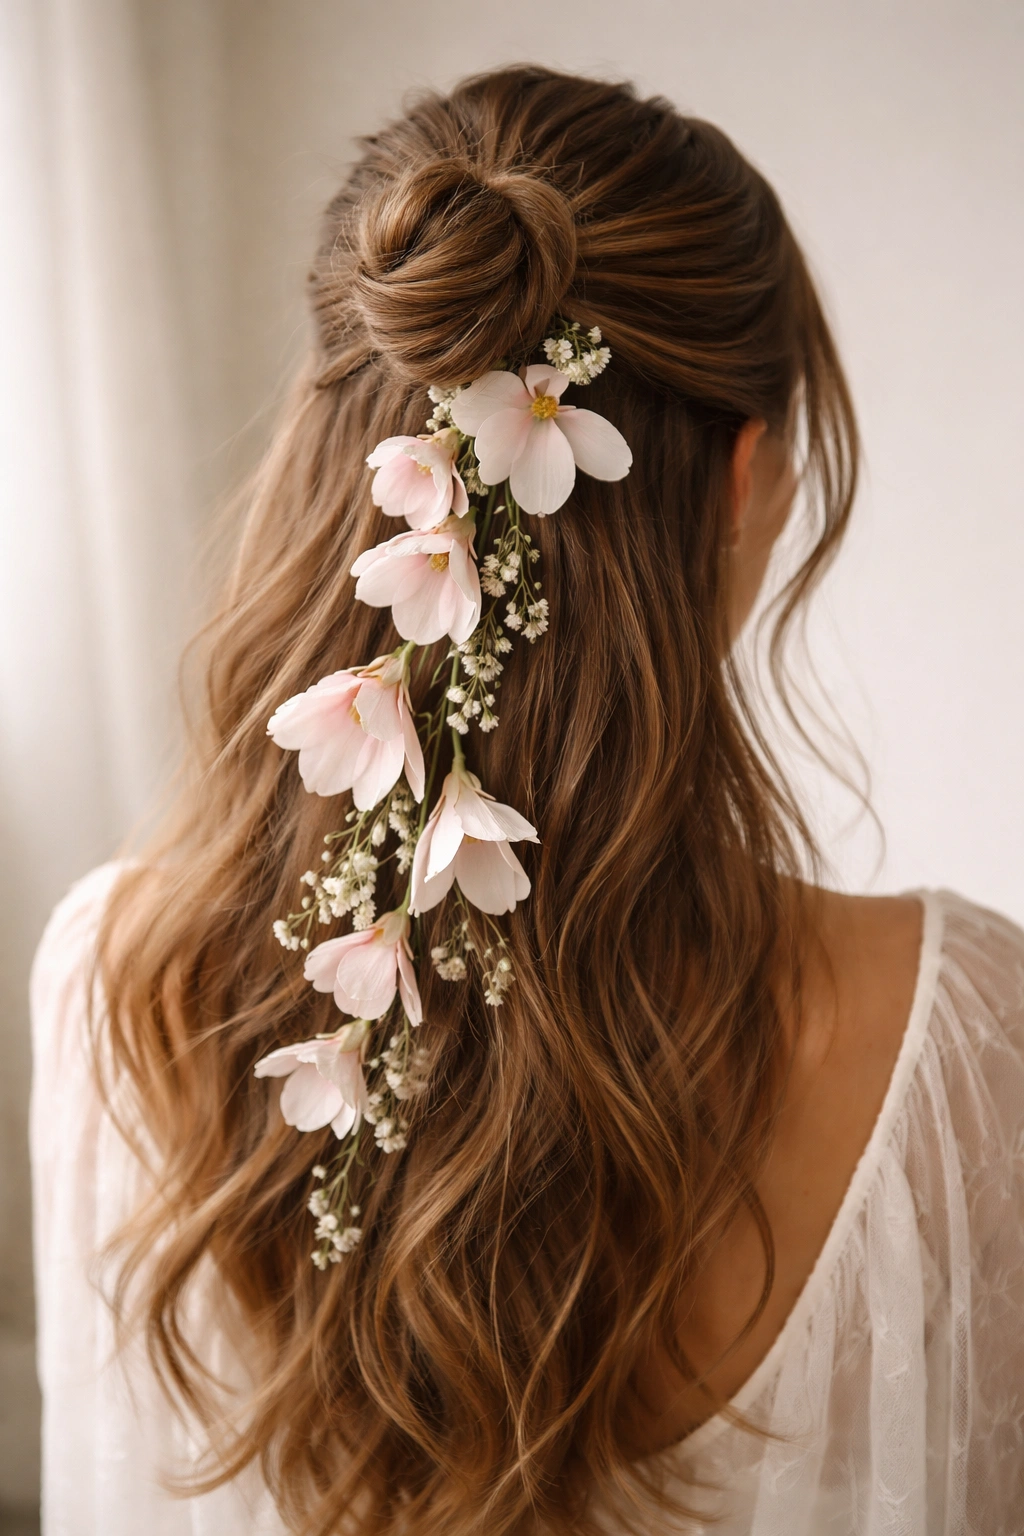
This style splits the difference between polished and undone. Your hair is half-up, creating a more refined silhouette than a full bun, while the half-down portion flows loosely. Flowers are positioned to cascade down from the bun area, creating movement and visual flow that extends the style beyond just the crown.
The Half-Up Technique
Take a section of hair from just behind your ears, bring it to the back of your head at the crown level, and secure it into a small ponytail. Twist this section and wrap it around its own base to create a petite bun, then secure with bobby pins. Leave the back and lower sections of your hair down and loose — these strands will frame the flowers and create that cascading effect. You’re not aiming for a full-height bun here; instead, you want a small, compact bun that sits at the crown.
Positioning Flowers for Cascade Effect
- Attach flowers (3-4 larger statement blooms work best here) to the bun using floral wire, positioning them so some blooms face out toward the camera and others angle downward
- Create a small floral stem or vine that extends down from the bun area using thin floral wire and greenery; this vine acts as a path for flowers to follow
- Position 2-3 small focal flowers along this path, creating the illusion of cascading movement
- Leave the lower half-down hair completely unadorned so the cascading flowers are the focal point and aren’t competing with too much texture
Styling secret: This works particularly well if you’ve curled or waved your loose hair — the texture catches the light and creates visual depth around the cascading flowers, making the whole effect feel more romantic and intentional.
5. Textured Crown Braid Bun with Delicate Florals
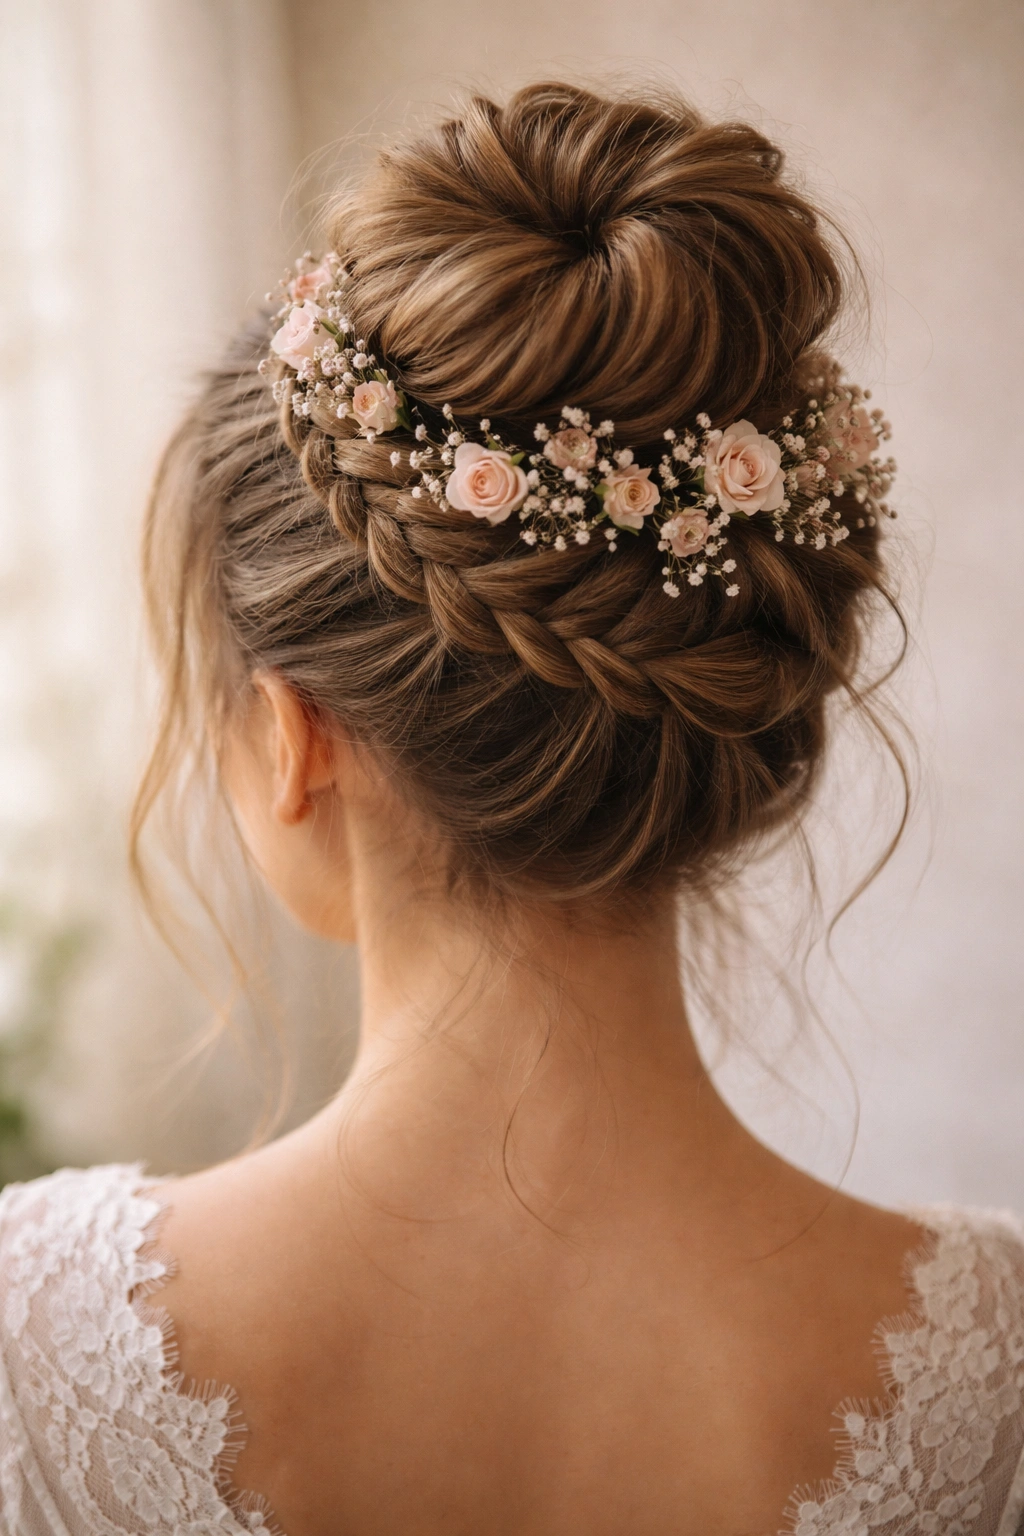
This approach builds a more intricate foundation. Rather than a simple twisted bun, you’re creating a crown braid across the back and sides of your head, then securing it into a bun at the top. The braid’s texture becomes part of the visual appeal, and flowers are positioned throughout the braid structure itself, creating an integrated look where the flowers feel like a natural part of the hairstyle rather than an afterthought.
Creating the Crown Braid Base
Start with side-parted hair. Take a section from one side just above your ear, and begin a Dutch braid (braiding underneath rather than over the top for more texture and visual interest) moving toward the center back of your head. When you reach the back, join this braid with another Dutch braid started on the opposite side, creating a crown effect. Once both braids meet, gather all your hair into a ponytail at the nape of your neck, then twist and wrap it into a loose bun. The entire structure — from the braids to the bun — is now your base for flowers.
Integrating Flowers Into the Braid Structure
- Use small delicate flowers (waxflowers, spray roses, baby’s breath) that won’t weigh down your braids
- Insert flowers directly into the braid as you’re styling, securing them with bobby pins as you go, rather than adding them after
- Focus flowers on the crown braid sections where they’re most visible, and use fewer in the actual bun area
- Prepare flowers in groups of 2-3 so you can quickly tuck them into the braid without stopping your progress
Important detail: When braiding with flowers already inserted, braid more loosely than you normally would — the flowers take up space, and you don’t want to create an uncomfortably tight braid that tugs on your scalp.
6. Undone Updo with Woven Flower Stems
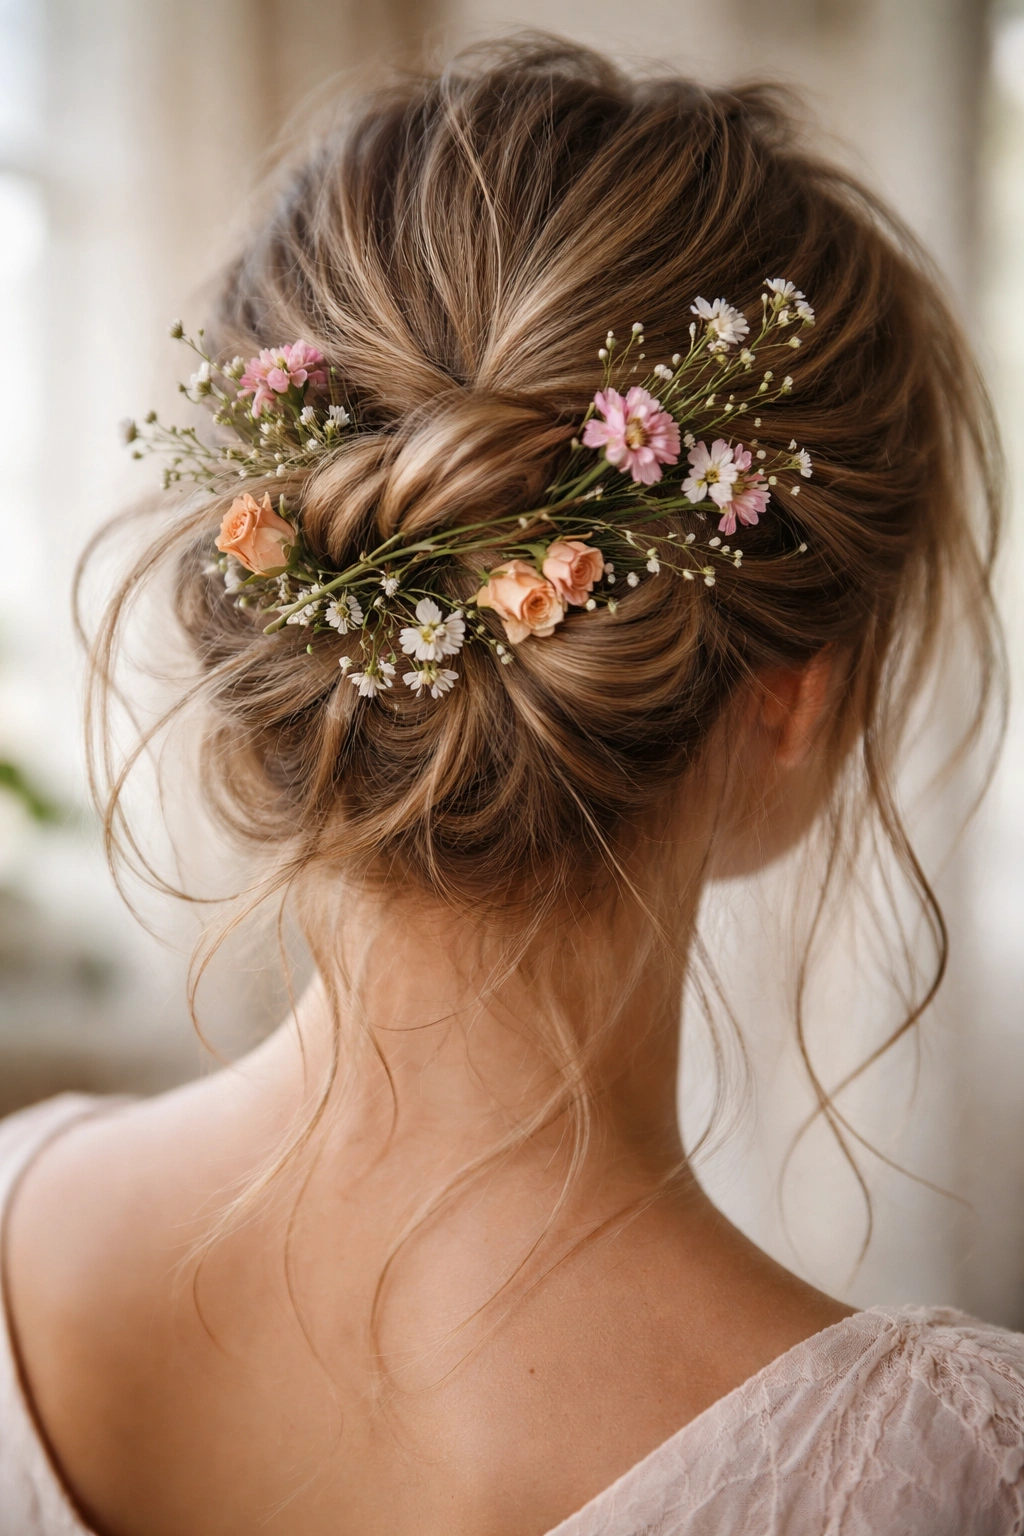
This style is all about the interplay of hair and flowers. Rather than treating flowers as separate decorative elements, you’re literally weaving floral stems into sections of your hair as you’re building the bun. This creates an organic, integrated look where it’s not always clear where the hair ends and the flowers begin.
The Weaving Technique
Create a slightly-damp ponytail (damp hair is easier to work with and will dry into a more textured, less slippery bun). Begin twisting sections of this ponytail, but as you twist, you’re simultaneously weaving thin floral stems or greenery (eucalyptus works beautifully, as do pussy willow branches or jasmine vines) through the twist. Continue spiraling these twisted and woven sections around the base of the ponytail to form the bun shape. As it dries, the hair will grip the stems more firmly, holding everything in place.
Selecting Weaveable Stems
- Use flexible stems like eucalyptus, jasmine, or thin, pliable branches rather than rigid flower stems
- Aim for stems that are 8-10 inches long so you have enough length to weave through multiple sections
- Choose greenery and foliage-heavy options for this technique; delicate flowers can get crushed or hidden, so save the statement blooms for other styling methods
- Prepare 8-12 stems, varying slightly in length, so you have options as you weave
How to finish it: Once the bun is fully formed and the hair has dried, add 2-3 small focal flowers (ranunculus, garden roses, or peonies) into the gaps of the bun to add color and visual interest. The woven greenery creates texture and structure; the flowers add the final touch of beauty.
7. Twisted Rope Bun with Bold Statement Blooms
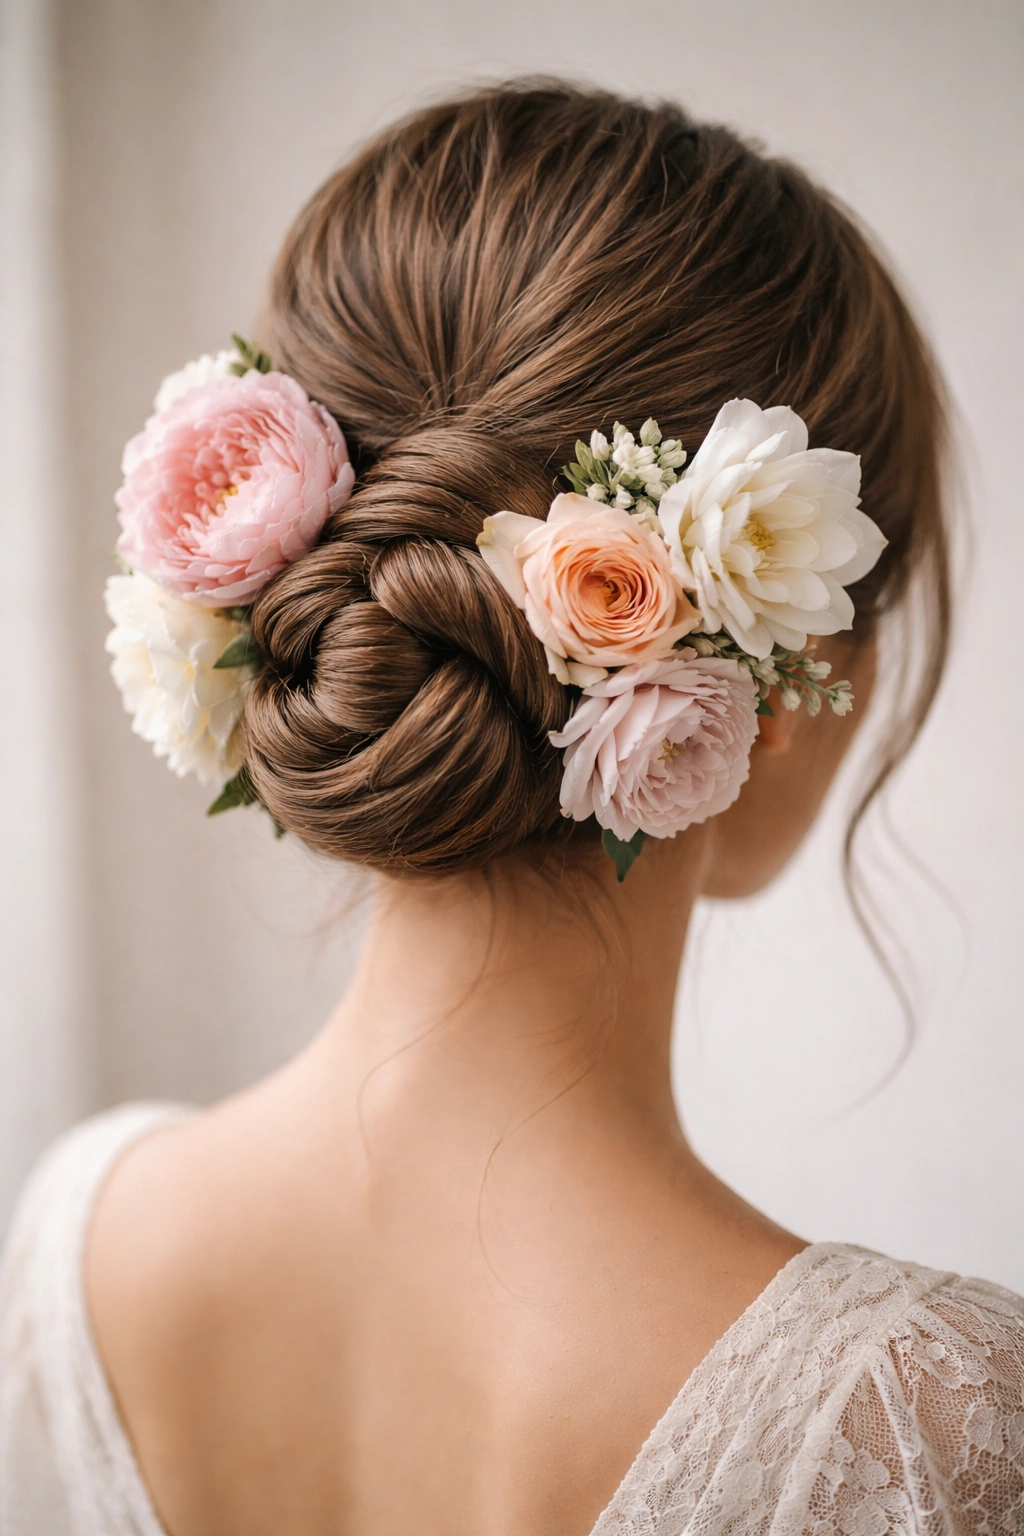
This style prioritizes architectural structure. Your hair is twisted tightly into a rope-like form (not braided — twisted), creating clean, defined lines. Against this structured base, you position 4-5 large, bold flowers that make a clear statement. The contrast between the neat, geometric twisted bun and the organic, free-form beauty of large blooms creates visual drama.
Building the Rope Twist
Create a high ponytail and divide it into two equal sections. Twist one section clockwise tightly, then twist the other section counterclockwise. Now, wrap these two twisted ropes around each other (one going over, one going under, creating a barber-pole pattern) to form a thicker, more interesting rope texture. As you reach the end, continue spiraling this rope around the base to form a compact bun. The twist pattern is visible and creates a polished, intentional look.
Positioning Statement Blooms
- Select 4-5 flowers with presence — large garden roses, peonies, dahlia, or ranunculus work beautifully
- Position these blooms around the edges of your bun, with some facing forward and others angled to the side
- Rather than trying to hide stems, wrap stems with floral tape in a color that matches your hair, making the wrapped stem part of the visual design (this adds another dimension to the look)
- Space your flowers evenly so they frame the bun rather than clustering in one area
Design note: This style works particularly well if you choose flowers in a single color or a very limited color palette — the architectural simplicity of the twisted bun pairs beautifully with the boldness of color or form in the flowers, rather than competing with multicolored florals.
8. Tousled Side Bun with Floral Pins
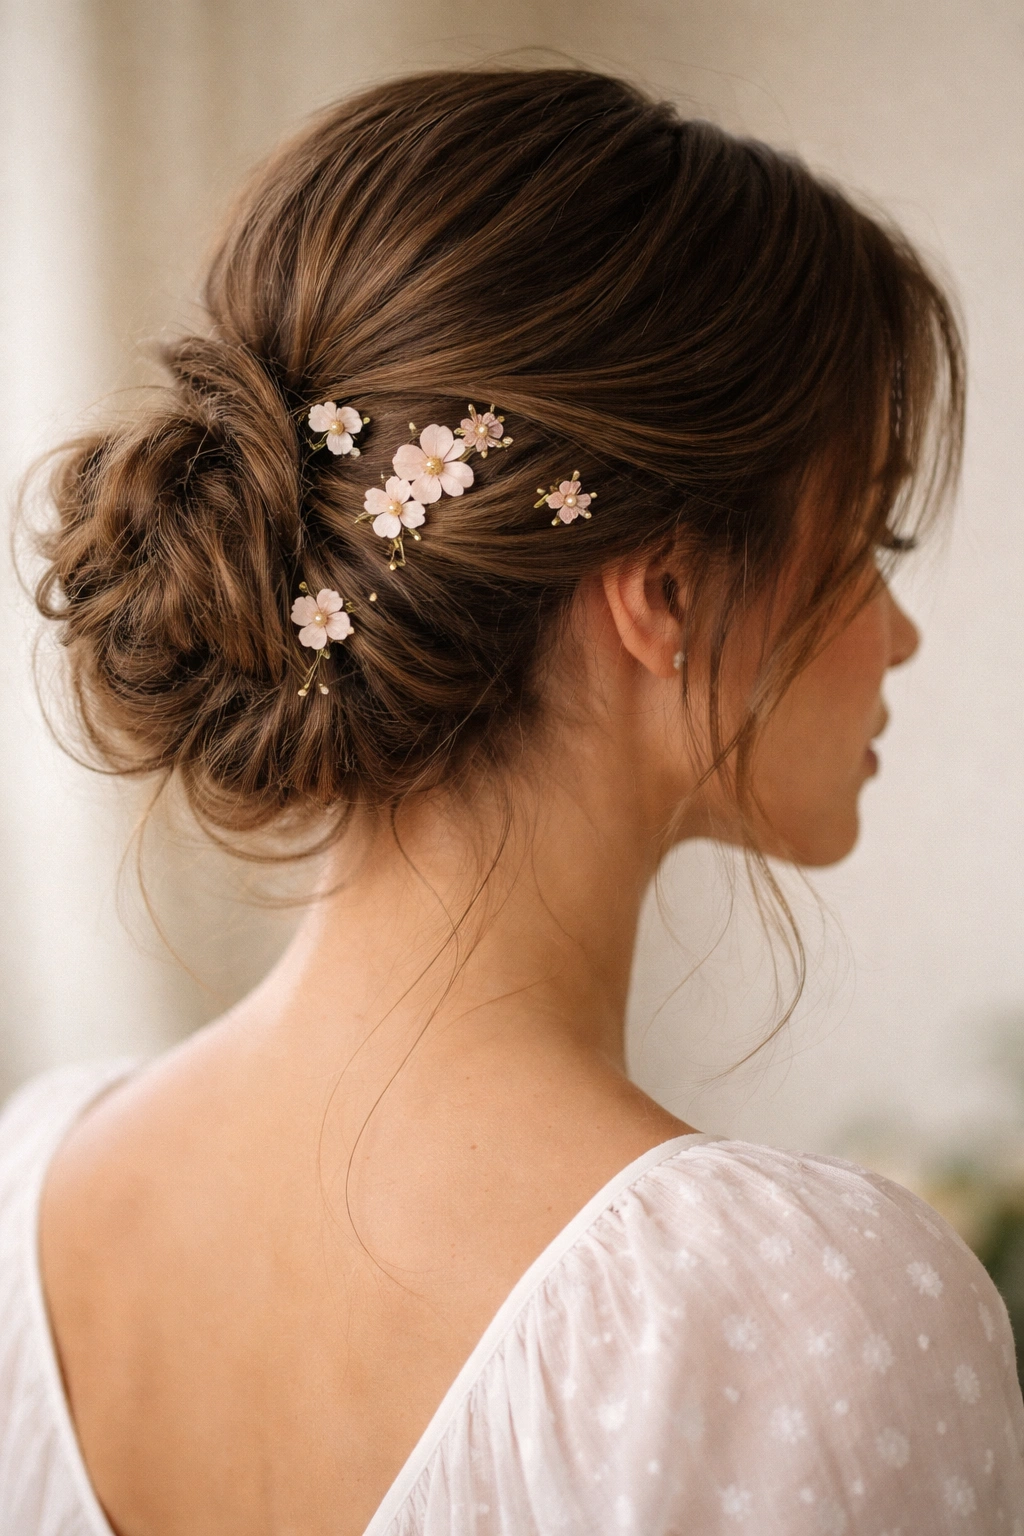
This final style brings florals into the realm of functional accessories. Rather than tucking whole flowers into your hair or weaving them into your style, you’re using floral picks and bobby pins that have small flowers attached to them. These work as both hair-securing tools and decorative elements, creating a gathered, romantic look that takes just a few minutes to achieve.
Building the Tousled Base
Brush your hair and create a deep side part. Gather hair from both sides toward the back of your head, creating an off-center ponytail that’s positioned behind your ear on the side opposite your part. Twist this ponytail loosely (don’t braid — you want visible movement and texture) and wrap it into a low, relaxed bun on that side. This position creates a romantic, femme-presenting silhouette.
Adding Floral Pins for Dimension
- Purchase small floral bobby pins (these are bobby pins with tiny silk flowers already attached) from craft or beauty stores, or create your own by hot-gluing small flowers onto regular bobby pins
- As you’re securing your bun with regular bobby pins, intersperse 6-8 of these floral pins throughout, positioning them so the flower faces outward
- You don’t need many — just enough that flowers are visible when you look at the bun from the front or side, but not so many that it feels costume-y
- Try varying pin heights so flowers are positioned at different depths within the bun, creating visual depth
Practical advantage: Because the flowers are attached to the pins themselves, you don’t need to worry about floral wire, fresh water, or stems poking your scalp. This style is genuinely quick to execute and holds beautifully throughout a full day or evening.
Final Thoughts
A messy bun with flowers is one of those hairstyles that seems complicated until you actually start putting one together, at which point you realize it’s mostly about having the right flowers, a few bobby pins, and the willingness to embrace a little bit of beautiful imperfection. Each of these eight approaches offers a different aesthetic — from delicate and romantic to bold and garden-fresh — but they all share the same underlying principle: texture in the hair, thoughtfully placed blooms, and a style that looks intentional without demanding rigid perfection.
The choice of which style to wear comes down to both the occasion and what you’re trying to communicate with your appearance. A wedding, anniversary, or formal celebration calls for the rose crown or romantic rope bun. A garden party or daytime celebration pairs beautifully with wildflowers or the crown braid effect. A casual date or everyday refresh works with baby’s breath and loose waves, or the floral pins approach if you’re short on time.
What makes all of these styles genuinely wearable is that they work with your hair’s natural texture rather than against it. A messy bun is inherently more forgiving than a sleek, polished updo — flowers only enhance that quality. Even if a strand falls loose or a flower shifts slightly, the overall effect remains beautiful and intentional. That combination of romance and ease is what makes messy bun hairstyles with flowers so appealing, and why they’ve remained a favorite styling choice across countless occasions and seasons.
