Beaded braids transform a simple ponytail into a playful work of art, and kids absolutely love the look—plus the gentle jingle of beads becomes an instant confidence boost. Whether you’re styling for a special occasion, looking for a protective style that lasts through the week, or just wanting to add some personality to everyday hair, beaded braid ponytails offer endless possibilities. The best part? Most of these styles are more forgiving than you’d think. You don’t need professional skills to create something that looks polished and feels special.
The key to nailing beaded braids is understanding the different braid techniques, knowing which bead sizes work best for different hair textures, and learning a few simple tricks that keep everything secure without pulling too tightly on a child’s delicate scalp. Kids’ hair is finer and more sensitive than adult hair, so the approach needs to be gentler—but that doesn’t mean the styles can’t be just as stunning. Once you master a few foundational techniques, you’ll find yourself mixing and matching braids, beads, and colors to create custom styles that match your child’s personality perfectly.
What makes beaded ponytails so versatile is how they adapt to any occasion. A sleek, single beaded braid ponytail works beautifully for school or everyday wear. Multiple braids woven together create boho elegance. Zig-zag braids and twisted variations add intricate texture that catches light and looks far more complicated than it actually is. From simple and neat to wildly creative, these ten styles show you everything from beginner-friendly options to impressive designs that’ll earn compliments everywhere you go.
1. Classic Single Beaded Braid Ponytail
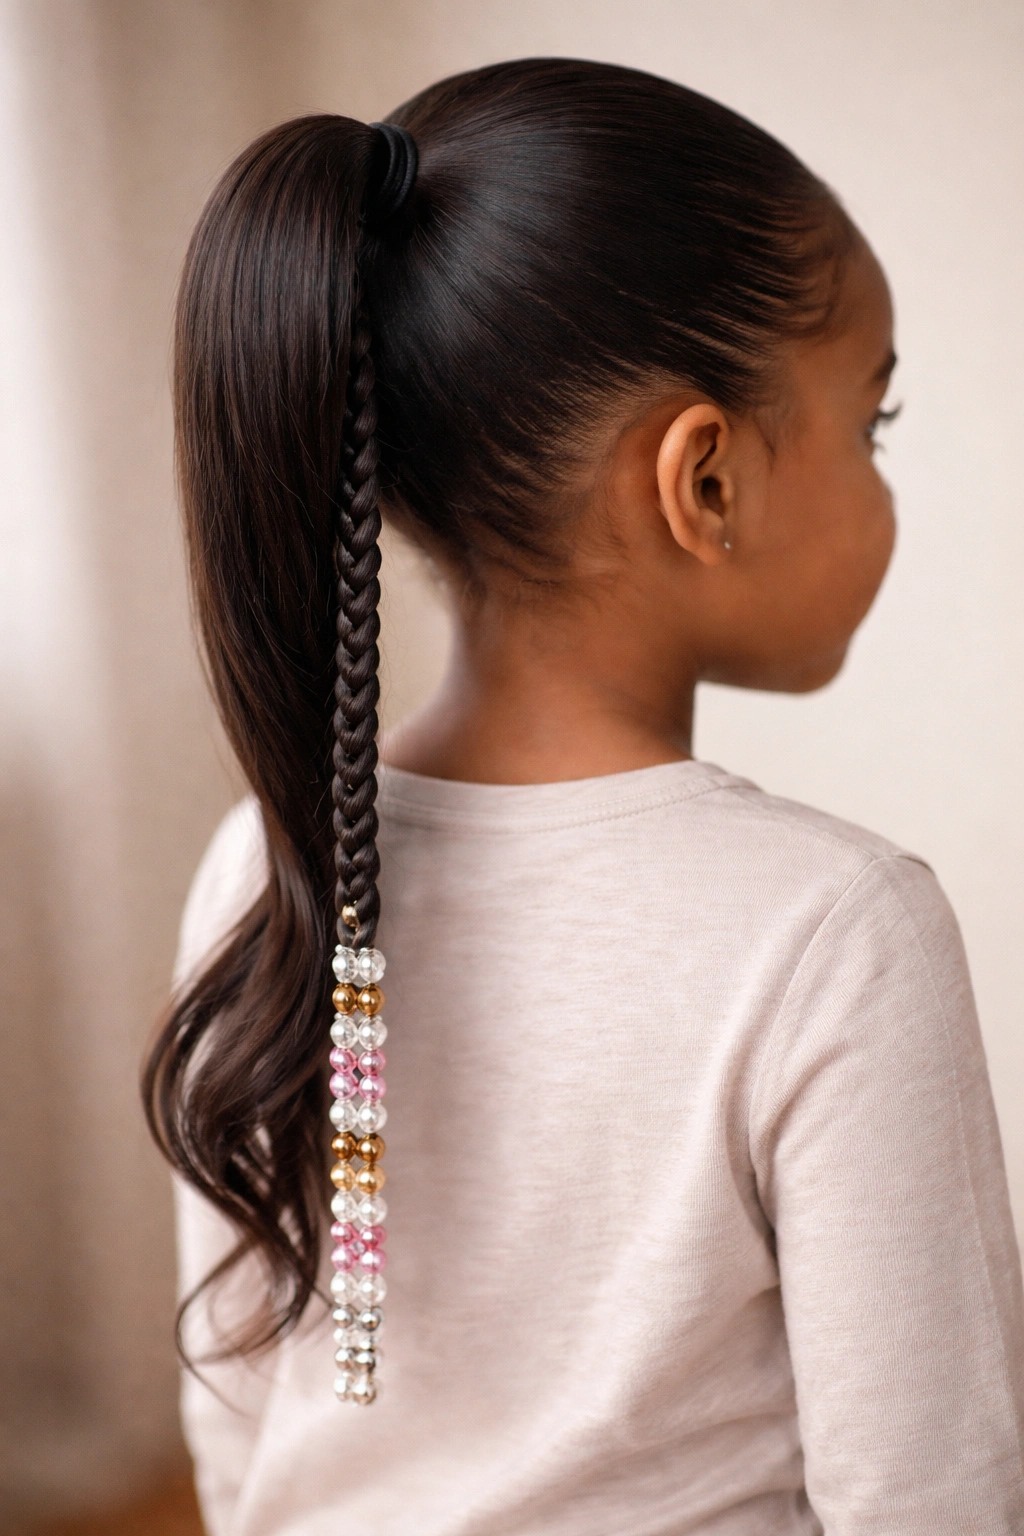
The single beaded braid ponytail is the gateway to more complex styles—it’s simple enough for busy mornings but polished enough for any occasion. You gather the hair into a sleek base ponytail, then braid from the elastic all the way down while threading beads onto individual strands as you braid. This style works beautifully on all hair types and textures, though it shows up most dramatically on thick, textured, or curly hair where the beads nestle into the braid’s crevices.
Why Kids Love This Look
The beauty of a single beaded braid is that it keeps hair completely off the face and neck while adding visual interest without looking overdone. Beads catch light and movement, creating sparkle that makes a child feel special without requiring anything elaborate. It’s practical for sports and active play, holds securely for hours, and the braid itself protects the ends of the hair, making it genuinely protective rather than just pretty.
How to Perfect the Technique
- Start with hair that’s been brushed smooth and pulled into a medium-tight ponytail about 2 inches from the ends
- Section the ponytail into three equal strands and choose which ones will hold beads (I recommend alternating—one strand gets beads, one doesn’t, one gets beads)
- As you braid, slip a bead onto the beaded strand before you cross it over, then continue the braid motion
- Use wood or acrylic beads with holes large enough to fit over damp hair but snug enough not to slide freely
- Secure the bottom with a small elastic and optionally finish with one final bead threaded onto the base of the elastic
Pro tip: Pre-thread your beads onto a thin string before you start braiding—this keeps them organized and means you won’t fumble searching for the next bead mid-braid. It cuts styling time in half.
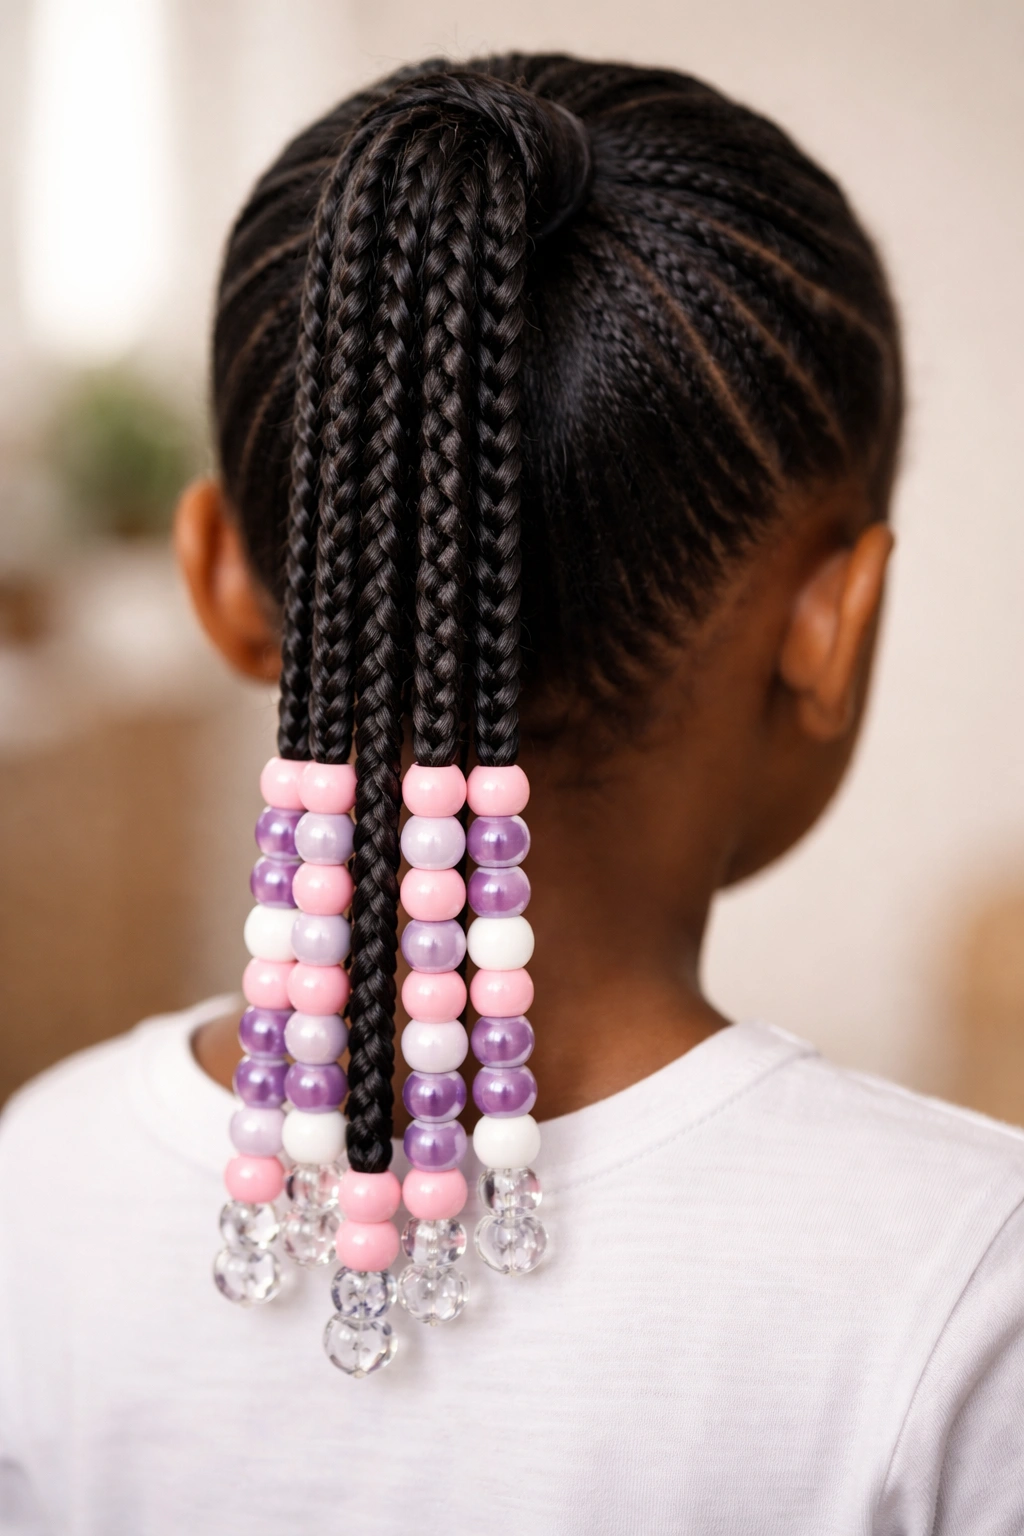
2. Two-Braid Ponytail with Coordinating Beads

Two braids from a single ponytail base create twice the visual impact and feel instantly more intentional than one. You create your ponytail foundation, then divide it into two sections and braid each independently with complementary bead colors. This style is particularly stunning when you use contrasting bead colors—gold on one braid, silver on the other, or alternating colors that match your child’s favorite outfit.
What Makes This Style Pop
The symmetry of two braids feels balanced and neat, while the paired beads create a sense of intentional design. This style offers more dimension than a single braid and still keeps everything manageable for styling. The two-braid approach also distributes the weight more evenly across the scalp, making it gentler for kids with sensitive heads. It’s polished enough for performances or special events but casual enough for everyday school wear.
Styling Steps and Bead Selection
- Create a high or mid-height ponytail depending on your child’s preference and hair length
- Use a comb to create a clean center part down the ponytail from the elastic to the ends
- Braid each side independently, adding beads in an alternating pattern or solid color
- Consider using slightly larger beads at the top of each braid and progressively smaller beads toward the bottom for a graduated look
- Secure each braid with matching elastics and finish with a decorative accent bead if desired
- Optional: wrap a thin piece of ribbon or thread around the base elastic to hide it and add polish
Worth knowing: Two-braid ponytails work especially well with gold, copper, or pearl beads for formal occasions, while acrylic pony beads in bright colors feel perfect for summer or casual days.
3. Spiral Twist Ponytail with Scattered Beads
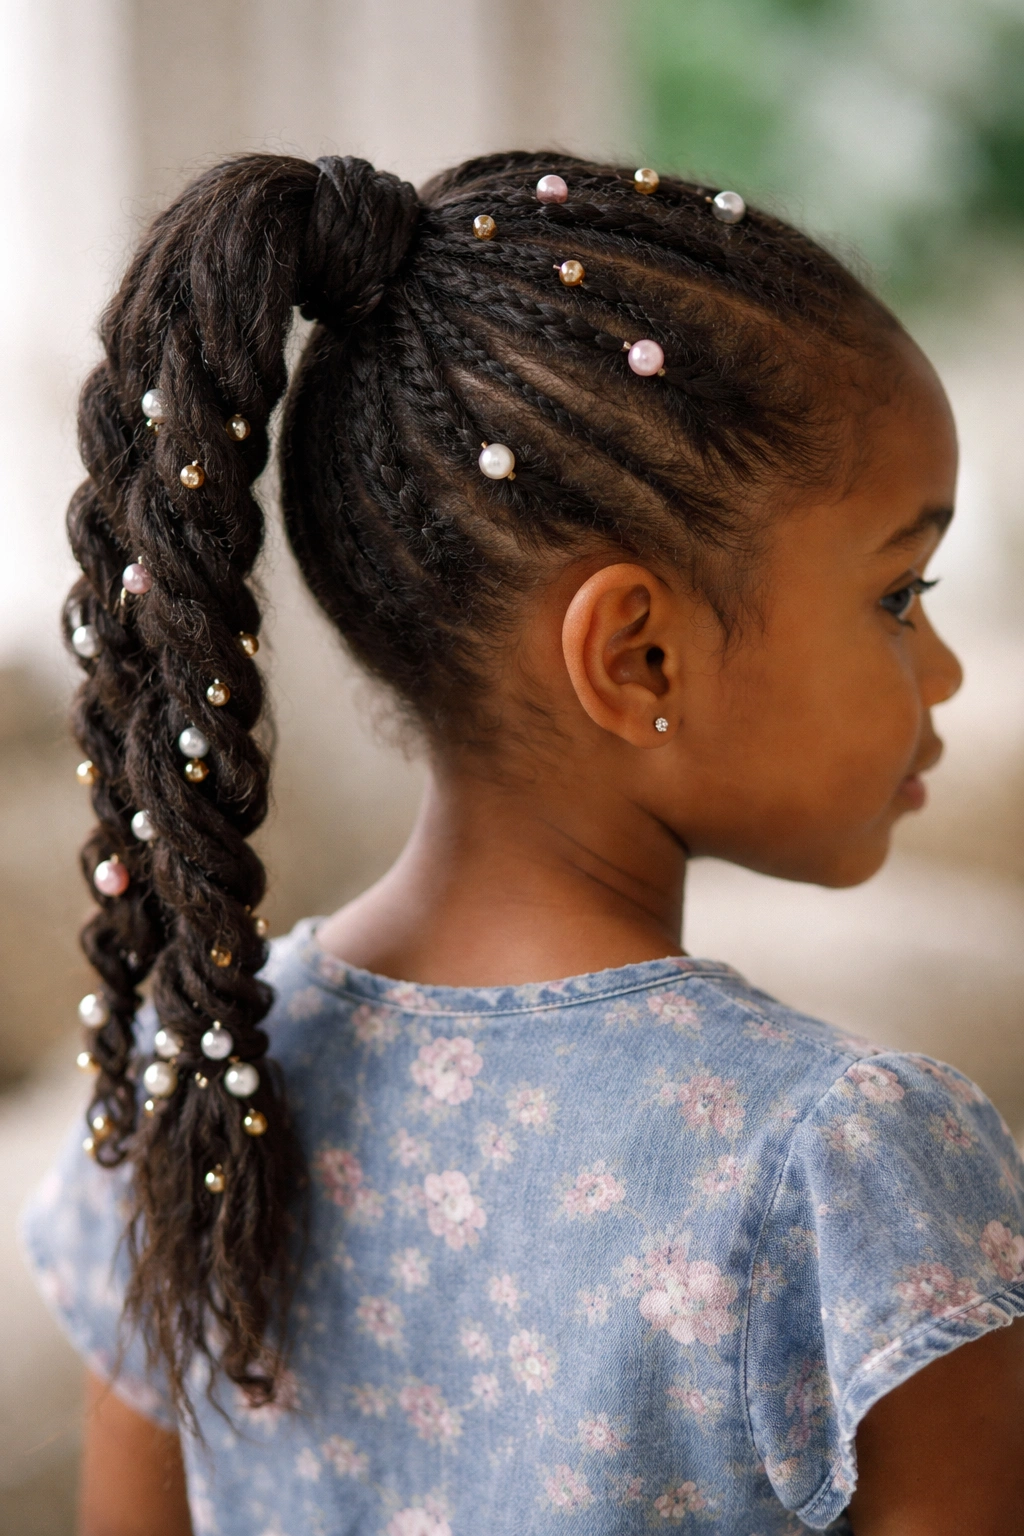
Instead of a traditional braid, this style uses a spiral twist technique—two sections of hair twisted around each other to create a rope-like texture that naturally holds beads in place. The twist is actually easier than braiding for many people, and the scattered bead approach gives it a more organic, less structured feel. Beads placed sporadically throughout the twist create visual pockets of interest rather than a uniform pattern.
Why the Twist Works Better for Some Hair Types
Twist styles often show up better on wavy, curly, or textured hair since the natural texture helps anchor beads in place. On very fine or straight hair, twists can sometimes slip, so pre-braiding with light product helps. The rope texture of a twist catches light differently than a braid does, creating an almost three-dimensional effect that photographs beautifully. Plus, twists are faster to create than braids, which matters when you’re working with a wiggly kid.
Creating the Perfect Spiral Ponytail
- Gather hair into a secure ponytail and divide into two equal sections
- Twist both sections tightly in the same direction (both clockwise or both counterclockwise)
- Wrap one twisted section around the other, continuing the twist as you wrap
- Thread beads onto individual strands at random intervals or in a loose pattern
- The beauty of this method is that imperfection looks intentional—scattered beads feel more boho and forgiving
- Secure the ends with a small elastic and finish with a larger statement bead at the base
Insider note: If beads slip on thin hair, apply a tiny dab of lightweight gel or water to the strand before threading the bead—it creates just enough friction to hold everything in place.
4. Zig-Zag Braid Ponytail for Texture and Movement

A zig-zag braid creates dramatic texture and movement by angling the braid pattern back and forth rather than straight down. This style requires a bit more technical skill, but once you understand the pattern, it becomes almost meditative to execute. The angled braid creates pockets and shadows that make beads appear to float and dance, especially as your child moves.
What Makes Zig-Zag Braids Visually Special
The diagonal lines created by a zig-zag pattern are inherently more interesting than straight lines. When you add beads, they nestle into the angular pockets, creating depth and dimension. This style photographs remarkably well because the angles catch light from multiple directions. It’s also a protective style that looks anything but boring—it’s the option for the kid who wants something special but not overly sweet or babyish.
How to Braid the Zig-Zag Pattern
- Start with a secure ponytail and divide into three sections
- Begin a standard three-strand braid, but instead of continuing straight down, angle your braiding to the right
- Braid diagonally across the ponytail, then angle back to the left for the next section
- Continue this back-and-forth pattern all the way to the bottom
- Add beads on the outer strands as they cross over, since these positions naturally show the beads off
- The beads should follow the zig-zag pattern, appearing to dance up the style
- Secure with a thin elastic and consider wrapping thread around the base to hide it
What to watch for: Make sure your angles are consistent—if the zig-zag is too extreme, it can look messy, but if it’s too subtle, the effort disappears. Aim for about 1-inch diagonal shifts each time you braid.
5. Four-Strand Beaded Braid Ponytail
Once your child (or you) masters three-strand braiding, the four-strand braid opens up entirely new possibilities. This braid looks significantly more complex and intricate than a standard three-strand braid, creating a thicker, more textured final product. Four-strand braids hold their shape beautifully, making them ideal for longer-lasting styles that maintain their neat appearance through an entire school day or activity.
The Visual Impact of Four-Strand Braids
Four-strand braids create an almost woven appearance with more surface area for beads to nestle into. The extra strand means more opportunities to thread beads through the structure, and you can create patterns like alternating beads on specific strands. This style reads as more sophisticated and intricate than you’d expect, especially when you choose jewel-toned beads that complement your child’s skin tone or outfit.
Mastering the Four-Strand Technique
- Create a ponytail and divide it into four equal sections
- Number them one through four from left to right
- Cross strand one over strand two, under strand three, over strand four
- Move to the right side: take strand four, cross it over strand one, under strand two, over strand three
- Continue this alternating pattern—one move on the left side, one on the right
- Add beads to specific strands as you work, threading them before each crossing motion
- The pattern becomes intuitive quickly, though it takes focused attention the first few times
- Secure the bottom with an elastic and finish with accent beads if desired
Pro tip: If you’re teaching your child to do her own four-strand braids, start with very thick yarn or ribbon instead of hair—it’s much easier to see the pattern and build muscle memory before transferring the skill to actual hair.
6. Waterfall Braid Ponytail with Hanging Beads
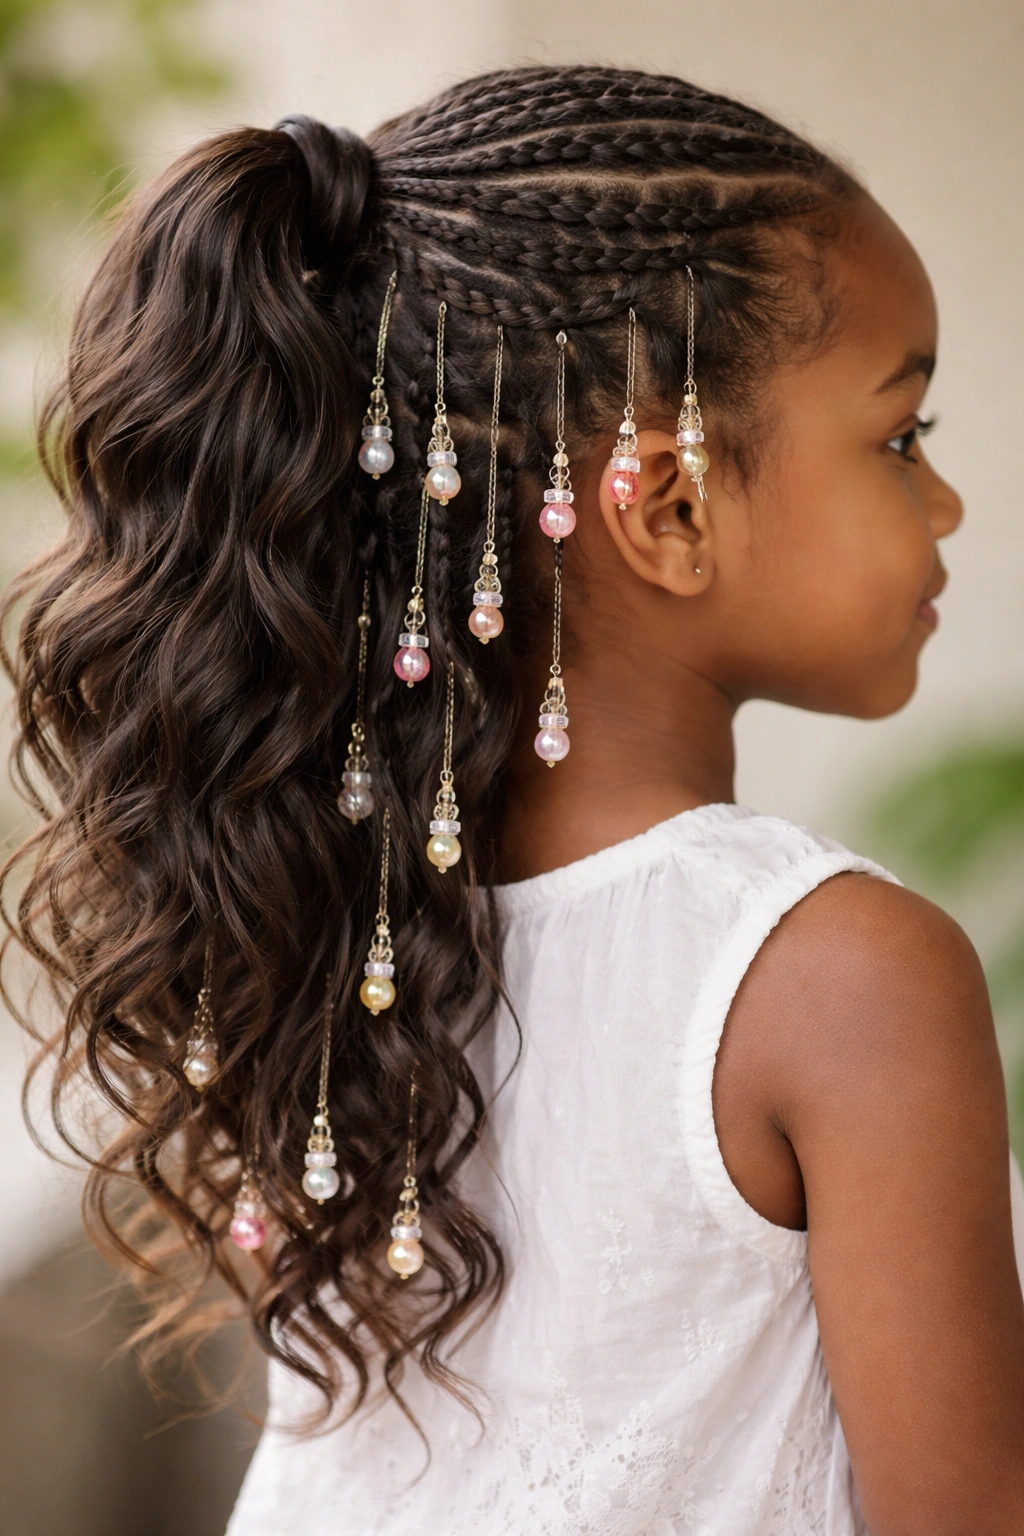
A waterfall braid creates the illusion of hair cascading or “falling” down the side of a ponytail, with sections of unbraid hair releasing and flowing naturally. This style is romantic, intricate-looking, and creates gorgeous texture for beads to hang from. Beads work beautifully in waterfall braids because they can be threaded onto both the main braid and the “falling” sections, creating a dimensional, almost whimsical effect.
Why Waterfall Braids Work for Ponytails
Waterfall braids naturally mix braided and unbraided hair, which creates visual variety and movement. When you add beads to both the braided sections and the loose falling pieces, the style gains incredible depth. The hanging beads catch light and move with your child, adding an interactive quality that makes the style feel alive rather than static. It’s elegant but playful—perfect for kids who like something a bit more artistic.
Step-by-Step Waterfall Braid Instructions
- Start at one side of the ponytail base, near the elastic
- Take three small sections and begin a standard three-strand braid
- After every braid crossover, drop the bottom strand (this is the “waterfall” section) and replace it with a new section from above
- Continue braiding diagonally across the ponytail, dropping a strand each time
- Add beads to the main braid as you work, and optionally thread beads onto the dropped “waterfall” sections
- You can create one waterfall across the ponytail or multiple overlapping waterfalls for more drama
- Secure the braid end with a small elastic and consider adding accent beads to the hanging sections
Worth knowing: This style works best on hair with some length (at least 8-10 inches) and looks especially striking with loosely textured or curly hair, which naturally shows off the waterfall effect.
7. Dutch Braid Ponytail with Metallic Beads
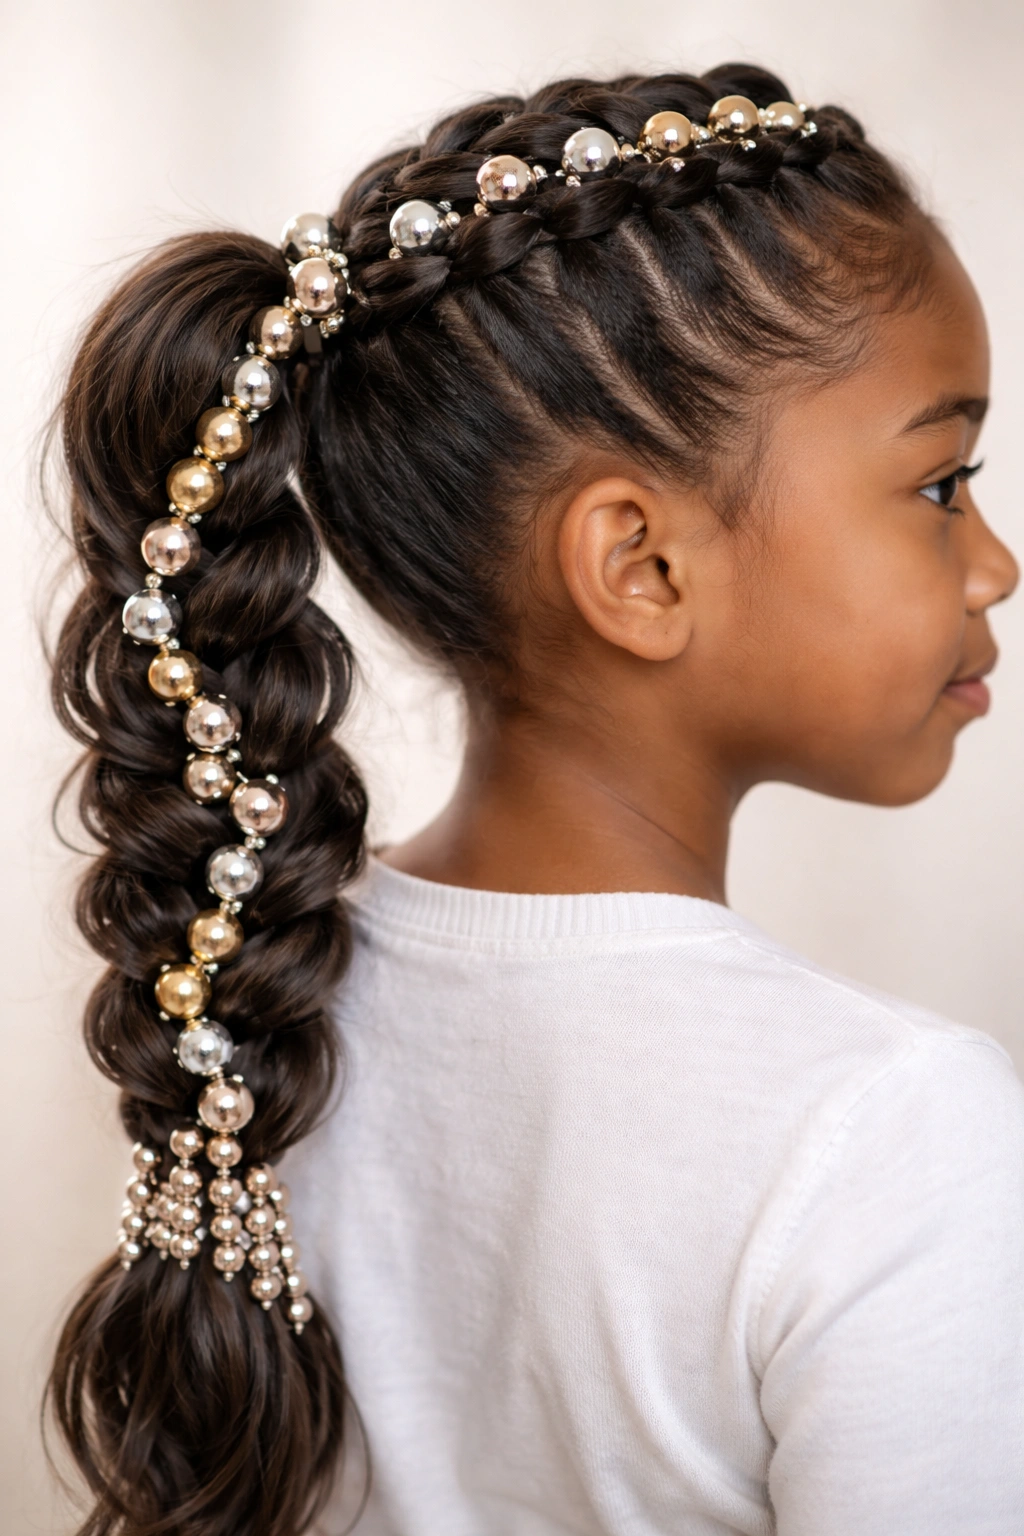
A Dutch braid—braiding under rather than over—creates a raised, 3D appearance that’s inherently more textured than a standard braid. When you add metallic beads to a Dutch braid ponytail, the beads appear to sit on top of the braid itself, creating a bold, high-contrast look. This style is perfect for kids who want serious presence and sparkle.
The 3D Effect Dutch Braids Create
Dutch braids sit higher and appear thicker than regular braids, with more visible texture on the surface. This raised appearance means beads positioned on the Dutch braid are front and center, catching light dramatically. The style has a sporty yet elegant edge—it’s what you’d choose if your child wants to look strong and put-together rather than delicate and dainty. Metallic beads (gold, silver, rose gold, copper) intensify this effect beautifully.
How to Dutch Braid Correctly
- Start with a ponytail pulled at your preferred height
- Divide the ponytail into three equal strands
- Instead of crossing strands over the center strand, cross them under
- This creates a braid that looks like it’s sitting on top of the hair rather than woven through it
- Add beads to each strand before you cross under, making them very visible on the finished braid
- Continue all the way to the bottom and secure with a small elastic
- The braid should look distinctly raised and three-dimensional
- Consider wrapping metallic thread or thin ribbon around the elastic base for extra polish
Insider note: Dutch braids can sometimes loosen more easily than regular braids, so make sure your base ponytail is secure and consider applying a tiny amount of styling cream or gel to the strands before braiding.
8. Bubble Ponytail with Beaded Knots
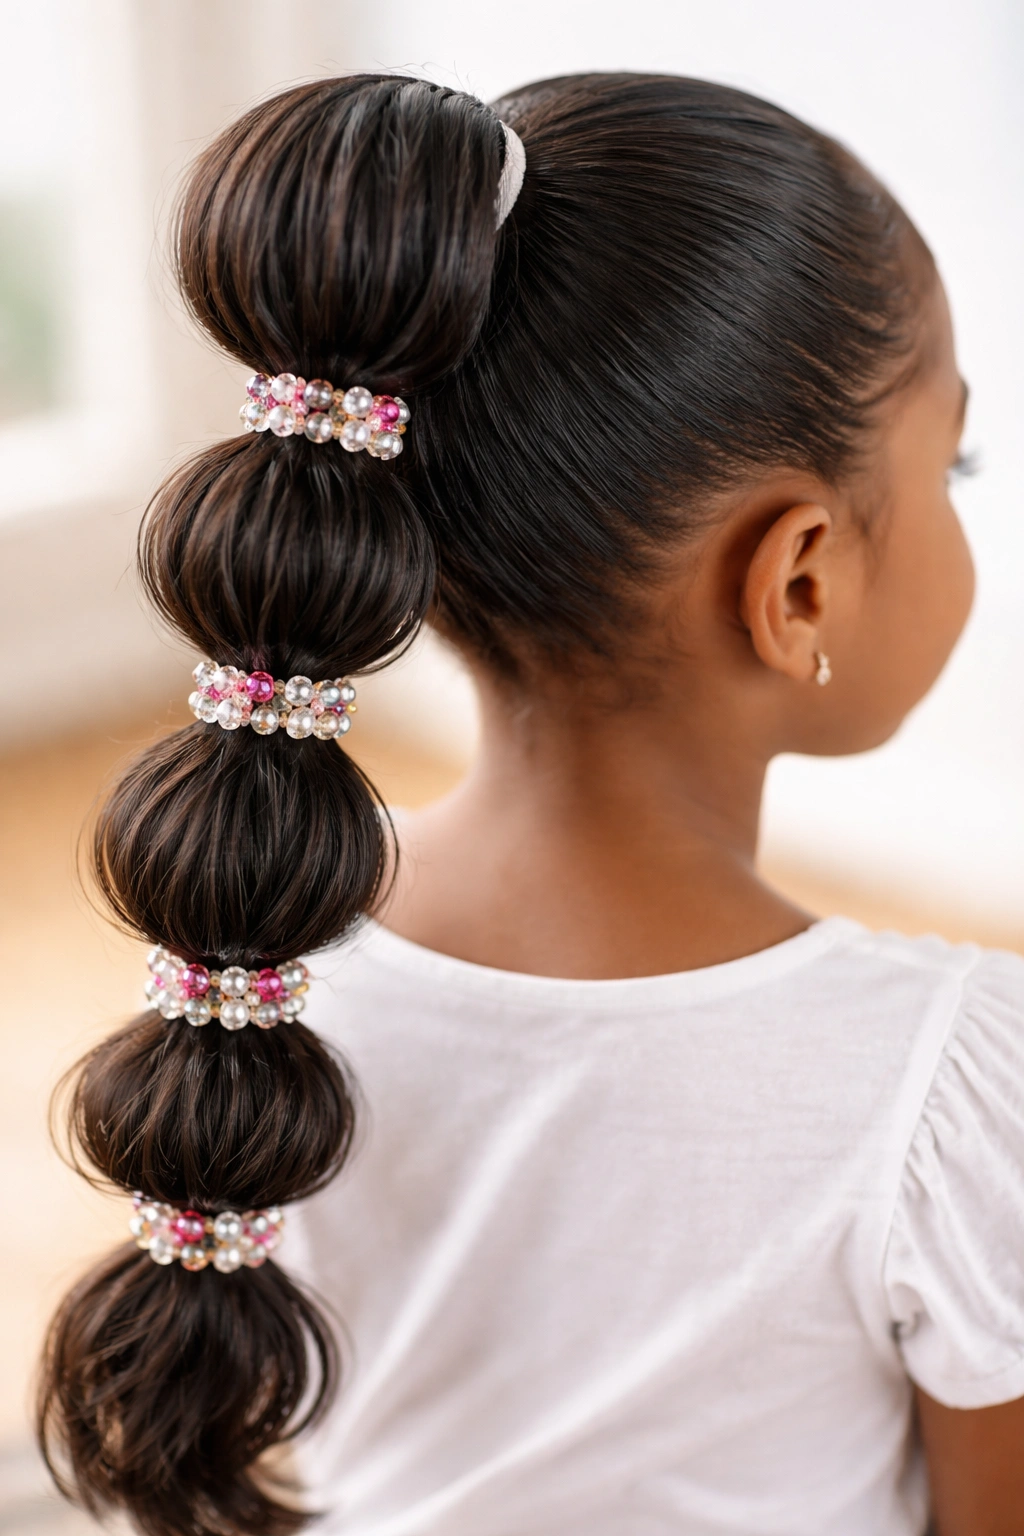
A bubble ponytail uses multiple small elastics spaced down the length of the ponytail to create a segmented, bubble-like appearance. Instead of braiding, you’re creating distinct sections that puff outward between the elastics. Beads work beautifully with bubble ponytails by threading them onto the elastic itself or onto small sections of hair between the bubbles, creating pockets of sparkle throughout the length.
Why Bubble Ponytails Appeal to Kids
Bubble ponytails feel playful, modern, and totally age-appropriate for younger kids. The segmented structure is visually interesting without requiring braiding skills, making it accessible for kids with shorter hair or those who find braiding frustrating. Adding beads transforms a simple bubble ponytail into something with serious personality—each bubble can feature a different bead color for a rainbow effect or coordinate with a specific outfit or theme.
Creating Picture-Perfect Bubble Ponytails
- Start with a standard high or mid-height ponytail using a clear elastic
- Measure down about 1.5 to 2 inches from the base elastic
- Use a small clear elastic to create the first “bubble” by securing the ponytail at that point
- Gently pull the ponytail section above the elastic upward and outward to create the bubble shape
- Measure down another 1.5 to 2 inches and add the second elastic, creating another bubble
- Repeat this pattern down the entire length of the ponytail
- Thread beads onto the elastics by sliding them over the elastic where the strands cross
- Optional: wrap thin thread or ribbon around each elastic to hide it and add color
- Alternatively, thread beads onto small sections of hair between the bubbles for a different effect
Pro tip: Bubble ponytails hold their shape longer if you use sturdy elastics and don’t pull the bubbles too far out—a gentle, natural puff looks more intentional than extremely exaggerated bubbles.
9. Fishtail Braid Ponytail with Alternating Bead Colors
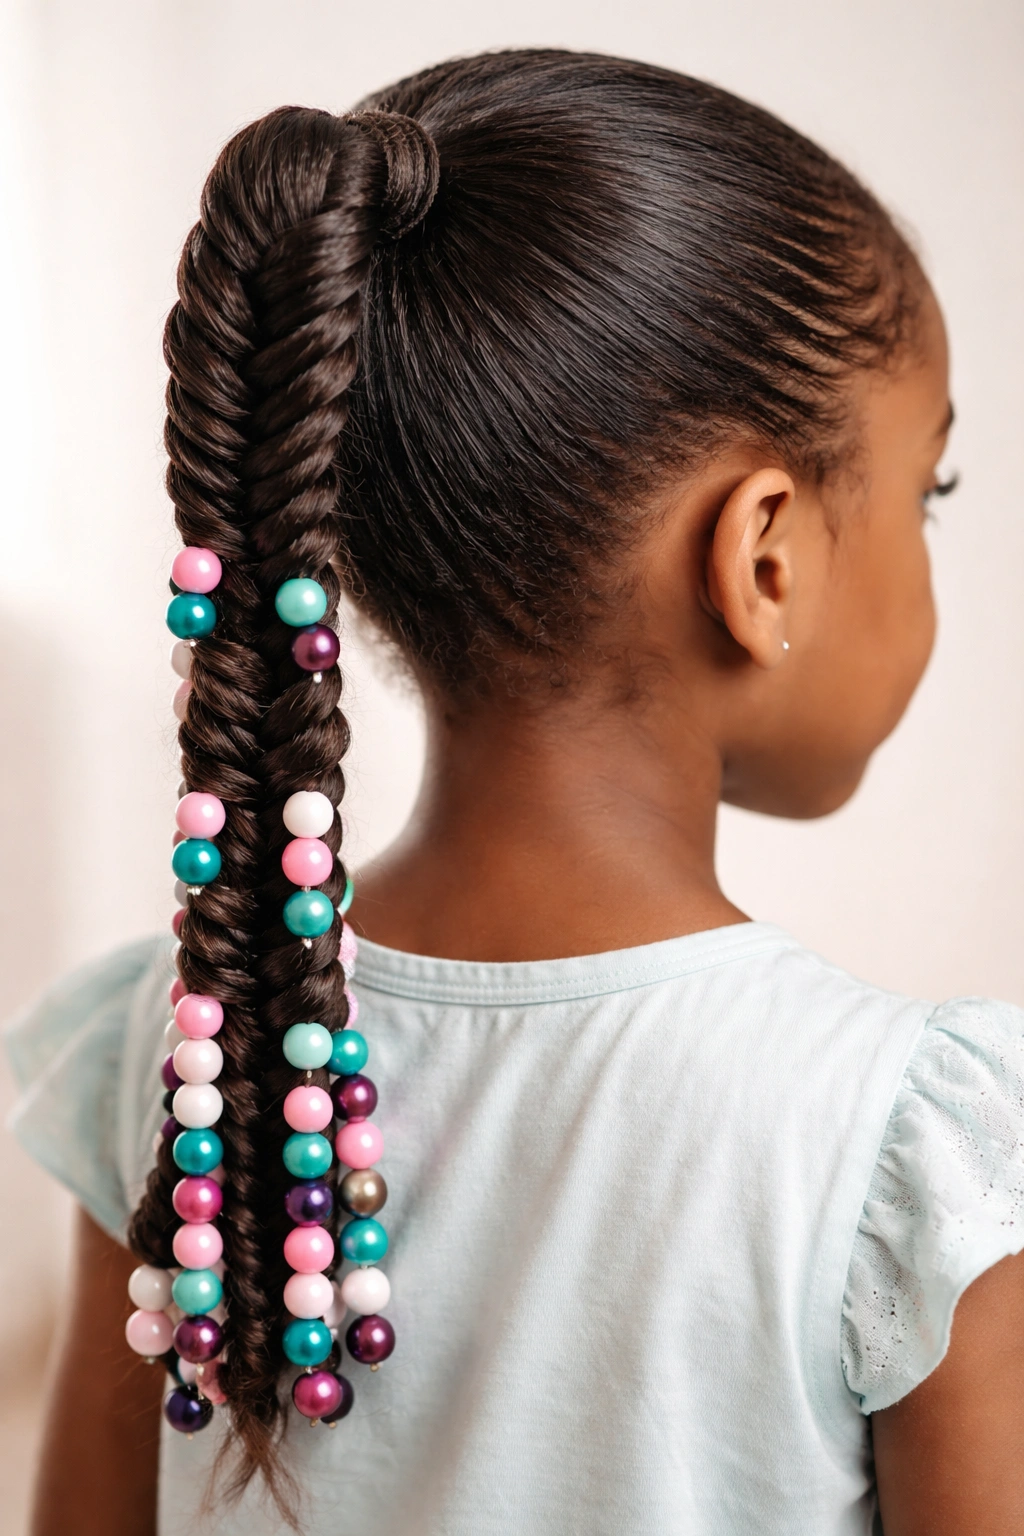
A fishtail braid uses only two sections instead of three, creating a fine, detailed texture that looks far more complex than it actually is. The thinner, more intricate appearance of a fishtail braid is perfect for threading multiple small beads in an alternating color pattern. This style is technically simpler than a standard three-strand braid but creates an impression of serious skill.
The Appeal of Fishtail Braids for Beading
Fishtail braids have numerous small crossover points where beads naturally settle, so you can thread far more beads through a fishtail than through a regular braid. The fine texture means multiple small beads create visual impact without looking heavy or overdone. Alternating bead colors through a fishtail creates a beautiful pattern that catches the eye—perfect for special occasions when you want to impress.
Mastering the Fishtail Braid Technique
- Create your ponytail and divide it into two large sections
- Take a very thin strand of hair from the outside of the right section
- Cross it over to join the left section
- Now take a thin strand from the outside of the left section
- Cross it over to join the right section
- Continue alternating, always taking from the outside of each section and crossing it over
- As you work, thread small beads onto the thin strands before you cross them over
- The alternating colors should create a visible pattern running through the braid
- Secure the bottom with a small elastic and finish with an accent bead
- This braid gets neater the longer you practice it, so don’t worry if the first attempt feels wobbly
Worth knowing: Fishtail braids are absolutely learnable by kids, and once they understand the two-section pattern, many kids find them actually easier than three-strand braids.
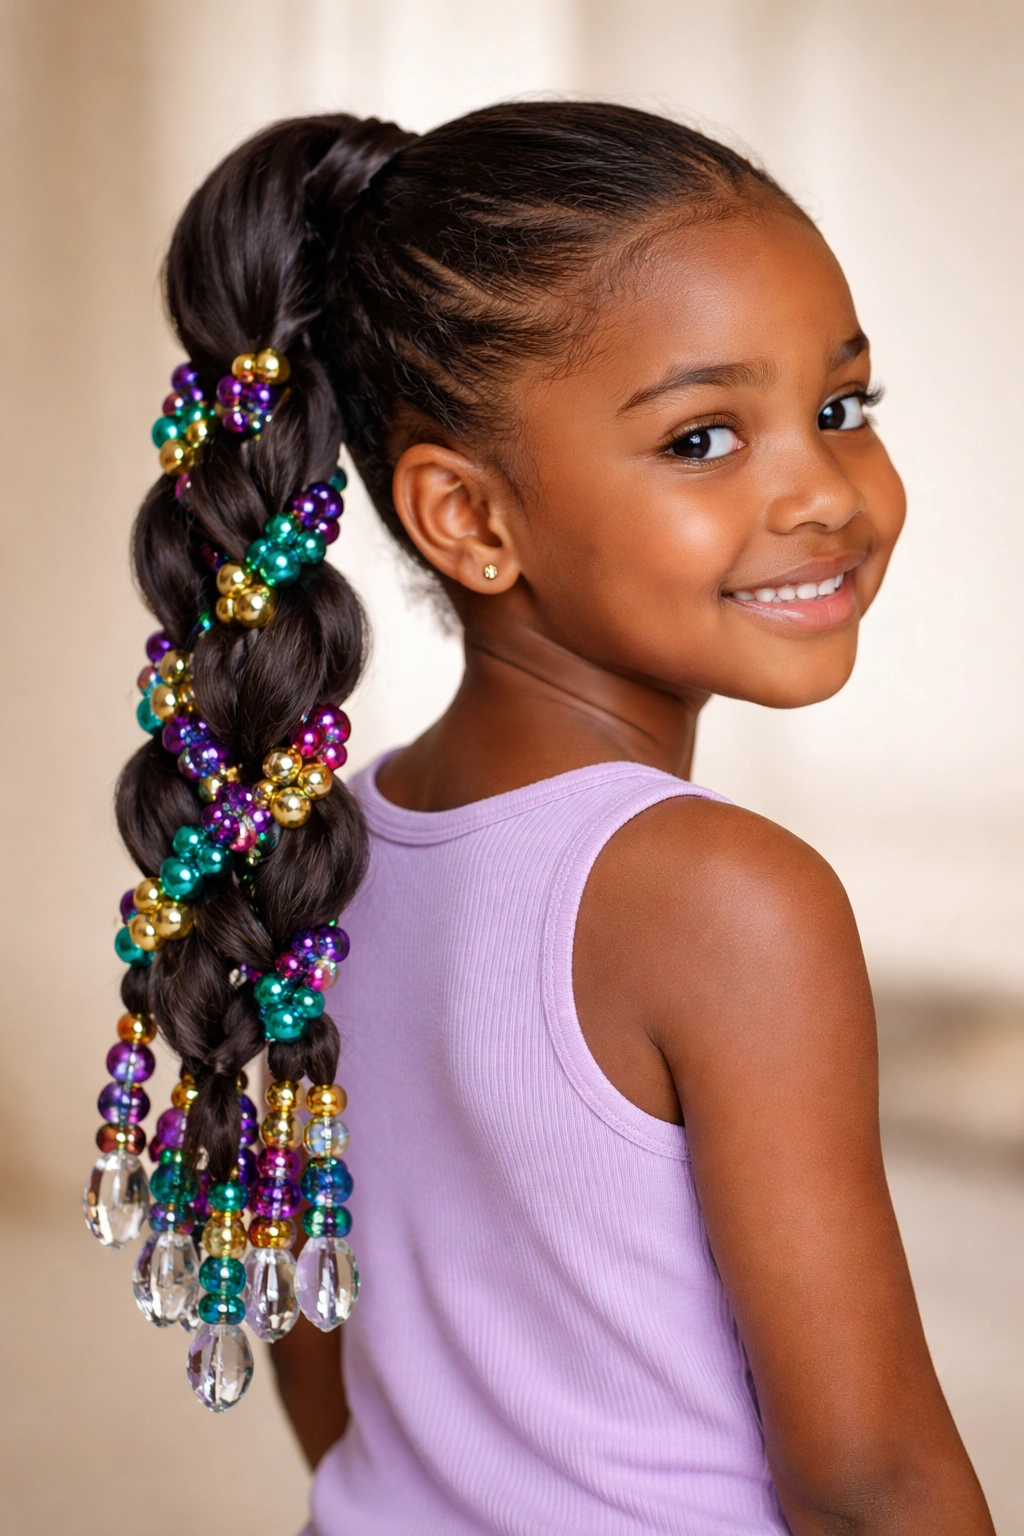
10. Rainbow Bead Gradient Ponytail with Mixed Braids
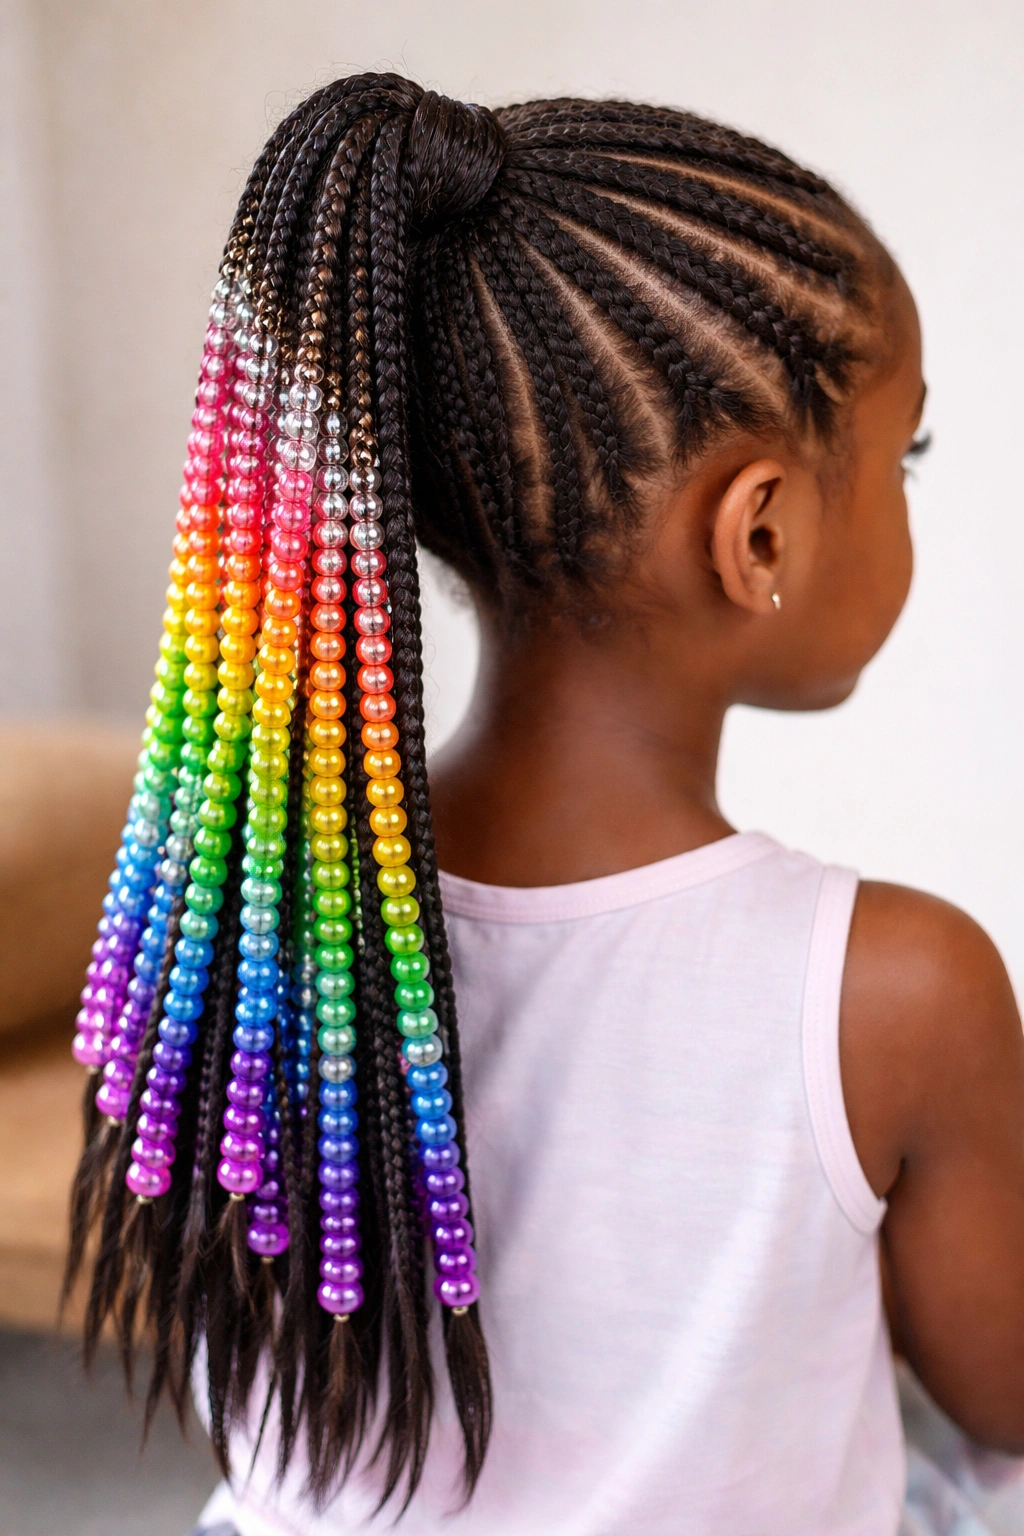
The ultimate statement style combines multiple braiding techniques within a single ponytail, using a carefully planned rainbow or gradient color scheme for the beads. You might start with a Dutch braid using gold beads at the crown, transition to a fishtail section with amber beads in the middle, and finish with a regular three-strand braid using blue beads at the bottom. This approach requires planning but creates something genuinely unique and show-stopping.
Creating Your Color Plan
Before you start styling, sketch out or mentally map your bead color progression. A classic rainbow moves through red, orange, yellow, green, blue, and purple—but gradients work beautifully too (light to dark, warm to cool, metallic to jewel tones). Consider your child’s hair color and skin tone; some bead colors will naturally harmonize while others will create interesting contrast. The most important rule is choosing colors that make your child feel confident and excited about wearing the style.
Building the Mixed-Braid Masterpiece
- Create a secure ponytail at your chosen height
- Divide the ponytail into 2-3 sections depending on your design
- Braid each section using a different technique (Dutch, fishtail, standard, or twisted)
- Assign specific bead colors to each braided section based on your planned gradient
- Make sure each braid is equally secure and polished before moving to the next
- Consider varying bead sizes slightly—larger beads in the middle sections for emphasis, smaller beads toward the bottom for visual tapering
- Secure each braided section with matching elastics and optionally wrap thread around the bases
- Step back and assess the overall balance; if one section feels too heavy or light, adjust your bead distribution
Pro tip: This style works best when each braided section is distinct enough that people can actually see the technique change—avoid making sections so small that the transitions feel lost.
Key Takeaways
The foundation of every great beaded ponytail is a secure base—that initial ponytail has to be tight enough to hold everything in place through an entire day of movement, but never so tight that it pulls uncomfortably on your child’s scalp. When you’re threading beads, damp hair holds better than completely dry hair, and even slightly damp hair takes beads more easily than hair coated in heavy product. Always test your bead hole sizes before committing to a full style; a bead that’s too small won’t thread at all, while one that’s too loose will slide all the way down rather than nestle into the braid.
The best part about learning these styles is that once you understand a few basic techniques—a standard three-strand braid, a simple twist, and how to space beads evenly—you can mix and match to create variations that are entirely your own. Your child’s preferences matter here too; some kids love the delicate elegance of fine fishtail braids with tiny beads, while others want bold Dutch braids with statement-size beads. There’s absolutely a style in this list that matches your child’s personality, hair type, and the occasion you’re styling for.
Start with whichever style sounds most manageable, practice it a few times until your hands remember the motion, then branch out into the others. Beaded braids might look complicated, but they’re genuinely a learnable skill—and honestly, the imperfections are often what make them look sweet and real rather than artificially perfect. Your child gets a beautiful, playful hairstyle, and you get the satisfaction of creating something they genuinely love wearing.