



Natural hair doesn’t require complicated styling routines or hours in front of the mirror to look stunning. If you’re new to embracing your natural texture, you might feel overwhelmed by the sheer number of style possibilities out there. The truth is, some of the most beautiful and manageable looks for natural hair are surprisingly simple—they just require understanding a few fundamental techniques and having the right approach for your specific hair needs.
This article is specifically designed for beginners who are navigating their natural hair journey. You’ll find that many of these styles use the same foundational methods, which means once you master one, the others become exponentially easier. Each style here can be created with basic tools (a spray bottle, some styling cream, and your fingers are often all you need) and takes anywhere from 10 to 30 minutes to complete. The key isn’t having perfect technique from day one—it’s understanding the purpose behind each step and being willing to practice.
Let’s start with something important: natural hair isn’t one-size-fits-all. Whether your hair is tightly coiled, loosely textured, fine, thick, short, or long, these styles can be adapted to suit your specific curl pattern and hair density. You’ll notice that some styles work better on second or third-day hair (hair that’s been styled and has begun to set), while others shine with freshly moisturized hair. Pay attention to what feels comfortable and sustainable for your routine.
The goal here isn’t perfection—it’s creating looks that celebrate your natural texture while keeping your hair healthy and your styling time manageable. Let’s explore 10 beginner-friendly styles that deliver real results.
1. High Puff Ponytail
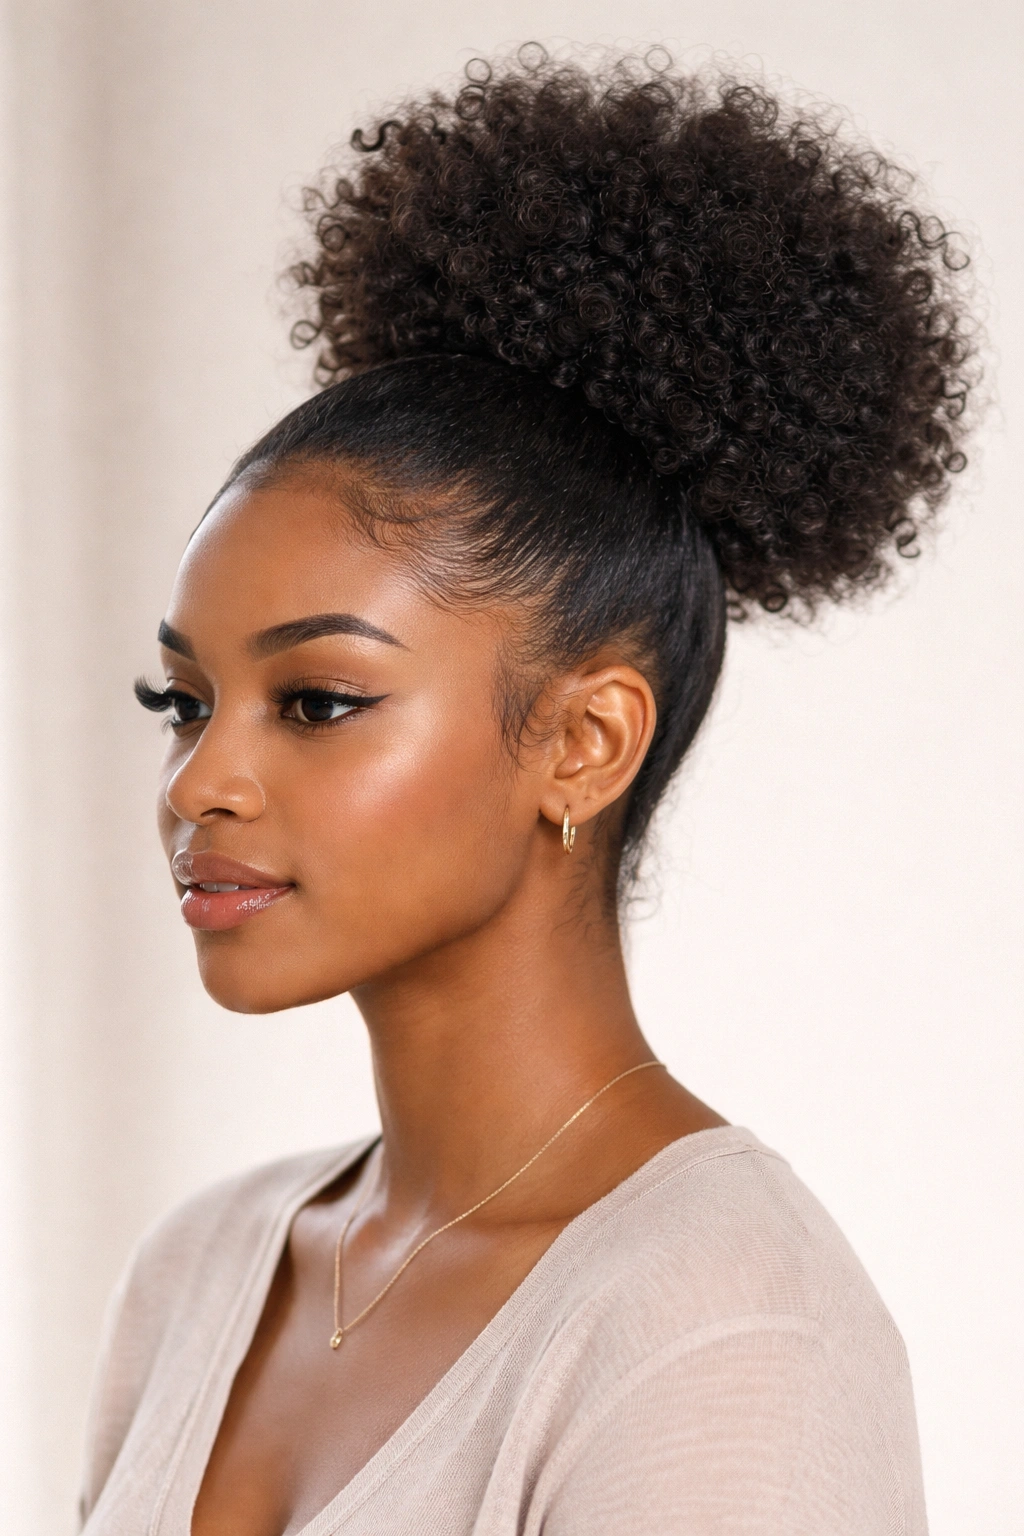
The high puff is often the first style beginners master because it’s forgiving, protective, and works on nearly every texture. A puff is essentially all of your hair gathered together, then fluffed out to create a full, rounded shape at the crown. The beauty of this style lies in its versatility—it can look sleek and polished or intentionally textured and voluminous, depending on your preference and the occasion.
To create a high puff, start with hair that’s freshly moisturized or refreshed. Use your fingers to comb through your hair and pull it straight up to the crown of your head, securing it tightly with a hair tie. The tightness matters here—if it’s too loose, the puff will deflate throughout the day; if it’s too tight, you risk unnecessary tension on your hairline. Aim for a “snug but comfortable” grip where you wouldn’t feel a headache after wearing it for several hours.
Why This Style Works for Beginners
The high puff requires zero additional styling skills beyond the ability to tie your hair back. You don’t need to braid, twist, or section your hair—just gather and secure. This simplicity is exactly why it’s so forgiving when you’re starting out. The style also works on hair at any length, from freshly chopped pixie cuts to waist-length locs.
How to Keep Your Puff Full and Shapely
- Gently separate and fluff the gathered hair from the root to the ends using your fingers
- Avoid over-manipulating—separate the sections just enough to create dimension without unraveling the style
- For extra volume, tease lightly at the base with a fine-tooth comb before fluffing
- Use a light hold gel or mousse around the edges to smooth flyaways without weighing down the puff
- Sleep on a silk pillowcase or wrap your puff loosely in a silk bonnet to maintain fullness overnight
Pro tip: On day two or three, your puff will actually look even fuller and more defined as the texture sets. This is the ideal time to style it, so don’t feel like you need to recreate this look from freshly washed hair every single time.
2. Braided Crown
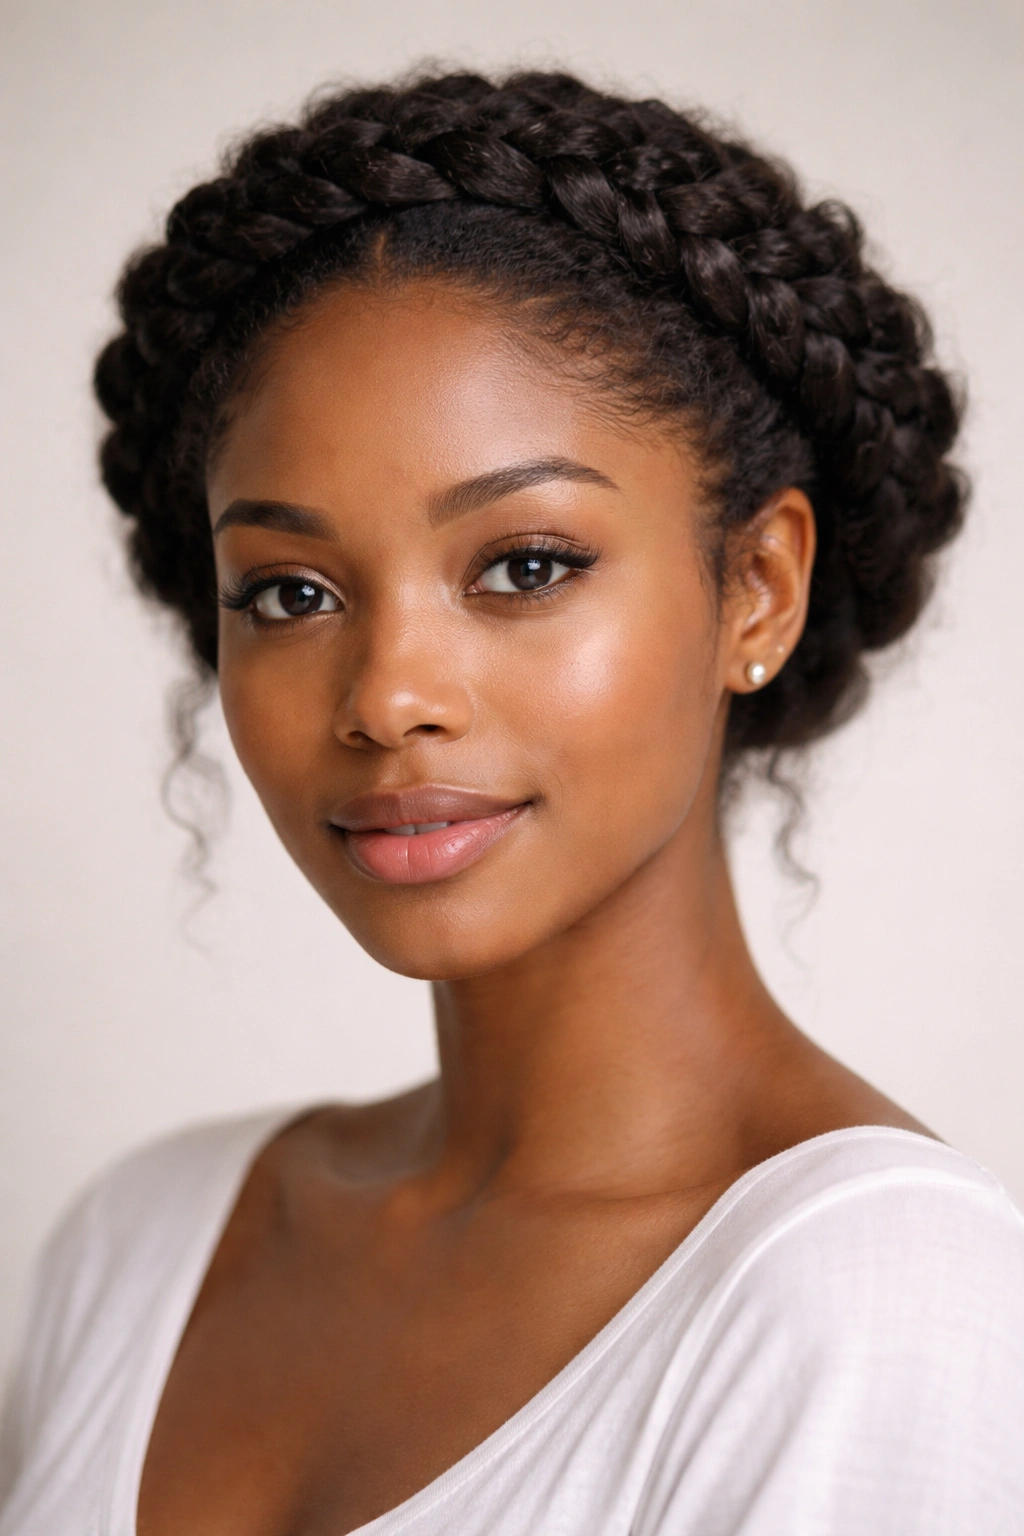
A braided crown brings an effortlessly elegant vibe that works for casual hangouts, professional settings, and everything in between. This style involves creating one or more braids that wrap around your head like a halo, and the best part is that it genuinely looks more complicated than it is. Once you understand the basic three-strand braid, you can create this look with confidence.
The braided crown works beautifully on hair with good texture and hold—ideally hair that’s been washed and styled within the last two or three days. Freshly washed hair can sometimes be too slippery for braids to hold their shape, so if you’re working with freshly moisturized hair, let it air-dry or blow-dry before attempting this style.
Step-by-Step Braiding Process
Begin by creating a deep side part, then use a fine-tooth comb to detangle one section thoroughly. Start your first braid from near your temple, feeding hair in from one direction as you braid toward the back of your head. The key is maintaining consistent tension—not so tight that it feels uncomfortable, but tight enough that the braid holds its shape. Once you’ve reached the nape of your neck, secure the braid with a small elasticized band or bobby pins tucked discreetly underneath.
Design Options and Variations
- Single braid crown: One thick, statement-making braid that runs from temple to temple across the back of your head
- Twin braids: Two thinner braids that sit slightly lower, creating a softer, more playful aesthetic
- Braids with added texture: Before braiding, apply a curl-defining cream or gel to deepen your wave pattern and create definition within the braid itself
- Loose and undone: Gently pull at the edges of each braid after securing to create a softer, more romantic version
The braided crown is one of the few styles where second or third-day texture actually works to your advantage. Your braids will hold better and look fuller because your curl pattern is already set.
3. Two-Strand Twists
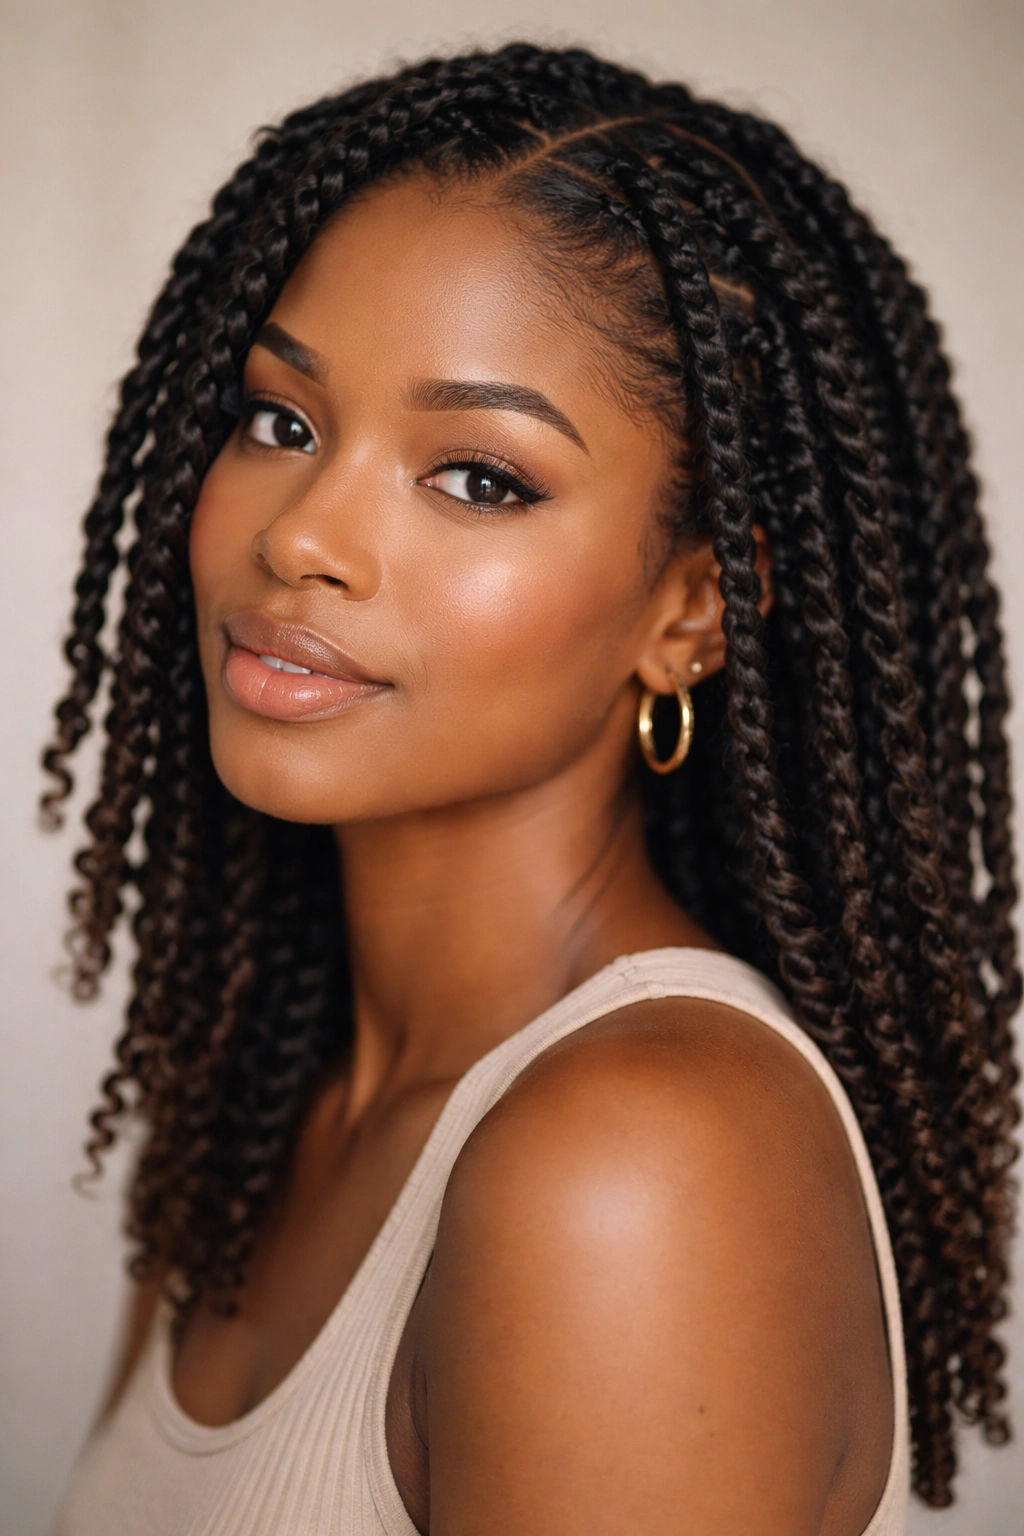
Two-strand twists are arguably the most transformative style you can create with your natural hair as a beginner. A twist is formed by taking two sections of hair and wrapping them around each other in a rope-like pattern, and the results are absolutely stunning. The style elongates your hair, creates beautiful texture definition, and can last anywhere from three days to two weeks depending on how you care for them.
The magic of two-strand twists is that they work on almost every curl pattern, though the size and definition will vary based on your hair type. Tightly coiled hair will showcase intricate spiral patterns, while looser textures create a thicker, more rope-like appearance. Both are beautiful—you’re simply working with what you have.
Creating Your First Set of Twists
Divide your hair into manageable sections—the number depends on how thick you want your twists and how much time you have. Start with larger sections if you’re a beginner; smaller sections are easier to manage once you’ve practiced the technique a few times. Apply a moisturizing styling cream or gel to each section, then separate it into two strands. Twist one strand around the other, maintaining even tension as you move down the length of your hair. Secure the end with a small elastic band, bobby pin, or by tucking it into the twist itself.
Styling Options After Twisting
- Wear them loose: Leave twists out and unraveled for natural, voluminous styling
- Twisted-out style: After a day or two, gently unravel each twist with your fingers for a super textured, defined style with amazing hold
- Updo with twists: Gather twists into a puff, bun, or ponytail for a polished look
- Sleep styling: Pin twists up in a pineapple position (gathered loosely at the crown) to preserve them overnight
Two-strand twists are actually one of the lower-maintenance styles once you understand the basic technique. The initial installation takes time, but the payoff is a protective style that can last for weeks with minimal daily attention.
4. Defined Wash and Go
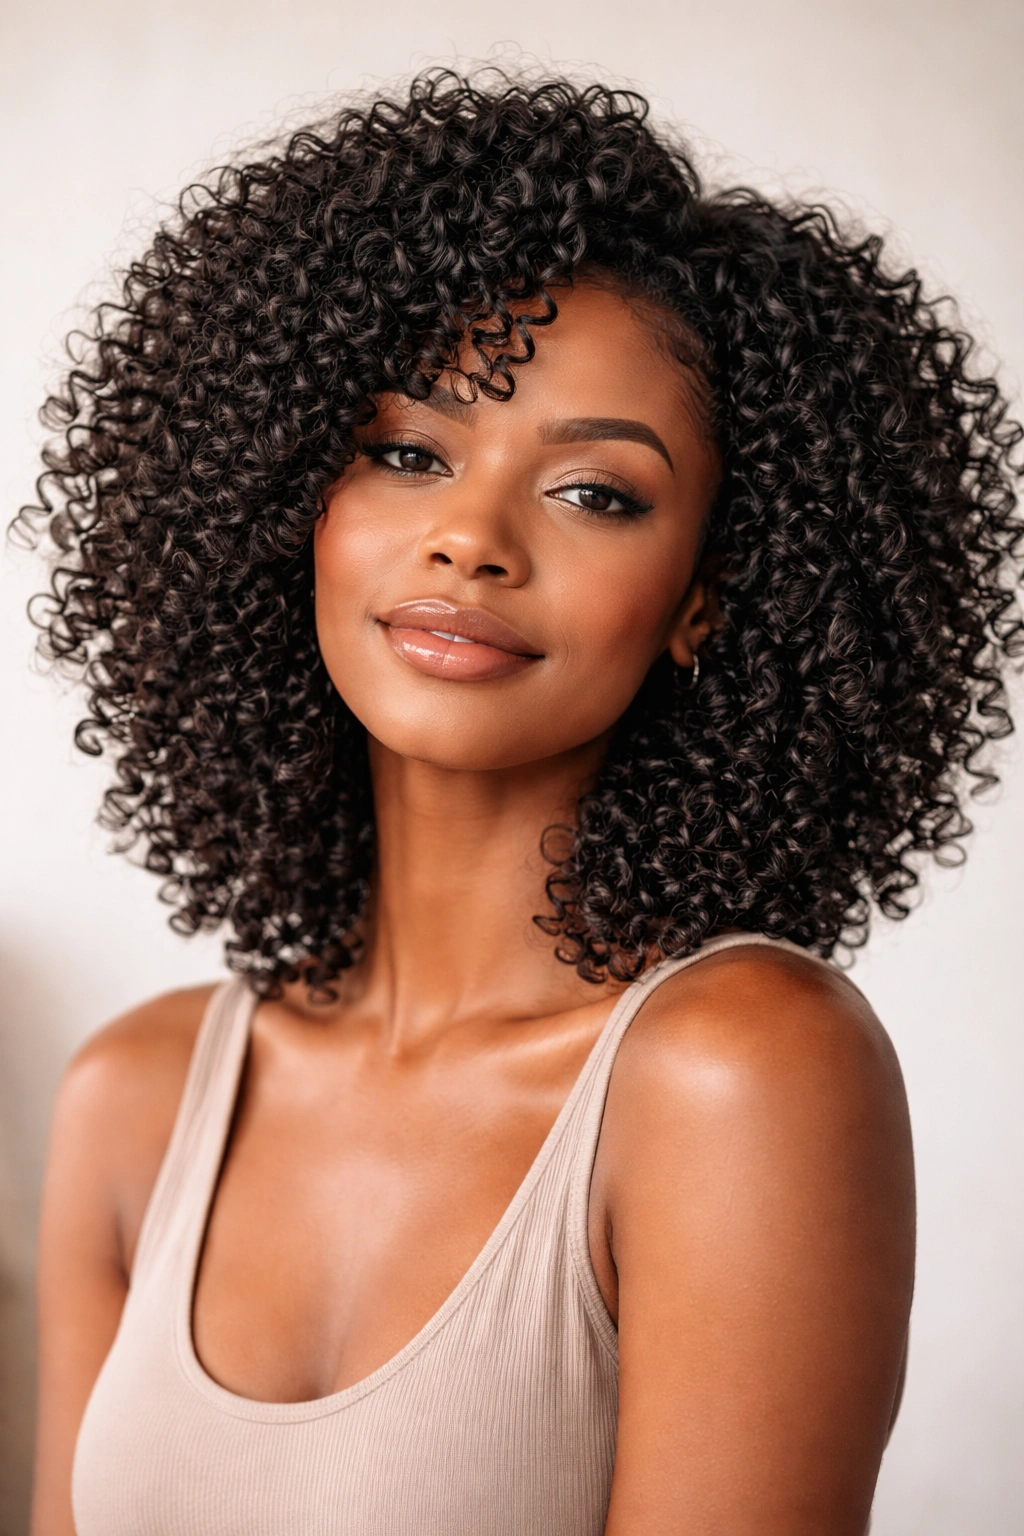
A wash and go is exactly what it sounds like—you wash your hair, apply products, and let it air-dry into a fully styled, defined look. For beginners, this might sound too simple to actually work, but the secret lies in using the right products and understanding how your hair responds to moisture and hold. This style celebrates your natural curl pattern without any manipulation beyond product application.
The wash and go requires a different mindset than other styles. You’re not trying to create a specific shape or structure; you’re enhancing and defining the curls that are already there. This means the first step is understanding your curl pattern and what helps it pop without frizz.
Product Selection Matters Significantly
A successful wash and go hinges on having the right products in your routine. You’ll want a moisturizing leave-in conditioner that hydrates without being so heavy that it weighs your curls down. Layer this with a curl-defining cream or gel that provides enough hold to keep your curls structured as they dry. The layering technique matters—apply products to soaking-wet hair, then use praying hands or a cupping motion to encourage your natural curl pattern to form.
Technique for Best Results
- Cleanse thoroughly: Use a sulfate-free shampoo or a cleansing conditioner to remove buildup without stripping moisture
- Apply products to soaking-wet hair: Dry hair will absorb products unevenly, creating frizz and inconsistent definition
- Use praying hands method: Hold sections between your palms and slide downward to encourage curl formation without disrupting your pattern
- Air-dry when possible: Heat styling can increase frizz; let your hair dry naturally if your schedule allows
- Refresh with water: On day two or three, dampen your hair with a spray bottle and reapply a small amount of product to refresh your curls
The wash and go is remarkably low-stress once you dial in your product formula. It’s the go-to style when you want to celebrate your natural texture with minimal effort.
5. Flat Twists
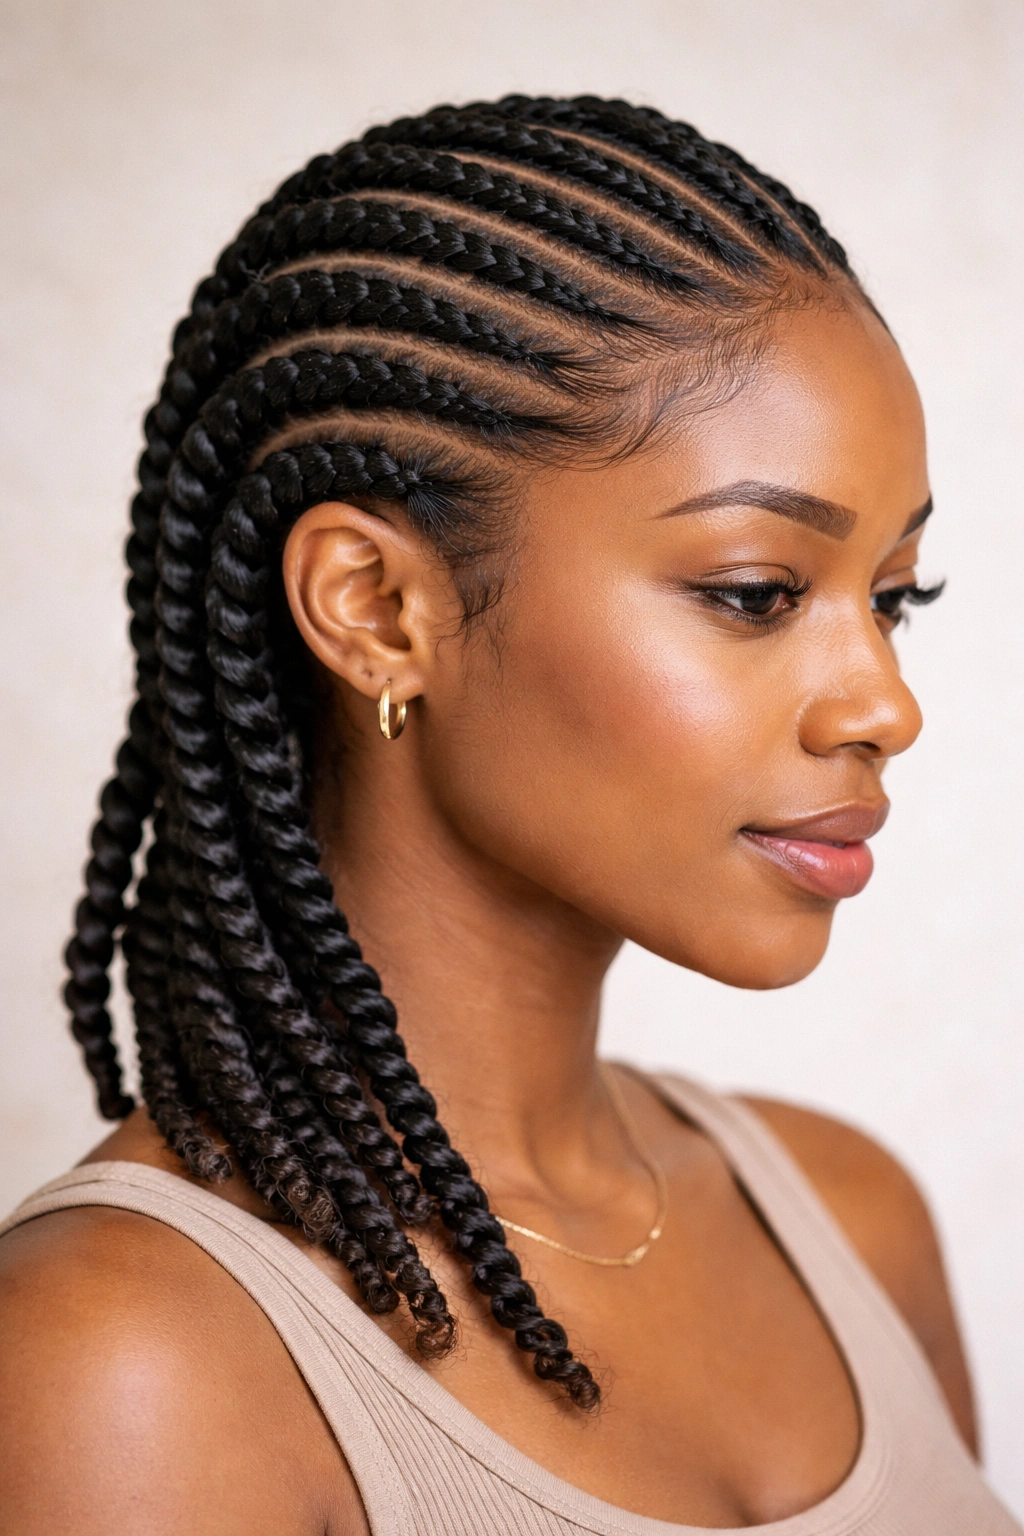
Flat twists are similar to two-strand twists, but instead of twisting two sections together while holding them vertically, you create a flatter braid-like pattern close to the scalp. This style is stunning, protective, and opens up countless styling possibilities. Many beginners find flat twists slightly more intuitive than regular twists because the flat, defined pattern makes it easier to control your technique.
The technique involves taking two sections of hair and twisting them around each other while feeding in additional hair from the sides, similar to a Dutch braid. The result is a defined, flat twist that sits close to your scalp and creates beautiful texture and visual interest.
Mastering the Flat Twist Technique
Start with a clean, detangled section of hair. Apply a styling cream or gel to increase grip and definition. Create a part line where you want your twist to begin, then separate the hair into two sections at the root. Twist these sections around each other while simultaneously feeding in small pieces of hair from one side of your parting line—this is what creates the flat, close-to-scalp pattern. Continue down the length of your hair, maintaining even tension so the twist looks clean and intentional.
Styling Ideas Using Flat Twists
- Protective updo: Create multiple flat twists and coil them into a bun at the nape of your neck for a polished protective style
- Twisted edges: Frame your face with one flat twist on each side, pinning them to the back of your head
- Zig-zag pattern: Create flat twists using a zig-zag parting line across your head for an artistic, fashion-forward look
- Mixed with regular twists: Combine flat twists at the roots with regular two-strand twists lower down for dimensional texture
Once you’ve practiced flat twists a few times, they become significantly easier because your hands develop muscle memory for the technique. The initial learning curve is worth the beautiful results.
6. Pineapple Method for Sleep
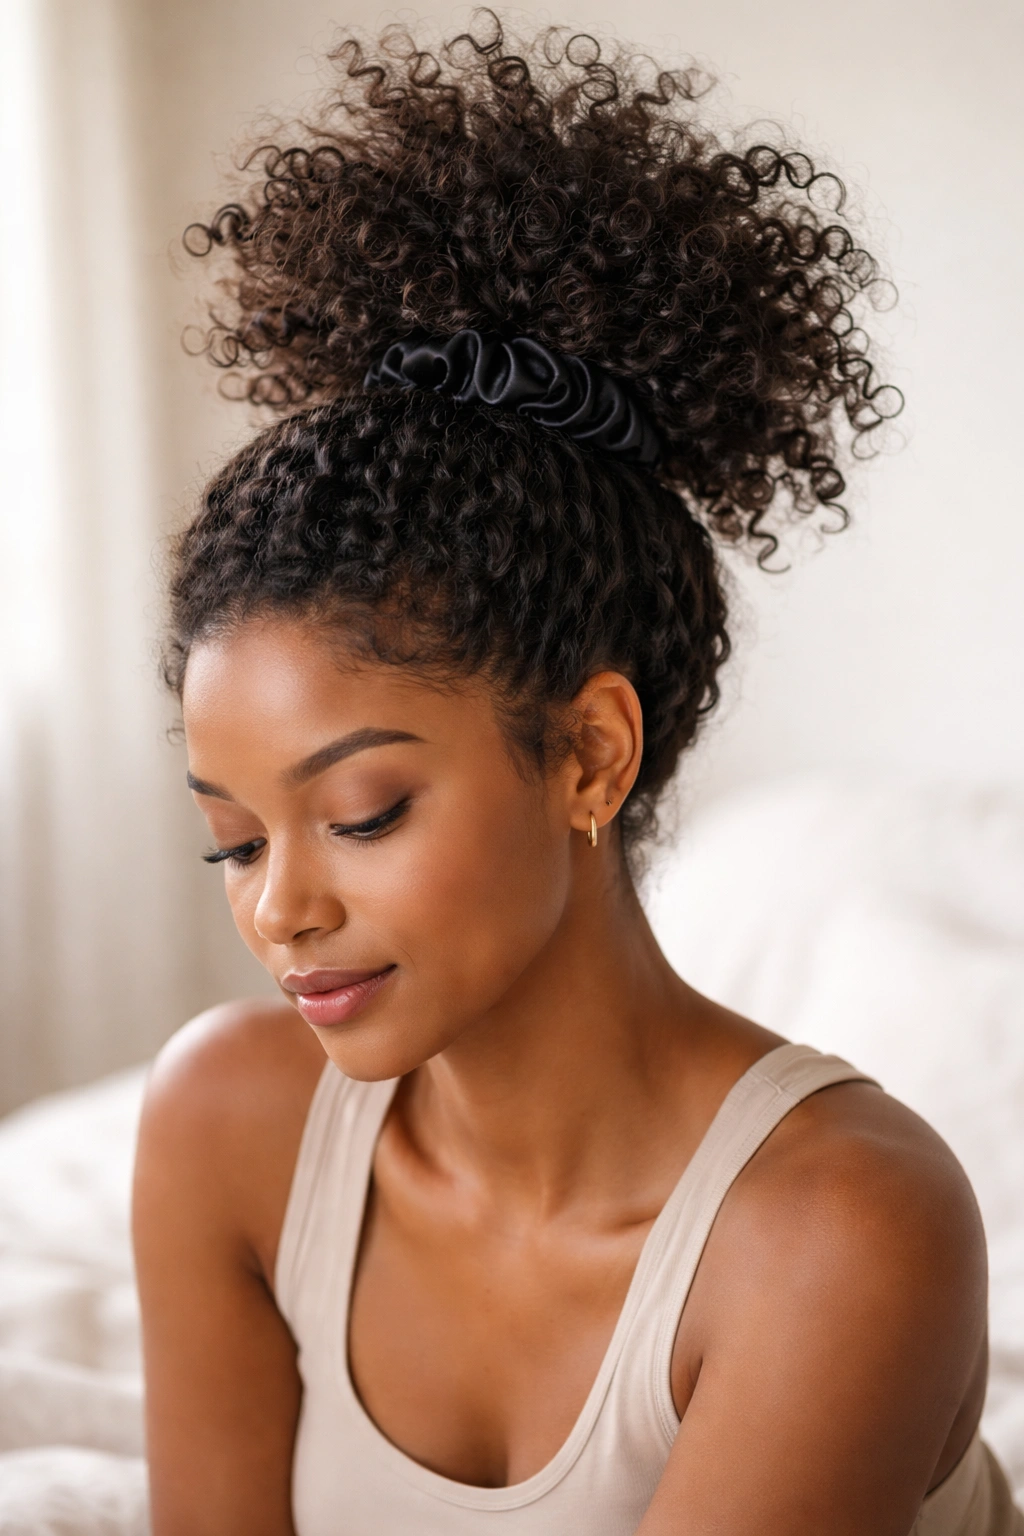
The pineapple method is a game-changing sleep style that protects your curls and allows you to extend the life of your style dramatically. This method involves gathering your hair loosely at the crown of your head—resembling the shape of a pineapple—and securing it with a silk scrunchie, fabric-covered elastic, or hair clip. The style sounds simple because it is, but the benefits are substantial.
The pineapple method works by keeping your curls in an elevated position while you sleep, which prevents the flat spots and frizz that happen when curls are pressed against a pillow all night. This is especially crucial when you’re trying to extend a style for multiple days or preserve a fresh wash and go.
Why This Sleep Method Transforms Your Curls
When you sleep on loose curls or twists, the weight and friction compress them, leaving flat patches and fuzzy texture. By holding curls up and away from the pillow, you maintain their shape and definition overnight. You’ll wake up to curls that look almost as good as they did before bed, which means less refreshing and manipulating required in the morning.
Proper Pineapple Technique
- Use a silk or satin scrunchie: These materials create less friction and prevent breakage compared to cotton elastics
- Position high but not tight: The gathering point should be at the crown of your head, but not so tight that you wake with a headache or tension headache
- Include all your hair: Make sure curls at the back and sides are gathered, not just the top section
- Consider a bonnet too: For extra protection, you can place a silk or satin bonnet over your pineapple for maximum preservation
The pineapple method is genuinely one of the most effective beginner tools for extending your styles and reducing daily manipulation. Once you start using it, you’ll wonder how you styled your hair without it.
7. Bantu Knots
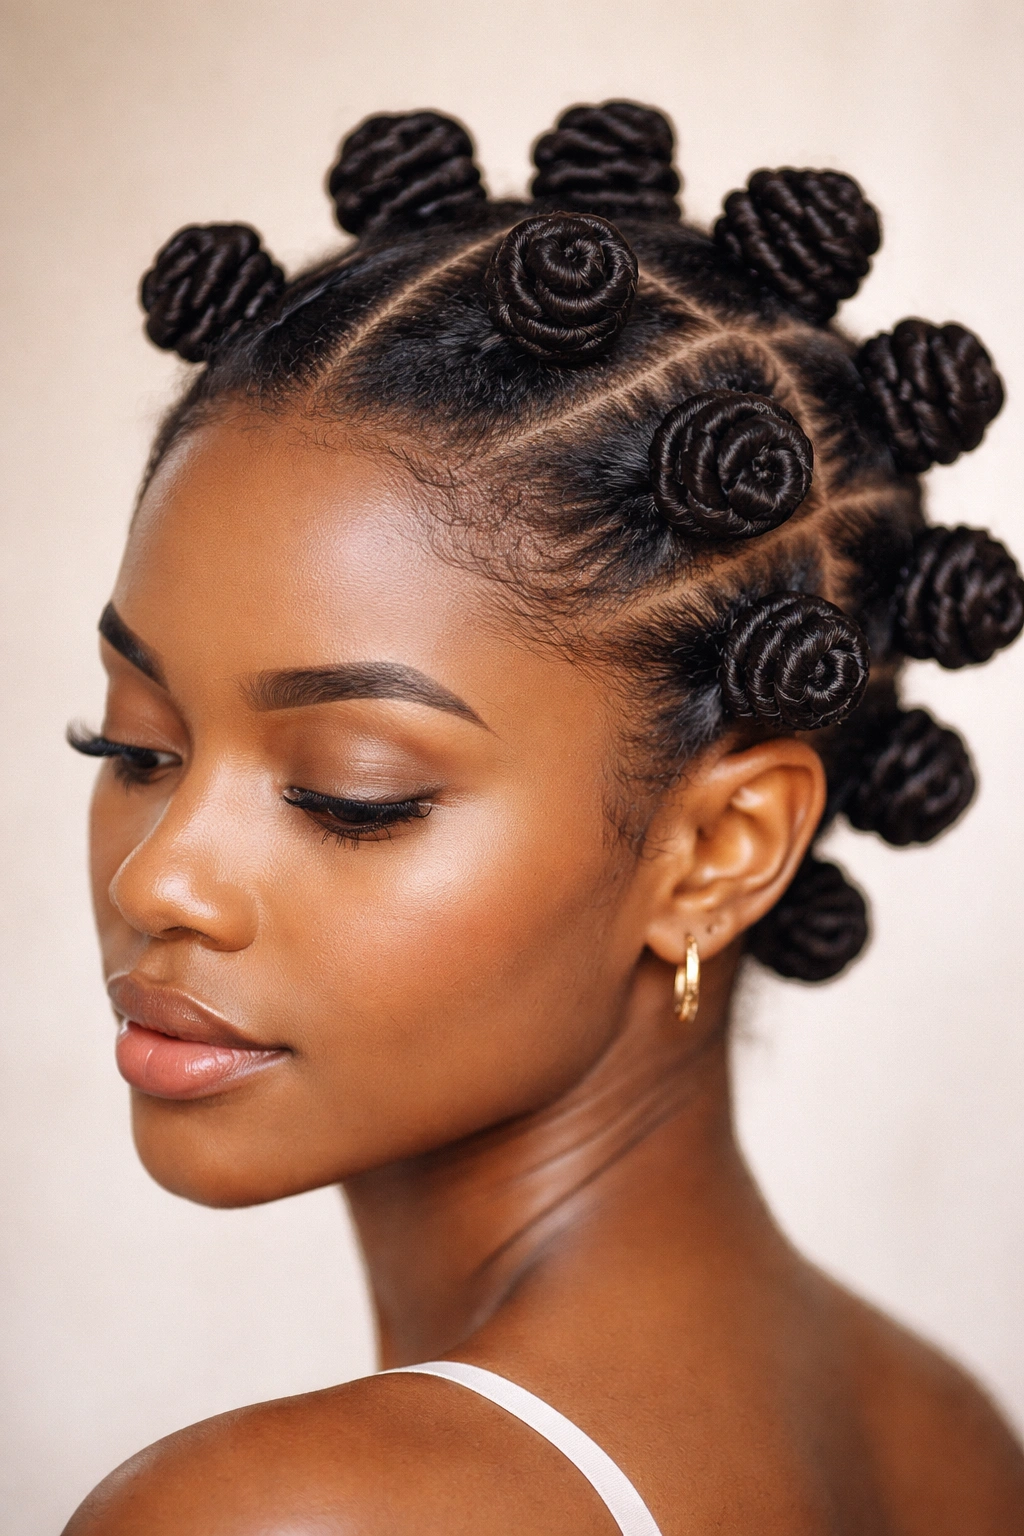
Bantu knots are small, coiled knots created by twisting hair and wrapping it around itself, resulting in a sculptural, textured look that’s equal parts protective style and artistic statement. They’ve been used for centuries across African cultures and hold deep significance in natural hair practices. When you unravel bantu knots after they’ve set, you get incredible curl definition and bounce that can last for days.
Creating bantu knots requires a bit more precision than some other styles, but they’re absolutely achievable for beginners who are willing to practice. The key is understanding the wrapping motion and having enough patience to work through all your sections.
Creating Bantu Knots Step by Step
Divide your hair into 8-12 sections, depending on how many knots you want and how much time you have. The larger your sections, the bigger your final knots will be. Apply a styling product to the first section, then two-strand twist it loosely from root to end. At the ends, begin wrapping the twisted section around itself, creating a coil that sits close to your scalp. Secure the end by tucking it underneath the knot or using a bobby pin. Repeat for each section until your entire head is covered with sculptural knots.
What to Expect After Unraveling
When you release bantu knots, you’re essentially unraveling twists that have set into a specific pattern. The results are incredibly defined curls with amazing bounce and texture. The longer you leave the knots in (ideally overnight or for 24 hours), the more defined your curls will be when you unravel them. You can wear the knots as a style themselves—they look especially striking when you mix different sizes or create patterns across your head.
Styling Variations
- Chunky bantu knots: Larger knots that cover your whole head quickly and create bold, statement-making curls when released
- Small detailed knots: Tiny knots that create intricate, tightly defined curls perfect for a more refined look
- Mixed sizes: Vary the size across your head for dimensional, artistic styling
- Worn as-is: You don’t have to unravel them—bantu knots themselves are a complete, beautiful style
Bantu knots teach you an important lesson about natural hair: sometimes the most beautiful final results come from having patience and letting your hair set into a specific pattern overnight.
8. Finger Coils
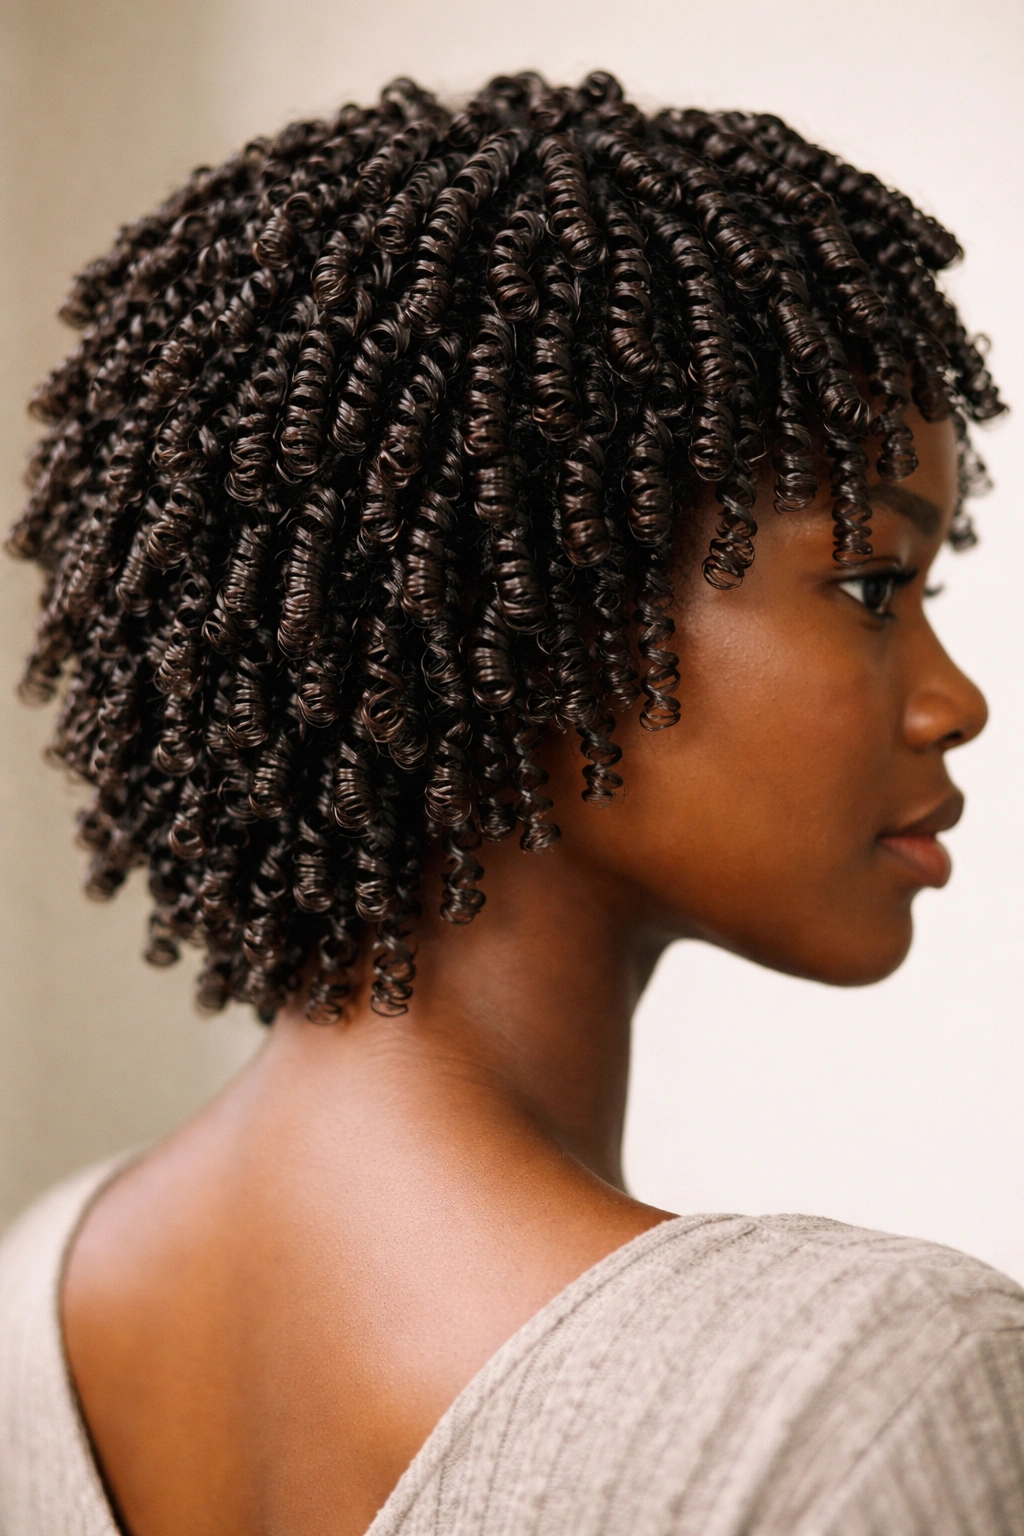
Finger coils are created by wrapping small sections of hair around your finger, creating a coil shape that delivers incredible definition and a delicate, intentional look. This style is particularly effective on curly and coily hair textures, and it’s deeply meditative to create—many people find the repetitive motion incredibly soothing. The results are absolutely worth the time investment, especially when you see how your curls transform as they dry and set.
Unlike twists, which you can complete relatively quickly once you develop the technique, finger coils require more time because you’re working with smaller sections. However, this also means you have more control and can create truly personalized styling. Each coil becomes a defined, bouncy curl when dry, and the overall effect is polished and intentional.
Technique for Creating Clean Finger Coils
Apply a curl-defining product to a small section of damp hair. Wrap the section around your index finger, starting at the root and spiraling downward. Once you reach the end of the section, gently slide your finger out, and the coil will hold its shape. Repeat this process across your entire head, keeping sections consistently sized for even, cohesive results. Allow the coils to air-dry completely—ideally overnight—before touching them.
Styling Coiled Hair
- Wear coils as-is: Individual coils are stunning on their own and create a sophisticated, intricate look
- Separate into a twist-out: Once fully dry, gently separate the coils with your fingers for a fuller, more voluminous texture
- Half-up style: Gather the top section of coils into a ponytail or puff while leaving the lower coils out
- Pin partially up: Use bobby pins to create a side-swept or off-centered style while keeping some coils loose
Finger coils require patience and intentionality, but they’re rewarding to learn because the results feel particularly special and thoughtful.
9. Half-Up Half-Down Style
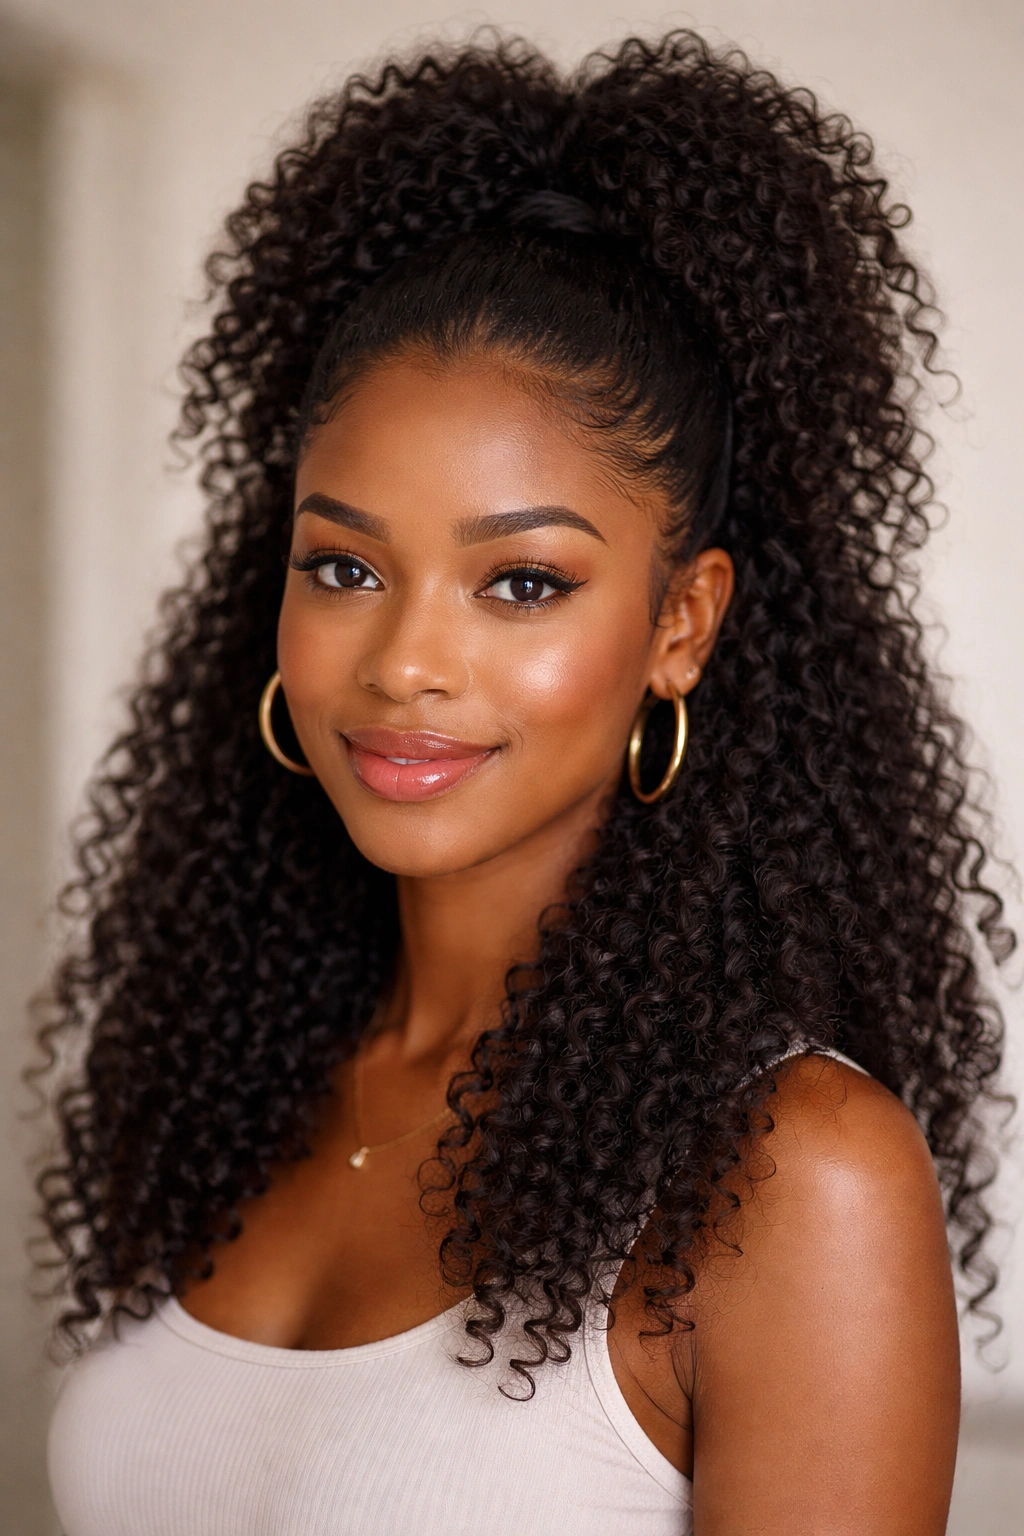
The half-up half-down style is exactly what the name suggests: you section off the top half of your hair and secure it away from your face, leaving the bottom half down and free. This style offers the best of both worlds—the polished, pulled-together feeling of an updo with the natural, flowing aesthetic of wearing your hair down. It’s incredibly versatile, works on every hair length and texture, and takes just minutes to create.
This style is perfect for days when you want your hair to look intentional without requiring a full styling routine. You can wear your down section in its natural curl pattern, create texture with twists or braids in the secured section, or mix both elements for additional dimension.
Creating a Half-Up Style with Twist Detail
Section off the top half of your hair using an invisible line that runs from temple to temple across the crown. Secure this top section into a ponytail, puff, or bun using your preferred method. For added interest, you can create small twists or braids within the secured section before gathering it, or braid around the ponytail holder for a more detailed look. Leave the bottom section of hair down in its natural state or add additional styling like defined coils or waves.
Variation Ideas
- With a braided crown: Create flat twists or regular braids in the top section, then gather them together
- Sleek vs textured: Keep the top section smooth and controlled while letting the bottom section be voluminous and textured
- With added accessories: Use a decorative clip, cuff, or hair stick to secure the top section for a more elevated look
- Partial twists: Twist just the sections immediately around your face before gathering the top section
The half-up half-down style is deceptively simple but carries enough visual interest that it feels intentional and styled. It’s perfect for transitioning between work and social settings without needing to restyle.
10. Low Bun with Twisted Detail
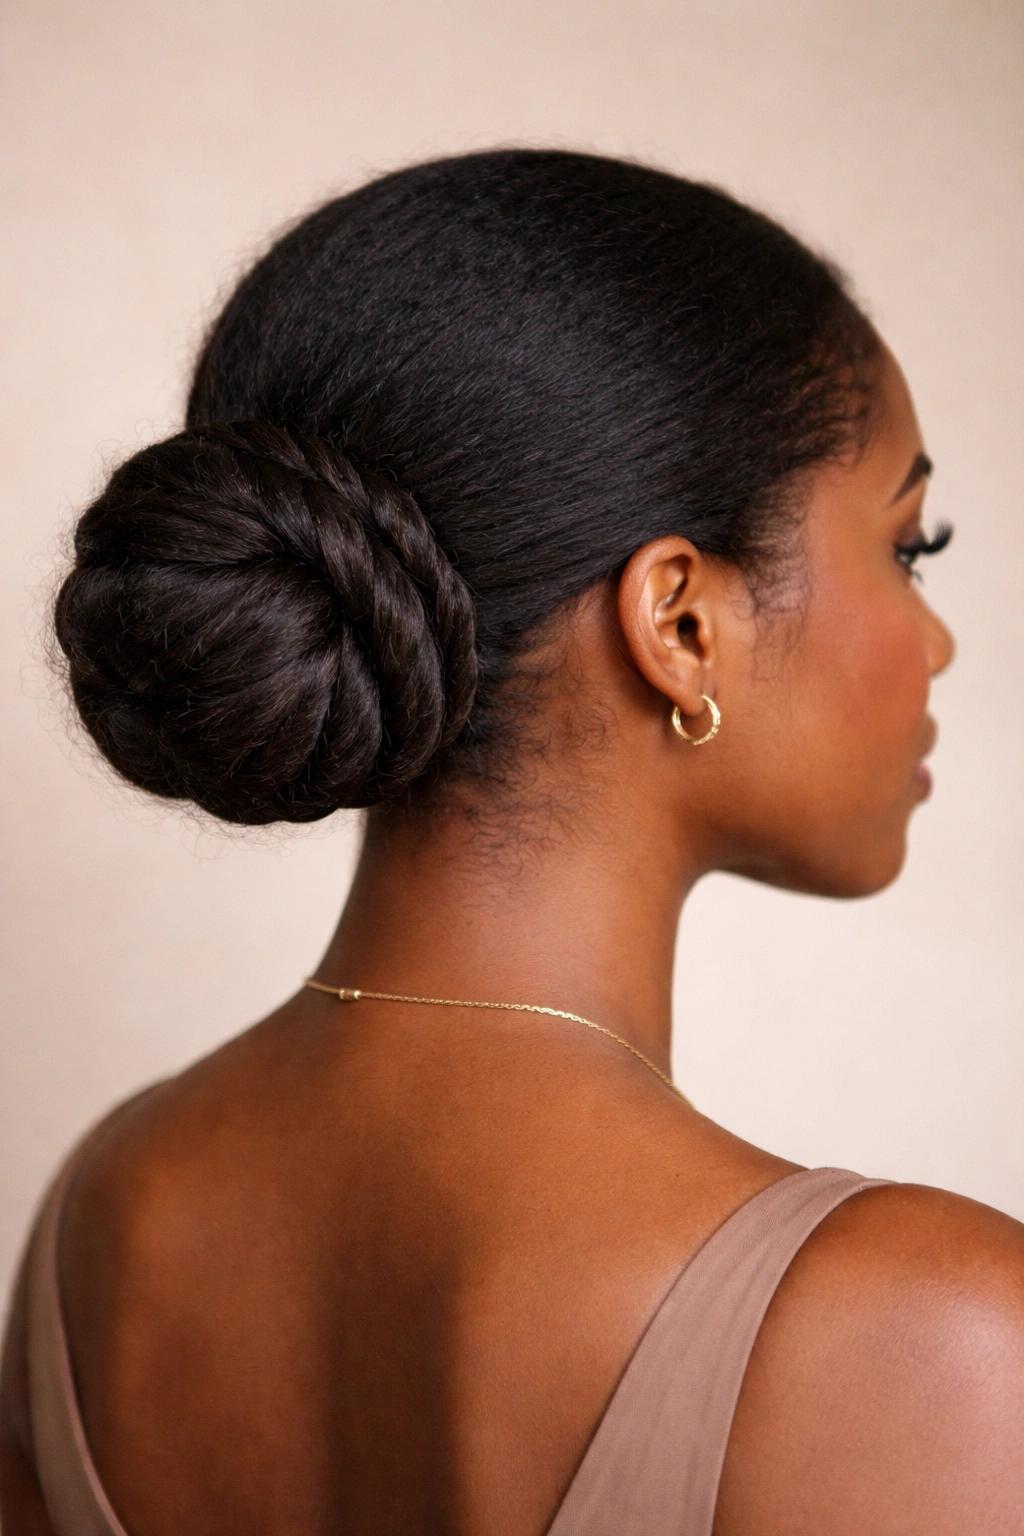
A low bun is a timeless protective style that works beautifully on natural hair at any texture or length. What makes this version special is the addition of twisted or braided detail, which transforms a basic bun into something more refined and interesting. This style is perfect for work, formal events, or casual days when you want your hair completely off your neck and face while still celebrating your natural texture.
A low bun sits at the nape of your neck, which is both elegant and practical. By incorporating twisted details, you add visual interest and dimension without requiring complex technical skills. The twisted elements can be created as you’re securing your hair into the bun, or they can wrap around the bun itself like a crown.
Building Your Low Bun with Twists
Gather your hair into a low ponytail at the nape of your neck, securing it with an elastic band. Divide the ponytail into 2-4 sections and create two-strand twists in each section. Once all sections are twisted, coil each twist around the base of the ponytail, securing them with bobby pins as you go. This creates a sculptural, dimensional bun with beautiful texture and intentional design. Alternatively, you can create the twists first before securing the ponytail, wrapping them around the gathering point for a slightly different aesthetic.
Design Elements That Elevate the Style
- Face-framing twists: Create smaller twists from the sections closest to your face for a softening effect
- Wrapped detail: Take one longer twist and wrap it around the entire bun multiple times for a rope-like effect
- Loose and undone: Gently pull at the edges of your twists for a softer, more romantic version
- Smooth crown, textured bun: Create a smooth or braided detail from your hairline back to the bun, then make the bun itself textured and full
This style is ideal for situations where you need your hair completely secured but want to feel like you’ve made an effort with your styling. The twisted detail transforms it from basic to beautiful.
Final Thoughts
Mastering these ten styles means you’ll have options for virtually any situation or hair mood. What you’ll likely notice as you practice is that many of these styles use similar foundational techniques—twists, braids, and gathering—which means your learning curve accelerates. The first time you create two-strand twists might take an hour, but by your fifth time, you’ll be done in 20 minutes.
The other thing that becomes clear when you’re building your natural hair styling repertoire is that there’s truly no “wrong” way to style your hair. Some days your puff might be smaller than others, your twists might not be perfectly even, or your bun might feel a little loose. These variations aren’t failures—they’re simply what your hair needs that day, and they’re all beautiful. Natural hair styling is a practice, which means you’re allowed to be imperfect and still end up with a style you love.
Start with the styles that feel most approachable to you, then gradually work your way toward the ones that require more patience or technique. Keep a spray bottle and some styling cream nearby so you can touch up or refresh any style during the day. Most importantly, remember that your hair is unique to you, so what works perfectly for someone else might need slight adjustments for your specific curl pattern and hair density. Trust your instincts, be willing to experiment, and give yourself grace as you develop these skills.
