



Afro buns have become one of the most versatile and protective styling options for textured hair, offering the perfect balance between polish and practicality. Whether you’re heading into a professional environment or getting ready for a weekend gathering, afro buns can be styled to match any occasion—from sleek and professional to creative and expressive. The beauty of the afro bun lies in its adaptability; the same basic technique can transform into countless looks depending on how you approach the foundation, placement, tension, and finishing details.
What makes afro buns so popular is that they’re not just a protective style—they’re a legitimate fashion statement. Unlike styles that require daily manipulation or intricate maintenance, a well-constructed afro bun can last several days while keeping your hair secure and your ends protected. At the same time, buns allow you to showcase your hair’s natural texture, volume, and dimension in ways that looser styles sometimes can’t. Whether you’re aiming for a boardroom-ready aesthetic or something more artistic and playful, there’s an afro bun variation designed for your exact need.
1. The Classic High Bun
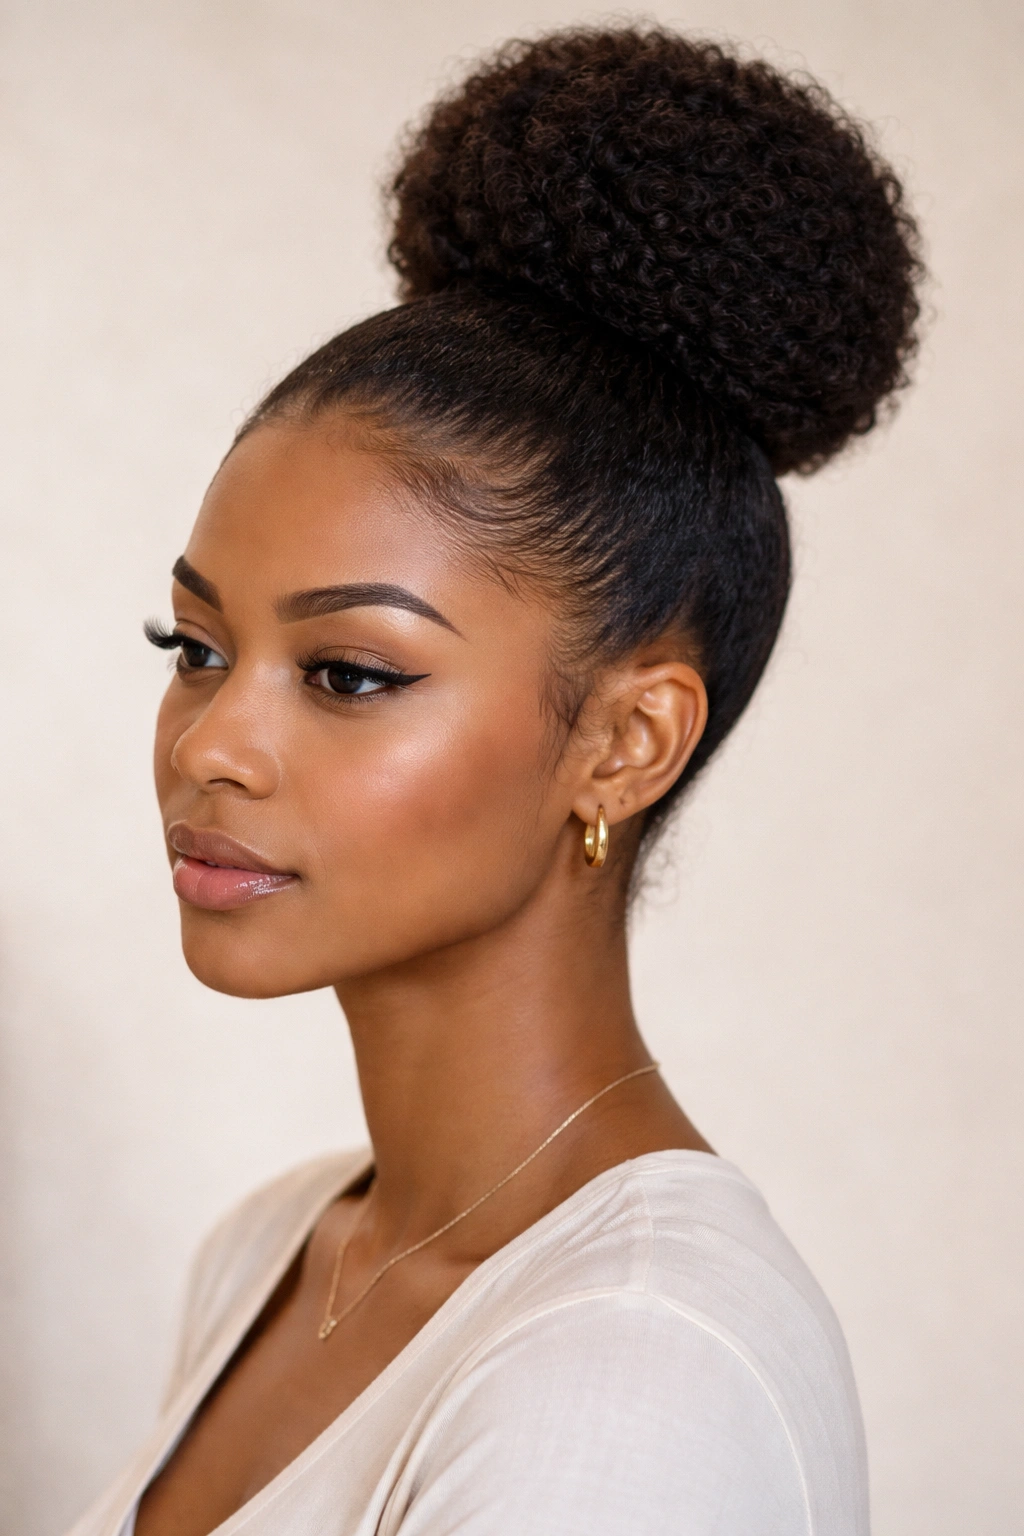
The classic high bun remains the most universally flattering and office-appropriate afro bun style, and for good reason. Positioned at the crown of the head, this bun creates an elegant elongation of the neck and face while projecting quiet confidence and polish. The key to making this work style feel genuinely professional—rather than severe—is maintaining softness around the hairline with a few wisps, and ensuring the bun itself has enough volume to feel intentional rather than tight.
Why It Dominates the Workplace
The high bun’s success in professional settings comes down to its visual clarity and neat appearance. The elevated placement naturally draws the eye upward and creates a clean silhouette that photographs well in professional contexts. Unlike some bun styles that can appear too casual, the high bun reads as intentional and put-together—it signals that you’ve taken care with your appearance without trying too hard. The volume that comes naturally from afro hair actually works in your favor here, making even a simple bun look textured and modern rather than sparse or unfinished.
How to Create and Maintain It
- Start with hair that’s been moisturized and detangled the night before, using a leave-in conditioner or lightweight oil to define your curl pattern
- Flip your head upside down and gather your hair at the crown using your fingers or a wide-tooth comb, creating a high ponytail with smooth edges
- Smooth down any flyaways around your hairline with a gel or edge control product—use a soft toothbrush or your fingertip to apply it gently
- Divide the ponytail into two or three sections and twist or coil each section loosely, then wrap them around the base of the ponytail to form the bun
- Secure with bobby pins tucked underneath the bun where they won’t be visible from the front
- Finish with a light hairspray if needed, but avoid oversaturating—afro hair often holds shape beautifully without it
Pro tip: If you notice frizz around your hairline by midday, keep a small jar of gel at your desk and do a quick touch-up during lunch. A five-second reapplication keeps you looking polished through the afternoon.
2. The Puff Bun
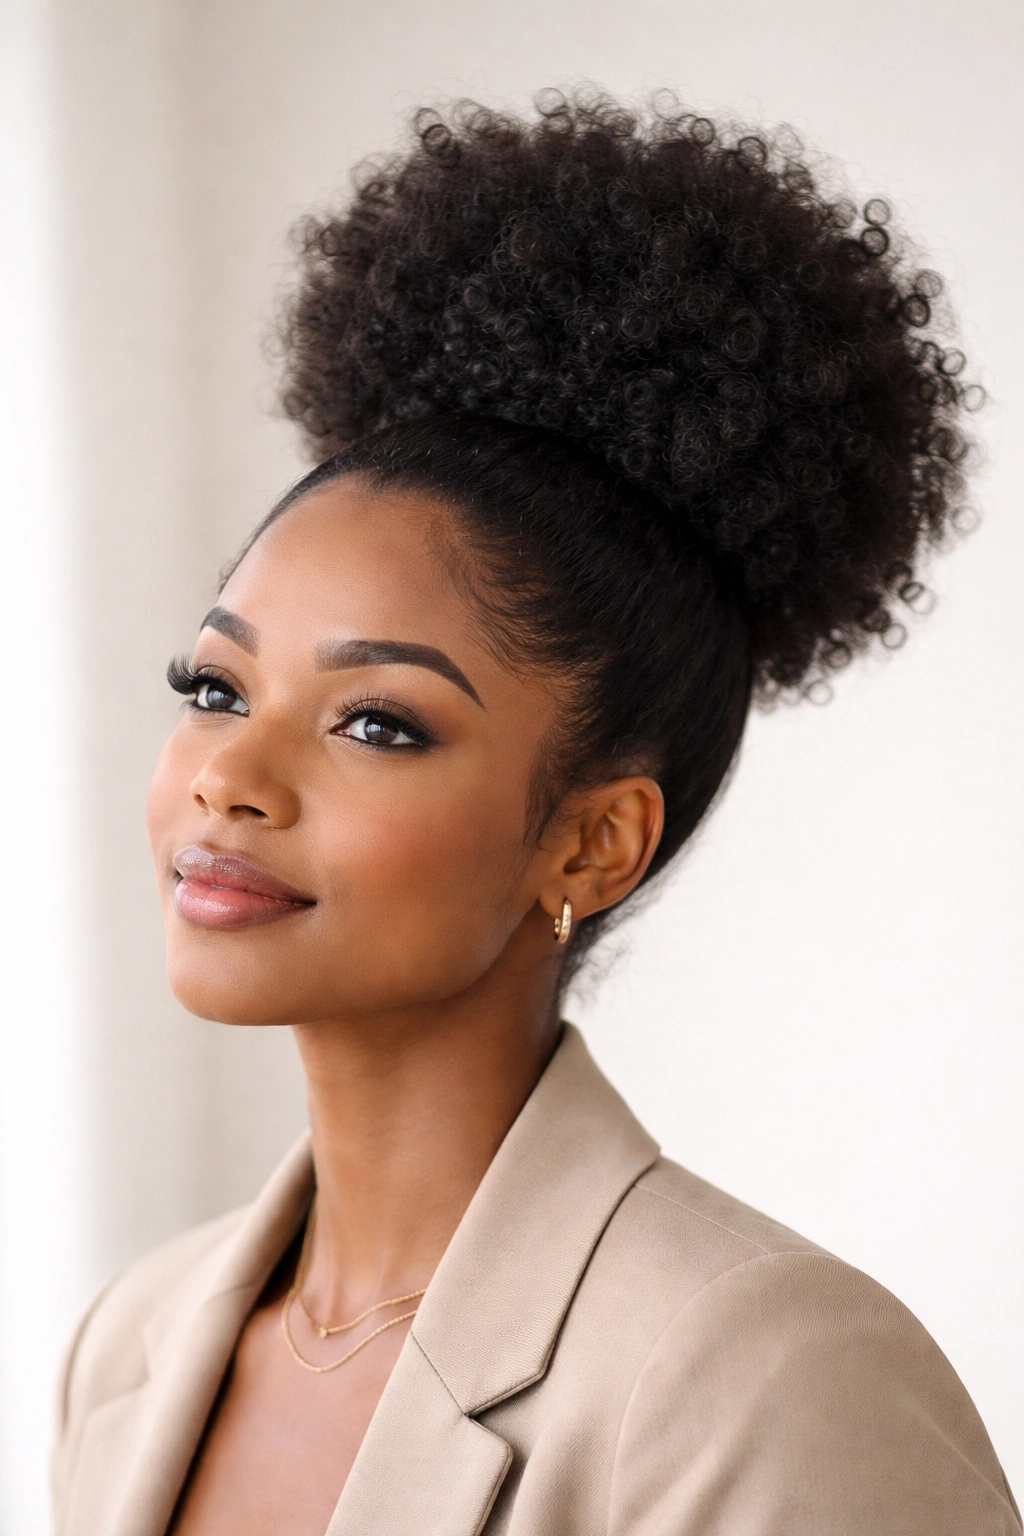
The puff bun—sometimes called the crown puff or top knot—celebrates the full, glorious volume of natural afro hair rather than constraining it. This style works by gathering hair at the crown and allowing it to bloom outward and upward into a rounded shape, rather than tucking and coiling it tightly. The result is a voluminous, textured bun that reads as confident and fashion-forward, making it equally at home in creative workplaces, casual Friday settings, or social gatherings.
What Makes It Stand Out
The puff bun’s magic lies in how it uses volume as its primary design element rather than sleekness. Because afro hair naturally has tremendous lift and density, a puff bun automatically looks fuller and more sculptural than a traditional bun made with straight hair. This style makes a statement without feeling overdone—it’s protective, it’s beautiful, and it’s unambiguously about celebrating your natural hair. The puff bun also requires less tension than many other styles, meaning you’re putting less stress on your hairline and edges while still achieving a polished look.
Styling Steps for Maximum Volume
- Detangle hair thoroughly using a wide-tooth comb or your fingers, starting from the ends and working upward in small sections
- Apply a curl-defining cream or mousse to damp hair and allow it to dry completely—this gives your curls definition and helps them maintain their shape throughout the day
- Use a soft hair tie to gather hair at the crown into a high ponytail, positioning it where you want your puff to sit
- Flip your head to the side and gently shake your ponytail to encourage hair to puff outward
- Use your fingers to massage and fluff the ponytail, separating curl clumps and encouraging fullness in all directions
- Secure with bobby pins underneath the puff where they won’t be visible, and add any decorative hair accessories if you’d like
Worth knowing: A puff bun looks best when your hair is freshly washed and styled, not when it’s been bunned for several days. If you’re planning to wear this style, refresh your curl pattern the night before by misting with water and reapplying your styling product.
3. The Low Side Bun
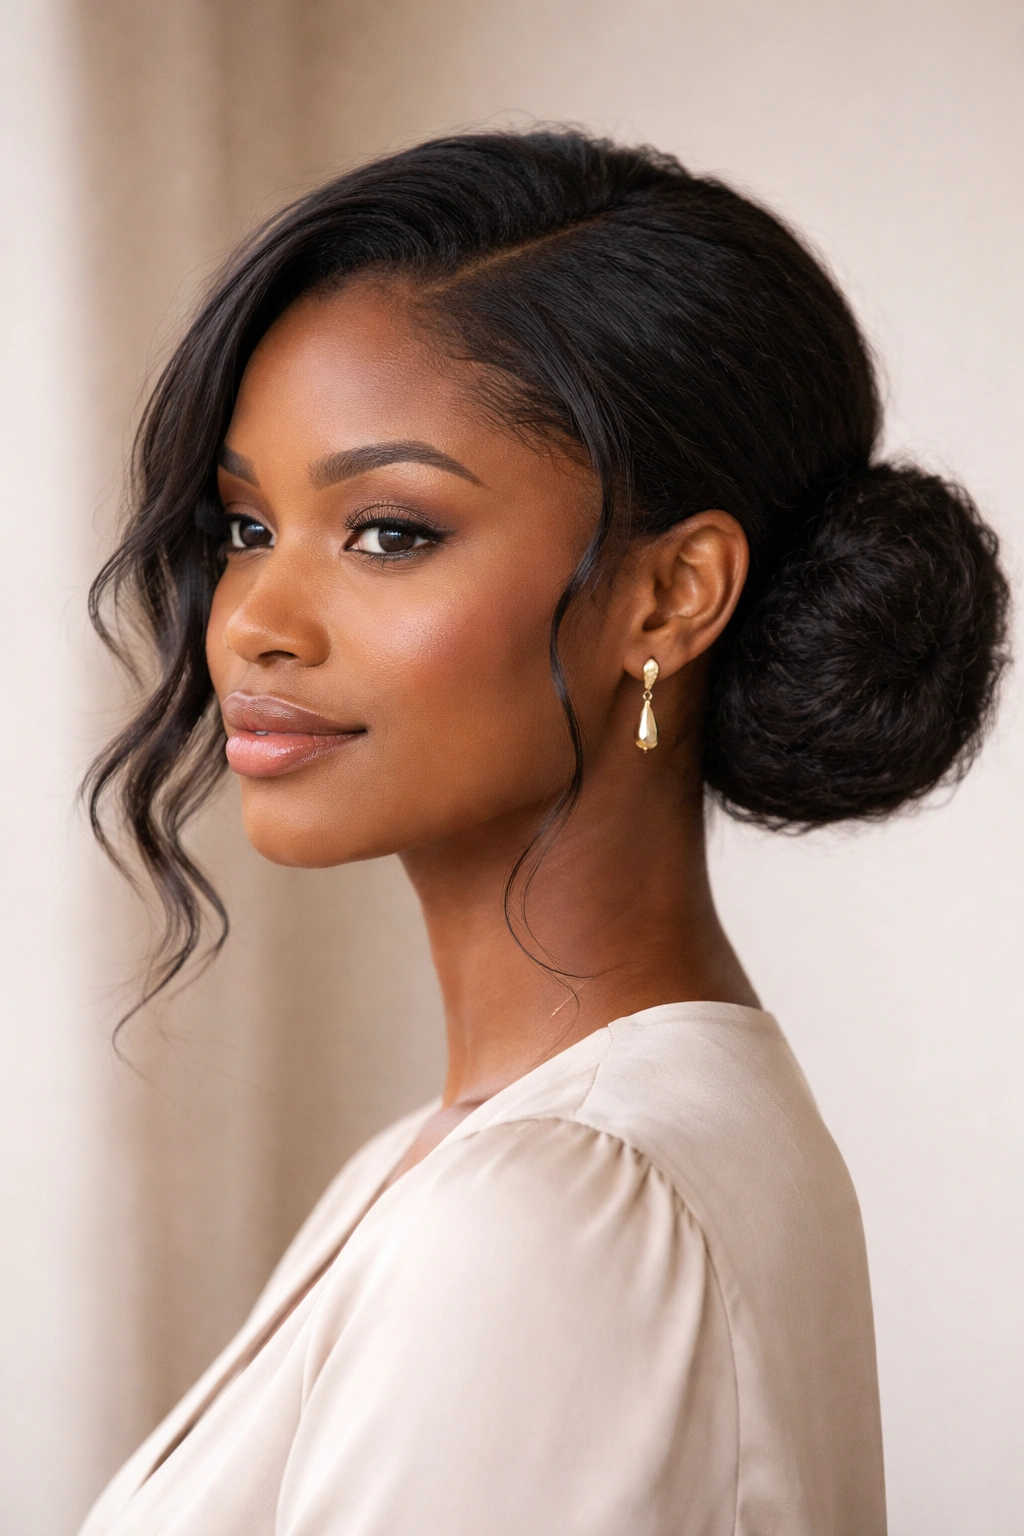
The low side bun offers an entirely different aesthetic from center-crown styles—it’s softer, more romantic, and surprisingly versatile across professional and casual settings. By positioning the bun to one side of your head at roughly ear level, you create asymmetrical balance that feels contemporary and intentional. This placement also naturally frames the face and softens your overall appearance, making it an excellent choice when you want to look polished without appearing overly formal.
How It Differs from High Placements
The low side bun projects approachability and creativity in ways the high bun can’t quite match. Because it sits lower and to the side, it feels less structured and more flowing—you can even leave a few larger waves or coils loose around the face for a deliberately undone quality. This style works beautifully in environments where personality and individuality matter as much as professionalism. The side placement also means you have a clear view from both angles; the bun doesn’t sit directly behind your head where it’s harder to assess and adjust throughout the day.
Step-by-Step Placement and Construction
- Detangle your hair completely and apply your preferred styling cream or gel to define your curl pattern
- Flip your head to the side you want your bun to sit on (typically the side with more naturally falling hair is more forgiving)
- Use your fingers to gather hair on that side, starting from the crown area and sweeping it toward your ear and shoulder
- Secure the gathered section into a low side ponytail using a soft hair tie
- Divide the ponytail into 2-3 sections and loosely twist each section
- Wrap the twisted sections around the base of the ponytail to form the bun, securing with bobby pins
Quick styling tip: Leave 2-3 larger pieces of hair loose around your face before gathering the rest into the side ponytail. These frame your features and add softness, preventing the style from looking too severe even though it’s essentially the same construction as a sleek side bun.
4. The Twisted Wrap Bun
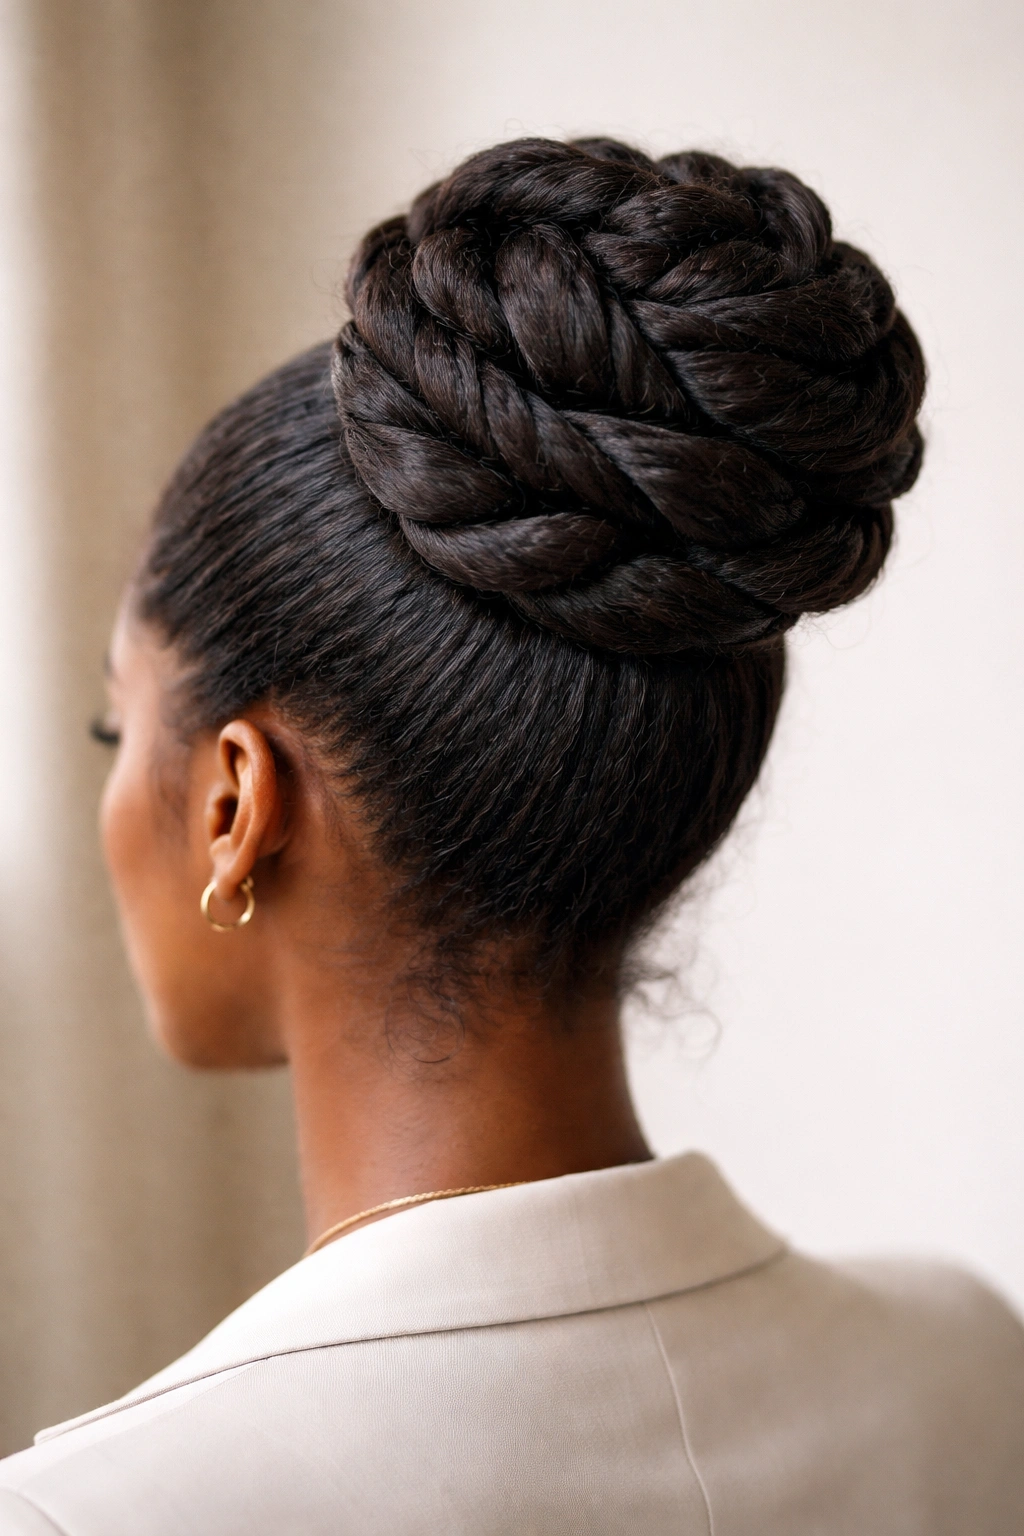
The twisted wrap bun takes the basic bun concept and adds visual interest through intentional texture and layering. Rather than creating one or two simple coils, this style involves twisting sections of your ponytail separately and then wrapping them around the base in overlapping patterns. The result is a bun with defined dimension and movement—it looks more intricate and handcrafted than a simple coil, while remaining totally achievable at home.
Why the Texture Elevates Your Look
The twisted wrap technique creates multiple layers of texture that catch light and create visual depth. Because each twist wraps around the base at slightly different angles, the bun doesn’t read as flat or one-dimensional. This added complexity automatically makes even a casual outfit feel more deliberate and styled. The texture also makes the bun more forgiving; small flyaways or slightly uneven sections become part of the design rather than imperfections, which means less time spent perfecting and more time actually living your life.
Creating Defined Twists
- Begin with a high or mid-height ponytail, using a strong elastic that won’t slip as you work
- Divide the ponytail into 4-6 sections depending on how much volume you want and how defined you want each twist to be
- Working with one section at a time, divide that section into two pieces and twist them around each other, keeping tension even so the twist stays neat
- Wrap the completed twist around the base of the ponytail, tucking the end underneath and securing with a bobby pin
- Repeat with each remaining section, positioning each wrap slightly overlapping the previous one to create a spiral effect
- Smooth any flyaways with a light gel and allow the style to set for 30 minutes before heading out
Pro tip: If you find that your twists are loosening throughout the day, you can mist them lightly with water and a bit of styling spray to reinvigorate the twist pattern. This works better than trying to re-twist, which can cause breakage.
5. The Sculptured Bun with Geometric Design
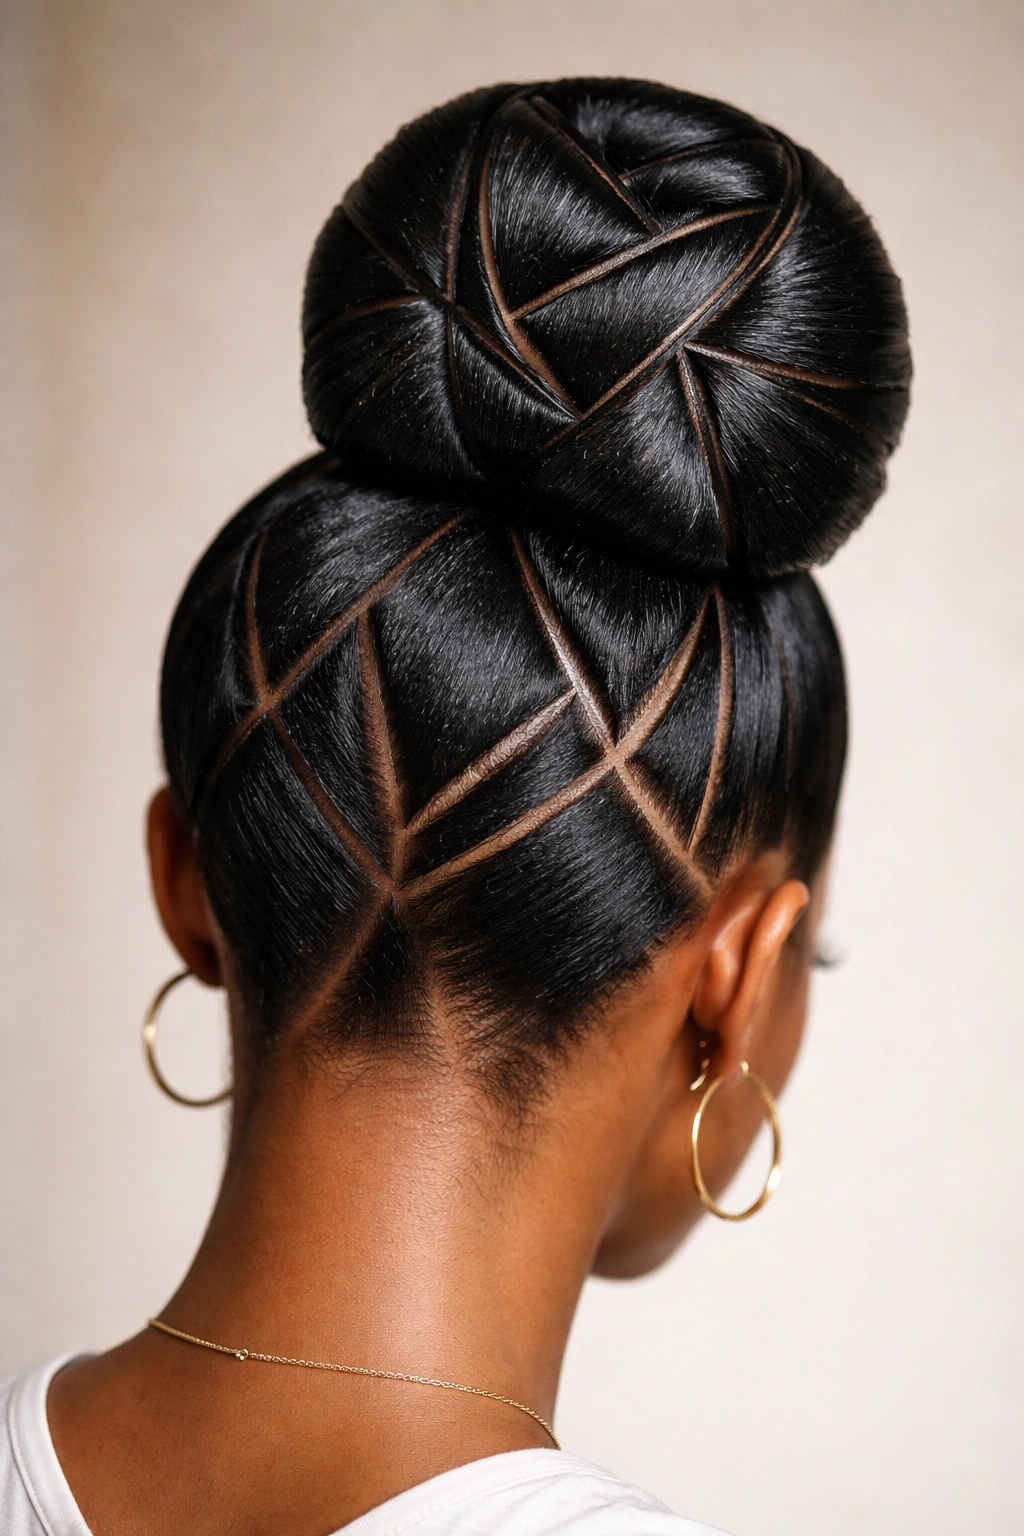
For those who want to make a genuine artistic statement, the sculptured bun with geometric design elements combines the protective function of a bun with the creative expression of an updo. This style involves creating a bun base and then using bobby pins, threading, or carefully arranged sections to create geometric patterns on top—think triangles, diamonds, or linear designs that transform the bun from functional to sculptural.
When to Wear It and Why It Works
This style shines at events where fashion and self-expression are celebrated—creative industry functions, social gatherings, performances, or any setting where your hair gets treated as an accessory and art form. The geometric elements make it impossible for the style to fade into the background; it’s a conversation starter that communicates confidence and creativity. Because the design is built into the structure rather than added through decoration, it reads as sophisticated rather than chaotic, even with bold patterns.
Building Geometric Structure
- Create a solid bun base using the classic high bun technique—smooth and tightly coiled
- Plan your geometric design before you start (sketch it out if that helps you visualize it)
- Use small bobby pins to create lines and patterns on the surface of the bun—pins placed vertically create lines, arranged in triangles create geometric sections
- You can also create divisions by threading thin string, yarn, or metallic thread around sections of the bun
- Part hair into geometric sections before bunning and bun each section separately, positioning them to form the overall design
- Secure all elements firmly so nothing shifts as you move throughout the day
Insider note: This style takes practice and patience the first few times, but it gets faster as you develop a technique. Set aside extra time the first time you attempt it, and don’t hesitate to take reference photos of designs you love so you can recreate them.
6. The Double Bun
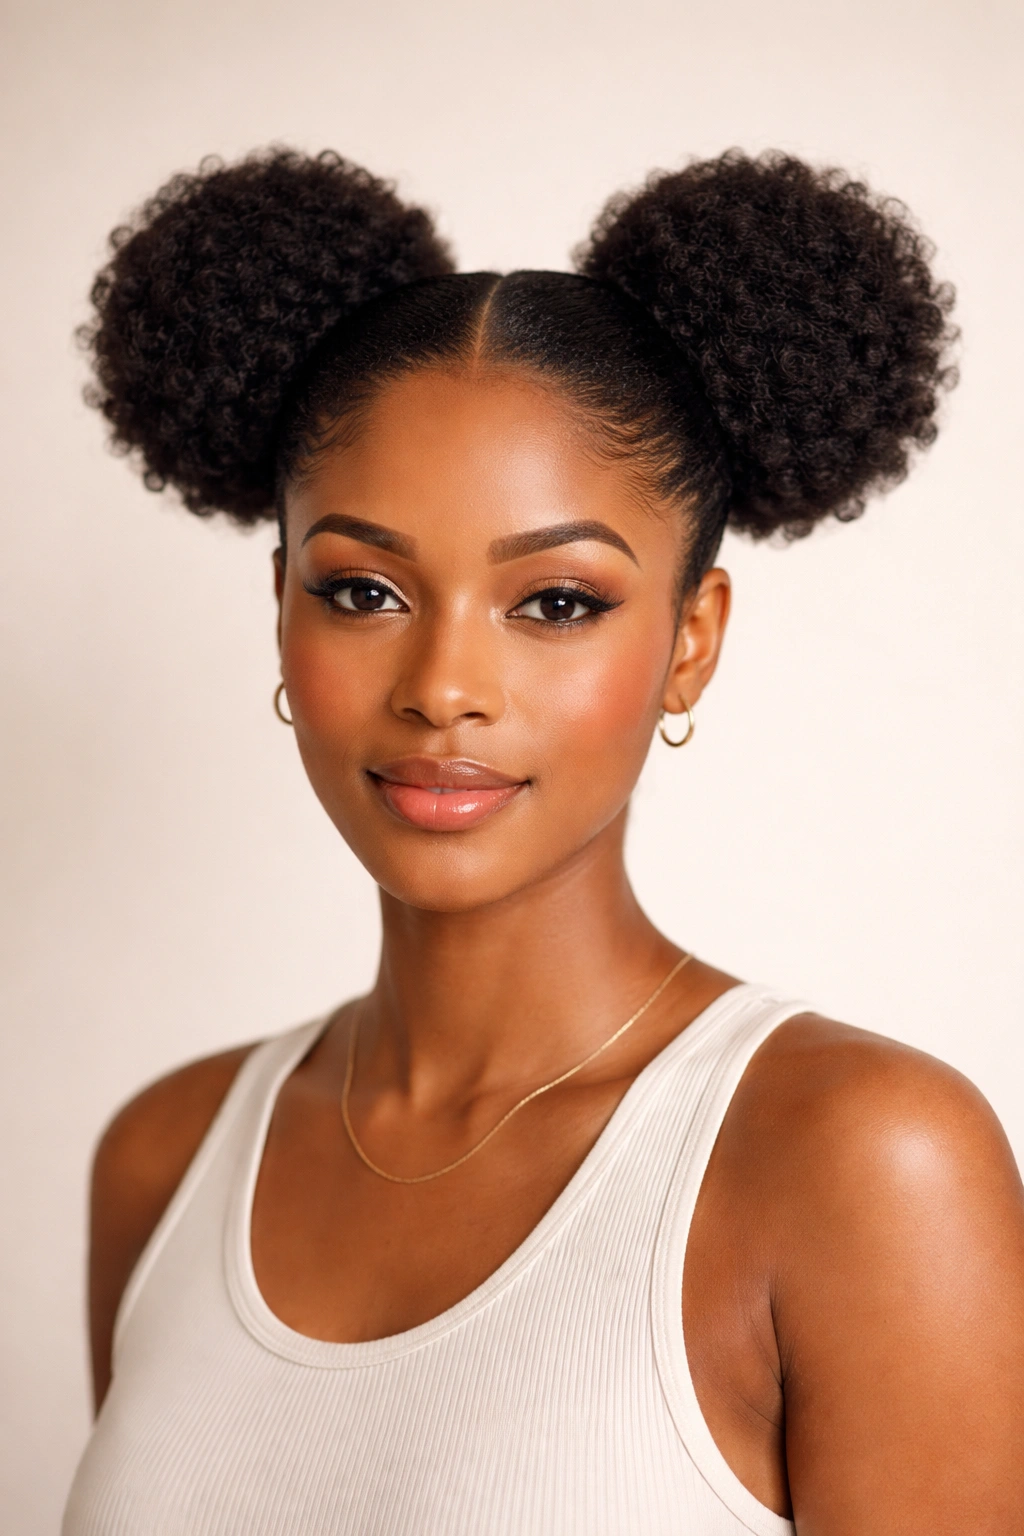
The double bun—sometimes called space buns or twin buns—brings playful energy while remaining surprisingly wearable for both casual work environments and weekend activities. Created by dividing your hair into two sections and bunning each one separately, positioned on either side of your head, this style immediately feels youthful and fun. What’s often surprising to people is how modern and intentional double buns look when executed with textured afro hair, rather than the more childish impression they might create with straight hair.
The Versatility Factor
Double buns work across a surprisingly wide range of situations. In creative offices or casual workplace environments, they read as confident and fashion-forward rather than unprofessional. At social gatherings, festivals, or weekend outings, they’re absolutely appropriate and visually interesting. The style also offers practical benefits—splitting your hair into two buns means less weight on any single point on your scalp, reducing tension on your hairline. The buns are also more stable individually than one larger bun, meaning less shifting and readjusting throughout the day.
Construction for Two Well-Balanced Buns
- Start with freshly washed, detangled hair that’s been styled with your curl cream or mousse
- Create a clean center part from your hairline to the nape of your neck using a rattail comb
- Gather the hair on one side into a high ponytail at the crown, securing with a soft elastic
- Repeat on the other side, ensuring both ponytails sit at exactly the same height so the buns balance visually
- Coil or twist each ponytail into a bun and secure with bobby pins
- Take a moment to ensure both buns have similar volume and positioning—stand in front of a mirror and view from multiple angles
What to know: Double buns work best on hair that’s been freshly styled. They also look better with some intentional volume rather than tight, flat coils, so embrace puffiness and texture rather than trying to make them sleek.
7. The Messy Top Knot Bun
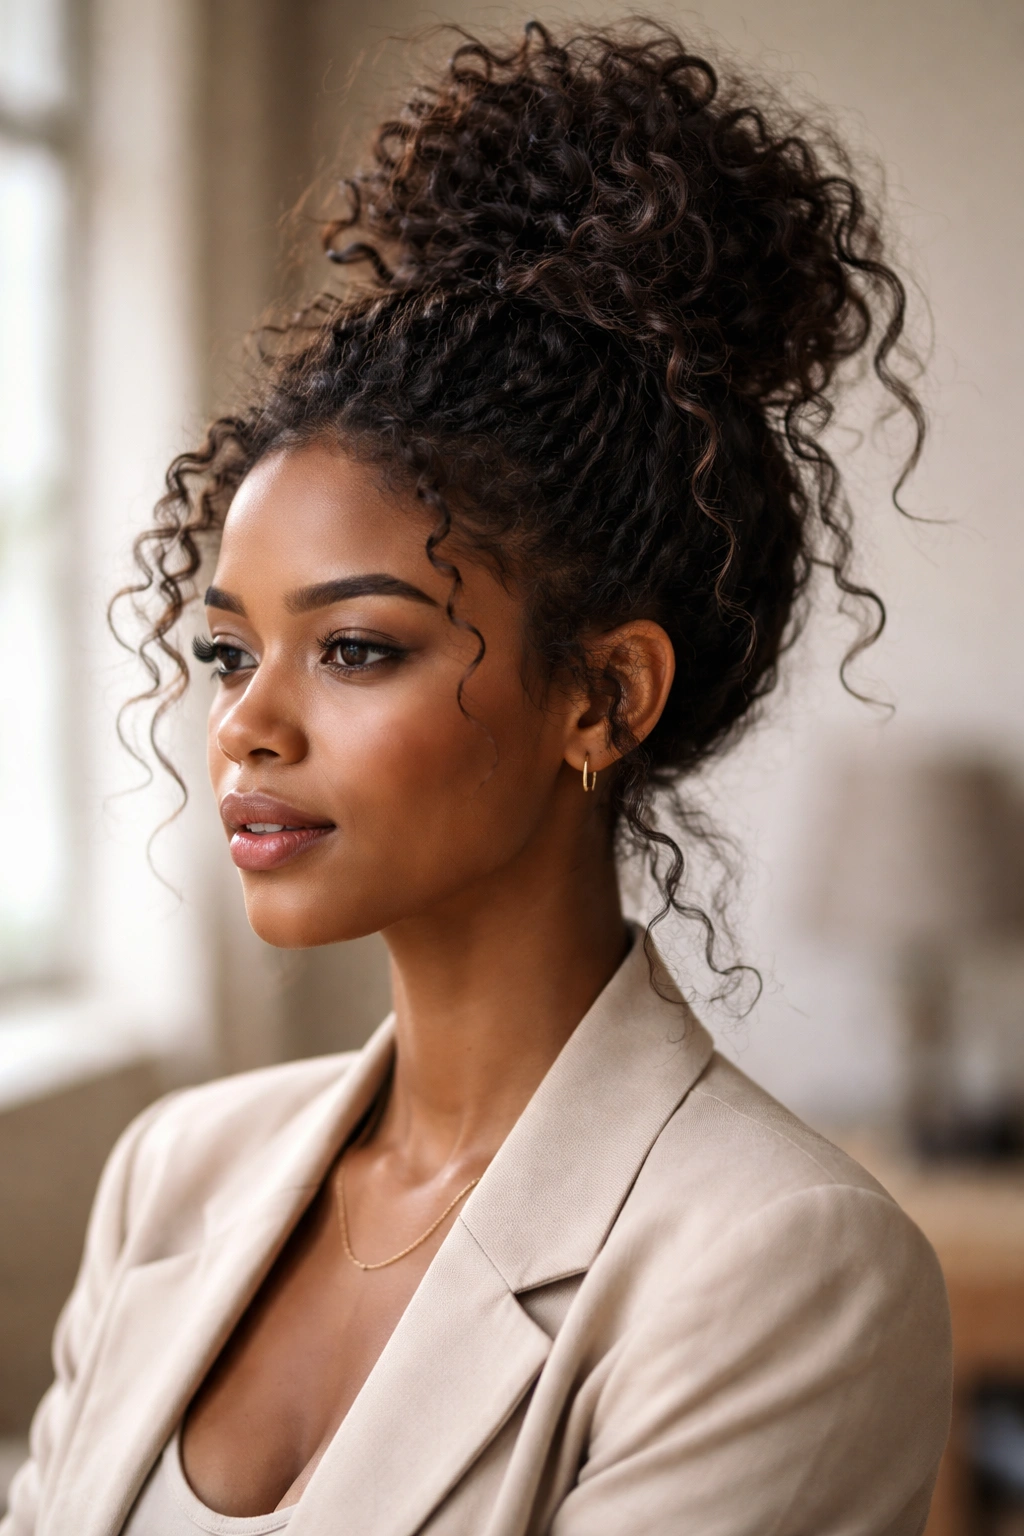
The messy top knot bun celebrates imperfection and texture in a way that feels effortlessly put-together, even though creating that effect requires some intention. This style deliberately allows pieces to fall loose, incorporates visible texture and dimension, and embraces a slightly undone quality. It’s the bun equivalent of saying “I have my life together but I’m not obsessed with perfection,” which works beautifully in many modern professional and social contexts.
Why Messy Doesn’t Mean Careless
The messy top knot is a design choice, not the result of neglect—there’s a significant difference between intentionally textured and actually unkempt. This style works because the bun base is solid and secure, but the surface is allowed to breathe and show texture. For people with afro hair, this style is genuinely easier to pull off than perfectly sleek buns, because the natural volume and texture are assets rather than problems to smooth down.
Creating Intentional Texture
- Apply a curl-defining product to damp hair and allow it to fully dry—you want defined, bouncy curls
- Create a high ponytail, but don’t pull it tight; leave it slightly loose for a softer look
- Loosely coil the ponytail without pulling each section taut; aim for relaxed, uneven coils rather than precise ones
- Leave a few 2-3 inch strands loose around your face and a few sections slightly uncoiled at the back of your head
- Secure everything with bobby pins but don’t smooth or perfect the surface; let texture show
- Optional: use a light hairspray to set the style, but avoid oversmooting with product
Real talk: This is the style to reach for when you want to look intentional without spending significant time styling. It’s also the most forgiving bun style if you need to adjust it midday or your hair shifts slightly—it already looks intentionally undone.
8. The Braided Crown Bun
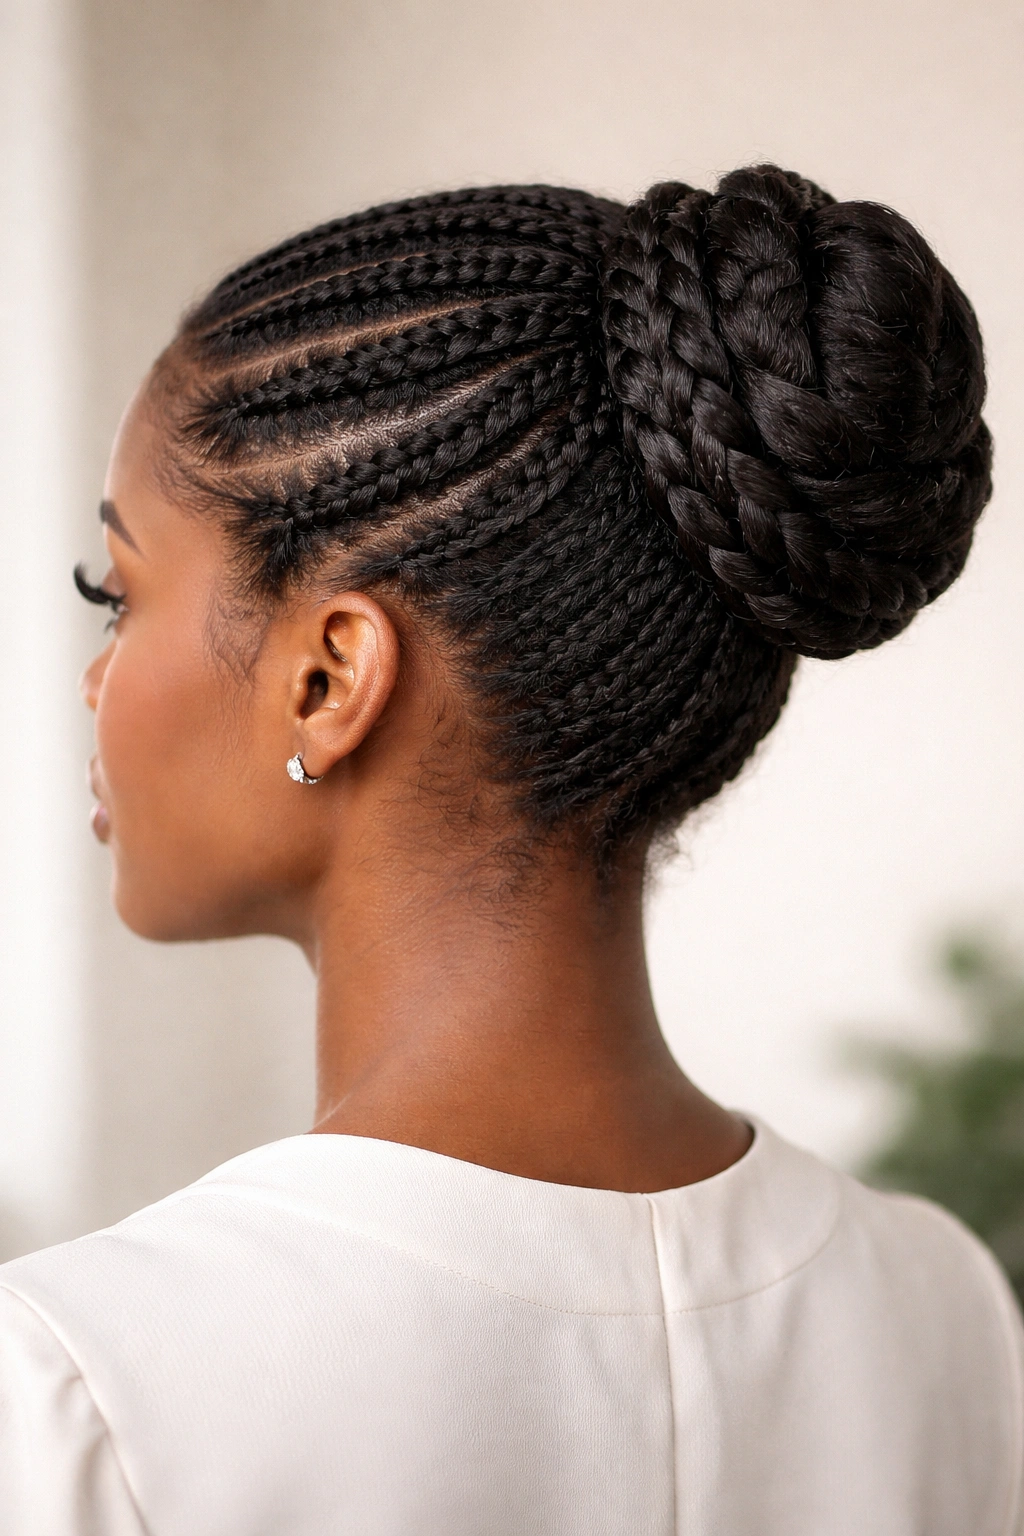
The braided crown bun combines the protective benefits of braids with the polished elegance of a bun, creating a style that works beautifully for both professional settings and special occasions. This involves creating one or more braids around the crown or scalp, gathering the braids into a bun at the back or crown, and securing the whole structure. The braids add dimension, visual interest, and a level of craftsmanship that makes even a simple bun feel more deliberate and special.
The Appeal Across Settings
The braided crown bun works in nearly every context because braids are universally read as intentional and well-styled. In professional settings, the braids signal that you’ve taken care with your appearance. At events, they feel special and thoughtful. The braids also provide stability—they anchor your bun in place more securely than a ponytail base alone, meaning less shifting and readjusting throughout the day. Additionally, braids offer their own protective benefits, keeping those strands of hair separate from the rest and reducing manipulation.
Braiding Foundation and Bun Assembly
- Detangle hair thoroughly and apply a light leave-in conditioner to make braiding smoother
- Create two or three cornrows or regular braids around your scalp (cornrows work best if you want a sleek look; regular braids add more texture and volume)
- Gather the ends of the braids at the crown or nape of your neck
- Coil or twist the braided sections together and secure with bobby pins to form the bun
- You can leave the braids visible on top of the bun for a braided crown effect, or hide them completely beneath the coiled bun depending on your preference
- Smooth down any flyaways and secure everything firmly
Worth knowing: Braided crown buns actually last longer than loose-based buns because the braids themselves provide structure. If you create this style on a Sunday, it can genuinely hold well through at least Tuesday with minimal readjusting, making it an excellent choice for longer-lasting protective styling.
Final Thoughts
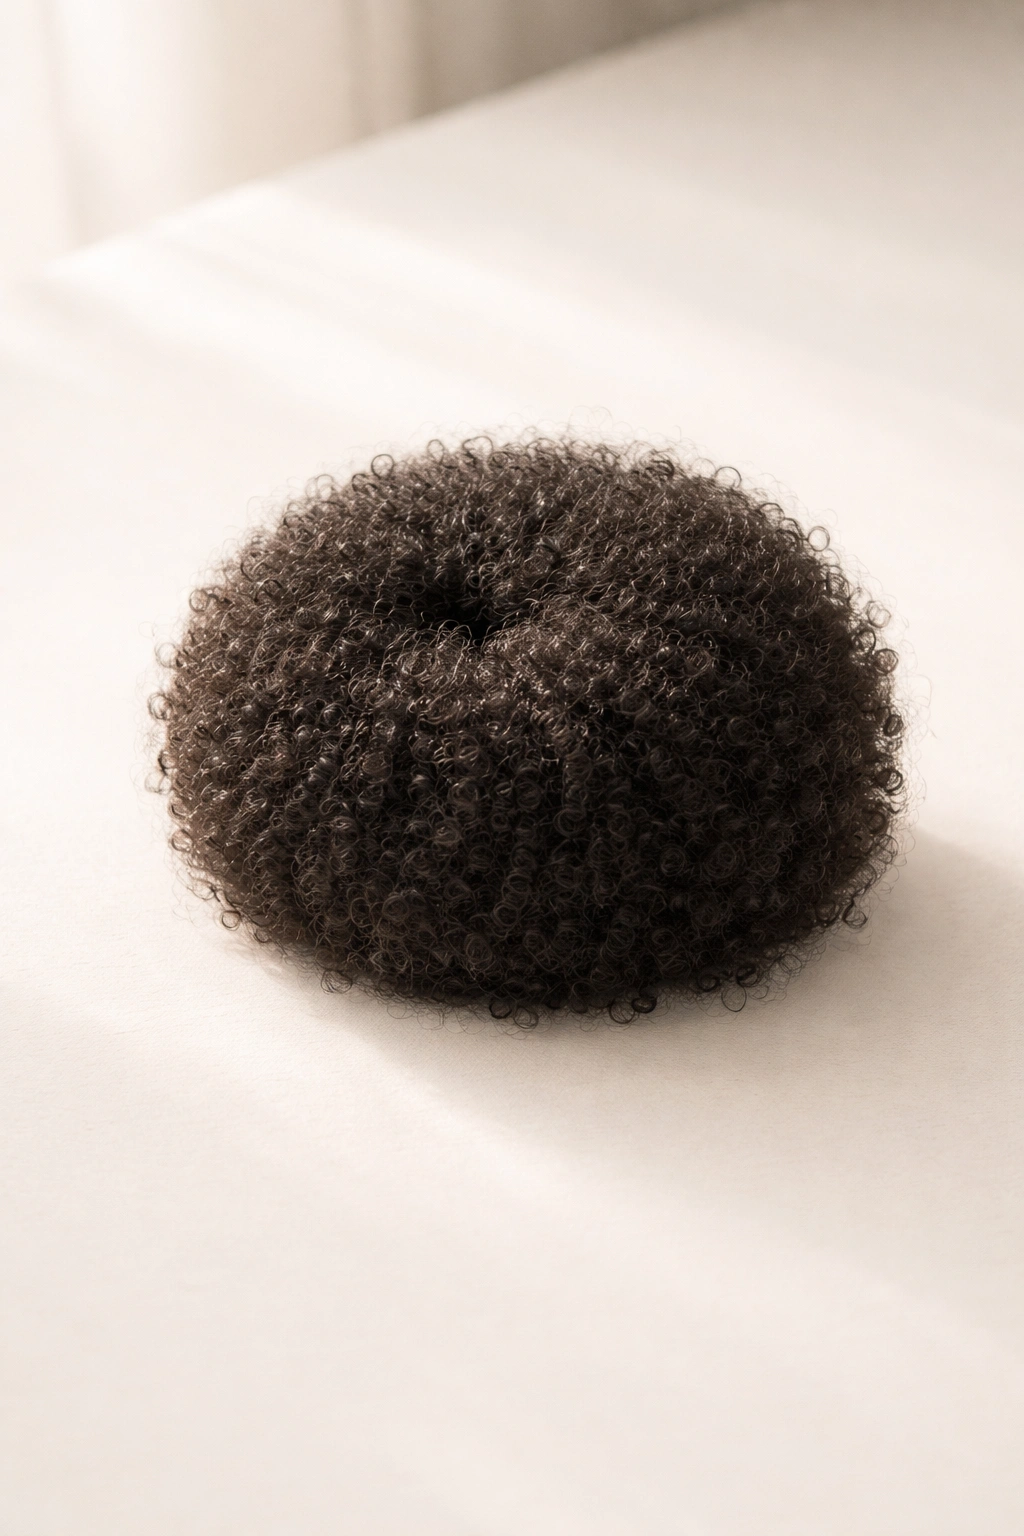
Afro bun styles offer something that few other hairstyles can match—the ability to be simultaneously protective, professional, creative, and beautiful. Each of these eight styles exists on a spectrum from sleek and minimal to textured and expressive, meaning there’s genuinely a version for every occasion and every mood. The best part about exploring different bun styles is that the basic technique remains consistent; you’re really just playing with placement, finishing techniques, and how much texture and looseness you allow to show.
The most important thing as you experiment with these styles is paying attention to what your hair actually wants to do rather than fighting against your natural texture. A puff bun works best when you let your hair be as voluminous as it naturally is. A twisted wrap bun looks beautiful because the twists showcase dimension. Even the sleek high bun works better when you accept that your edges might not be absolutely smooth, and that’s fine—that’s just what healthy afro hair looks like.
As you try each style, take notes on which ones feel most comfortable, which ones last the longest without readjusting, and which ones make you feel most like yourself. You’ll quickly discover that you have a few go-to styles that become your reliable options on busy mornings, and a few special occasion versions you love wearing when you have more time. The beauty of afro bun styling is that mastering these basics gives you enough flexibility to create something that feels fresh and intentional every single day.
