



Getting ready to do your hair at home doesn’t mean settling for boring or basic. Natural hair holds endless styling possibilities, and the beauty of afro hairstyles is that many of the most stunning looks require nothing but what you already have — your hands, some natural hair products you can make or buy affordably, and a willingness to learn technique. Whether you’re dealing with tight coils, loose waves, or anything in between, there are styles that’ll not only look incredible but also make your hair healthier. The confidence boost that comes with a fresh, intentional hairstyle is real too.
Home styling gives you control over tension, timing, and exactly how much manipulation your hair gets — something that matters more for natural hair health than most people realize. You’re not paying premium salon prices every few weeks, and you’re learning skills that stick with you. The techniques in this guide are designed for realistic home application, without requiring specialized tools or professional equipment you’d need to invest in. Each style balances visual impact with genuine wearability, so you’re not just looking good for Instagram — you’re rocking something you can live in comfortably for days or weeks.
1. Classic Afro
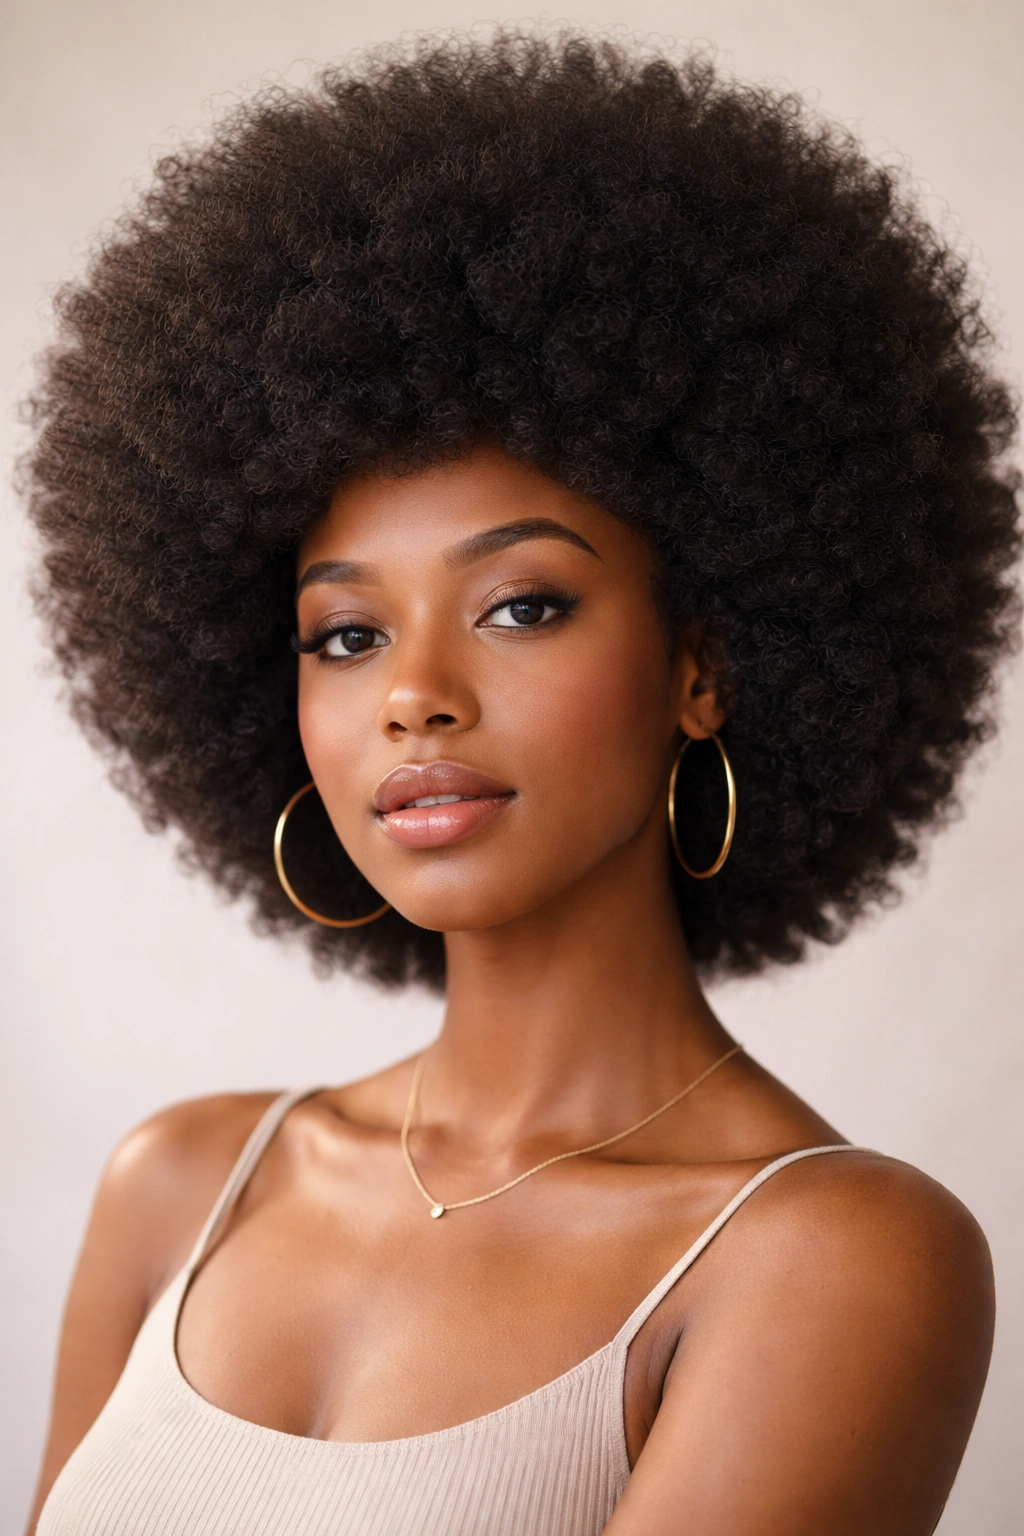
The crown jewel of natural hair styling, the classic afro celebrates texture in its purest form. This style works best when your hair is moisturized, stretched slightly to add volume, and shaped deliberately with a pick or wide-tooth comb. The magic isn’t in complicated steps — it’s in healthy hair and understanding how to lift your curls away from your scalp to create that full, rounded silhouette.
Why This Look Never Goes Out of Style
The classic afro makes a statement that says your natural texture is exactly enough. There’s something powerful about wearing your hair in its most unmanipulated form, and the versatility is genuinely remarkable. You can shape it into different silhouettes depending on your mood, add accessories without commitment, and switch up your look in minutes without any additional styling work.
How to Build Your Best Afro
- Start with clean, moisturized hair — ideally 2-3 days post-wash when your curls have settled and absorbed products fully
- Apply a lightweight leave-in conditioner to damp hair, focusing on the mid-lengths and ends
- Use a wide-tooth comb or pick to gently detangle from the ends upward, working section by section
- Pick through your hair from the roots outward, lifting as you go to create volume and shape
- Use a soft-bristle brush to smooth the outer edges if you want a more polished finish, or leave it textured for a more natural look
- Finish with a light hairspray or gel to hold your shape throughout the day
Pro tip: Flip your head upside down while picking to naturally lift your roots and create maximum volume without pulling or straining your hairline. Your hair will look fuller and rounder with significantly less effort.
2. Twist-Outs
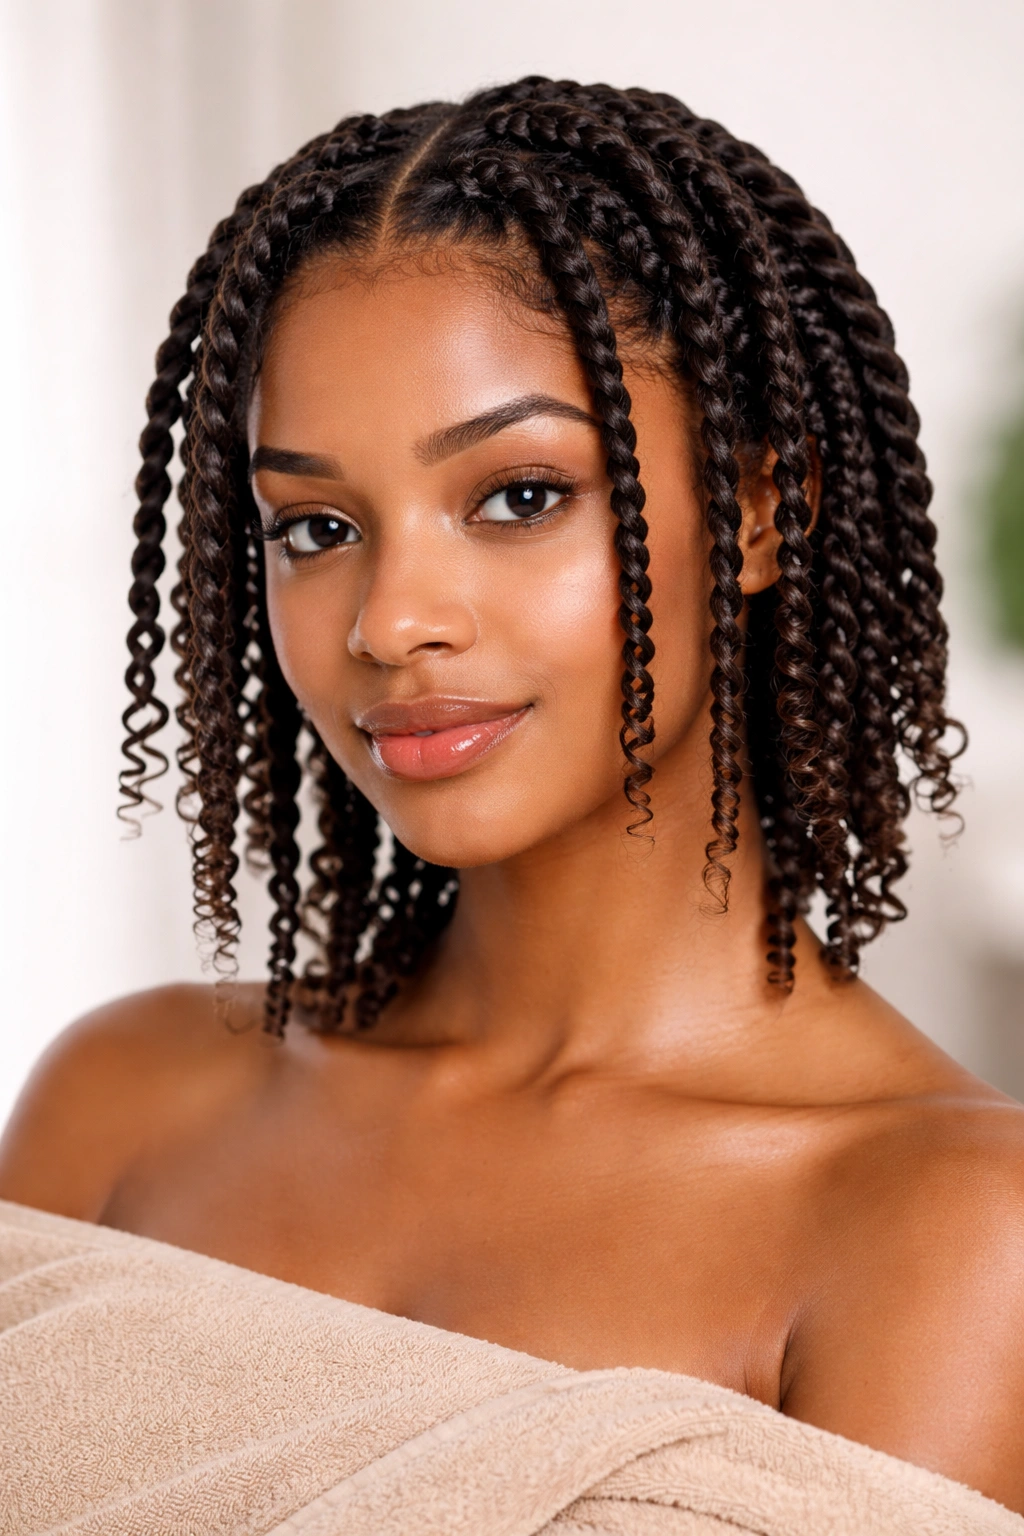
Twist-outs are a gateway protective style that creates defined texture and hold without manipulation during daily wear. You create the style while your hair is wet or damp by twisting sections around each other, then unravel those twists once they’re fully dry. The result is beautiful coiled spirals and a style that lasts easily for five to seven days before needing refreshment.
The Science Behind Why Twist-Outs Hold
When you twist wet hair, you’re setting a temporary curl pattern into place. As the hair dries, it holds that pattern, and the twists function like a gentle set — no heat required. The tighter you twist and the longer you leave them in, the more defined your curls become. Looser twists create a softer, wavier look instead of tight coils.
The Step-by-Step Process
- Wash and condition your hair, leaving it very wet
- Apply a twisting cream or curl-defining gel throughout, working in small sections
- Section your hair into 6-12 parts depending on desired definition (more sections = tighter twists)
- Starting at the root, twist two small subsections around each other all the way to the end, rolling the ends together for a point
- Wrap each completed twist around your finger to set the curl pattern and secure the end
- Air dry completely — ideally overnight or for at least 8-12 hours
- Gently unravel each twist when completely dry, starting at the bottom and working up
- Shake out with your fingers for volume and definition
- Lightly mist with a styling spray to lock in the pattern
Insider note: Twist-outs last significantly longer if you palm-roll the ends while unraveling rather than just pulling them apart. That extra tension helps set the curl pattern into place.
3. Bantu Knots
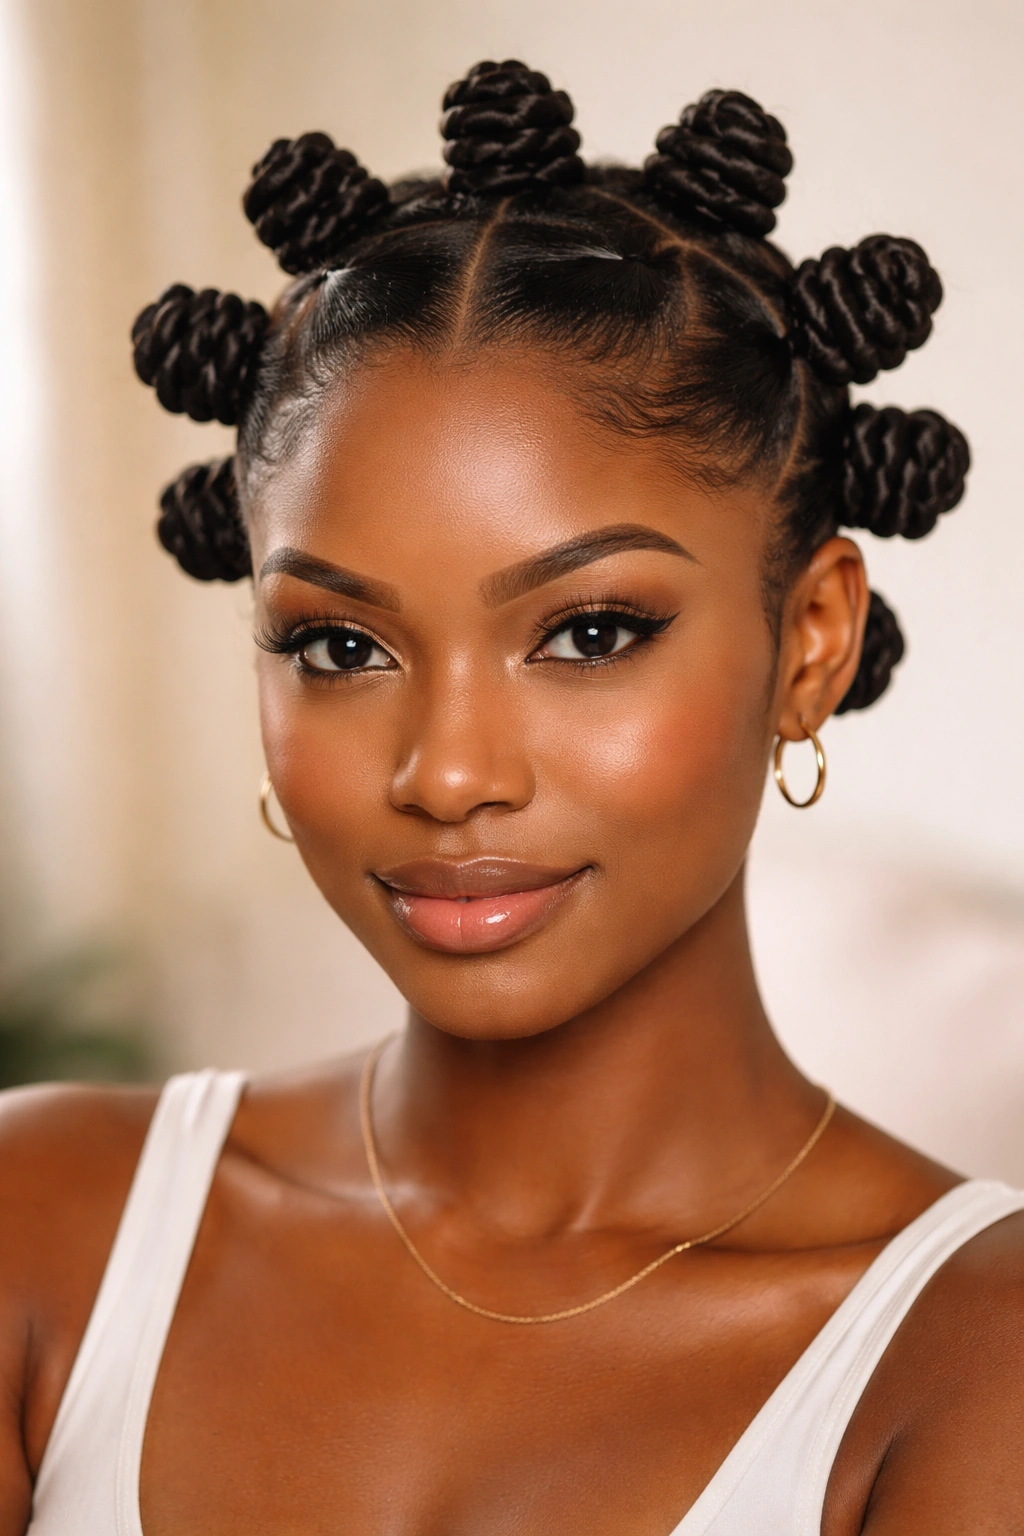
Bantu knots are sculptural, protective, and genuinely fun to create. You’re wrapping sections of hair around themselves to form little knots that sit flat against your scalp, then unraveling them when dry to reveal bouncy coils. Beyond the hairstyle itself, bantu knots double as a protective styling method that allows your hair to rest while you’re wearing them.
What Makes Bantu Knots So Effective
Bantu knots protect your ends and reduce tension while creating defined curls without needing traditional tools. The style dates back centuries in African hair culture, and the mechanics are simple enough that you can do a full head in 30-45 minutes once you get the hang of wrapping. The unraveled result gives you coils that bounce with movement and last for days with minimal touching up.
Creating Knots That Actually Stay
- Section damp hair into 8-12 parts using clips to keep unstyled sections separate
- Apply a creaming gel or styling butter to each section as you work
- Starting at the root, wrap the section around itself in a spiral motion, similar to wrapping a piece of string around a finger
- Keep wrapping until you reach the end of the hair, then tuck the end underneath to secure
- As you wrap, twist the section slightly to create a coil pattern underneath the knot
- Allow the knots to dry completely — at least 6-8 hours or overnight
- Carefully unravel each knot from the bottom upward, gently separating the coils as you go
- Finger-comb through to add volume and shape, or leave tightly coiled for maximum definition
- Use a lightweight oil or mousse to prevent frizz if needed
Worth knowing: Knots placed closer together create tighter, more defined coils, while larger sections and looser wrapping result in softer, wavier results. This gives you full control over your finished texture.
4. Box Braids
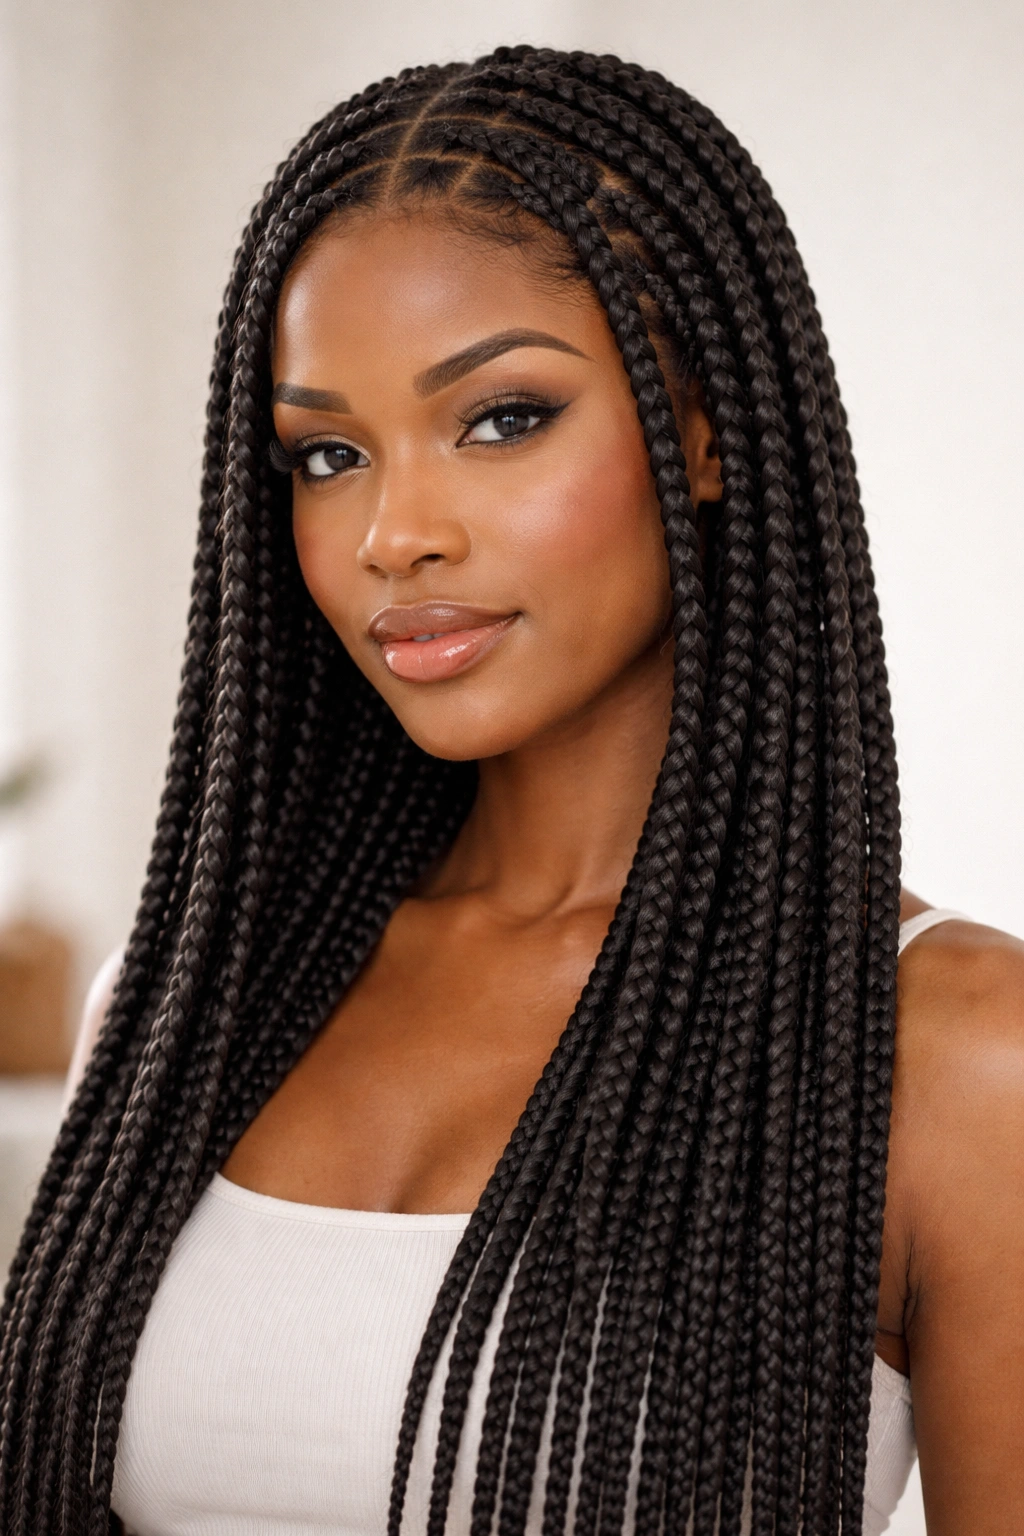
Box braids are the quintessential protective hairstyle that keeps your natural hair tucked away and looking sharp for weeks at a time. These braids are made by dividing your hair into square-shaped sections, then braiding extensions through each section. The result is low-maintenance styling that allows your edges and ends genuine rest and recovery.
Why Box Braids Deserve Their Reputation
Box braids work because they genuinely protect your hair from daily friction, manipulation, and environmental stressors. The braids themselves are sturdy and stylish, and extensions allow you to achieve length, volume, and different color play without damaging your own hair. You get styling versatility too — braids can be worn down, twisted into updos, wrapped into buns, or decorated with beads and cuffs.
Braiding Technique That Holds Without Slippage
- Section clean, moisturized hair into square-shaped quadrants using a comb and clips
- Start with smaller sections if this is your first time — larger braids go faster once you have the motion down
- Grab three strands of your natural hair as your base and divide extension hair into three equal parts
- Incorporate the extension into one of your base strands, then begin a standard three-strand braid
- Keep tension firm but not so tight that you’re pulling your scalp — your hands should feel engaged, not strained
- As you braid down the length, gradually add the extension strands in until they’re fully incorporated, then continue braiding your natural hair
- Wrap the very end with thread or use a tiny clear elastic to secure the braid tip
- If braiding feels overwhelming at first, practice with smaller sections and take breaks — your hands will build strength and muscle memory quickly
- Once your braids are complete, keep them tidy by wrapping them in a silk scarf at night and refreshing the parts as they grow out
Pro tip: Satiny, lightweight extensions slip out less than thicker ones, and pre-braided extensions save enormous time if you’re working with a tight schedule.
5. Two-Strand Twists
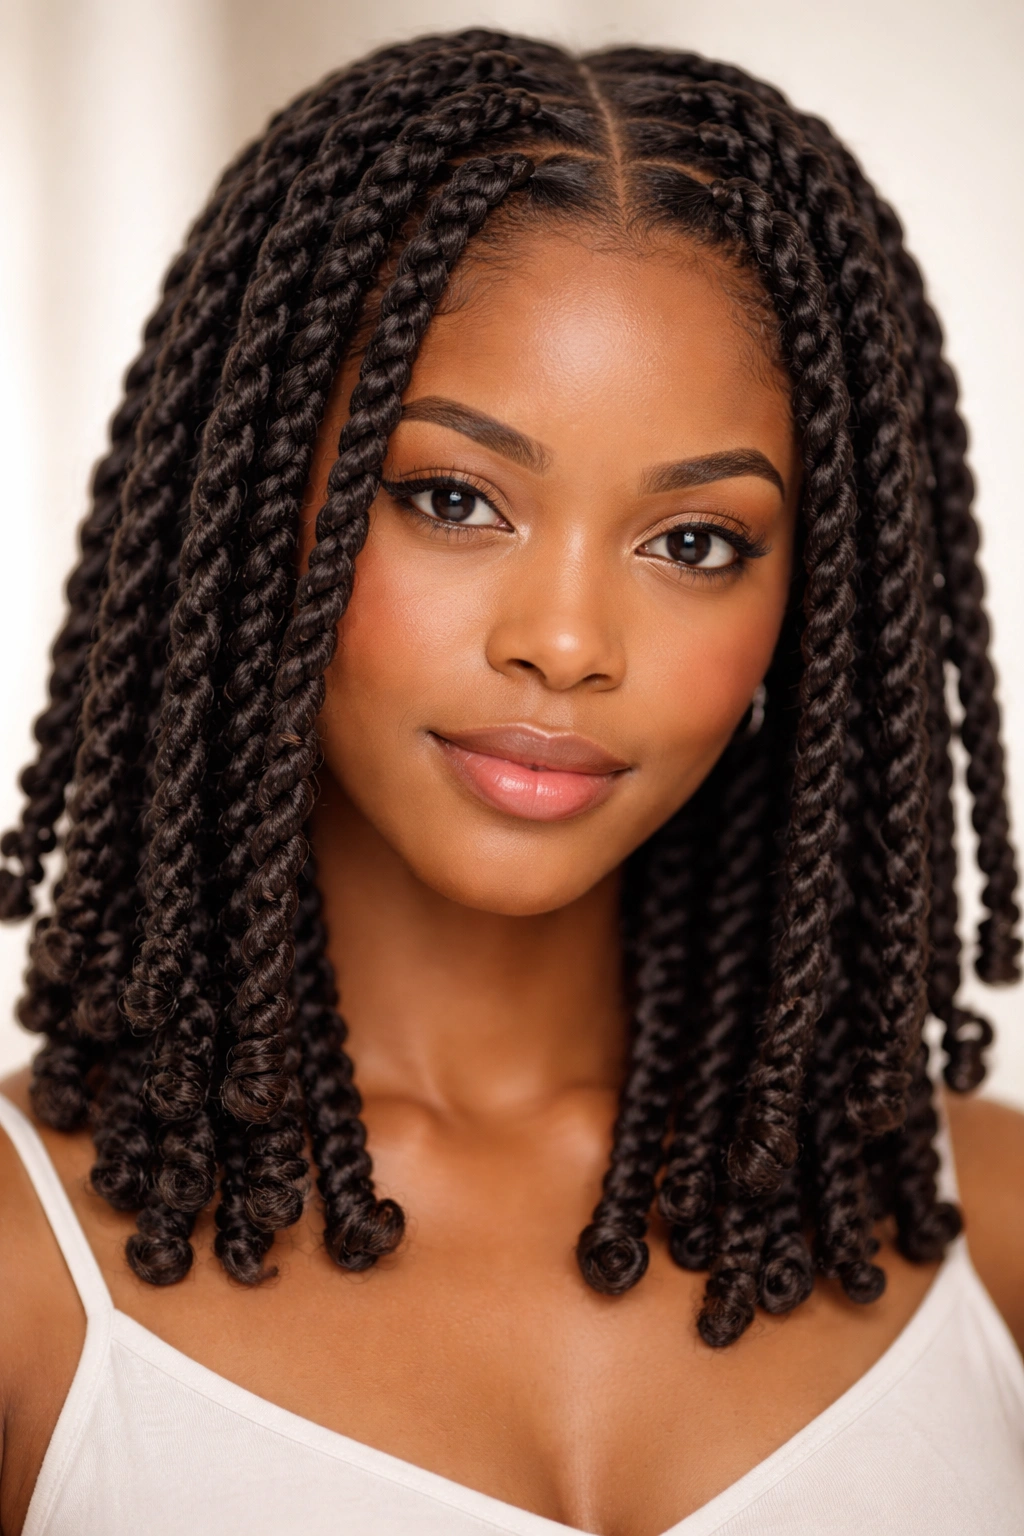
Two-strand twists are simpler than they sound but deliver stunning results that last nearly as long as more complicated styles. You’re essentially taking two strands of hair and wrapping them around each other, creating a rope-like twisted pattern. The style is endlessly variable — you can do large twists for a softer look, tiny twists for intricate detail, or medium twists for the classic version.
The Mechanics of a Solid Two-Strand Twist
Two-strand twists work on all curl patterns because you’re creating definition through tension and structure rather than relying on your natural curl pattern. The twists dry into place and can last five to ten days depending on how tightly you twisted and how much product you used. You can sleep on them, work out in them, and wear them in updos without them unraveling if you’ve twisted correctly.
Building Two-Strand Twists That Actually Last
- Work with damp hair and a styling product like twisting butter or gel
- Divide your hair into sections — four large twists cover quickly, but twelve smaller twists create more defined detail
- Take one section and split it into two equal parts
- Wrap the right strand over and around the left strand, then wrap the left strand over and around the right strand
- Keep tension consistent as you work downward, twisting as tightly or loosely as you prefer
- When you reach the end, you can wrap the tail around your finger for a coil, leave it straight, or hide the end underneath
- For faster drying and maximum hold, apply a light gel before twisting and allow at least 6-8 hours drying time
- Refresh twists by separating them down the middle when they begin to blend together as they grow out
Insider note: Twists last visibly longer if you start at the root and twist continuously all the way down without stopping, versus twisting in sections and then connecting them. One continuous motion creates more durability.
6. Wash and Go
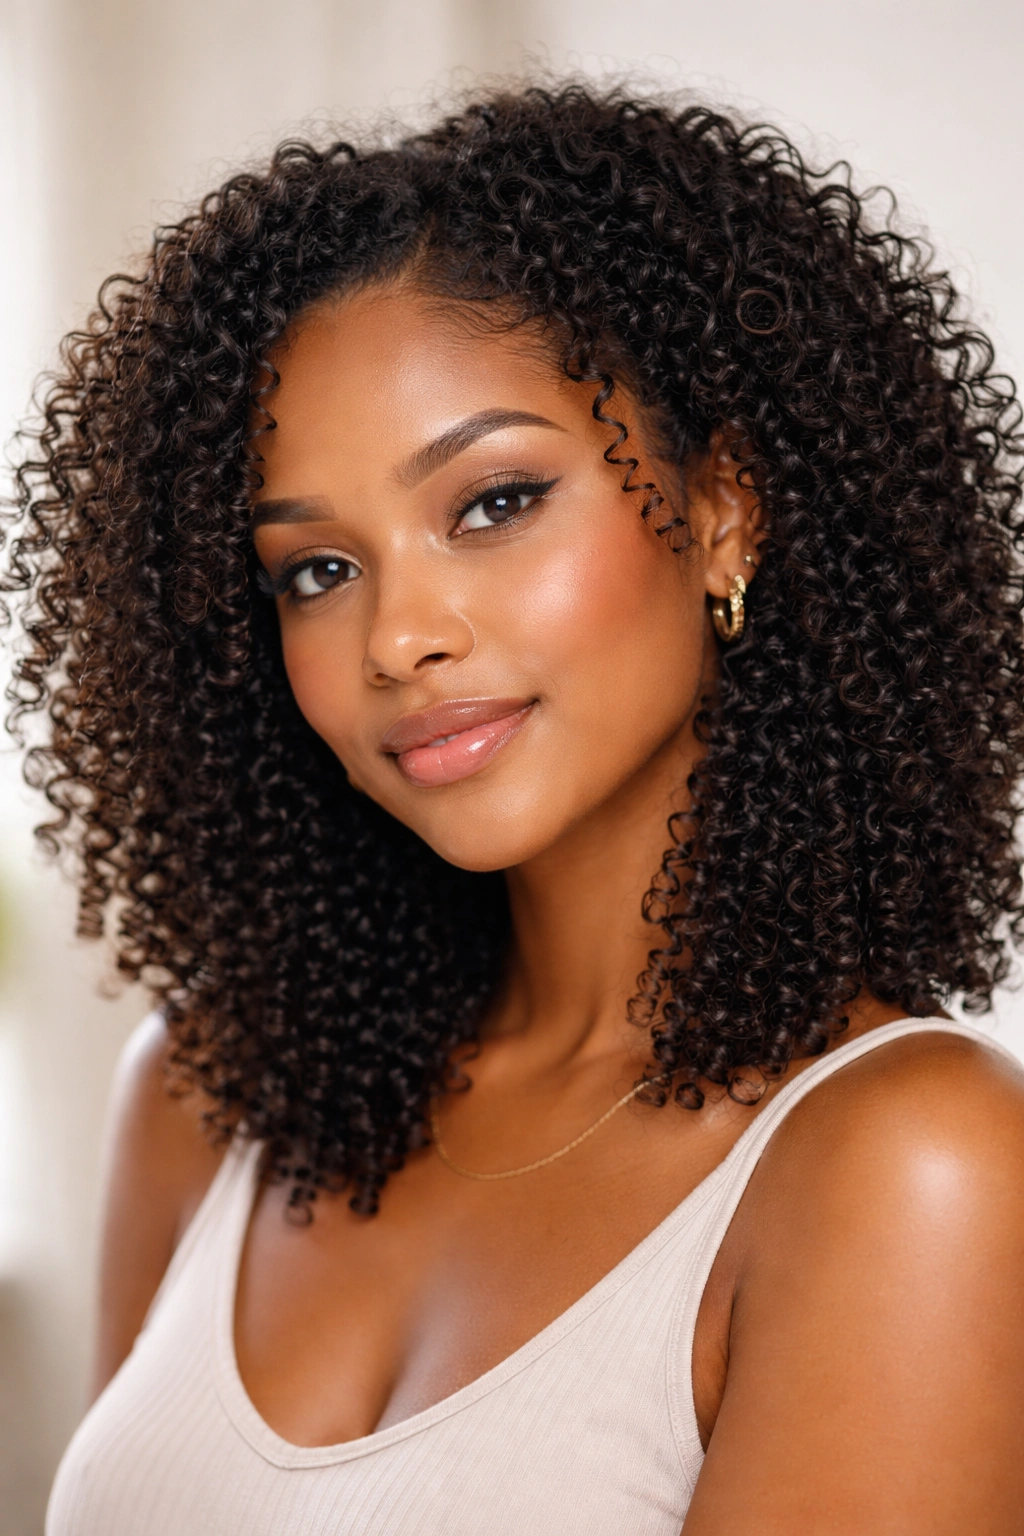
The wash and go is the ultimate low-effort, high-reward style that celebrates your natural curl pattern in its most minimal form. After shampooing and conditioning, you apply styling products to soaking wet hair and let your curls air-dry or diffuse into their natural shape. It’s genuinely the simplest style on this list, but simplicity requires understanding your hair’s actual pattern and knowing which products enhance rather than weigh your curls down.
Making Your Wash and Go Actually Work
The wash and go seems deceptively easy because you’re not doing much, but that’s actually where the challenge lies — your products and technique have to do all the work. Lighter products that define without creating buildup are essential, and you need to apply everything while your hair is soaking wet so the product distributes evenly through the curl pattern.
The Actual Steps for a Successful Wash and Go
- Shampoo thoroughly to remove all product buildup from previous styles
- Deep condition for at least 10-15 minutes while your hair is wet
- While still in the conditioner, apply a leave-in conditioner to fully saturated hair, concentrating on the ends
- Apply a curl-defining cream, gel, or mousse before rinsing out any excess product
- Gently squeeze out excess water — don’t wring or rub, which disrupts your curl pattern
- You can air-dry (which can take 8-12 hours) or use a diffuser on low to medium heat for 30-45 minutes
- Avoid touching your curls while they’re setting, as handling them creates frizz
- Once fully dry, gently shake out your curls for volume and definition
Worth knowing: Wash and gos look best on hair that’s at least somewhat hydrated before you start, so the night before is a great time to co-wash or mist your hair and let it sit under a shower cap.
7. High Puff with Ponytail
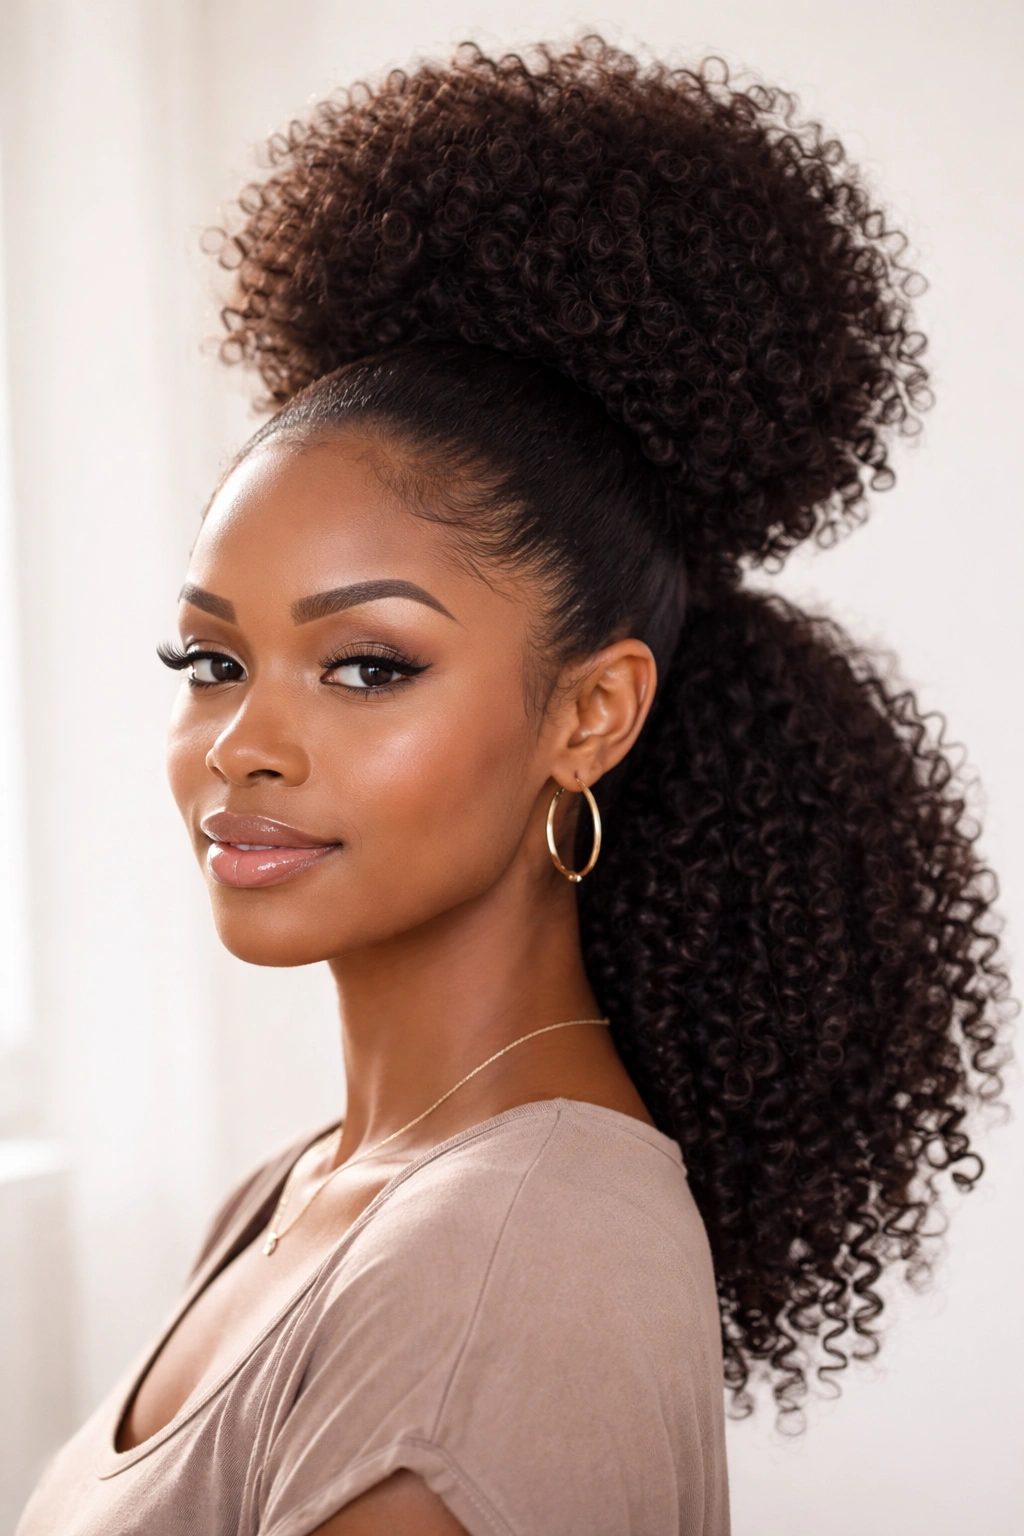
A high puff gathered into a ponytail combines the best of both worlds — a protective style that allows hair to rest while looking intentional and styled. You’re gathering your natural afro or curls into a high ponytail at the crown, creating a voluminous puff that sits on top of your head, with either the rest of your hair flowing loose or tucked into the puff itself for a fuller effect.
Why This Style Works for Everyone
The high puff with ponytail works because it’s protective without being as committing as box braids, and it looks different enough from your everyday styling to feel fresh and intentional. The style is work-appropriate, gym-appropriate, and casual-appropriate depending on how you’ve styled the ponytail section. You can dress it up with jewelry or keep it simple depending on your mood.
Creating a Puff That Looks Intentionally Voluminous
- Start with moisturized, textured hair — a few days post-wash is ideal because your hair will have extra definition and hold
- Brush or pick your hair upward and backward, gathering all the hair you want in the puff
- Use a strong elastic or hair tie to secure everything at the crown of your head, pulling tight enough to last all day but not so tight that you’re creating tension
- Take the gathered ponytail and fluff it with your fingers or a pick to create volume and shape
- If you want extra fullness, tease the base of the puff gently before gathering it
- Style the remaining hair however you like — leave it down for a half-up-half-down effect, or gather it into the puff with bobby pins
- Wrap a small section of hair around the elastic base to hide it and create a polished look
- Secure with a bobby pin tucked into the puff so it’s invisible
Pro tip: Adding a scrunchie or decorative hair tie over your elastic makes the whole look feel more intentional and finished, plus it makes removing the style easier on your hairline.
8. Coil-Outs
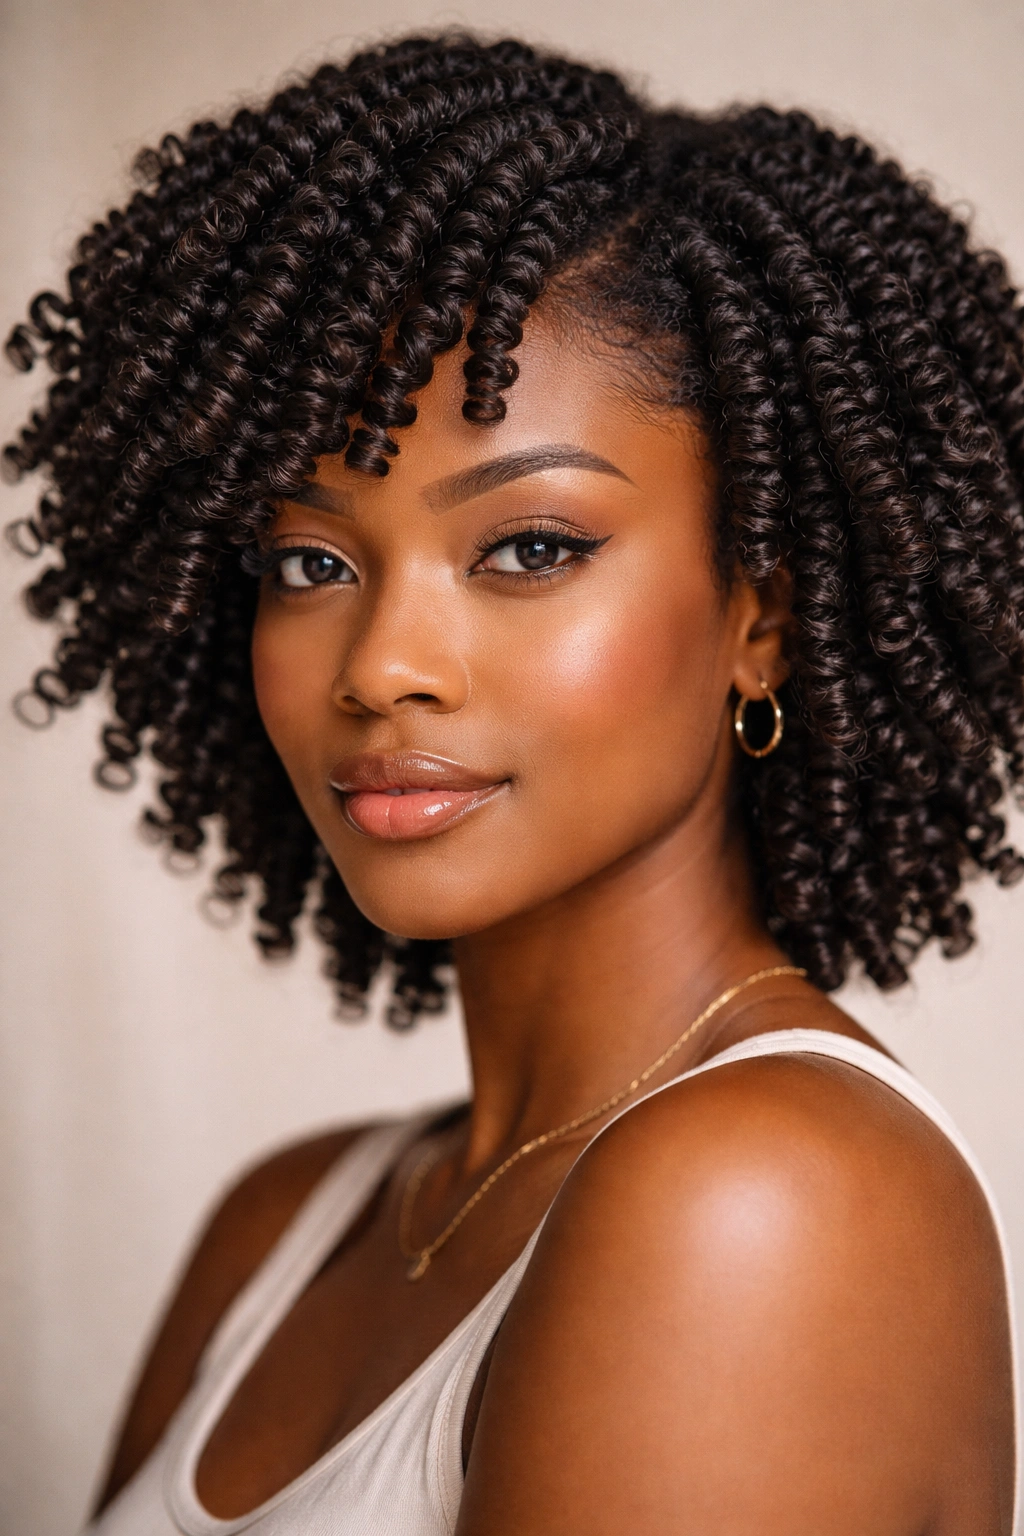
Coil-outs are created by wrapping small sections of wet hair around a rod, pencil, or your finger, then unraveling once dry to reveal tight, defined coils. This style is particularly stunning on tighter curl patterns and can last for days with proper care. The coils themselves are protective because they reduce the surface area that’s exposed to friction, and the defined texture looks professionally done even though you’ve created it at home.
The Beauty of Setting Curls This Way
Coil-outs create a defined, uniform texture because you’re controlling exactly how tight each coil is and how long it stays set. Unlike twist-outs, where the definition depends partly on your natural curl pattern, coil-outs deliver consistent coils regardless of your curl pattern. The style also works well for layering different sizes of coils for a more complex, textured look.
Rolling, Drying, and Unraveling Successfully
- Shampoo and deep condition thoroughly, leaving your hair very wet
- Apply a curl-defining cream or gel to small sections as you work
- Starting at the root, wrap your section around a rod, pencil, or your own finger, spiraling downward
- Use clips or your fingers to hold the wrapped section in place while you work on the rest of your hair
- Leave the coils in place to air-dry or use a diffuser to speed up the process — this typically takes 6-10 hours
- Once completely dry, carefully unroll each coil from the bottom upward, gently separating the coils as you release them
- Finger-comb through for volume, or leave tightly coiled for maximum definition
- Mist lightly with a holding spray if desired
Insider note: Coil-outs created on larger rods result in softer waves, while tiny rods or finger-coiling create tight, defined spirals. You can vary your rod sizes on different sections to create a multidimensional texture.
9. Faux Locs
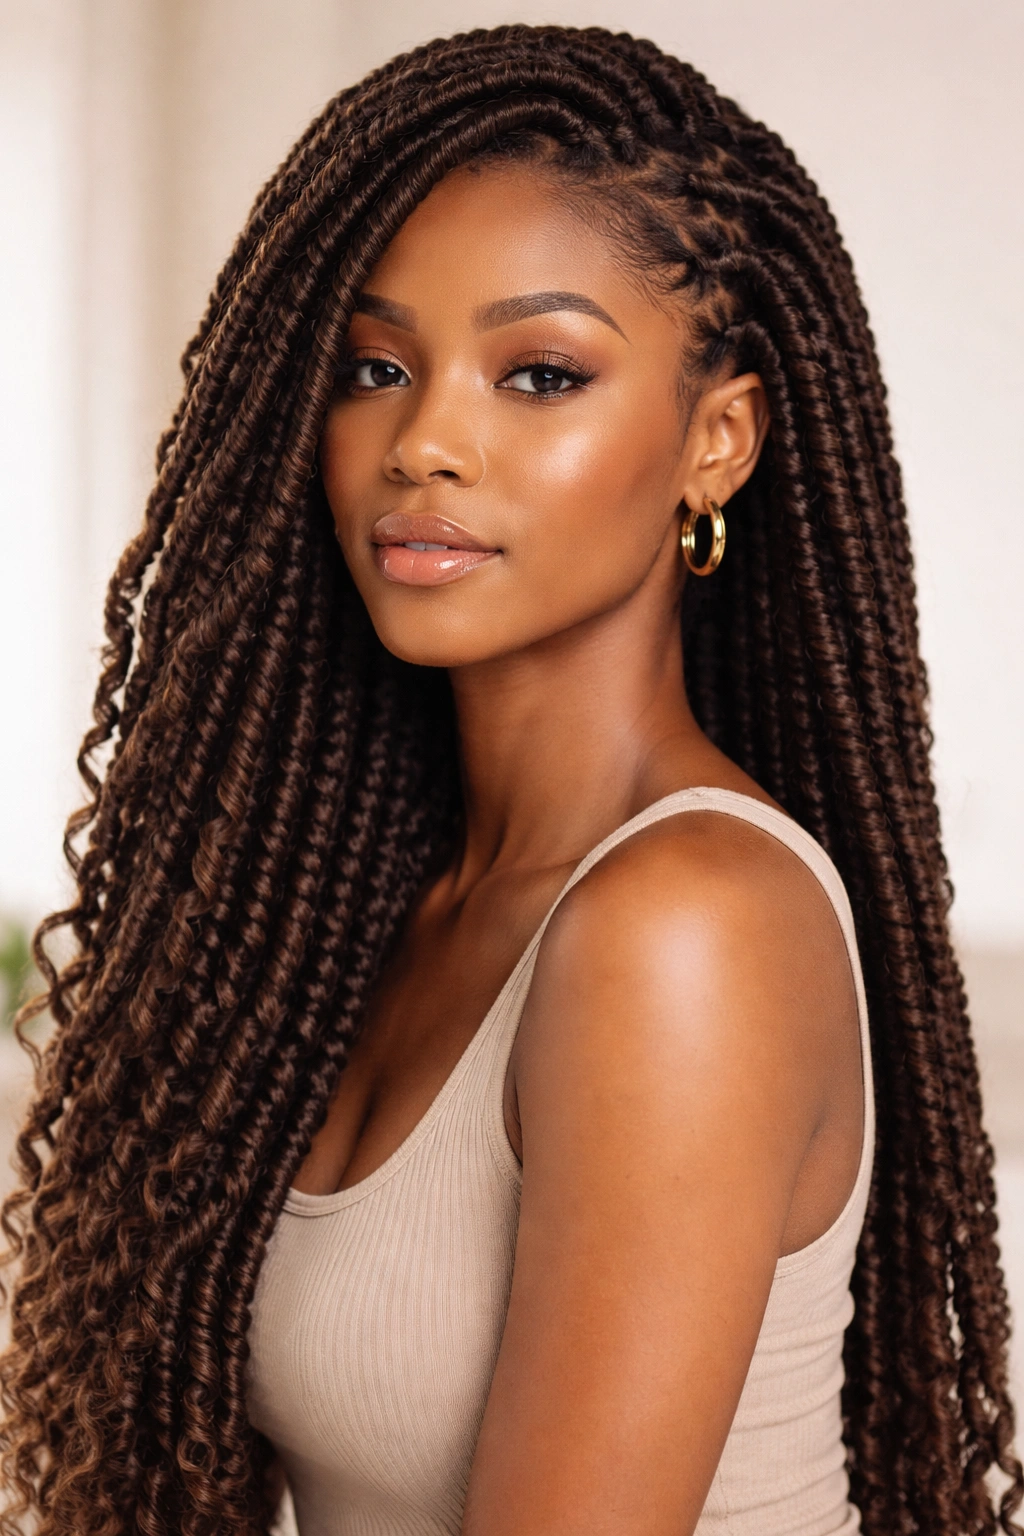
Faux locs are the protective style that looks like you’ve committed to actual locs without the long-term commitment or the maintenance. You’re wrapping sections of synthetic hair or extensions around your own natural hair in a spiral pattern, creating a locked appearance that’s temporary but visually stunning. The style is protective, versatile, and can be worn for weeks at a time.
Why Faux Locs Offer the Best of Both Worlds
Faux locs protect your natural hair while giving you the aesthetic of locs without the permanent decision or the years-long journey. You can experiment with length, color, and texture while your hair grows and rests underneath. The style is undeniably bold and makes a visual statement, while still being professional enough for most work environments.
Creating Faux Locs at Home
- Divide your hair into sections using clips and a comb — larger sections create thicker locs, while smaller sections create a more detailed look
- Starting at the root, wrap synthetic hair around a section of your natural hair in a spiral motion
- Keep the wrapping tight and even, spiraling downward until you’ve used enough synthetic hair to create texture
- As you reach the end, you can wrap the tail around your finger to create a coil, or twist it for definition
- Tuck the synthetic hair end underneath or secure it with a small elastic
- Consistency is key — all your locs should be similar thickness and wrapped tightly for a polished look
- Allow the locs to set for at least 24 hours before washing or sleeping on them
- Faux locs last 4-8 weeks depending on how securely you’ve wrapped them
Worth knowing: Thinner synthetic hair takes longer to wrap but creates finer, more delicate locs, while thicker hair wraps faster but creates bolder, chunkier locs.
10. Flexi Rod Set
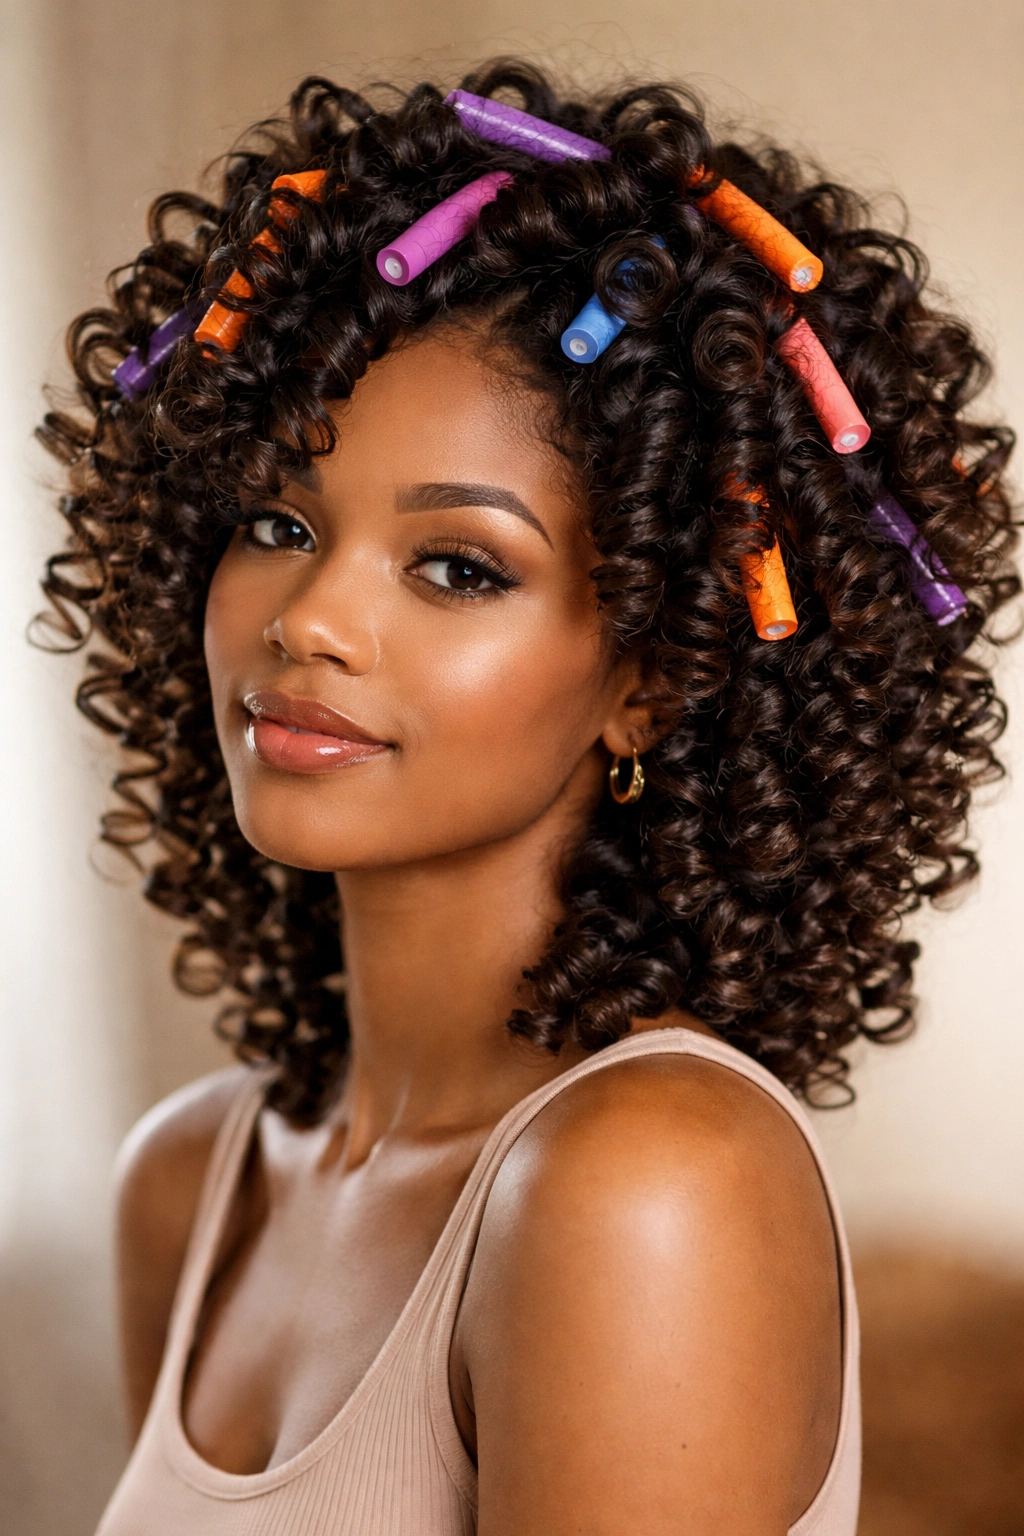
A flexi rod set gives you bouncy, voluminous curls that last nearly two weeks without the heat of hot rollers or blow-dried curls. You’re wrapping damp hair around flexible rods of various sizes, then allowing them to air-dry or diffuse-dry. The result is a salon-quality curl pattern that you’ve created entirely at home for a fraction of the salon cost.
How Flexi Rods Transform Your Curl Pattern
Flexi rods work on every curl pattern because you’re setting the hair into a specific curl shape regardless of what your natural pattern is. The rods are flexible enough to bend and shape without kinking your hair, and air-drying means zero heat damage. You get defined, bouncy curls that hold for days and actually improve your hair’s overall look by adding volume and shine.
Rolling, Setting, and Releasing Curls
- Shampoo and condition, leaving your hair damp but not soaking wet
- Apply a curl-enhancing cream or mousse to damp hair, working in sections
- Start with one section and wrap it around a flexi rod, tucking the ends under slightly so they don’t stick out
- If you’re using rods of different sizes, use smaller rods on top for volume and slightly larger rods underneath for movement
- Once all your hair is rolled, allow at least 6-8 hours drying time — overnight is ideal
- You can air-dry or use a bonnet dryer or diffuser for faster setting
- Gently unroll each rod, supporting the curl as it releases to maintain the pattern
- Shake out your curls with your fingers for volume and bounce
- Smooth the outer layer with a paddle brush if you want a polished finish, or leave textured for a more natural look
Pro tip: Smaller rods create tighter curls that last longer, while larger rods create softer waves that are more forgiving if you’re learning. Start with medium rods for the easiest learning curve.
11. Finger Coils
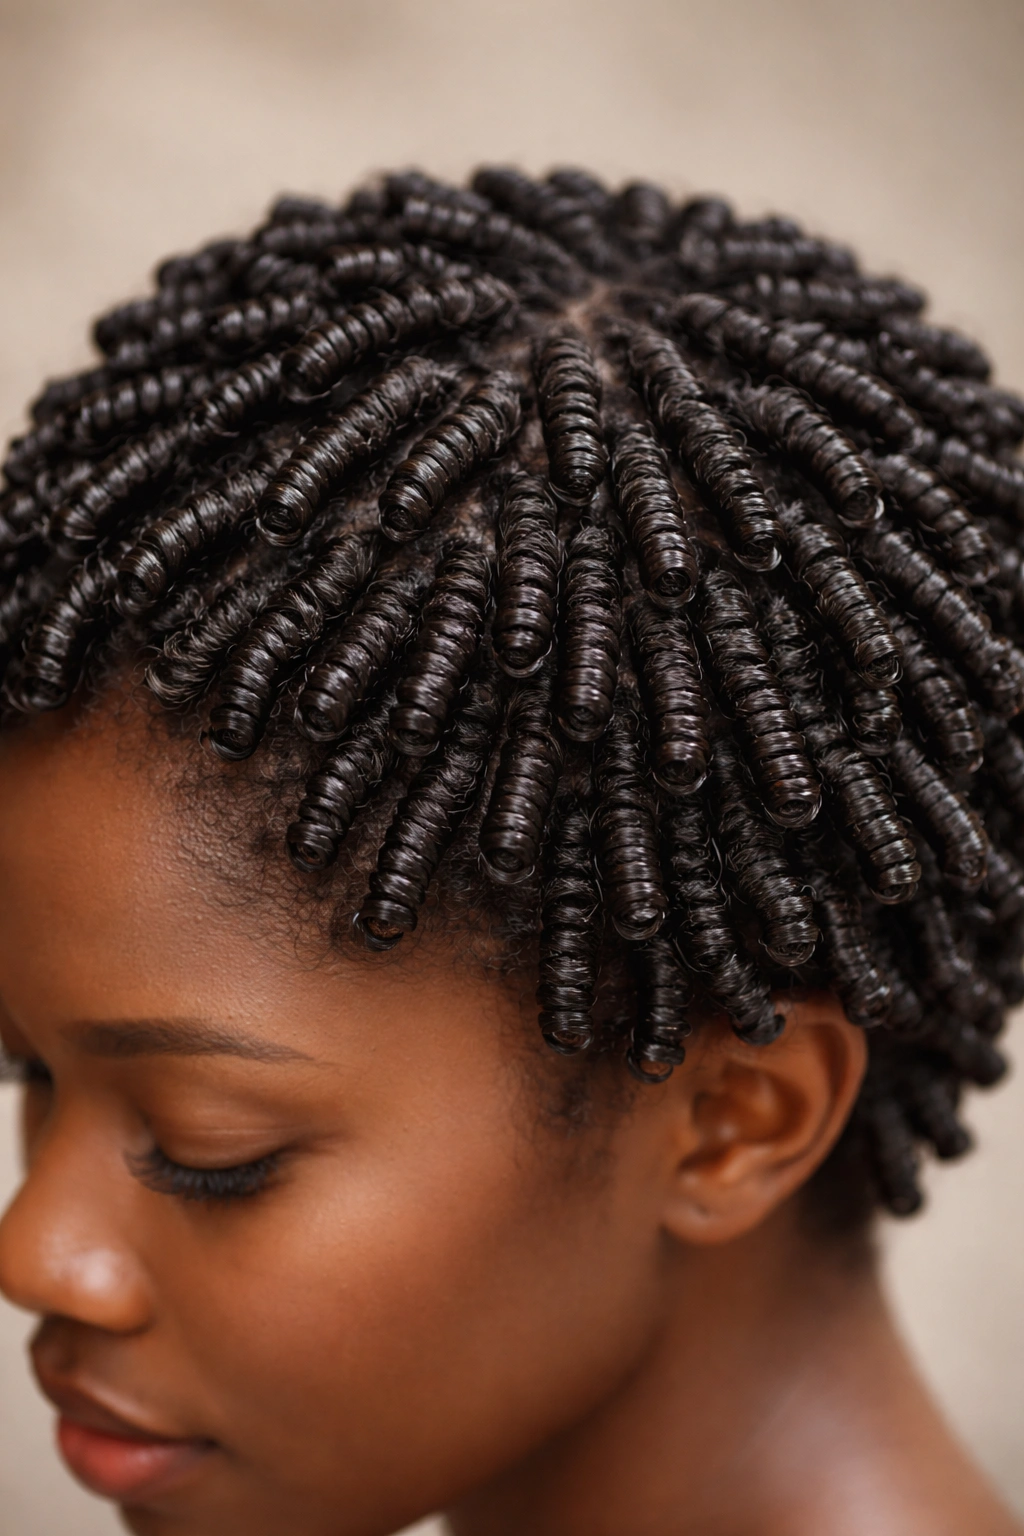
Finger coils are the most portable protective style because all you need is your own fingers and some product. You’re manually wrapping small sections of hair around your fingers to create coil patterns that dry into place. This method works particularly well for very curly hair and creates a delicate, intricate finished look.
The Meditative Simplicity of Finger Coiling
Finger coiling takes patience and practice, but there’s something genuinely satisfying about the process once you develop the rhythm. The coils you create are uniquely yours — you control the tightness, the size, and the exact shape. The finished style looks intricately detailed and deliberately designed, never accidental or messy.
Coiling Technique That Creates Lasting Definition
- Apply a coiling cream or gel to small damp sections of hair
- Starting at the root, wrap the section around your index finger, spiraling downward
- Keep the coil compact and tight as you work downward
- Once you reach the end, gently slip your finger out while keeping the coil intact
- The coil should hold its shape on its own — if it unravels immediately, your product isn’t strong enough or you didn’t coil tightly enough
- Continue through all your hair, one section at a time
- Air-dry completely — this can take 12-24 hours depending on your hair density and the strength of your product
- Once dry, gently separate the coils with your fingers for volume
- Very light finger-combing can add more texture, or leave tightly coiled for maximum definition
Insider note: Coils that start at the root and spiral all the way to the end last significantly longer than coils that start partway down the hair shaft.
12. Braidout
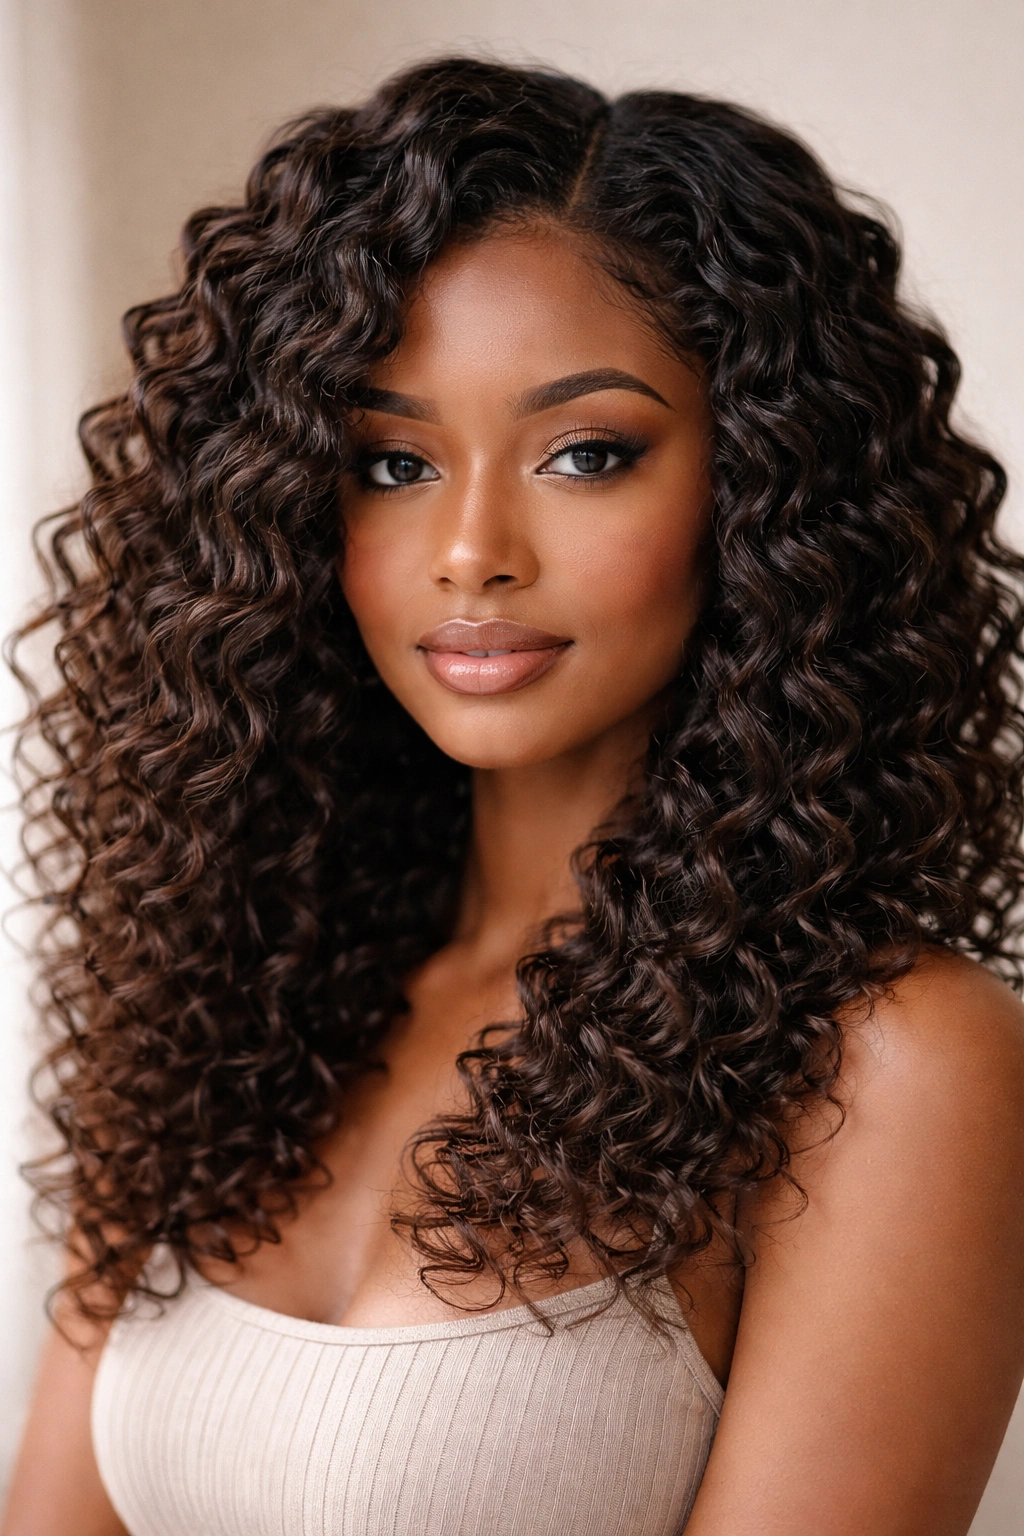
A braidout follows the same principle as a twist-out, but with braids instead of twists. You create two-, three-, or four-strand braids while your hair is damp, allow them to fully dry, then unbraid to reveal a textured, wavy pattern. The style is endlessly variable depending on braid size and tightness, and it typically lasts five to ten days.
Why Braidouts Create Such Defined Texture
Braids create more distinct texture and definition than twist-outs because of how the three (or more) strands interact and compress together. As the braid dries, it sets a very specific pattern that unravels into waves and coils with visible dimension. The result looks professionally styled and textured without any additional work once the braids are unraveled.
Creating Braids That Unravel Into Waves
- Work with damp hair and a styling product like braiding cream or gel
- Create braids of consistent size — larger braids for waves, smaller braids for tighter texture
- Braid from the root all the way to the end, keeping tension firm but not scalp-pulling
- Secure the ends with small elastics or thread
- Allow complete air-drying — typically 8-12 hours or overnight
- Gently unbraid from the bottom upward, carefully separating each strand as you release the braid
- Use your fingers to separate and fluff the waves created by the braids
- For more definition, finger-comb or use a pick; for a softer look, gently shake out without additional combing
Worth knowing: The tighter you braid, the more defined your texture will be, and the longer the style will last before it starts to blend together.
13. Crown Braids
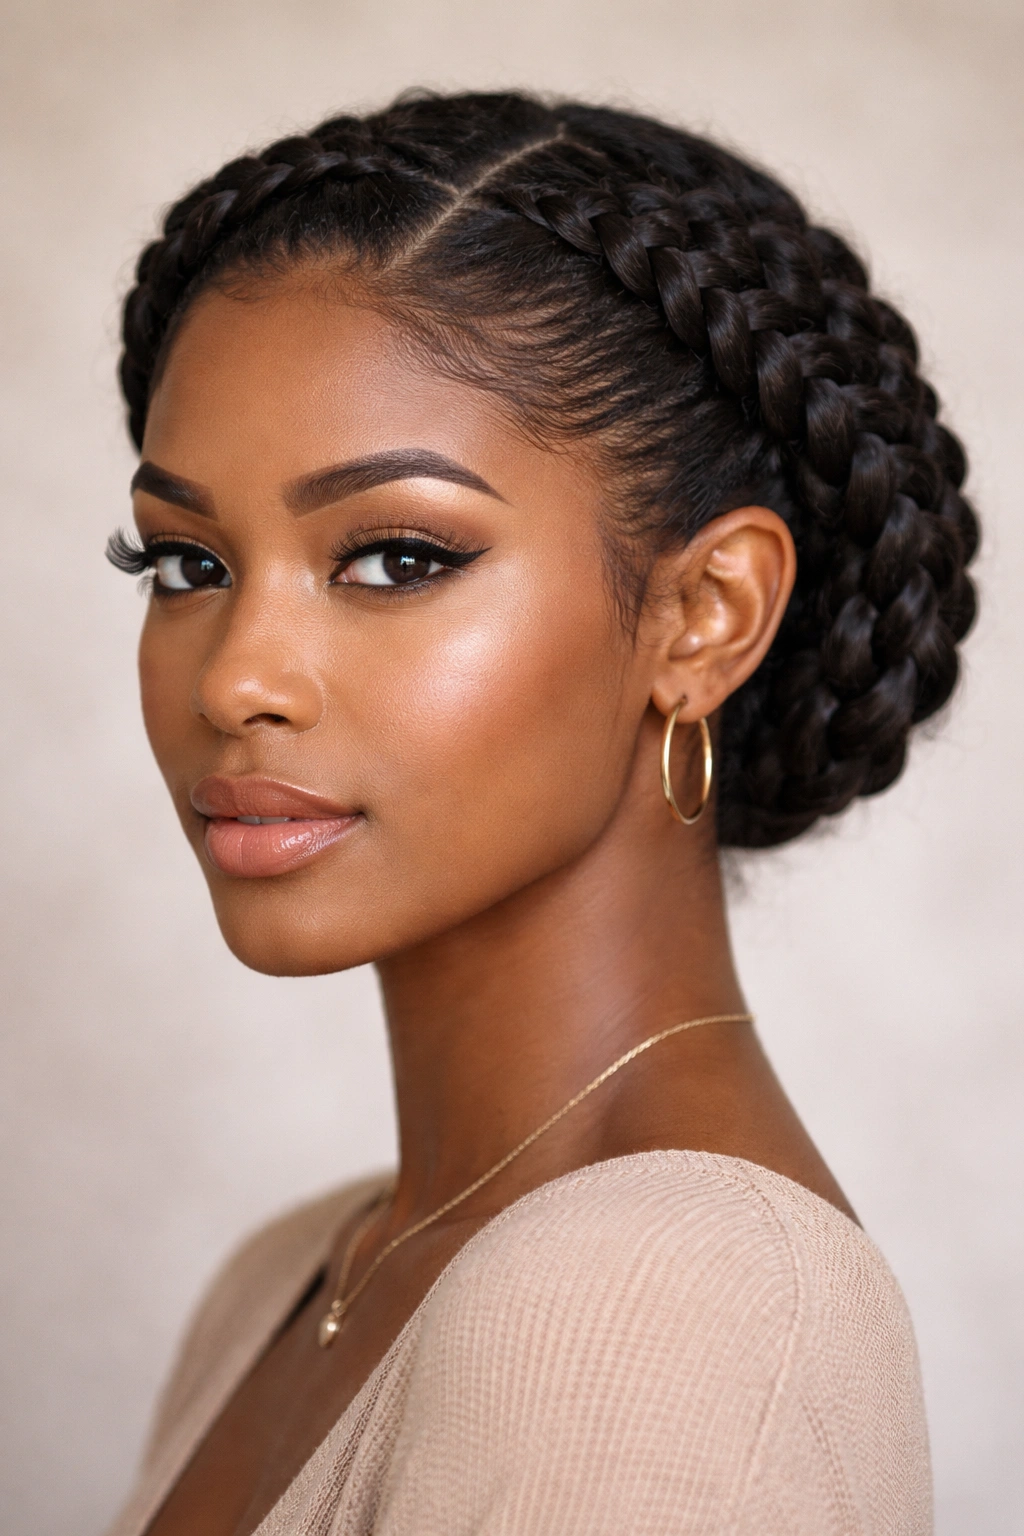
Crown braids wrap around your head like a crown or halo, creating an elegant, romantic style that works for everyday wear and special occasions. You’re creating cornrows or Dutch braids that follow the natural shape of your head, starting at one ear, braiding around toward the back, and ending at the opposite ear. The style is protective, visually stunning, and surprisingly easy to master once you understand the braiding motion.
The Elegance of Braids That Frame Your Face
Crown braids are instantly more polished than loose natural hair while still showing off your texture and style. The braids frame your face and draw attention to your eyes and features, and the protective nature means your hair is tucked away and resting. You can add beads or jewelry for extra impact, or keep them simple for a clean, elegant look.
Braiding a Crown That Sits Smoothly
- Section your hair into two parts vertically down the middle, clipping one side out of the way
- Starting at one ear, begin a Dutch braid (braiding with strands going under instead of over, which creates a raised braid)
- As you braid, gradually angle upward and backward, following the natural shape of your head
- Continue braiding all the way to the back of your head, adding new hair from the section you’ve designated
- Repeat on the other side, braiding from the opposite ear to meet the first braid at the back
- Where the two braids meet, secure both braids together or join them into one braid that continues to the ends
- Tuck the ends under and secure with bobby pins hidden in the braided section
- Gently tease the braids slightly to create a fuller look and soften the edges
- A light hairspray helps tame flyaways and hold the style in place
Pro tip: Practice your braiding motion on a friend or even a practice head before doing this on yourself, since the angle and hand positioning are different from regular braids.
14. Tapered Afro with Fade
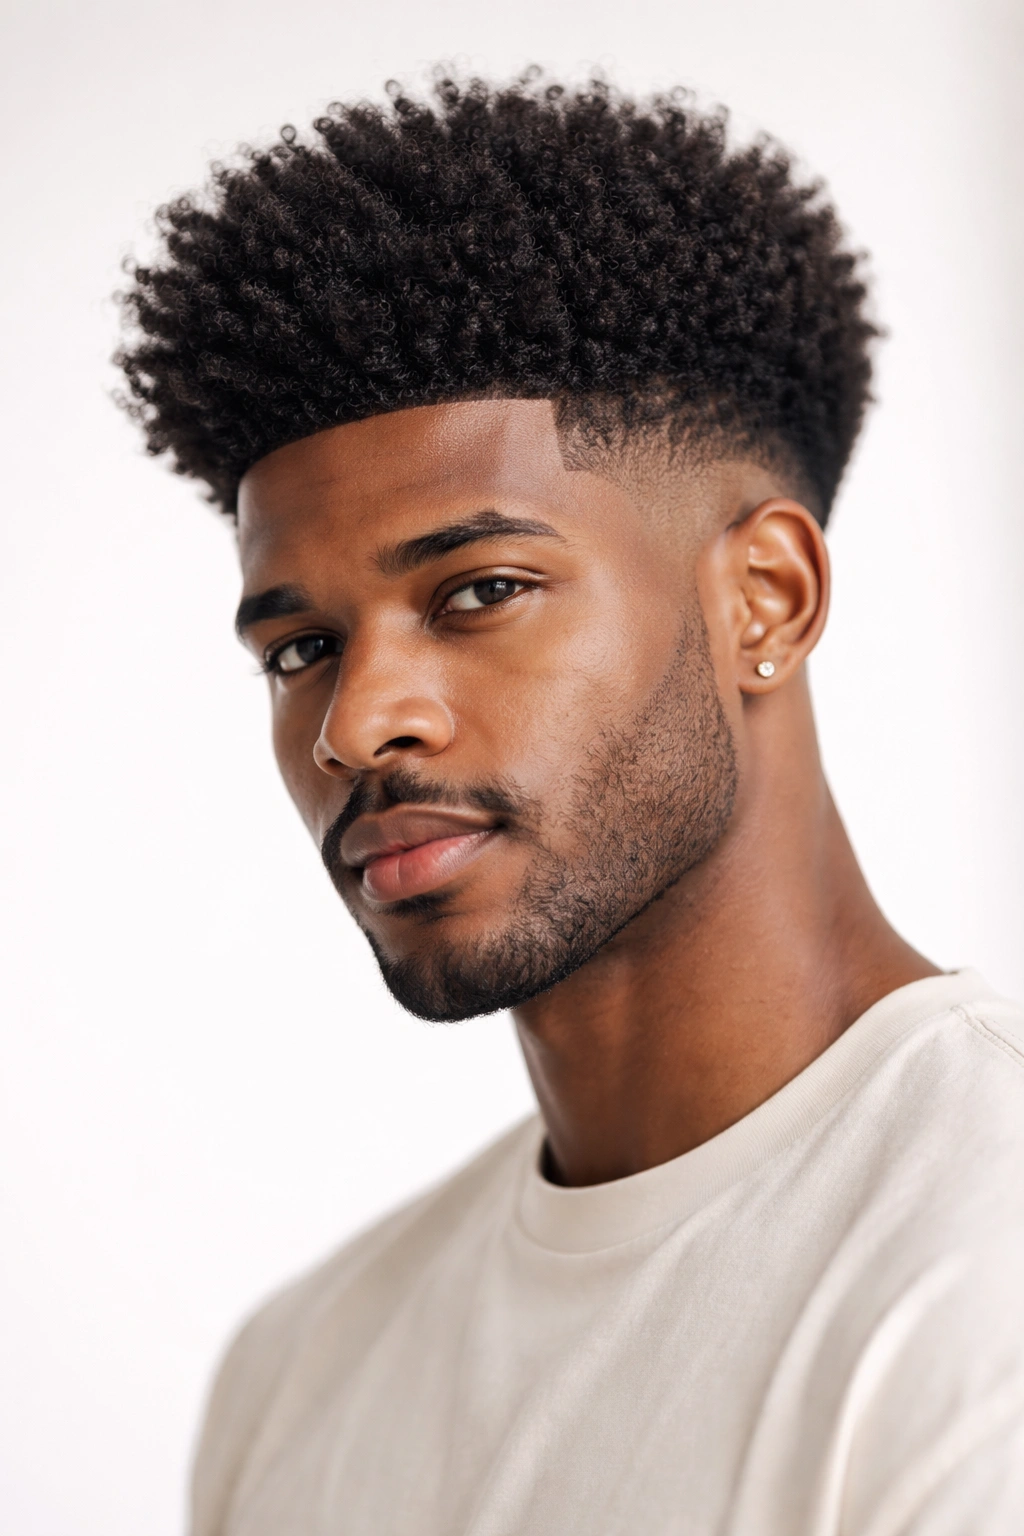
A tapered afro with fade is an edgy, sharp look that combines a full, textured afro on top with closely cut or faded sides. The fade or taper creates clean lines and visual contrast, making the afro itself look even fuller and more intentional. This style is particularly striking and modern-looking, and it works on all hair textures.
The Bold Visual Impact of This Cut
A tapered afro with fade makes a clear statement and instantly communicates that you’re intentional about your style. The contrast between the full top and the clean sides creates visual drama and keeps the overall look from feeling oversized. You can adjust the fade’s tightness and height to match your personal aesthetic, from subtle to extremely sharp.
Creating the Cut and Styling the Top
- This style works best if you get the fade cut professionally — it requires clipper skills and precision that are difficult to replicate at home
- Once the fade is established, you’ll want to maintain it every 2-4 weeks as your hair grows out
- Style the afro on top by keeping it moisturized and using a pick or afro brush to lift and shape
- Apply a light styler that defines without creating buildup or crunchiness
- The sides should be kept clean and sharp, either faded with clippers or lined with a razor
- Between professional cuts, you can carefully line up your edges at home using a trimmer if you’re confident, but precision is essential
- Keep the top section healthy and moisturized with regular deep conditioning to maintain volume and texture
Insider note: The most dramatic tapers go down to skin, while more subtle tapers fade to a very short length that still shows texture. Start conservative with your fade choice — you can always go shorter next time if you want more contrast.
15. Wash and Go with Defined Curls
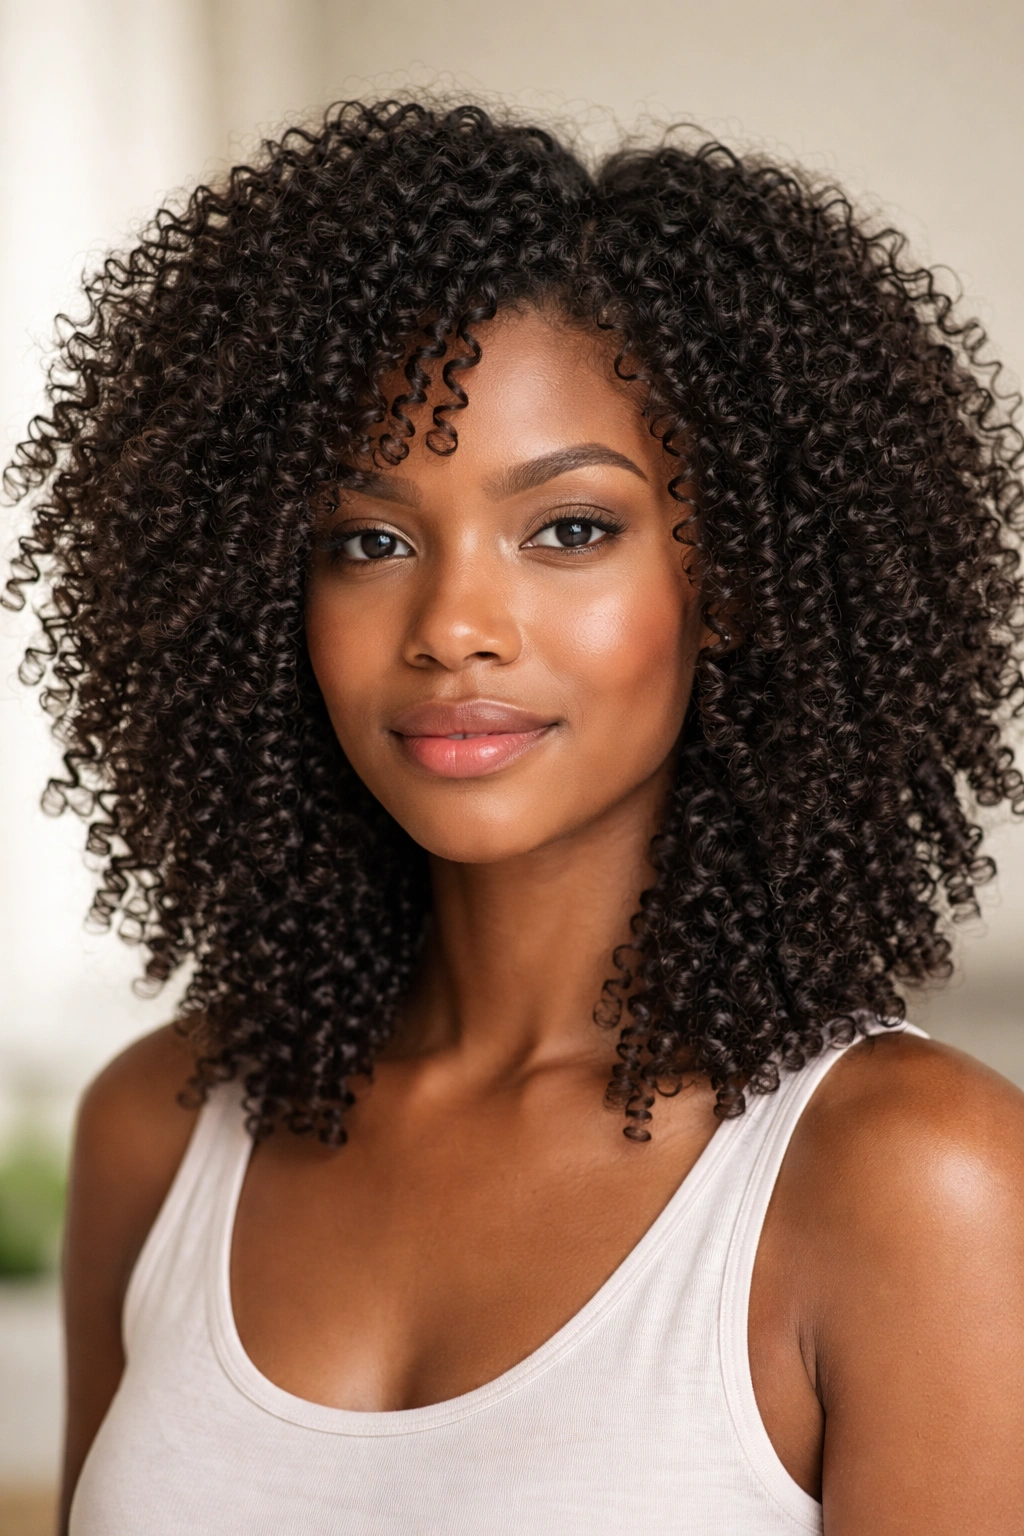
This is the elevated version of the basic wash and go, with more intentional product layering and technique to create genuinely defined, bouncy curls that last longer and look more polished. You’re using a multi-step approach to encourage curl definition, reduce frizz, and create a style that genuinely looks salon-quality while still being low-manipulation and air-dried.
Moving Beyond Basic Wash and Go
A wash and go with defined curls requires slightly more finesse than the basic version, but the results last noticeably longer and look significantly more intentional. By layering your products strategically and using techniques that encourage definition without creating buildup, you’re achieving complexity with minimal stress on your hair.
The Layered Approach to Defined Curls
- Shampoo thoroughly and deep condition for 15+ minutes with your hair fully saturated
- Apply a leave-in conditioner while your hair is still very wet, distributing it evenly throughout
- Apply a lightweight curl cream, focusing on the mid-lengths and ends
- For extra definition, use a curl-defining gel or mousse on top of the cream — the cream underneath prevents the gel from flaking
- Praying hands method: Place a small amount of product between your palms, rub together, then run your hands down sections of hair with palms pressed together (rather than raking through with fingers, which causes frizz)
- You can smooth your curls with a microfiber towel or t-shirt to encourage clumping and definition
- Air-dry completely or use a diffuser on low heat for 30-45 minutes
- Allow several hours before touching your curls — this lets the product fully set
- Once dry, you can gently shake out for volume or add a light mousse for extra bounce
Pro tip: The praying hands method creates significantly less frizz than finger-raking and naturally encourages your curls to clump together into larger, more defined formations.
Final Thoughts

Natural hair styling at home is an act of self-care and creative expression, not just a way to save money on salon visits. Each of these fifteen styles offers something different — some are genuinely protective and allow your hair to rest, while others celebrate your texture in its purest form. The styles that matter most are the ones that make you feel confident and comfortable, whether that’s a simple wash and go you can do in minutes or an elaborate crown braid that takes an hour.
Start with whichever style speaks to you most, and give yourself permission to practice without expecting perfection immediately. Your first twist-out might not be as defined as you’d hoped, or your first set of box braids might feel clumsy and take forever. That’s completely normal and honestly part of the journey. The skills build through repetition, and there’s genuine value in understanding your own hair intimately enough to style it exactly the way you want.
The real power in natural hair styling is autonomy — knowing that you can create whatever look you’re envisioning without waiting for an appointment or depending on someone else’s interpretation of your ideas. You’ve got this, and your hair is ready for whatever style you choose.
