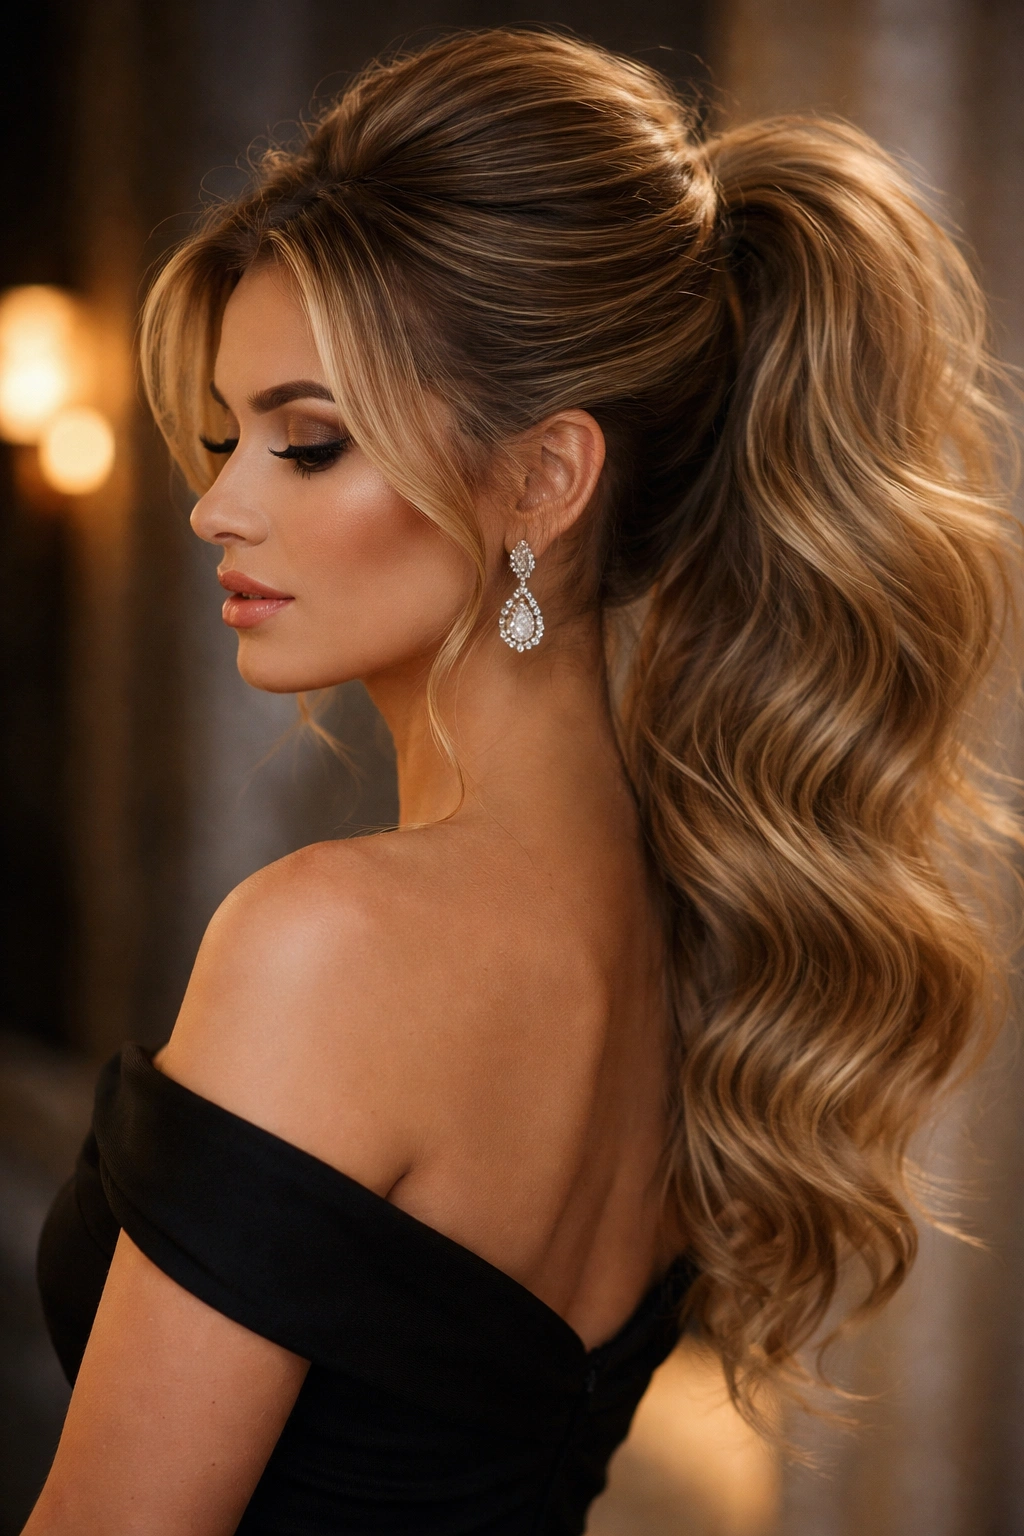
The beauty of a well-executed updo ponytail lies in its transformative power—it takes you from everyday polished to undeniably elegant in just a few minutes. Whether you’re attending a black-tie gala, a wedding, a formal dinner, or a professional event that demands your best look, an updo ponytail offers that perfect balance between sophisticated restraint and statement-making style. Unlike loose waves or simple styles, an updo ponytail says you’ve put thought and care into your appearance, and it keeps your hair contained and elegant throughout the entire event, no matter how much you move, dance, or interact with others.
The real appeal of updo ponytails for formal occasions is their versatility. There’s genuine variation within this category—from sleek, minimalist designs that whisper elegance to textured, intricate styles that command attention. You can adapt an updo ponytail to match your dress code, your venue, your personal aesthetic, and the formality level of the event. A classic high bun ponytail works beautifully for a professional gala, while a romantic twisted updo suits a garden wedding just as perfectly. The key is understanding which styles complement your face shape, hair type, and the specific occasion you’re preparing for.
What makes these styles so enduringly popular for formal events is that they solve real problems. They keep hair off your face so your features and any statement jewelry or makeup can shine. They’re stable enough to last through the entire event without requiring constant adjustments. They read as intentional and refined, instantly elevating your overall look. And perhaps most importantly, they require no more than 15-20 minutes to execute at home, saving you the cost of a formal salon appointment if you’re comfortable styling your own hair.
1. Classic High Bun Ponytail
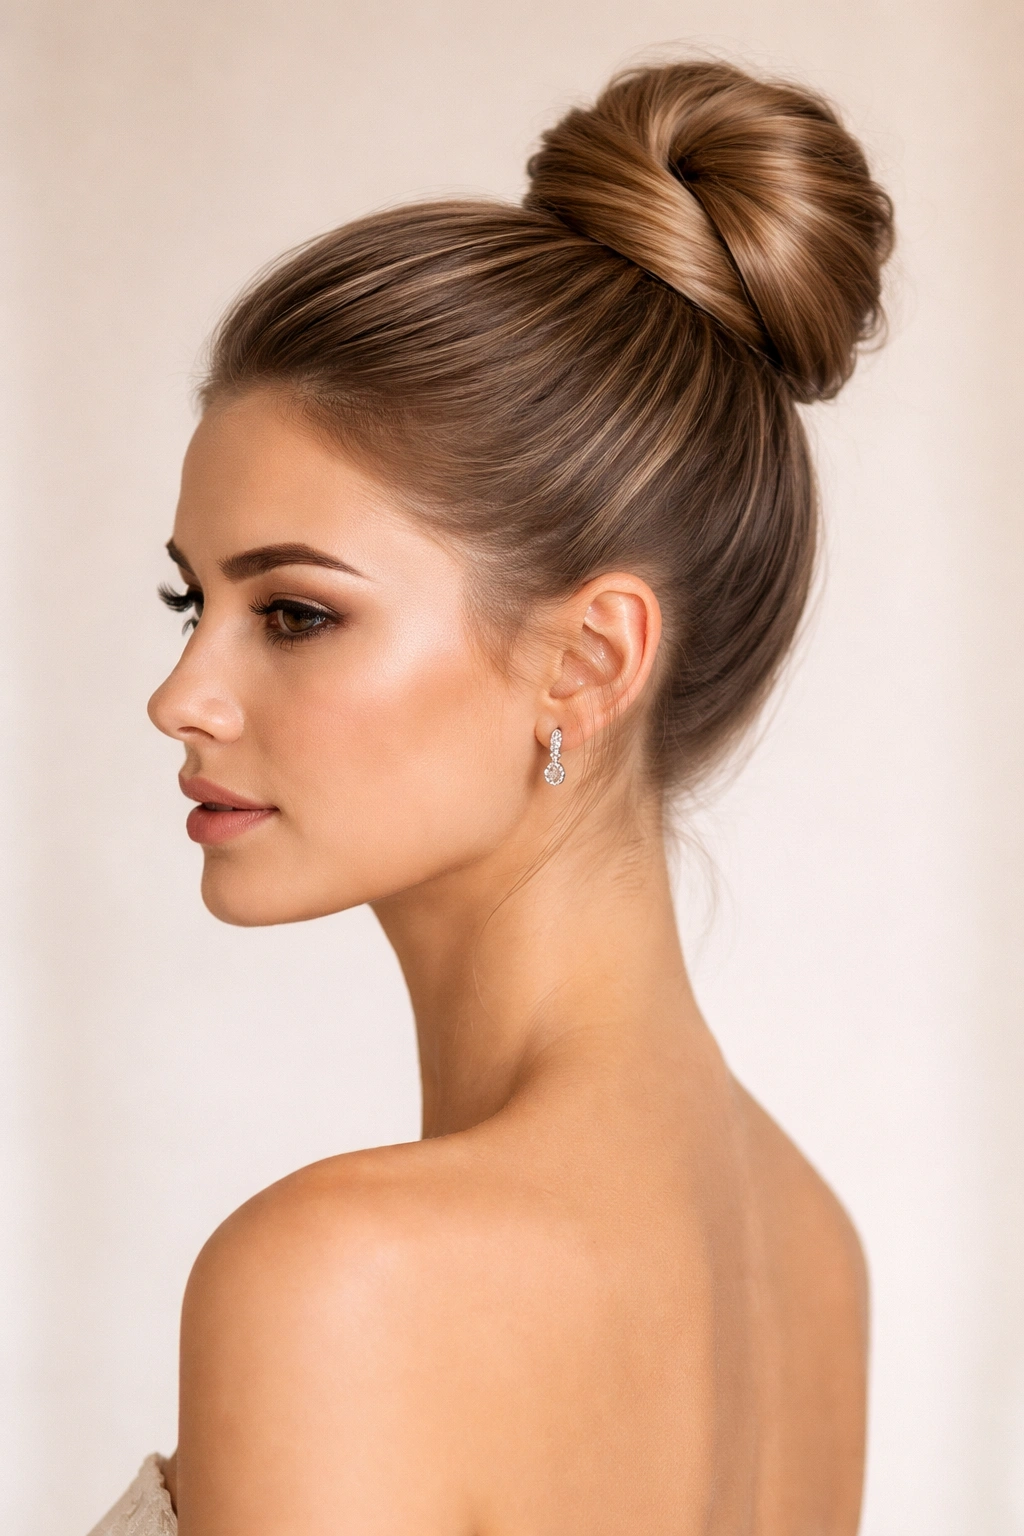
The classic high bun ponytail is the foundation upon which all other formal updo ponytails are built. It begins with gathering all your hair into a sleek, high ponytail positioned at the crown of your head—imagine a point directly above and slightly behind your ears. From there, you twist or braid the ponytail base and wrap it around itself, securing it into a neat, compact bun. The beauty of this style lies in its absolute elegance through simplicity, its forgiving nature with different hair textures, and the fact that it works identically well whether your hair is stick-straight or naturally wavy.
Why It’s Perfect for Formal Events
This style reads as inherently formal because of its clean lines and balanced proportions. The high placement draws attention upward to your eyes and face, making it ideal if you’re wearing statement earrings or have done detailed eye makeup. The compact bun conveys control and polish—there’s no “undone” feeling here, just refined elegance. It photographs beautifully from all angles, which matters when you’re at an event with professional photographers or social media-worthy moments.
How to Execute It Flawlessly
- Prep your hair: Start with hair that’s been blow-dried smooth or naturally straight. Use a smoothing serum or light hairspray to tame any flyaways before you begin.
- Create the ponytail base: Brush all hair upward toward the crown and secure with a clear elastic or a snag-free hair tie. Make sure the ponytail is truly centered—asymmetrical placement immediately reads as accidental rather than intentional.
- Add texture if needed: If your hair is very fine or slippery, gently backcomb the interior of the ponytail to create grip before wrapping.
- Form the bun: Divide the ponytail into two sections. Twist one section around the base of the ponytail, then wrap the second section around that, tucking the ends underneath and securing with bobby pins that match your hair color.
- Set it: Use a firm-hold hairspray to ensure the bun maintains its shape throughout the event.
Pro tip: The most common mistake is making the bun too loose. A high bun ponytail for formal wear should be compact and smooth, not pillowy or relaxed. Think “ballet dancer” not “casual weekend.”
2. Twisted Rope Updo Ponytail
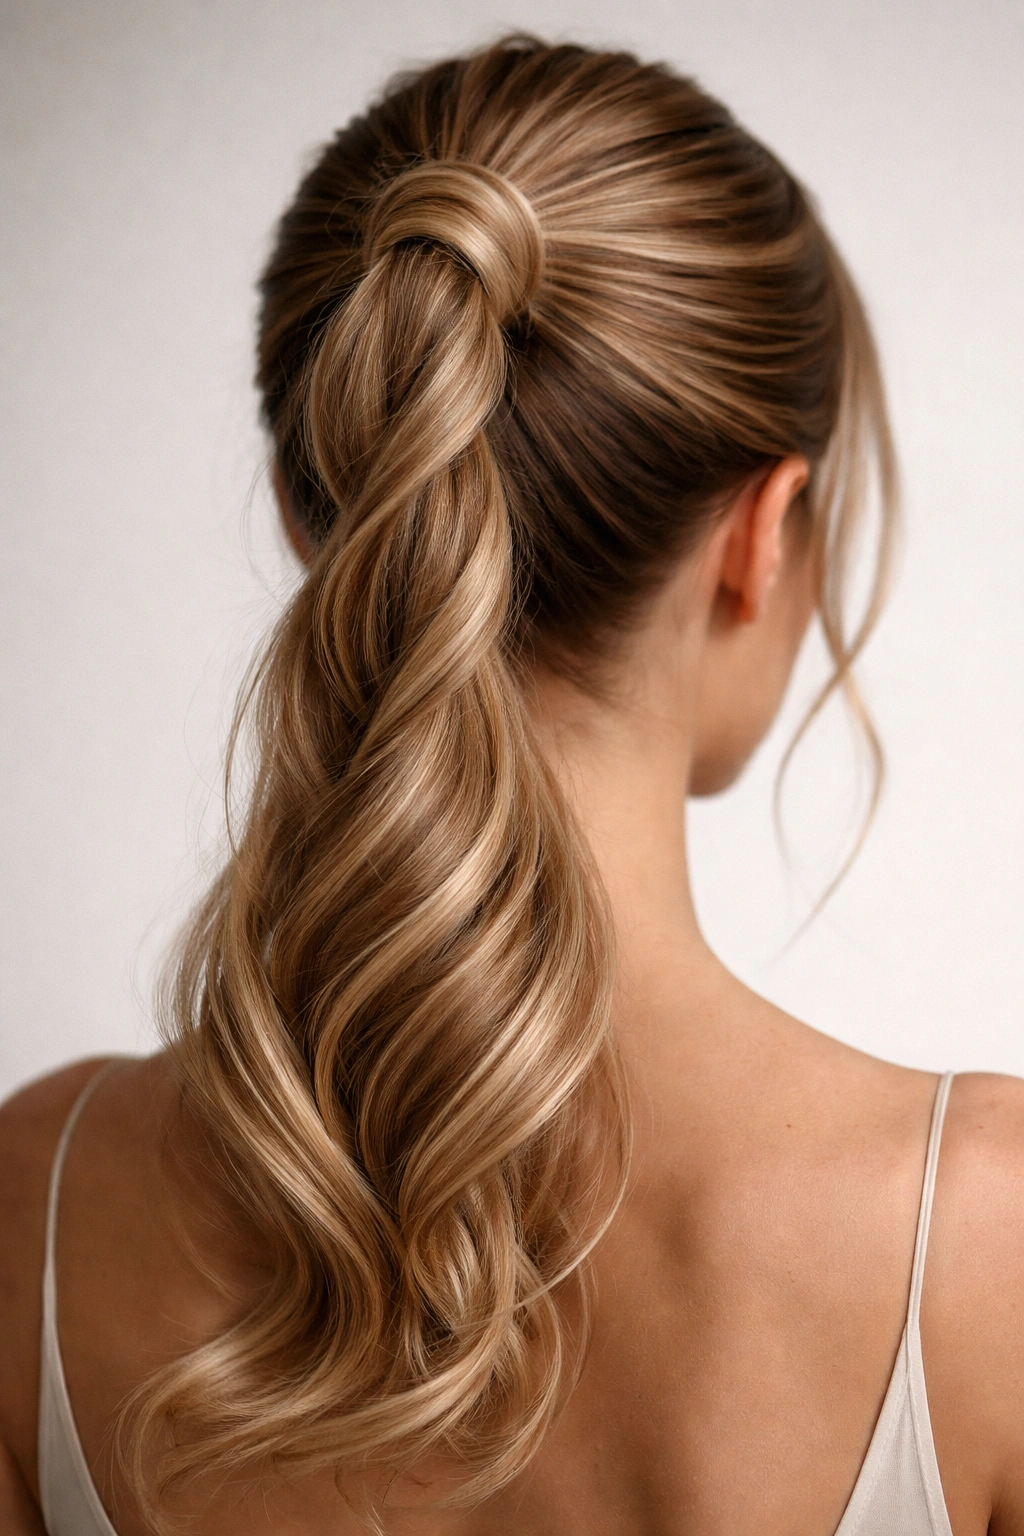
A twisted rope updo ponytail takes the classic high bun and elevates it by replacing a simple wrap with two twisted sections that spiral around each other. Instead of just wrapping the ponytail once, you divide it into two even sections, twist each one separately while holding them taut, then twist those two twisted sections around each other, creating a rope-like texture that’s both more visually interesting and actually more secure than a simple wrap.
The Visual Interest Factor
This style creates beautiful texture and dimension even from a distance. The twisted sections catch light differently than smooth hair, giving the bun subtle depth and movement without any actual looseness. If you’re wearing your hair up in photos or under spotlight lighting, the twisted details add sophistication and prevent the style from looking flat or one-dimensional. The texture is especially flattering if you’re wearing a strapless or backless gown where your updo is a key design element.
Step-by-Step Construction
- Start with a high ponytail: Same as the classic version, but this time you want a slightly thicker ponytail—it needs enough volume to create visible texture when twisted.
- Divide into two equal sections: Split the ponytail lengthwise into two even sections, holding each one securely in your fingers.
- Twist each section individually: Twist the first section clockwise around its own axis until it forms a tight rope, then do the same with the second section (also clockwise for consistency).
- Create the rope: Now twist those two twisted sections around each other in the opposite direction—if you twisted the individual sections clockwise, now twist the pair counter-clockwise—this prevents them from unraveling.
- Wrap and secure: Once you’ve twisted the rope all the way to the ends, begin wrapping it around the base of the ponytail in a coil, pinning as you go with bobby pins placed every half-inch.
Worth knowing: This style requires hair with at least medium thickness to create visible texture. On very fine hair, the twists can look thin and potentially straggly rather than elegant.
3. Braided Crown Updo Ponytail
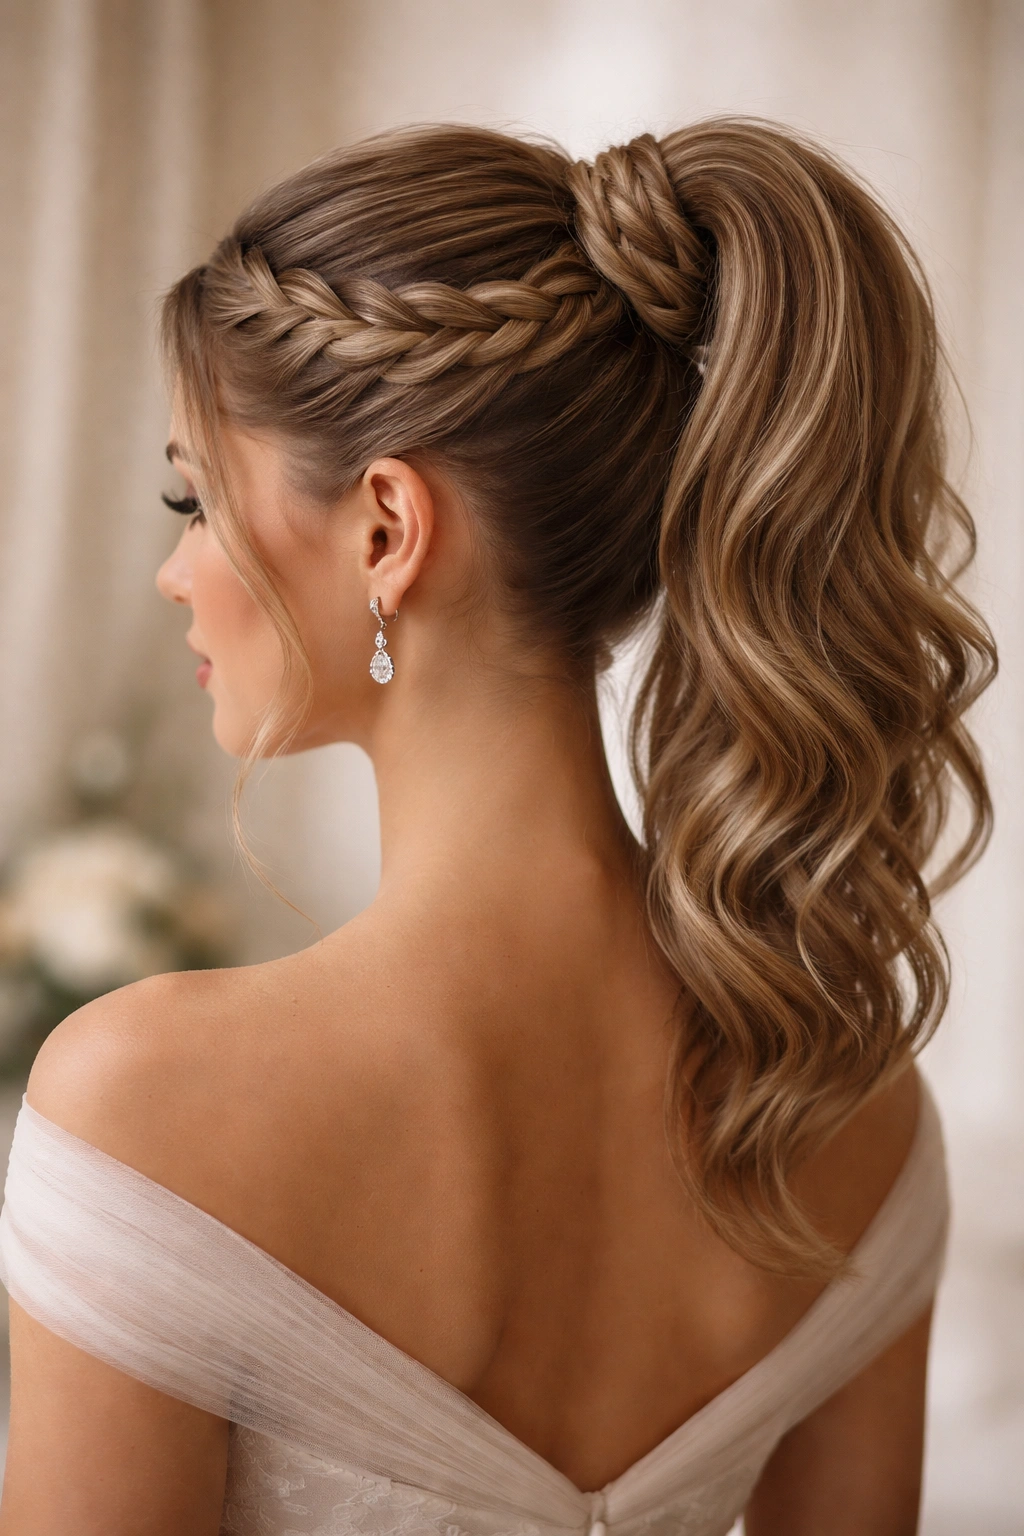
A braided crown updo ponytail combines the romantic appeal of a braid with the formality of an updo. You create a high ponytail, then braid the ponytail itself before wrapping it into a bun—the braid becomes the architectural detail that makes this style more interesting than a simple bun while still maintaining complete elegance and polish. This works especially beautifully for events like garden weddings, engagement parties, or any formal occasion with a slightly softer aesthetic.
Why Braids Signal Romance and Intentionality
Braids are inherently more complex-looking than twists, which automatically makes your updo read as more intentional and labor-intensive (even though it’s really not that much harder to execute). A visible braid woven through your updo shows thoughtfulness about your appearance. The braid also creates a visual anchor—a eye-catching detail that draws attention in a positive way and immediately elevates the overall look from “basic ponytail” to “styled updo.”
The Braiding and Assembly Process
- Build your ponytail: Create a high ponytail as in the classic version, but this time you can leave it slightly looser to accommodate the braid texture.
- Choose your braid type: A simple three-strand braid is classic and works for any occasion. If you want something more intricate, a four-strand or Dutch braid creates a thicker, more visually striking detail.
- Braid from root to tip: Starting at the base of the ponytail (right where the hair tie is), begin braiding all the way down to the ends. For a tighter, more formal appearance, make your braid snug but not uncomfortably so.
- Wrap into the bun: Once you’ve finished braiding, take the braided length and coil it around the base of the ponytail, tucking the end underneath and securing with bobby pins.
- Secure the whole structure: Use hairspray to set everything, then add decorative bobby pins or a small clip along the braid if desired.
Insider note: The most sophisticated version of this style has the braid visible and prominent—don’t bury it inside the bun. Let it be seen as an actual design element, not just hidden infrastructure.
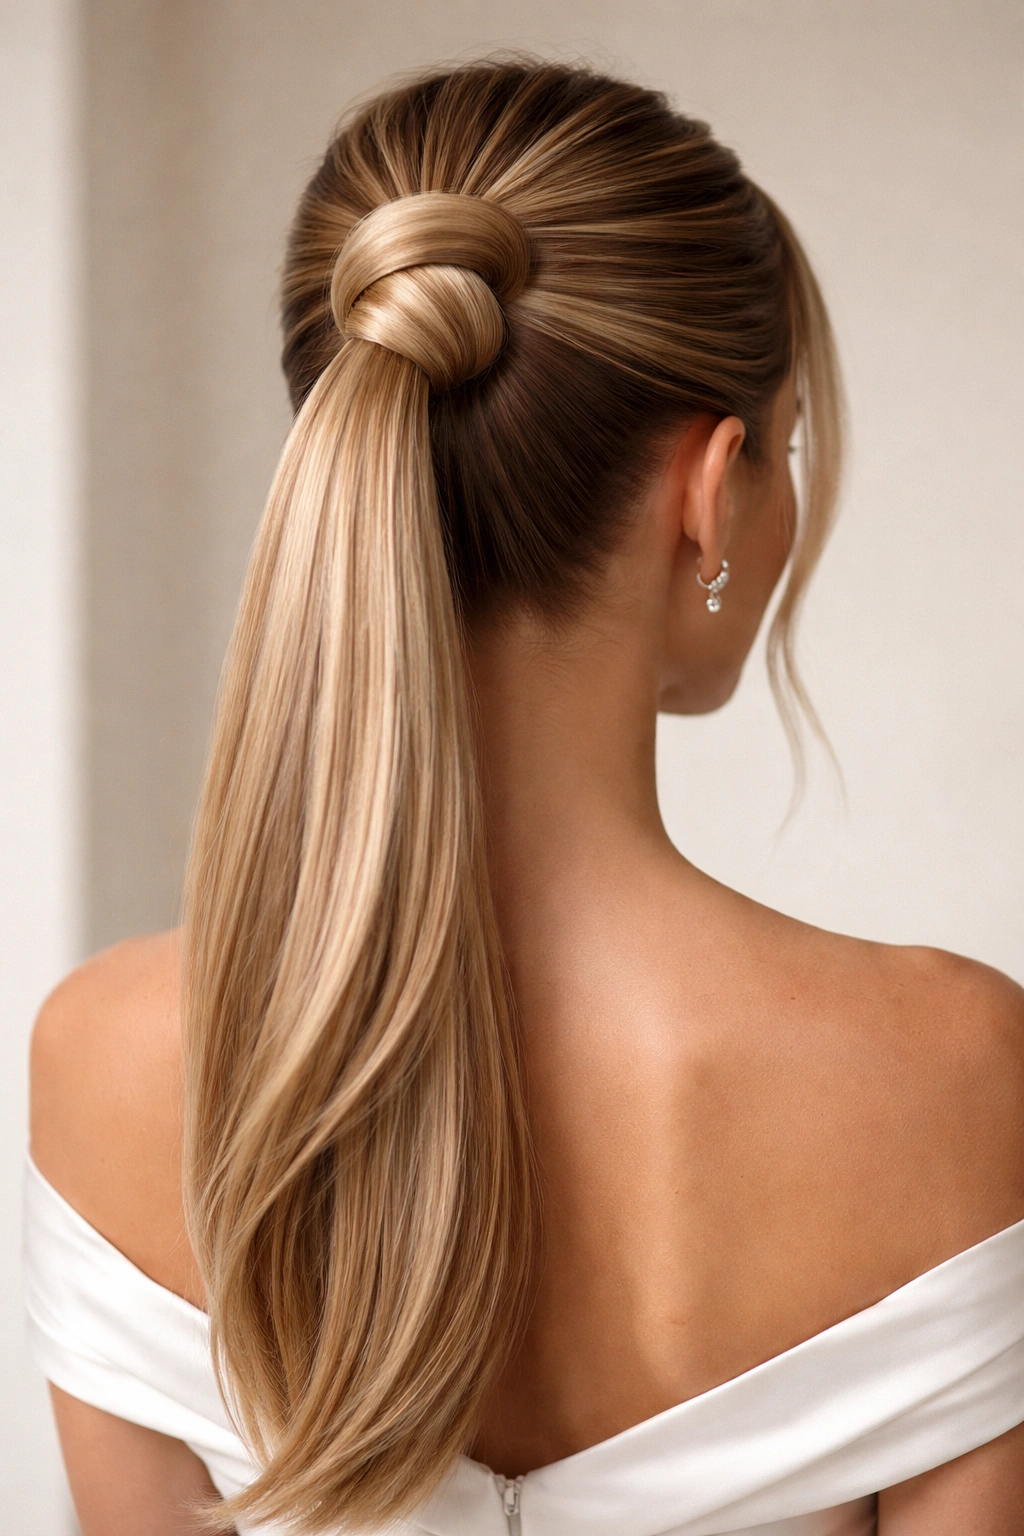
4. Sleek Low Bun Ponytail
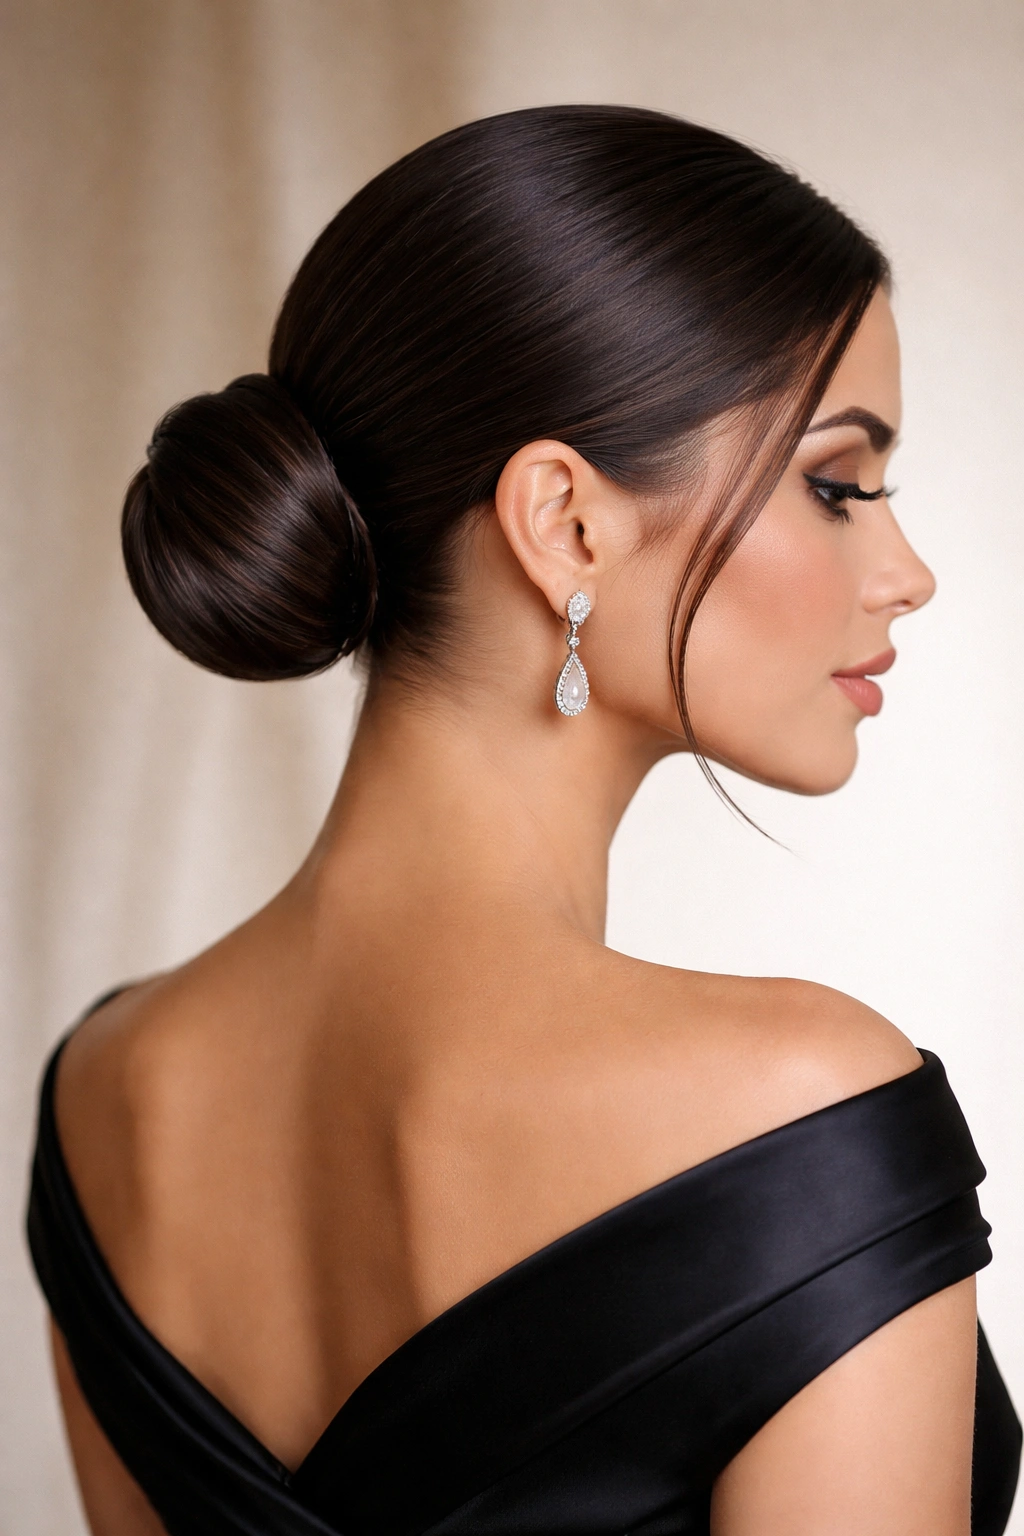
A sleek low bun ponytail positions the entire updo at the nape of your neck rather than at the crown. This style is phenomenal for formal events where you want to show off your neck, shoulders, and the back detail of your dress—think formal dinners, black-tie events, or sophisticated galas. The lower placement also works beautifully for oval and round face shapes, as it elongates the appearance of your face and draws attention downward.
When a Low Bun Is the Right Choice
Lower ponytails and buns are often more flattering than high ones, especially if you have a shorter neck, a rounder face, or you’re wearing a dress with interesting neckline or shoulder details. A sleek low bun doesn’t compete with your outfit the way a high bun might—it becomes part of the complete silhouette rather than a focal point on its own. The low placement also feels inherently more mature and refined, which works perfectly for professional galas, formal dinners, or events where you want to project authority and sophistication.
Creating Sleek, Smooth Lines
- Smooth is the operative word: This style demands silky, smooth texture throughout. Use a smoothing serum and a fine-tooth comb to ensure there are absolutely no bumps or flyaways.
- Position the ponytail correctly: Rather than at the crown, position the base of your ponytail at the nape of your neck, roughly an inch or two above where your hair naturally ends. The ponytail should be on the lower side of center.
- Tease minimally, if at all: A sleek low bun looks best when achieved through sheer smoothness and control, not volume. If you must add grip, do it underneath the ponytail where it won’t show.
- Wrap cleanly: Divide the ponytail into two sections and wrap them around each other, or simply twist the entire ponytail and coil it. Either way, keep the wrapping extremely neat.
- Set with strong hold: Use a firm hairspray to guarantee the style doesn’t develop any bumps or flyaways as the evening progresses.
Pro tip: If you have baby hairs or a wispy hairline, use a tiny brush and edge control product to smooth those down before you finish—they’re the difference between polished and slightly disheveled.
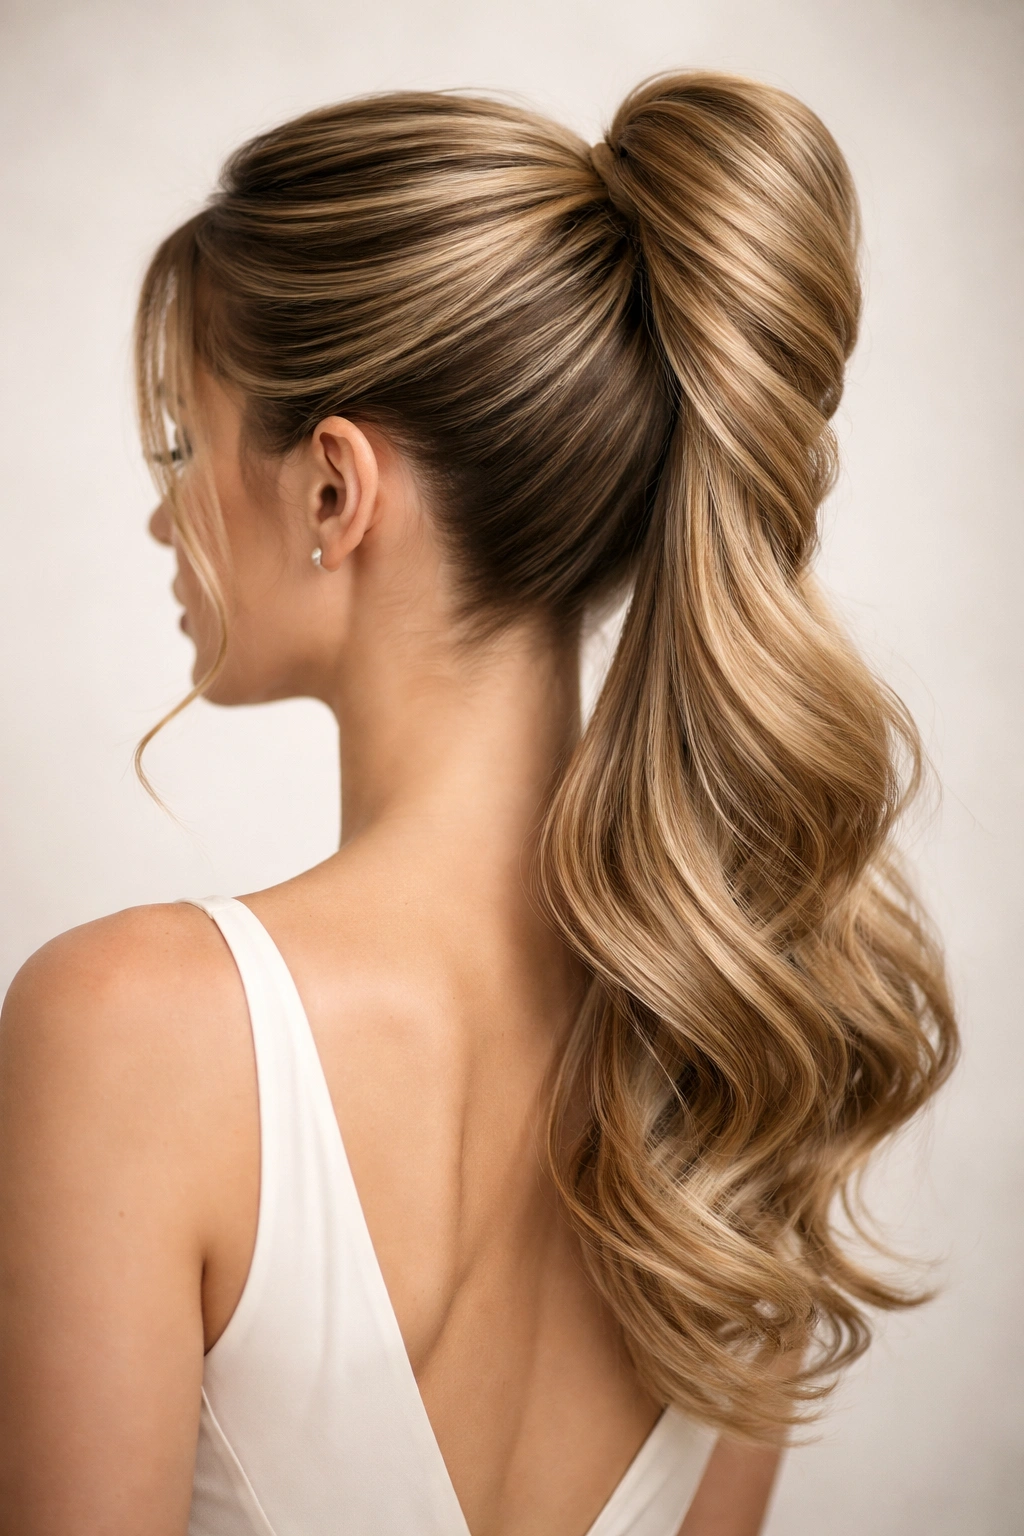
5. Voluminous Textured Updo Ponytail
Not every formal event demands sleek minimalism—sometimes the occasion calls for drama and volume. A voluminous textured updo ponytail keeps your hair up and structured while maintaining apparent fullness and presence. This style works beautifully for events where you want to feel bold and confident, for venues with dramatic lighting that will catch texture and movement, or if you simply prefer the feel and appearance of fuller hair over a sleek, tight style.
Creating Intentional Volume Without Sacrificing Formality
The key to pulling off a voluminous updo at a formal event is making the volume look intentional and controlled, not accidental or messy. You’re aiming for a style that looks like you deliberately created fullness for visual impact, not a style that looks like you couldn’t quite get your hair to cooperate. This distinction is achieved through strategic teasing, selective smoothing, and careful shaping.
The Teasing and Building Process
- Prep with texture: If you have naturally straight hair, create some texture first by curling it loosely or using a texturizing spray. Slightly wavy or naturally curly hair is ideal for this style.
- Create a substantial ponytail base: Rather than pulling hair impossibly tight, create a ponytail with some give. The ponytail itself should feel weighty and full in your hand.
- Backcomb strategically: Tease the upper portion of the ponytail to create a cushioned base, but leave the outer layer smooth. You want interior volume without exterior frizz.
- Shape the bun: Rather than wrapping the ponytail tightly, arrange it more loosely into a rounded or slightly looped bun shape. Pin it in place, allowing some intentional softness.
- Smooth the exterior: Use a fine-tooth comb and smoothing serum to smooth down the outer layer of the bun, creating a polished surface despite the textured interior.
- Add a decorative element: A jeweled clip, a silk ribbon, or decorative bobby pins along the bun draw attention to the style and make the fullness look intentional rather than accidental.
Worth knowing: This style requires more bobby pins than a sleek bun—expect to use 8-12 pins to ensure everything stays in place throughout the event.
6. Romantic Curled Ponytail Twist
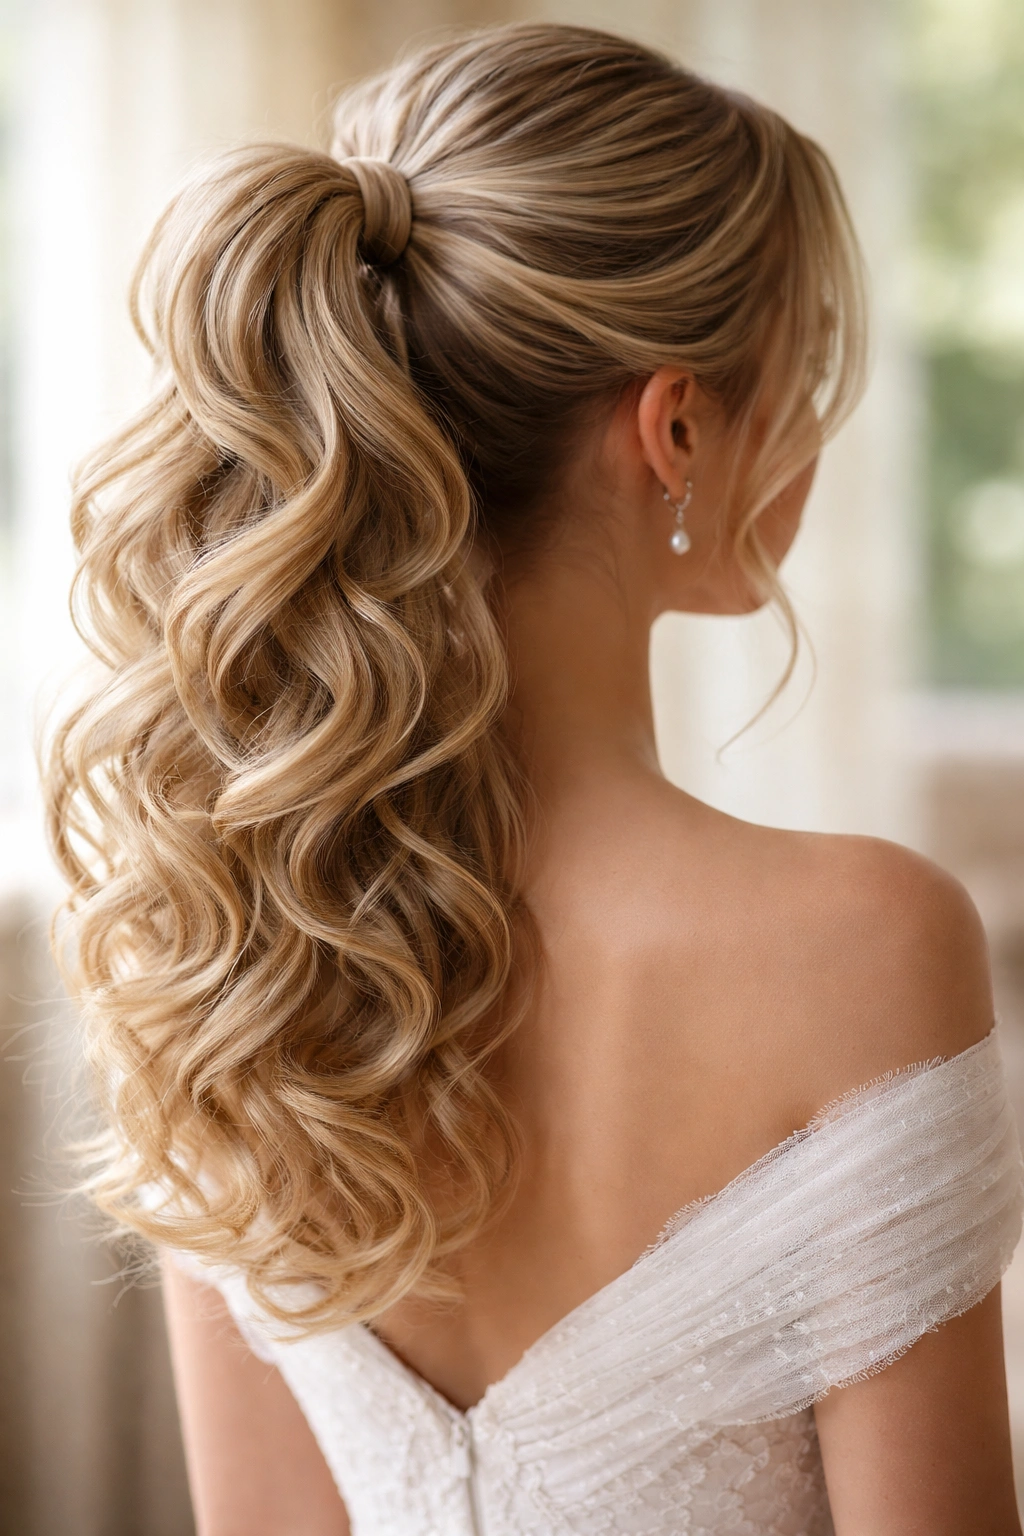
A romantic curled ponytail twist starts like a high ponytail but replaces a bun with looped or curled sections that create height and movement while maintaining an updo structure. Imagine gathering your hair into a high ponytail, then instead of twisting it and wrapping it into a bun, you create loose loops or curls from the ponytail and pin them to form a soft, romantic updo. This style is perfect for weddings (as a guest or bride), engagement parties, or any formal event with a romantic or garden aesthetic.
Why Loops Create Romance Without Sacrificing Structure
Looped styles bridge the gap between a practical updo and a softer, more romantic appearance. The loops or curls create visible softness and movement while the overall structure remains compact and styled—you get the best of both worlds. Hair that would otherwise look loose and undone is actually secured and pinned, so you have all the structural benefits of an updo with the aesthetic benefits of softer styling.
Building the Looped Structure
- Create your ponytail foundation: Make a high ponytail similar to the classic bun version, but this time you can leave it slightly looser.
- Decide on loop size: Smaller loops create a more compact, formal look. Larger loops create more movement and romance. For formal events, aim for medium-sized loops—roughly the size of your fist or slightly smaller.
- Form individual loops: Take a section of the ponytail, form it into a loop or curl, and pin the loop to your head right at the base of the ponytail. The ends of the loop should tuck underneath or be camouflaged.
- Repeat and layer: Continue forming loops around the ponytail base, overlapping them slightly and pinning each one securely. You can arrange them however looks best—symmetrical loops are more formal, asymmetrical or organic arrangements are more romantic.
- Smooth and refine: Use hairspray and a fine-tooth comb to smooth down any flyaways and refine the overall appearance.
- Finishing touches: Tuck in any stray ends and add decorative pins or a small clip if desired.
Pro tip: Curling your ponytail with a large barrel curling iron before creating the loops will make the loops hold their shape better throughout the event.
7. Sleek Polished High Ponytail
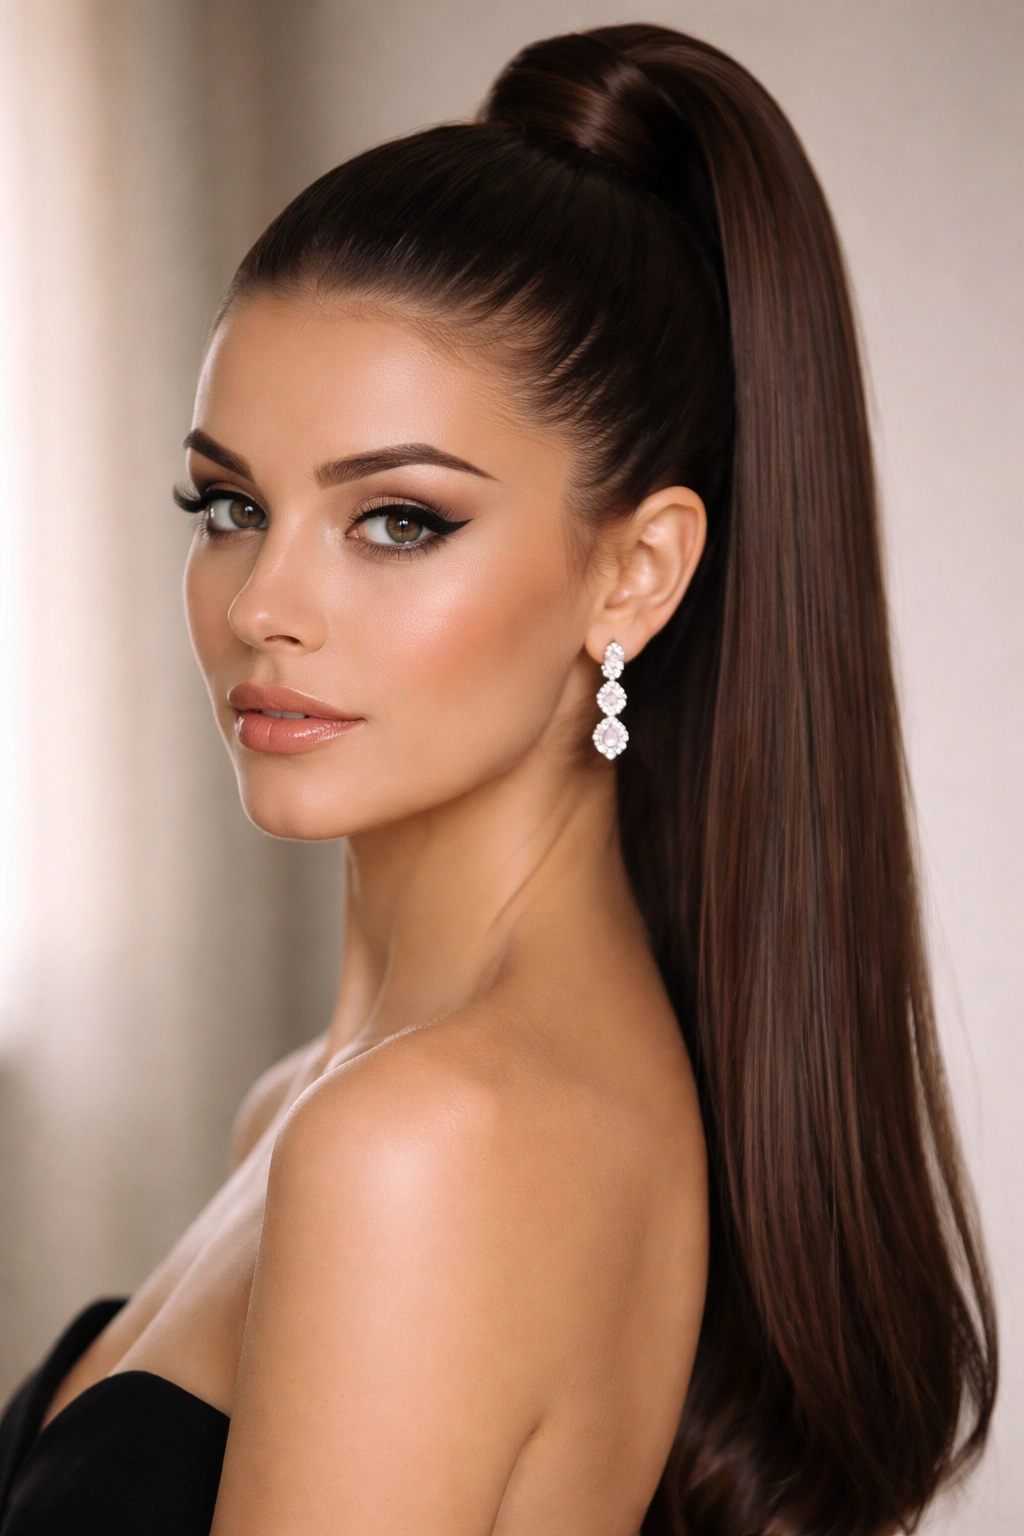
Wait—a ponytail for a formal event? Yes, but not just any ponytail. A sleek, polished high ponytail with absolutely immaculate execution can absolutely work for formal occasions, particularly if you want a style that feels modern, shows off your face and features, and still reads as intentionally styled and formal. This isn’t a casual, bouncy ponytail—it’s a geometric, structured style that only works because every detail is absolutely flawless.
The Formality of Perfection
What makes a simple high ponytail formal is the obsessive attention to smoothness, placement, and polish. Every single hair must be smooth, the base must be absolutely centered, the rubber band must be hidden, and the line from your head to the base of the ponytail must be perfectly vertical. Any bumps, flyaways, asymmetry, or looseness immediately reads as casual. Formality here comes from precision, not from the complexity of the style itself.
Achieving Absolute Sleekness
- Start with genuinely smooth hair: Blow-dry your hair straight or use a smoothing iron to ensure there are zero waves, frizz, or texture.
- Use the right products: Apply a smoothing serum or anti-frizz product, then a light holding spray to create control without making hair look stiff.
- Create the perfect part: A center part is most modern and formal. Use a fine-tooth comb and your fingernail to create an absolutely straight line from your forehead to the base of your skull.
- Gather with precision: Brush all hair directly back and up toward the crown, ensuring the line is completely vertical—not forward or backward. Secure with a high-quality elastic or snag-free hair tie.
- Hide the elastic: Once you’ve secured the ponytail, take a small section of hair from the ponytail base and wrap it around the elastic to completely conceal it. Pin the wrapped section in place underneath.
- Final smoothing: Use a fine-tooth comb and smoothing serum to smooth any stray hairs, then apply a final coat of finishing spray.
Worth knowing: For maximum formality, the ponytail should start directly at the crown of your head. Any lower and it risks looking casual or everyday.
8. French Twisted Updo Ponytail
A French twisted updo takes the technique of a French twist and combines it with a ponytail structure to create a sophisticated updo that’s more interesting than a basic bun but works with all hair types and lengths. You begin by creating a high ponytail, then rather than braiding or wrapping it, you twist the ponytail and wind it upward against itself, creating a twisted column of hair that sits vertically at the back of your head. The result looks more complex than it actually is—it’s genuinely easier than a braid but appears more intricate.
Why This Style Looks More Complex Than It Is
The beauty of a French twisted updo is that it creates visual complexity and textural interest without requiring advanced braiding skills. The vertical twist reads as sophisticated and controlled, the technique is straightforward enough that anyone can master it, and it works beautifully with different hair textures and densities. You also get one of the longest-lasting formal updo styles—the twisted structure is incredibly stable and resistant to falling apart as the evening progresses.
The Twisting and Coiling Process
- Build your foundation: Create a high ponytail at the crown of your head, similar to your classic bun base.
- Begin twisting: Take the entire ponytail and twist it around its own axis, maintaining tension as you twist. The twist should be snug enough to create visible texture but not so tight that it feels uncomfortably pulled.
- Coil upward: As you continue twisting, begin coiling the twisted ponytail upward, pinning as you go. The coil should spiral upward along the back of your head, creating a vertical or slightly diagonal line.
- Tuck and secure: Once you’ve coiled all the way to the ends of your hair, tuck the ends underneath the topmost coil and pin everything securely. This style requires 8-10 bobby pins placed close together to ensure stability.
- Set completely: Use a firm-hold hairspray to lock everything in place and prevent any loosening as you move and dance throughout the evening.
Insider note: This style looks most sophisticated when the twisted coil is slightly visible—you want people to see that there’s actual structure and technique involved. Don’t hide it; make it part of the design.
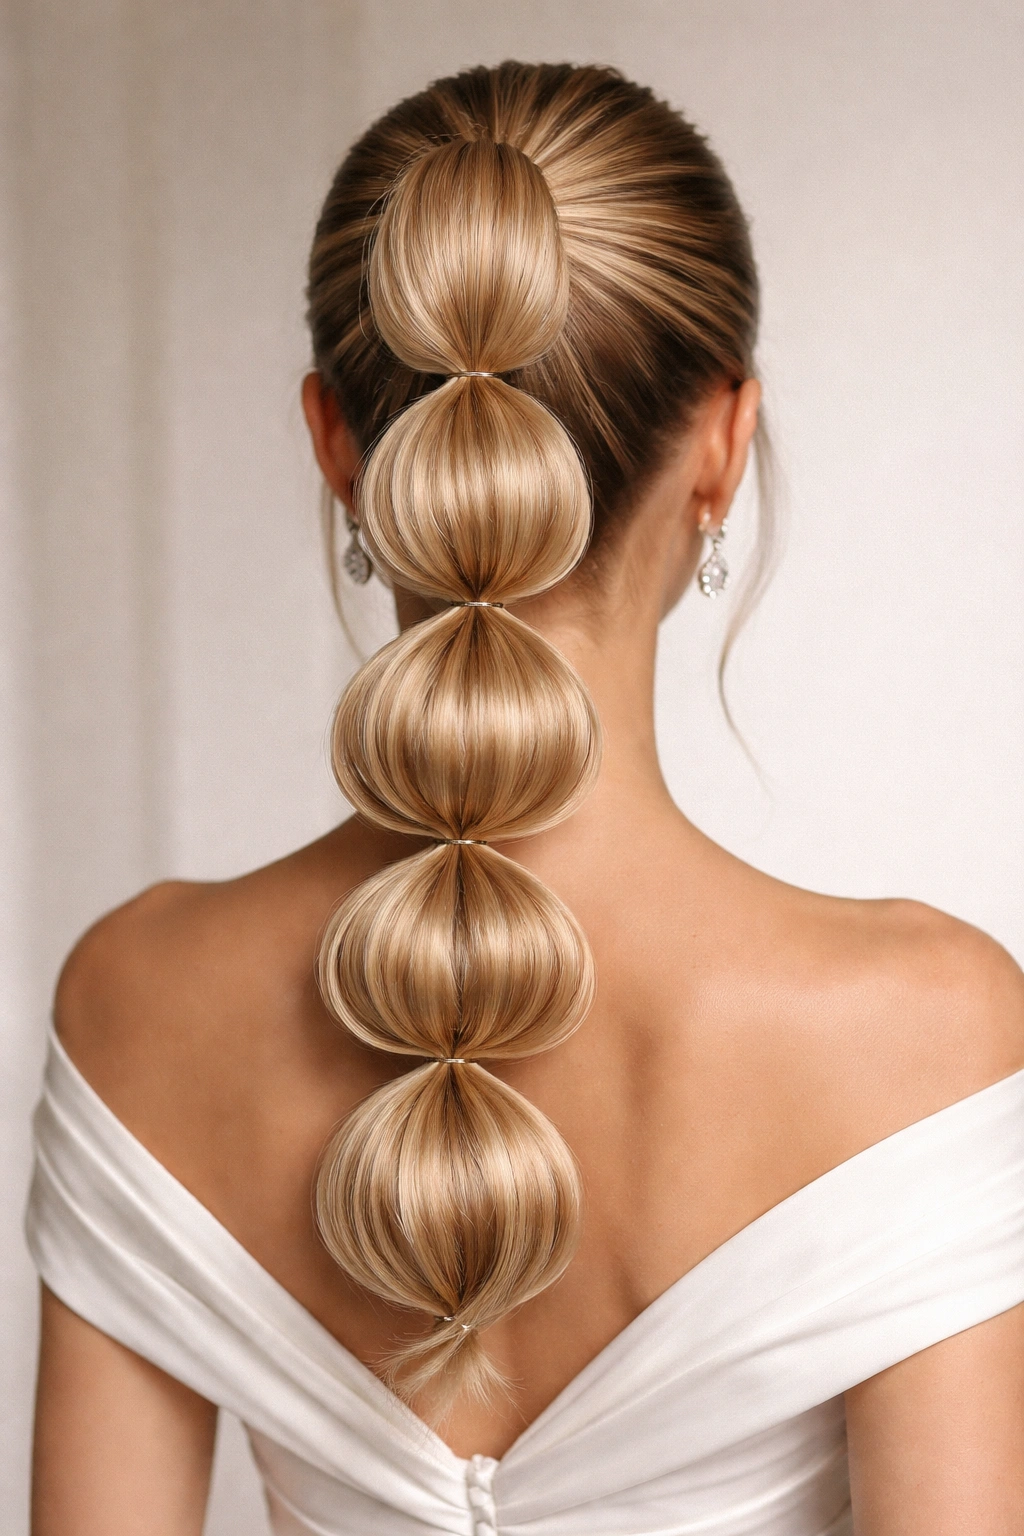
9. Sleek Bubble Ponytail Updo
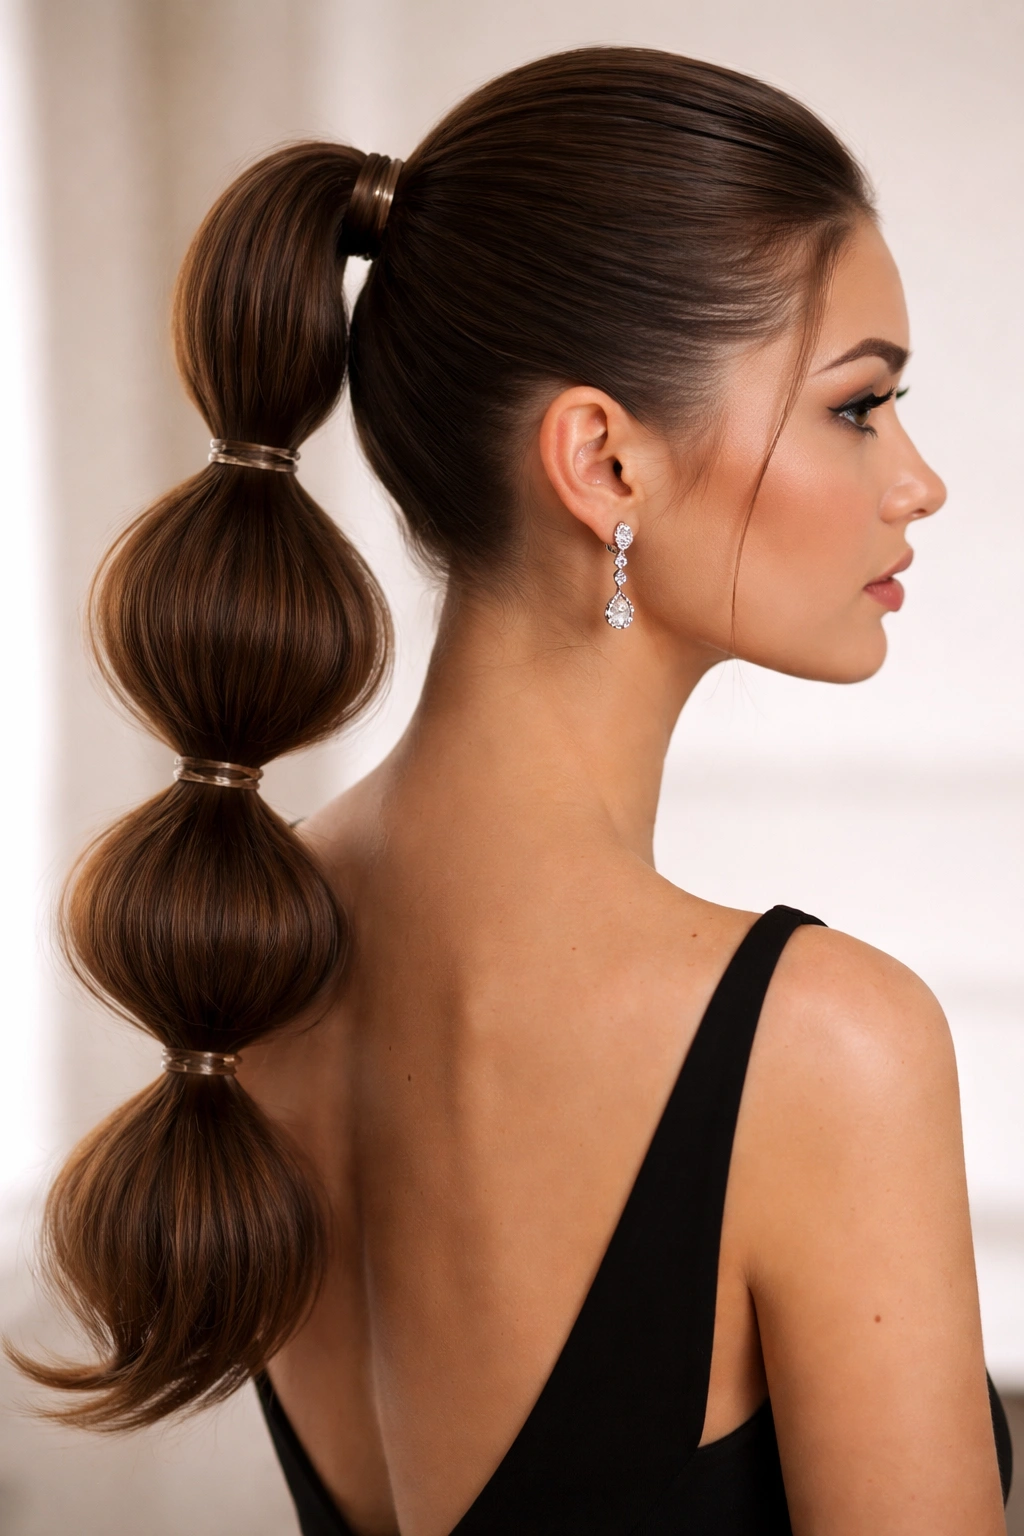
A bubble ponytail updo is a more modern, fashion-forward interpretation of a formal updo. You create a high ponytail, then secure the ponytail with multiple elastic bands spaced evenly along its length, creating bubble-shaped sections. You can either leave the bubbles loose and soft, or you can gently tease each bubble and wrap it around itself to form small buns, creating a stacked bun effect. This style is perfect for younger guests, more fashion-forward events, or occasions where you want to balance formal structure with contemporary style.
The Playful Formality of Bubbles
Bubble ponytails occupy an interesting space—they’re structured and intentional enough to work at formal events, but they’re contemporary and playful enough to feel fresh and modern. They work beautifully for galas, younger-crowd weddings, or events where you want to show personality while still being appropriately formal. The style is also incredibly practical—the multiple bands provide excellent hold even if you’re dancing or moving around extensively.
Creating Perfect Bubbles
- Start with your high ponytail: Create a sleek, smooth, high ponytail as you would for a classic style. Smooth is essential—any bumps underneath will be visible in the bubble structure.
- Divide with precision: Decide how many bubbles you want (typically 3-5 for a formal event) and divide your ponytail into equal sections. If you want 4 bubbles, divide into 4 equal lengths.
- Create the bubbles: Secure each section with a clear elastic positioned approximately 1.5 to 2 inches from the section above it. Once all elastics are in place, gently push each section outward and upward to create a bubble effect—the hair between the elastics should puff out slightly.
- Add texture if desired: For a more dramatic effect, gently backcomb each bubble to add volume and texture. For a more streamlined, formal look, leave them smooth.
- Create wrapped bun bubbles (optional): If you want the style even more structured, take each bubble and twist or coil it around itself, tucking the ends into the next elastic band down. This creates stacked mini-buns rather than loose bubbles.
- Final setting: Use hairspray to hold the bubbles in place and prevent any loosening throughout the event.
Pro tip: The most common mistake is making the bubbles unequal sizes. Taking a moment to measure and divide precisely creates a much more polished, intentional-looking result.
10. Wrapped High Knot Ponytail
A wrapped high knot ponytail is an ultra-modern, architectural interpretation of an updo that combines the polish of a formal style with the contemporary feel of a high knot or man-bun-inspired shape. You gather your hair into a high ponytail, then tie a literal knot in the ponytail—looping one section over and under another—and pin the knot in place. The result is a geometric, structured style that photographs beautifully and works perfectly for modern formal events, gallery openings, contemporary galas, or weddings with a minimalist aesthetic.
Why Knots Read as Modern and Intentional
A tied knot in your hair creates immediate visual interest and appears so intentional that it reads as high-fashion. The knot structure also provides excellent stability—it’s nearly impossible for the style to come loose or develop bumps and flyaways. You’re combining the geometric precision of formal styling with an unexpected, contemporary detail that makes the look feel fresh and current rather than traditional.
Tying and Securing Your Knot
- Create a sleek ponytail: Make a high ponytail with absolute smoothness—any bumps will be visible and will interfere with the knot structure.
- Divide the ponytail in half: Split your ponytail into two equal sections, holding each one in a separate hand.
- Tie an overhand knot: Cross one section over the other (as if you were beginning to tie a regular knot), then pull both sections snugly to create the knot structure. You want the knot snug but not uncomfortably tight.
- Adjust and shape: Once you’ve tied the knot, position it so it sits perfectly centered at the top of the ponytail. Gently adjust the loops and tails of the knot so they’re balanced and symmetrical.
- Pin securely: Use bobby pins (preferably ones that match your hair color) to pin the knot in place from underneath. You’ll typically need 3-4 pins placed in a small cluster right at the center of the knot.
- Tuck the tail: The remaining tail of the ponytail can either be left loose (if your hair is long enough to reach past the knot), wrapped around the knot base, or curled into a small bun above the knot.
Worth knowing: This style works best with longer hair that has enough length to create a substantial knot. On shorter lengths, the knot can look cramped or appear to take up too much of the ponytail.
11. Looped Formal Bun Ponytail
A looped formal bun ponytail is a structured version of the romantic curled ponytail twist that creates a more architectural, formal appearance. Rather than soft, organic loops, you create precisely shaped loops of equal size and pin them to form a perfectly rounded or slightly flattened bun shape. This style reads as incredibly intentional, highly controlled, and genuinely formal—it’s the updo equivalent of perfectly sculpted architecture rather than organic growth.
The Precision Factor in Formal Styling
What transforms casual loops into formal loops is the precision and uniformity involved. When every loop is exactly the same size, arranged symmetrically, and secured with mathematical precision, the overall effect reads as high-fashion and formal rather than soft or romantic. This is the style to choose if you want your updo to be the statement of your appearance, if you want to project absolute polish and control, or if you simply prefer more structured styles that feel intentional and geometric.
Creating Uniform, Controlled Loops
- Prep and ponytail: Create a high, smooth ponytail with excellent grip. The base of this style needs to be rock-solid.
- Decide on loop count: For most heads and hair densities, 4-6 loops create a balanced, formal appearance. Plan your loops before you start.
- Create uniform sections: Divide your ponytail into the number of sections you want loops. Keeping sections equal in size is essential—unequal loops immediately look accidental.
- Form each loop identically: Create each loop by folding a section of ponytail into a loop shape, pinning it at the base with the ends tucked underneath. Every loop should be the same approximate size and depth.
- Arrange in formation: Pin all loops together, creating a rounded bun shape. A slightly flattened, oval-shaped bun reads more formal than a perfectly round one.
- Refine the edges: Smooth down any flyaways and ensure the exterior of the bun is sleek. The interior can have more texture and volume, but the outside should appear polished.
- Final security: Use firm-hold hairspray and ensure every loop is pinned securely—you need at least 12-15 bobby pins for a style this structured.
Pro tip: Using a round brush to curl each section before creating the loops will make the loops hold their shape and appear more intentionally formed rather than randomly pinned.
12. Intricate Woven Updo Ponytail
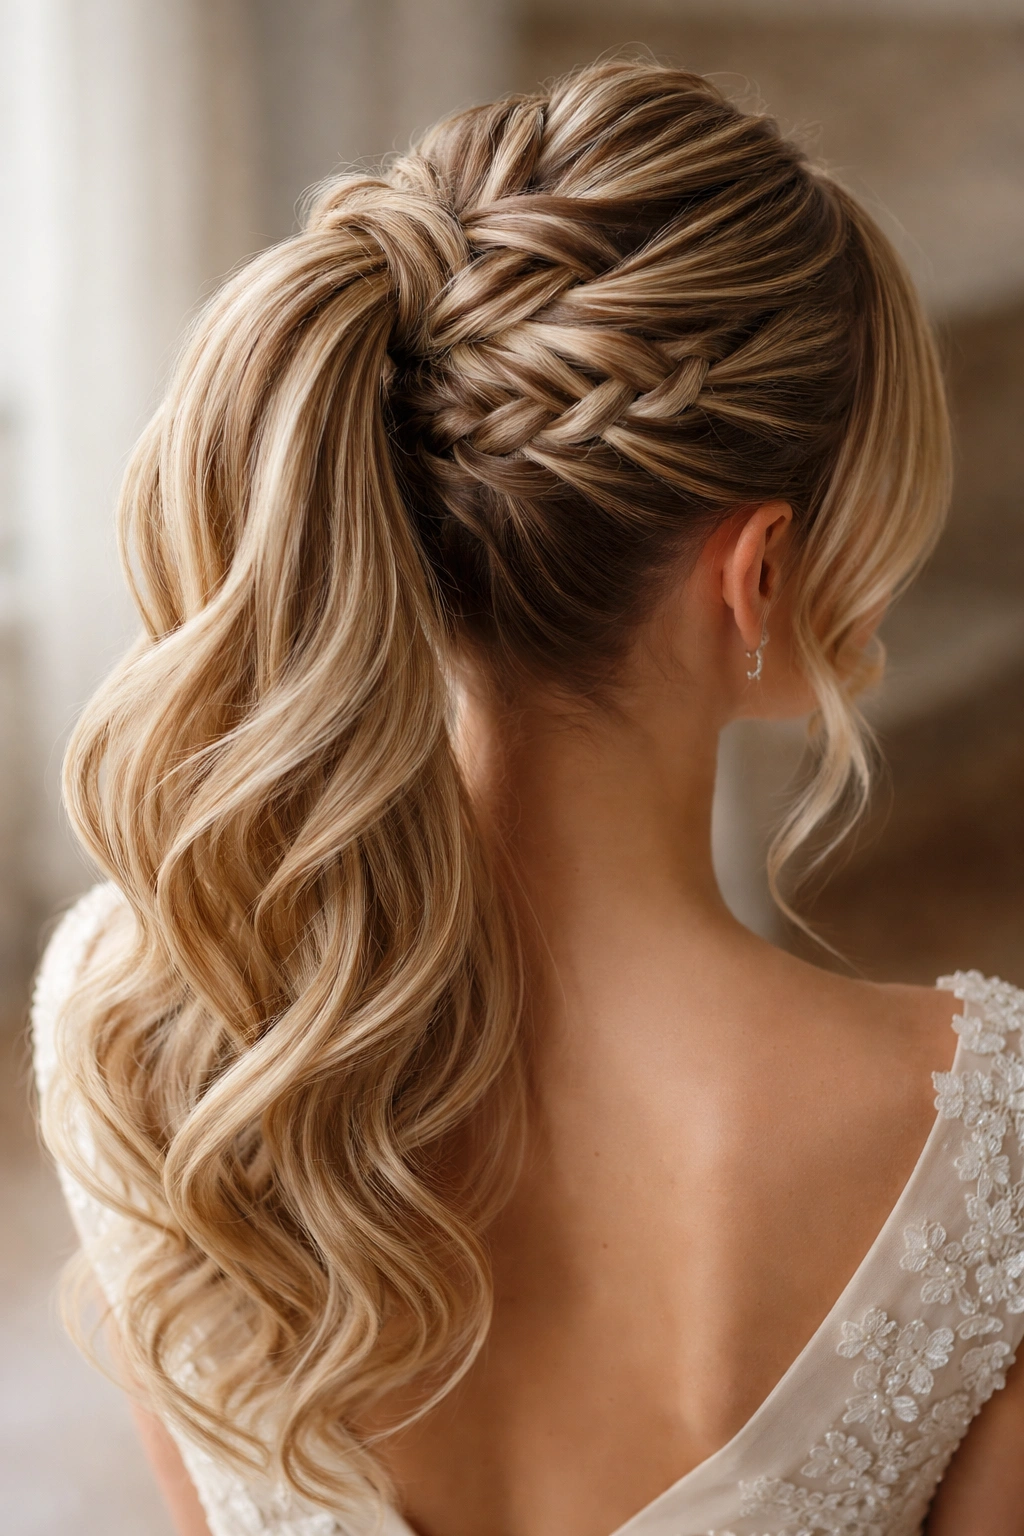
An intricate woven updo ponytail is the most complex style on this list, combining multiple braiding or weaving techniques into a single sophisticated updo. You might create two braids that weave around each other, incorporate a Dutch or French braid, or create a laced pattern where braided sections weave through unbraided sections. This is the style to choose when you want maximum visual impact, when you want your updo to be absolutely showstopping, or when you have the time and skill to execute something genuinely intricate.
When Complexity Becomes Elegance
An intricate woven updo reads as profoundly elegant because of the obvious time, skill, and intention involved in creating it. You’re signaling through your hairstyle that this event matters enough for you to invest serious effort. The visual complexity also means your updo becomes a focal point and conversation piece rather than simply background decoration. This style is perfect for significant events—destination weddings, gala events, engagement parties—or simply if you love the challenge of creating something intricate and beautiful.
Building Your Woven Structure
- Decide on your weaving pattern: Plan this out before you start. Will you create two braids that interweave? A spiral of braids that wraps around the back of the head? A laced pattern? Sketching or pinning a reference image helps enormously.
- Section your hair strategically: Rather than creating one ponytail, you might create multiple smaller sections that you’ll braid independently and then weave together.
- Braid with precision: Execute each braid or woven element with tight, consistent tension. Any loose or uneven braiding will read as sloppy rather than intricate.
- Weave your sections: Once individual braids are complete, begin weaving them together according to your planned pattern. This might mean braids looping over and under each other, or braids spiraling around a central point.
- Form the final updo: Once you’ve created your woven structure, arrange it into your chosen updo shape—a bun, a knot, a looped formation. The weaving creates the visual detail; the final shape determines the overall silhouette.
- Secure everything: Use numerous bobby pins (expect 15-20+) and firm-hold hairspray. A complex style like this demands absolute security.
- Add decorative elements: Small jeweled clips, delicate bobby pins with pearl or crystal details, or silk thread woven through the braids can enhance the intricacy and add luxury to the style.
Worth knowing: This style can take 30-45 minutes to execute properly, even if you’re experienced. It’s not a quick-fix updo—it’s a labor of love that shows on the final result.
Final Thoughts

The twelve updo ponytail styles covered here represent the full spectrum of what’s possible when you combine formal structure with creative interpretation. Whether you choose the absolute simplicity of a sleek high ponytail, the romantic appeal of looped curls, the architectural precision of a wrapped knot, or the intricate complexity of woven braids, every single one of these styles works beautifully for formal events when executed with attention to detail and commitment to polish.
The real secret to pulling off any formal updo is understanding that formality lives in the details—the absolute smoothness of your hair, the precision of your placement, the security of your pins, the final coat of hairspray that guarantees your style won’t shift or loosen as you move through the evening. A formal updo isn’t truly formal if it’s slightly bumpy, slightly off-center, or slightly likely to slip. Spend the extra five minutes perfecting the details, and you’ll have a style that lasts beautifully through the entire event and photographs like a professional styling.
Consider your hair type, the neckline and back detail of your dress, your face shape, and how much time you realistically have to spend on your hair. That combination will point you toward the style that’s genuinely right for you. Once you’ve chosen, practice it at least once before the actual event—nothing builds confidence like knowing you can recreate the style smoothly and successfully. Your updo should feel like armor and celebration combined—that’s the mark of truly successful formal styling.