



Twist styles have become a go-to solution for anyone looking to keep their natural hair protected, manageable, and genuinely stylish without spending hours at the salon. Whether you’re working with tightly coiled, wavy, or densely textured hair, twists offer the rare combination of simplicity, versatility, and longevity—you can rock the same style for weeks and still look intentional and put-together. The beauty of twist styling is that once you understand the foundational technique, you can adapt it endlessly: twist your hair thicker or thinner, combine twists with other techniques, dress them up for an evening out, or keep them casual for everyday wear.
The appeal goes beyond aesthetics. Twist styles protect your natural hair from daily manipulation and environmental stress while you’re going about your life. They require minimal maintenance once installed, which means you’re not constantly touching, combing, or manipulating your strands. You can wash your twists, moisturize your scalp, and refresh them with a light twist-up as needed without dismantling the entire style. For those mornings when you’re running late but still want to look like you’ve got your life together, twists deliver that effortlessly polished appearance that feels authentic to your hair and your aesthetic.
What makes twists especially appealing is that you don’t need to wait for a salon appointment to switch up your look. While professional stylists certainly have advanced techniques, many twist styles are completely doable at home—especially if you’ve done them once or twice before. You’ll need patience more than anything else, though the time investment becomes worthwhile when your style lasts three to six weeks. Real talk: some twist styles are genuinely easier than others, and some suit specific hair textures or lifestyle situations better than the rest.
1. Rope Twists
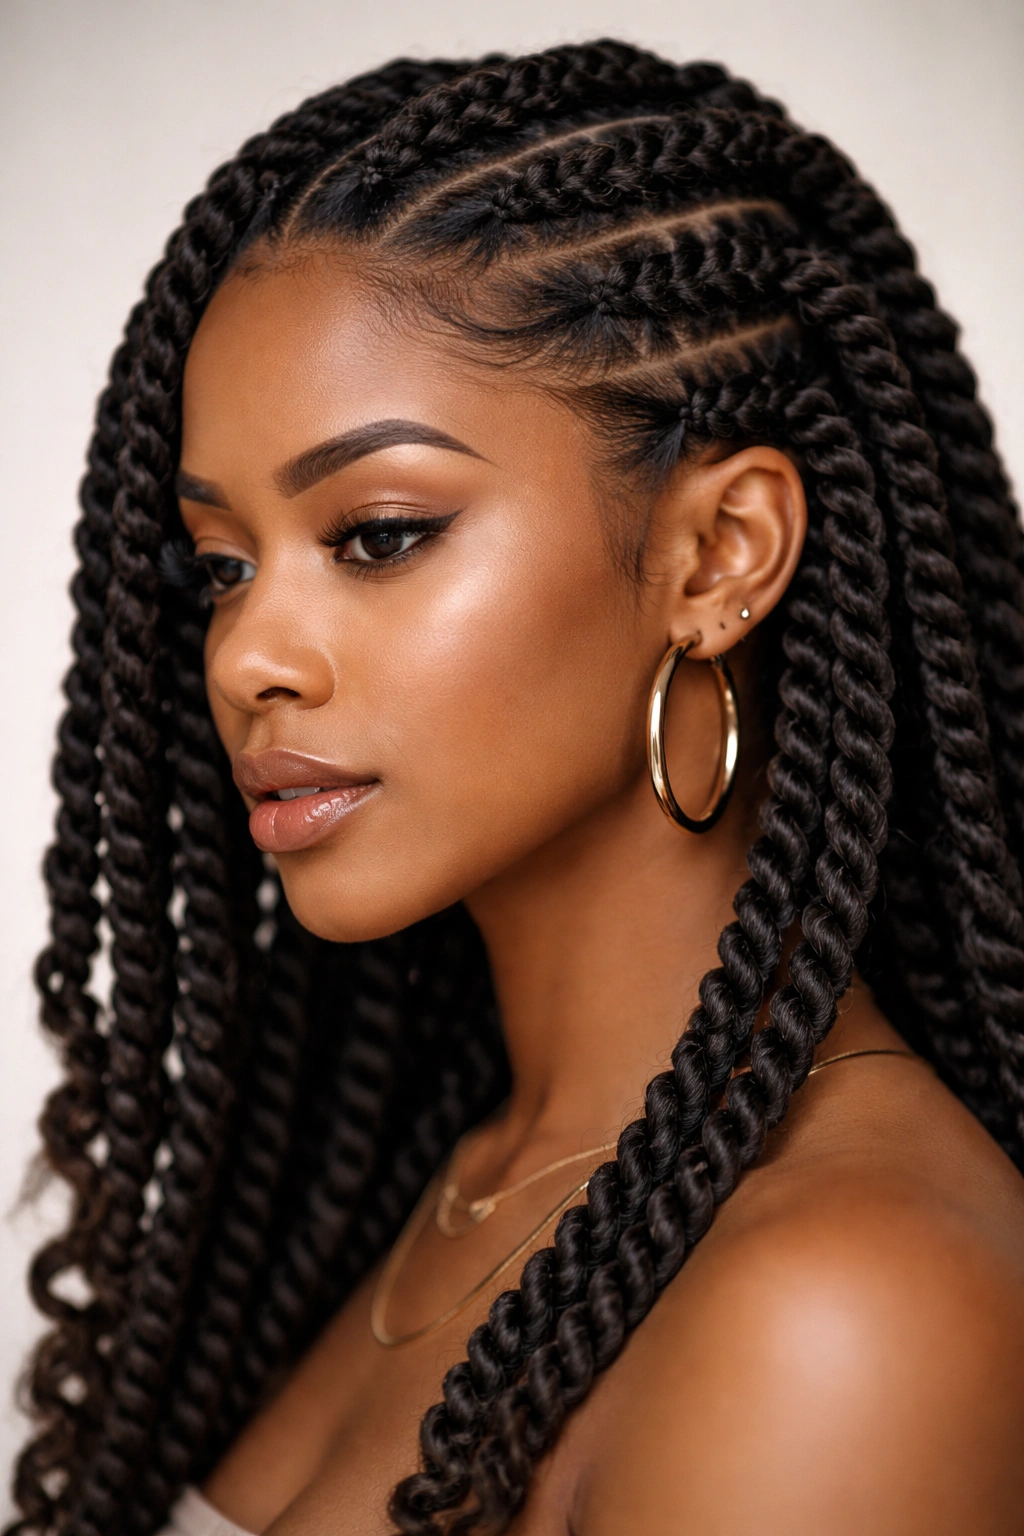
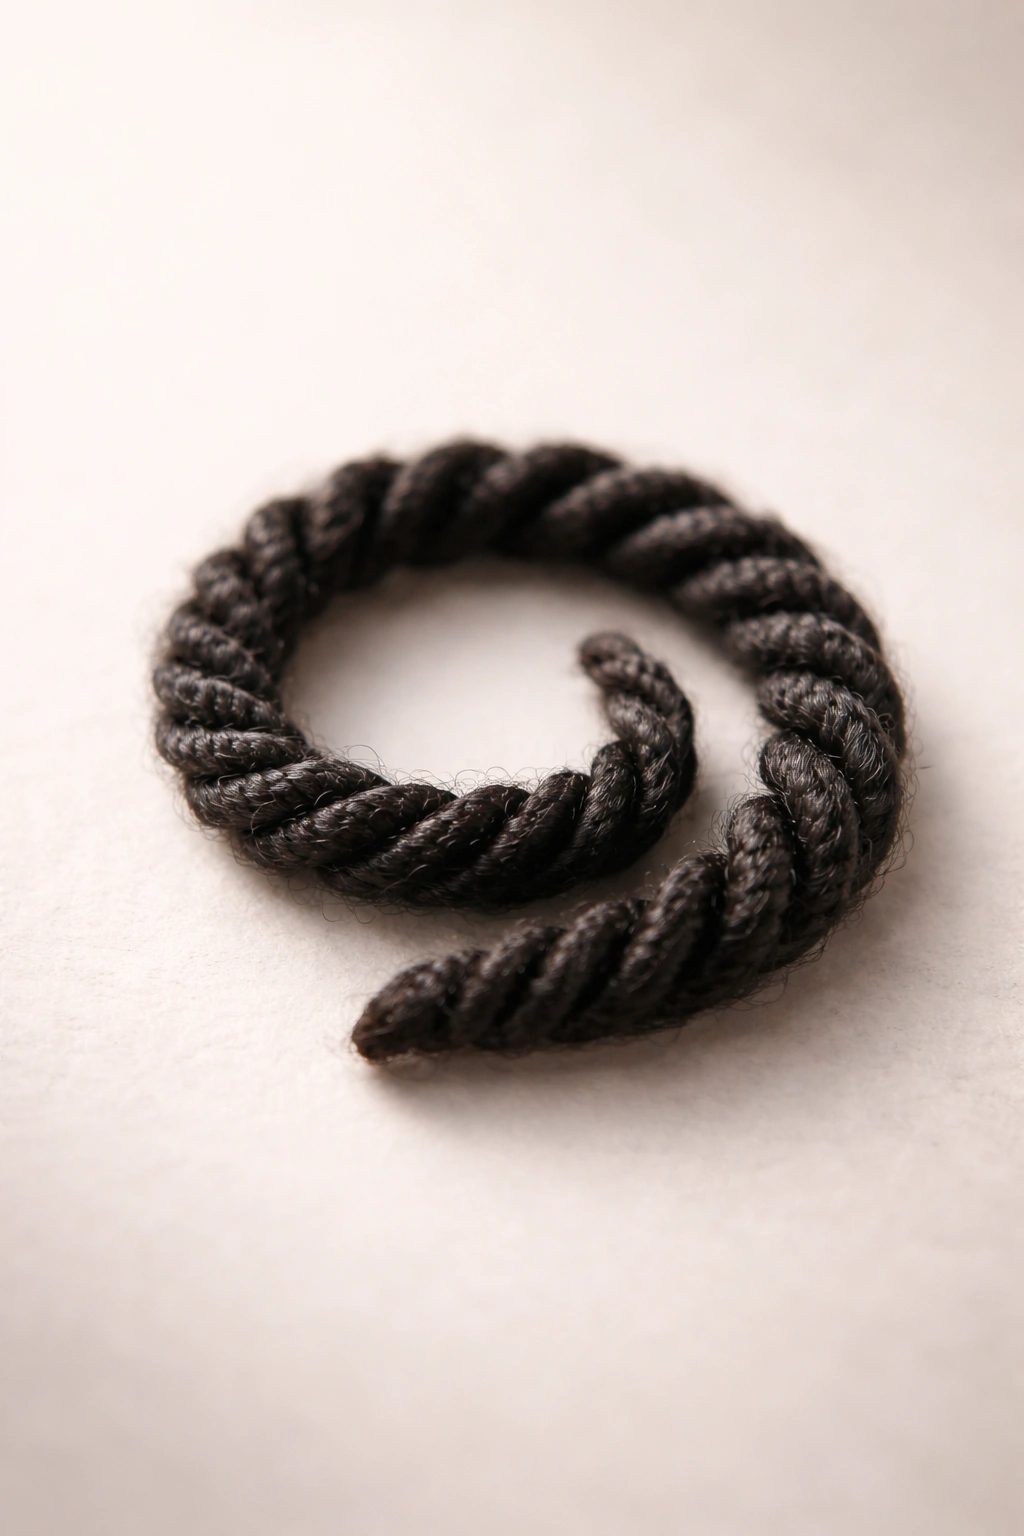
Rope twists are the textured cousin of traditional two-strand twists—instead of twisting two sections of hair cleanly over each other, you wrap them around one another in a tighter spiral that creates a ropelike appearance. This technique produces a style that looks thicker, bolder, and more visually defined than standard twists, which makes rope twists an excellent choice if you want a statement look or prefer the way tighter twists frame your face and sit against your scalp.
What Makes Rope Twists Unique
The wrapping technique creates a denser visual texture that photographs beautifully and holds up remarkably well over time. Because the sections are wrapped rather than simply twisted, rope twists tend to stay twisted longer before loosening or unraveling—many people find they can get five to six weeks of wear from rope twists compared to four to five weeks from traditional two-strand twists. The style works equally well on medium to thick hair textures and looks intentional whether you’re dressing them up or keeping them casual. Rope twists are also naturally perfect for protective styling because the wrapping creates a tighter hold on each section of hair from root to tip.
How to Create and Maintain Rope Twists
- Detangle your hair thoroughly with a leave-in conditioner and moisturizing spray; damp (not soaking wet) hair works best for the initial installation
- Divide your hair into sections of whatever size you prefer; larger sections create thicker rope twists that install faster, while smaller sections create finer, more intricate-looking twists
- Take two subsections from each main section and wrap one around the other while twisting both subsections simultaneously—the wrapping is the key difference from standard twists
- This technique requires more attention and precision than regular twisting, so don’t rush; going slowly the first time means you’ll develop better muscle memory
- Moisturize your scalp every few days with a lightweight oil or scalp elixir, and mist the twists themselves with a hydrating spray every two to three days
Pro tip: Rope twists look absolutely stunning when installed with a ombre or color-block effect—try installing your first few twists with your natural hair color and switching to a vibrant extension color halfway down, or alternate colored twists in a deliberate pattern for an elevated look.
2. Senegalese Twists
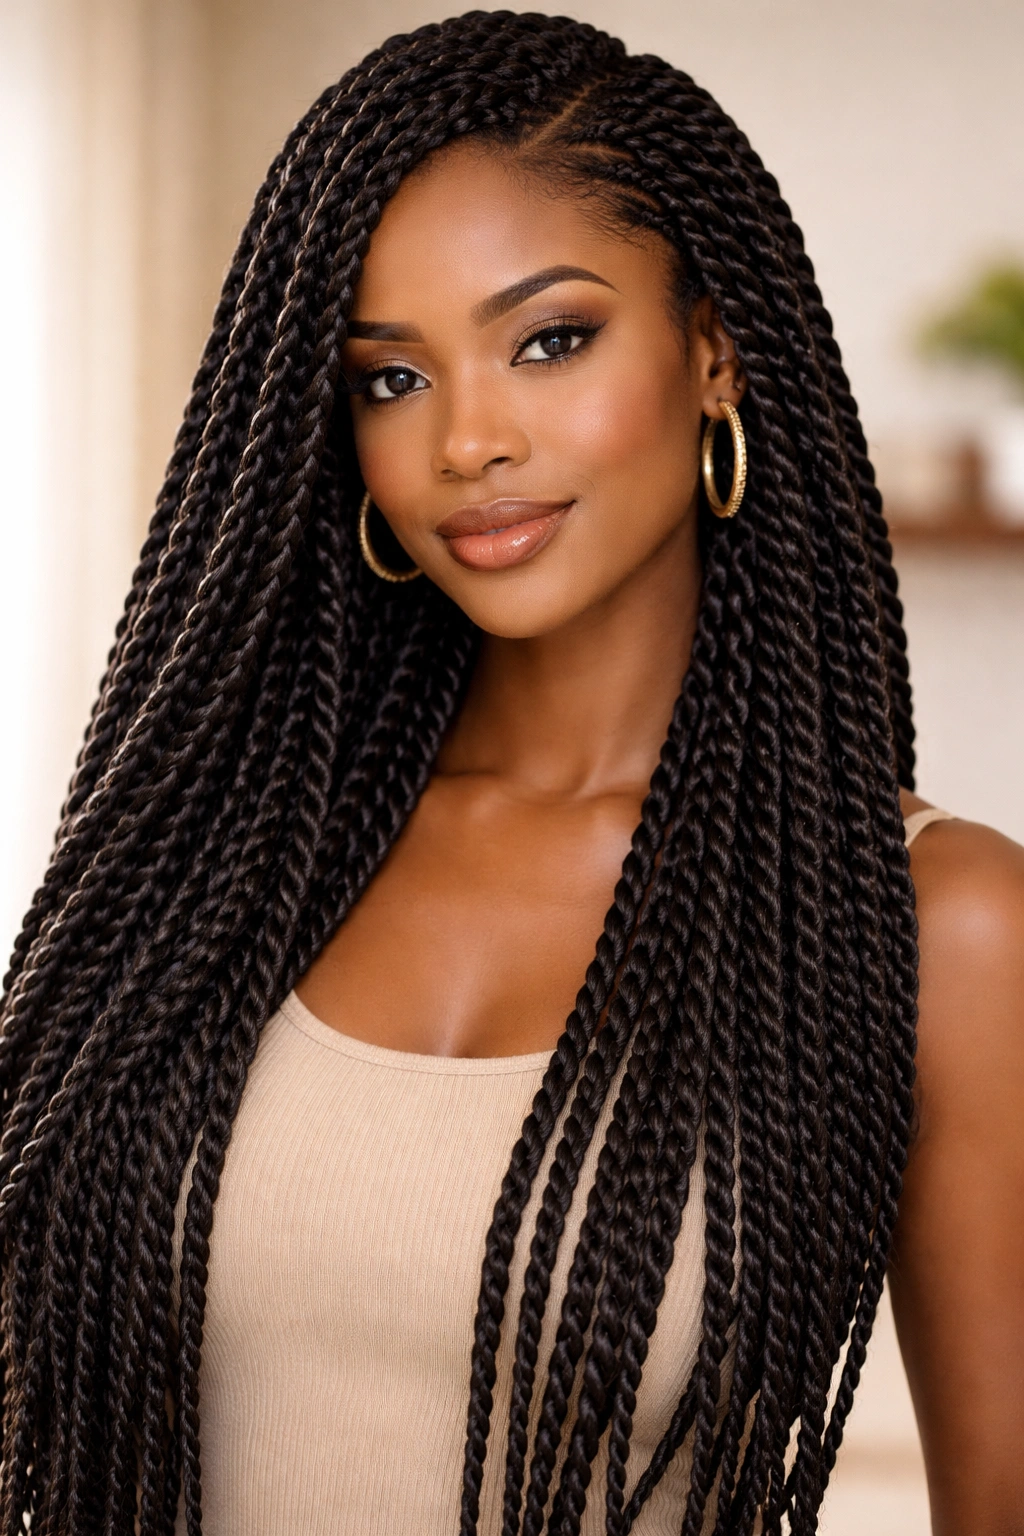
Senegalese twists represent a specific variation that uses three strands instead of two, creating a style that’s immediately recognizable by its fuller, ropelike appearance and elegant visual weight. Named after the West African region where this braiding and twisting technique has been a cultural staple for generations, Senegalese twists have become mainstream in natural hair communities as a protective style that looks polished enough for professional settings while still honoring traditional techniques.
The Three-Strand Structure
The three-strand twist combines elements of rope twists and traditional braiding, but the technique remains closer to twisting than braiding—you’re still rotating strands around each other rather than crossing them over. This creates a style that reads as more refined and intricate than two-strand twists, with visible texture and dimension that catches light beautifully. The added strand also means Senegalese twists have substantially more hold and durability than standard twists. Many people find that Senegalese twists last six to eight weeks without loosening, which is a significant advantage if you’re someone who dislikes the maintenance of refreshing twists every few weeks.
Installation Tips and Best Practices
- You can install Senegalese twists using your natural hair alone or with extension hair added for length, thickness, or color—adding extensions gives you more styling flexibility and typically extends the wear time even further
- Work with damp, moisturized hair and apply a light styling cream or twisting cream to each section before you begin—this helps the three strands hold together more securely
- Take your time with the first few twists to establish a consistent technique; once you find your rhythm, your hands will move faster
- Separate each completed twist from the next with your fingers as you work to prevent them from sticking together or adhering at the scalp
- Sleep on a silk or satin pillowcase and consider pineapple-ing your twists at night (gathering them loosely at the crown) to reduce frizz and extend the time between refreshes
Worth knowing: Senegalese twists are exceptionally beautiful worn in an updo style—you can create buns, coils, or wrapped updos that look intricate and intentional because the three-strand texture is inherently decorative.
3. Two-Strand Twists
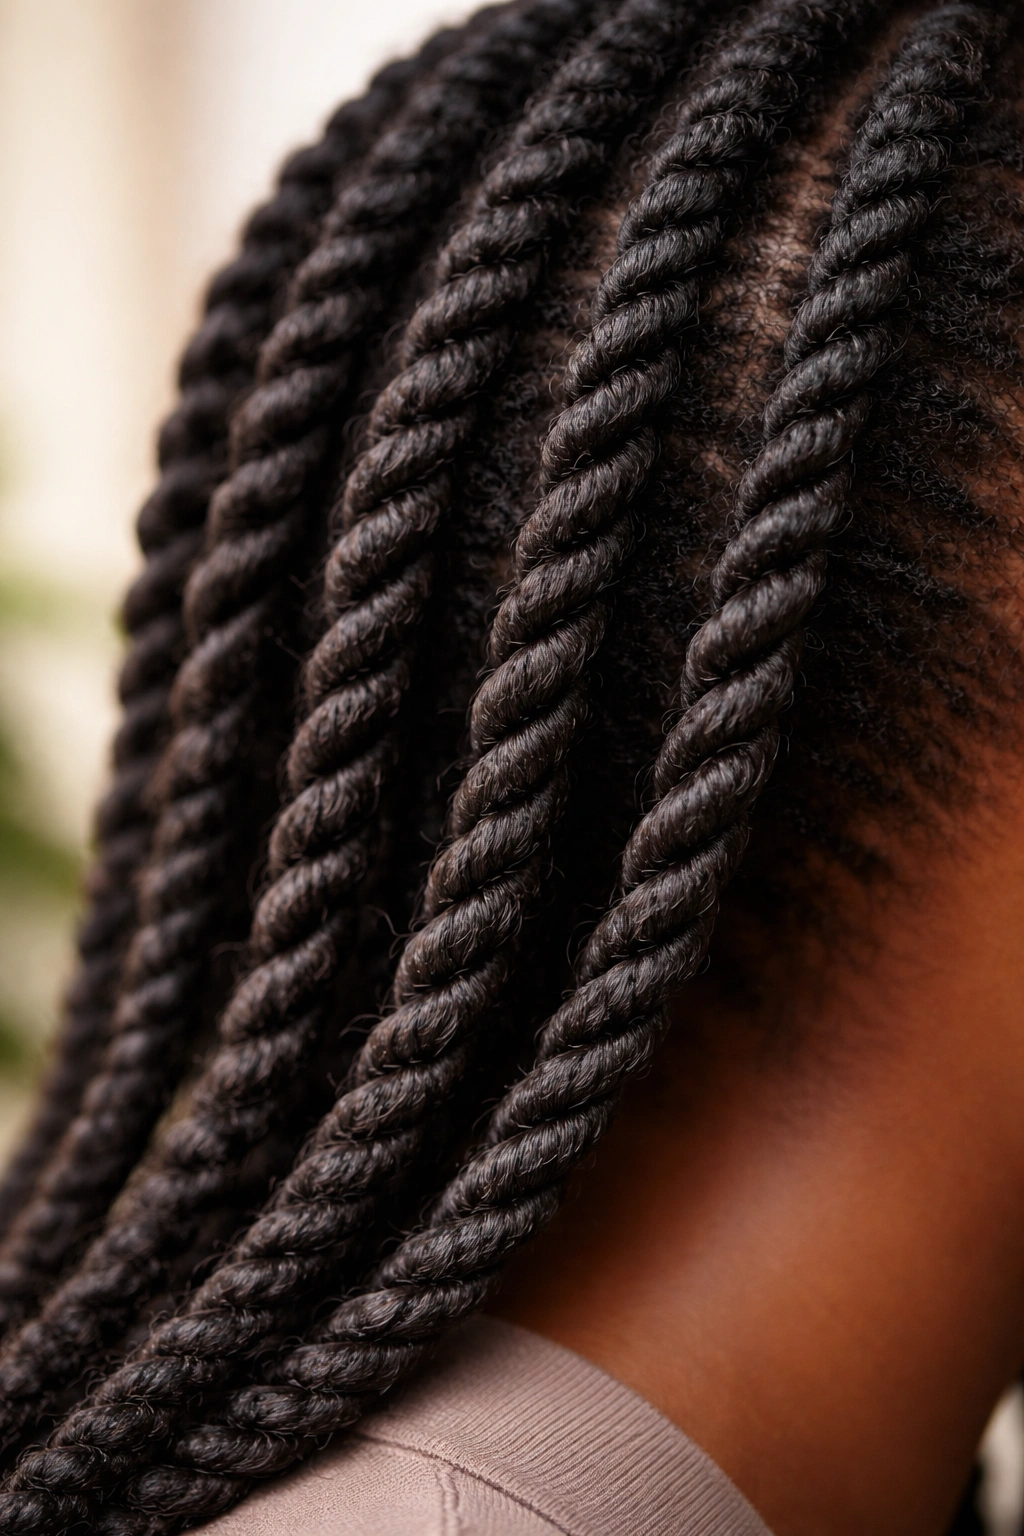
Two-strand twists are the fundamental technique that most natural hair enthusiasts learn first—you simply divide your hair into two sections and rotate them around each other from scalp to end. This simplicity is deceptive: two-strand twists are endlessly versatile and work beautifully on nearly every hair texture, from loose waves to tight coils. They’re the entry point into twist styling because the learning curve is genuinely manageable, and once you’ve installed one set successfully, you understand the basic mechanism that all other twist variations build from.
Why Two-Strand Twists Remain Essential
The accessibility of two-strand twists makes them invaluable for anyone with limited time, a tight budget, or reluctance to book salon appointments. You can install them at home in an afternoon or evening with nothing more than a leave-in conditioner, your hands, and patience. Because you’re only managing two sections per twist, the technique is less complex than braiding, meaning even people with limited dexterity or hand strength can successfully create two-strand twists. The style itself looks great worn down, tucked into a bun, or pinned into an updo—they work equally well as an everyday wear style or a dressed-up option for special occasions.
Installation and Longevity
- Start with completely detangled, damp (not wet) hair; moisture helps the twists hold more securely throughout the installation process
- Apply a twisting cream, styling butter, or leave-in conditioner to each section before twisting—this provides slip so your hands move smoothly and creates hold that lasts longer
- Divide your hair into sections before you start twisting; consistent section size means your twists will look uniform and balanced around your head
- Twist from scalp to end, applying slight tension without pulling so tightly that you create stress on your hairline or scalp
- Seal the ends of each twist by dipping them in hot water or carefully running them under warm water to help them hold their shape
- Most people get four to five weeks of wear from two-strand twists before they begin noticeably loosening
Quick note: Two-strand twists are perfect for two-toned or multi-colored looks—install some twists with extension hair in a contrasting color for visual interest without committing to permanent color.
4. Marley Twists
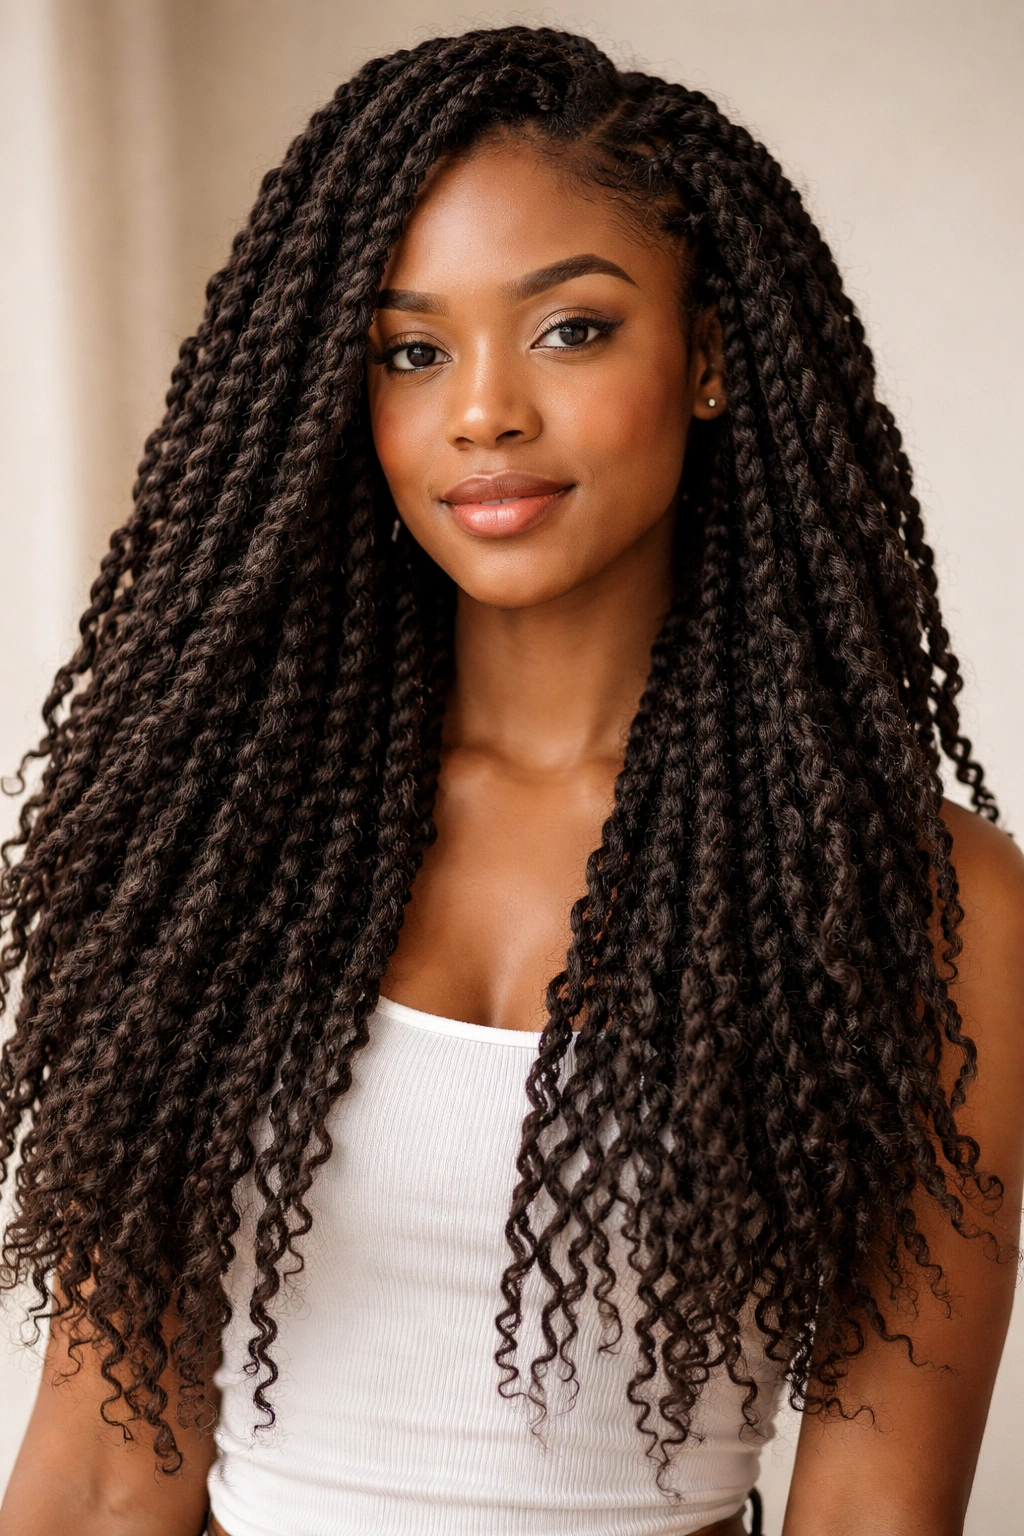
Marley twists use a specific type of crochet hair or braiding hair to add texture, volume, and durability to your natural twists. Named after the type of extension hair traditionally used (Marley hair, which has a coarser, more natural texture than synthetic crochet hair), Marley twists combine your natural hair with extensions to create a style that’s fuller, longer, and significantly more durable than twists using natural hair alone.
The Extension Advantage
Adding extensions through Marley twists gives you substantially more styling versatility—you can create thicker twists, longer twists, or use colored extensions to add visual interest. The extensions also extend the wear time significantly because they don’t unravel the way natural hair sometimes does; the texture of Marley hair grips your natural strands and keeps everything locked together. The added texture creates visual definition that reads beautifully and photographs well. Marley twists typically last six to eight weeks, sometimes longer if you maintain them properly. The style also protects your natural hair more thoroughly because your hair is tucked inside the twist rather than being the sole structure holding the style together.
How to Install Marley Twists
- Prepare your natural hair by washing, conditioning, and detangling thoroughly; let it air-dry to damp
- Section your hair into the size twists you want—Marley twists are typically thicker than natural-hair-only twists, so consider making your sections slightly larger
- Open your Marley hair extension and divide it into the amount you need for each twist
- Attach the Marley hair to your natural hair at the root by twisting your natural hair together with the extension hair as one unit
- Continue twisting your natural hair and the Marley hair together down the entire length, keeping tension consistent
- Seal the ends by dipping them in hot water to fuse the Marley hair slightly and prevent unraveling
- These twists are thicker and heavier, so be intentional about the size—very large twists can pull on your scalp, so find a size that feels secure but comfortable
Real talk: Marley twists require more frequent scalp maintenance than some other styles because you can’t access your scalp as easily; moisturize your scalp with lightweight oils every few days and don’t install these too tightly if you have a sensitive scalp.
5. Flexi-Rod Twists
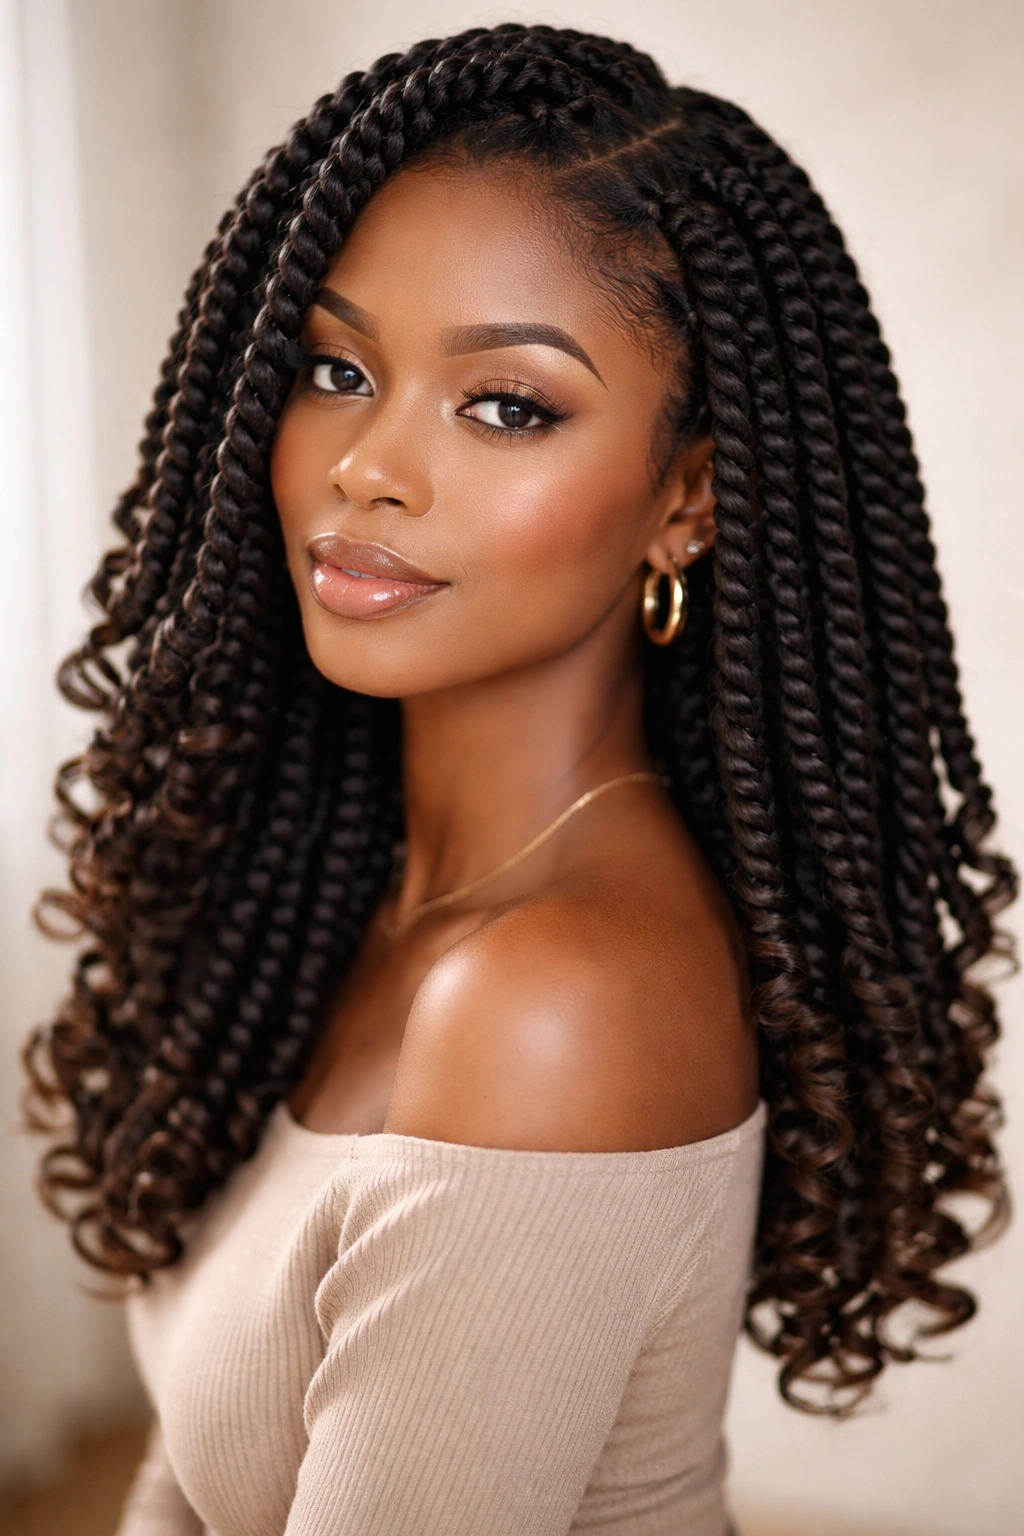
Flexi-rod twists combine the hold and definition of twists with the textured curl pattern created by setting twists on flexi-rods (those flexible, spongy hair rollers with no metal clips). This hybrid approach creates a style that has the visual appeal of defined twists with added dimension, texture, and curl definition at the ends. The result is soft, bouncy, and notably more voluminous than straight twists while still maintaining the protective benefits of twist styling.
Creating Texture Through Flexi-Rod Setting
After you’ve completed your twists, you simply roll the ends or full length of each twist onto a flexi-rod and allow them to set overnight or dry completely under a hood dryer. The rods create a subtle curl pattern that softens the twists and adds tremendous visual interest—the style reads as more textured and intentional than straight twists. The combination works beautifully for people who find straight twists feel too rigid or prefer the visual softness of curled ends. Setting twists on flexi-rods is especially effective if you’re someone who likes to refresh or style your hair frequently; the texture gives you options for how you wear the style day to day.
Setting and Maintaining Flexi-Rod Twists
- Complete your twists first (any variety—two-strand, rope, or Senegalese twists all work well with this technique)
- While your twists are still damp or slightly damp, roll each twist onto a flexi-rod starting from the end and rolling toward the scalp
- Use medium to large rods depending on how tight you want the resulting curl—smaller rods create tighter, more defined curls while larger rods create loose, flowing waves
- You can set the rods overnight if your twists are already dry, or use a hooded dryer for two to three hours to set them faster
- Gently unroll the rods the next morning; the twists will have a beautiful curled texture that lasts two to three weeks before relaxing
- This styling technique works best on twists that are at least three to four days old, as newer twists tend to have more moisture and take longer to set
Pro tip: Flexi-rod twists look absolutely stunning for date nights or events—the texture is soft and romantic while still maintaining the protection of your natural twists.
6. Heatless Twists
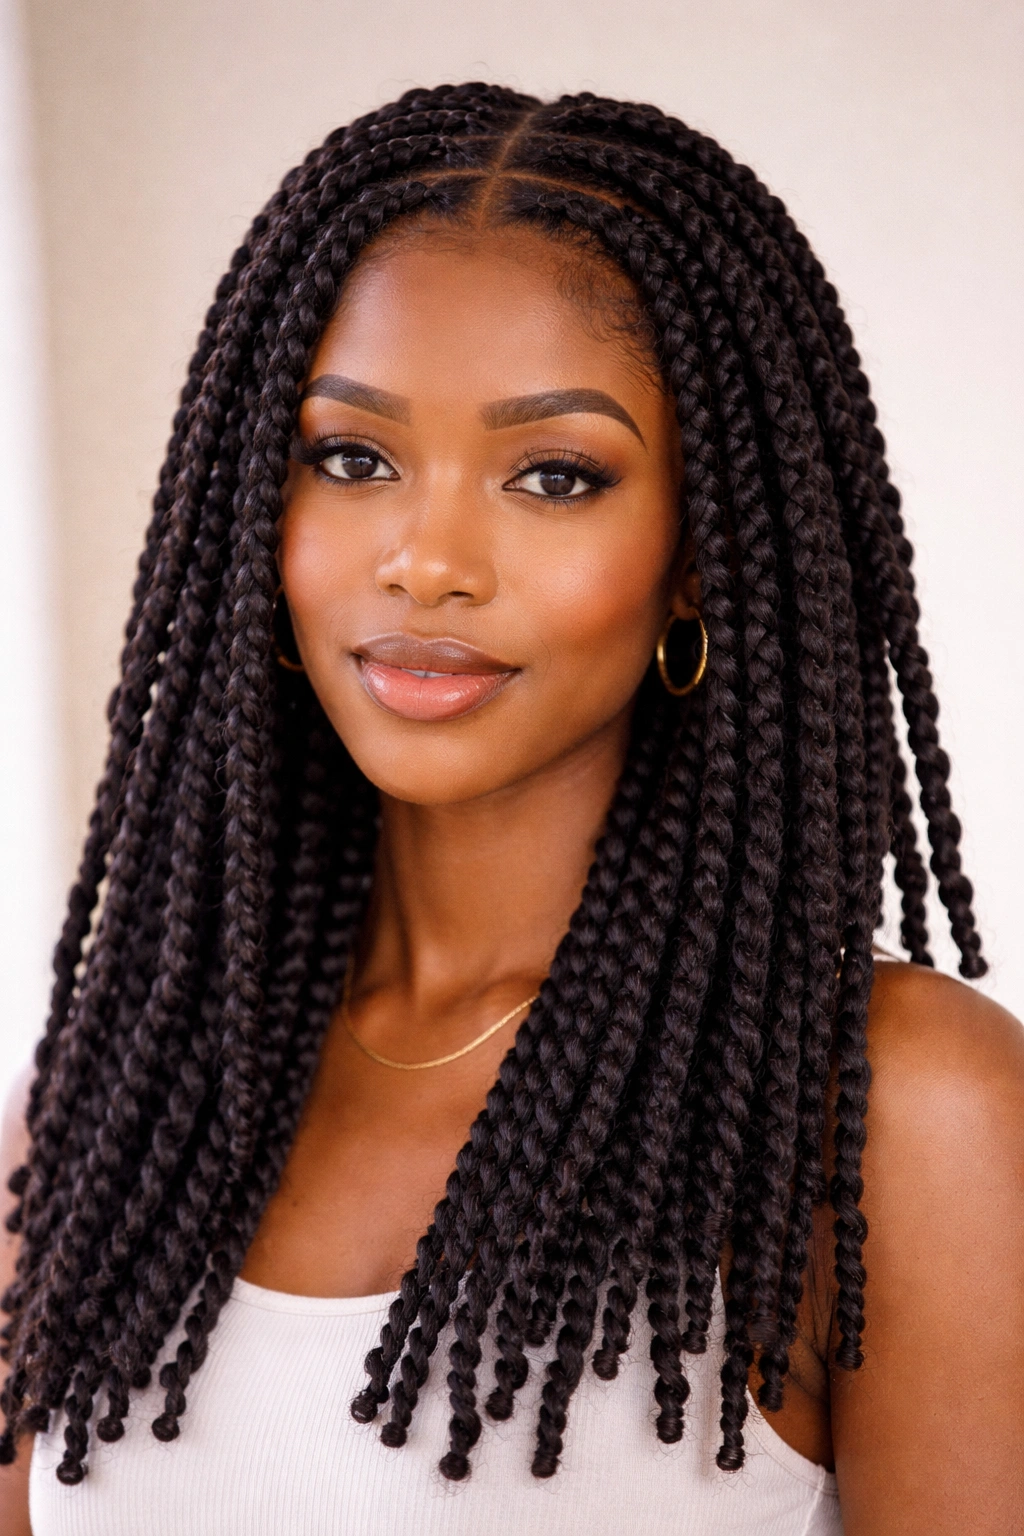
Heatless twists refer to the basic twist installation done without any heat styling or manipulation beyond the twisting technique itself. This approach prioritizes the health of your natural hair by eliminating any thermal damage risk while creating a beautiful, low-manipulation style. Heatless twists are genuinely the simplest installation method because you’re not adding steps like rod-setting, curling, or blow-drying—you twist your hair and you’re done.
The Simplicity and Scalp Care Advantage
Heatless twists are perfect for people who have limited time, prefer minimal maintenance styles, or want to prioritize scalp health above all else. Because you’re not applying heat or complex styling techniques, your scalp receives zero stress from the installation process, and you can actually see and access your scalp more easily for moisturizing and cleaning. The installation is genuinely quick compared to other styles—depending on your hair thickness, section size, and the number of twists, you can complete an entire head in three to five hours. Heatless twists look best when you’ve twisted them while your hair is damp with a good twisting cream, allowed them to dry completely (which you can do overnight or over a day), and then left them as-is without additional manipulation.
Best Practices for Heatless Twist Installation
- Wash and condition your hair thoroughly, then apply a hydrating leave-in conditioner and twisting cream while your hair is damp
- Divide your hair into sections of your preferred size and twist each section from scalp to end, applying consistent tension throughout
- Allow the twists to dry completely before you wear them down or style them into updos—this typically takes overnight or eight to twelve hours depending on your hair’s moisture content
- Don’t re-twist or manipulate the twists while they’re still damp, as this can cause them to unravel or lose definition
- Sleep on a silk or satin pillowcase to minimize frizz and help your twists hold their shape longer
- Heatless twists typically last three to four weeks before loosening significantly
Important note: If your hair tends toward dryness, heatless twists can sometimes feel stiff or brittle because they’re not being manipulated or moisturized during installation—make sure you’re applying plenty of leave-in conditioner and twisting cream to prevent this.
7. Spring Twists
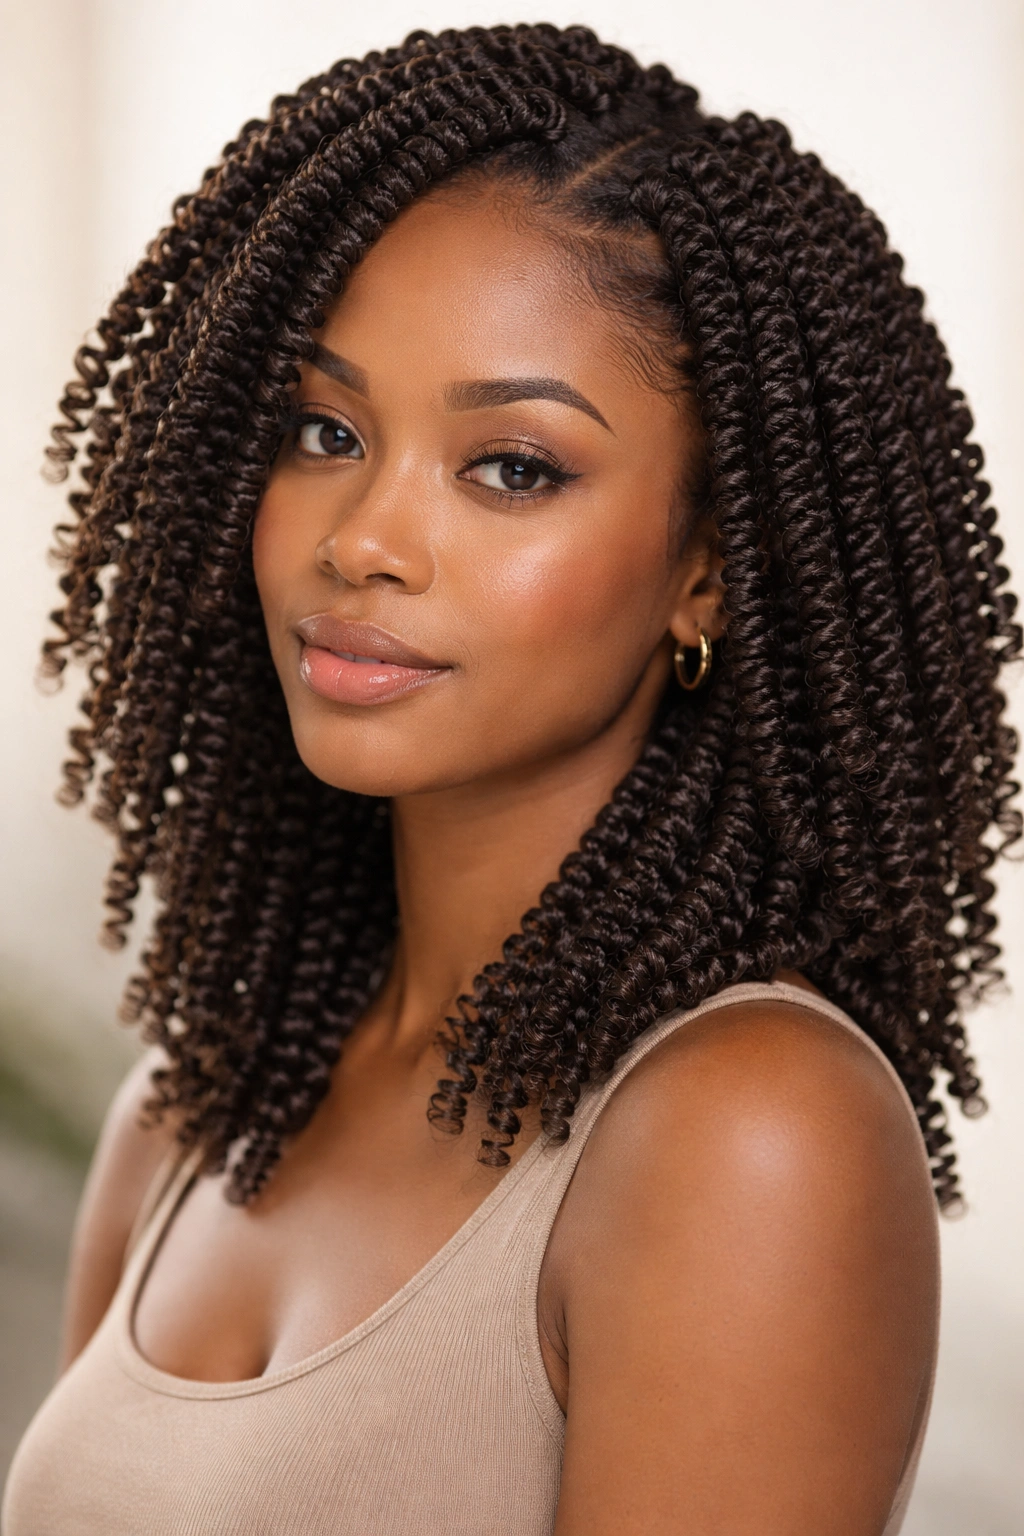
Spring twists are a specific variation that uses small, tightly coiled sections of crochet hair or extension hair pre-twisted into a spring-like formation. You install spring twists by threading your natural hair through the pre-made spring twist and securing it at the root, creating a style that’s instantly ready to wear without the time-intensive hand-twisting that other styles require. The pre-twisted extension creates a tight, bouncy, springy appearance that’s immediately recognizable and visually stunning.
Pre-Twisted Extensions and Installation Efficiency
The major advantage of spring twists is the dramatically reduced installation time—instead of spending hours hand-twisting each section, you’re working with pre-made units that you’re simply securing into place. Installation typically takes two to three hours instead of the four to eight hours required for hand-twisted styles. Spring twists come in various colors and sizes, so you have tremendous styling flexibility without needing to add extensions or manipulate your natural hair extensively. The resulting style has that tight, bouncy texture that many people find visually appealing and protective for their natural hair.
How to Install Spring Twists
- Prepare your natural hair by washing, conditioning, and detangling thoroughly; allow it to air-dry to damp
- Section your hair into the number of spring twists you want; each section should be slightly smaller than the spring twist you’ll be using
- Take your natural hair section and thread it through the opening of the pre-twisted spring twist extension
- Secure the spring twist to your natural hair at the root by twisting them together or using a tiny band to hold them in place
- The spring twist’s natural curl pattern will integrate with your natural hair to create a cohesive look
- These twists are less customizable than hand-twisted styles, but they’re excellent if you have limited time or prefer not to hand-twist
Worth knowing: Spring twists typically last six to eight weeks because the pre-twisted structure is extremely durable—but they’re heavier than hand-twisted styles, so make sure your scalp feels comfortable before committing to a full head.
8. Yarn Twists
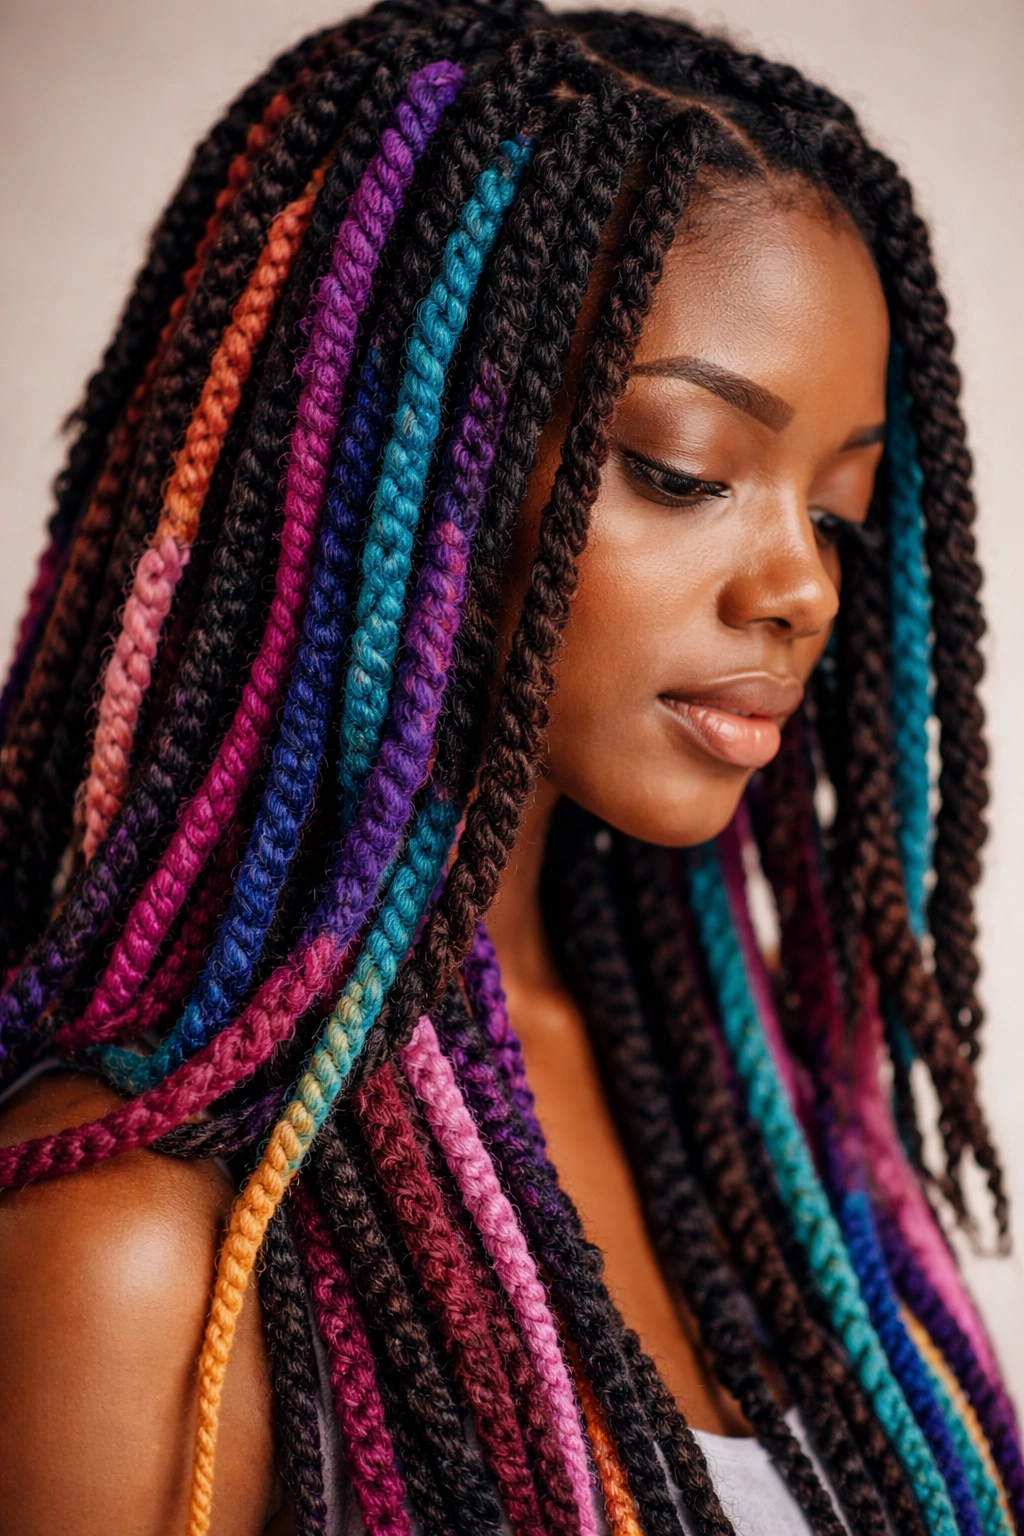
Yarn twists combine your natural hair with colored yarn to create a lightweight, budget-friendly style that’s visually playful and endlessly customizable. You simply incorporate yarn into your twists as you install them, allowing you to add color and texture without using traditional extension hair. This technique is particularly popular for creating bold, colorful looks without the commitment or cost of adding extended-wear crochet hair.
Lightweight and Colorful Styling
The beauty of yarn twists is the combination of affordability, lightness, and visual impact. Yarn weighs significantly less than crochet hair or Marley hair, which means yarn twists create minimal tension on your scalp compared to heavier extension styles. You can add as much or as little color as you want by choosing yarn colors that contrast with or complement your natural hair color. Yarn twists work beautifully for creating ombre effects, bold color-blocked patterns, or subtle highlights that make your twists visually interesting. The yarn also has a unique texture that photographs beautifully and creates a style that stands out without looking overdone.
Installing Yarn Into Your Twists
- Select yarn colors in a weight that’s thin enough to integrate smoothly into your twists; acrylic yarn or wool yarn both work well
- Divide your yarn into sections that match your twist sections, and fold each yarn piece in half to make it easier to manage
- Begin your twist by twisting your natural hair with the folded yarn, treating the yarn the same way you would extension hair
- Continue twisting your natural hair and yarn together down the entire length, keeping them integrated and twisted consistently
- The yarn will create a loose texture that contrasts visually with your tightly twisted natural hair, creating a beautiful dimensional effect
- Seal the ends by tying them off with a small piece of thread or by gently fusing them with a curling iron on low heat (be careful not to melt the yarn)
- Yarn twists typically last four to six weeks depending on how tightly you installed them
Pro tip: Yarn twists are perfect for festival looks or adventurous styling moments—the lightweight nature means you can do as many as you want without worrying about scalp stress, and you can always remove them and try different colors next time.
9. Protective Twists Updo
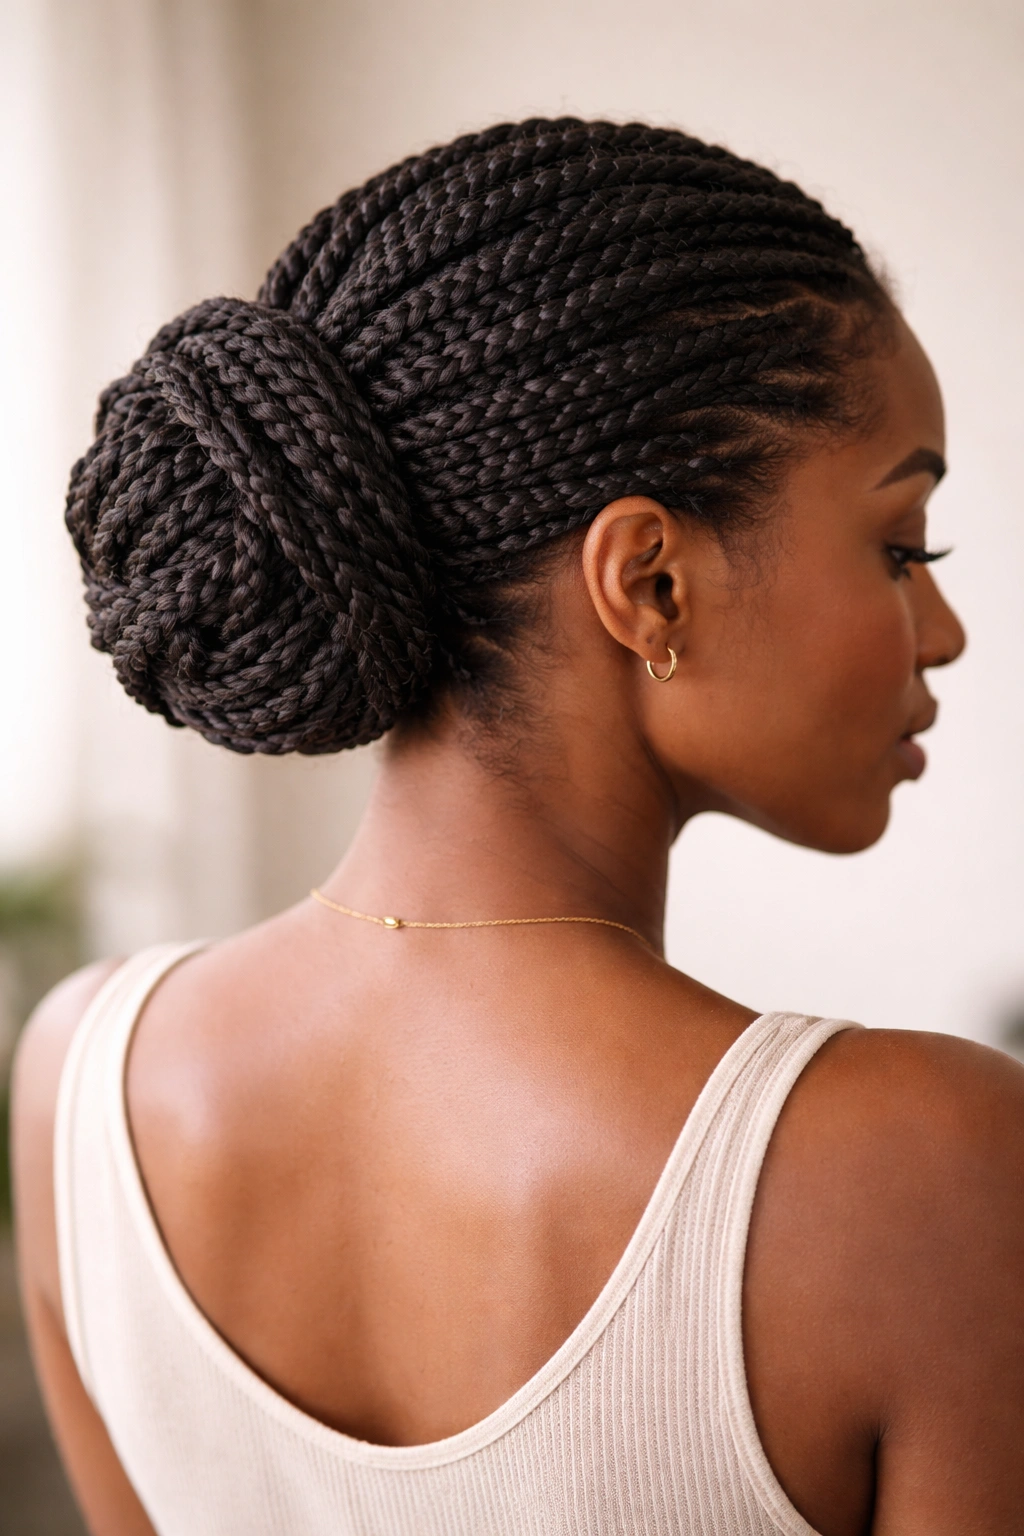
A protective twists updo is any arrangement of your completed twists into a bun, coil, wrapped design, or secured updo that tucks the ends of your twists away and minimizes exposure to friction and environmental stress. This approach combines the protective benefits of twists with the added protection of an updo, creating one of the most scalp-healthy styles available. Whether you’ve installed two-strand twists, Senegalese twists, or any other variation, styling them into an updo adds another layer of protection while creating a polished, intentional appearance.
Protective Styling Benefits and Variations
An updo made from twists protects your hair by securing the ends away from friction with pillows, clothing, and environmental elements while also minimizing the movement and manipulation that happens when you wear twists down. Updo variations include low buns (which feel lightweight and elegant), high buns (which look playful and youthful), wrapped buns where you coil your twists into circular formations, and pinned designs where you create patterns with your twists for visual interest. The updo also makes it easier to care for your scalp because you can access the roots of your hair and clean or moisturize more effectively. Many people find that their twists last longer—sometimes an additional one to two weeks—when worn up instead of down.
Creating Beautiful Twist Updos
- Start with twists that are at least three to four days old, as older twists hold their shape better when styled into updos
- For a low bun, gather your twists at the nape of your neck and coil them around each other to create a circular shape, securing with bobby pins and a hair tie
- For a high bun, gather your twists at the crown and use the same coiling technique, which creates a more youthful appearance
- For wrapped buns, group several twists together and wrap them around a central point, pinning as you go to create a decorative spiral
- Use bobby pins that match your hair color and pin strategically to prevent the updo from loosening during the day
- Avoid pulling your twists so tightly into the updo that you’re creating tension at the roots—protective styling should feel secure, not painful
Real talk: Updo styles created from twists are genuinely one of the most elegant, effortless-looking protective styles—you can style them for professional settings, casual everyday wear, or special events and they always look intentional and polished.
10. Boho Twists
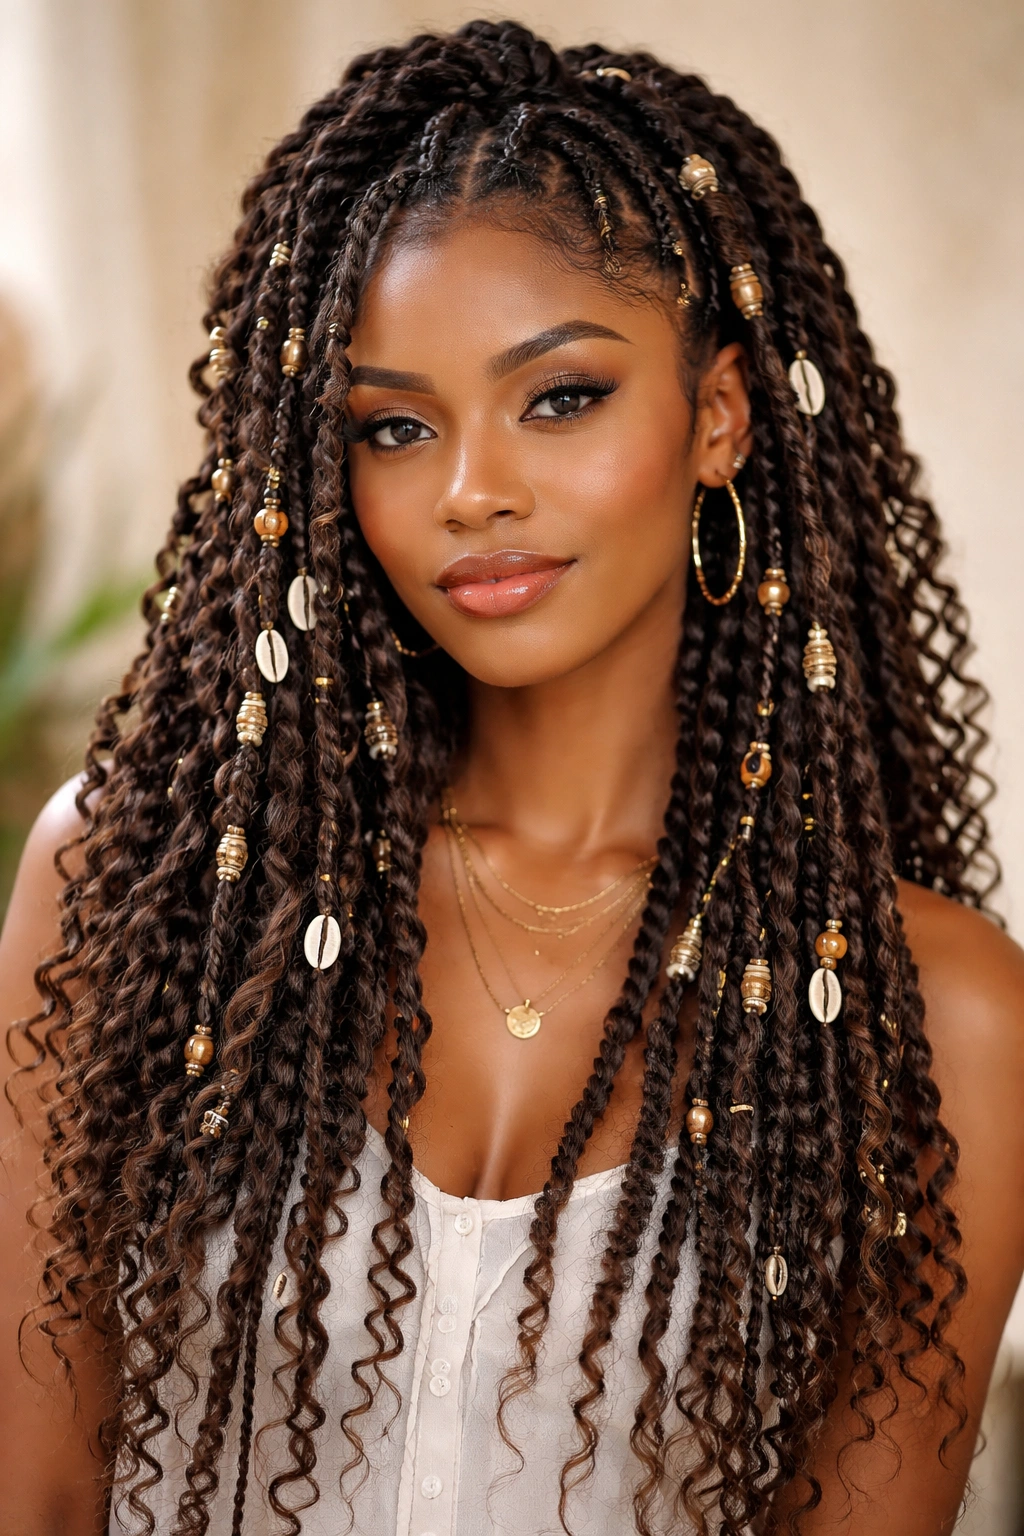
Boho twists combine your natural twists with ornamental elements like beads, rings, cuffs, or decorative clasps that you thread onto individual twists to create a more decorative, artistic appearance. This styling variation takes a basic twist installation and elevates it with accessories and intentional styling choices that create a bohemian, free-spirited aesthetic. Boho twists work beautifully for people who love accessories and want their protective style to feel like an intentional fashion statement.
Ornamental Embellishments and Customization
Adding beads, rings, or cuffs to your twists transforms the look from utilitarian protective styling into deliberate, artistic adornment. You can add accessories to just a few strategic twists for subtle enhancement, or decorate your entire head for a bold, statement-making look. Common choices include wooden beads, brass cuffs, metal rings, gemstone clasps, or even delicate chains threaded onto individual twists. The accessories add visual weight and create a style that photographs beautifully while still maintaining all the protective benefits of twist styling. Boho twists work on any of the twist variations discussed above—you can create boho versions of two-strand twists, Marley twists, or any other technique.
Adding and Securing Accessories
- Begin with completed twists that are at least five to seven days old, as fully set twists hold beads and accessories more securely
- Slide beads or rings directly onto your twists, working from the end upward; you can cluster beads together or space them throughout the length
- For heavier accessories like large wooden beads or metal cuffs, position them closer to the root where they’re supported by more hair
- You can secure beads in place by threading them onto twists and then tightening a tiny band around the twist just above the bead
- Leave some twists unadorned to create visual balance and prevent the style from feeling visually overwhelming
- Vary your bead placement and sizing across your head to create an asymmetrical, intentional aesthetic rather than something that looks purely random
Quick note: Boho twists require a bit more maintenance to keep accessories from shifting, but refreshing the bead placement is genuinely enjoyable and takes only a few minutes—think of it as a styling ritual rather than maintenance burden.
Final Thoughts
Twist styles have earned their place as a cornerstone of natural hair care because they genuinely deliver on the promise of protection, longevity, and aesthetic appeal without demanding constant salon visits or complicated daily maintenance. The technique itself is simple—you’re twisting sections of your hair around each other—but the variations are genuinely endless. You can create styles that feel soft and romantic (flexi-rod twists), bold and statement-making (rope twists with vibrant extensions), or elegant and professional (Senegalese twists styled into an updo).
The most important thing is finding the variation that aligns with your lifestyle, hair texture, and styling preferences. If you’ve got limited time but want a beautiful result, spring twists or professional Senegalese twists at a salon make sense. If you love the process of styling and want maximum control, two-strand twists or rope twists at home give you complete creative freedom. If you want to experiment with color without commitment, yarn twists are your answer.
Start by trying one style on a small section of your hair—maybe a few twists at the back—so you can practice the technique before committing to a full head. This takes the pressure off and lets you develop muscle memory at a comfortable pace. Once you’ve got one technique down, all the variations become accessible. You’re building skills that you’ll return to again and again because twist styles genuinely make natural hair care easier, more beautiful, and more manageable than the alternatives.
