



You’ve probably seen those impossibly perfect hairstyles on social media and thought, “There’s no way I could pull that off.” But here’s the truth: French braid messy bun combinations are some of the most forgiving and versatile styles you can attempt. The beauty of these hybrids is that they marry the structure and elegance of a French braid with the effortless, undone aesthetic of a messy bun—which means imperfection actually works in your favor.
Whether you’re preparing for a casual day at home, heading to the office, or getting ready for something more polished, there’s a French braid-to-bun hybrid that fits your mood and skill level. These styles work with almost any hair texture and length, from wavy to curly to straight. The French braid portion gives you a put-together foundation, while the messy bun keeps things from feeling too formal or overly constructed.
The real magic happens in understanding how these two techniques complement each other. The braid controls and contains hair at the crown or sides, while the bun lets you release some of that texture for volume and movement. Once you master a couple of these styles, you’ll find yourself reaching for them on your laziest mornings and your most important days alike. Let’s break down eight distinct ways to combine French braiding with messy bun styling, from simple to surprisingly sophisticated.
1. Classic French Braid into Low Messy Bun
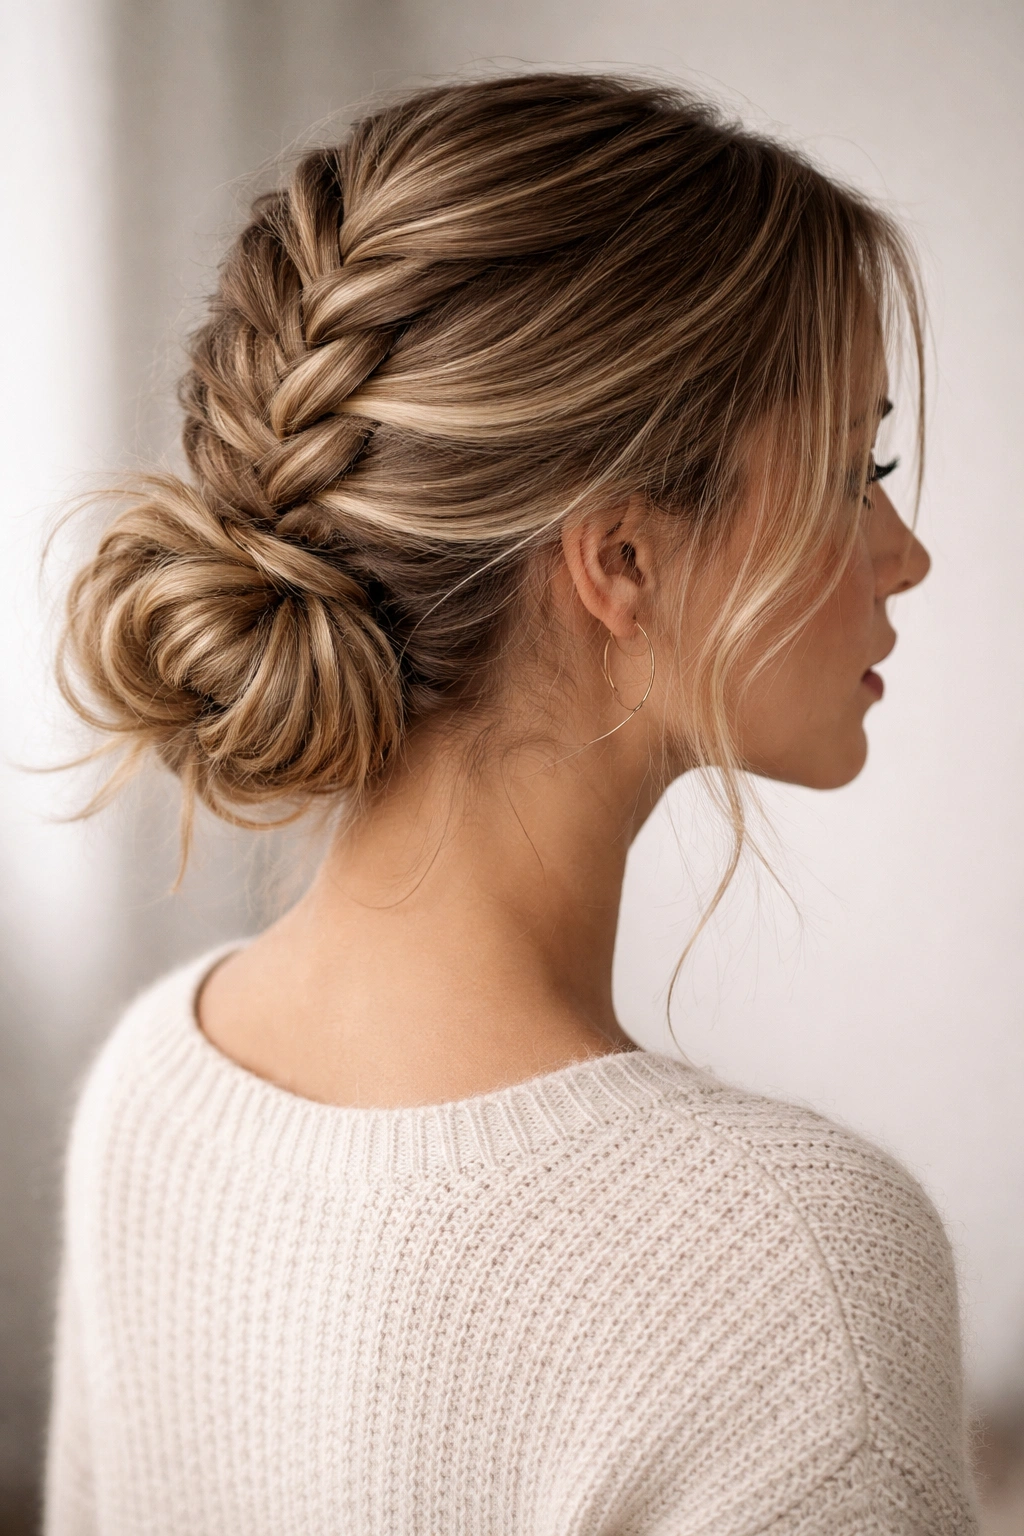
This is the foundation style—and honestly, once you nail this one, the others become much easier to execute. You’re essentially creating a French braid that starts at your hairline and flows directly into the base of your bun, eliminating the need for multiple techniques to work together separately.
Start by brushing your hair thoroughly and gathering it into a low ponytail at the nape of your neck, roughly where your bun will eventually sit. Don’t secure it yet—just hold it loosely with one hand while you begin your French braid at the crown of your head. Take a small section from the center of your crown and divide it into three strands. Cross the right strand over the middle, then the left strand over the middle, adding new hair from the sides as you go. Continue braiding downward, incorporating hair as you travel toward that low ponytail point.
Why This Style Works for Every Occasion
The low placement keeps this look professional enough for work or formal events, while the messiness prevents it from feeling stuffy. This style actually suits all face shapes because the braid draws the eye upward and the low bun creates beautiful negative space around your face. It’s also incredibly stable—the braid essentially anchors everything, so you won’t have flyaways escaping throughout the day.
How to Build Volume and Texture
- Use a texturizing spray or dry shampoo on clean or second-day hair for grip and body
- Gently tease the base of your bun with a fine-tooth comb before securing it
- Leave a few intentional face-framing pieces out before you begin braiding
- Don’t pull the braid too tightly—looser braids look more modern and feel more comfortable
- After securing your bun with bobby pins, gently pull sections of it outward for a fuller, undone appearance
Pro tip: If your hair is slippery or very fine, braid damp hair rather than dry. It’s easier to control and holds shape better as it dries.
2. Double French Braids Converging into One Bun
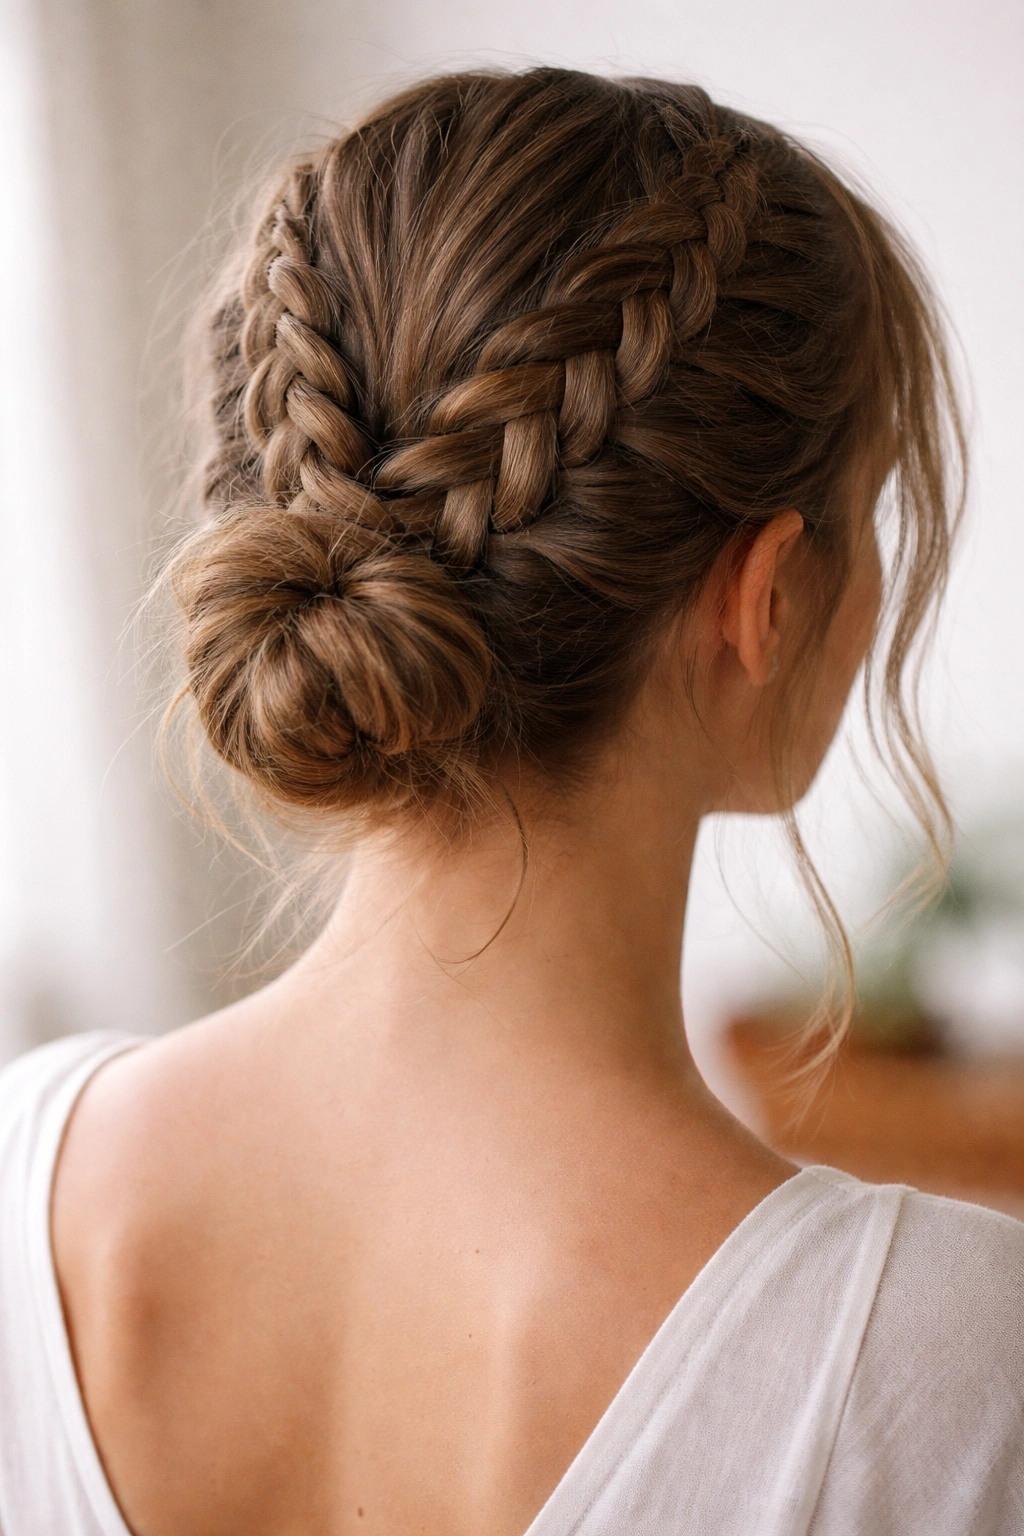
This style looks intricate and fashion-forward, but it’s actually easier than it looks once you understand the concept. You’re creating symmetry by braiding from both sides simultaneously, then merging those braids at the back before forming your bun. It’s one of those styles that makes you look like you spent serious time on your hair when really you’ve just mastered a clever technique.
The key is starting at the same point on both sides and ensuring your braids are roughly the same tightness and thickness so they blend seamlessly where they meet. Begin with a deep side part—this actually makes the whole process easier because it gives your hair a natural flow toward each side. Take a section just behind your ear on the right side and begin a standard French braid, adding hair as you move backward toward the nape of your neck. Simultaneously (or immediately after finishing the first), repeat on the left side, braiding in the same direction so both braids naturally converge at the back of your head.
Why Symmetry Elevates the Look
Double braids automatically read as “intentional” and polished, even when paired with a casually undone bun. This combination is particularly striking with medium to thick hair because you get visible braid definition plus a full, voluminous bun. The symmetry also creates a flattering frame for your face—it’s especially pretty if you have a longer face shape and want to add width through the sides.
Building This Style Step by Step
- Apply texturizing spray to damp hair and let it dry completely before starting
- Use a comb to create a clean, deep side part down the center of your scalp
- Take time to make your braids roughly equal in size; practice with the first braid, then mirror it on the second side
- Secure each finished braid with a small elastic at the nape of your neck before gathering everything into a bun
- Twist the two braids around each other once or twice before securing the bun for added visual interest
- Pull gently on the braid sections to add width and that modern, loose aesthetic
Worth knowing: This style takes longer than a single braid, but it’s totally worth the extra five minutes for the elevated result. It photographs beautifully and actually feels more secure than you’d expect.
3. Side French Braid Wrapping Around a Messy Bun
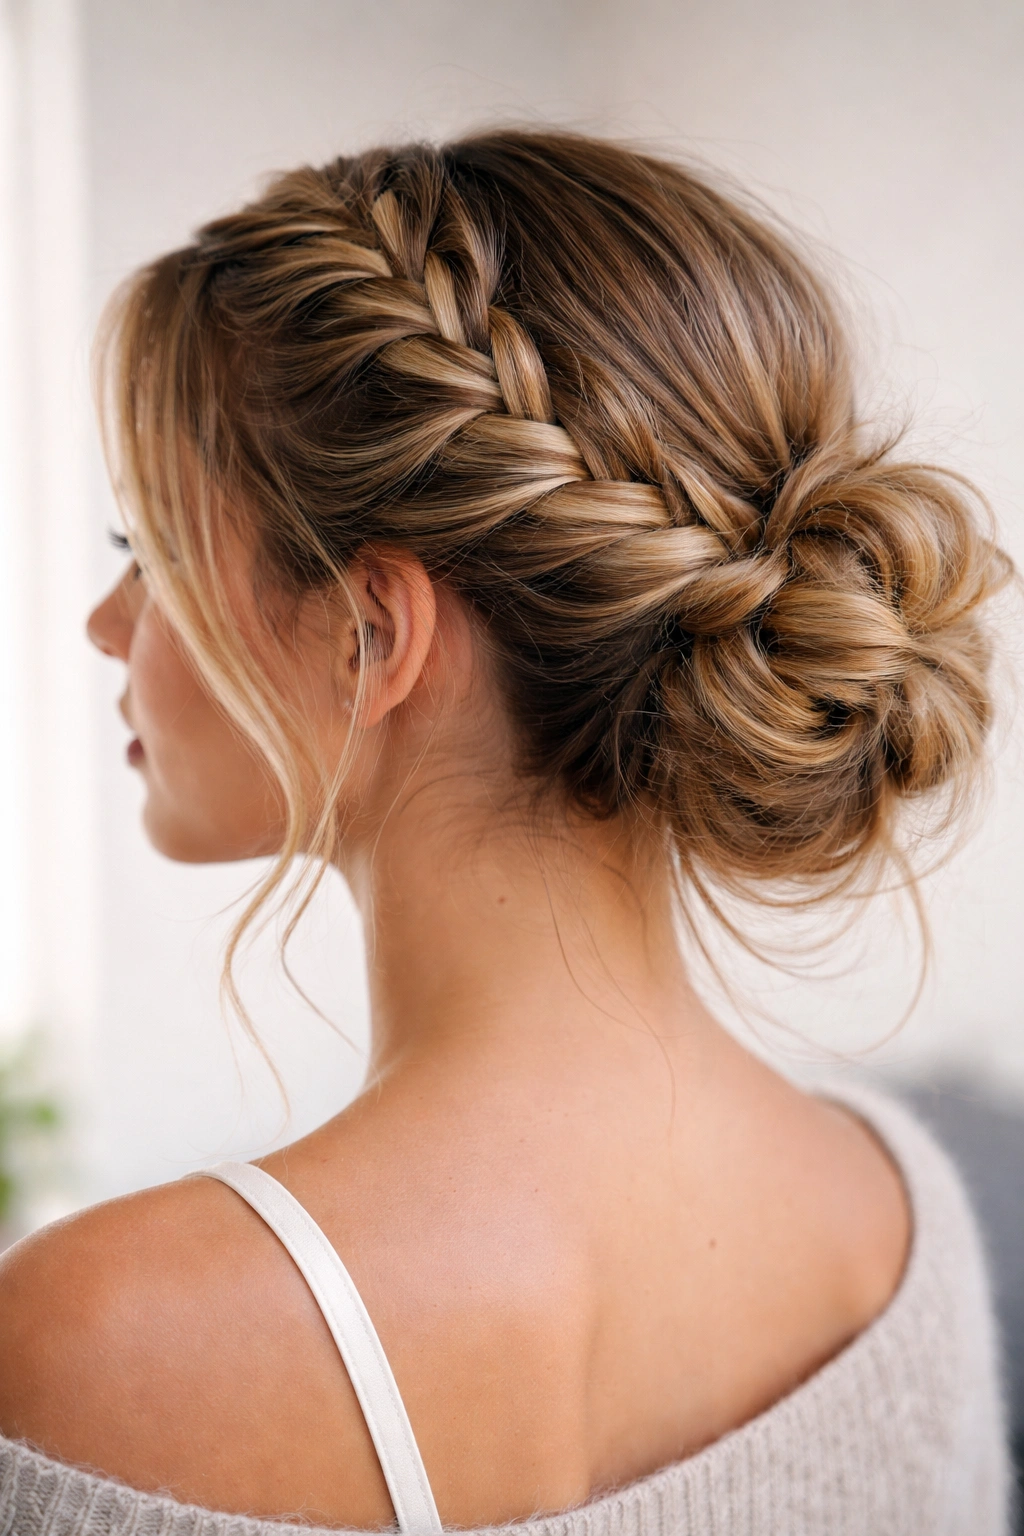
For days when you want something a little different from center-crown styles, the side braid wrap is your answer. You’re essentially creating a French braid that starts above one ear and travels around the back of your head, wrapping around a bun that’s anchored on the opposite side. It’s asymmetrical, interesting, and honestly looks harder to execute than it actually is.
Start by gathering your hair into a loose, high messy bun on one side of your head—let’s say the right side for clarity. Don’t make it perfect; let some pieces fall loose around your face and neck. Now, begin your French braid just above your left ear, braiding backward and horizontally rather than downward. As you move across the back of your head, incorporate hair in a way that naturally guides the braid toward your bun. Once you reach your bun, you can either tuck the finished braid into the base of the bun and secure it with bobby pins, or wrap it around the bun like a crown and pin it in place.
The Appeal of Asymmetrical Styling
Asymmetrical styles have a distinctly modern, fashion-forward feel that’s perfect for creative workplaces, artistic events, or simply days when you want to feel a little extra. This particular style also works beautifully with different hair textures and lengths. If you have shorter hair, the side placement prevents any awkward short pieces from looking out of place. With longer hair, the asymmetry prevents that “too much hair in one spot” feeling that sometimes happens with centered styles.
Securing and Perfecting Your Side Wrap
- Create your bun first so you have a clear target for your braid to wrap around
- Don’t stress about keeping the braid perfectly tight—looser actually looks better here
- Use bobby pins that match your hair color so they’re less visible where the braid meets the bun
- Pull sections of the braid outward gently after securing it to create dimension and movement
- Leave at least two or three small pieces loose around your face for softness
- Mist everything lightly with flexible hold hairspray—not the stiff kind that locks everything in place
Insider note: If your braid feels loose or wobbly, that’s actually the right aesthetic. The key is making sure it’s secure with bobby pins, not that the braid itself is pulled tight.
4. Twisted French Braid Messy Bun Hybrid
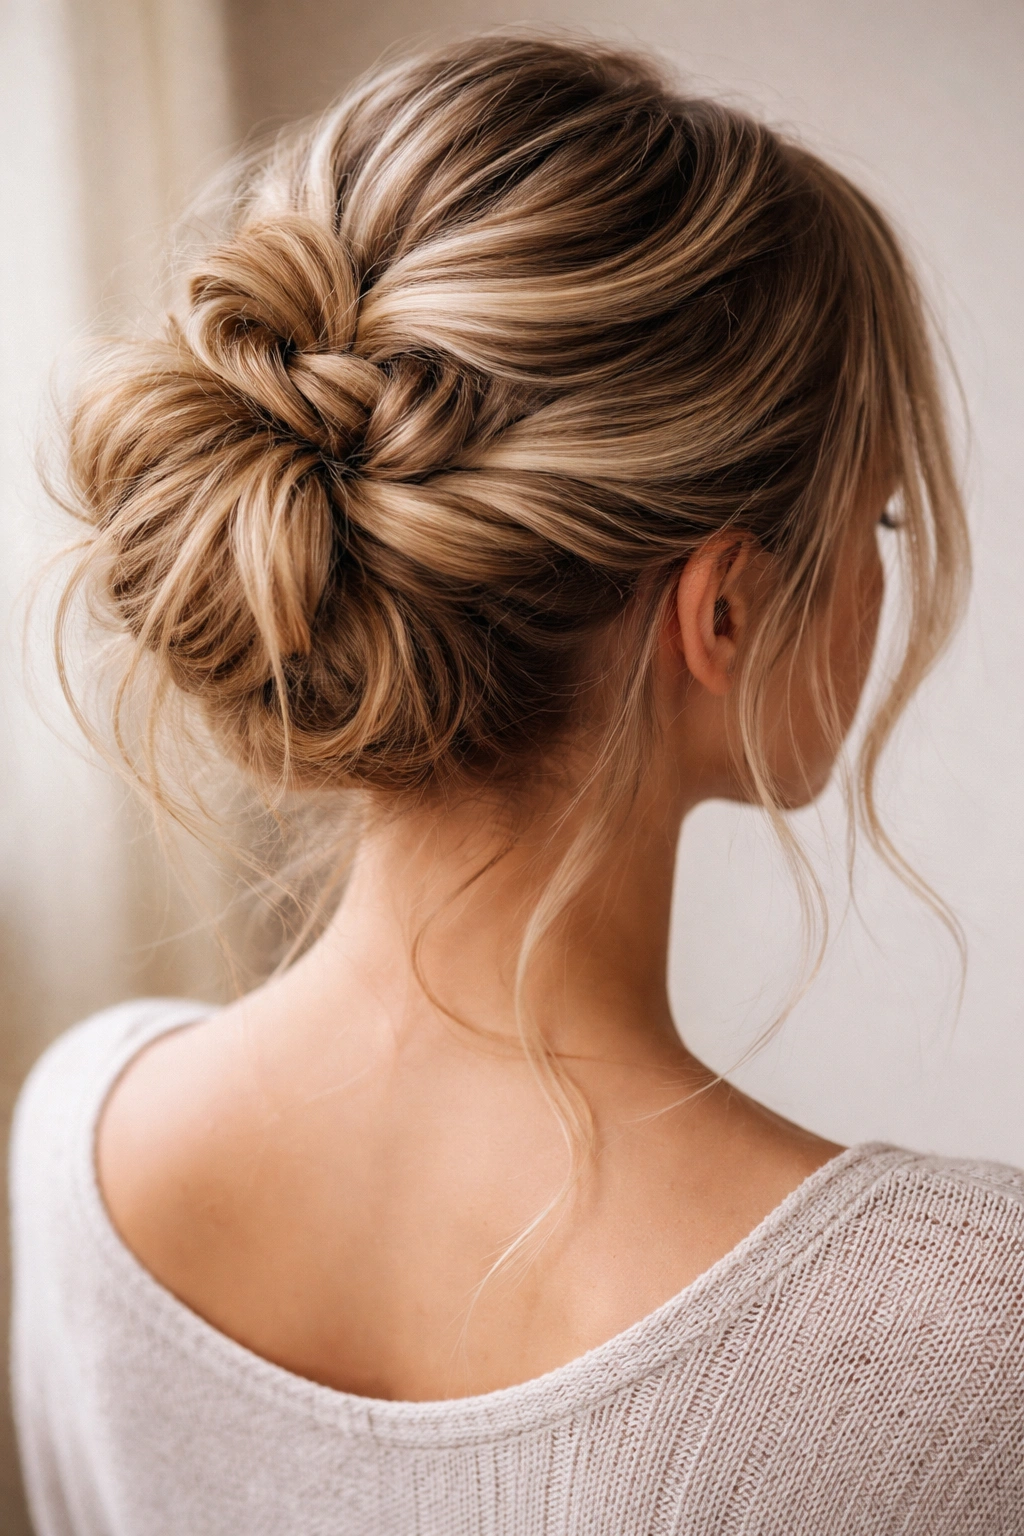
This style splits the difference between a traditional French braid and something closer to a twisted crown. Instead of creating distinct over-under braid sections, you’re working with larger sections that twist around each other as they travel toward your bun. It’s easier to execute than a traditional French braid once you get the rhythm, and it creates beautiful, chunky texture that looks incredibly voluminous and modern.
Begin at your crown with three thick sections of hair. Instead of crossing them over and under each other like a traditional braid, you’re gently twisting two sections around each other while incorporating new hair from the sides with each rotation. Think of it as a braid’s looser, more relaxed cousin. Keep your hands somewhat loose and your movements deliberate but not tight. As you twist down toward the nape of your neck, gather the remaining hair and transition directly into your bun base. The twisted portion becomes the anchor for your messy bun rather than being separate.
Why Twists Create Visual Impact
Twisted braids catch light differently than traditional braids—they create these beautiful, textured shadows that read as intentional and dimensional. This style is particularly flattering if you have naturally wavy or curly hair because the twist pattern echoes and enhances your natural texture rather than fighting against it. The thickness of the twists also means this style works beautifully with finer hair that might look limp in a traditional thin braid.
Making Twists Look Effortlessly Polished
- Start with textured hair (second-day hair, after waves, or with dry shampoo applied)
- Keep your sections chunky—at least an inch thick per section—rather than delicate
- Twist slowly and deliberately; rushing makes twists look sloppy rather than intentionally undone
- As you go, gently pull the outer edges of each twist outward to create more volume and that romantic, loose aesthetic
- When you transition to your bun, keep the same thickness and looseness rather than suddenly tightening things up
- Finish by pulling sections of your bun outward to match the texture of the twist above it
Real talk: This is actually easier than a traditional French braid if you’ve never braided before, because you’re working with bigger sections and there’s less precision required. If braiding intimidates you, start here.
5. Waterfall French Braid with Loose Bun
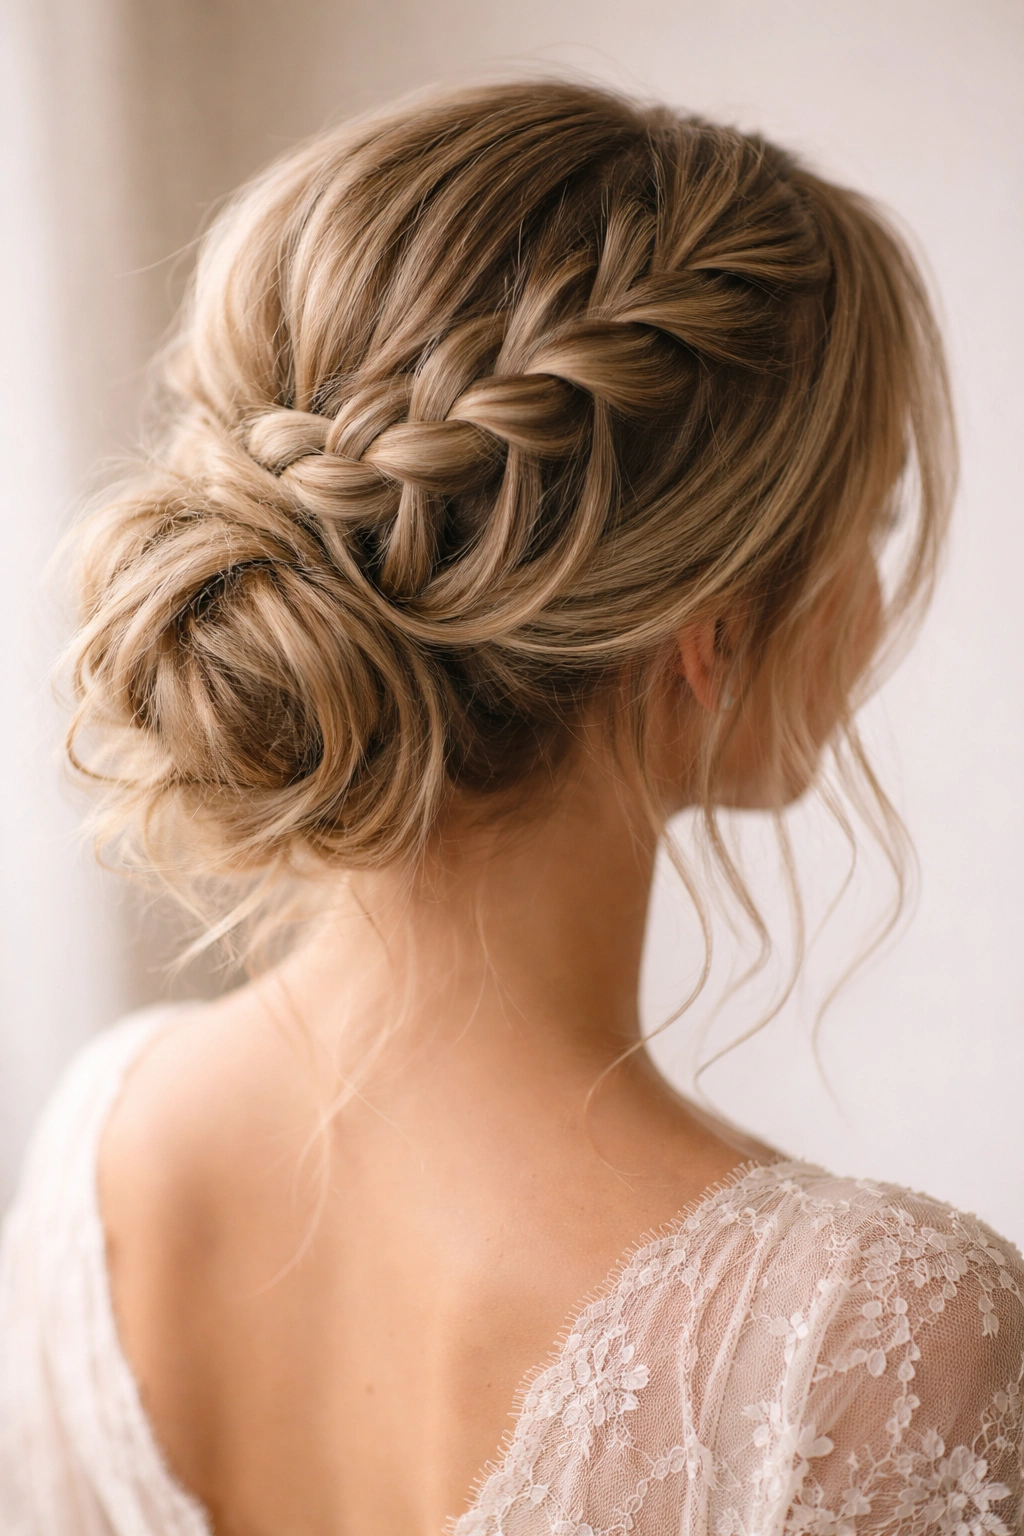
A waterfall braid is one of the most beautiful and photogenic braid techniques you can master, and pairing it with a loose bun on the opposite side creates a genuinely romantic, wedding-guest-worthy look that still feels relaxed and wearable for everyday life. The waterfall effect comes from releasing sections of hair as you braid, creating thin strands that literally cascade down the back of your head.
Start at one temple and begin a standard French braid, but with a twist: after you cross a section over the middle, instead of adding more hair to that crossed section, you let it fall loose and replace it with a new section from the side. This creates the “waterfall” effect of hair falling past the braid itself. Continue this pattern as you move toward the back of your head, aiming for the opposite side of where you started. Once you’ve traveled about three-quarters of the way across, gather all remaining hair into a low bun on the opposite side. The waterfall sections will frame this bun beautifully, creating dimension and movement.
The Romance of Waterfall Details
Waterfall braids have this effortlessly romantic quality that makes them perfect for softer, more feminine occasions. This style is particularly beautiful with longer hair and works especially well if you have waves or some natural texture to work with. The cascading sections catch light and movement, creating a dynamic look even when you’re standing still. Because you’re combining two distinct techniques—the waterfall and the bun—the overall result feels more intricate and fashion-forward than either technique alone.
Creating a Convincing Waterfall Effect
- Start with damp or textured hair; it’s much easier to control than freshly washed, smooth hair
- Make sure your initial three-strand section is secure before you start the waterfall motion
- Keep your hand movements smooth and steady; jerky movements make the effect look accidental rather than intentional
- Leave approximately three to four thin strands falling from your braid—more than that reads as too heavy
- Pin the end of your braid into your bun cluster so it’s secure and won’t unravel as the day goes on
- Gently pull sections of your bun outward so it has volume and movement that matches the flowing strands above it
Pro tip: Waterfall braids are actually more forgiving than traditional braids when it comes to perfection. A few flyaways and loose strands actually enhance the romantic, organic feel rather than detracting from it.
6. French Braid Crown with Undone Bun
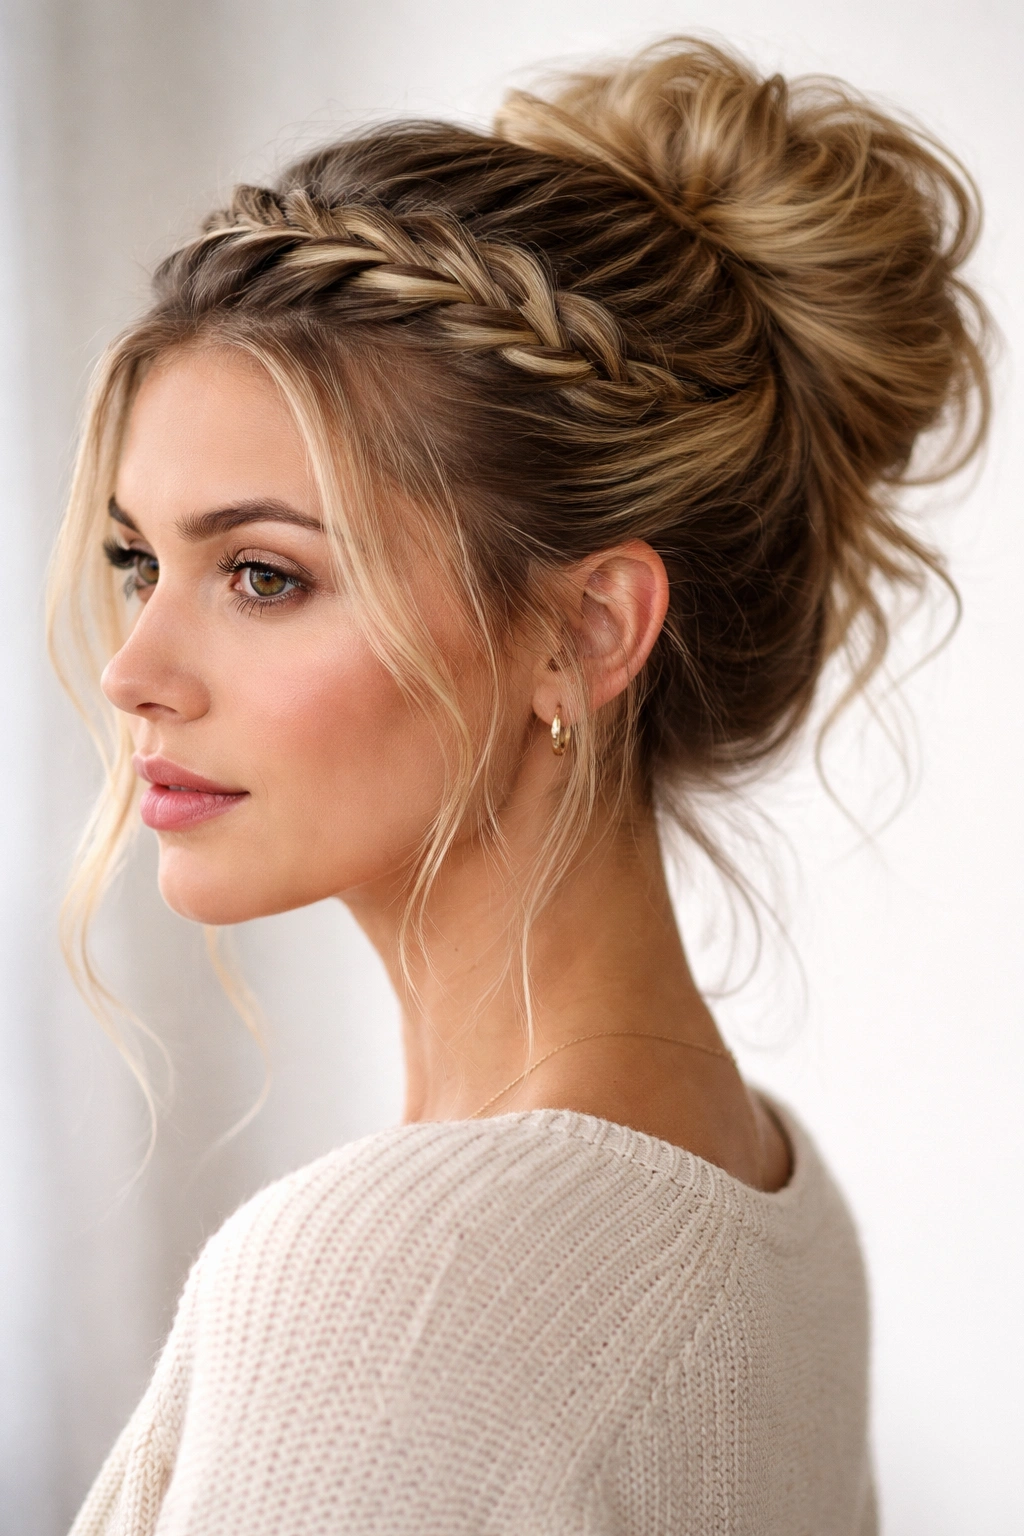
This style makes you look like royalty having a very casual day. You’re creating a halo braid that frames your face and travels across the crown of your head like a crown, with a loosely gathered, intentionally undone bun sitting at the back. It’s a style that works for both casual and moderately formal occasions—it’s equally at home at a family brunch or a garden party.
Part your hair down the middle and take a section just above one ear. Start your French braid here, aiming to travel horizontally across the back of your head toward the opposite side, just like you would a crown. Add hair as you go, incorporating strands from the top and the sides as you move across. The goal is for your braid to sit roughly along the line where you’d wear a tiara. Once you reach the opposite side, you can either secure the end of the braid into a bun at the back, or let it blend into a loose gather of hair. Then, collect all the remaining hair at the nape of your neck and form your bun—keep it loose, intentionally imperfect, and full of texture.
Why Crown Braids Feel Special
There’s something inherently special about a braid that frames your face and sits close to your head. It feels put-together and intentional while still being comfortable and wearable for long periods. This style actually draws attention upward and makes your face feel more open and youthful. It’s also incredibly practical—because the braid is anchoring hair near your crown, you have less overall pulling sensation at your scalp, making it comfortable to wear for hours without developing that “tight hair” headache.
Perfecting Your Crown Effect
- Use the mirror and make sure your braid travels at an even height across the back of your head
- Take time to incorporate hair evenly on both sides so the braid feels balanced
- Avoid pulling the braid too tightly along the crown—you want it snug enough to stay in place but loose enough to look modern
- When you transition to your bun, choose a placement that feels natural given where your braid ends (usually slightly off-center rather than dead center)
- Pull your bun pieces outward generously so it has a soft, romantic shape rather than looking tight
- Release a few small pieces around your face and ears for softness and to frame your features
Worth knowing: This style is particularly stunning if you have a longer face or want to add shape around your face. The crown placement and the framing pieces create beautiful proportions.
7. Reverse French Braid into Textured Messy Bun
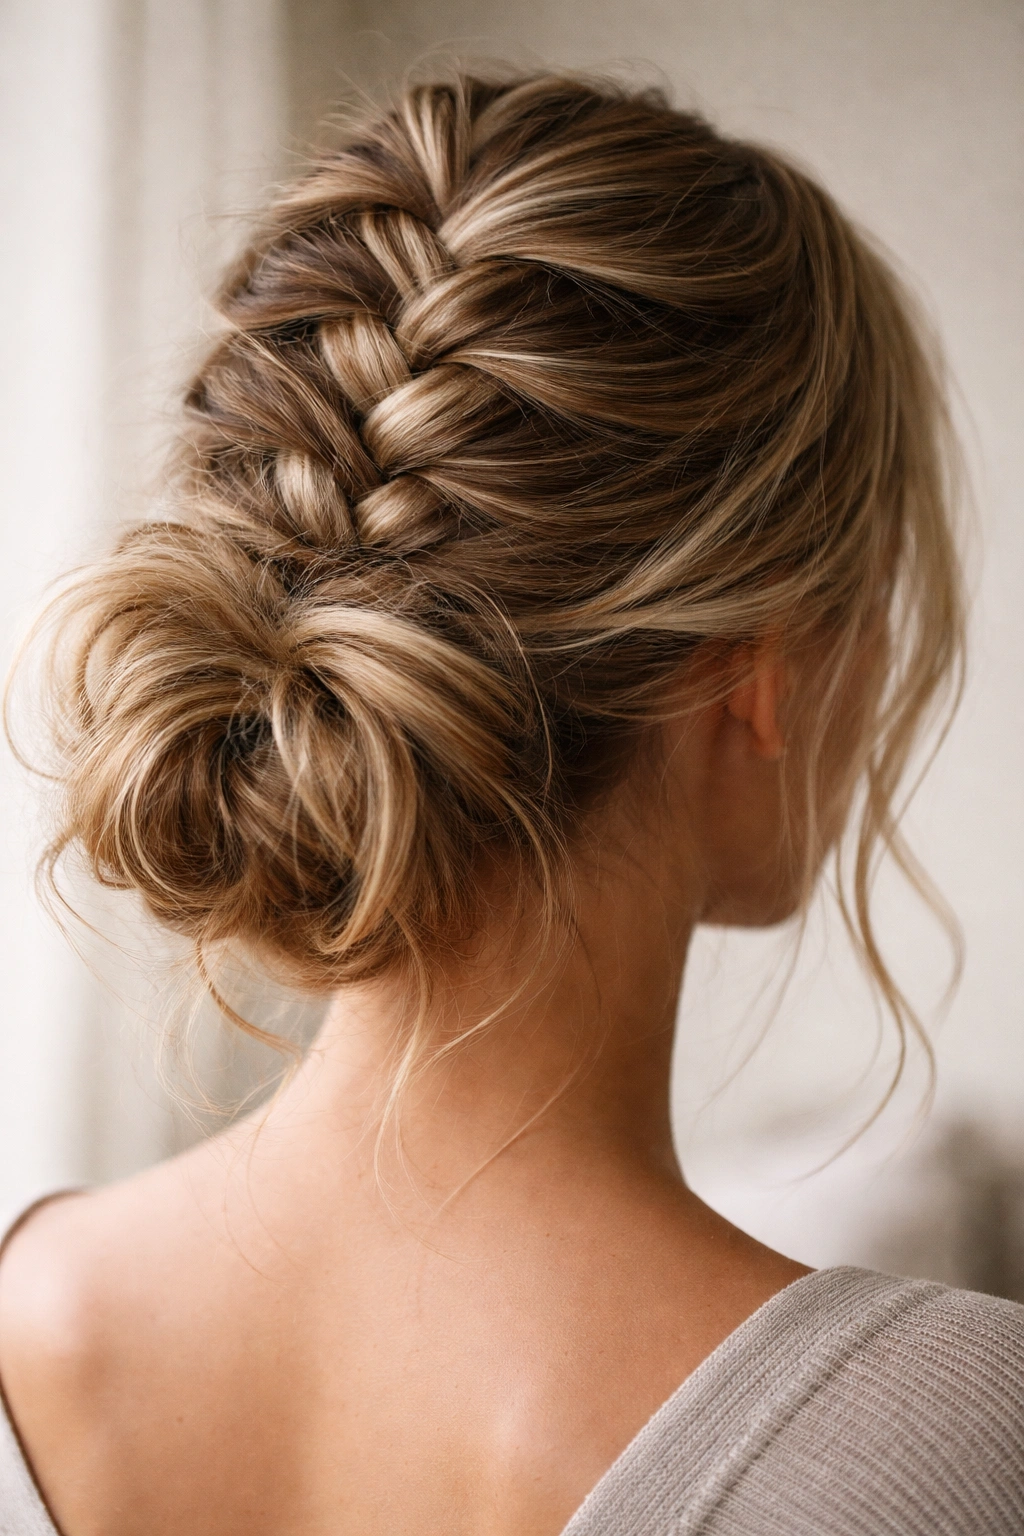
A reverse French braid—also called an inside-out braid because sections cross under instead of over—creates a beautiful, textured, almost three-dimensional appearance. Pairing it with a messy bun amplifies that texture even further, creating a style that looks surprisingly intricate but is no harder to execute than a traditional braid once you learn the motion.
Start at your crown and take three sections of hair. Instead of crossing the right section over the middle (like you would in a traditional braid), you’re crossing it under the middle. Then cross the left under the middle. This reverse motion creates a braid that puffs outward and looks much thicker and more dimensional than a traditional braid. Continue this motion as you travel downward, adding hair from the sides as you go, but always crossing under rather than over. Once you’ve incorporated most of your hair, gather everything into a loose bun at the nape of your neck and secure it with bobby pins. The reverse braid naturally flows into the bun in the most beautiful way.
The Visual Impact of Inside-Out Braids
Reverse braids photograph beautifully because they catch light completely differently than traditional braids. They also look more modern and less “polished” in the best way—they read as intentionally undone rather than formally braided. If you have fine hair, reverse braids actually make your hair look thicker because of the puffing effect they create. With thick or curly hair, they create the kind of romantic volume that most people spend money on extensions trying to achieve.
Mastering the Reverse Motion
- Practice the reverse motion with loose hair first if you’ve never done it before—it takes maybe three practice sessions to feel natural
- Keep your hands relaxed and your sections chunky rather than trying for delicate, thin strands
- Cross under deliberately and smoothly; hesitant, jerky motions make the braid look unintentional
- As you braid, gently pull the sides of the braid outward to create more puffiness and dimension
- Don’t try to make a reverse braid perfectly symmetrical or tight—the looser and puffier it is, the better it looks
- When you transition to your bun, continue pulling the braid sections outward so the bun is equally textured and voluminous
Insider note: Once you master the reverse braid, you’ll probably use it for every style because it looks better than a traditional braid and feels just as easy once it becomes muscle memory.
8. Half-Up French Braid to Messy Bun Style
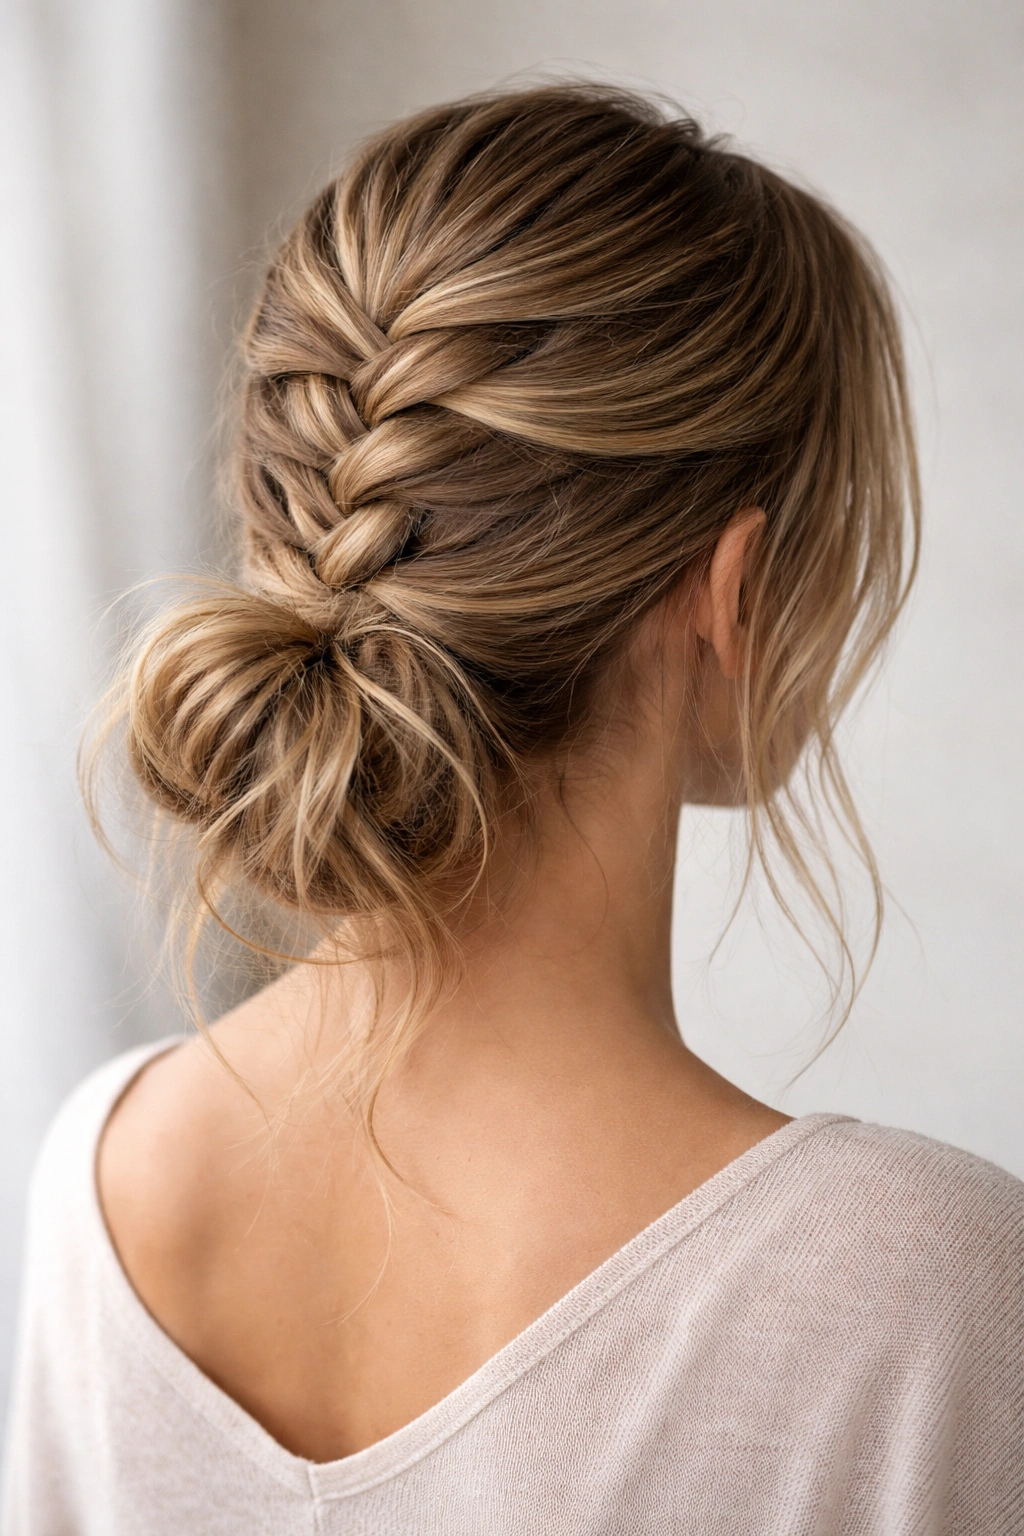
This style is perfect for days when you want a little polish without committing to a fully styled look. You’re creating a French braid that starts at the crown and travels about halfway down the back of your head, then you’re gathering all the hair—the braided portion plus the loose hair below it—into a single messy bun. It’s a hybrid of half-up styling and full-bun styling that gives you the best of both worlds.
Start at the crown of your head with a small section and begin your French braid, but instead of braiding all the way to the nape of your neck, stop roughly at the middle of the back of your head, around ear-level depth. Secure the end of your braid with a small elastic. Now, gather all the remaining loose hair (including your braid tail) into a low-to-mid height bun at the back of your head and secure it with bobby pins. The braid becomes part of the bun cluster rather than being a separate element, creating beautiful layered texture. The result is something that reads as “intentionally styled” from the back but feels casual and comfortable on your head.
Why Half-Up Works for Every Situation
This style strikes the perfect balance between effort and payoff. You get the visual interest and apparent polish of a braided style without the commitment of braiding all the way down your head. It’s ideal for people with shorter hair because you’re not dealing with a lot of loose length to wrangle. It’s equally perfect for longer hair because the braid anchor keeps everything from feeling too heavy or pulling at your scalp. The style works beautifully with all hair textures and is genuinely comfortable to wear for the entire day.
Building the Perfect Half-Up Version
- Decide how much hair you want braided before you start—roughly at ear-level or a bit lower is usually most flattering
- Make sure your braid is snug enough to stay in place but not so tight that it pulls uncomfortably
- When you transition to your bun, incorporate the braid end smoothly so it blends with the rest of the hair
- Don’t try to hide the braid; instead, arrange your bun so the braid texture is visible and intentional
- Leave two or three small pieces of loose hair framing your face—this softens the style and prevents it from looking too severe
- Gently pull the bun sections outward so it has a full, undone appearance rather than a tight, polished one
Real talk: This might be the most practical French braid-bun hybrid for everyday wear. It looks intentional without requiring serious skills or taking forever to execute.
Final Thoughts
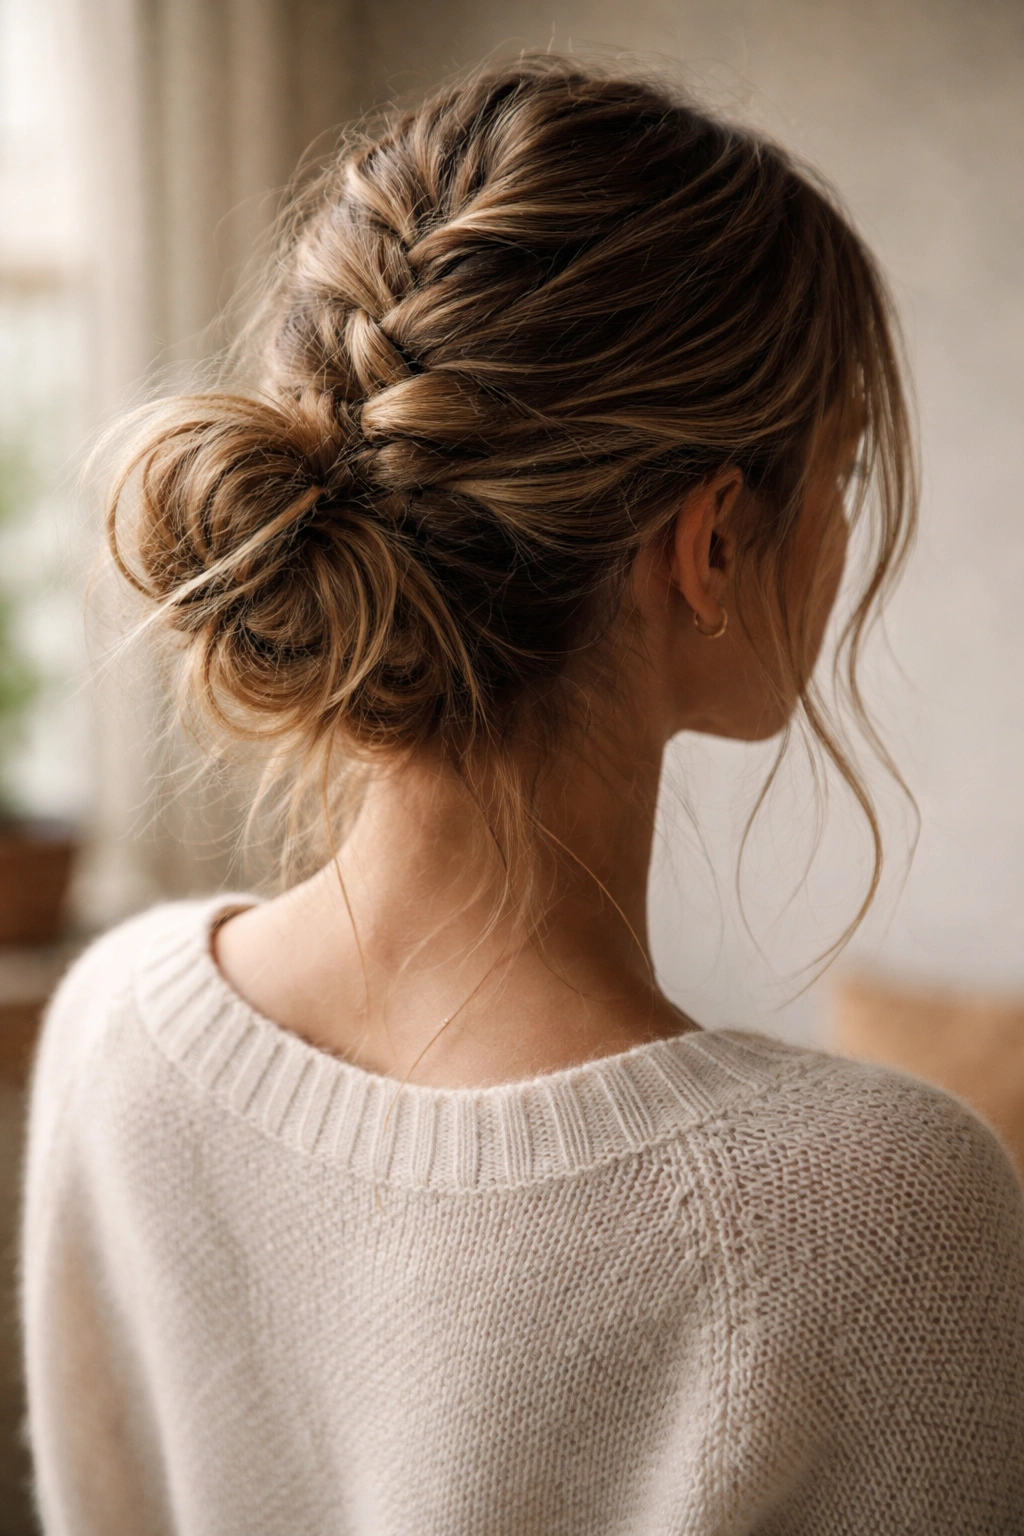
The beauty of these eight French braid-to-bun styles is that they prove you don’t have to choose between polish and comfort, between intricate and effortless, between put-together and undone. Every single one of these styles successfully lives in the space between formal and casual, making them genuinely useful for your real life rather than just for special occasions.
Start with whichever style speaks to you most, rather than beginning with the “easiest” one. You’ll learn faster and practice more frequently if you’re excited about the style you’re working toward. Once you nail one, the others will come much more easily because you’ll understand how the braid flows into the bun and how to create that intentional-yet-undone aesthetic that makes these styles so wearable.
The secret most people don’t realize: texture is your friend. Second-day hair, dry shampoo, texturizing spray, and gentle teasing all make these styles look better and hold longer. And imperfection is literally the goal—those flyaways, those pieces that escape the braid, that bun that’s a little lumpy—those aren’t mistakes you need to fix. They’re exactly what make these styles look modern, romantic, and genuinely like something a real person would wear.
