There’s something effortlessly chic about a half-up hairstyle, especially when you’re working with naturally wavy or textured hair. Unlike straight hair that can look flat when styled this way, waves add dimension and movement that make a half-up instantly interesting — you get the face-framing benefit of styles with hair down, plus the pulled-together polish of an updo. The best part? Most of these styles take fewer than five minutes to create, and they work whether you’ve got loose, beachy waves or more pronounced, defined texture.
The trick to nailing a half-up with wavy hair lies in understanding how to work with your waves rather than fighting them. You’re not trying to tame or straighten — you’re enhancing what’s already there. The weight distribution matters more than perfect symmetry, and texture is actually your secret weapon. Pieces that slip out or frame your face aren’t failures; they’re the whole appeal. Once you understand the handful of core techniques — which layers to pull, how to anchor a half-up so it doesn’t slip, and where to add volume — you’ll find dozens of variations you can create on the fly depending on your mood and what you’re doing that day.
Whether you’re heading to work, out for coffee, or getting ready for something more dressed up, a half-up works in nearly every context. The styles below range from effortlessly undone to slightly more polished, but all of them respect the natural texture of your waves while giving you a style that actually stays put throughout the day.
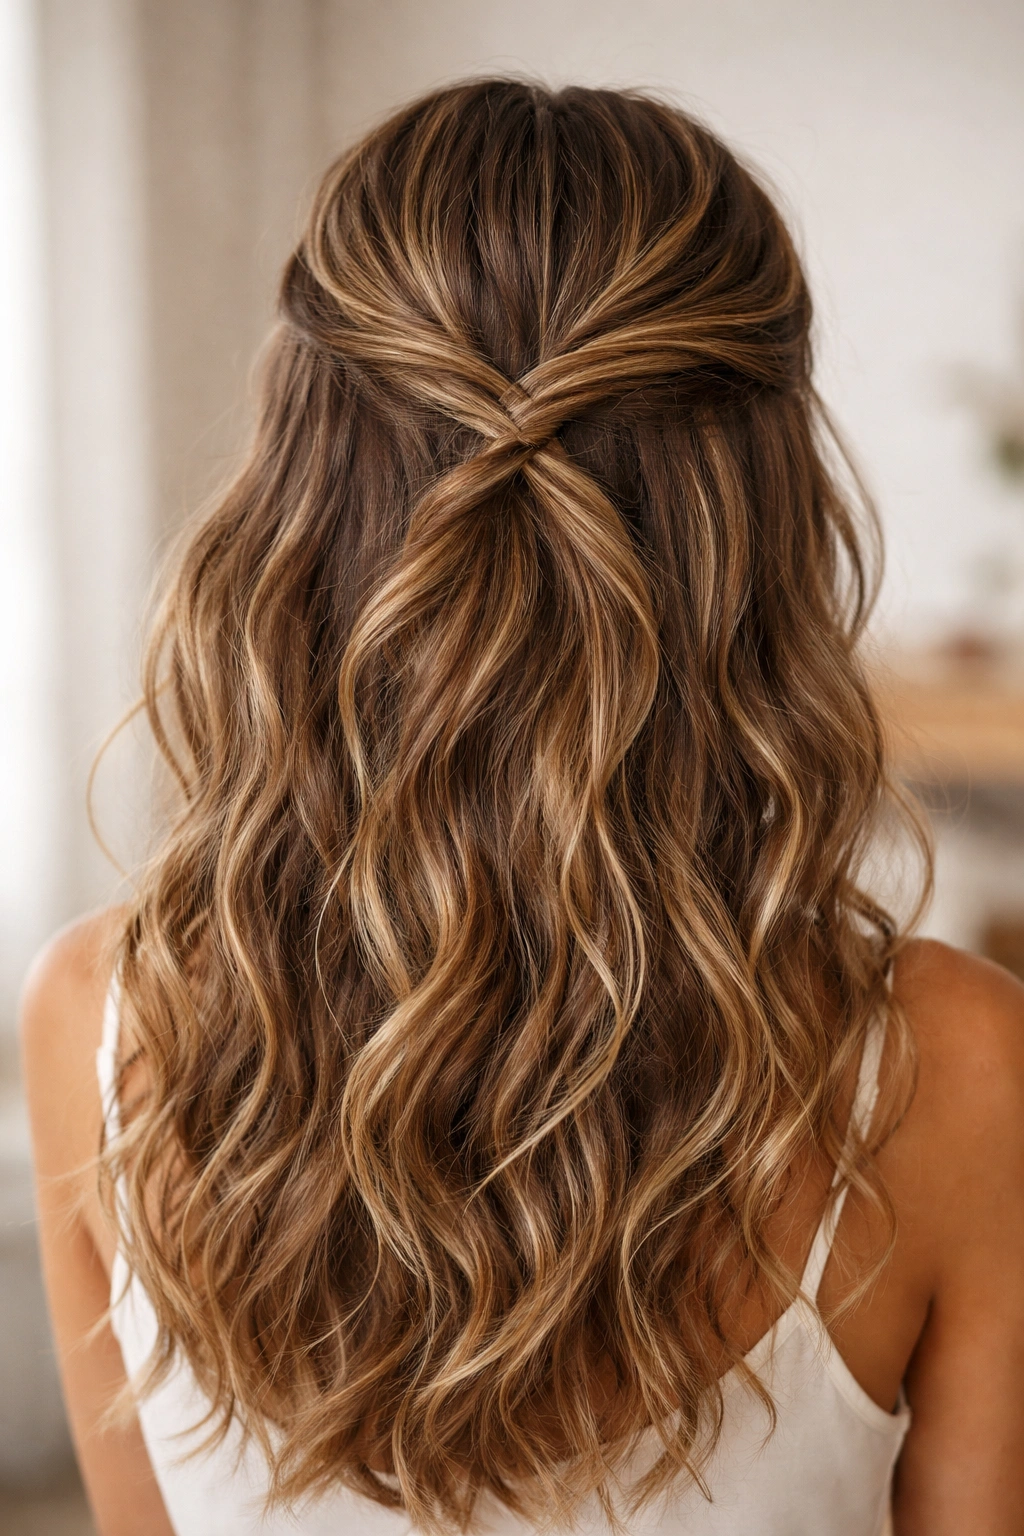
1. The Twisted Half Up
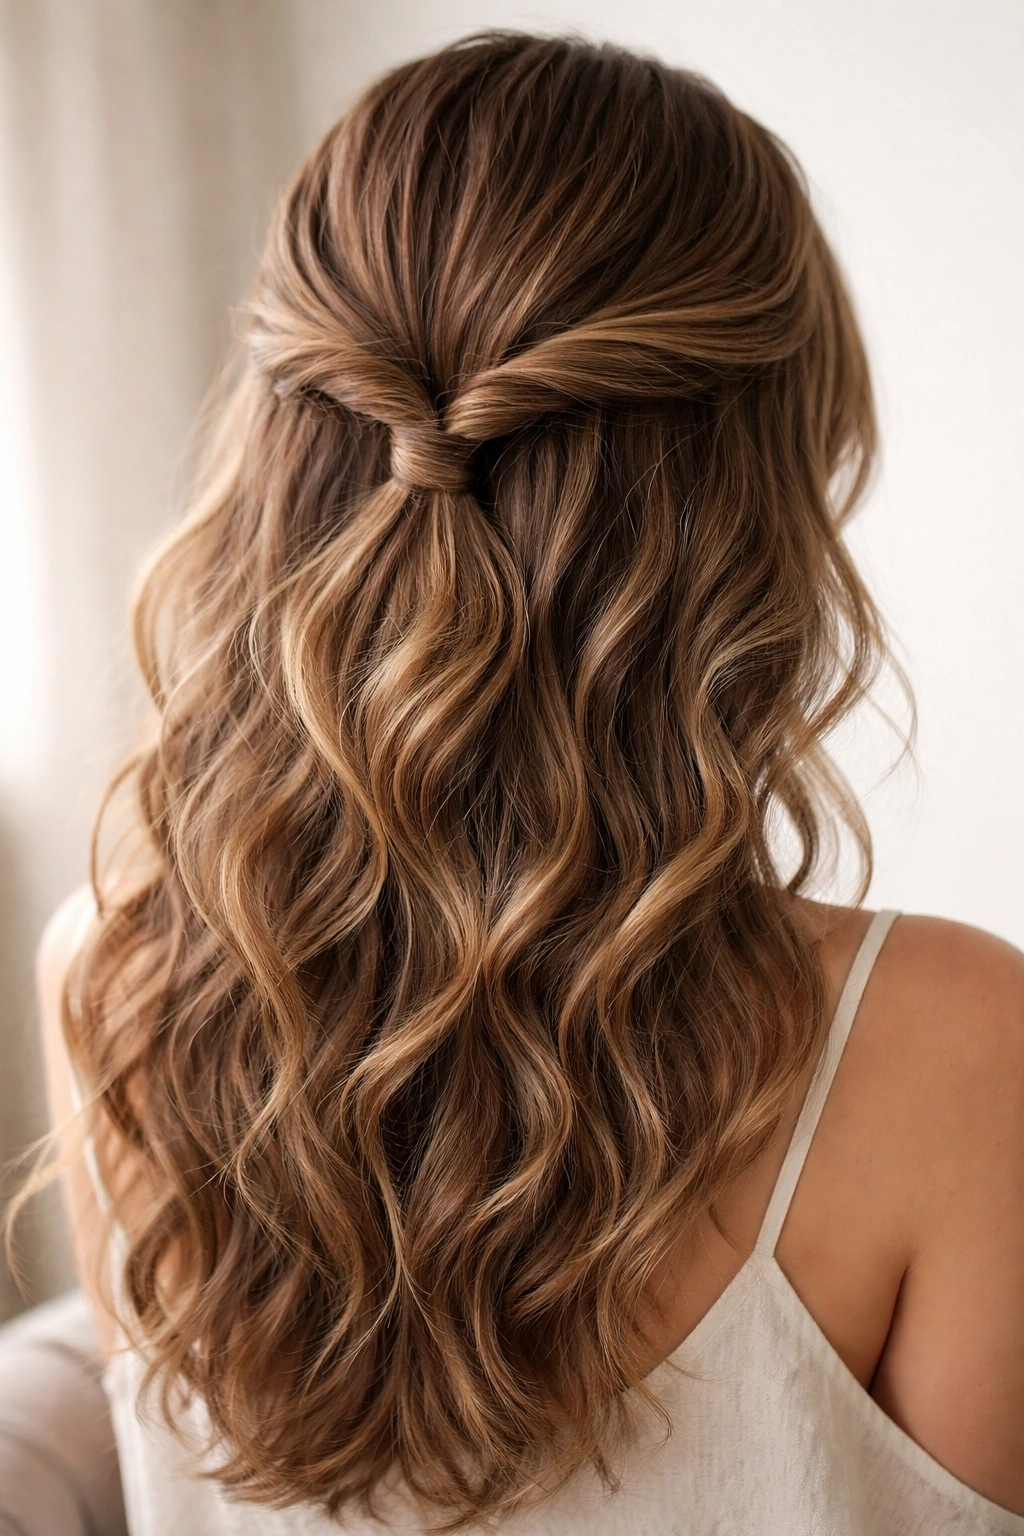
This is the fastest half-up you can create, and it looks intentionally elegant rather than like you just threw your hair together. You’re taking sections from both sides of your face, twisting them loosely, and securing them at the back of your crown — and that’s genuinely the entire technique.
How to Create the Twisted Effect
The key is not to twist too tightly, which would flatten your waves and make the style feel rigid. Instead, use a loose, relaxed twist that lets your wave pattern show through. Start by taking a section about two inches wide from just above your ear on one side. Twist it gently as you move back toward the crown, holding the twist loosely between your fingers so the texture remains visible. The twist should feel organic, not like a perfectly spiraled rope. Repeat on the other side, and as you bring both twists together at the back of your head, cross them over each other once before securing with a small elastic or bobby pin.
Pro Tips for Long-Lasting Hold
- Use a texturizing spray or dry shampoo at the roots before you start — this gives the elastic something grippy to hold onto, which prevents the style from slipping as the day goes on
- Don’t secure the twists directly at the crown; instead, gather them slightly lower, around the nape area where hair is naturally thicker
- Leave the front sections slightly loose rather than pulling them taut — this creates dimension and looks intentional
- For extra grip, backcomb or tease the section of hair where you’ll place your elastic before twisting; this creates friction that holds the style all day
2. The Braided Half Up
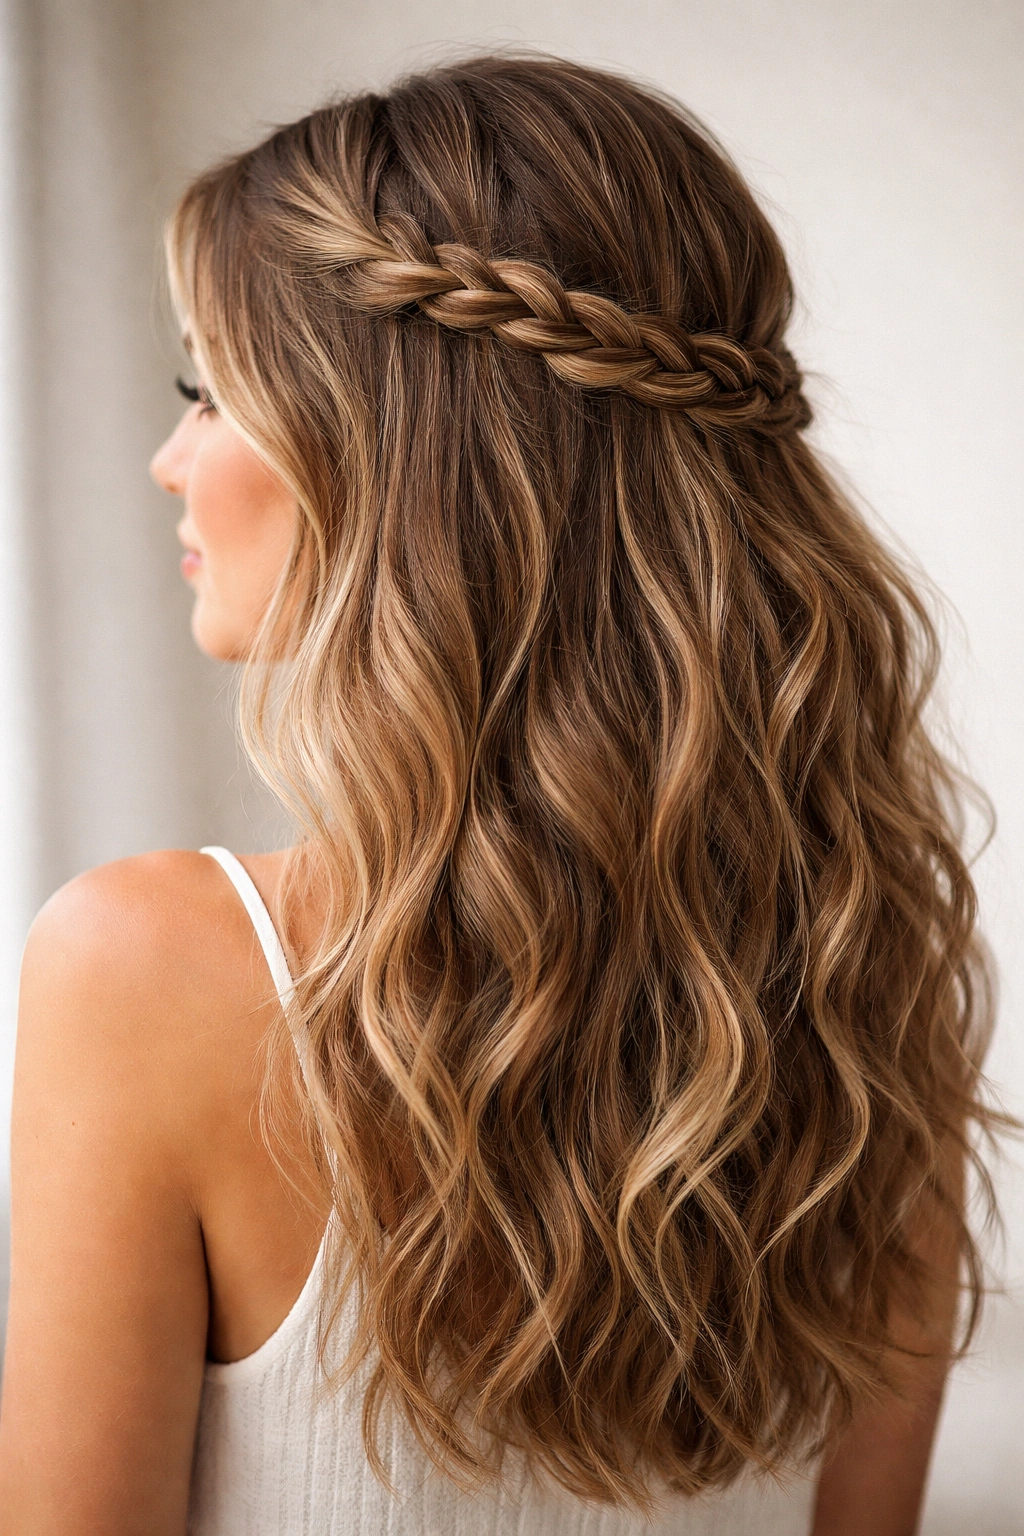
A half-up braid works beautifully with wavy hair because the braid itself adds another layer of texture and interest. Unlike smooth, straight hair where a braid can look too polished, a braid in waves feels bohemian and effortlessly put-together.
Building Your Braid
You have flexibility here with how thick you want your braid. A loose, chunky braid looks more relaxed and beachy; a tighter braid is slightly more refined. Start by sectioning hair about three inches wide from one side of your face — you’re not taking hair from both sides like you would for a full crown braid, just one side. Create a basic three-strand braid, keeping it loose so your waves remain visible within the braid itself. The braid doesn’t need to go all the way to the back; bring it about three-quarters of the way across the back of your head, then secure it with a small elastic. The loose ends of the braid can blend into the rest of your half-up hair at the back.
Variations That Keep It Interesting
- Try a fishtail braid for a softer, more intricate look — fishtails have a built-in delicate quality that photographs beautifully
- Braid only one side for an asymmetrical take, securing it lower and letting it sit against the longer layers beneath
- Create two thin braids instead of one thick one, crossing them over each other as you secure them
- After you’ve braided and secured it, gently pull apart the braid slightly to loosen and widen it — this amplifies the texture and makes the style feel less structured
3. The Messy Textured Half Up
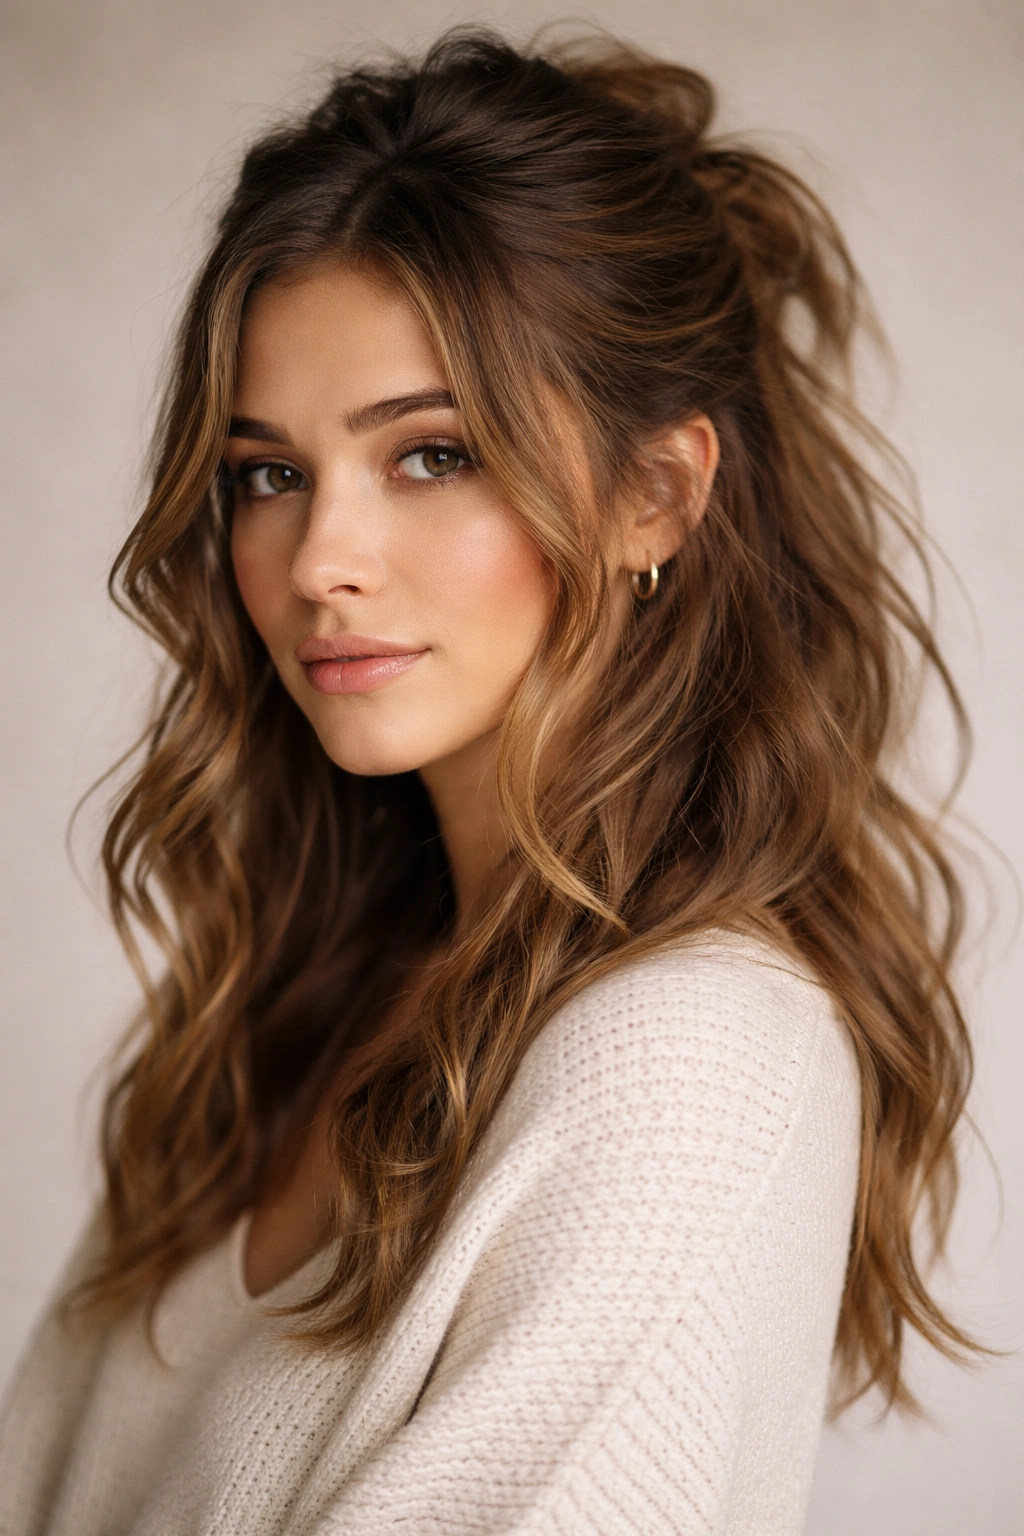
This is the half-up for days when you want to look polished without looking like you tried too hard. You’re deliberately creating a slightly undone, piecey texture that feels current and intentional rather than accidental.
Creating Intentional Messiness
The goal is controlled chaos. Start by pulling back the top section of your hair — roughly from the crown to about an inch above your ears on both sides — but don’t make it smooth or precise. You want pieces falling out and the overall shape to be slightly loose. Use a claw clip or elastic to secure it, but don’t position it centered at the back of your head. Off-center placement automatically reads as more relaxed. As you secure it, deliberately leave some shorter pieces unsecured around your face and temples. These pieces frame your face naturally and add to the intentionally undone vibe.
The Secret to Keeping It Polished
- Apply a texturizing spray or sea salt spray to your hair before styling — this emphasizes wave texture and keeps strands from looking too smooth
- Use a clip rather than an elastic for extra grip and adjustability; you can shift it throughout the day if needed
- Separate individual sections with your fingers after securing to create more dimension and pieciness
- A light spritz of flexible-hold hairspray helps maintain the slightly loose structure without making it feel stiff
- The scattered, undone quality should feel intentional, not like your style fell apart — aim for about 80% controlled and 20% undone
4. The Sleek Pulled-Back Half Up

When you need your hair completely out of the way but still want half-up styling, this is your go-to. It’s polished and clean, with a slightly more formal edge than the other styles on this list, making it perfect for work, meetings, or occasions where you need a more finished look.
Achieving the Sleek Finish
Start with damp hair or lightly dampen the top section you’re going to style. The moisture helps smooth the cuticle temporarily. Using a fine-tooth comb or a smoothing brush, brush the hair back from your hairline and temples, directing it toward the crown. The key is keeping tension as you brush so the section lies flat against your head. Gather your half-up section at the crown and secure it with a sleek elastic. For extra smoothness, apply a smoothing serum or lightweight gel to the brushed section — just enough to tame flyaways without creating a shiny, wet appearance.
Maintaining Smoothness Throughout the Day
- Work with slightly damp hair rather than completely dry hair; dryness creates frizz and puffiness
- Use a paddle brush for the smoothest finish, brushing in the direction you want the hair to lay
- A light smoothing cream or anti-frizz serum is essential; apply it to your palms and smooth it over the brushed section
- This style works best if you refresh it mid-day; even smooth hair builds volume over eight hours, so a quick re-brush and re-secure around hour 4 keeps it looking fresh
- Humidity is the enemy of sleek styles, so this version works better indoors or in drier climates
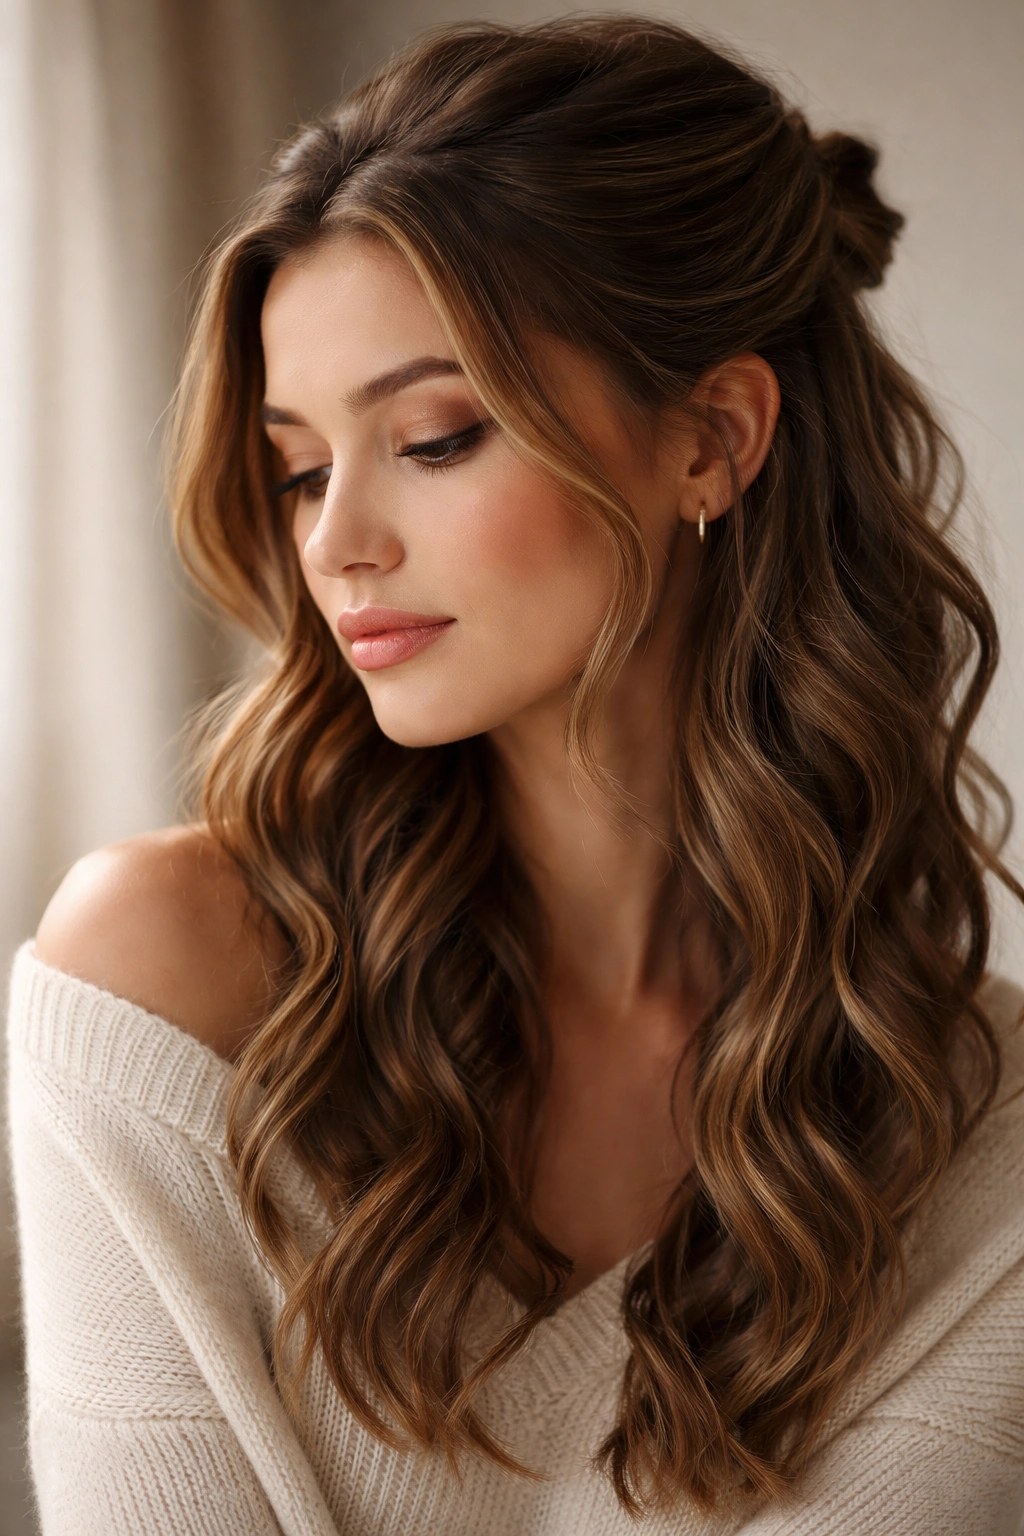
5. The Half Up with Face-Framing Waves
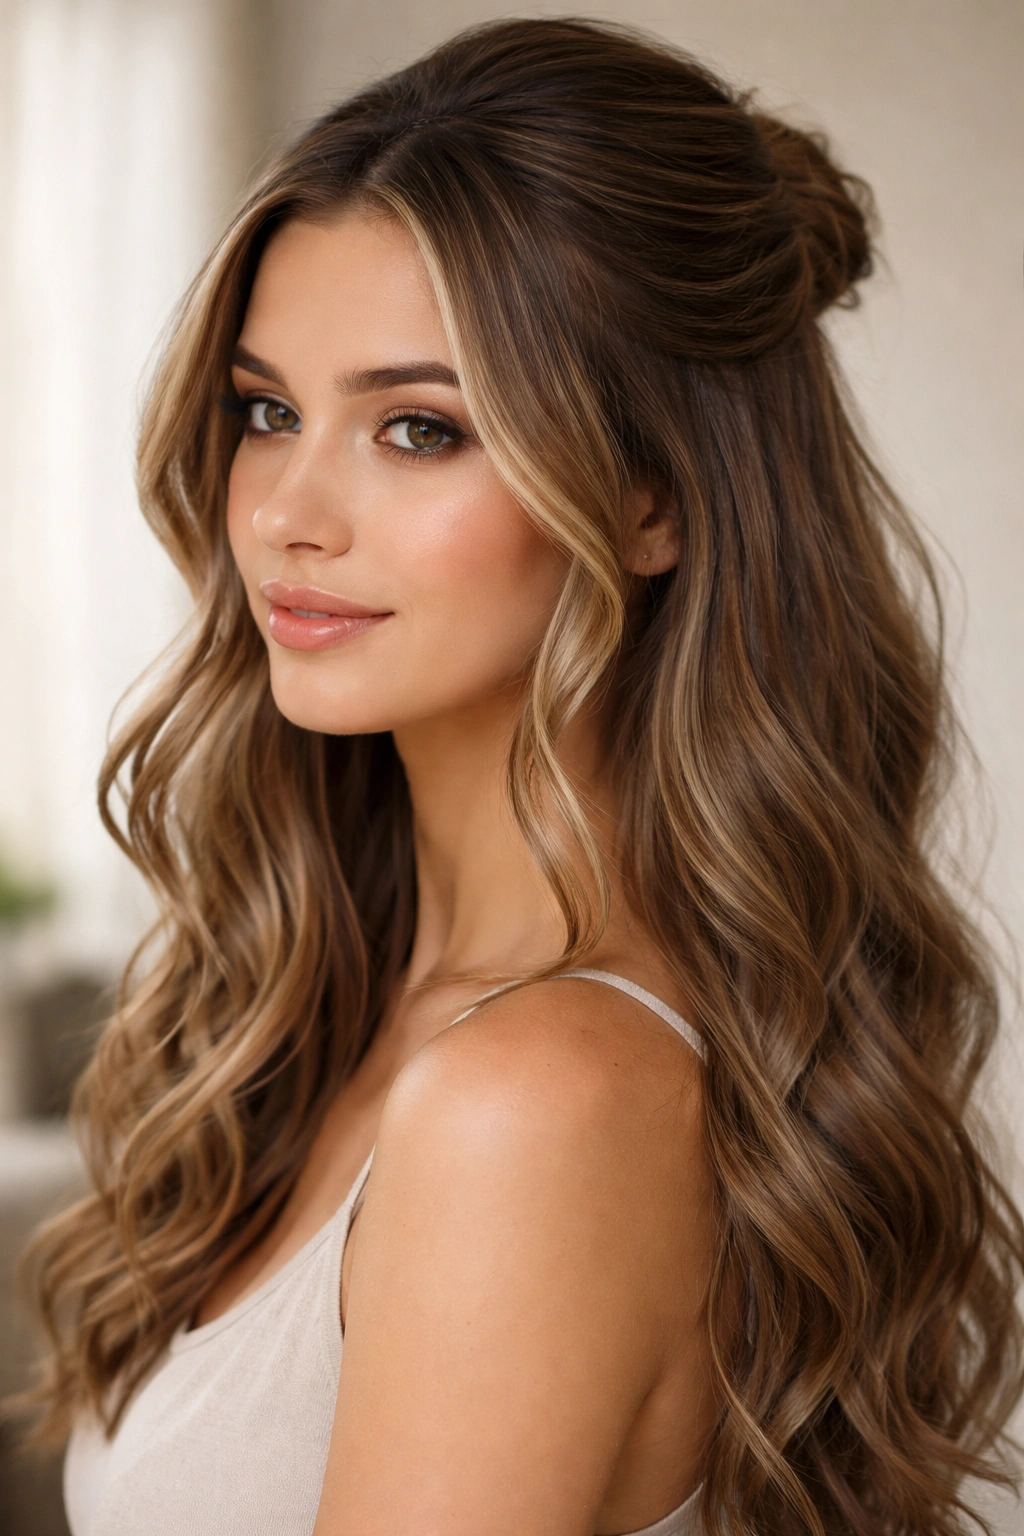
This style specifically emphasizes the face-framing element, leaving longer pieces on both sides of your face to angle forward and highlight your features. It’s romantic and flattering, working beautifully for everything from casual to special occasions.
Designing the Frame
Take a narrower section than you normally would for a half-up — about one inch wide from each temple — and leave these sections completely out of your main half-up. Pull the rest of the hair back to your crown and secure it. The frame pieces should fall naturally along your jawline or slightly past it, depending on where your longest layers are. To enhance the wave in these face-framing pieces, you can curl them gently with a curling iron or diffuse them with a blow dryer if they’re not as wavy as the rest of your hair. Alternatively, let them dry naturally and reshape them as needed.
Styling the Framing Pieces for Maximum Impact
- These pieces look best when they have dimension and movement; if they’re too straight, they’ll look like you couldn’t control them
- A light texturizing spray helps define the waves in your face-framing pieces and prevents them from looking limp
- Tuck one side slightly behind your ear for asymmetry and to prevent the pieces from obscuring your face entirely
- If you want these pieces to have more of a curl or wave, take 10 seconds with a curling iron on a low heat setting just before you create the half-up
- This style is particularly flattering if you curl or enhance the waves so they angle forward toward your face rather than curving back
6. The Crisscross Half Up
This style adds visual interest and a touch of sophistication by crossing two twisted or braided sections over each other at the back of your head. It’s more detailed than a simple half-up but only requires a couple of extra minutes.
Executing the Crossover
Create two twisted sections, one from each side of your face, following the same technique as the Twisted Half Up (loose, relaxed twists that let your wave texture show). Bring both twists to the back of your head but don’t secure them immediately. Instead, cross one over the other in an X-shape, positioning the crossover point about two inches below your crown. Once you’re happy with the placement, secure both twists together with a single elastic or bobby pin at the crossover point. Let the ends of the twists fall into your main half-up section — they should blend seamlessly with the rest of your hair.
Design Variations on the Crisscross
- Try crisscrossing braids instead of twists for a more textured, intricate look
- Create the crisscross but don’t secure the ends together — let them fall separately into the half-up, which creates more of a crisscross pattern than a structural style
- Make the crossover point higher or lower depending on where you want the visual interest; a higher crossover is more bold, while a lower one is subtler
- For an asymmetrical take, bring one twist forward and one back, creating a diagonal rather than a centered pattern
- This is an excellent opportunity to use a decorative clip or barrette at the crossover point for added interest
7. The Half Up with Ribbon or Accessory
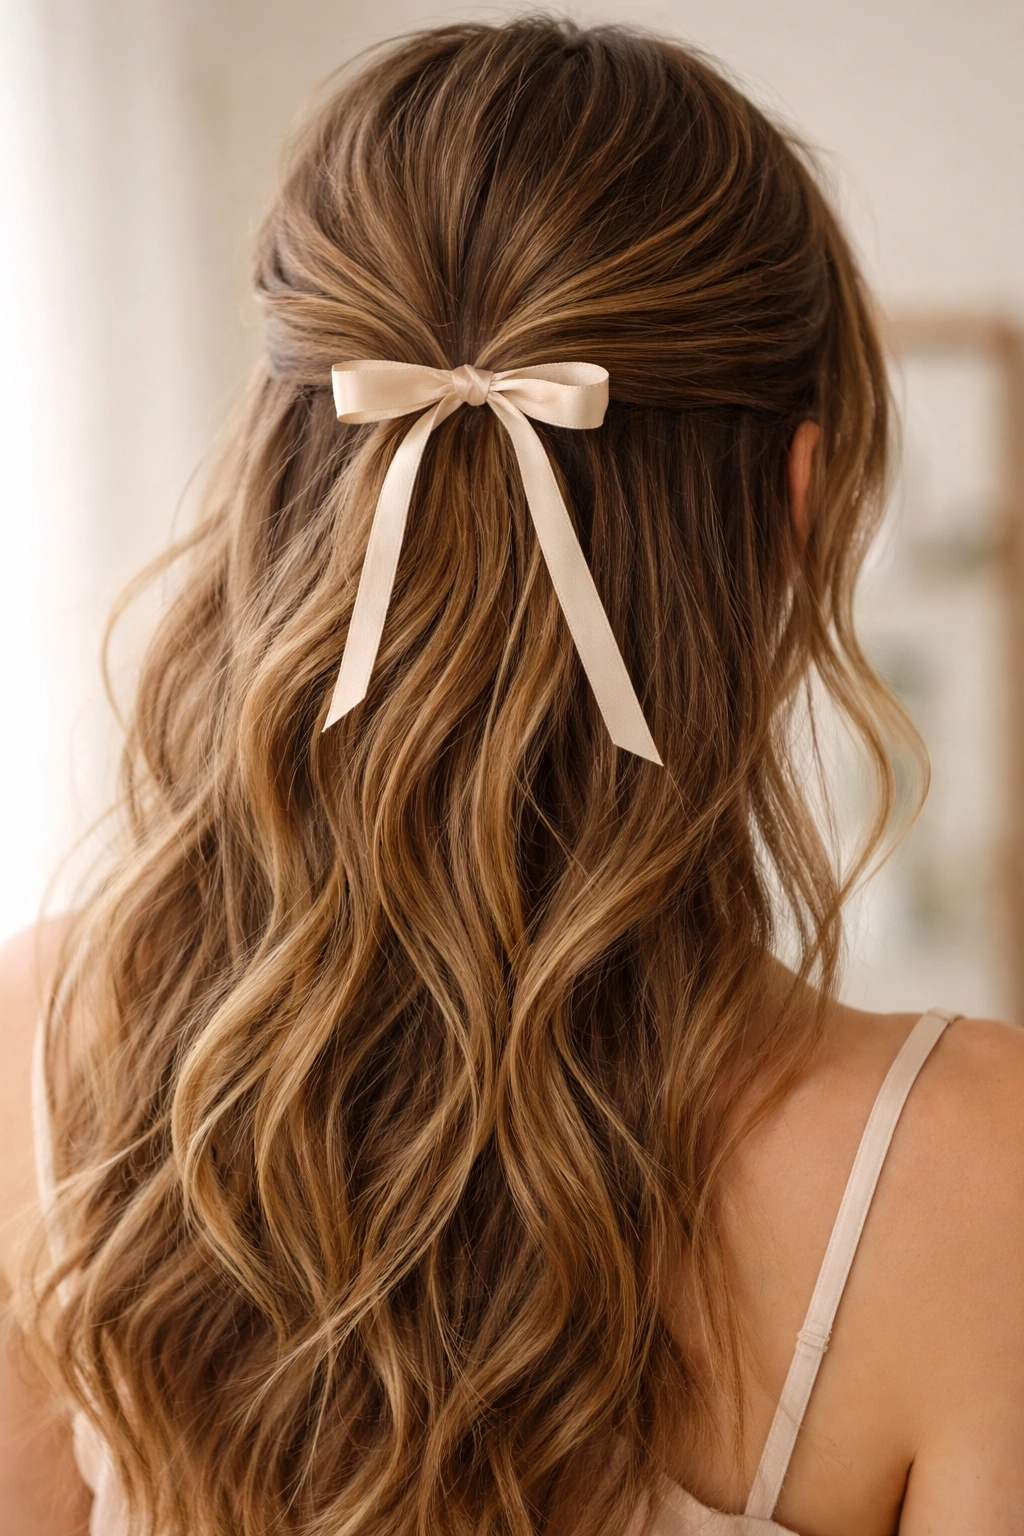
Adding a ribbon, scarf, or decorative element transforms a basic half-up into something that feels special and intentional. The accessory becomes the focal point, making even a simple style feel considered and put-together.
Incorporating an Accessory
You have a few options here. The simplest is to wrap a thin ribbon or scarf around the elastic after you’ve secured your half-up, then tie it in a small bow or knot. Alternatively, weave the ribbon through your hair as you twist or braid, so it becomes part of the structure rather than just an accessory added after. For a very simple look, secure your basic half-up with an elastic, then slide a decorative clip over the elastic to hide it. The clip itself becomes the focal point.
Choosing the Right Accessory
- Velvet ribbons add richness and work for both casual and formal occasions
- Silk ribbons or scarves add shine and a luxe feeling without being overly dressy
- Decorative clips should coordinate with your outfit or hair color; a tortoiseshell clip works with almost everything, while a metallic one can feel more formal
- Pearl-studded or beaded clips add subtle shine and work well for evening or events
- The width of the ribbon matters; thinner ribbons feel more delicate, while wider ones feel bolder
8. The Voluminous Crown Half Up
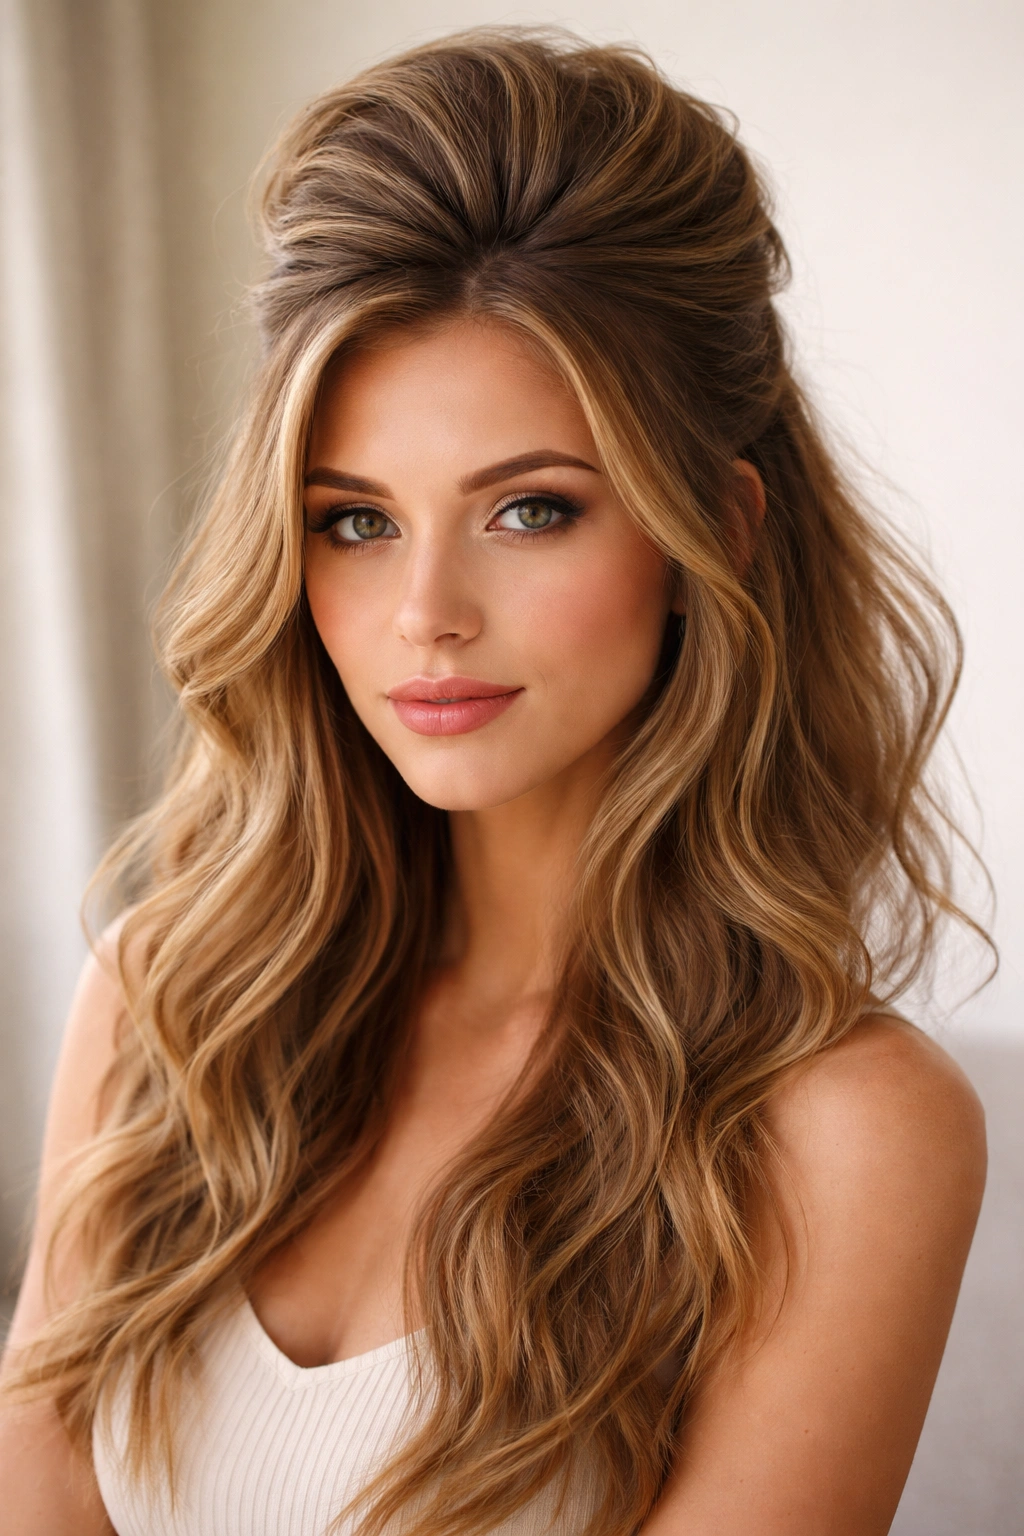
This style prioritizes lift and volume at the crown, creating a more dramatic, eye-catching effect. It’s ideal if you want your half-up to be the focal point of your look, or if you’re going somewhere special and want something that photographs well.
Building Volume at the Crown
Start by rough-drying your hair with your head tipped upside down, focusing heat and movement at your roots. You want maximum texture and lift from the start. Once your hair is dry, flip back upright and section your half-up area. Before securing, use a fine-tooth comb or teasing brush to backcomb the roots of your half-up section at the crown — this creates a cushion of texture that holds volume. Smooth the outer layer back down over the teased section, then pull everything back into your half-up and secure it. The underside is teased and textured, while the outer layer looks polished.
Techniques for Sustained Volume
- A texturizing spray applied before teasing helps create more grip and hold
- Tease more aggressively at the center crown and slightly less as you move toward the sides; this creates a natural-looking dome of volume rather than a uniform poof
- Secure your elastic slightly lower than you normally would — this gives you more teased hair above the elastic to stand up and create volume
- Use a fine-tooth comb to gently smooth flyaways and separate individual sections, which creates more dimension than a smooth, solid-looking crown
- This style benefits from being refreshed mid-day; volume gradually flattens over time, so a quick tease and fluff can bring it back to life
Final Thoughts
The beauty of a half-up hairstyle with wavy hair is that perfection isn’t the goal — texture, dimension, and a touch of intentional undone-ness are what make the style work. Your waves are doing most of the heavy lifting in terms of visual interest, which means you can focus on the mechanics of actually securing the style so it stays put all day. Master the basic techniques of twisting, braiding, and strategic pin placement, and you’ll be able to create dozens of variations depending on your mood, your occasion, and how much time you have to spend styling.
The half-up works across virtually every hair type, but wavy and textured hair genuinely seems made for this style — it lets your natural texture shine while giving you the practical benefits of having hair partially off your face and neck. Experiment with different section sizes, placement heights, and accessories until you find your go-to version. Some days you’ll want the effortless messiness of a textured half-up; other days you’ll want the polished edge of a sleek version with face-framing waves. Once you’ve practiced these eight variations a few times each, the whole process becomes second nature, and you’ll be able to create them in under five minutes without even thinking about it.