



Afro puff ponytails are having a moment—and honestly, they deserve all the attention. Whether you’re heading into the office, running errands, or getting ready for the weekend, this protective style offers versatility that few other hairstyles can match. You get the polished appeal of a pulled-back style without sacrificing the volume, texture, and natural beauty of your curls. The best part? These styles work whether you’re rocking a high-shrinkage curl pattern or looser coils, and they’re forgiving enough for second-day hair while still looking intentional and put-together.
What makes afro puff ponytails so practical is that they tick multiple boxes at once. They keep hair off your face and neck, they’re protective because your ends are tucked away, and they work in virtually any environment—from a corporate meeting to a casual Saturday at home. The styling time is minimal once you understand the technique, and most styles can be worn for several days if you refresh them properly. Plus, there’s genuine creativity involved; small choices about placement, tightness, texture, and added elements transform the whole vibe.
The challenge most people face is knowing where to start. You might think there are only a handful of ways to do a puff, but the reality is far more interesting. Placement changes everything—high versus low shifts the entire aesthetic. Adding a twist, a wrap, or texture elements takes it from basic to sophisticated. Some versions read professional and polished; others feel playful and undone. Let’s explore eight distinct approaches that’ll give you options for whatever your day calls for.
1. The Sleek Executive Puff
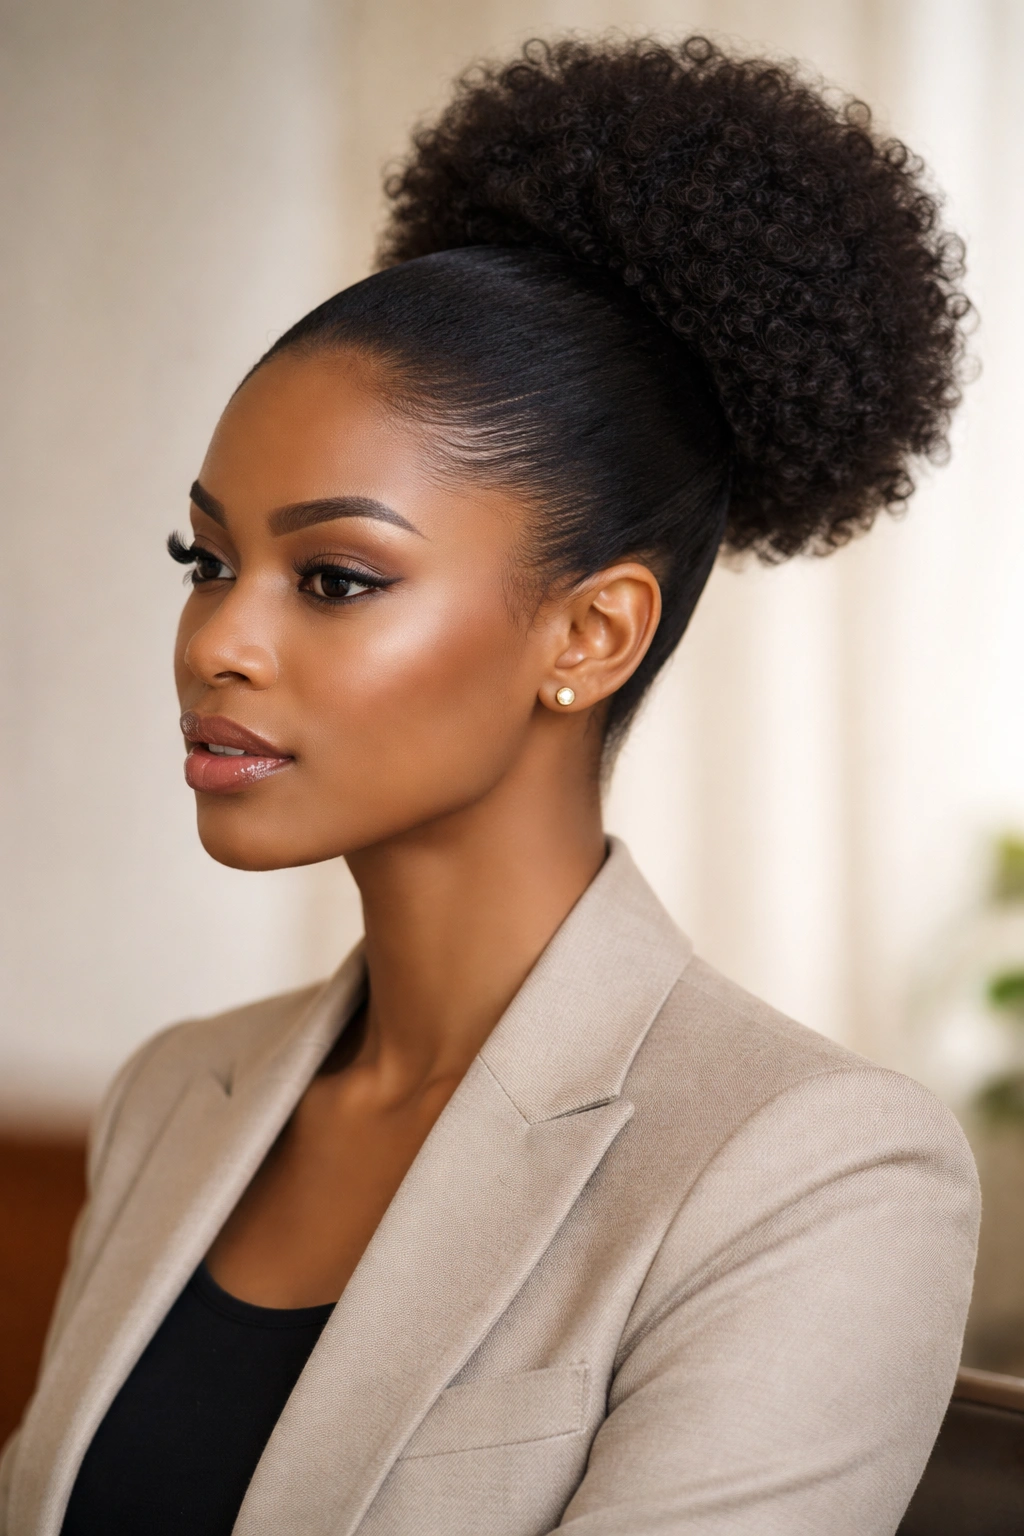
This is the one you reach for when you need to look sharp and professional. The hair is gathered high on the crown, smoothed down at the base with a lightweight gel or mousse, and secured tightly with a sturdy hair tie. The puff itself is full and defined—you’re not going for wispy here—and the finish has polish without being overly decorated. It pairs effortlessly with corporate attire and reads as intentional styling rather than a casual grab-and-go.
Why It Works in Professional Settings
The sleek executive puff commands attention in all the right ways. The clean, smooth foundation signals that you’ve put thought into your appearance, while the height and fullness of the puff itself showcases the texture and volume of your hair without making it feel like it’s consuming your face. The tightness at the base keeps flyaways contained throughout a full workday, so you’ll look polished at your 9 a.m. meeting and your 4 p.m. presentation equally well.
How to Achieve It
- Brush or detangle your hair gently with a wide-tooth comb or detangling brush, working from the ends upward to avoid breakage
- Apply a lightweight smoothing gel to the perimeter and edges; a tiny amount goes a long way—you’re aiming for control, not crunch
- Gather hair high on the crown (roughly where you’d place the crown of a head) and secure with a strong elastic or hair tie designed for textured hair
- Smooth any bumps or flyaways with the back of your brush or a silk scarf
- Optional: wrap a small section of hair around the base of the tie to conceal it and add polish
Pro tip: Invest in a quality hair tie made specifically for curly and coily hair—brands designed for textured hair are gentler and create less tension, which means healthier hair over time and a smoother base.
2. The Twisted High Puff
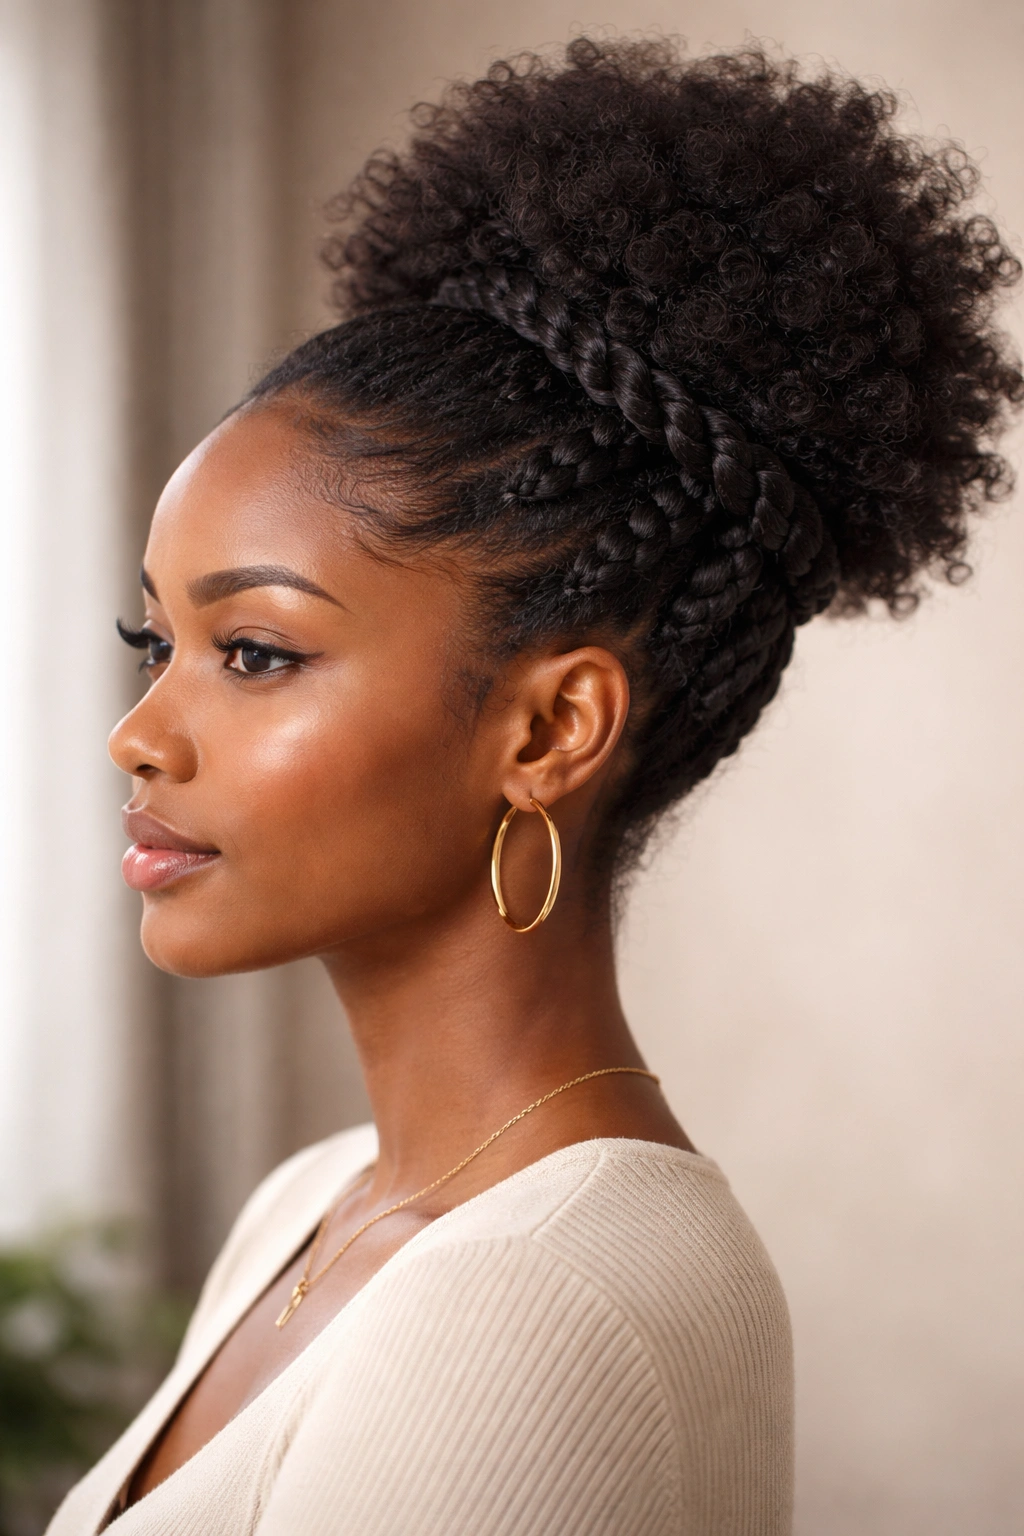
Add one elevated element and suddenly the puff feels more intentional. This version involves twisting sections of hair before gathering them into the puff, creating texture and visual interest. The twists form a small crown effect around the base of the puff, transforming it from simply secured to deliberately styled. It’s playful enough for weekend vibes but polished enough to wear on a casual workday.
What Makes the Twist Element Special
The twisted portions catch light differently than the rest of your hair, creating dimension that makes the style feel more elaborate than it actually is. It also serves a practical purpose: the twist creates a tighter grip on the sections you’re incorporating, which means the puff will last longer without loosening or requiring a midday refresh. This is especially valuable on days two or three when your hair has naturally relaxed a bit.
Building Your Twisted Puff
- Section your hair into 3-4 parts (depending on your hair volume and how much twist detail you want)
- Twist each section loosely from the roots down to about the mid-length of your curls
- Gather all twisted sections together at your desired height and secure with an elastic
- Gently separate and fluff the untwisted portions above the elastic to create volume
- If you want extra definition, you can wrap a thin, untwisted section of hair around the base to conceal the elastic
Insider note: Fresh twist-outs work beautifully for this style—if you’ve done two-strand twists the night before, simply unravel them and gather into the puff for texture that’s already perfectly spiraled.
3. The Low Gathered Puff
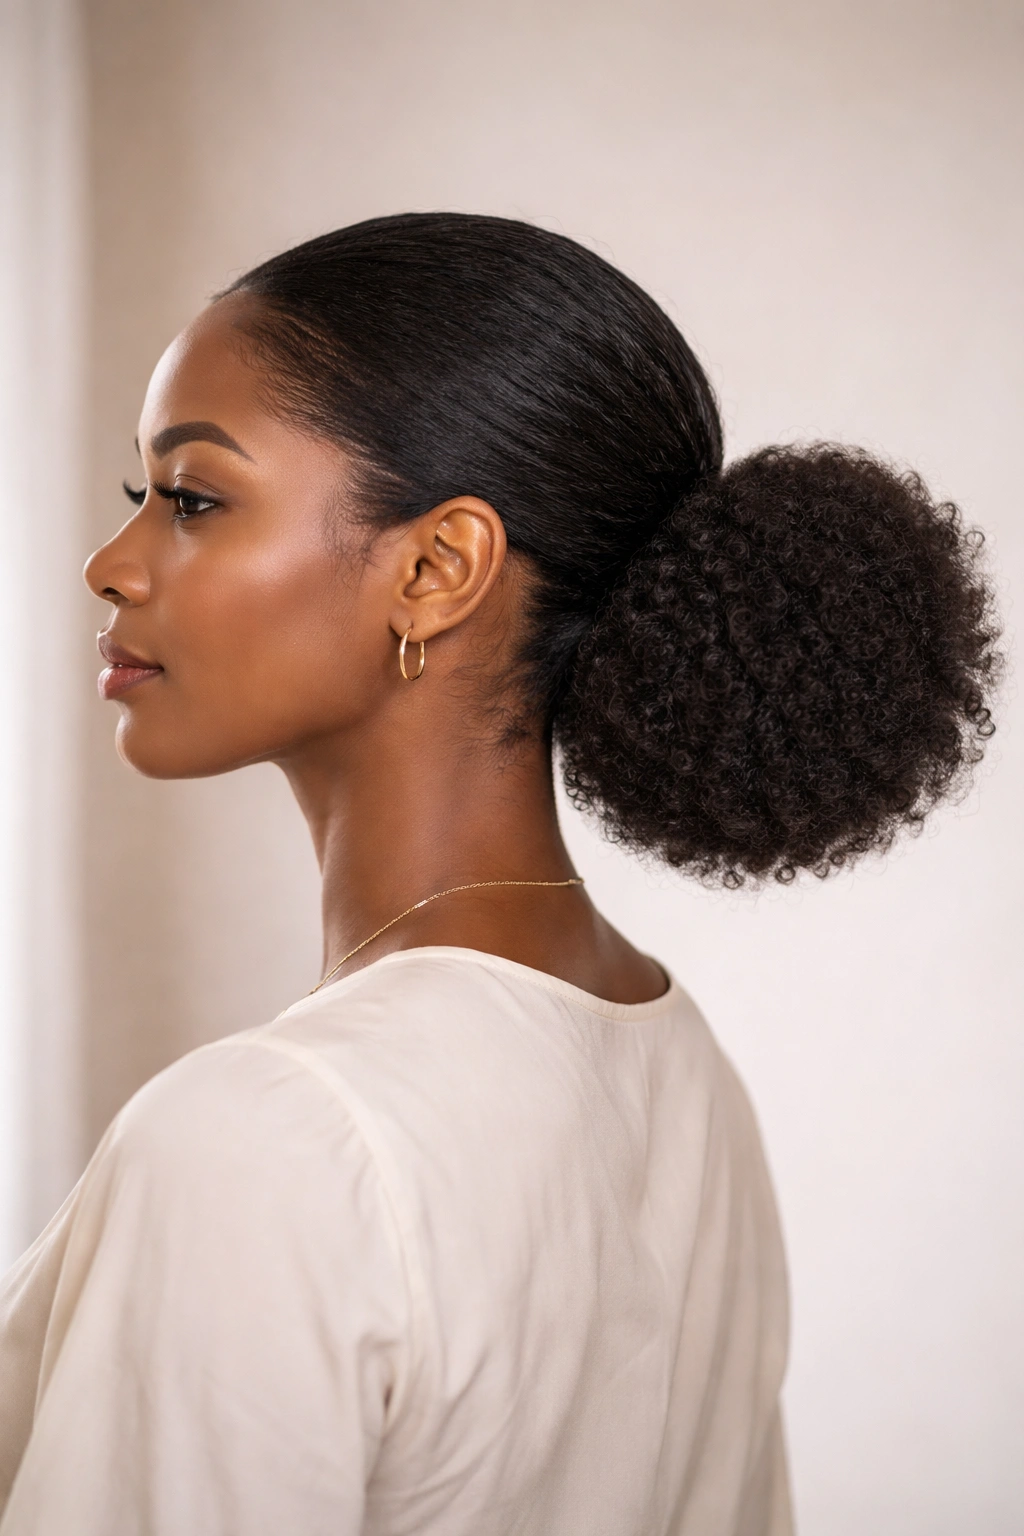
There’s something effortlessly elegant about a puff positioned lower on the head. This version sits at the nape of your neck or the back of your crown rather than at the very top, completely changing the silhouette. It feels more relaxed than its higher cousin, making it perfect for days when you want to look polished but not formal. It also works beautifully if you have a particular outfit you’re wearing or if you prefer not to draw attention to the crown area.
Why Low Placement Changes Everything
A lower puff elongates your neck and face, which creates a different visual balance than a high puff. It also tends to feel less severe, which makes it read as approachable rather than all-business. For some curl patterns, a lower placement also feels more secure because you’re working with hair closer to the scalp where it’s naturally stronger. This style photographs beautifully too—it doesn’t overwhelm the face the way some high puffs can.
Positioning and Securing
- Identify where you want the puff—usually 2-3 inches above the nape of your neck, but trust your instinct based on your face shape
- Gather hair at that point with a bit more looseness than you’d use for a high puff; this lower placement naturally creates a softer effect
- Secure with an elastic, and gently fluff the puff upward and back to add volume
- Smooth the hair lying against your neck with a bit of moisturizing cream or light oil for a polished finish
- Leave a few face-framing pieces loose if you want that softer, less structured effect
Worth knowing: This placement works particularly well if you’re wearing your hair in a way that you want your face and shoulders to feel open—it doesn’t compete with statement jewelry or structured necklines.
4. The Textured Bubble Puff
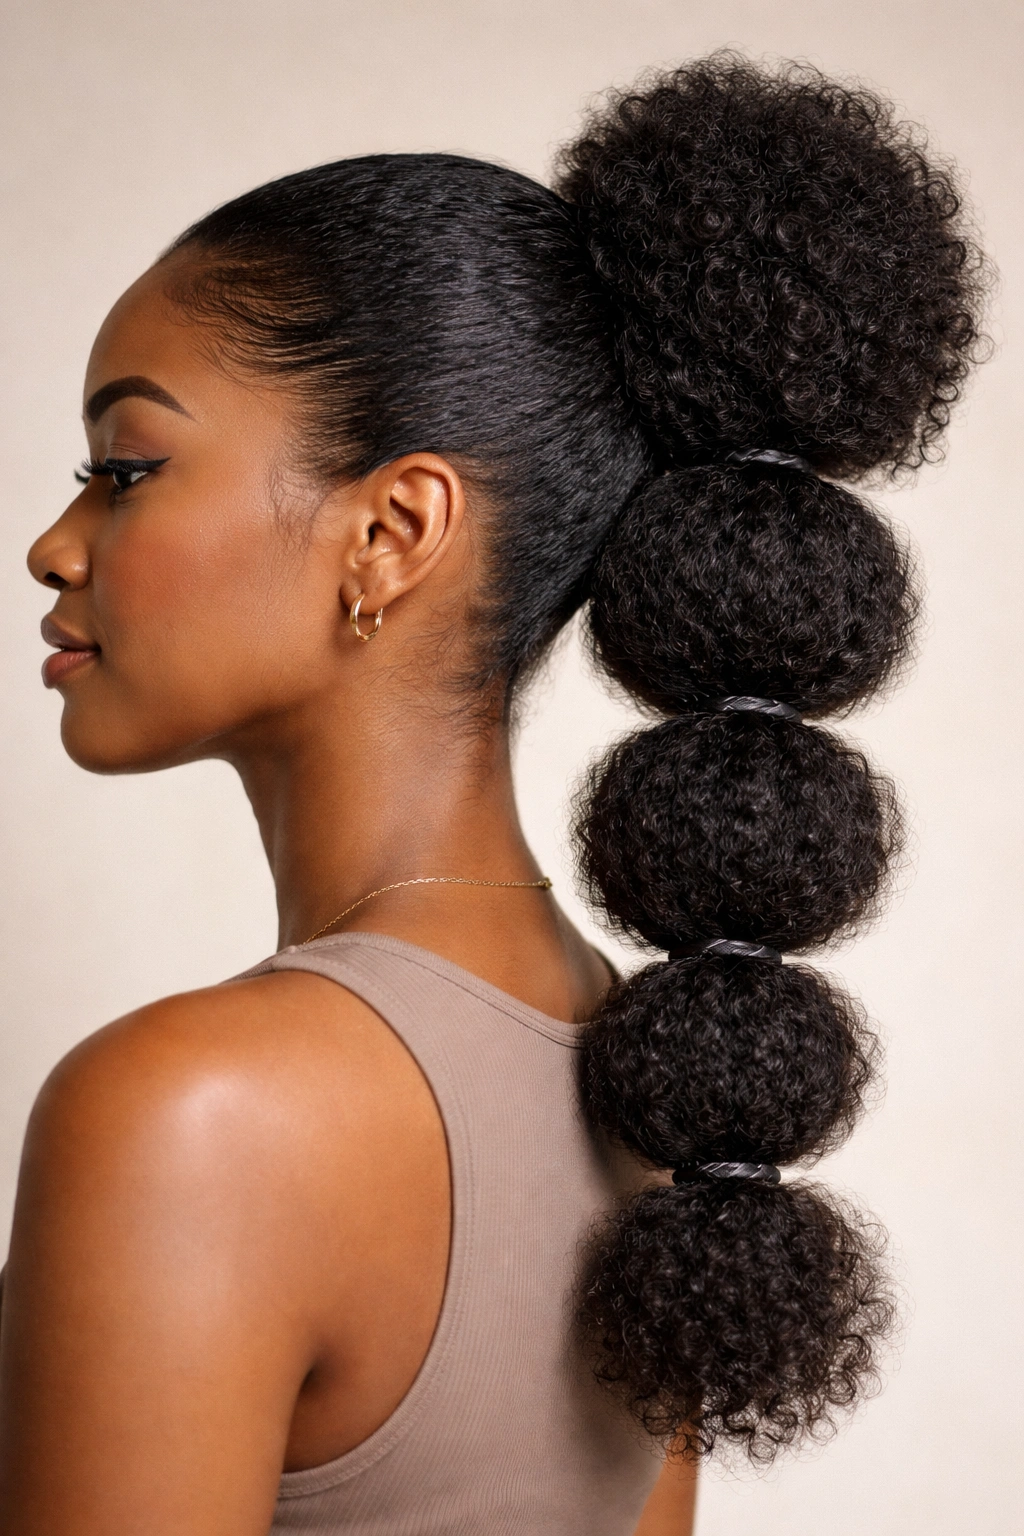
Stack multiple elastics along the length of your gathered hair and you’ve created something that looks more complicated than it is. Each elastic creates a “bubble” of puffed hair, stacked vertically from your ponytail base up to the very end. It’s playful and unexpected, with a retro vibe that feels fresh on modern Black hair. This is the choice for days when you want your style to be a statement.
The Visual Impact of Stacking
Bubble ponytails (or puffed ponytails with stacked sections) are attention-getters. There’s movement and dimension in a way that a single puff doesn’t provide. Each bubble catches light independently, and the overall effect is undeniably stylish. This works beautifully on days when you want your hair to be part of your outfit narrative—when you’re dressing up intentionally or making a statement with how you present yourself.
Creating the Bubble Effect
- Gather your hair into your base puff and secure with a strong elastic
- Beginning about 1-1.5 inches below the base elastic, wrap another elastic around the gathered hair, pulling slightly upward to create a bubble
- Repeat this process, spacing each elastic 1-1.5 inches apart, all the way to the ends of your hair
- Gently separate and fluff each bubble to maximize volume and create definition between sections
- The puff at the very top (your base) should be the fullest, with bubbles getting slightly smaller as you move down
Pro tip: This style actually lasts beautifully for several days. Refresh the bubbles each morning by gently separating them, and the elastics will keep the style from sagging or coming loose.
5. The Wrapped Accessory Puff
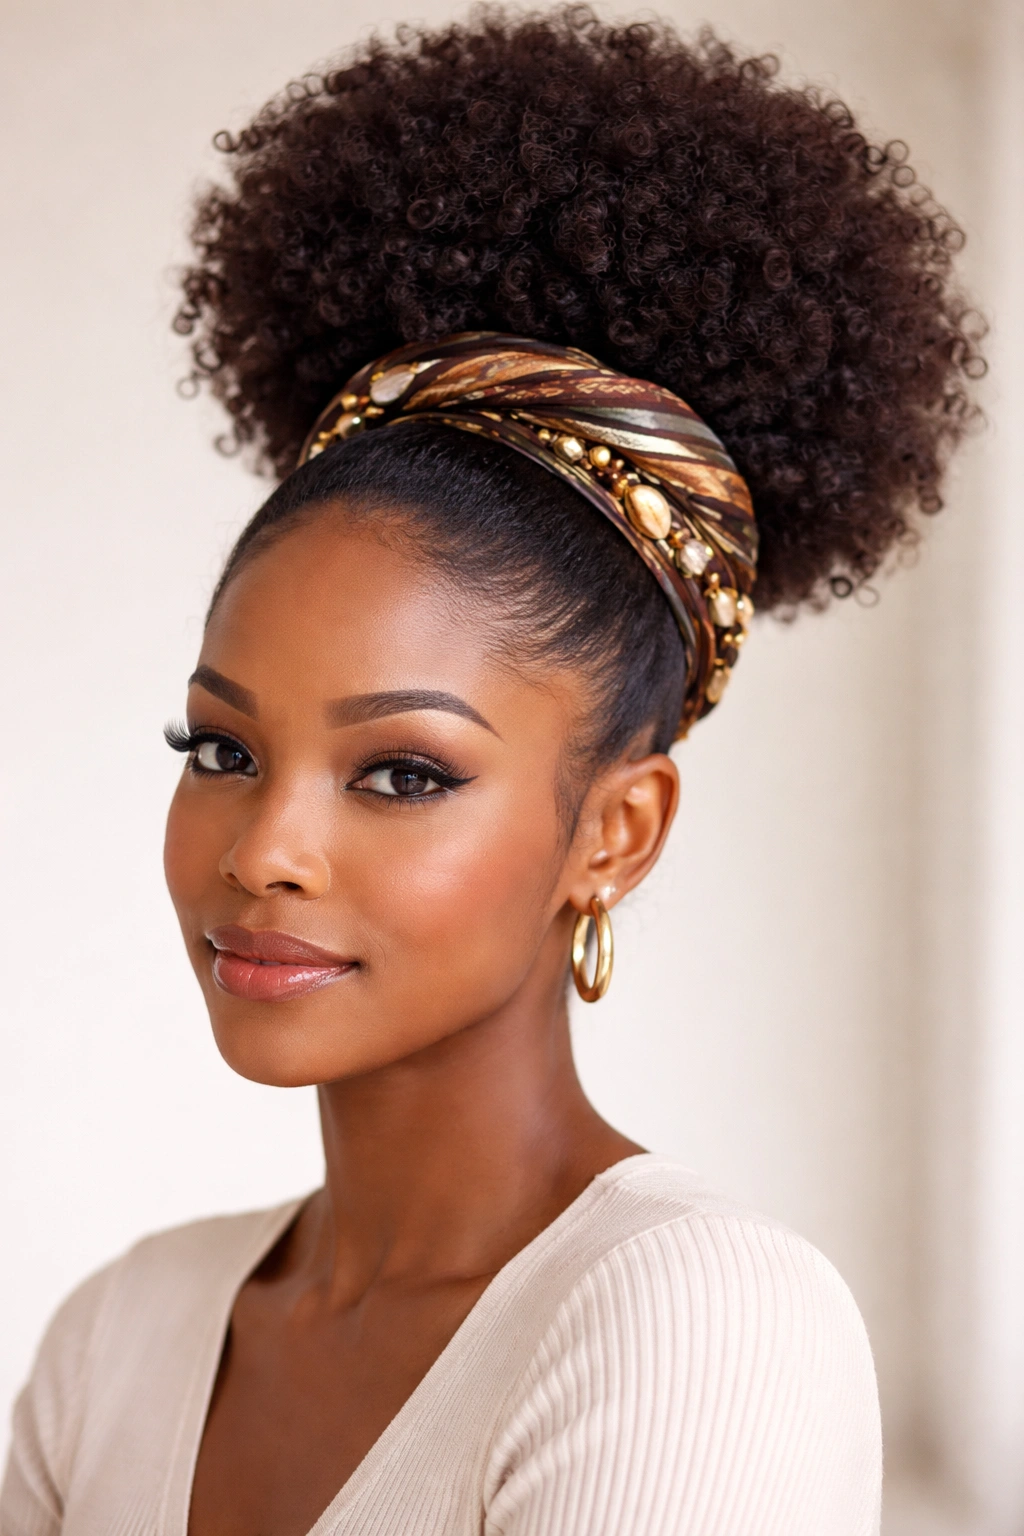
Sometimes the transformation happens not through technique but through what you add. This version incorporates a scarf, a beaded wrap, a decorative band, or even a metallic cuff wrapped around the base of your puff. The wrapping serves both a functional purpose—covering the elastic and creating a polished finish—and an aesthetic one. The accessory becomes part of your outfit’s overall vibe, whether that’s bohemian, minimalist, or bold.
Accessories as Style Elevation
There’s genuine elegance in wrapping your puff base with a complementary piece. A silk scarf in a color that echoes something you’re wearing pulls your whole look together. A beaded wrap adds cultural meaning and celebration. A gold cuff transforms it into evening-ready styling. This approach works because it shows intentionality—you’re clearly thinking about your whole presentation, not just securing your hair.
Wrapping Technique That Holds
- Create your puff base with a standard elastic
- Cut or tear a scarf, fabric strip, or beaded accessory into the width and length you need (roughly 2-3 inches wide and 12-16 inches long)
- Wrap the fabric tightly around the base of your puff where the elastic sits, beginning at the back
- Overlap the ends and secure with a bobby pin hidden underneath, or tie the ends together if it’s a scarf with pre-finished ends
- Fluff the puff above the wrap to give it volume and dimension
Worth knowing: The best wrapping fabrics are ones with some grip—silk and cotton blends work better than slippery materials that’ll slip down throughout the day.
6. The Twisted Rope Puff
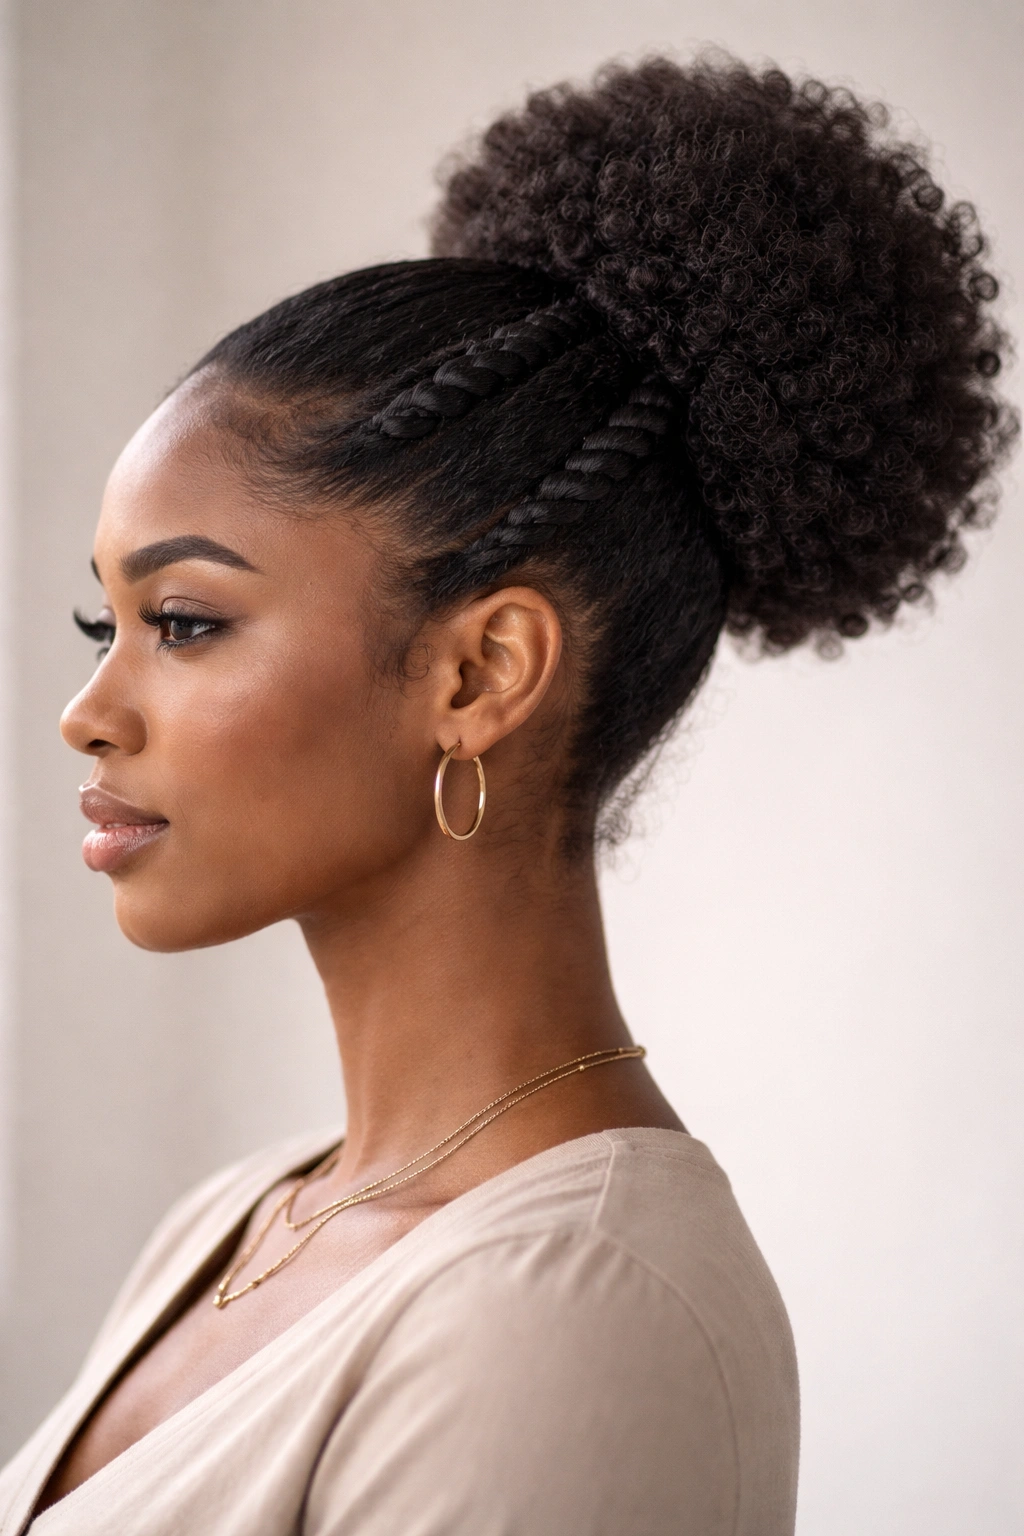
This style creates a more structured, defined look by twisting sections before gathering, but in a different way than the twisted high puff. Here, you create one or two thick rope twists from the side of your head toward the crown, then incorporate those twists into your puff base. It’s more artistic and takes a bit more skill, but the payoff is a style that looks professionally done and immediately more elevated.
The Geometry of Rope Twists
Rope twists create visual lines that draw the eye. Two thick twists forming a “V” shape or X pattern toward your puff add movement and intentionality to your styling. This works beautifully when you want that “I got my hair done” feeling even though you did it yourself. The twists also add structural support to your puff because they create multiple anchor points rather than just the single base elastic.
Building Rope Twists Into Your Puff
- Section out the hair you want to twist—starting at your temple or side of your head works beautifully
- Divide that section in half and twist each half around the other tightly, creating a thick rope
- Bring that twisted rope toward your crown or the back where your puff will sit
- Repeat on the other side if you want symmetry, or do just one for an asymmetrical effect
- Gather all your hair (including the rope twists) into your puff base and secure
- The twists become part of the puff foundation, adding texture and visual interest
Insider note: This style is particularly stunning if you’ve done a braid-out or twist-out the night before—the texture from that prep style shows beautifully in the rope twists.
7. The Voluminous Play Puff
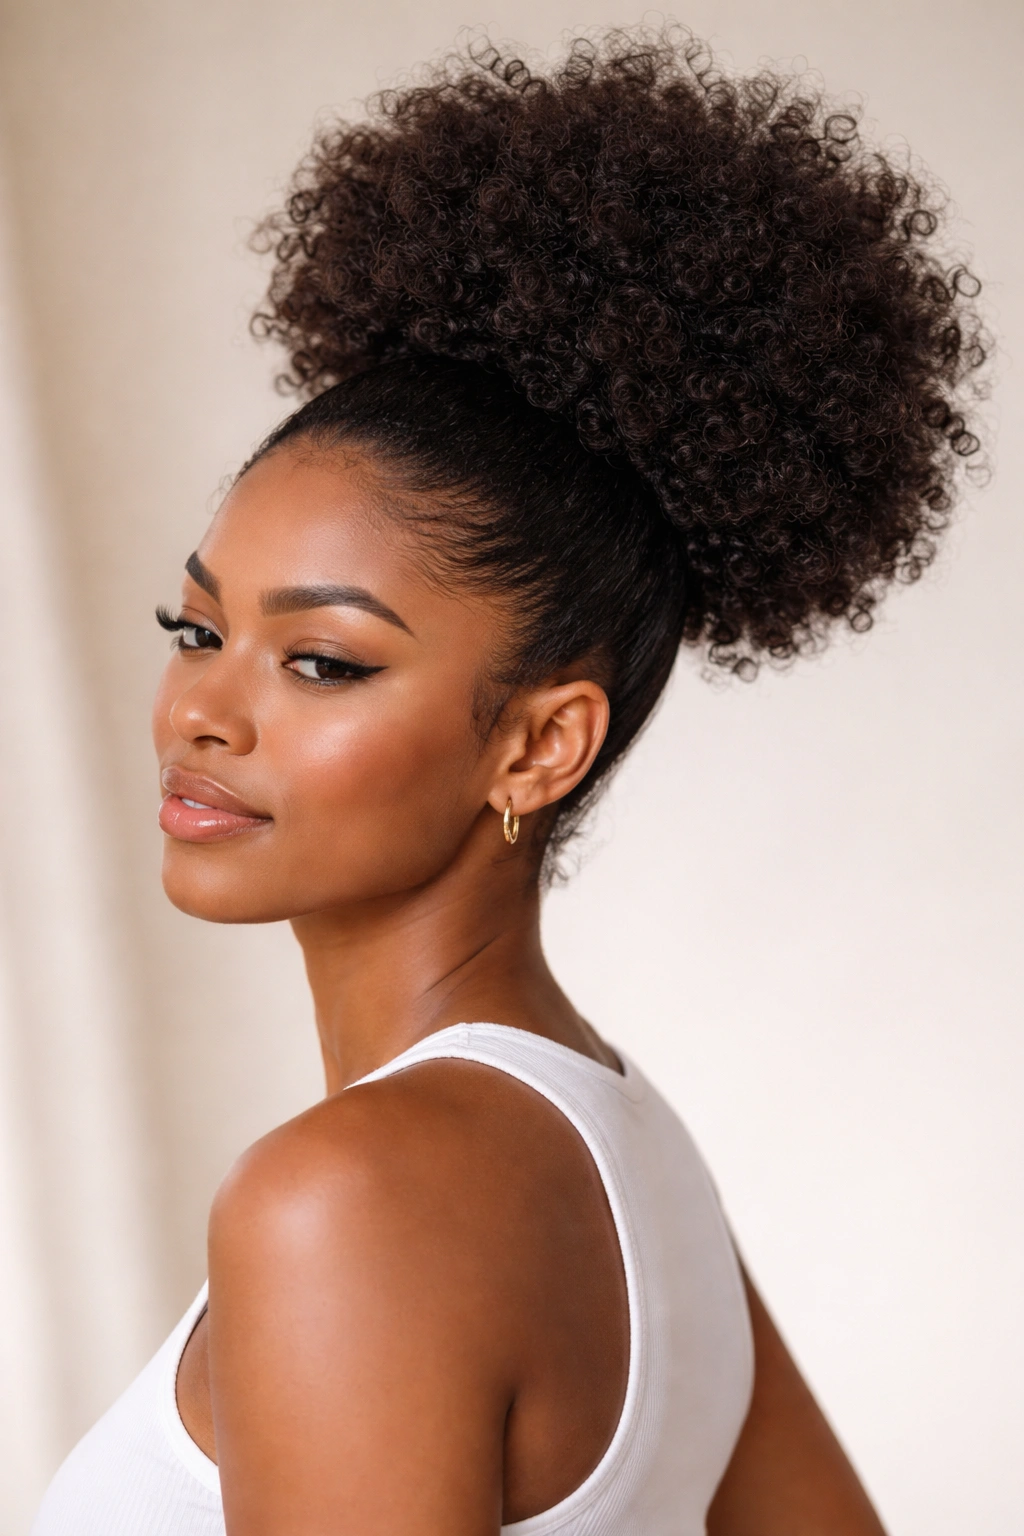
When you want maximum height and impact without any restriction, this is it. The voluminous play puff uses the least amount of gel or smoothing product possible—you’re working with your hair’s natural texture and maximizing its lift. The base is loose enough that hair near the elastic still looks fluffy, and the puff itself is as big and full as your hair naturally becomes. This is the weekend warrior version, perfect for social outings, running around, or anytime when style matters but comfort is paramount.
Why Loose Actually Looks Better Sometimes
A voluminous puff communicates confidence in your natural texture. There’s no fighting your hair’s nature or trying to contain it into a specific shape—you’re celebrating the fullness. This approach works beautifully if you have high-shrinkage hair because the natural volume is genuinely impressive. It also feels the most comfortable to wear; there’s no tension, no tight elastic cutting into your scalp, and your edges get a rest.
Going for Maximum Volume
- Use minimal product—a very light cream or just water to define your curls
- Flip your head upside down and gather your hair at the base of where you want your puff
- Use a loose elastic or even a scrunchie (the fabric kind, not rubber) to secure it
- Stand up and gently separate and fluff every section of the puff
- Run your fingers through to encourage maximum volume and eliminate any clumping
- Use a pick or your fingers to create definition and lift in the gathered puff
Pro tip: This style photographs beautifully in natural light—the volume catches the light in a way that really shows off your curl pattern and the dimensions of your hair.
8. The Sleek-Top/Fluffy-Bottom Puff
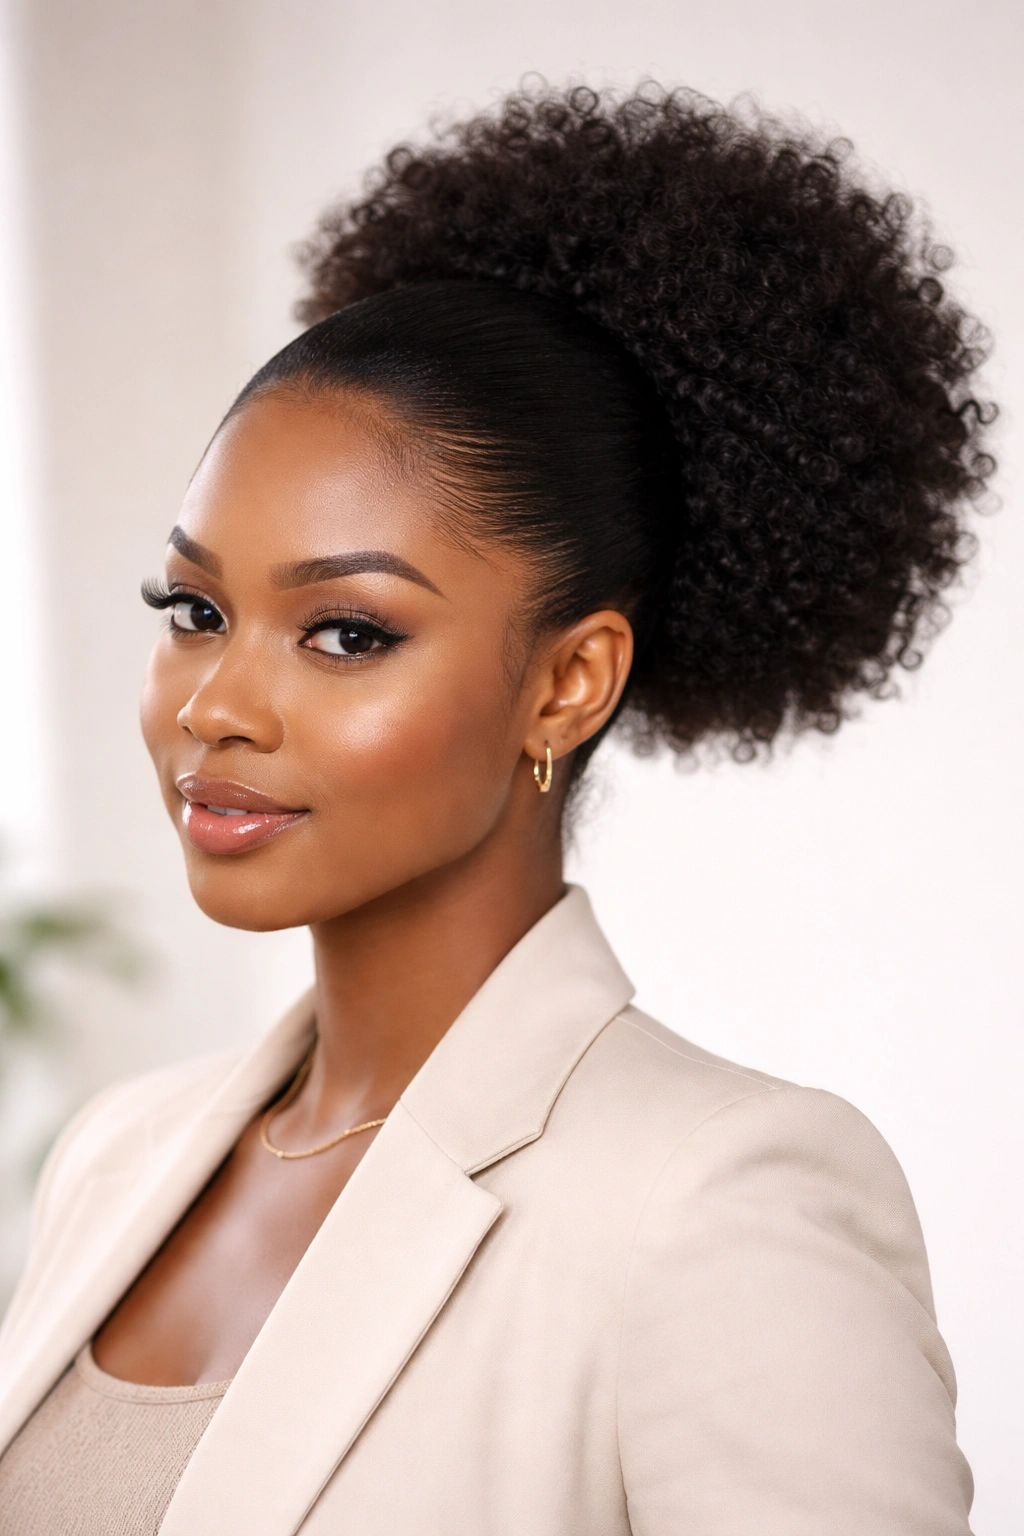
Here’s where you combine opposite approaches into one cohesive style. The top portion of your gathered hair is smoothed with gel for a sleek, polished look, while the puff itself remains full and textured. It’s the perfect marriage of polish and personality—professional enough for work, stylish enough to feel current, and comfortable enough to wear for hours. This is the “you look like you have your life together” style.
Balancing Control and Natural Texture
This approach works because it gives you the best of both worlds. The smooth top communicates that you’ve styled your hair intentionally; the fluffy bottom honors your natural texture and curl pattern. It’s particularly effective if you have curl definition or coils because the textured puff really shows off what your curls naturally do. This is also the most forgiving version because slight frizz or flyaways in the puff part read as texture, not as messiness.
Achieving the Contrast
- Brush or detangle your hair and apply smoothing gel to the bottom two-thirds of your gathered section
- Gather all your hair at your desired height and secure with a strong elastic
- Using the back of a brush or a fine-tooth comb, smooth the hair between your base and the elastic, working downward
- This smoothed section should be roughly 2-3 inches long, creating a clear visual line between sleek and textured
- Gently fluff and separate the puff portion above, encouraging it to expand and show off your curl pattern
- Smooth any flyaways around your face with a light cream or edge control
Worth knowing: This style reads differently depending on placement. A high placement feels very polished and professional; a mid-height placement feels effortlessly styled; a low placement feels relaxed and casual.
Final Thoughts
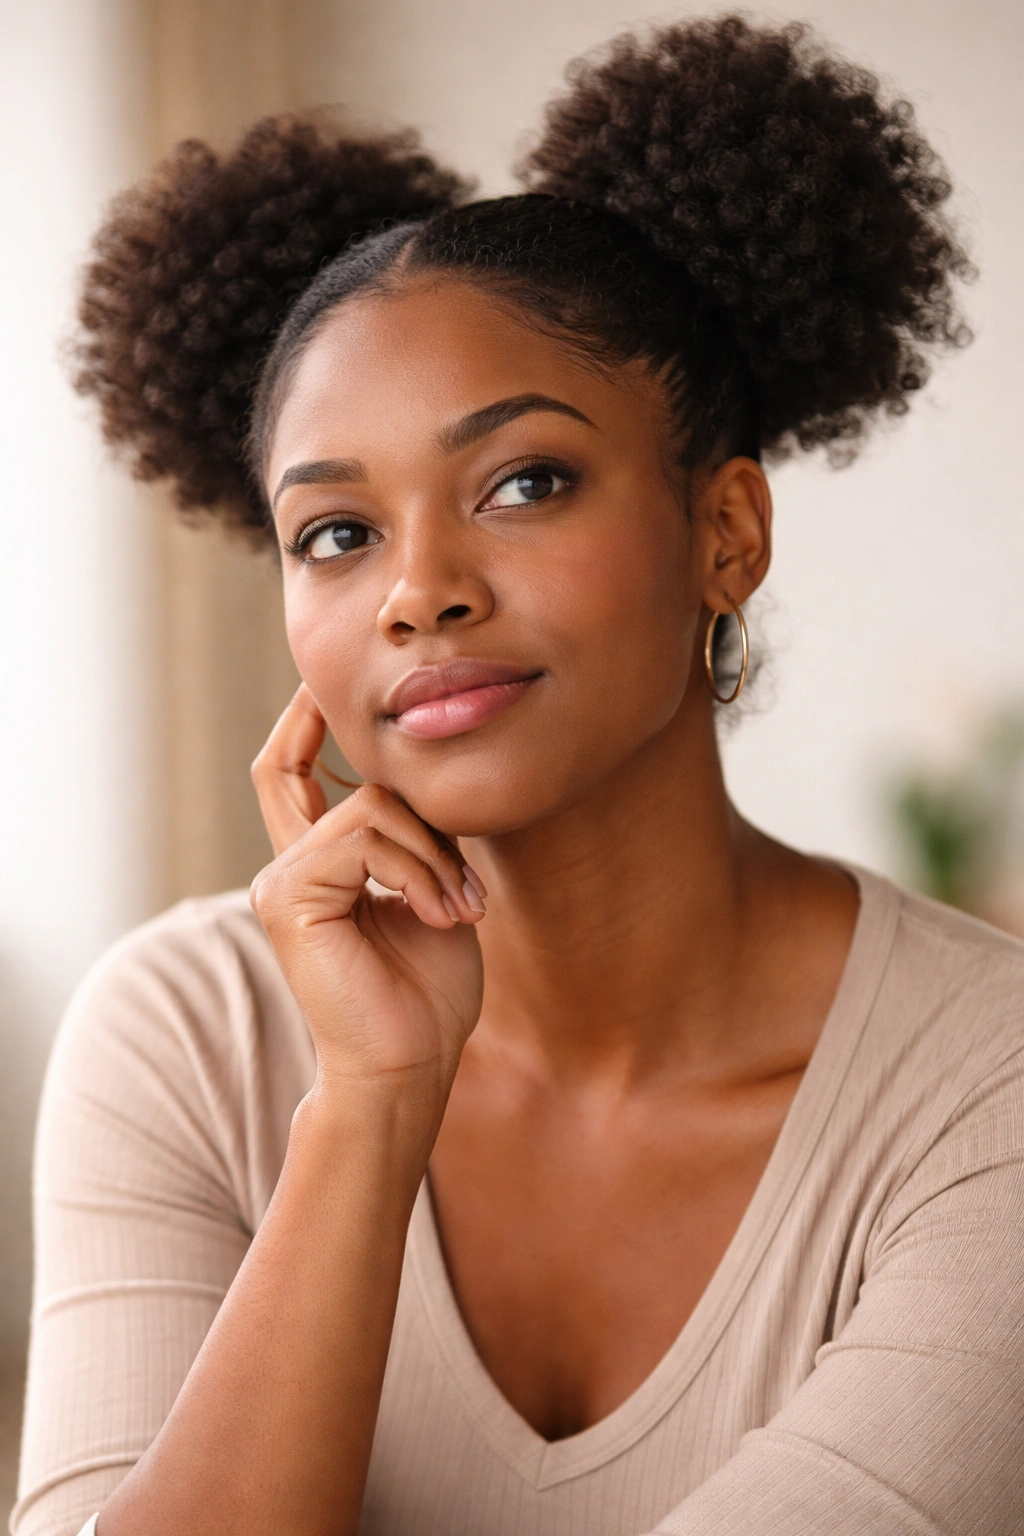
The beauty of afro puff ponytails lies in their flexibility. These eight approaches prove that even within a single hairstyle category, there’s room for enormous variation based on where you place it, what you do to the hair before gathering it, and what you add or remove. Some days you’ll want the sleek executive energy; other days you’ll crave the playful bubble effect or the artistic rope twists.
What matters most is choosing the version that matches your day’s demands and your comfort level. A puff you’ve pinned too tightly will give you a headache and tension on your edges, no matter how polished it looks. A puff that’s so loose it falls out halfway through your workday will frustrate you constantly. The goal is finding your sweet spot—the styling approach that looks intentional, feels comfortable, and lasts through your full day without requiring constant adjustment.
Remember that these styles are more forgiving than you might think, especially as you’re learning them. A slightly imperfect puff that you created yourself—with your own hands, at your own sink, in the time it takes to drink a coffee—is infinitely more powerful than a perfect puff that requires expensive salon visits or hours of your time. Start with whichever version appeals to you most, practice it a few times, and then branch out to the others. Your hair will tell you what works best for your curl pattern, your lifestyle, and your personal style. Trust that conversation, and you’ll find yourself reaching for these styles automatically because they work.
