



Four-C hair is gloriously unique. It’s tightly coiled, densely packed, and requires a completely different approach than looser curl patterns. The good news? Some of the most stunning afro hairstyles work best on 4C hair, and you absolutely don’t need to pay for salon services to achieve them. With the right products, techniques, and a bit of patience, you can create salon-quality styles at home that last weeks, not days.
The key to success with 4C hair is understanding what makes it tick. This hair type thrives on moisture, definition, and protective styling. It benefits from styles that allow you to stretch your coils, showcase your natural texture, or give your hair a break from manipulation while still looking intentional and beautiful. The styles below represent the most versatile and forgiving options for home styling—each one is achievable with basic tools and comes with concrete steps to ensure you get professional results.
Whether you’re looking for a quick everyday look or a weekend project, there’s something here that fits your lifestyle. Each style addresses the specific needs of 4C hair: moisture retention, definition without frizz, and longevity. You’ll learn not just how to do each style, but why it works for 4C texture and how to customize it for your hair’s unique needs.
1. Twist-Out Style
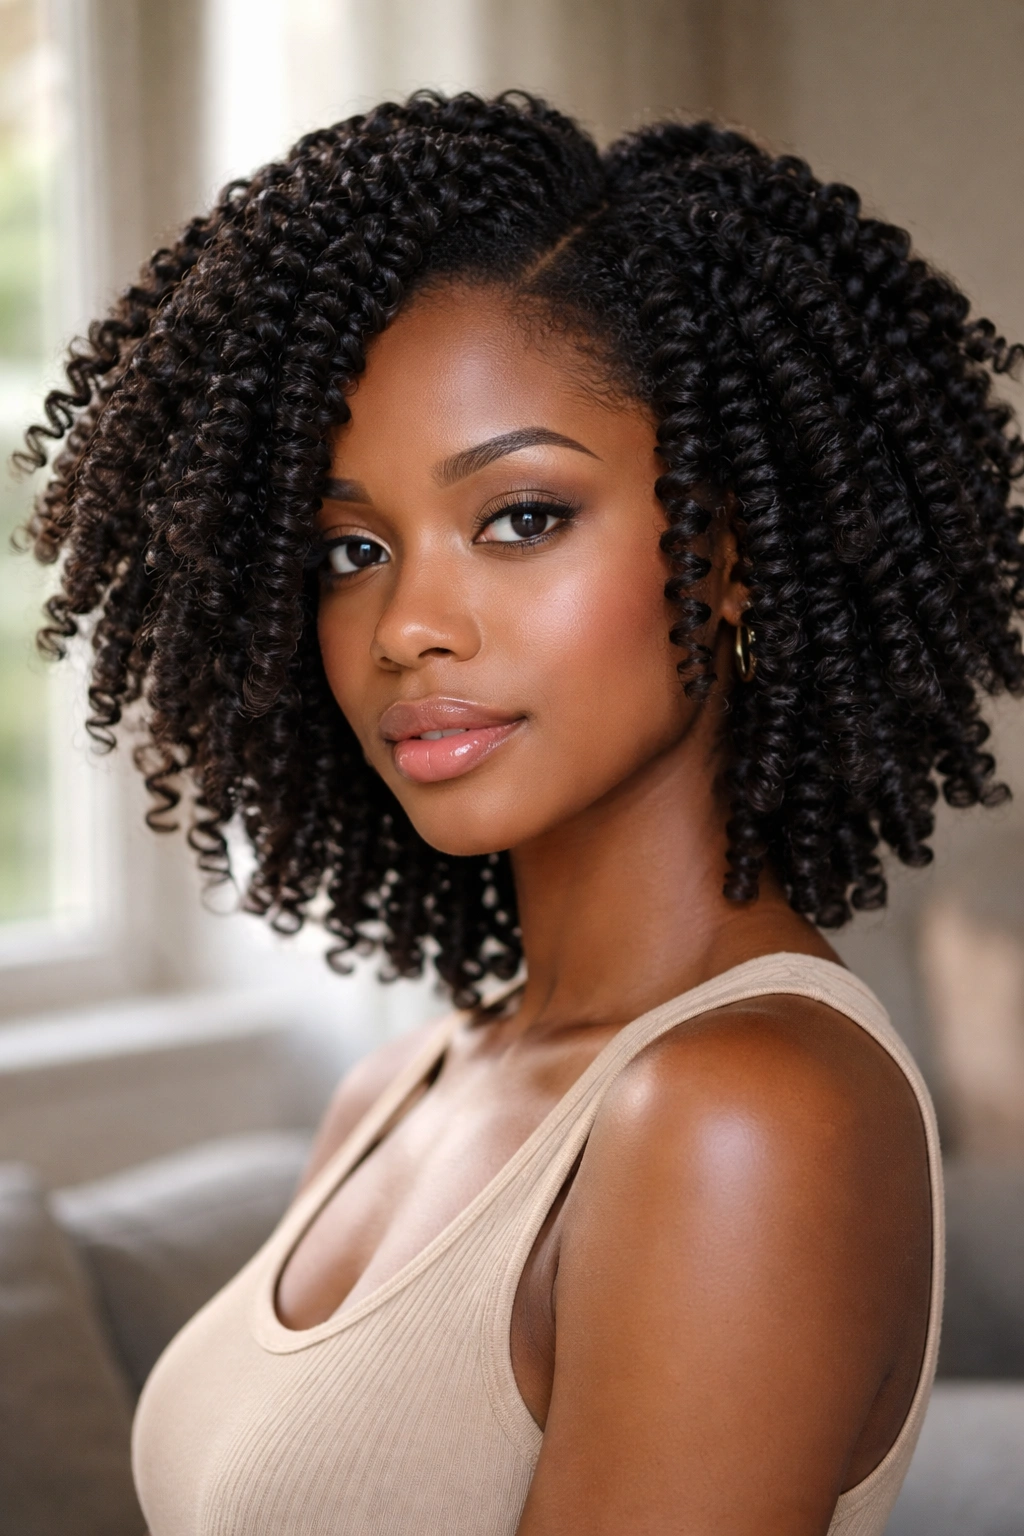
A twist-out is one of the most rewarding styles you can create on 4C hair because the payoff is huge—defined, voluminous coils that look intentional and polished. The beauty of this style is that it works whether your twists are tight or loose, and the results last for days if you protect them at night with a satin bonnet or scarf.
How the Twist-Out Definition Works
Two-strand twists stretch your coils as they set, and when you unravel them, the coils hold that stretched definition beautifully. This is particularly effective on 4C hair because your natural curl pattern is so tight that it’s primed to hold shape. The key is using a strong-hold gel or edge control to help the twists stay smooth and defined as they set, which prevents frizz before it even starts.
What You’ll Need to Get Started
- Moisturizing leave-in conditioner (your choice—Cantu, Carol’s Daughter, or SheaMoisture all work well)
- A strong-hold gel or twist cream (Eco Styler, Kinky-Curly, or Pattern are reliable)
- A wide-tooth comb for detangling
- Your fingers for parting and creating sections
- Optional: a blow dryer on low heat or time to let twists air dry overnight
The moisture is critical here—4C hair can look dull and frizzy if it’s dry when you twist. Apply your leave-in generously, then add your gel or cream on top to seal everything in. The layering creates definition and moisture barrier that lasts.
Pro Tip
Do your twists at night and sleep on them, then unravel in the morning. This saves time and prevents your hands from getting tired, plus the overnight setting time helps everything lock in. If your hair is prone to dryness, mist each section lightly with a spray bottle of water mixed with a tiny bit of leave-in conditioner before twisting.
2. Wash and Go
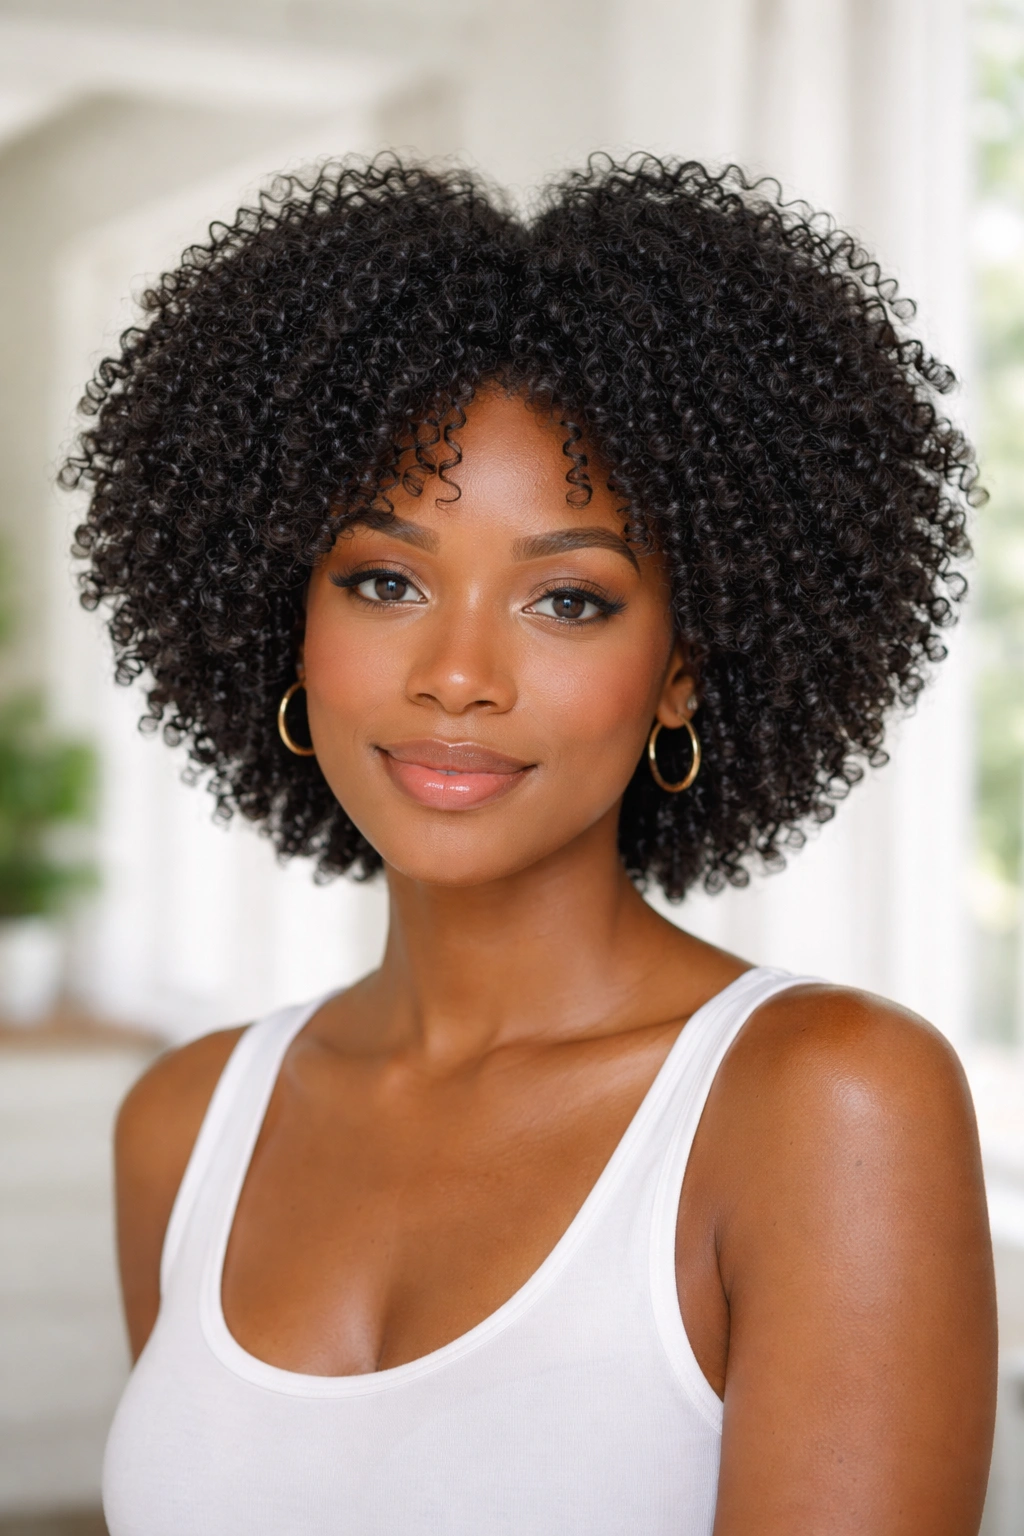
This is the ultimate low-maintenance afro hairstyle for 4C hair, and it’s taken a lot of trial and error for the natural hair community to perfect the formula. A successful wash and go requires the right products in the right sequence, because 4C hair tends toward shrinkage, frizz, and dryness if you don’t layer correctly.
The Product Layering System That Actually Works
The order matters tremendously. Start with a rich leave-in conditioner applied to soaking-wet hair, then add a curl-defining cream or custard, and finish with a lightweight gel or oil to seal. This three-step system gives you moisture (the leave-in), definition (the cream), and frizz protection (the sealer). Skip any of these layers and your wash and go will deflate or frizz within hours.
Setting Your Wash and Go for Maximum Hold
Apply your products while your hair is still dripping wet, not just damp. Use your fingers to rake them through in the direction of your curl pattern, letting gravity help set everything. Then either diffuse with a blow dryer on low heat or air dry. This matters because the shape your curls dry in is the shape they’ll hold for the next few days.
Real Talk About Wash and Go Longevity
A wash and go typically lasts 3–5 days on 4C hair, but only if you sleep on it correctly. Use a satin bonnet or pineapple (a loose, high ponytail that doesn’t crease your curls). Sleeping on cotton or regular pillowcases will undo your definition by morning because friction causes frizz and disrupts your curl pattern.
Quick Facts About This Style:
- Best done on soaking-wet hair, not partially damp
- Requires a good diffuser attachment if you use a blow dryer
- Lasts longest when protected at night
- Works better on hair that’s been freshly washed and deep conditioned
- The frizz you see on day two is normal—refresh it with a spray bottle of water and a bit of gel
3. Bantu Knots
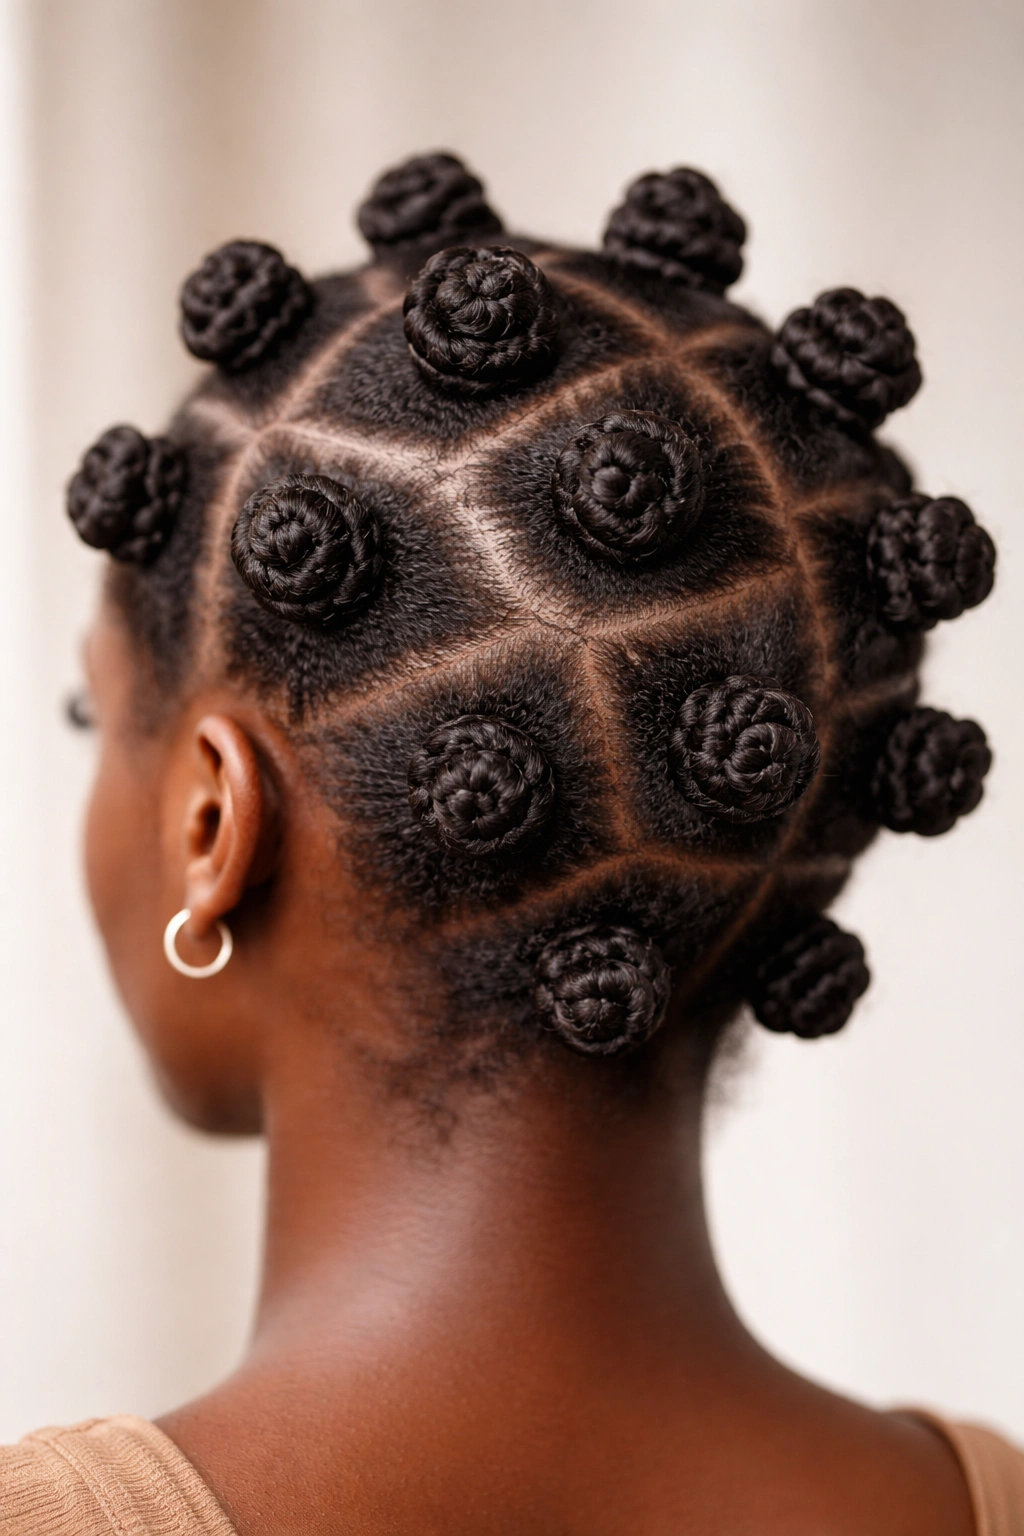
Bantu knots are both protective and beautiful. They look intricate and intentional, but they’re surprisingly simple to create, and they’re one of the few styles that show off 4C texture while giving your hair a break from daily handling. Plus, when you unravel them, you get a gorgeous coil pattern that lasts for a week.
Understanding Bantu Knot Structure
Each knot is essentially a two-strand twist wrapped in a spiral around itself, creating a small bun that sits flat against your scalp. On 4C hair, these knots hold their shape exceptionally well because your curl pattern is already so tight. You don’t need to use heavy products—in fact, lighter is better because heavy products can weigh them down.
Creating Bantu Knots That Stay Put
Section your hair into square or rectangular sections, depending on how large you want your coils to be. Apply a small amount of leave-in conditioner and gel to each section, then two-strand twist from the root all the way down. Once you’ve twisted the full length, wrap the twisted section around the base to form a knot and secure it with a bobby pin or by tucking the end underneath. The knots should sit securely enough that they don’t unravel as you sleep.
The Unraveling Process and Results
Wait at least 8–10 hours before unraveling (overnight is ideal). When you unravel, do it gently from the bottom up, using your fingers rather than a comb. The coils will spring up instantly, giving you volume and definition. If you want more volume, finger-comb the coils apart slightly. If you want tighter, more defined coils, leave them closer together.
Worth Knowing About Bantu Knots:
- They work best on shoulder-length or longer 4C hair
- Short hair can do them, but the knots may be very tiny
- Sleeping in them is comfortable because they sit flat
- They last 7–10 days if you protect them at night
- The coil pattern you get after unraveling is semi-permanent—you can reshape by misting with water
4. Two-Strand Twists
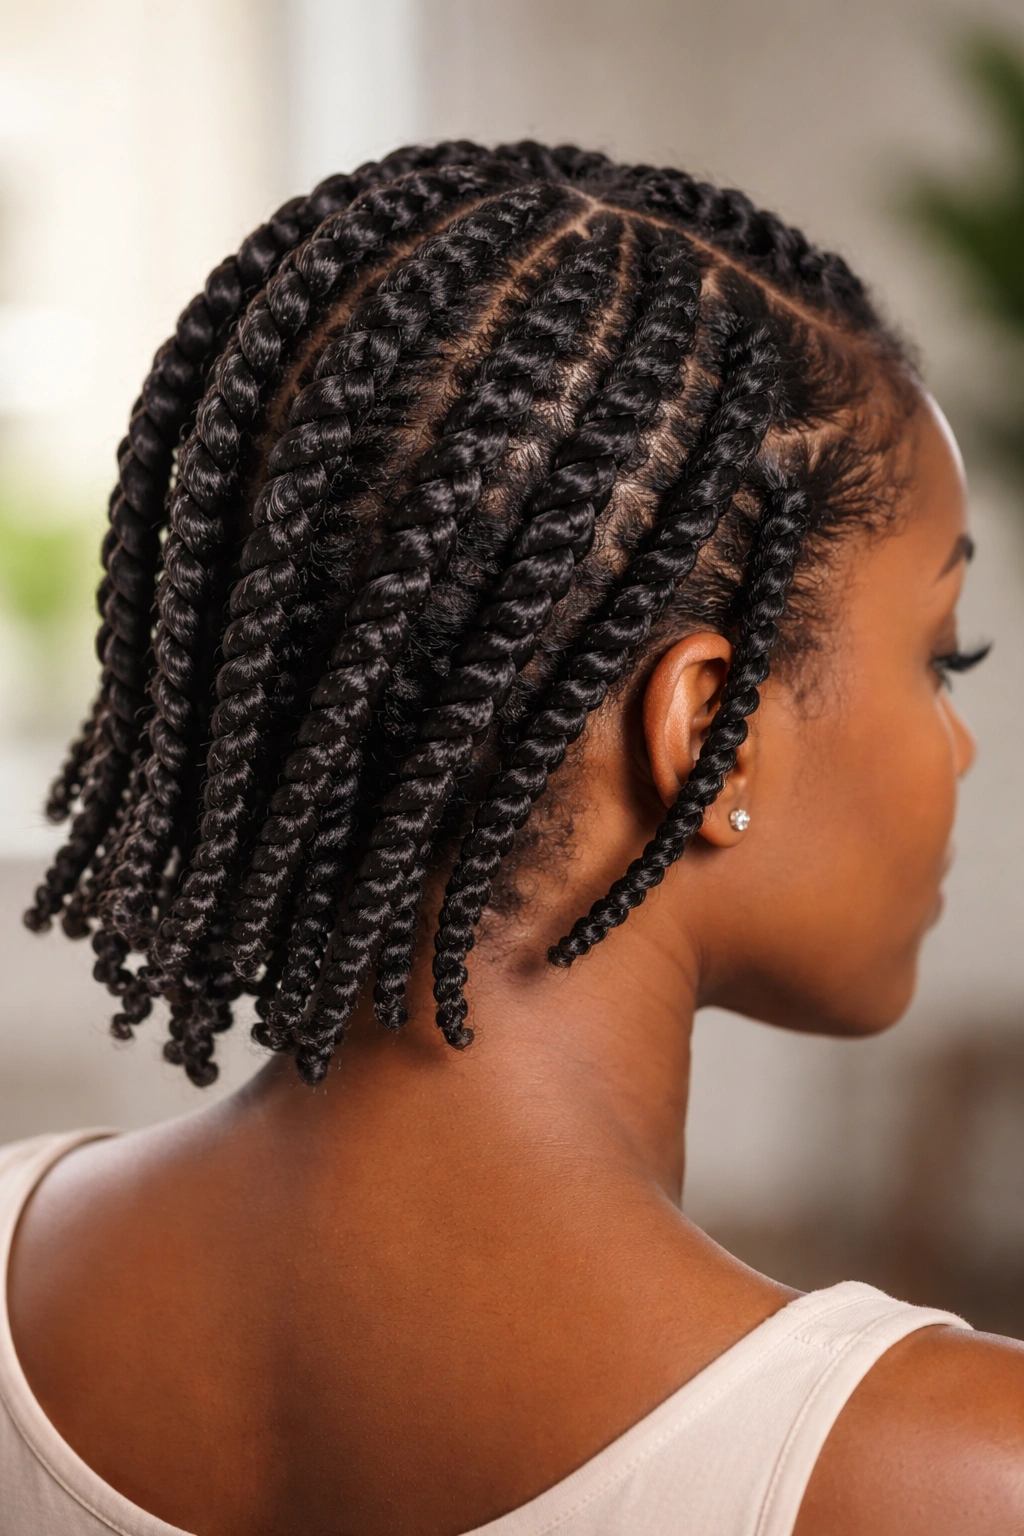
Two-strand twists are the foundation of many afro hairstyles, and they’re essential to master if you want to build a rotation of home styles. They’re incredibly versatile—you can wear them as-is for a casual, textured look, style them into an updo, or unravel them for defined coils. On 4C hair, they provide stretch and definition while still being protective.
The Mechanics of Creating Defined Twists
Section your damp hair into the size you want your twists to be, apply a moisturizing cream or gel, then take two strands and twist them around each other, alternating which strand goes over the other. The tighter and smoother your twists, the more defined they’ll look when you unravel them. Your twist size determines the final look—small twists create tiny coils, larger twists create bigger coils.
Maintaining Twist Definition Over Time
Twists look sharpest the first few days, but they soften as the week progresses, which is totally normal. To keep them looking fresh longer, sleep on them with a satin bonnet, and refresh the definition by spritzing lightly with water mixed with a tiny bit of leave-in conditioner. You can also re-twist the loosening parts gently with your fingers.
Different Twist Styles and Outcomes
You can create traditional two-strand twists (neat and defined), chunky twists (thicker, faster to do, very protective), or flat twists (twisted close to the scalp, great for updos and protective styling). Each variation offers different aesthetics and protection levels. Flat twists are particularly good for protective styling because they distribute tension evenly across your scalp.
Quick Facts About Two-Strand Twists:
- Typically take 2–4 hours to create, depending on section size and hair length
- Last 1–2 weeks if protected and maintained
- Can be re-twisted at the roots as new growth comes in
- Work on all 4C hair lengths from short to long
- Best done on damp or moisturized hair for definition
5. Box Braids
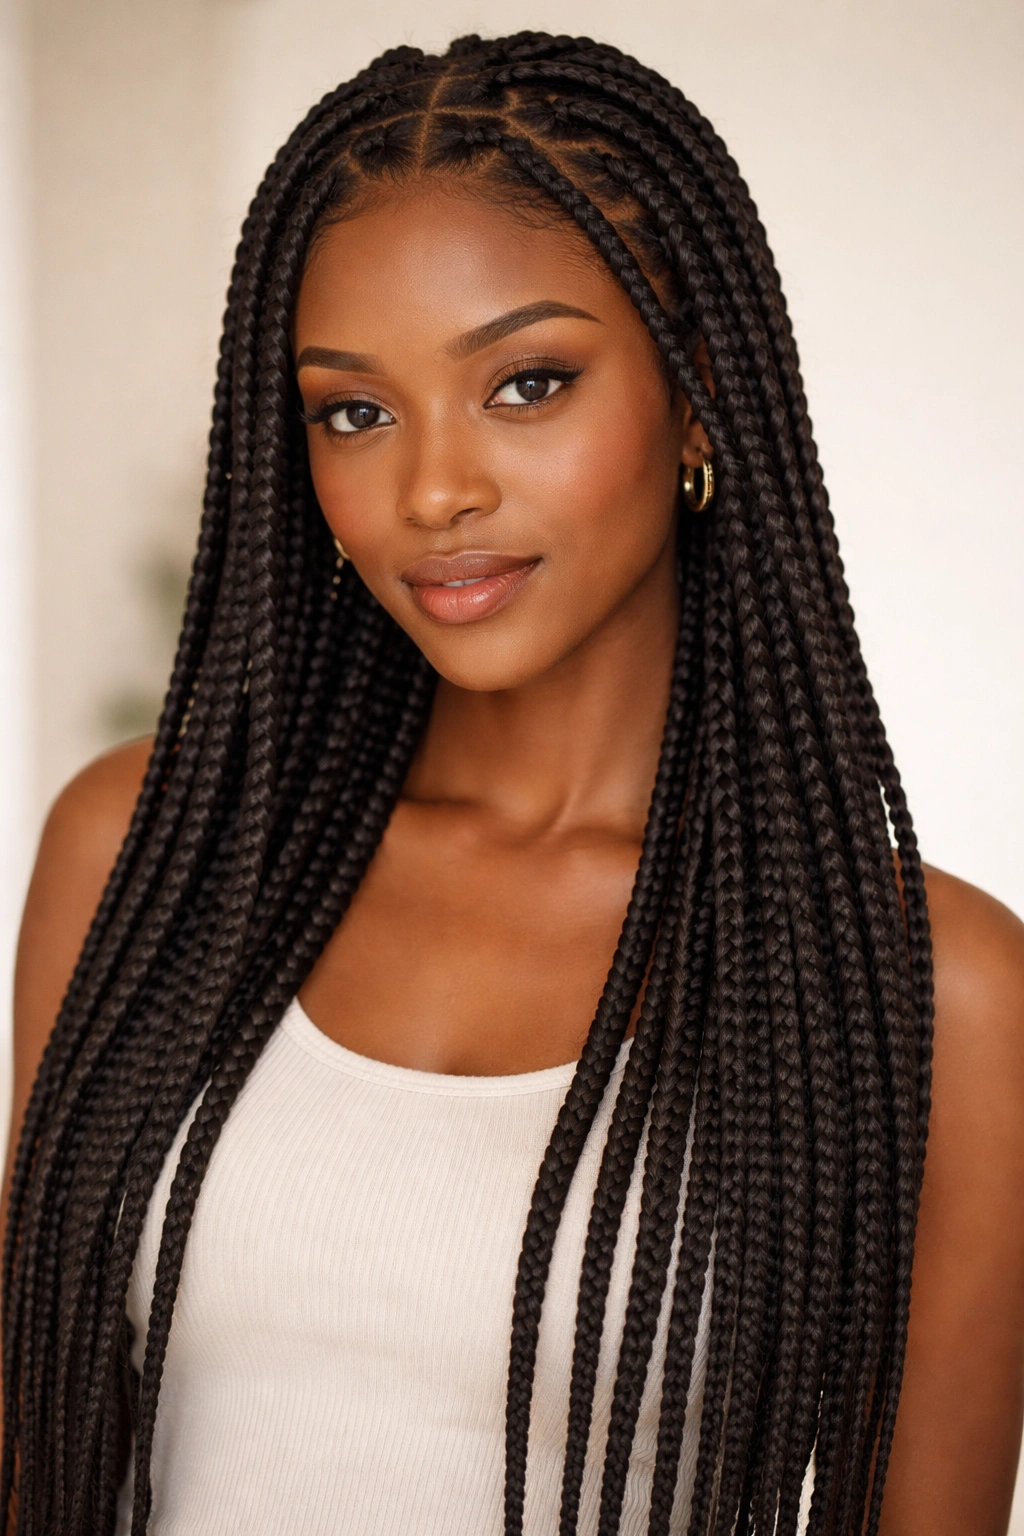
Box braids are the quintessential protective style for 4C hair. They distribute tension evenly across your scalp, require minimal daily manipulation, and give your natural hair a chance to rest and recover. They also look fantastic and can be worn for weeks. The trade-off is that they take time to install, but the longevity makes them worth the investment.
Why Box Braids Work So Well for 4C Texture
Box braids stretch your coils and create a smooth, defined look that showcases the beauty of 4C hair without the maintenance of constant retwisting. Because the braids are individual and self-contained, they don’t require daily styling or product application like some other styles do. This makes them ideal for people with busy schedules or those trying to reduce daily manipulation of their hair.
Installation Tips for Longevity and Comfort
Use braiding hair (synthetic is more affordable; human hair blends are pricier but look more natural) and install the braids on damp, moisturized hair. Section your hair into even squares or rectangles, apply a small amount of leave-in conditioner to each section, and braid from the root all the way down. The key to comfortable braids that last is not making them too tight—if your scalp hurts after an hour, they’re too tight and need to be loosened or reinstalled.
Maintenance and Longevity
Box braids typically last 6–8 weeks depending on how well you care for them. Keep your scalp clean by spritzing it with diluted apple cider vinegar or a scalp cleansing spray every few days. Wrap them in a satin bonnet at night to reduce frizz and extend their lifespan. You can also refresh them by spritzing the frizzy parts lightly with water and smoothing them down.
Common Box Braid Variations:
- Small box braids (take longer to install, last longer, look neater)
- Jumbo box braids (faster to install, make a bolder statement, slightly less protective)
- Ombré or colored braids (fun aesthetic, make sure the synthetic hair is high-quality)
- Box braids with beads (add weight and visual interest, can be heavy on delicate edges)
6. Faux Locs
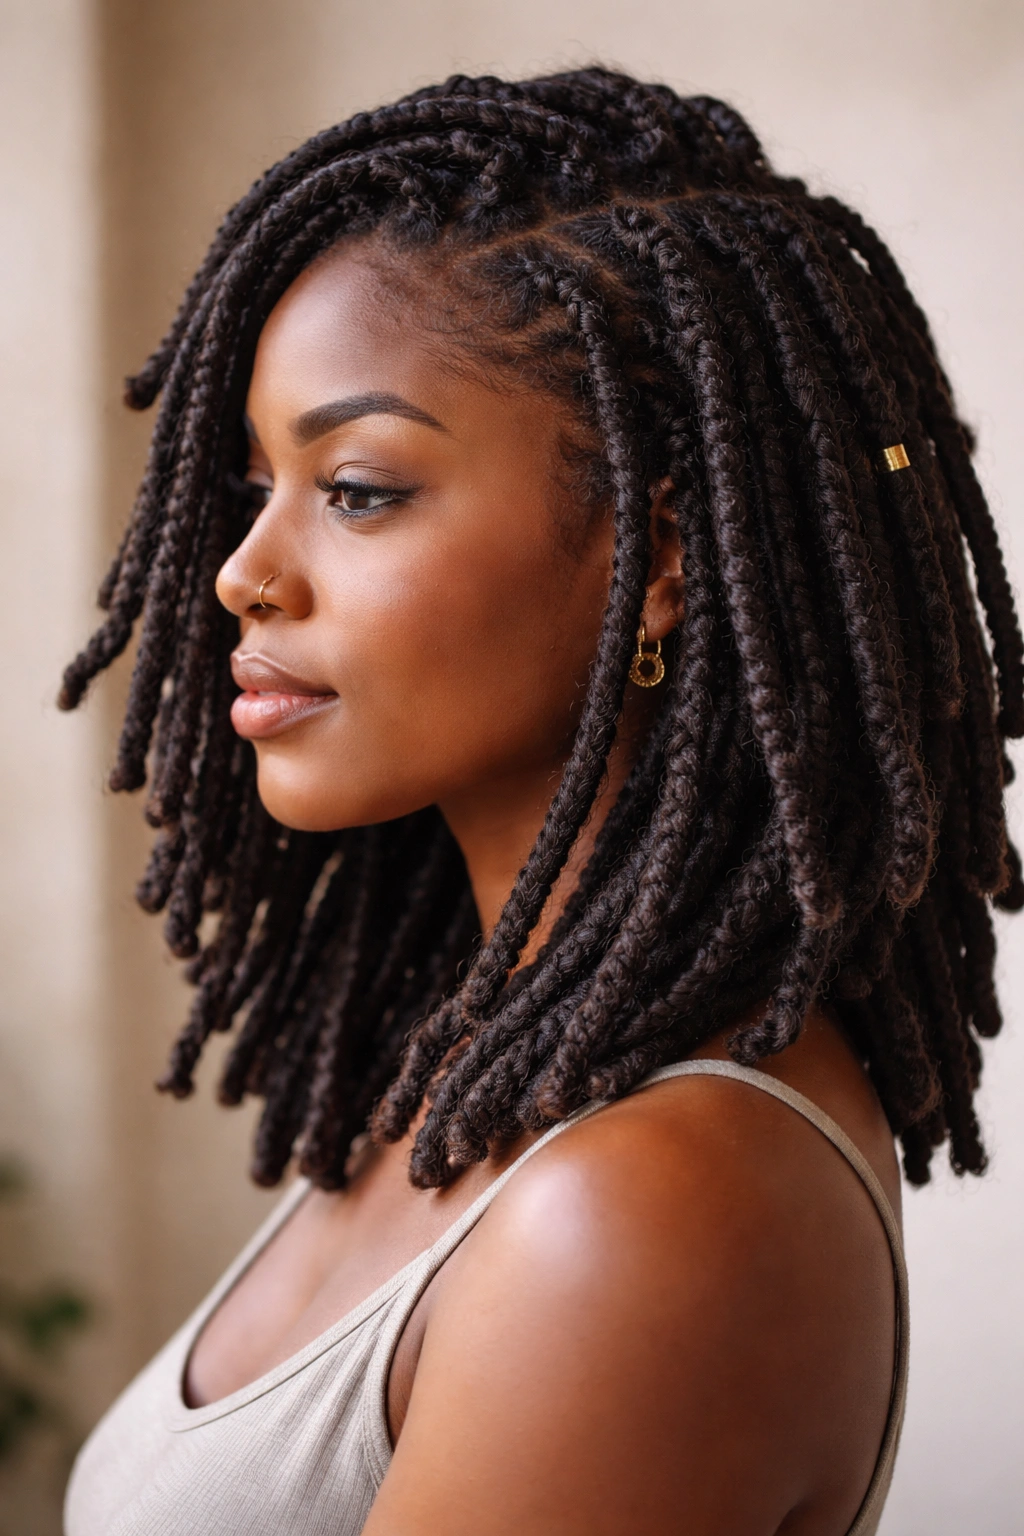
Faux locs give you the look and feel of dreadlocks without the permanent commitment or the difficulty of taking them out. They’re a fantastic protective style for 4C hair, especially if you want something that looks more mature or edgy than braids. The installation is similar to box braids, but the texture is different—they’re thicker and have a more distinct loc appearance.
Creating Faux Locs with Braiding Hair
Use thicker braiding hair or loc-specific synthetic hair to create faux locs. Section your hair into larger squares than you would for box braids (since you want thicker locs), braid each section from root to tip, then wrap the braid tightly with the braiding hair to create the loc texture. This wrapping is what gives faux locs their distinctive appearance and separates them visually from box braids.
Styling Options with Faux Locs
One of the big advantages of faux locs is the styling versatility. You can wear them down loose, put them in a high bun, create a half-up style, or wrap them with yarn or thread for added visual interest. This flexibility means one protective style can work for multiple occasions—casual, professional, or going out.
Caring for Faux Locs Long-Term
Faux locs also last 6–8 weeks and benefit from the same care as box braids: a clean scalp, nighttime protection with a bonnet, and gentle handling. They can look a bit fuzzy after a few weeks, which is normal—you can smooth them down with a light spritz of water or leave them fuzzy for a more textured, bohemian vibe. The wrapping can start to unravel, and you can either fix it or let it happen naturally for a “breakdown” look.
Why Choose Faux Locs Over Box Braids:
- More protective because the wrapping distributes tension differently
- Look and feel thicker, which some people prefer aesthetically
- Offer more styling versatility
- Work well for people wanting a bolder statement
- Excellent for longer hair that wants to look more dramatic
7. Crown Braid with Natural Texture
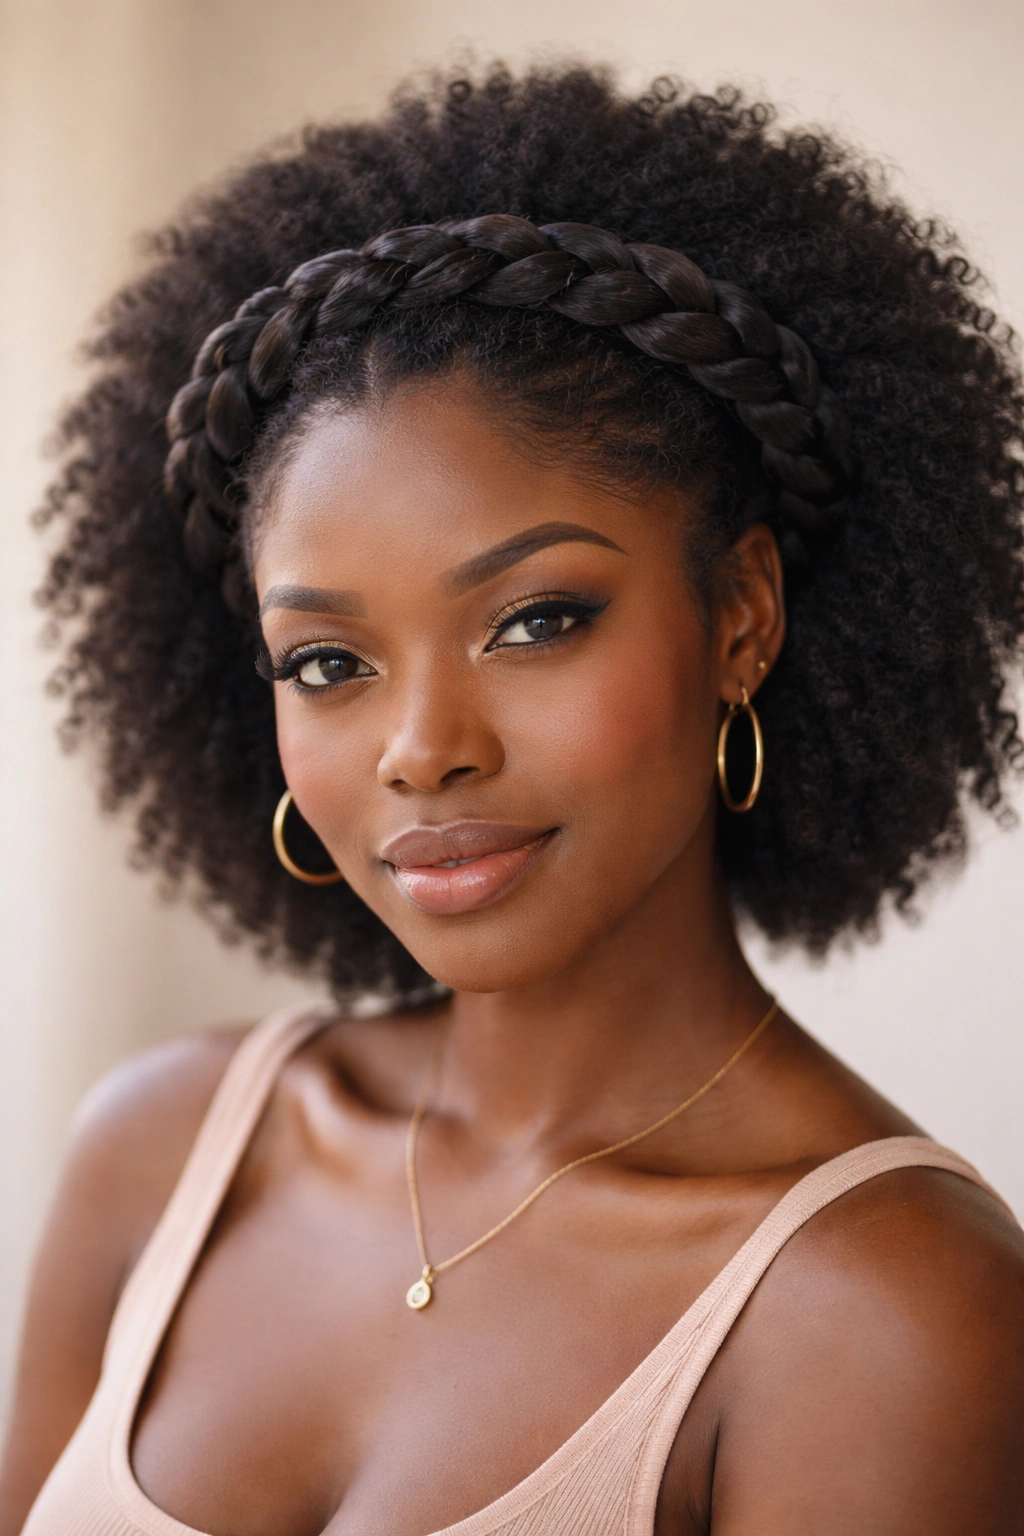
A crown braid is a gorgeous updo that works beautifully on 4C hair, especially when you leave your natural texture showing in the center. It’s elegant enough for special occasions but low-key enough for everyday wear. The combination of the structured braid with the free texture creates visual interest and celebrates your natural curl pattern.
Creating the Crown Braid Structure
A crown braid is essentially a flat twist or French braid that follows your hairline from one ear, around the crown, and down to the other ear. Start at one ear by taking a small section of hair and beginning to flat braid or French braid as you move around your head. The goal is to create a halo effect that frames your face and tops your natural texture.
Leaving Your Natural Texture Visible
Unlike styles where you contain all your hair, a crown braid intentionally leaves the bulk of your 4C texture showing underneath and throughout. This means you get the structure and polish of a braid combined with the volume and definition of your natural coils. It’s a beautiful compromise between protective styling and showing off your texture.
Making It Last Throughout the Day
A crown braid looks sharpest immediately after installation, but it will soften as the day goes on. To keep it looking fresh, do it on day-old hair (hair that’s been washed and styled the previous day) rather than freshly washed hair, which is too slippery. Use a small amount of edge control or gel on the braid sections to smooth them, but not so much that your texture underneath looks dry.
Pro Tip: Add a subtle hair accessory like a delicate cuff or decorative bobby pin where the two ends of the braid meet at the nape of your neck. This finishes the look polished and gives it a more intentional, styled appearance.
8. Defined Coils
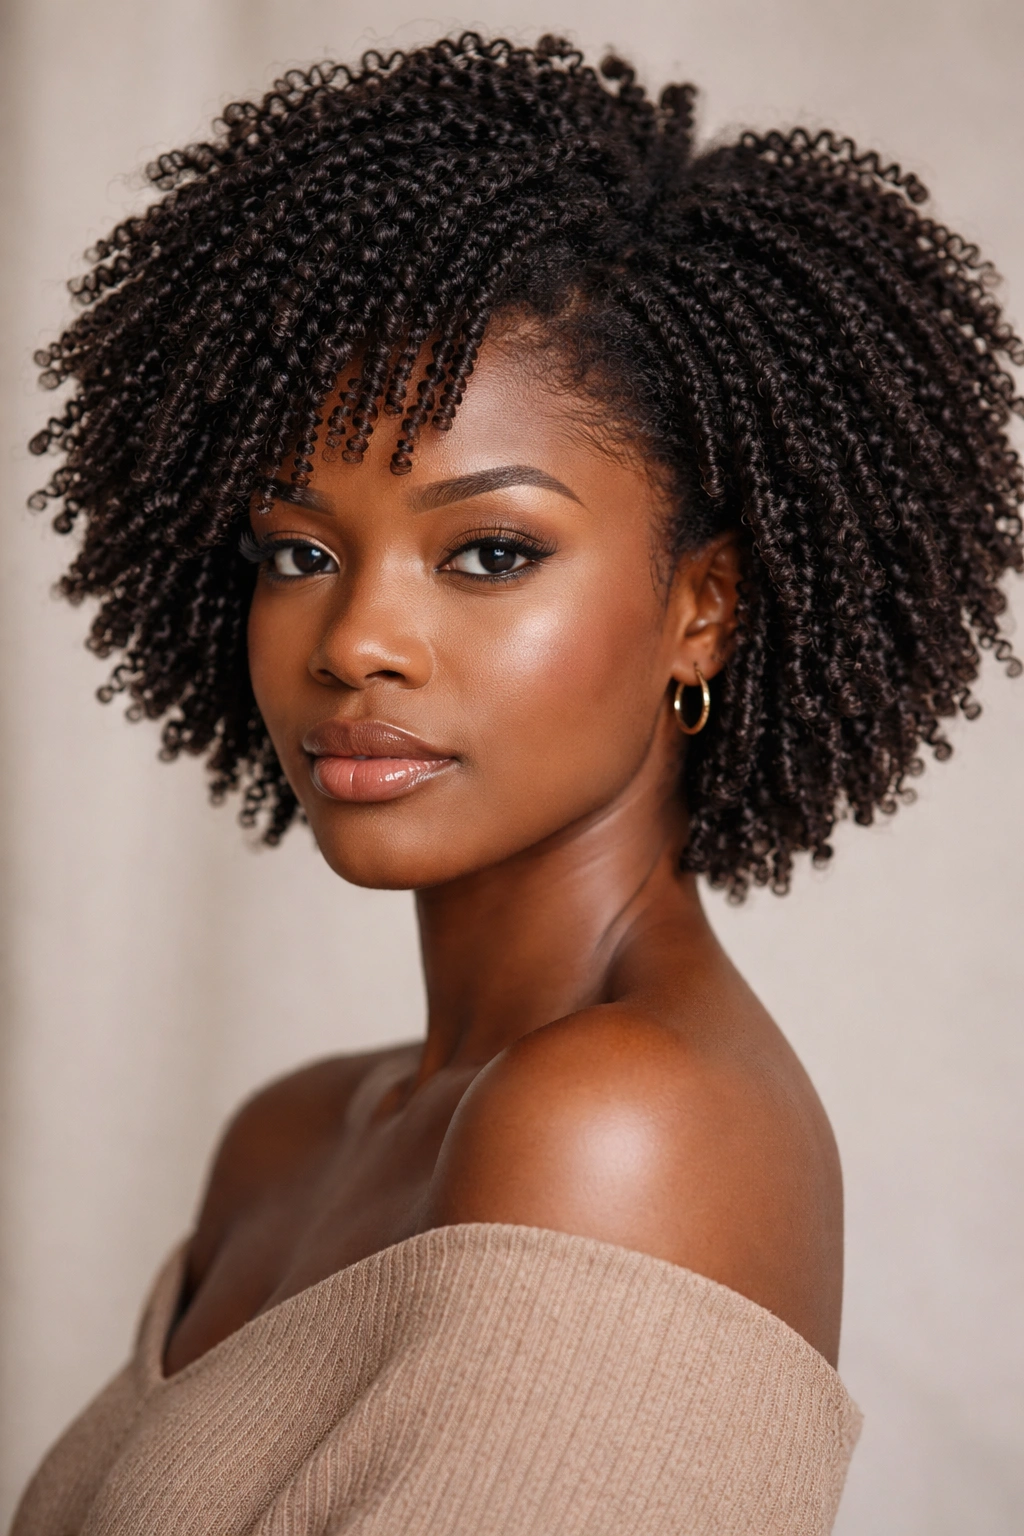
This style is all about showcasing your natural 4C coil pattern at its absolute best—tight, defined, voluminous, and bouncy. Unlike a wash and go (which is more casual) or a twist-out (which is semi-permanent), defined coils are re-created for impact. This style takes time to install but lasts beautifully and turns heads because it’s just so visually striking.
The Technique for Creating Super-Defined Coils
Detangle your damp hair thoroughly with a wide-tooth comb and conditioner. Then, using your index finger wrapped in a small section of moisturized hair, create a coil by wrapping the hair around your finger, spiraling from root to tip. Gently remove your finger and let the coil spring up. This is time-intensive—think 4–6 hours for a full head—but the payoff is coils that look sculptural and last for days.
Product Combination for Maximum Definition
Use a rich leave-in conditioner as your base, then a curl-defining cream or custard, and finish with a strong-hold gel. This layering ensures the coils hold their shape without looking crunchy. You’re essentially creating a moisture + definition + hold structure that keeps everything locked in. Don’t skimp on the leave-in—4C hair needs all the moisture it can get to maintain definition.
Drying and Setting Your Coils
Air drying defined coils takes a long time (8–12 hours or overnight). To speed this up, you can use a diffuser attachment on a low heat setting for 30–45 minutes, which helps set the coils without frizzing them. Once fully dry, your coils will be set in their shape and will last for up to two weeks if protected properly at night.
What Makes This Different from Other Styles:
- Much more time-intensive to install than most other styles
- Creates the most defined, polished 4C look possible
- Lasts longer than most styles (up to two weeks)
- Requires consistent, careful maintenance at night
- Best reserved for times when you have the energy and patience to do it right
9. High Puff
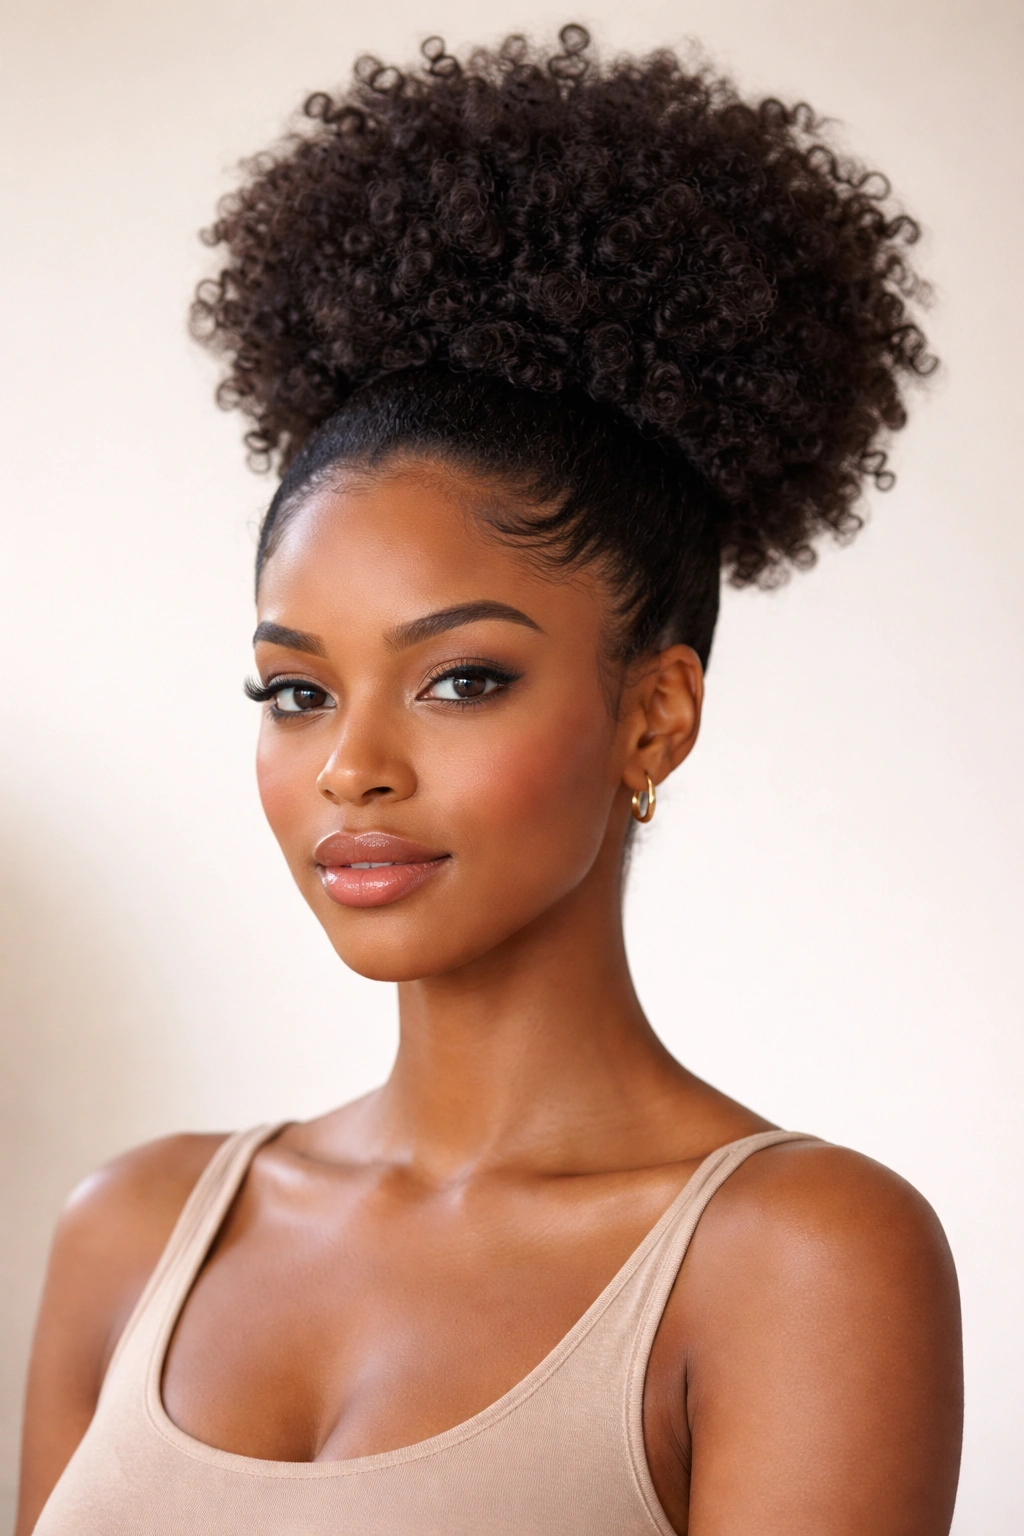
A high puff is a sleek, voluminous updo that works beautifully on 4C hair. It’s versatile enough to wear to the gym, to work, or out on the weekend. The beauty of a high puff on 4C hair is that your natural texture becomes the focal point—instead of trying to tame it, you’re amplifying it and celebrating how much volume you have.
Creating a Sleek, Secure High Puff
Brush your hair straight back into a high ponytail using a stiff brush or edge control to smooth your edges and hairline. Secure the ponytail tightly with a hair tie, then fluff the ponytail to create volume. Some people like a smooth puff, while others prefer to leave some texture showing. Both looks work—it’s just a matter of personal preference. If you want extra volume, tease the ponytail gently before fluffing.
Edge Care with the High Puff
One trade-off with a high puff is that it can put tension on your edges if worn too tightly or too frequently. To minimize this, don’t wear it more than two days in a row, make sure the ponytail isn’t uncomfortably tight, and use a nourishing edge control that also moisturizes (not just holds). Apply edge control before you brush your hair back so you’re protecting as you style.
Styling Variations
You can wear your high puff sleek and smooth for a more polished look, or you can leave your natural texture showing in the ponytail for a more textured, casual vibe. Some people add a scarf or wrap around the base of the ponytail for color and visual interest. Others add a hair cuff or decorative tie. The base style is simple, but the variations are endless.
Quick Facts About High Puffs:
- Takes 5–10 minutes to create
- Works on all 4C hair lengths from short to shoulder-length
- Can be worn for 1–2 days comfortably
- Best on day-old or second-day hair
- Requires a strong hair tie that won’t slip through your hair
10. Passion Twists
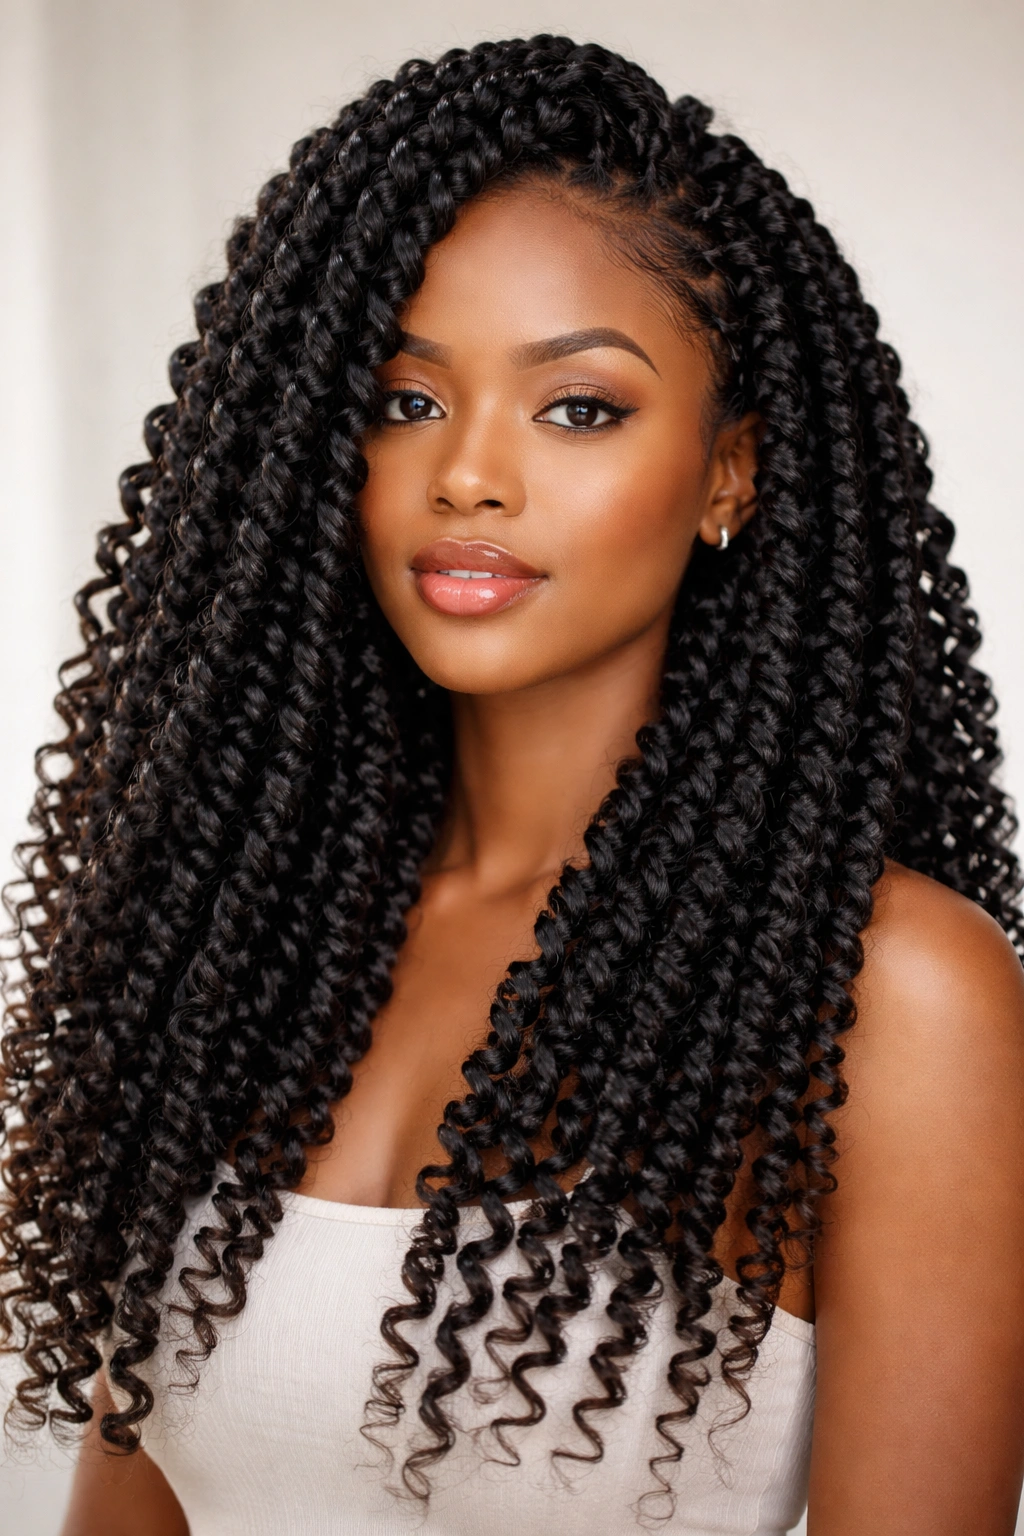
Passion twists are a modern take on traditional two-strand twists. They use synthetic hair (usually braiding hair) to add volume and create a fuller, more textured look. They’re lighter than box braids but offer more visual impact than regular twists, and they’re fantastic for people who want a bold, statement-making protective style.
Installing Passion Twists
Section your hair as you would for two-strand twists, but divide each section in half. Add braiding hair to each half alongside your natural hair, then two-strand twist everything together. The result is twists that are thicker and fluffier than natural twists but thinner and more textured than box braids. It’s a perfect middle ground.
Styling and Personality Options
One of the fun things about passion twists is the braiding hair options. You can use colors that coordinate with your skin tone, create an ombré effect (darker at the roots, lighter at the tips), or go bold with a contrasting color. The twists look great worn down, styled in an updo, or gathered to one side.
Duration and Maintenance
Passion twists typically last 4–6 weeks, which is shorter than box braids but longer than natural twists. They require the same care: protect them at night with a bonnet, keep your scalp clean, and re-twist the roots as new growth comes in. They can start to look fuzzy or separated after a few weeks, which is normal and part of their charm—some people love the softer, more relaxed look they develop over time.
Why Passion Twists Are Worth Trying:
- Perfect middle ground between natural twists and synthetic styles
- Offer tons of color and styling options
- Less time-intensive to install than box braids but longer-lasting than natural twists
- Lightweight and comfortable for long-term wear
- Great for experimentation if you want to try a bolder look
11. Crochet Braids
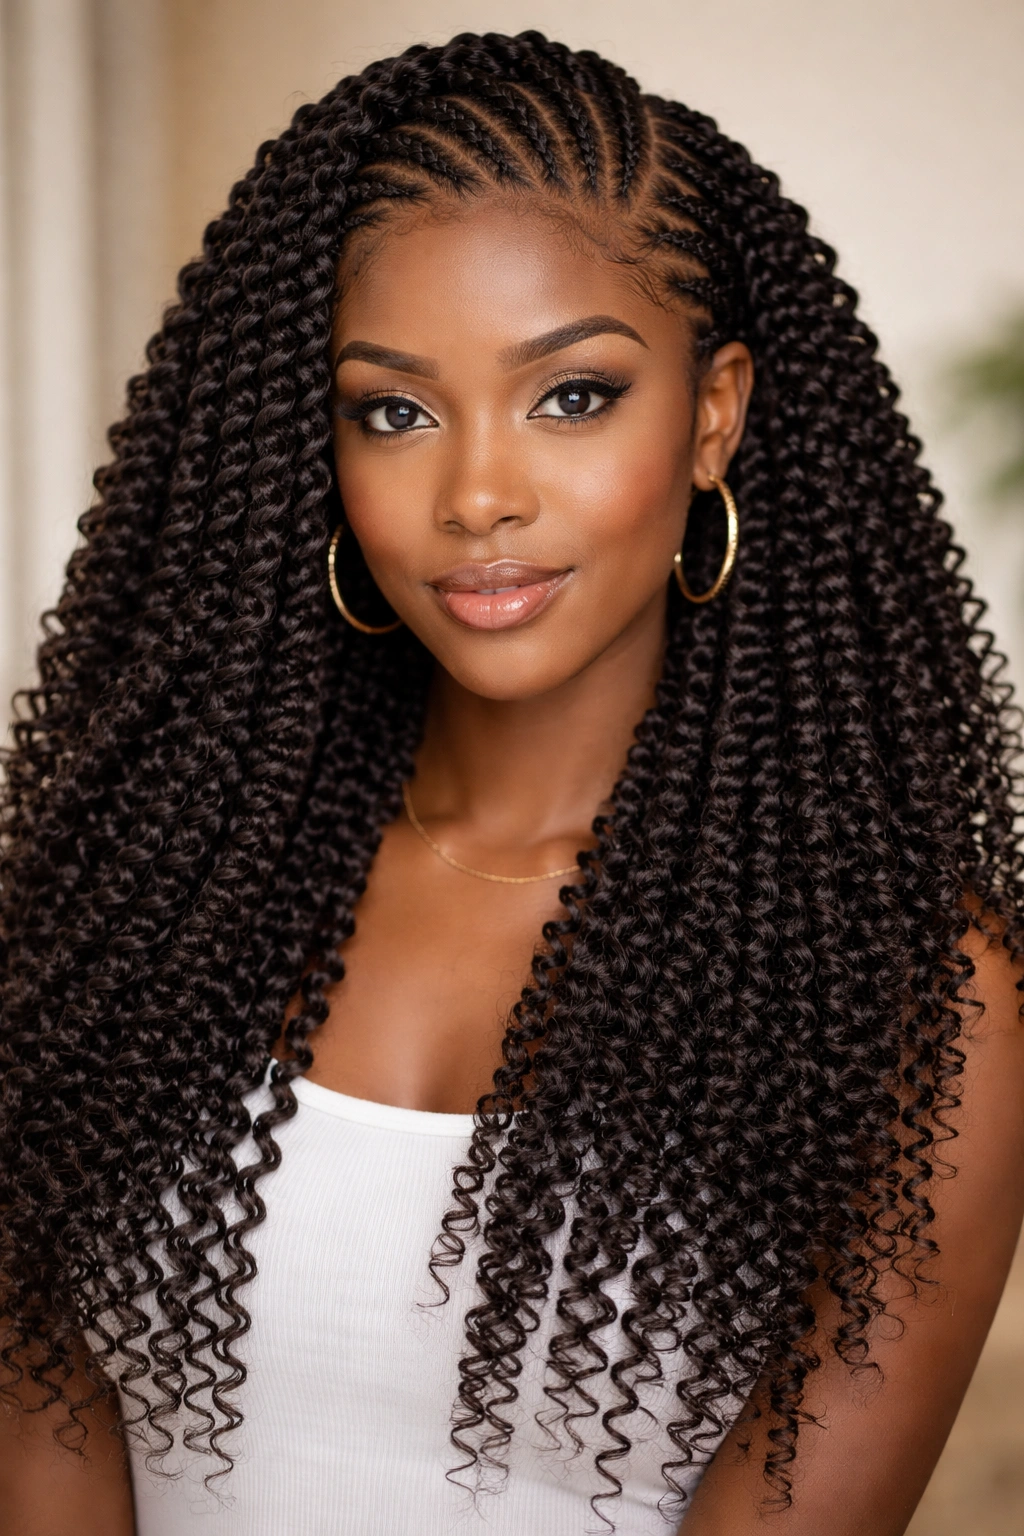
Crochet braids are technically a protective style, but they feel less restrictive than some other options because your natural hair is braided flat against your scalp and the main bulk of the style is synthetic hair that’s crocheted in. For 4C hair, this means your natural hair gets a complete break while you still get a polished, long-lasting style.
Understanding the Installation Process
You’ll need to have cornrows or flat twists braided close to your scalp (typically 4–8 braids, depending on your hair texture and the look you want). Then, using a crochet hook and synthetic braiding hair or locs, you’ll crochet the hair into the braids to create the body of the style. It sounds complicated, but once you understand the motion, it’s manageable.
The Advantage of Less Tension
Because the bulk of the weight is the crocheted hair rather than your natural hair, crochet braids put less tension on your edges and scalp compared to box braids. This makes them an excellent option if you want a protective style but are worried about tension alopecia or scalp sensitivity. They’re also typically more affordable because you’re using less synthetic hair.
Versatility in Length and Style
Crochet braids can be short and curly (using crocheted curl extensions), long and straight, thick and chunky, or thin and delicate. You can dye them, style them in multiple ways, and they hold their shape really well. They last 4–8 weeks depending on how well you care for them and how much your natural hair grows at the roots.
Things to Know About Crochet Braids:
- Installation is easier than box braids if you learn the crochet motion
- Require less synthetic hair, so they’re more budget-friendly
- Put less tension on edges than traditional braids
- Work well for longer hair styles (18 inches and up)
- The locs-style crochet braids are particularly popular right now
12. Braid-Out with Curl Definition
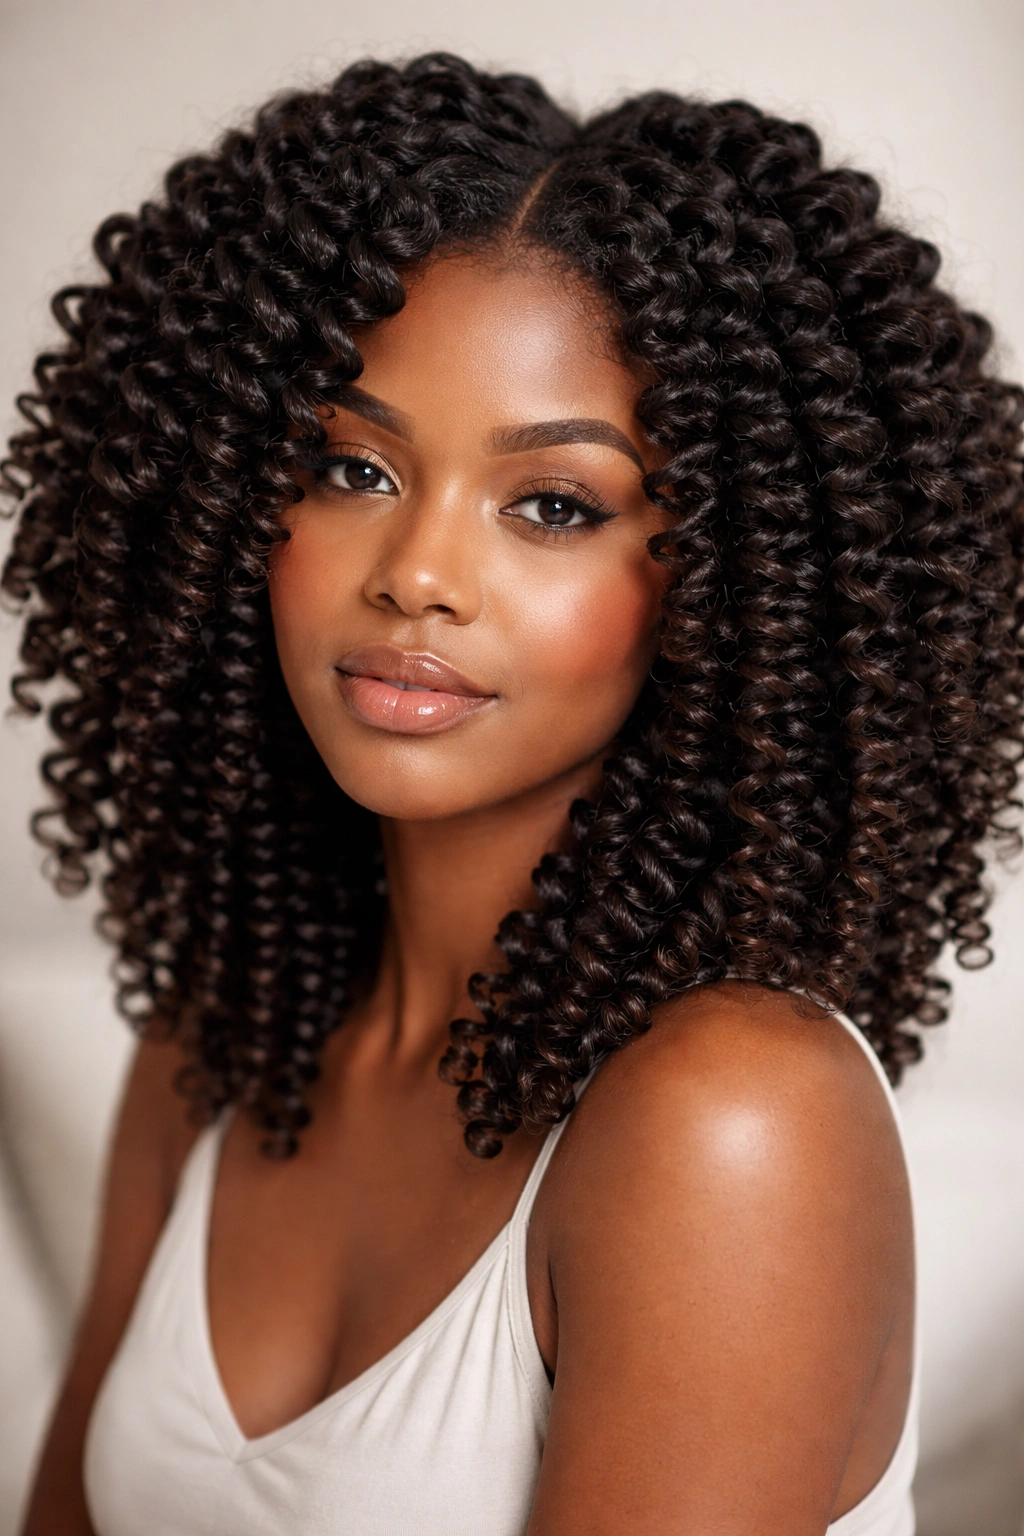
A braid-out is when you braid your hair, let it set overnight, and then unravel the braids to create defined coils. It’s similar to a twist-out, but the coils are typically larger and the definition can be even more dramatic. For 4C hair, a braid-out gives you bold, bouncy coils that make a real statement.
Creating the Braids for Maximum Definition
Braid your damp, moisturized hair into sections—the size of your braids determines the size of your coils. Two-strand braids create regular coils, while three-strand braids (traditional braids) create slightly larger, more textured coils. Use a strong-hold gel or edge control to smooth the braids and ensure they set with sharp definition. The smoother and neater your braids, the more defined your coils will be.
The Setting and Unraveling Process
Let your braids set for at least 8–10 hours (overnight is ideal) so the coils have time to form and hold their shape. When you unravel, do it gently from the bottom up, taking your time and being careful not to disturb the coil structure. Some people finger-comb their coils apart slightly for volume, while others leave them tight and defined. Both looks are beautiful—it’s just about your preference.
Longevity and Refreshing
A braid-out typically lasts 5–7 days on 4C hair. As the days go on, the definition softens slightly, which is normal. To keep it looking fresher longer, protect it at night with a satin bonnet, and you can re-braid problem sections if they start to frizz. You can also mist lightly with water and apply a bit of gel to any sections that need refreshing.
Pro Tip: For maximum impact, use a three-strand braid instead of a two-strand braid. The three-strand braid creates slightly larger coils with a different texture pattern, and it’s a nice variation if you rotate between styles.
Tips for Managing 4C Hair at Home
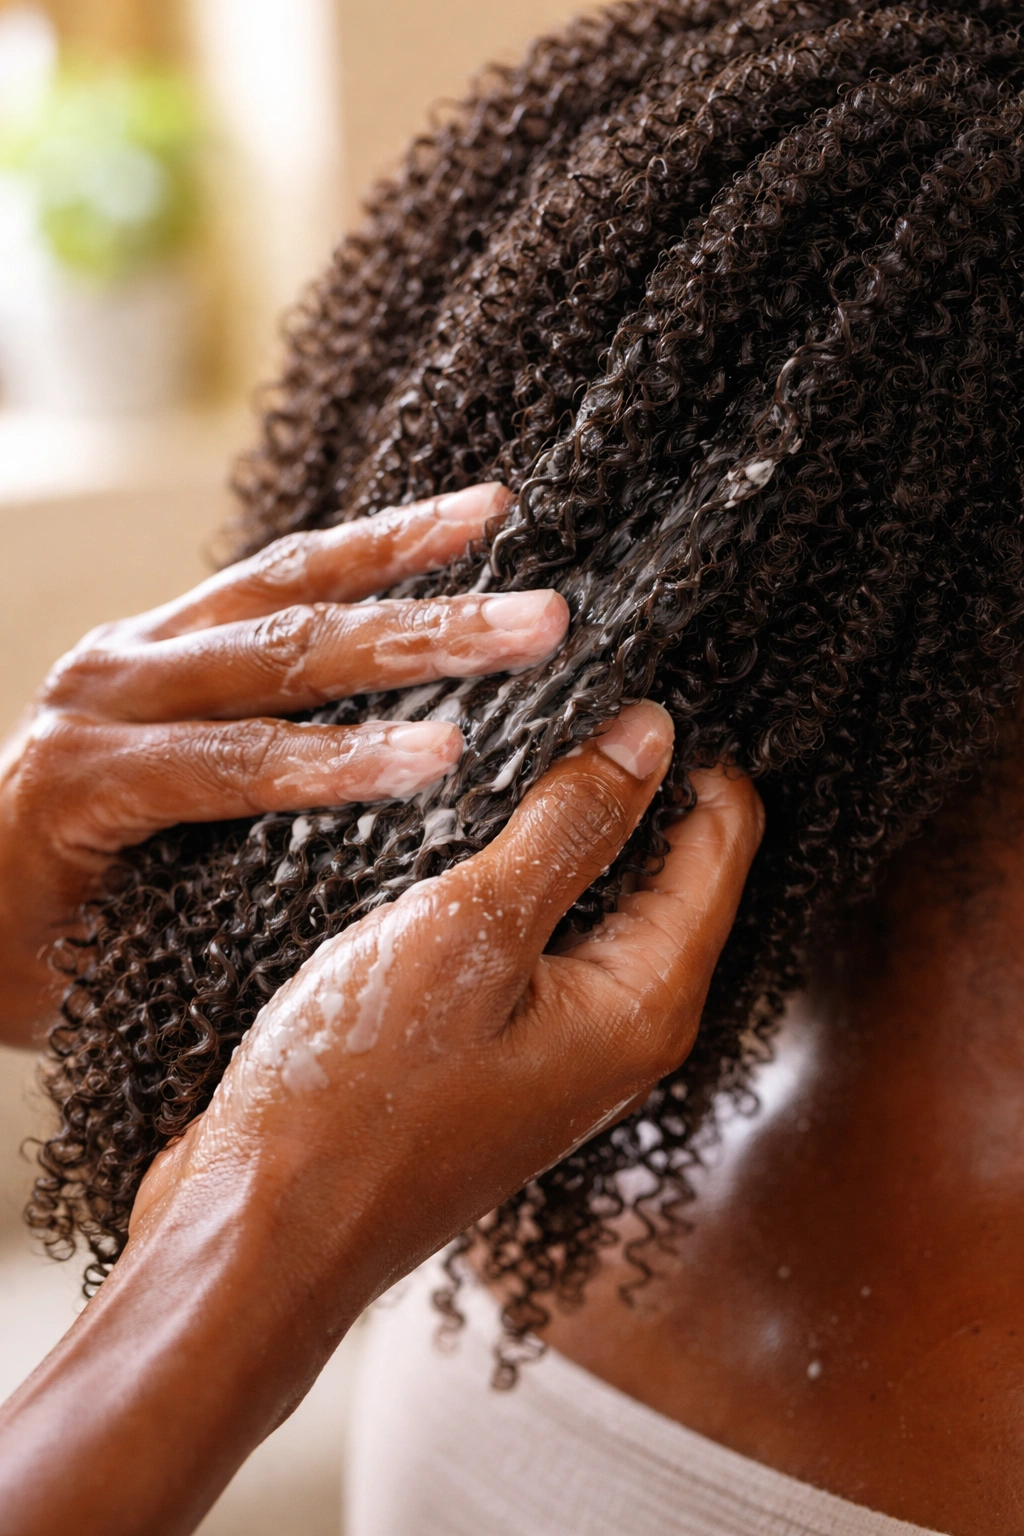
Successfully styling 4C hair at home requires understanding what this texture needs to thrive. Your hair is naturally drier than looser curl patterns because the sebum produced at your scalp has a harder time traveling down the tight coil pattern to moisturize the lengths and ends. This means moisture is not optional—it’s foundational. Every single style in this guide will look better and last longer if you start with properly hydrated hair.
Deep conditioning should be a regular part of your routine, not something you do once a month. Aim for every 1–2 weeks, and use heat (a shower cap under warm water or a heating cap) to help the conditioner penetrate. Your 4C hair can absorb moisture much better with gentle heat, which opens the cuticle and allows hydration to really sink in. Leave your deep conditioner on for at least 20 minutes, or longer if you have the time.
Product quality matters significantly with 4C hair. Cheap products often contain silicones and sulfates that coat your hair temporarily but don’t provide real moisture or nourishment. Invest in a few good products rather than many mediocre ones: a sulfate-free shampoo, a rich leave-in conditioner, a moisturizing cream or custard, and a strong-hold gel. You don’t need twenty products—you need the right ones used correctly.
Water is also crucial. A spray bottle of plain water can be your best friend for refreshing styles, reactivating products, and adding moisture to your hair throughout the week. Some people prefer mixing their water with a tiny bit of leave-in conditioner or a hydrating spray to boost the moisture. Keep a spray bottle nearby throughout your styling process and use it liberally.
Common Mistakes to Avoid
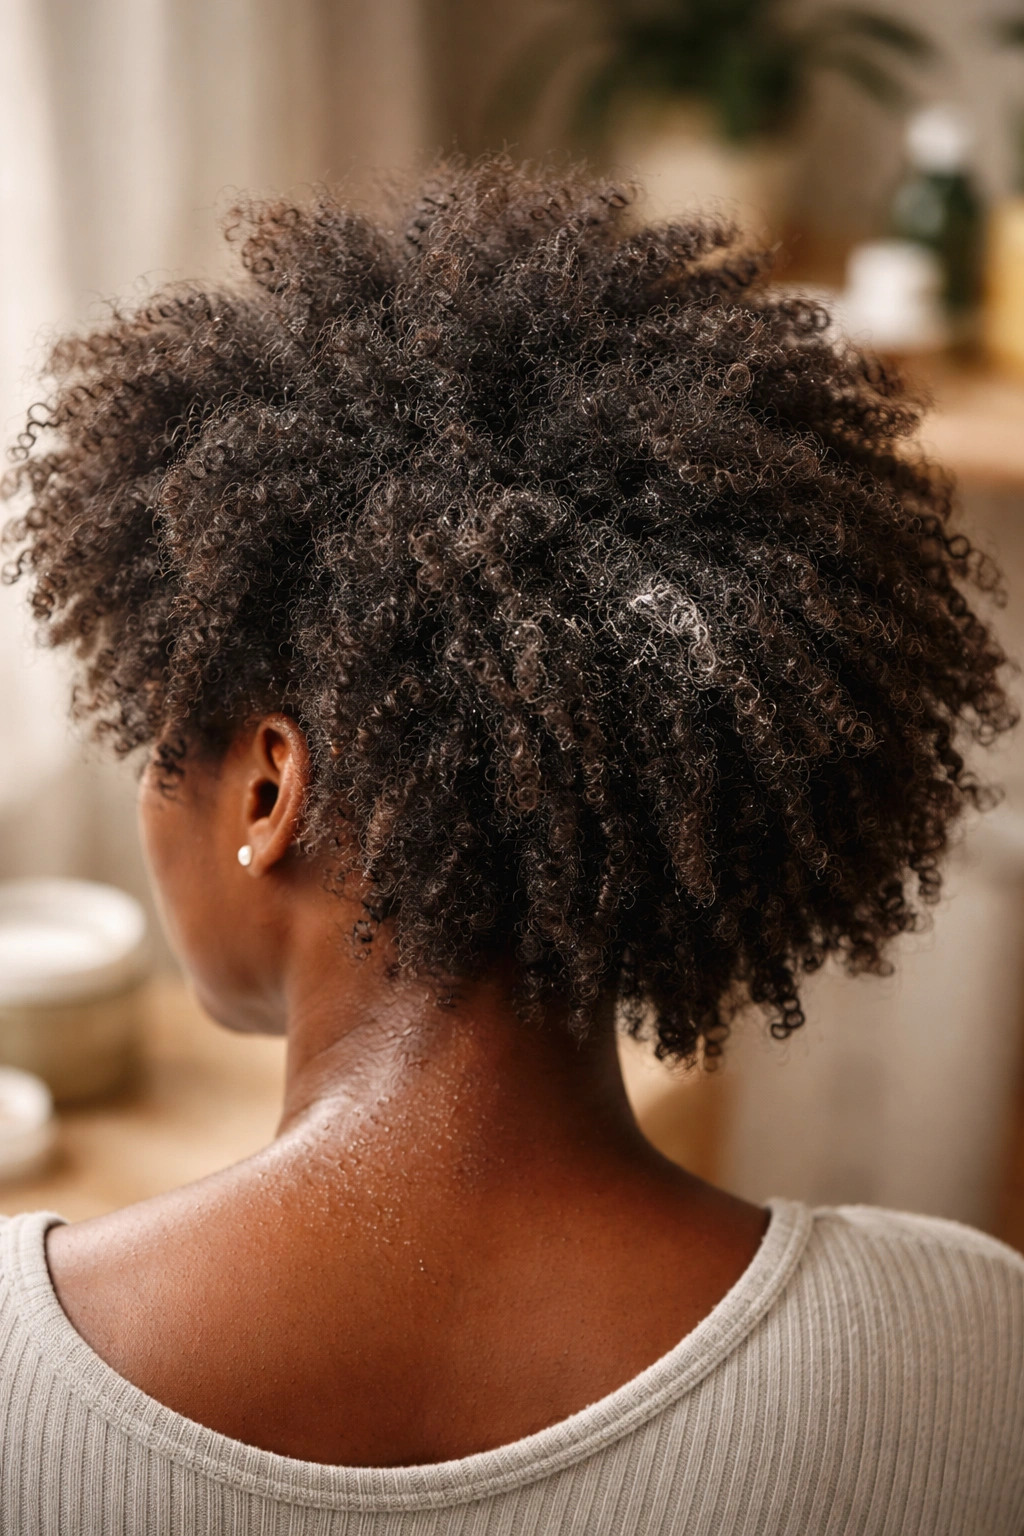
The biggest mistake people make with 4C hair is using products that are too heavy or the wrong formula. Heavy butters and creams can weigh your coils down and make them look limp instead of full and bouncy. Look for products that are rich but lightweight—they should be moisturizing without being heavy. If your defined coils fall flat or your twists look dull within hours, you’re likely using products that are too heavy for your hair.
Another common mistake is doing styles on hair that’s too dry. 4C hair that’s dry before you start will look frizzy, dull, and won’t hold definition. Always start with damp or freshly moisturized hair. If you’re working with day-old hair, spritz it with water first to rehydrate it before you style. Dry hair is stubborn and fights against definition—moisturized hair cooperates and holds shape.
Not protecting your hair at night is another big one. A satin bonnet, scarf, or pillowcase is not optional for 4C hair—it’s essential. Cotton pillowcases absorb moisture from your hair and create friction that causes frizz and disrupts your coil pattern. Even the most beautifully done style will look rough by morning if you don’t protect it. Make a satin bonnet or scarf part of your routine without exception.
Over-manipulating your hair is also a trap. 4C hair can handle styling, but it doesn’t like constant touching, picking apart, and retwisting. Do your style and then leave it alone for a few days. Touching it constantly throughout the week will create frizz and undo your definition. If something needs refreshing, use a light mist of water and a tiny bit of product rather than redoing the whole section.
The Best Products for 4C Styling
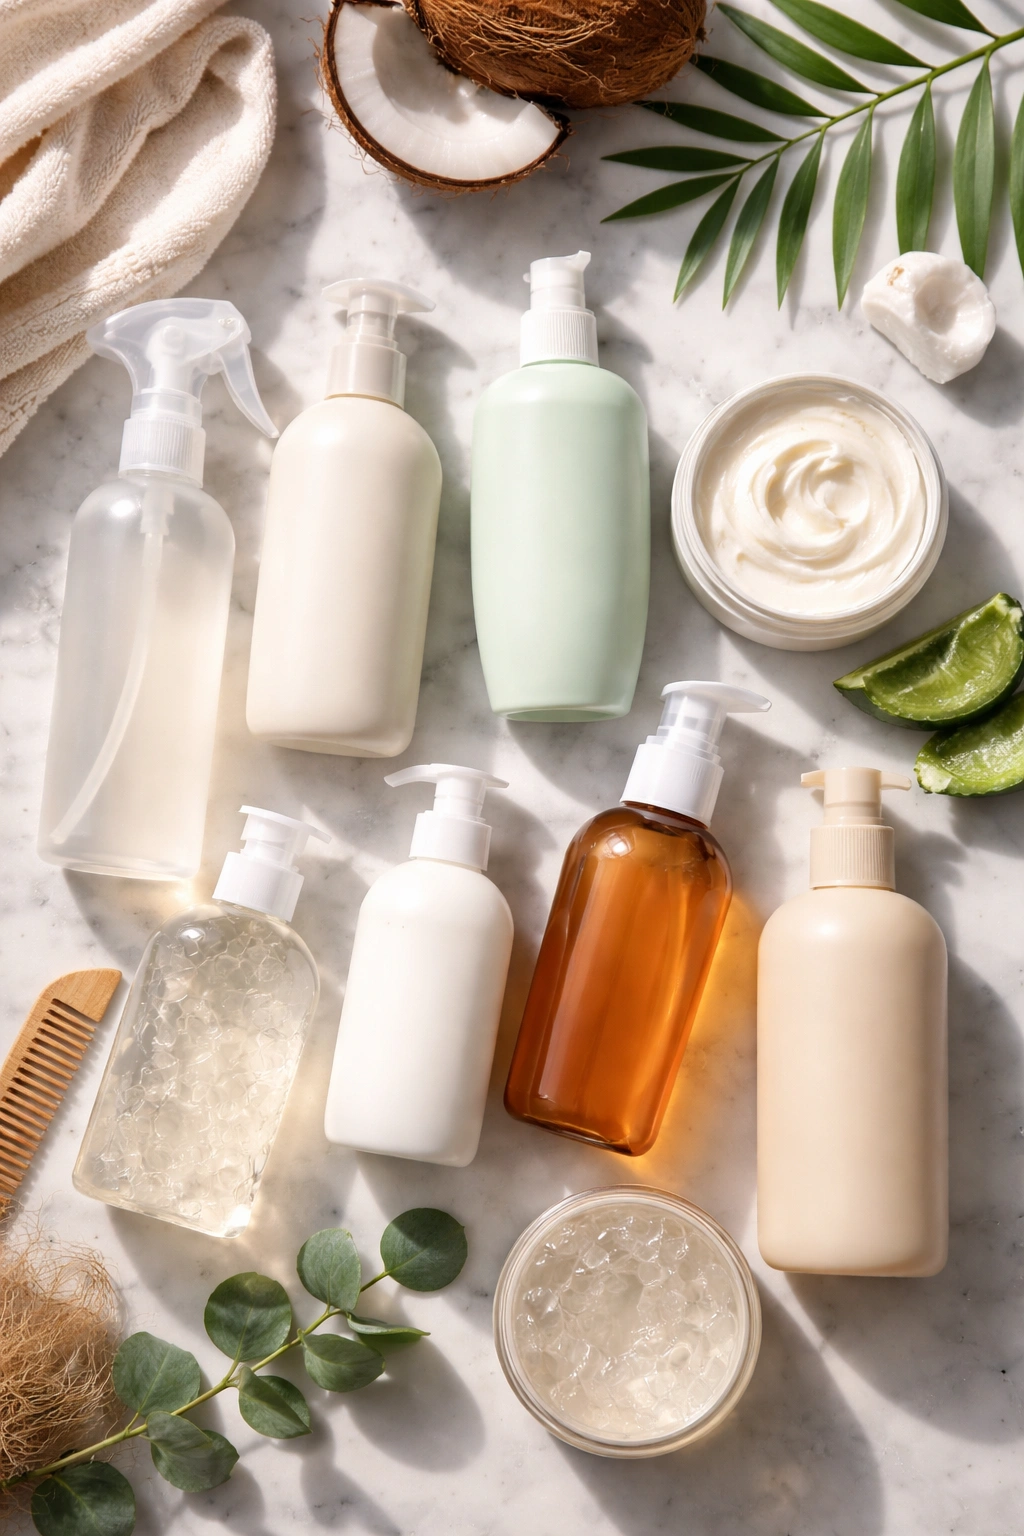
You don’t need expensive products to achieve great styles on 4C hair, but you do need products specifically formulated for textured hair. SheaMoisture, Cantu, Carol’s Daughter, and Pattern are all reliable brands that consistently deliver moisture and definition without breaking the bank. Kinky-Curly products are pricier but legendary in the natural hair community for their quality and performance. Eco Styler gel is the gold standard for hold—it’s inexpensive, accessible, and beloved for a reason.
For leave-in conditioners, look for products with no silicones and lightweight formulas that won’t weigh your coils down. Your leave-in should absorb into your hair, not sit on top of it. Cantu Shea Butter Leave-In Conditioner, Carol’s Daughter Black Vanilla Moisture & Shine Leave-In, and SheaMoisture Coconut & Hibiscus Curl Enhancing Smoothie all work beautifully on 4C hair without being heavy.
For gels and hold products, Eco Styler Gel (the original or any of their variations) is unbeatable. It provides strong hold without flaking, it’s water-soluble so it washes out cleanly, and it’s affordable. Kinky-Curly Curling Custard is another favorite—it’s more of a cream than a gel, so it offers both hold and moisture. Aunt Jackie’s Don’t Burn My Hair Gel is an older classic that still works beautifully for defined styles.
If you’re using synthetic hair for braids, twists, or crochet, invest in decent quality braiding hair. Cheap synthetic hair tangles easily, sheds, and looks plastic-y. Mid-range options like Freetress or Xpression braiding hair are affordable and hold up well. They tangle less, look more natural, and don’t shed as much as the absolute cheapest options.
Maintenance Between Styles
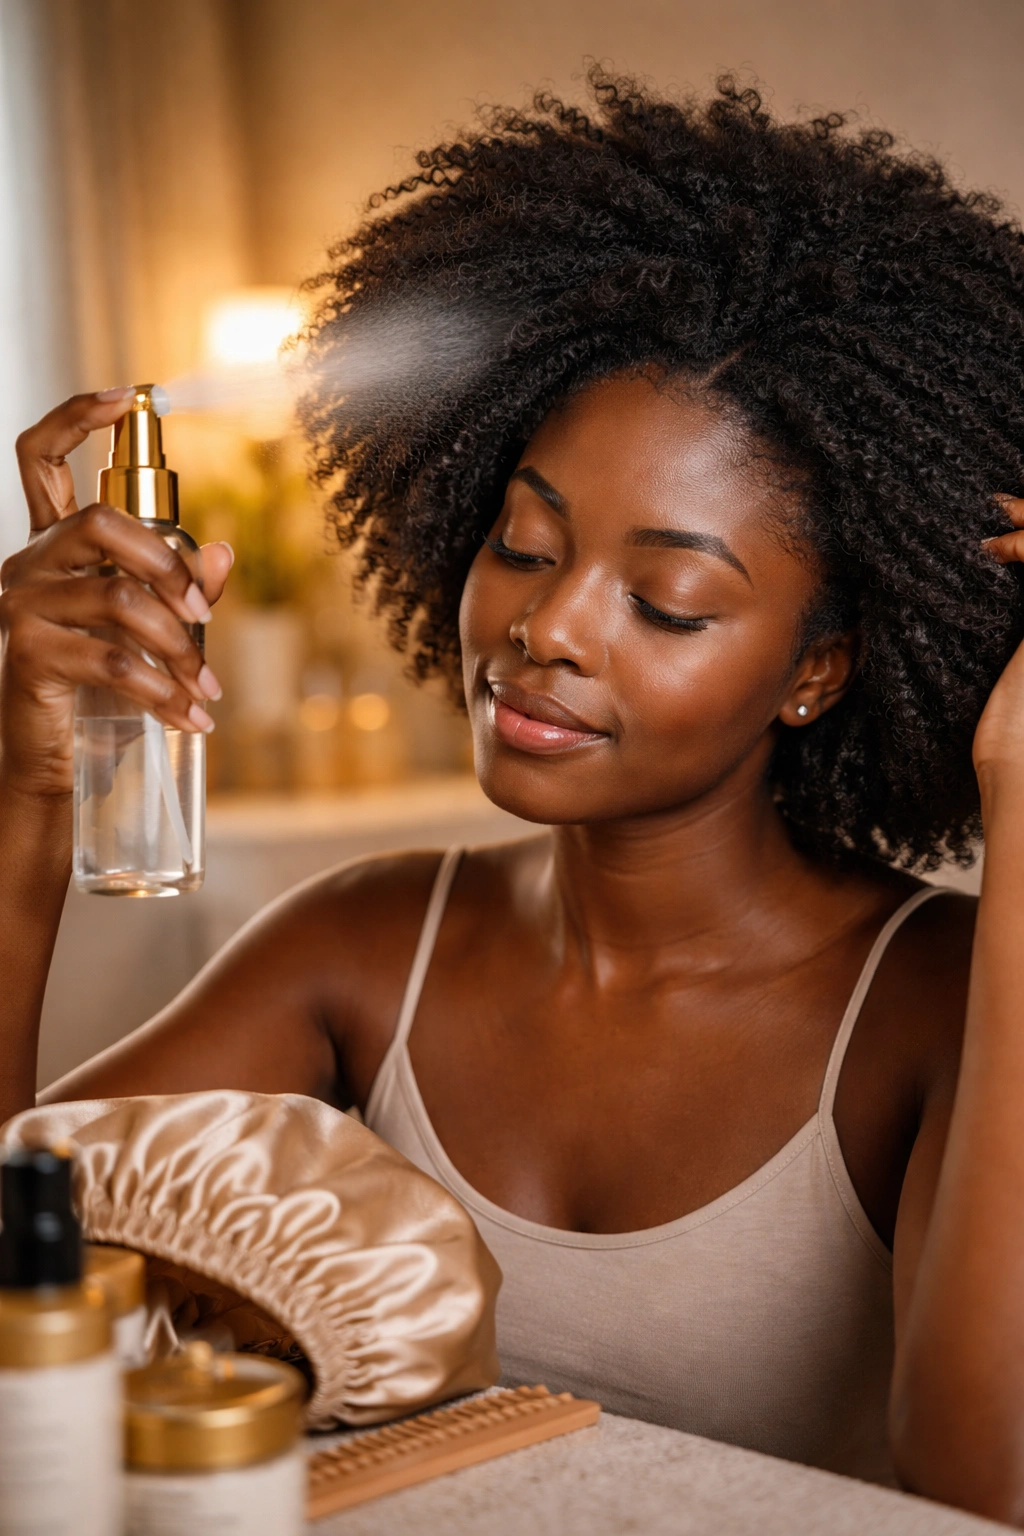
How you care for your hair between styles determines how long your styles last and how healthy your hair stays underneath them. Scalp care is non-negotiable. Every few days, spray your scalp with a diluted apple cider vinegar spray (one part vinegar to three parts water) or a scalp-cleansing spray to remove product buildup, sweat, and excess oil. A clean scalp will stay healthier and won’t develop itching or irritation underneath protective styles.
Misting your styles with water throughout the week helps maintain moisture and definition. Many people think once a style is done, they’re hands-off with products until the style comes out, but 4C hair benefits from light refreshing throughout the week. A light spritz of water with a tiny bit of leave-in conditioner reactivates your products, adds moisture, and refreshes your definition. Do this in the evening before bed, and your style will look fresher the next morning.
Night protection is absolutely essential. A satin bonnet is the best option because it covers your entire head, provides protection on all sides, and keeps everything in place while you sleep. If you don’t have a bonnet, a satin scarf tied around your hair (not too tight) is the next best thing. Some people sleep on a satin pillowcase instead, though this offers less protection than a full bonnet.
Every 3–4 weeks, plan for a deep conditioning session even if you’re wearing a protective style. You can do this with your style in by applying a deep conditioner, covering your head with a plastic cap, and sitting under heat (warm water in a shower or a heat cap) for 30 minutes. This keeps your hair nourished and healthy underneath the style, which is crucial for long-term hair health.
Final Thoughts
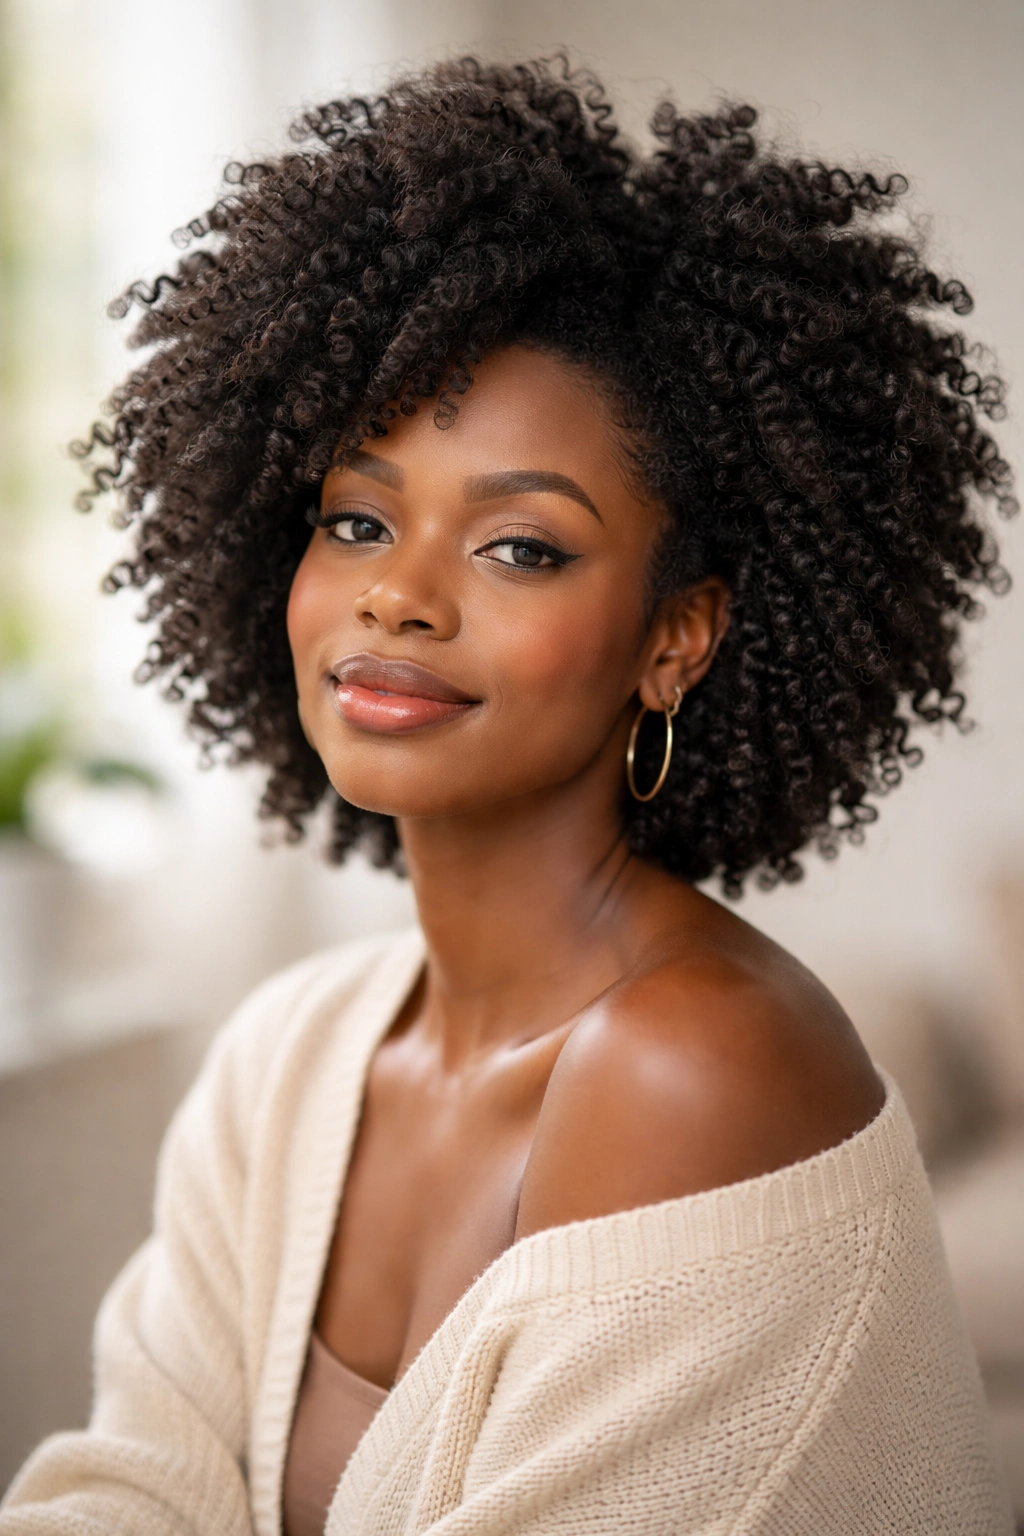
The diversity of styles available for 4C hair is genuinely remarkable. From quick wash-and-gos to elaborate installations like faux locs and crochet braids, there’s something for every mood, occasion, and lifestyle. The key to success is understanding that 4C hair has specific needs—moisture, protection, and careful handling—and choosing styles and products that honor those needs.
Start with whichever style appeals to you most, rather than trying to do them all at once. Once you nail one or two styles, add another to your rotation. Over time, you’ll build a repertoire of looks that work for your specific hair, your lifestyle, and your aesthetic. Home styling does take practice and patience, but the payoff is absolute control over your look, significant savings compared to salon visits, and the confidence of knowing you can create something beautiful with your own hands.
Your 4C hair is a crown, not a problem. These styles exist because natural hair is beautiful, textured, and full of possibility. Give yourself grace as you learn, invest in good products and knowledge, and remember that perfection isn’t the goal—healthy, happy hair and a style you love is.
