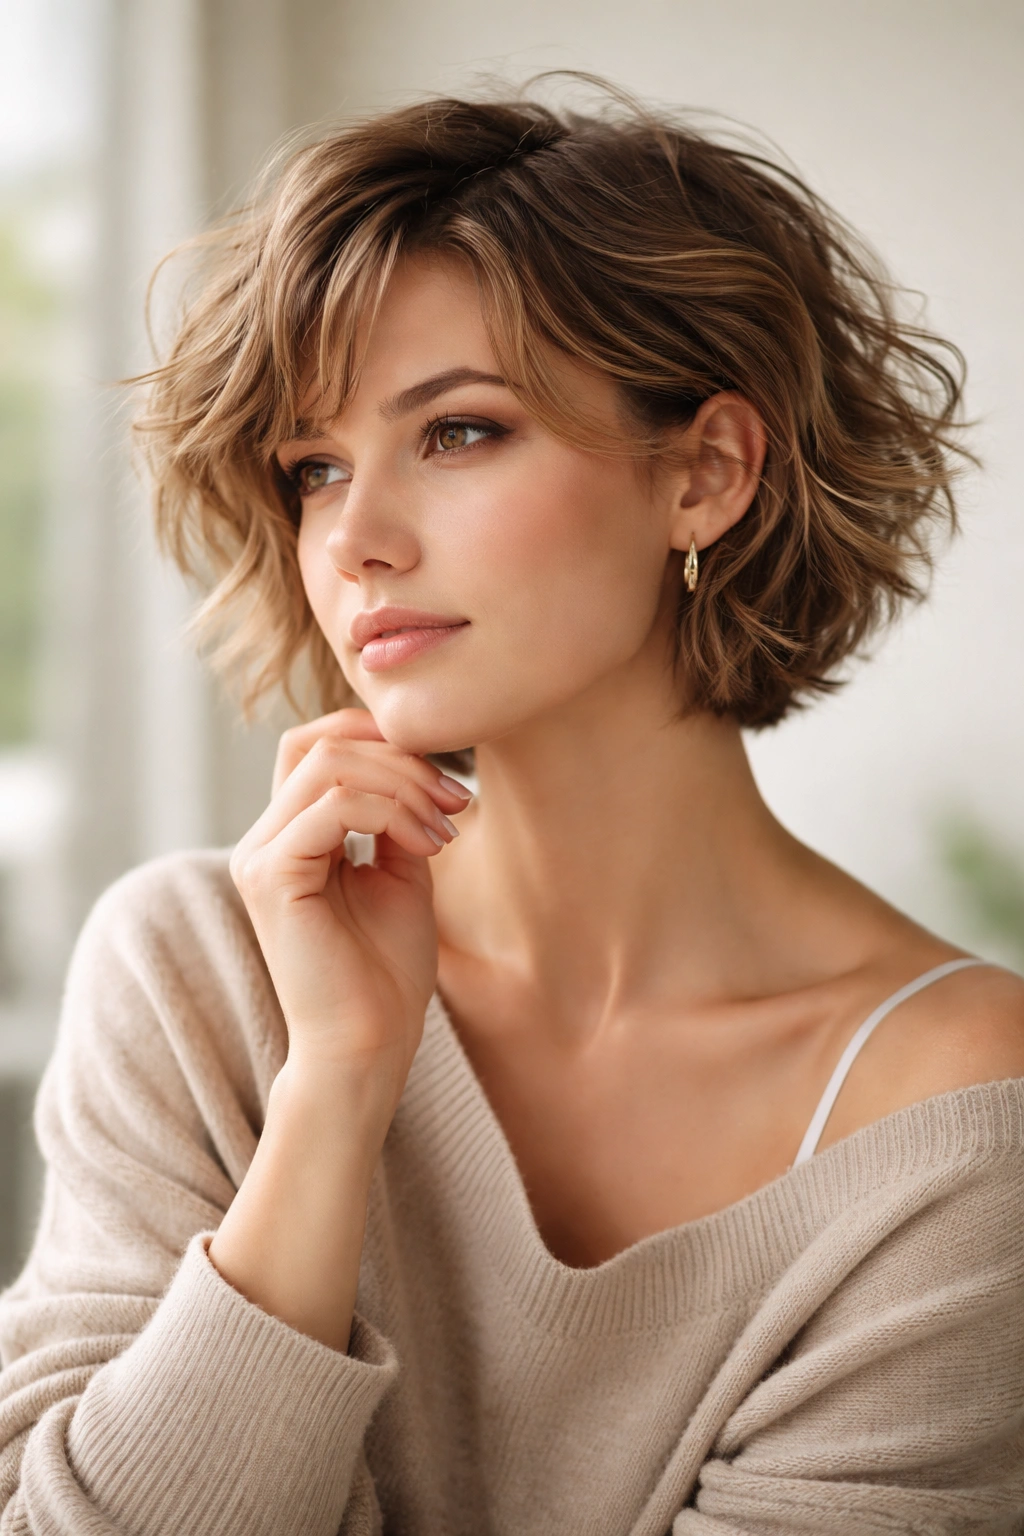
Messy short wavy hairstyles have become the ultimate go-to for anyone who wants effortless texture, movement, and undeniable style without requiring hours of styling time each morning. There’s something genuinely appealing about a cut that looks intentionally undone—like you just ran your hands through your hair and somehow achieved absolute perfection. The beauty of messy short wavy styles lies in their versatility; they work for straight hair types that need volume, naturally wavy locks that are finally getting their moment, and curly hair that benefits from shorter length and strategic layering.
What makes these styles so practical is that they actually minimize damage and upkeep compared to longer alternatives. Shorter length means your ends are fresher, your waves hold better, and you’re working with less hair weight pulling down your texture. The “messy” element isn’t accidental—it’s a deliberate design choice built into the cut itself through layers, disconnected pieces, and strategic texture work that a skilled stylist creates. This means your waves have built-in movement and dimension even on days when you’re running late.
Whether you have fine, thin hair that needs volume or thick, textured hair that needs containment, there’s a messy short wavy option that will look like it was custom-designed for your hair type. These styles range from tousled pixie cuts to choppy bob variations, from beach-wave midlengths to shaggy layers that channel that effortlessly cool aesthetic. Let’s explore 20 distinct interpretations of this trend, each with styling guidance and the specific techniques that make them work.
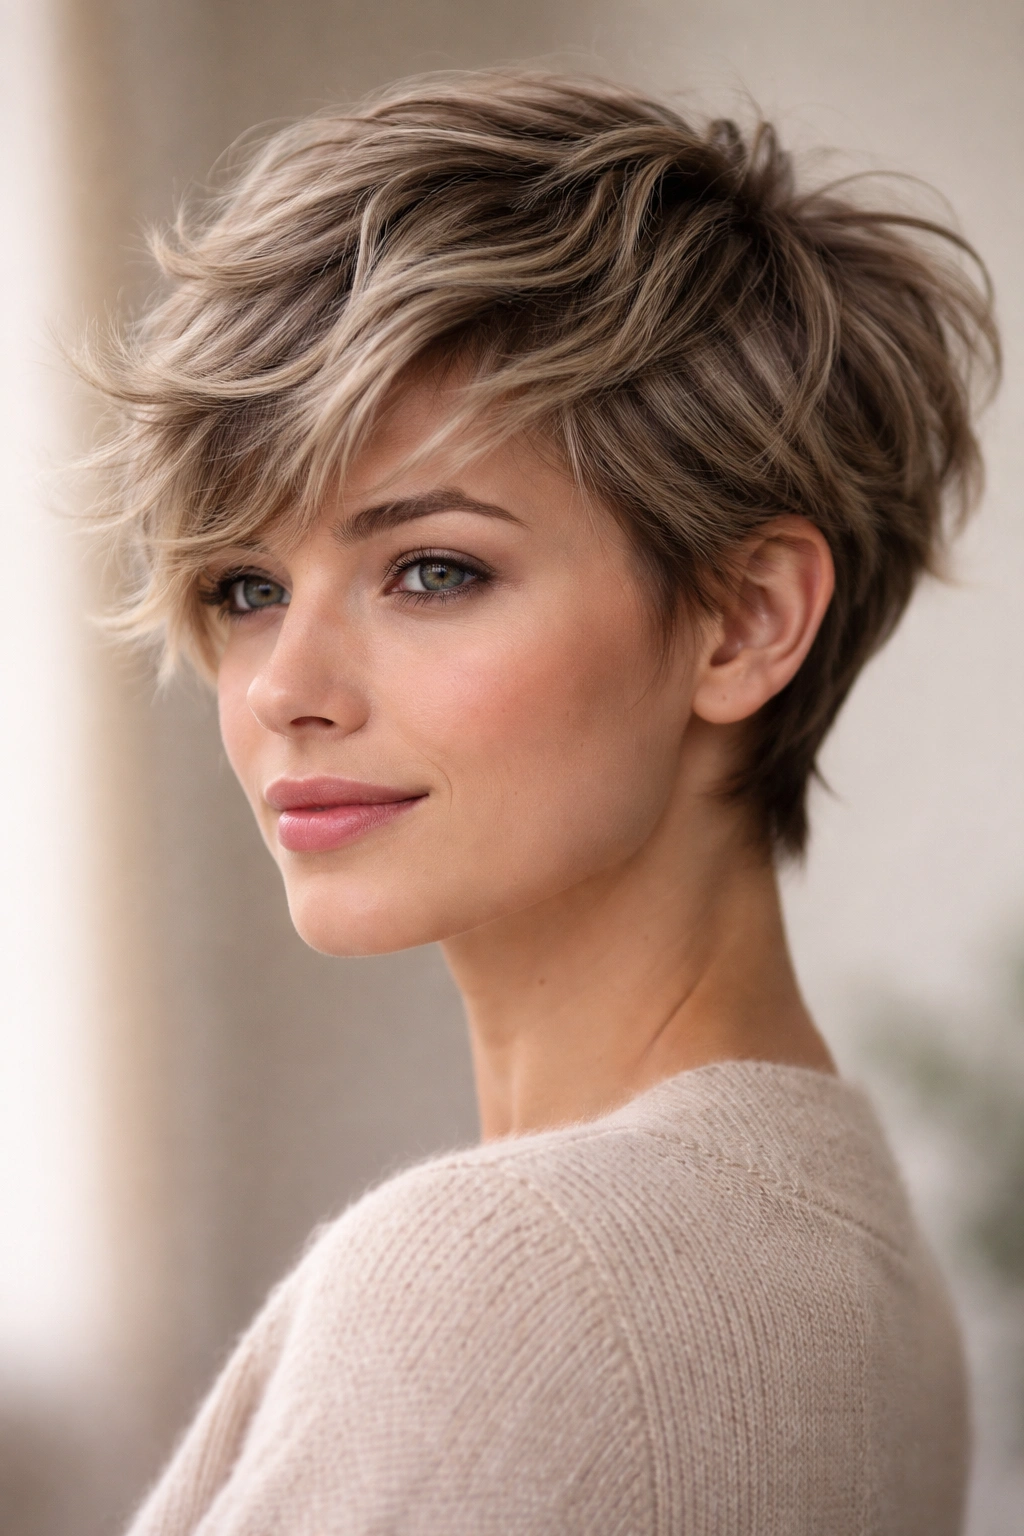
1. The Textured Pixie with Wavy Layers
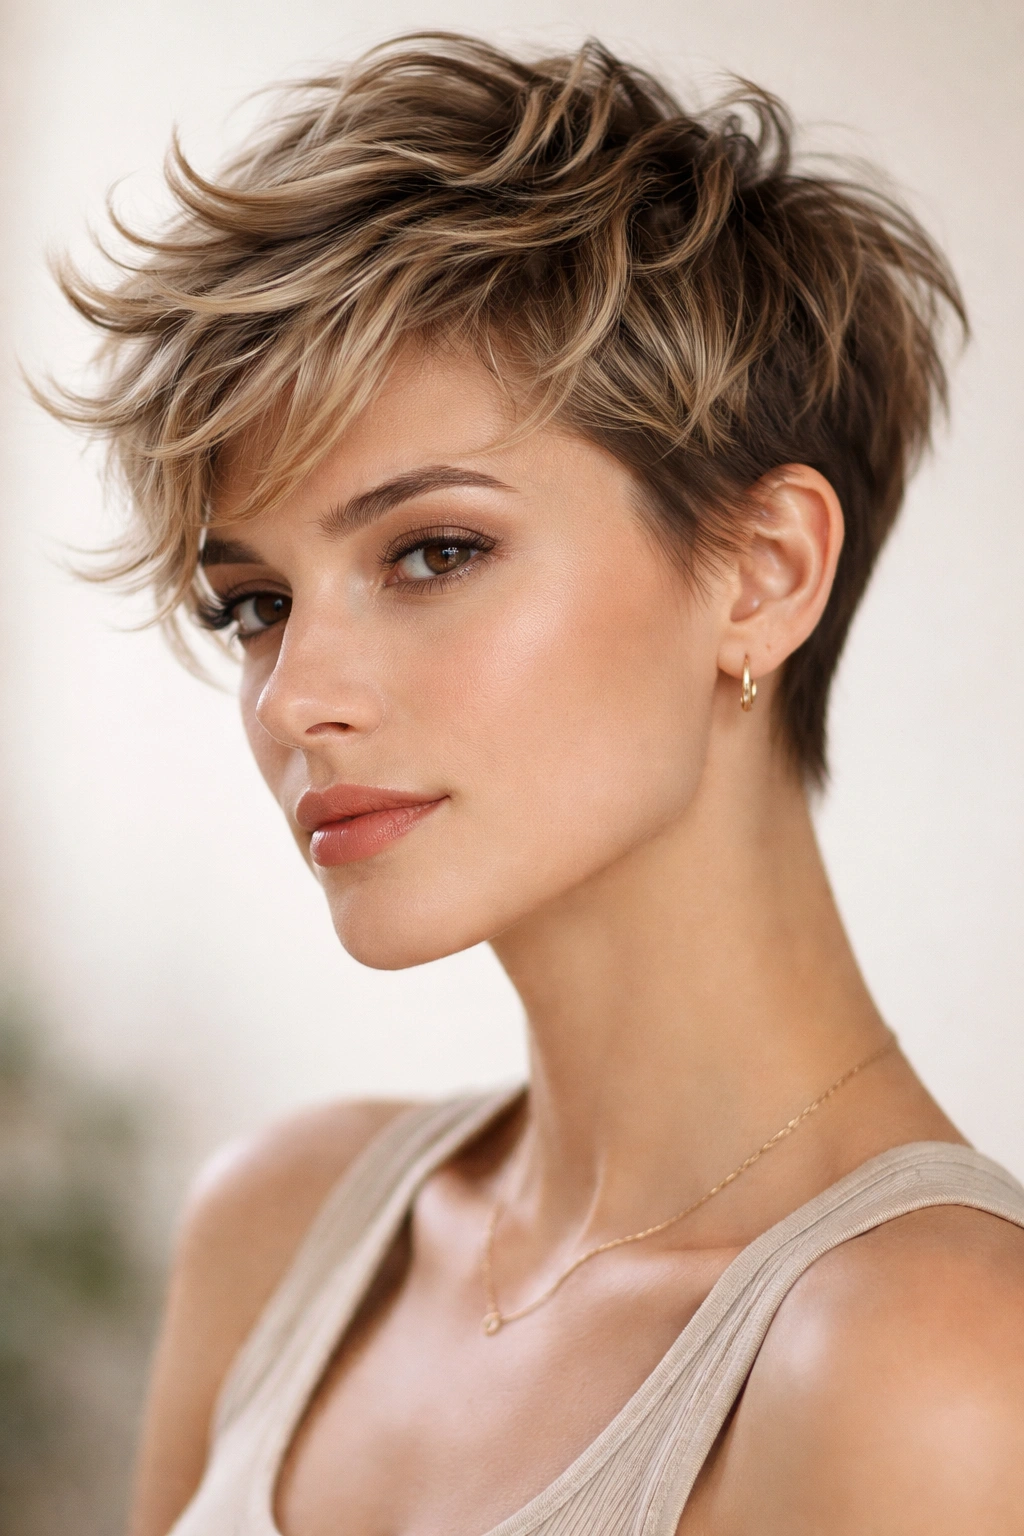
The textured pixie represents the ultimate short wavy statement—bold, modern, and surprisingly easy to maintain. This cut features ultra-short length on the sides and back while keeping slightly longer, choppy layers on top that can flip, wave, and texture in multiple directions. The beauty of this style is that it’s not a traditional blunt pixie; instead, the layers are disconnected and point in various directions, creating immediate movement.
Why It Works for Wavy Hair
The shorter foundation actually allows your natural wave pattern to shine without the weight of longer hair pulling it down flat. Each layer can bend and curl independently, so your waves look more pronounced and dynamic. The cut removes bulk while preserving texture, which is exactly what wavy hair needs to look intentional rather than frizzy.
How to Style and Maintain
- Product application: Use a lightweight texturizing spray or sea salt mist on damp roots, then scrunch upward as hair dries
- Blow-dry technique: Flip your head upside down and rough-dry with a diffuser to encourage wave formation
- Daily styling: A small amount of matte pomade through the top layers adds definition without heaviness
- Maintenance cuts: Trim every 4 weeks to maintain the choppy layer effect and prevent the cut from looking grown-out and shapeless
Pro tip: This style photographs exceptionally well on camera—the choppy texture catches light beautifully and reads as high-fashion even when styled casually.
2. The Shaggy Short Mullet
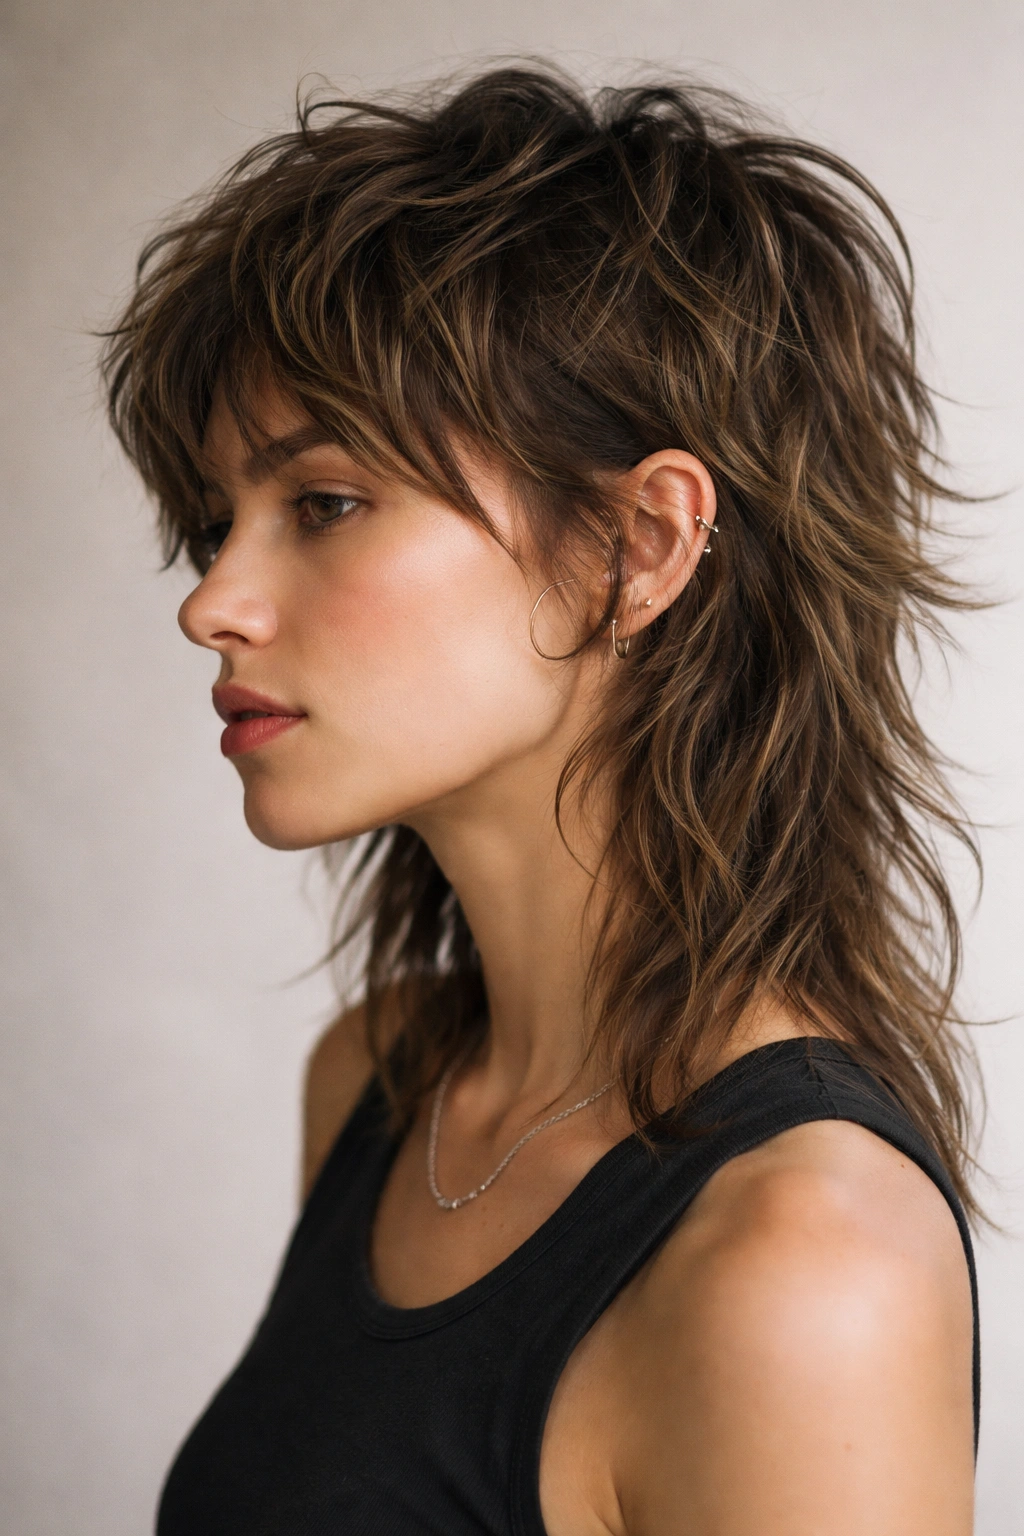
The shaggy short mullet brings back an iconic silhouette with a thoroughly modern, effortless twist. Shorter, heavily layered on top with slightly longer layers in the back creates a shape that’s undeniably cool without feeling costume-like. The key difference from vintage mullets is that everything blends seamlessly through choppy, feathered transitions rather than hard, distinct sections.
The Appeal of This Choppy Hybrid
This cut works because it gives you short, manageable length in the front and sides while the longer back layers can wave, flip, and move. The layering means each section has its own texture and movement pattern, which is precisely what makes messy styling so easy. You’re not fighting against the cut; you’re working with its natural shape.
Styling Strategy and Product Choices
- Wave emphasis: Apply mousse to damp hair before blow-drying to amplify wave definition throughout
- Back layer movement: The longer back section needs a flexible hold product—try a light spray rather than heavy pomade
- Textured finish: Work a small amount of salt spray through damp hair, then let it air-dry partially before blow-drying for organic texture
- Edge definition: Use a styling cream on the shorter front section to prevent flyaways while keeping waves intact
Worth knowing: This style requires a stylist who understands how layers interact with wavy texture—a mediocre execution can look choppy in the wrong way.
3. The Wolf Cut Short Version
The wolf cut—originally popularized in longer lengths—translates beautifully into a short, wavy interpretation. This cut combines the disconnected, feathered layers of a shag with the textured, piece-y quality of a modern mullet, creating maximum dimension and movement. The “wolf” name comes from the sharp, almost wild edges and the way the layers fan out unpredictably.
Why Wavy Hair Elevates the Wolf Cut
Wavy texture is actually ideal for this style because the cut’s layer structure is designed to work with your hair’s natural bends. Unlike straight hair that might need heavy styling to create the wolf cut’s intended movement, wavy hair automatically provides the texture the cut is engineered for. The result looks intentional and effortlessly chic.
Creating the Messy Wolf Aesthetic
- Diffuser drying: Use a blow-dryer with a diffuser attachment, scrunching upward as you work to encourage waves throughout
- Product layering: Start with mousse on damp hair, then add sea salt spray for texture and a light-hold styling cream for definition
- Piece separation: Use your fingers to separate and define individual layers, pushing some forward and pulling others back
- Texture spray: A dry texture spray applied mid-day refreshes the cut’s edge definition and keeps pieces from clumping together
Insider note: This cut thrives on movement and does look better on days two and three when natural oils give it more grip—plan your social calendar accordingly if you love the just-washed look every day.
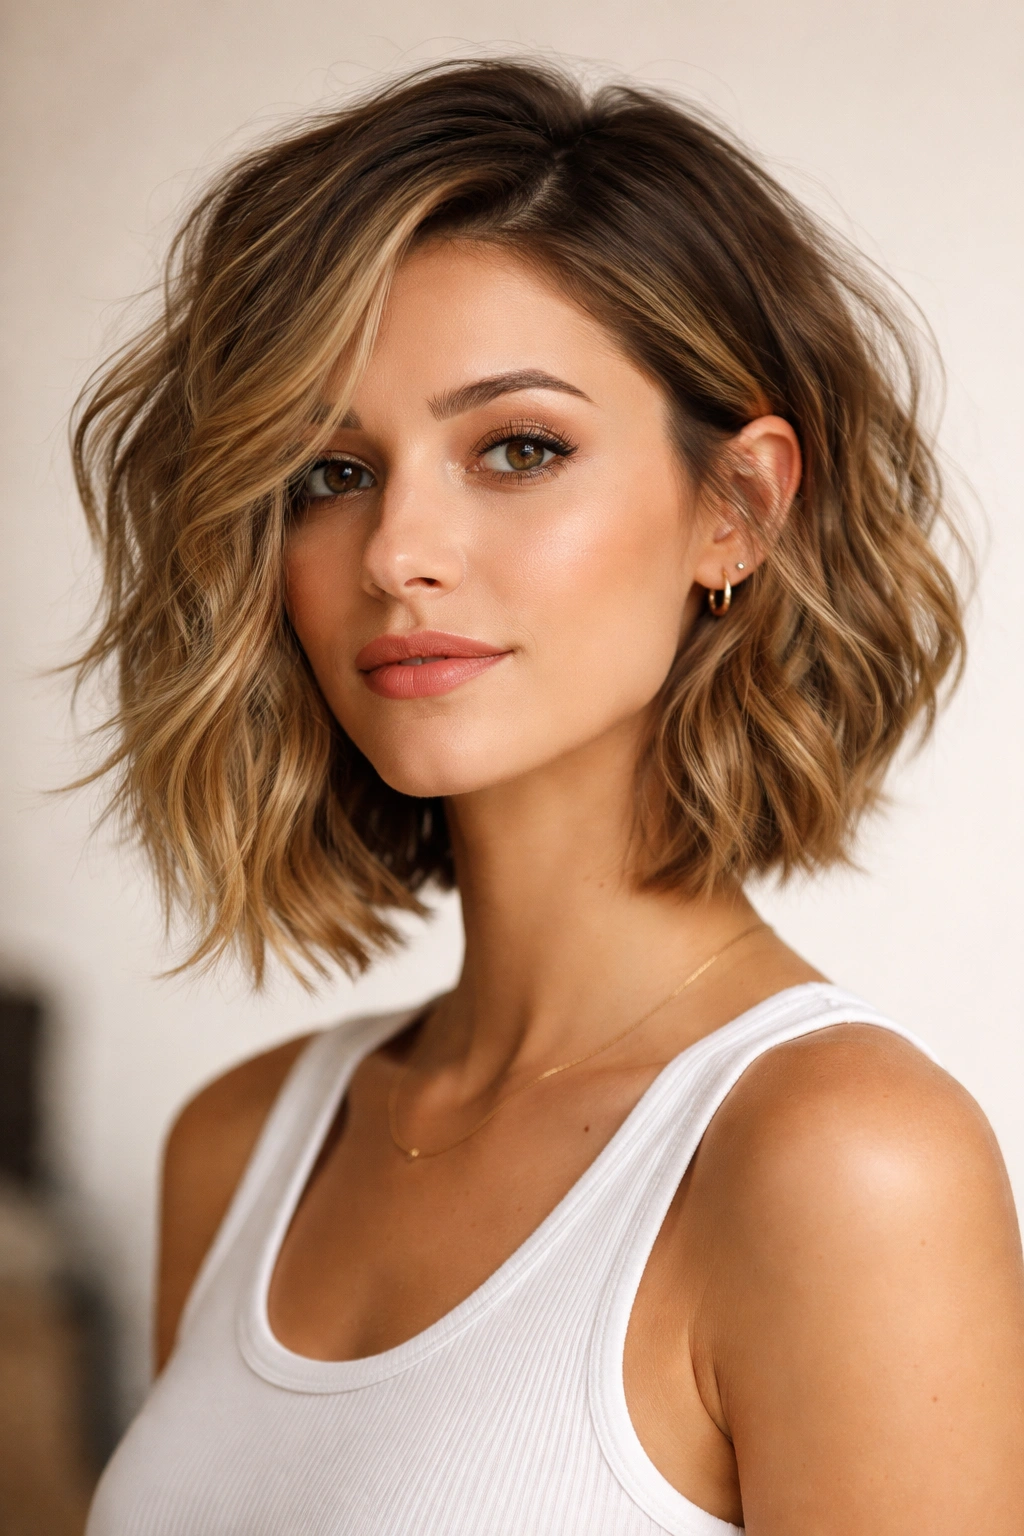
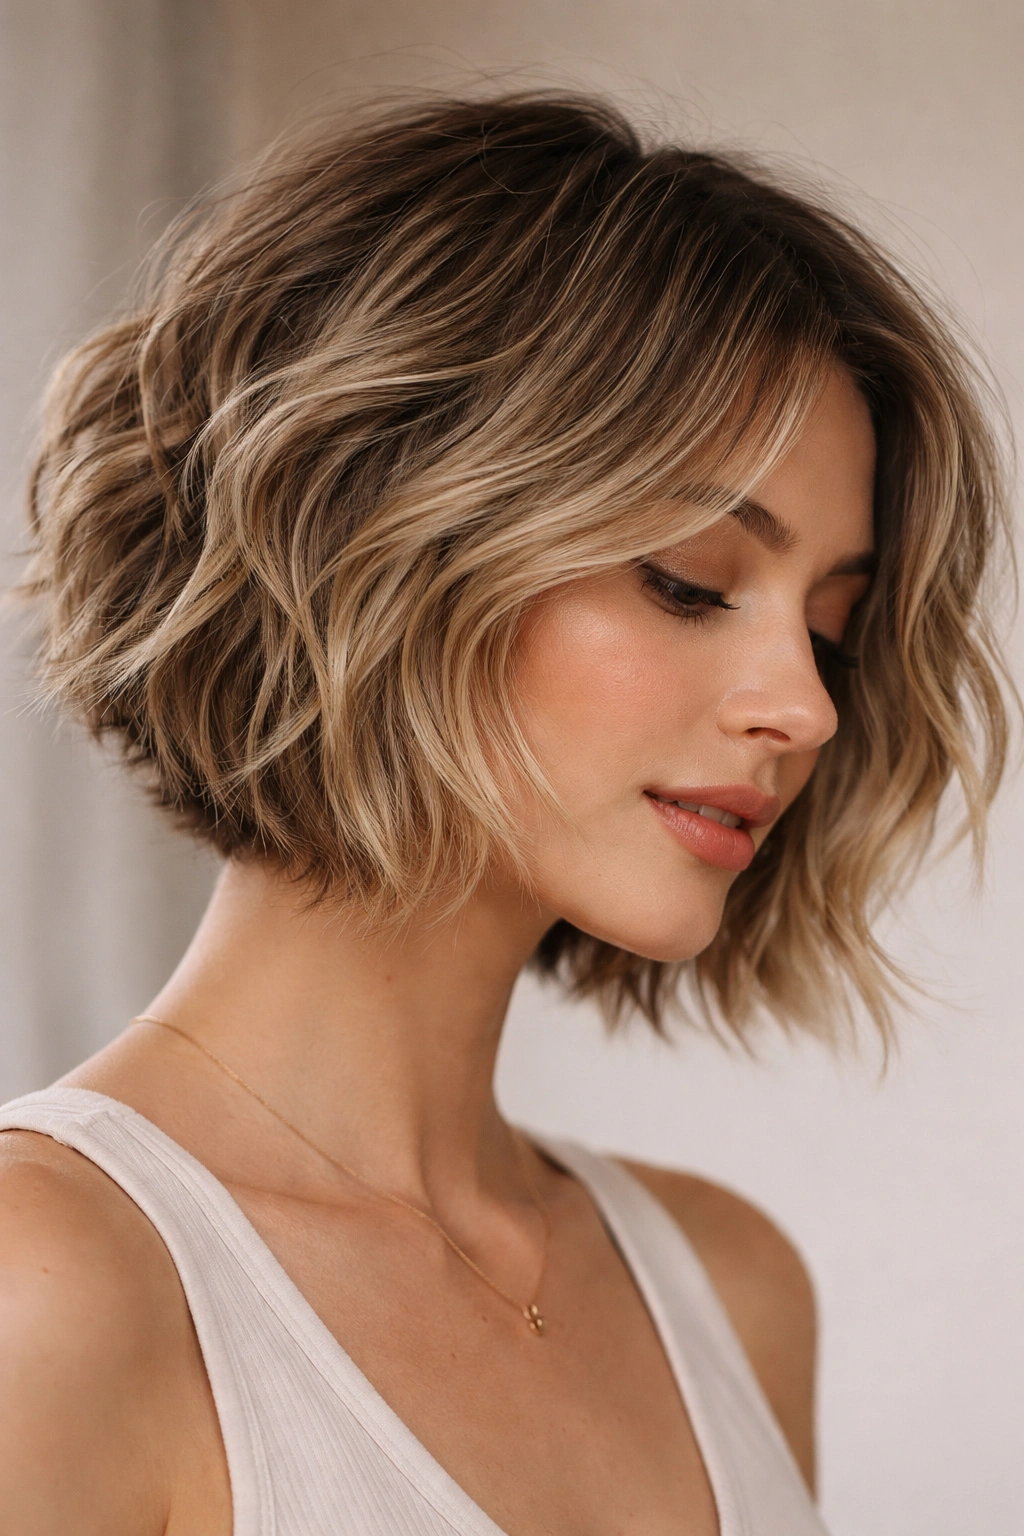
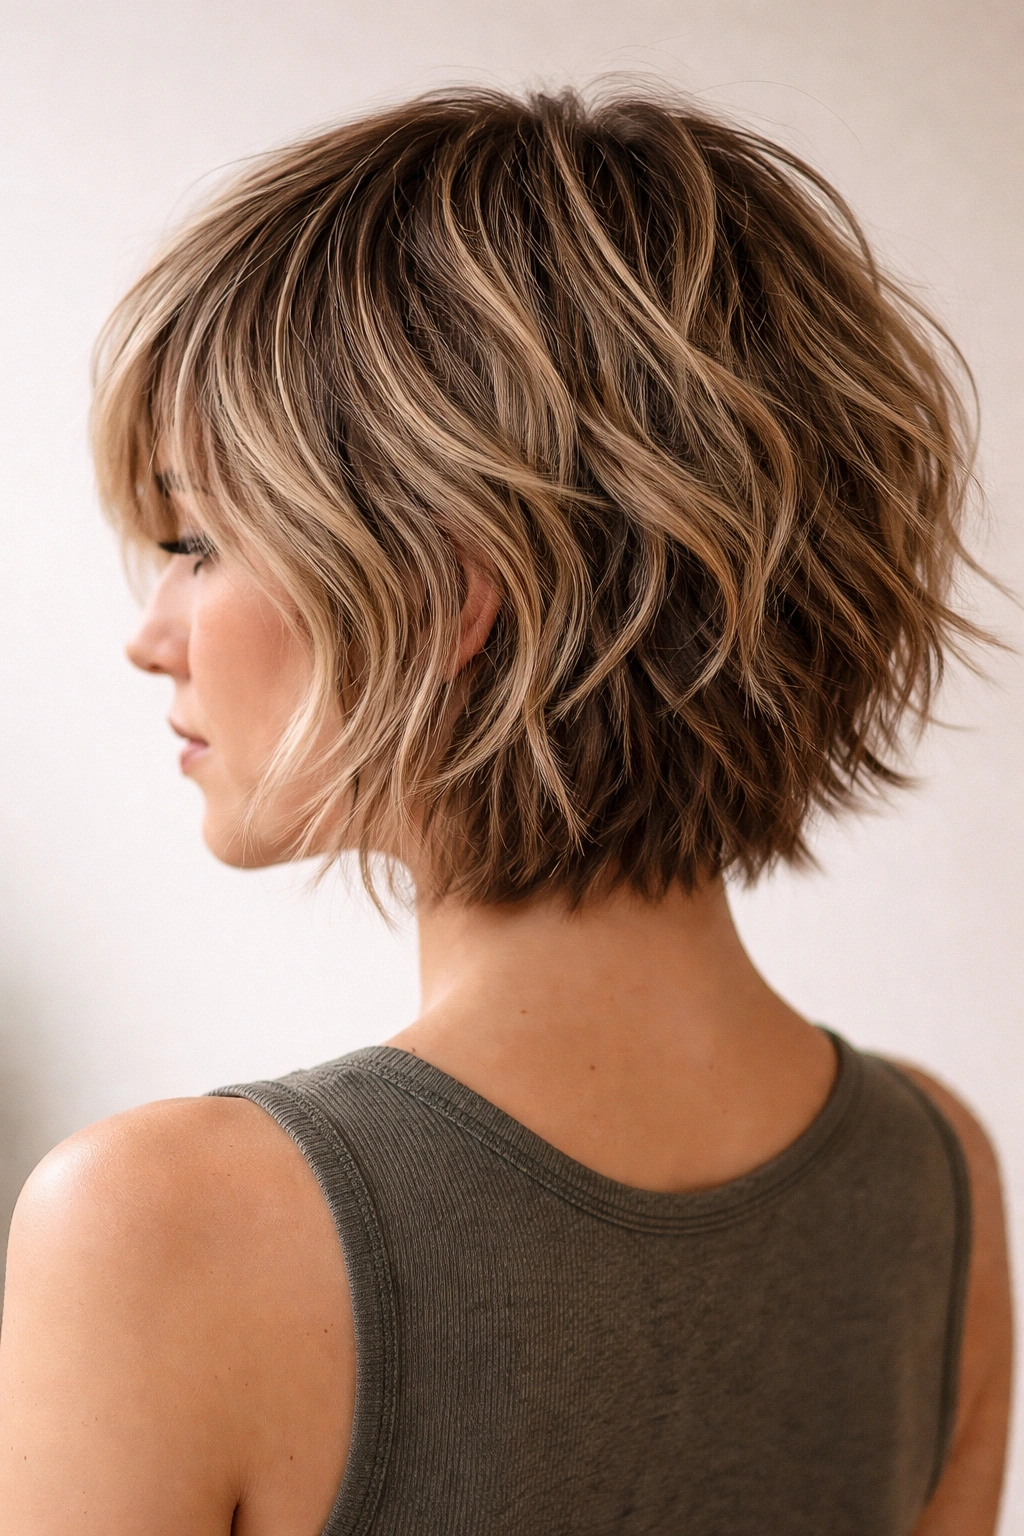
4. The Choppy Layered Bob with Waves
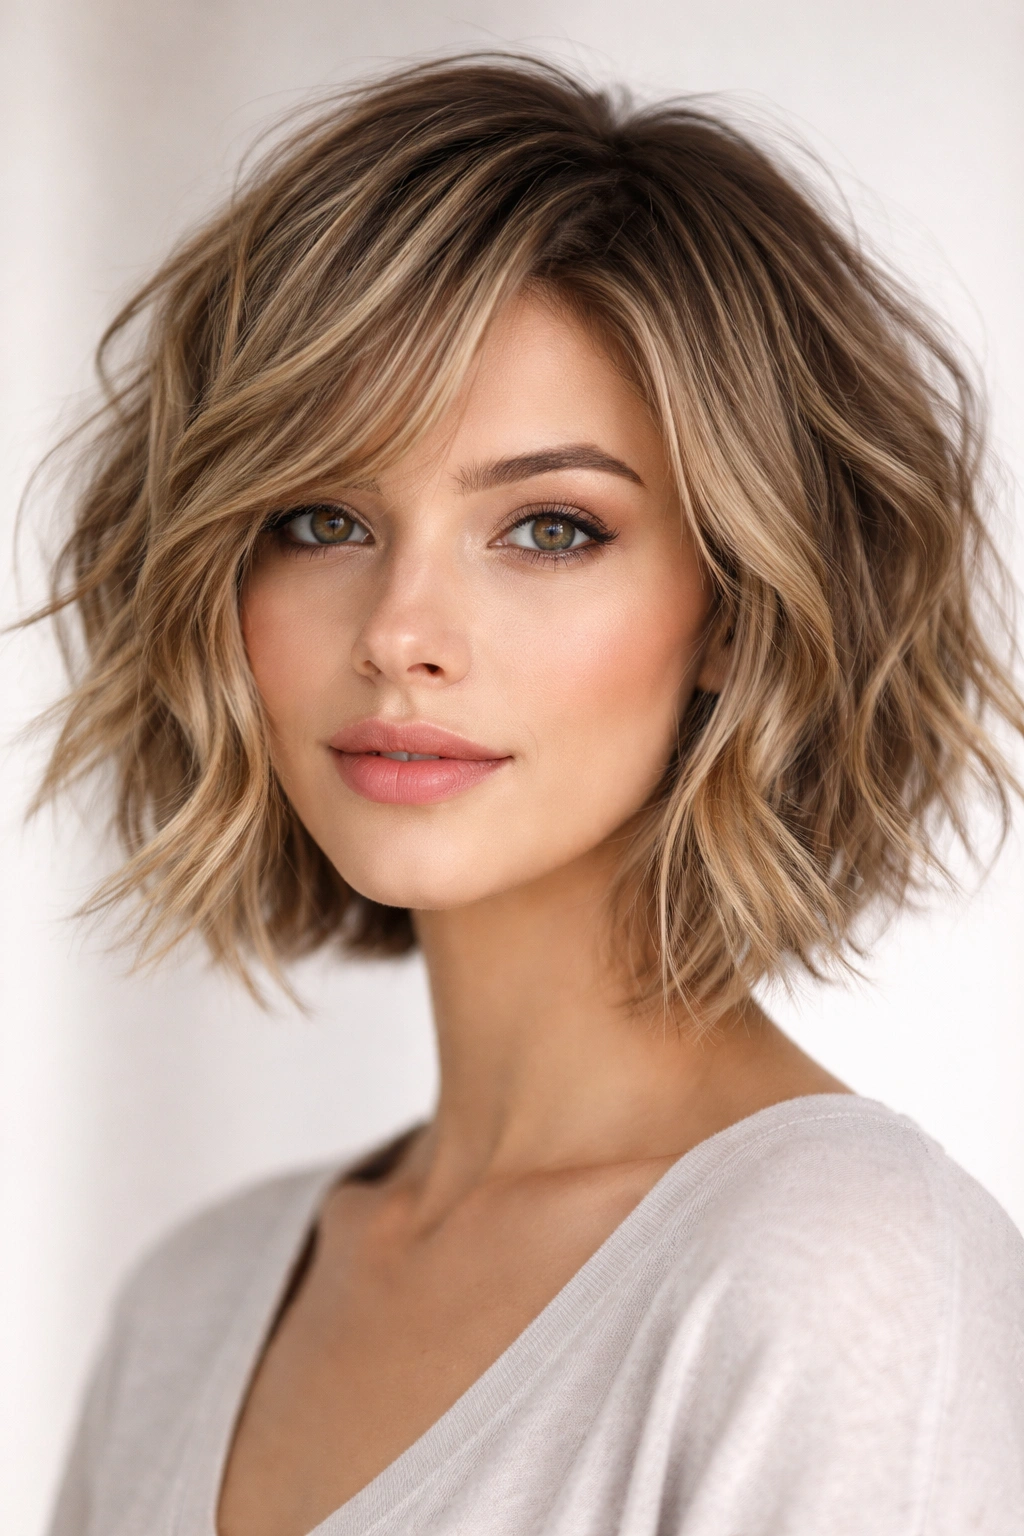
A choppy layered bob sits right at the chin or slightly above, featuring disconnected layers throughout that create built-in movement and texture. Unlike blunt bobs that sit flat and heavy, this interpretation breaks up the length into pieces that can flip, wave, and bend independently. The waves naturally interact with the layers to create depth and dimension.
How Layers Transform a Classic Bob
The traditional bob can look severe or flat, especially on wavy hair that fights against the line. Adding choppy, disconnected layers removes that severity while actually enhancing the wave pattern. Each layer catches light differently, and waves have space to form without pressing flat against your head. You get volume without bulk, shape without constraint.
Styling the Choppy Bob
- Base wave creation: Apply a curl-enhancing cream to damp hair before blow-drying, using a round brush to direct sections
- Layer separation: Finger-comb or use a wide-tooth comb to separate layers after drying, creating distinction between pieces
- Texture building: Sea salt spray applied to second-day hair adds grip and prevents the bob from looking too smooth
- Styling cream placement: Focus heavier-hold products on the back sections where weight might pull waves down, keeping the front lighter
Quick facts about choppy bobs:
- They work on most hair types, though thicker hair showcases the layering most dramatically
- Face-framing layers can be customized to highlight or soften your bone structure
- This style requires trims every 5-6 weeks to maintain the choppy, defined edges
- Waves that are too loose might need a light wave-enhancing product to read as intentional rather than undefined
5. The Tousled Pixie Bob Hybrid
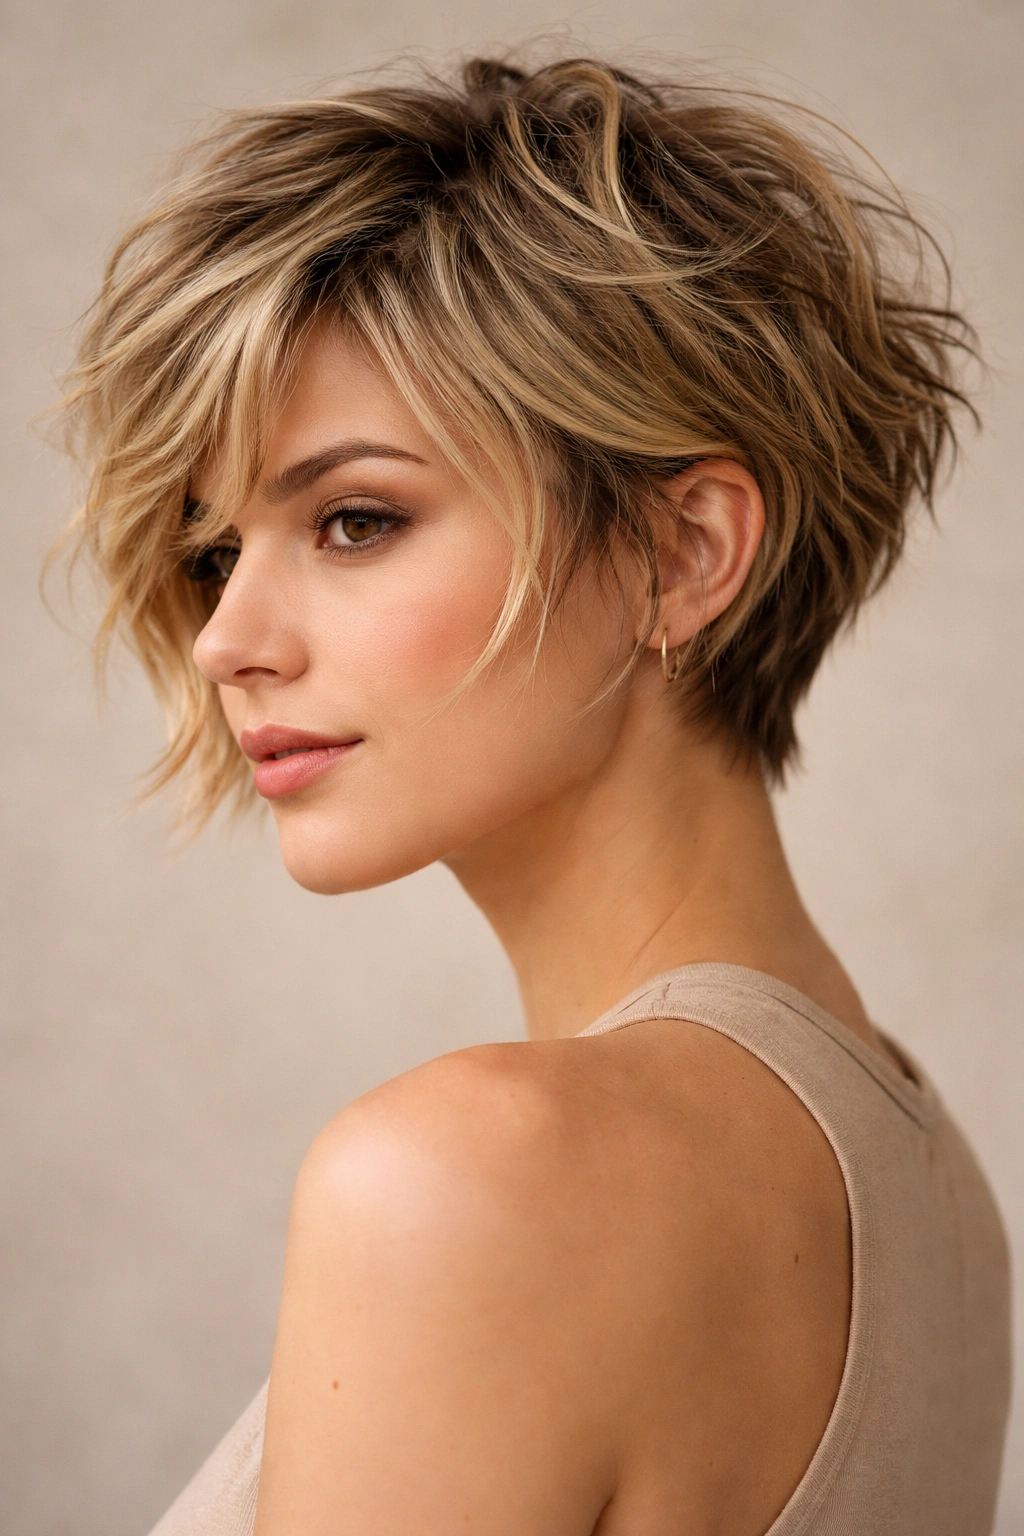
This style sits between a pixie and a bob—longer on top and in the front, shorter in the back, with pieces that seem almost randomly distributed. The length is short enough to be practical but long enough that you have multiple directions for waves to flow. The “hybrid” nature is what makes it so interesting; it doesn’t fit neatly into either category, which is precisely the point.
The Versatility of Hybrid Lengths
By mixing short and medium lengths throughout the cut, you create more opportunities for texture and movement. Hair in the front can flip forward or sweep sideways, the back can be tousled and textured, and the sides can taper down or flip out depending on how you style that day. No single shape dominates; the cut feels organic and ever-changing.
Styling This In-Between Length
- Flexible approach: This cut doesn’t demand a specific styling method—waves work whether you blow-dry, diffuse, or air-dry
- Directional styling: Use your hands to push longer pieces in different directions while hair is still damp to create the tousled effect
- Texture throughout: Apply sea salt spray to damp roots and ends, then scrunch gently as hair dries
- Minimalist products: A light styling cream or texture spray is usually sufficient; over-product can weigh down the hybrid structure
Pro tip: This cut looks phenomenal with slight color variation or highlights—the layers catch lighter pieces and create even more dimension.
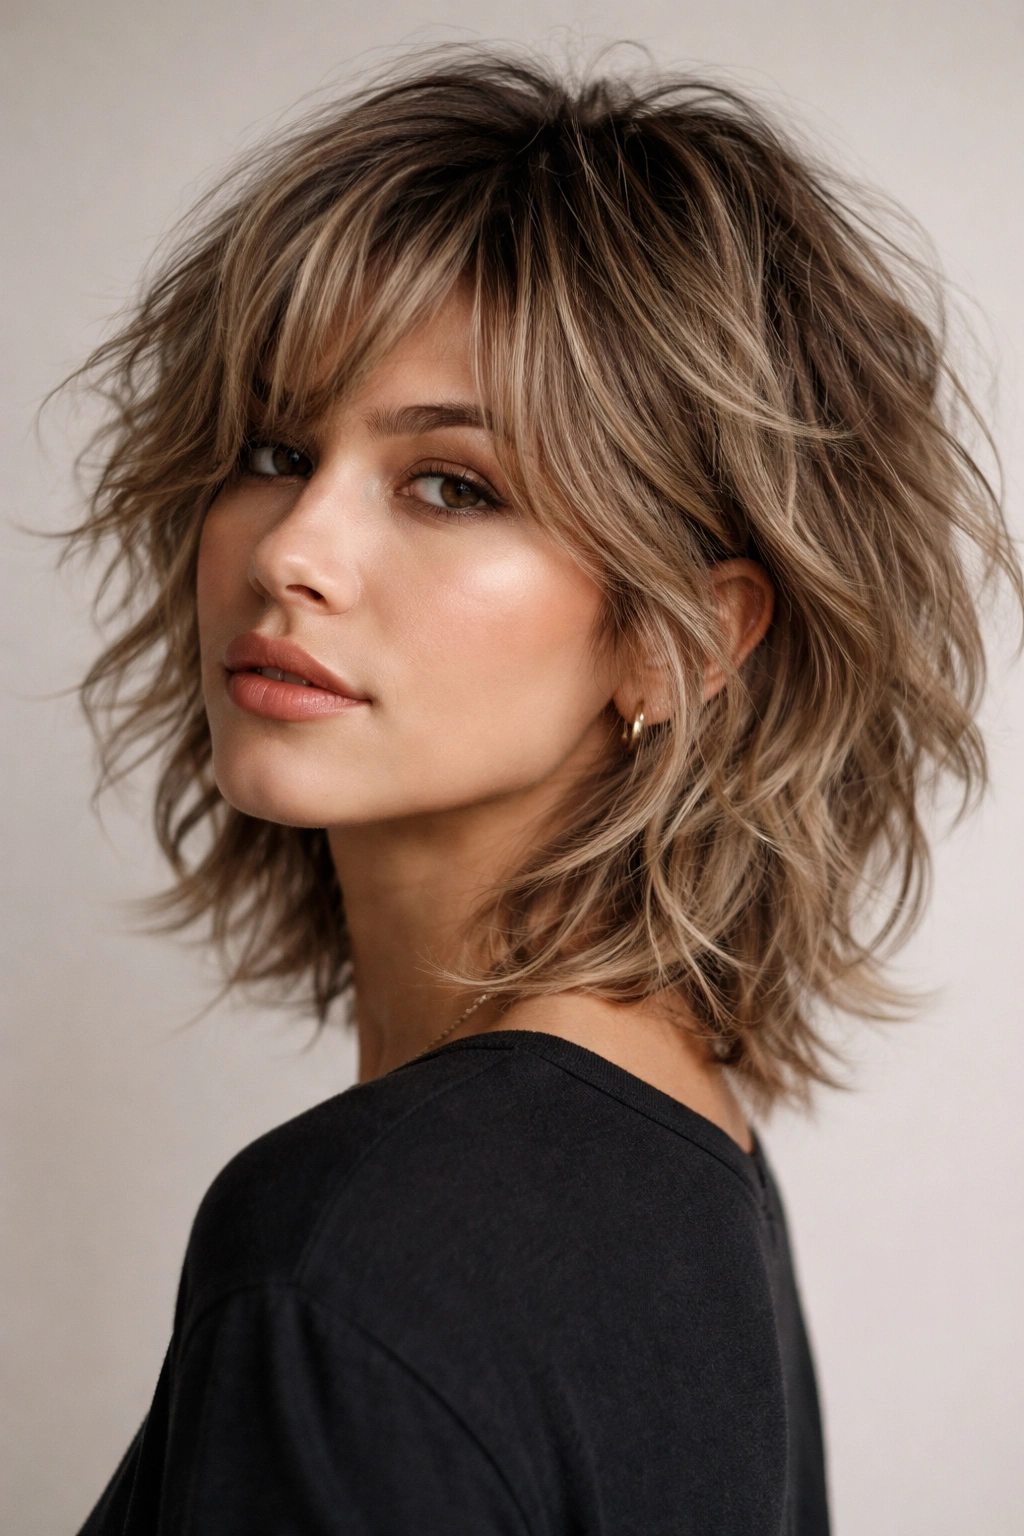
6. The Disconnected Shag with Heavy Texture
The disconnected shag takes the classic shag concept and leans into the messy, textured aesthetic with gusto. Heavy layering throughout creates individual pieces that don’t follow a single direction—some flip up, some flip down, some point outward. The cut is deliberately unstructured, with no attempt to create a smooth transition between layers.
Building Maximum Texture and Movement
This style is designed for people who love that undone-hair aesthetic and aren’t trying to appear polished. The intentionally choppy, piece-y quality reads as fashion-forward and cool rather than unkempt. Every hair is short enough that styling is genuinely fast, but the layers create so much visual interest that the cut never looks boring or undefined.
Maintenance and Daily Styling
- Fresh texture: Work texturizing spray through damp hair, scrunching sections upward as you work
- Blow-dry boost: Use a blow-dryer on low heat with fingers or a pick to encourage layers to separate and point in different directions
- Piece definition: A matte pomade or clay applied sparingly to the top layers adds separation and definition without stiffness
- Refresh spray: This style genuinely improves on day two when natural oils add grip—a texture spray extends that look another day
What to watch for: Very fine or very thin hair might look wispy with this much layering—consider a modified version with slightly less heavy texture.
7. The Wavy Butterfly Layers
Butterfly layers earned their name because they sit at specific points around the head, creating a shape that resembles wings in motion. In a short, wavy version, these layers flip and move even more dramatically since they’re not weighted down by length. The cut specifically targets face-framing sections and creates a stunning frame around your features.
Why Butterflies Suit Wavy Hair
The precise layer placement on a butterfly cut is designed to work with your hair’s texture, not against it. Waves naturally follow the layer lines, so the cut looks intentional and professionally designed. The face-framing effect is customizable—you can wear your hair tucked back and still have soft, flattering texture around your face.
Styling Strategy for Butterfly Layers
- Face-frame focus: Direct styling product and blow-drying attention toward the face-framing layers to ensure they have maximum movement
- Directional drying: Blow-dry your hair in multiple directions—backward, forward, and sideways—to let the butterfly layers fall naturally
- Texture emphasis: Apply mousse or wave-enhancing spray specifically to the lighter, face-framing pieces to boost their visibility
- Separation: Use a pick or your fingers to separate the frame pieces from the rest of your hair, making them distinct and dimensional
Quick facts about butterfly layers:
- They’re incredibly flattering for round faces, as they create height and angles
- This style works on virtually any hair type when properly executed
- The face-framing pieces grow out fairly quickly, so plan trims every 4-5 weeks
- Waves in the face-frame pieces actually get more pronounced as they grow slightly longer between trims
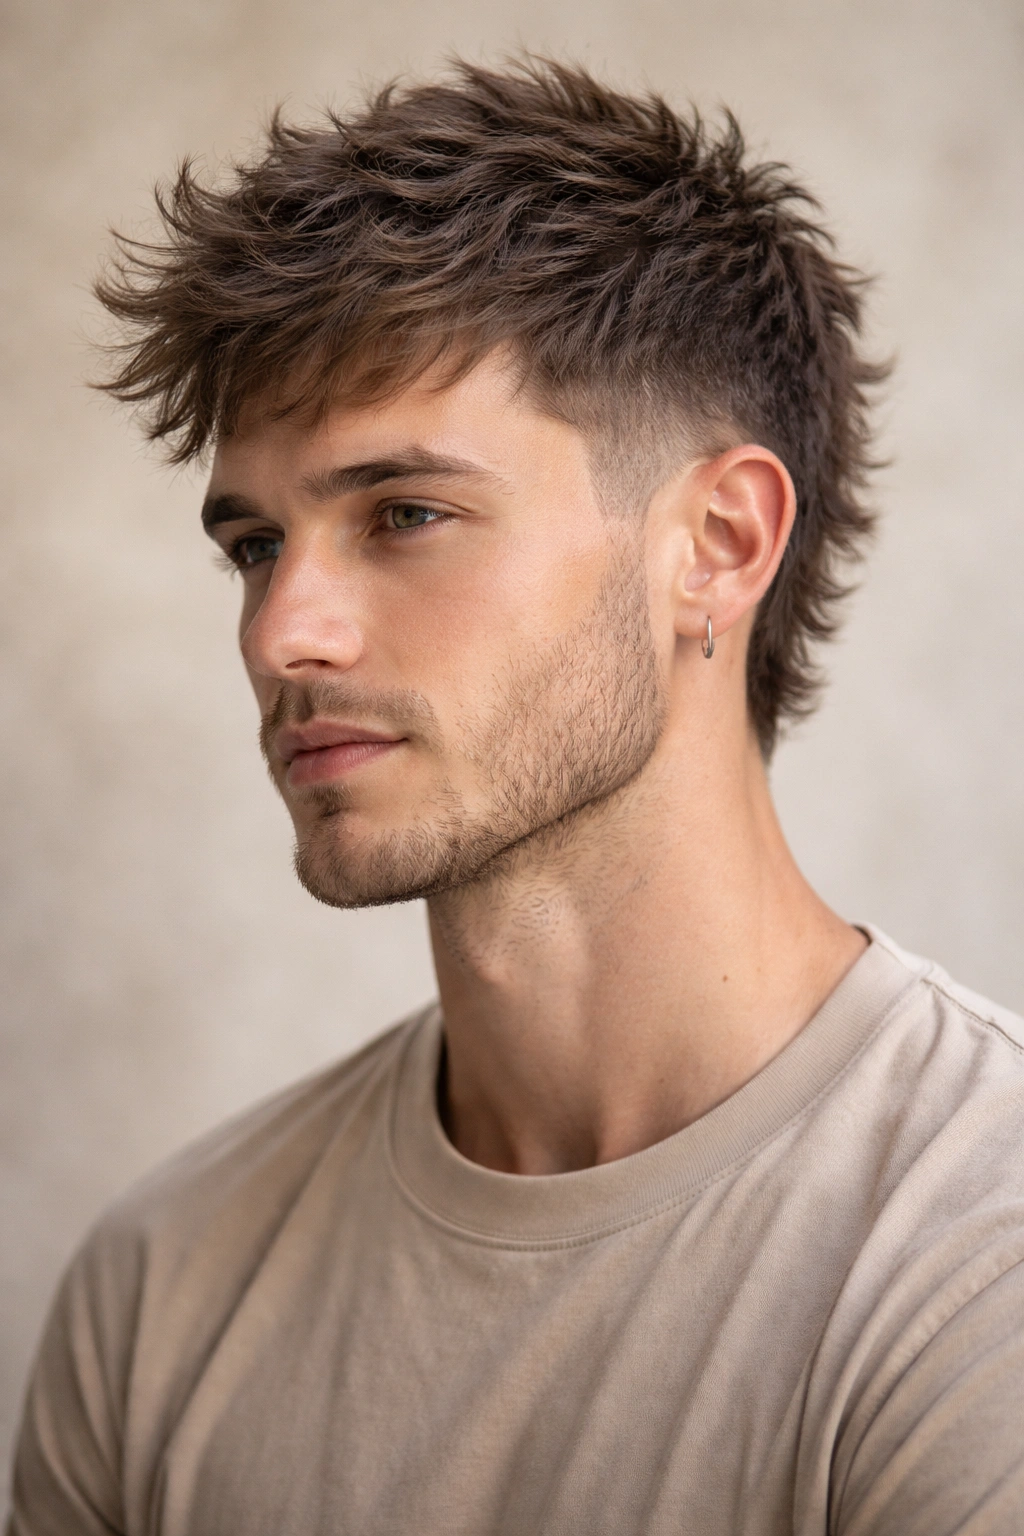
8. The Spiky Pixie Wave
For those who want serious edge and attitude, the spiky pixie wave delivers exactly that. This cut features very short sides and back—almost severe—with longer, choppy layers on top that can spike, wave, and point in multiple directions. The contrast between the clean, short sides and the textured, longer top is what makes this style so visually striking.
Creating the Spiky Aesthetic with Waves
Rather than using standard gel to create true spikes, the wave pattern creates natural points and texture throughout the top section. Your waves already have directional lift, so the cut is engineered to enhance that existing movement. It’s edgy without requiring aggressive styling products, which is a serious advantage if you prefer lightweight, breathable hair products.
Styling the Spiky Pixie Wave
- Product choice: A flexible matte pomade works better than shiny gel—it maintains the wave texture while adding definition
- Application method: Work the product through damp hair with your fingers, pushing sections upward and outward
- Blow-dry technique: Use a blow-dryer with a concentrator nozzle, directing heat upward and forward to encourage height and spike formation
- Refresh styling: On day two, a texture spray revives the spiked effect without needing to wash your hair
Worth knowing: This style has serious presence—it reads as bold and fashion-forward, which is great if that’s your aesthetic but worth considering if you prefer understated looks.
9. The Soft Tousled Fringe with Texture
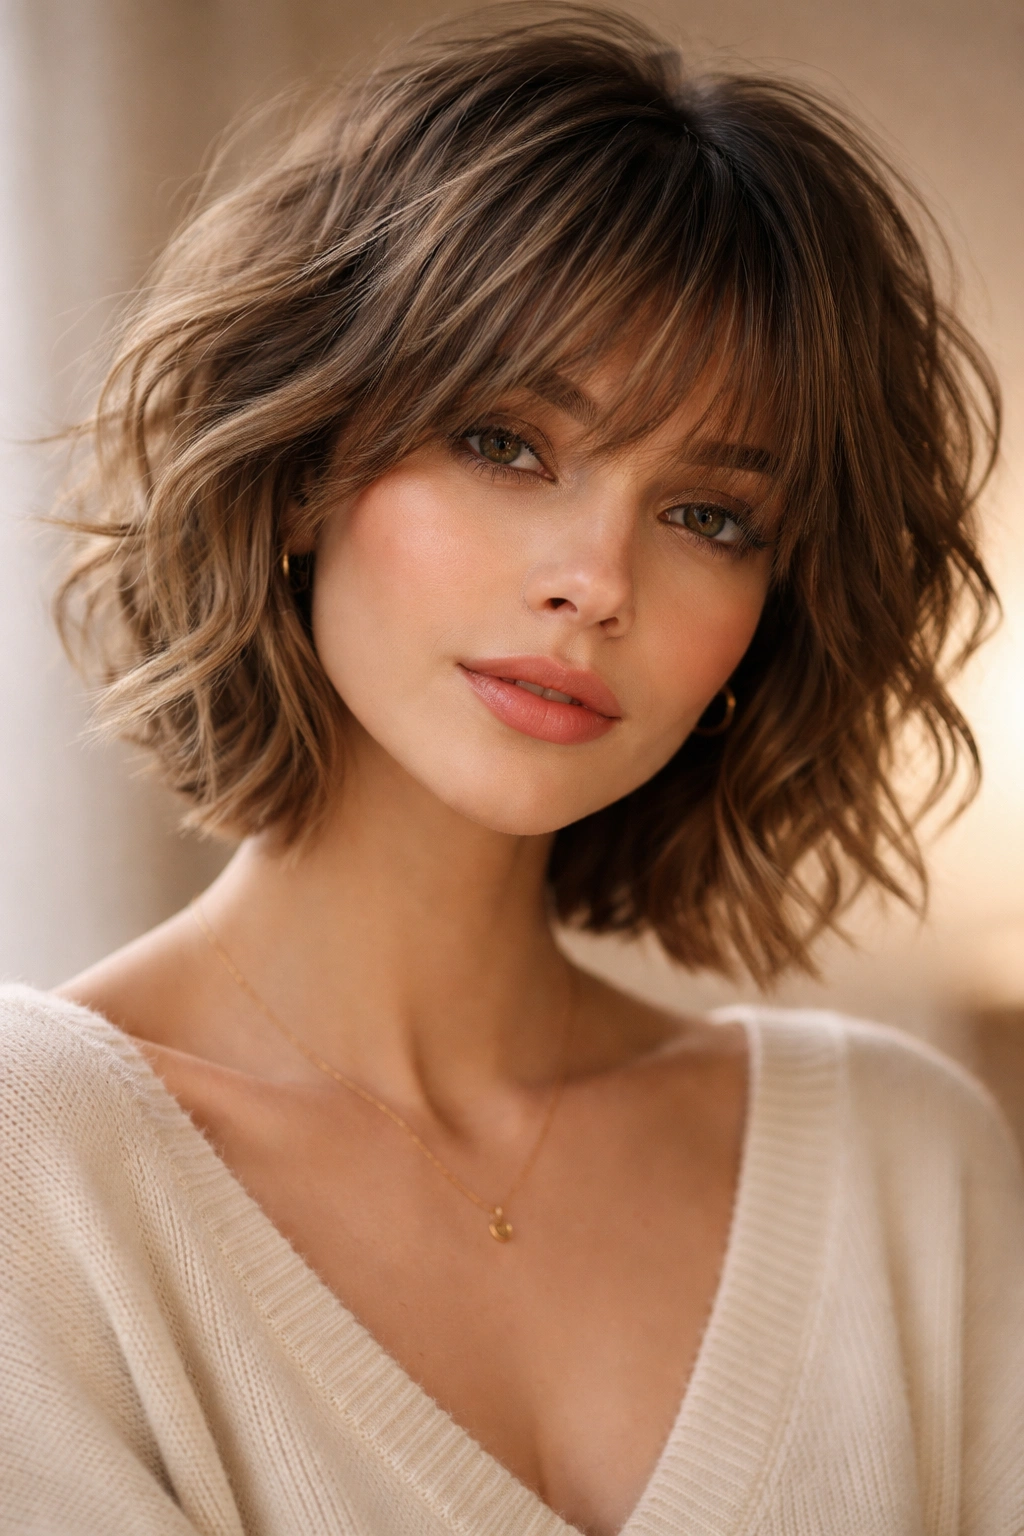
This style features soft, choppy layers throughout with particular emphasis on a face-framing fringe that sits somewhere between traditional bangs and longer face-frame pieces. The fringe can be styled multiple ways—tousled to the side, flipped upward, or even partially tucked behind your ear. The rest of the cut is textured and layered, creating movement that complements the fringe beautifully.
The Softness Factor
Unlike edgy, spiky pixies, this interpretation prioritizes softness and approachability. The layers are there, but they blend together rather than creating sharp separation. Waves soften everything further, creating a romantic, gentle aesthetic that still feels modern and intentional.
Fringe and Texture Styling
- Fringe direction: Blow-dry your fringe while pushing it slightly to the side for a tousled, undone look rather than straight-down severity
- Texture throughout: Apply mousse to damp roots before blow-drying to encourage waves to form throughout, including the fringe
- Soft separation: Use your fingers to gently separate pieces rather than a comb or pick—this keeps the texture soft rather than sharp
- Light products: A light styling cream or sea salt spray maintains the soft aesthetic without adding heaviness or crunch
Pro tip: This style actually looks better when it’s not perfectly styled—embrace the slightly messy texture rather than trying to make everything smooth and controlled.
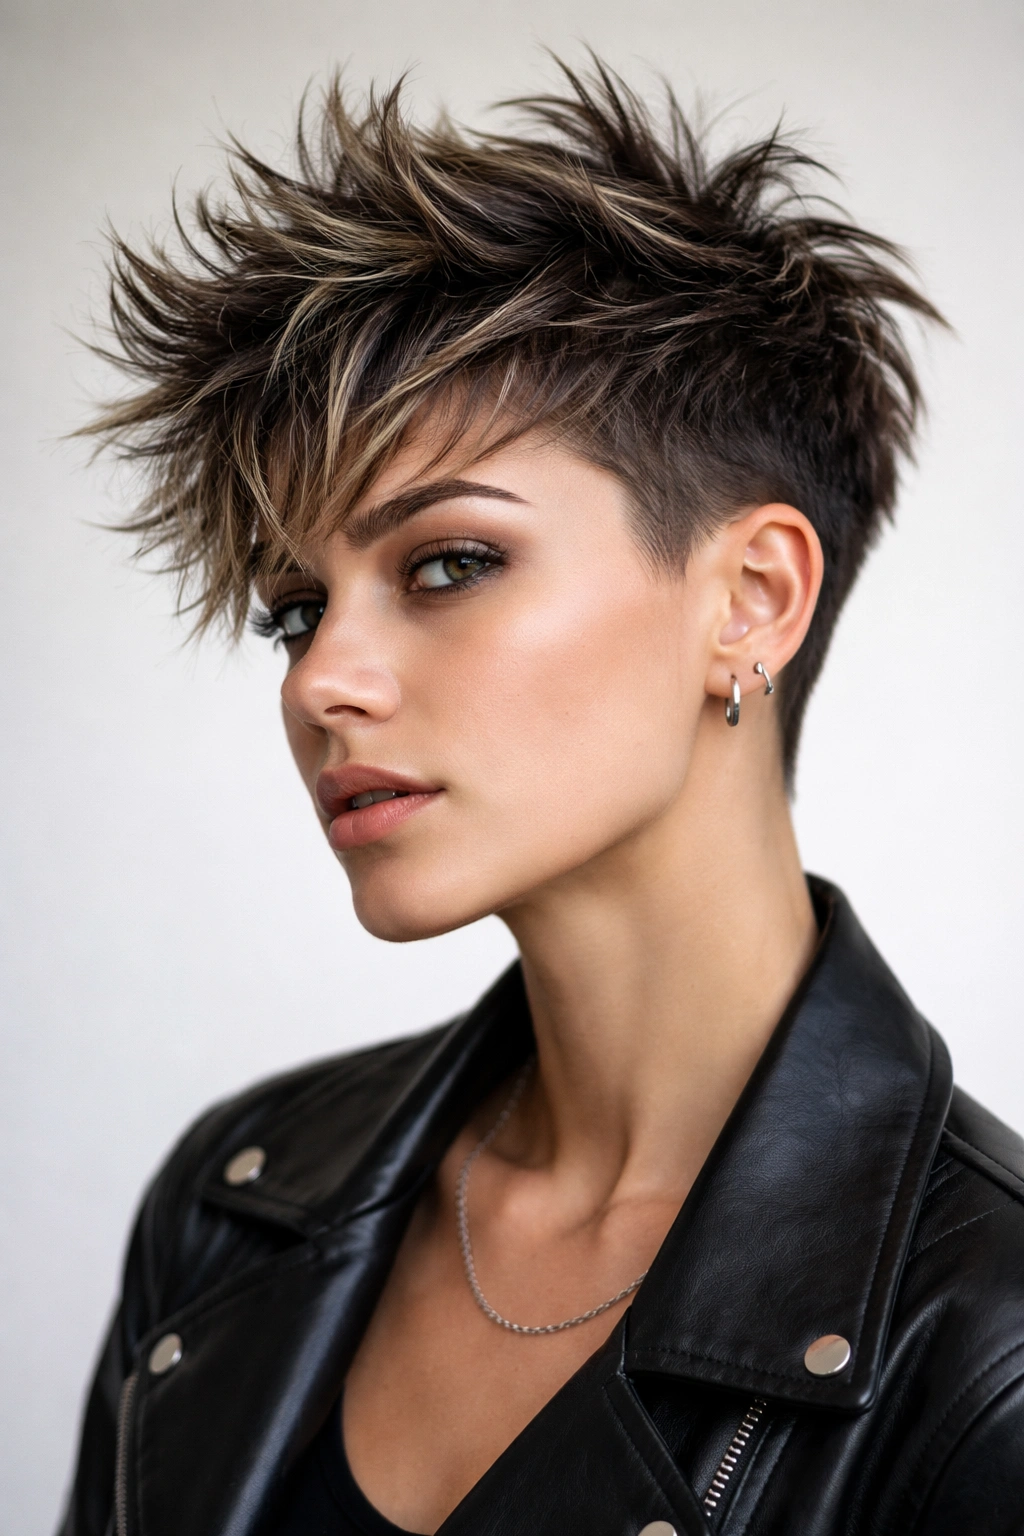
10. The Textured Undercut Wavy
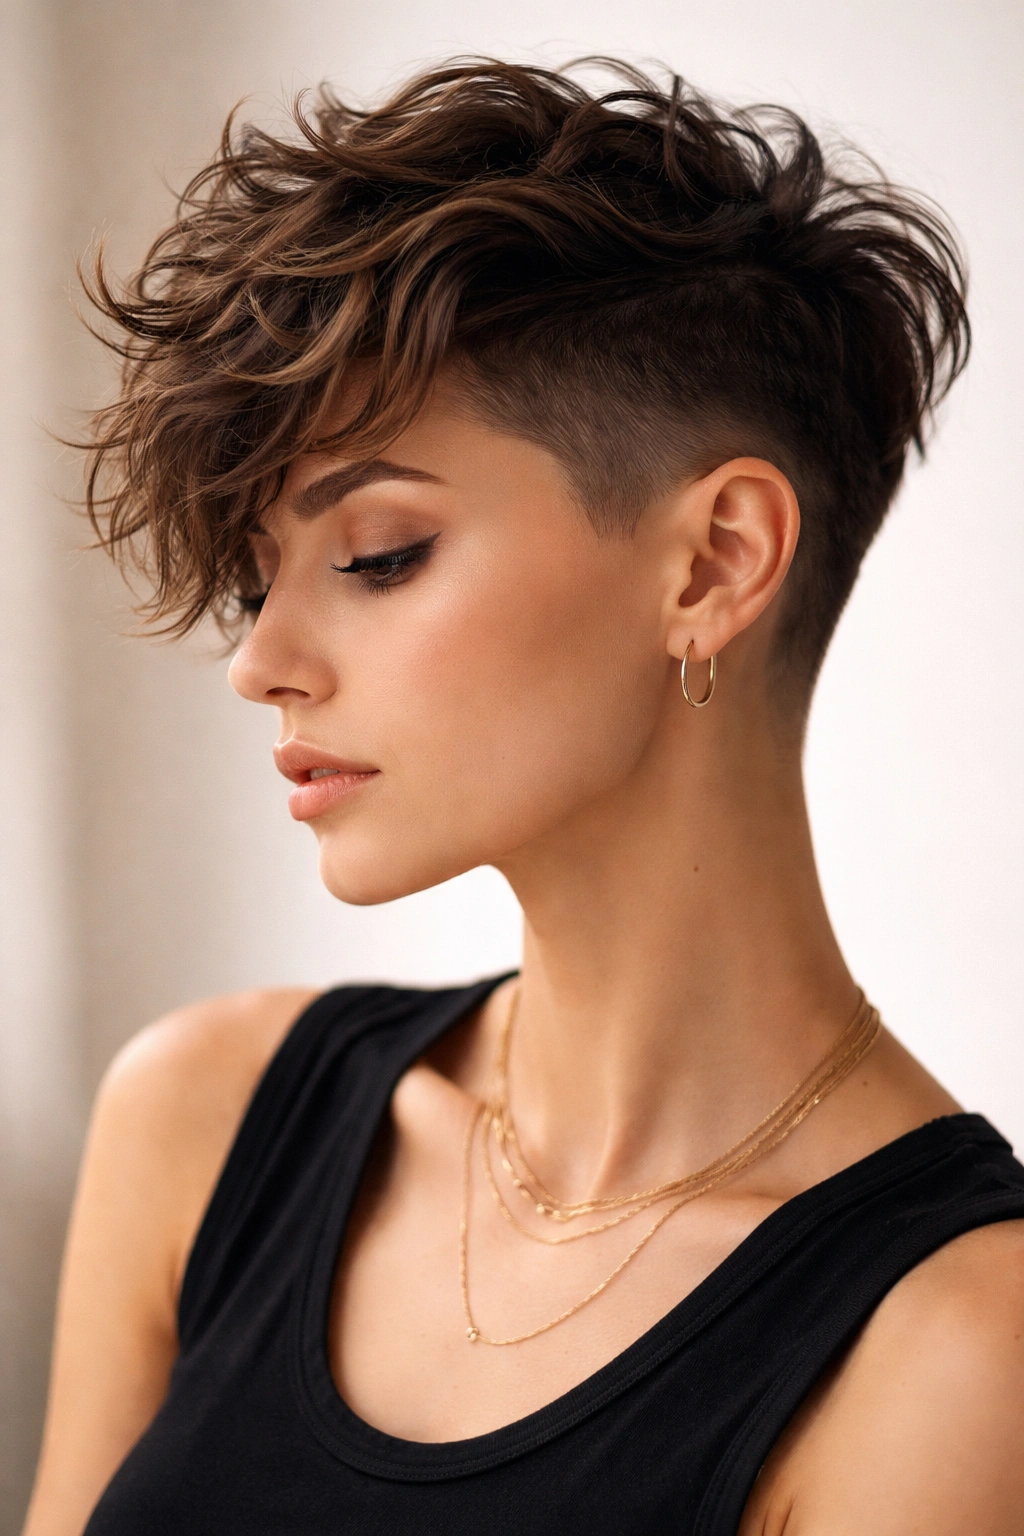
An undercut means the hair underneath (from the ears down and around the back) is cut much shorter than the hair on top, creating a hidden design when you wear your hair down and a dramatic reveal when you pull it up. With wavy hair, this creates unexpected dimension and the ability to show off an intentional design choice whenever you want. The top section features choppy, textured layers that sit on top of the shorter undercut.
The Duality of Undercut Styling
This style offers genuine versatility—wear it down for an everyday, relatively conservative look, or pull it up to show off the undercut design. The undercut itself can be a simple fade, a geometric shape, or even a small tattoo design if you’re feeling particularly bold. The wavy top layers frame and soften the undercut aesthetic.
Styling the Textured Undercut
- Down-day styling: Style the top layers normally with sea salt spray and a diffuser to create waves and texture
- Up-day styling: Pull the top section into a high pony or bun to fully reveal the undercut and create a completely different look
- Undercut maintenance: The undercut portion needs trims every 3-4 weeks to maintain the clean fade or design
- Top layer maintenance: The longer, textured top grows out faster and needs trims every 5-6 weeks
Quick facts about textured undercuts:
- This style requires a skilled stylist who understands how to blend the undercut with the longer top layers
- The undercut can make wavy hair appear fuller since weight is removed from underneath
- This look is genuinely transformative if you like changing your appearance without committing to a single style
11. The Beachy Wavy Crop
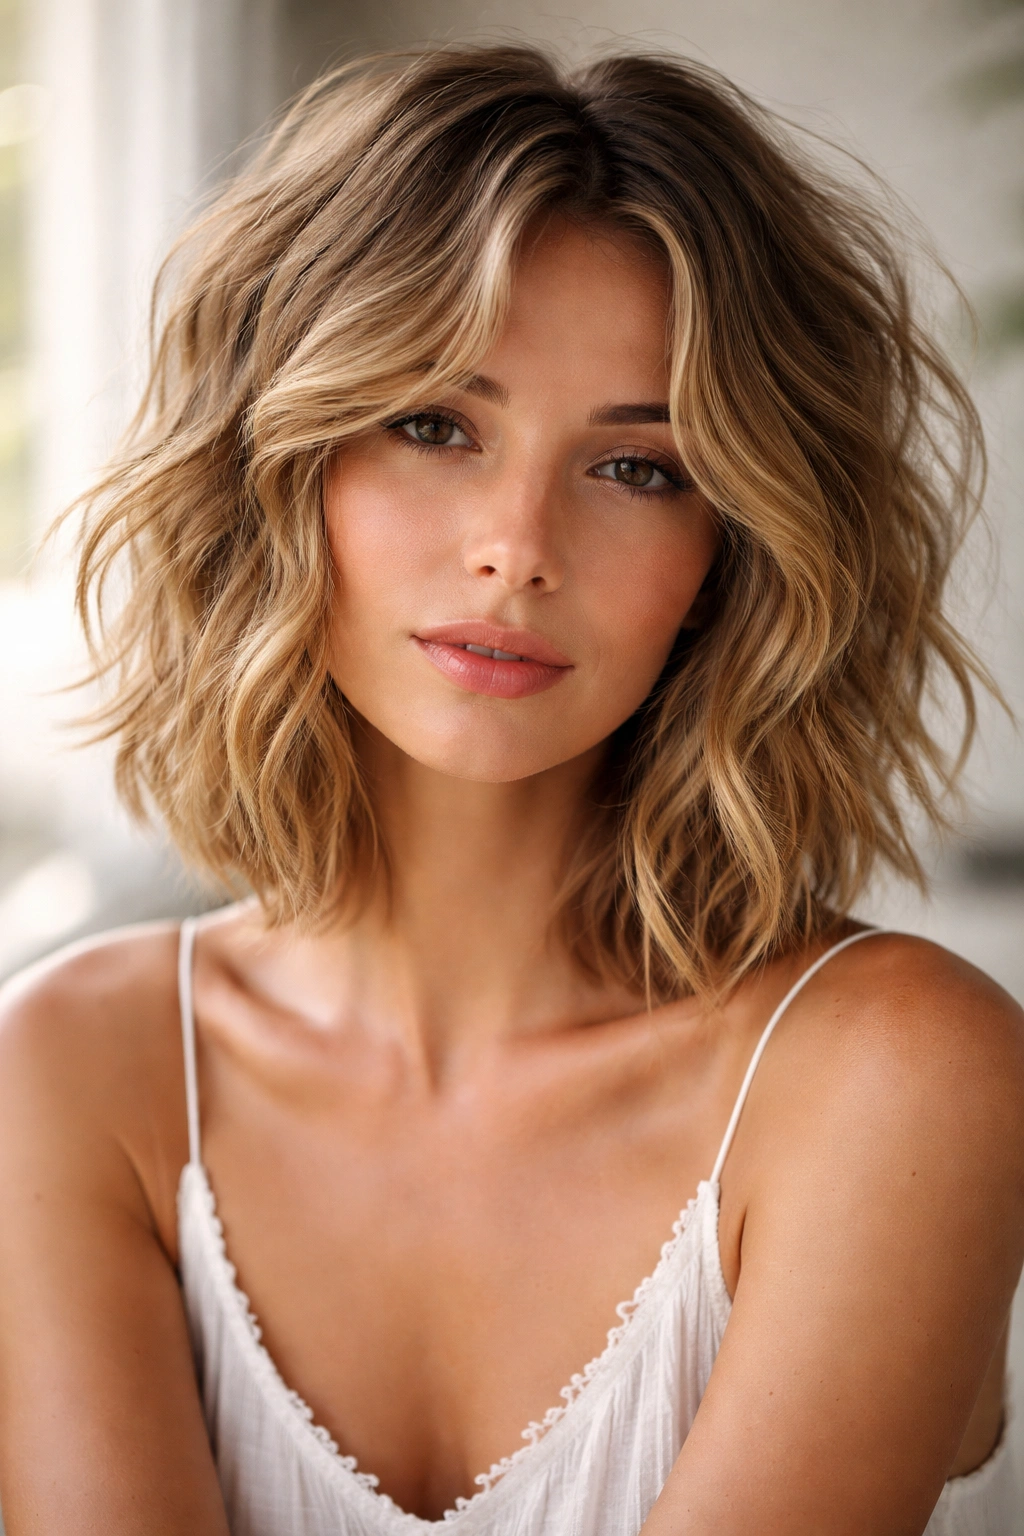
The beachy wavy crop aims for that “I just came from the beach and my hair dried perfectly” aesthetic, even if you live nowhere near the ocean. This cut features short length all around—nothing longer than collar-length—with choppy layers throughout that encourage waves to form naturally. It’s carefree, effortless, and practically designed for the messy look.
Capturing the Beach Aesthetic
The key to making this work is accepting that perfection is the opposite of the goal. Messy texture, slightly undefined edges, and waves that go in slightly different directions are exactly what you want. The styling approach is minimal; let your waves do the work rather than trying to control them.
Creating and Maintaining Beachy Waves
- Salt spray foundation: Apply sea salt spray to damp hair before blow-drying for that signature beachy texture
- Minimal blow-dry: Use a diffuser on low heat, scrunching sections as you dry rather than trying to direct each wave
- Air-dry flexibility: This cut actually works beautifully with air-drying—the layers dry at slightly different speeds, creating natural texture
- Refresh approach: A spray bottle of water and a bit of sea salt spray revives day-old beachy waves without restyling from scratch
Insider note: This style genuinely looks better when you’re not actively trying to style it perfectly—the more you fuss, the less beachy it becomes.
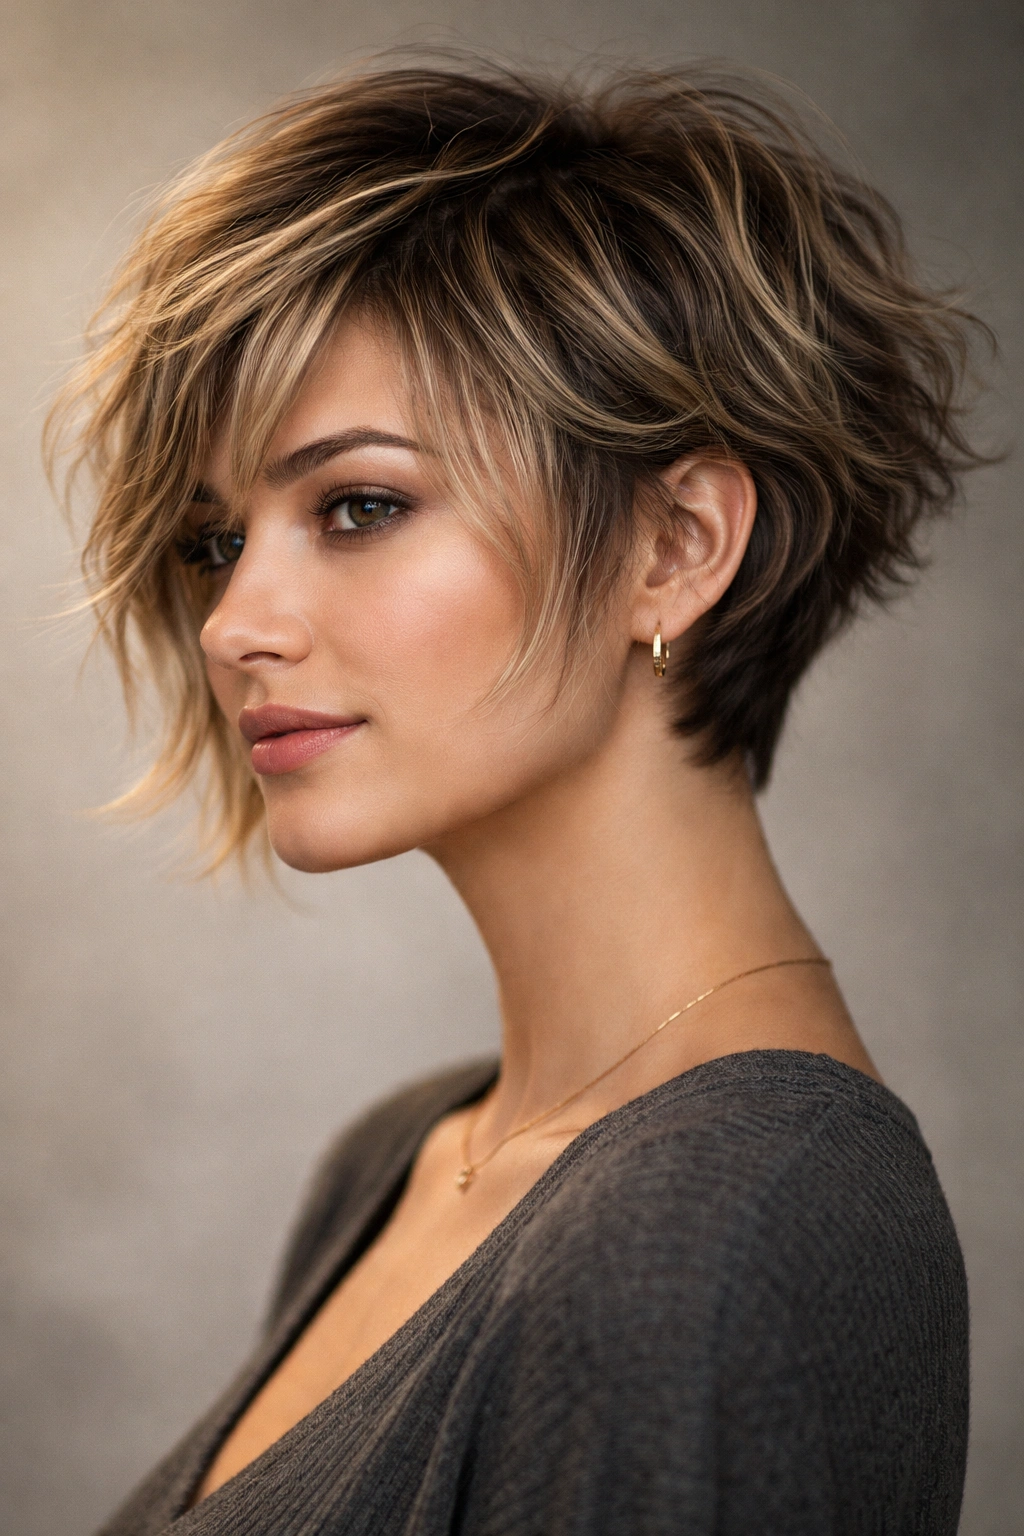
12. The Layered Crop with Face-Framing Waves
This interpretation focuses on a short, cropped length all around with particularly strategic layering that frames your face. The face-framing pieces are intentionally longer than other sections, creating soft waves that draw attention to your features. It’s structured enough to look intentional while remaining effortlessly textured.
Why Face-Framing Matters on Cropped Styles
A blunt crop can look severe, but face-framing layers soften the effect while actually drawing more attention to your face. The waves in those frame pieces add movement and dimension, making your features feel more approachable. You get the low-maintenance benefit of a crop with the flattering, softening effect of longer face-frame pieces.
Styling Cropped Face-Frames
- Frame-first approach: Apply styling products specifically to the face-framing pieces first, ensuring they have maximum movement and definition
- Directional blow-dry: Blow-dry the frame pieces slightly forward and to the sides, allowing natural waves to enhance the framing effect
- Texture emphasis: Sea salt spray applied to damp face-frames adds grip and ensures they maintain their shape throughout the day
- Separation technique: Use a pick or wide-tooth comb to gently separate the frame pieces from the rest of the crop, maintaining definition
Quick facts about cropped face-frames:
- This style is incredibly flattering for most face shapes, particularly square or angular faces
- The face-frame pieces can be customized during cuts to create specific effects—shorter for less dramatic framing, longer for more impact
- Maintenance is relatively easy since the crop itself needs minimal styling; the frame pieces are where effort concentrates
13. The Asymmetrical Wavy Lob
While technically “lob” suggests longer-than-shoulder length, a wavy lob-inspired crop sits right around chin-length with an asymmetrical cut that’s longer on one side and shorter on the other. The length variation creates movement and dimension, while layers throughout provide texture and wave enhancement. This is the perfect style for someone who wants short hair but feels nervous about losing length entirely.
Why Asymmetry Enhances Wavy Texture
An asymmetrical cut creates natural imbalance that actually looks more interesting and modern than symmetrical cuts. Waves flow differently on each side of your head, creating visual interest and movement that a symmetrical cut can’t quite achieve. The length variation gives you styling flexibility—you can sweep longer pieces one direction one day, another direction the next.
Asymmetrical Wavy Styling
- Side placement: Determine which side you prefer longer and style that side to showcase the length and wave pattern
- Texture building: Apply mousse or wave-enhancing spray to both sides, but emphasize the longer side to maximize movement there
- Directional styling: Blow-dry your longer side slightly forward or across to showcase the asymmetry, shorter side slightly back
- Piece separation: Use your fingers to gently separate the longer pieces, creating dimension and preventing them from lying flat
Pro tip: Asymmetrical cuts photograph beautifully because the length variation creates interesting angles in photos—this style is particularly flattering on camera.
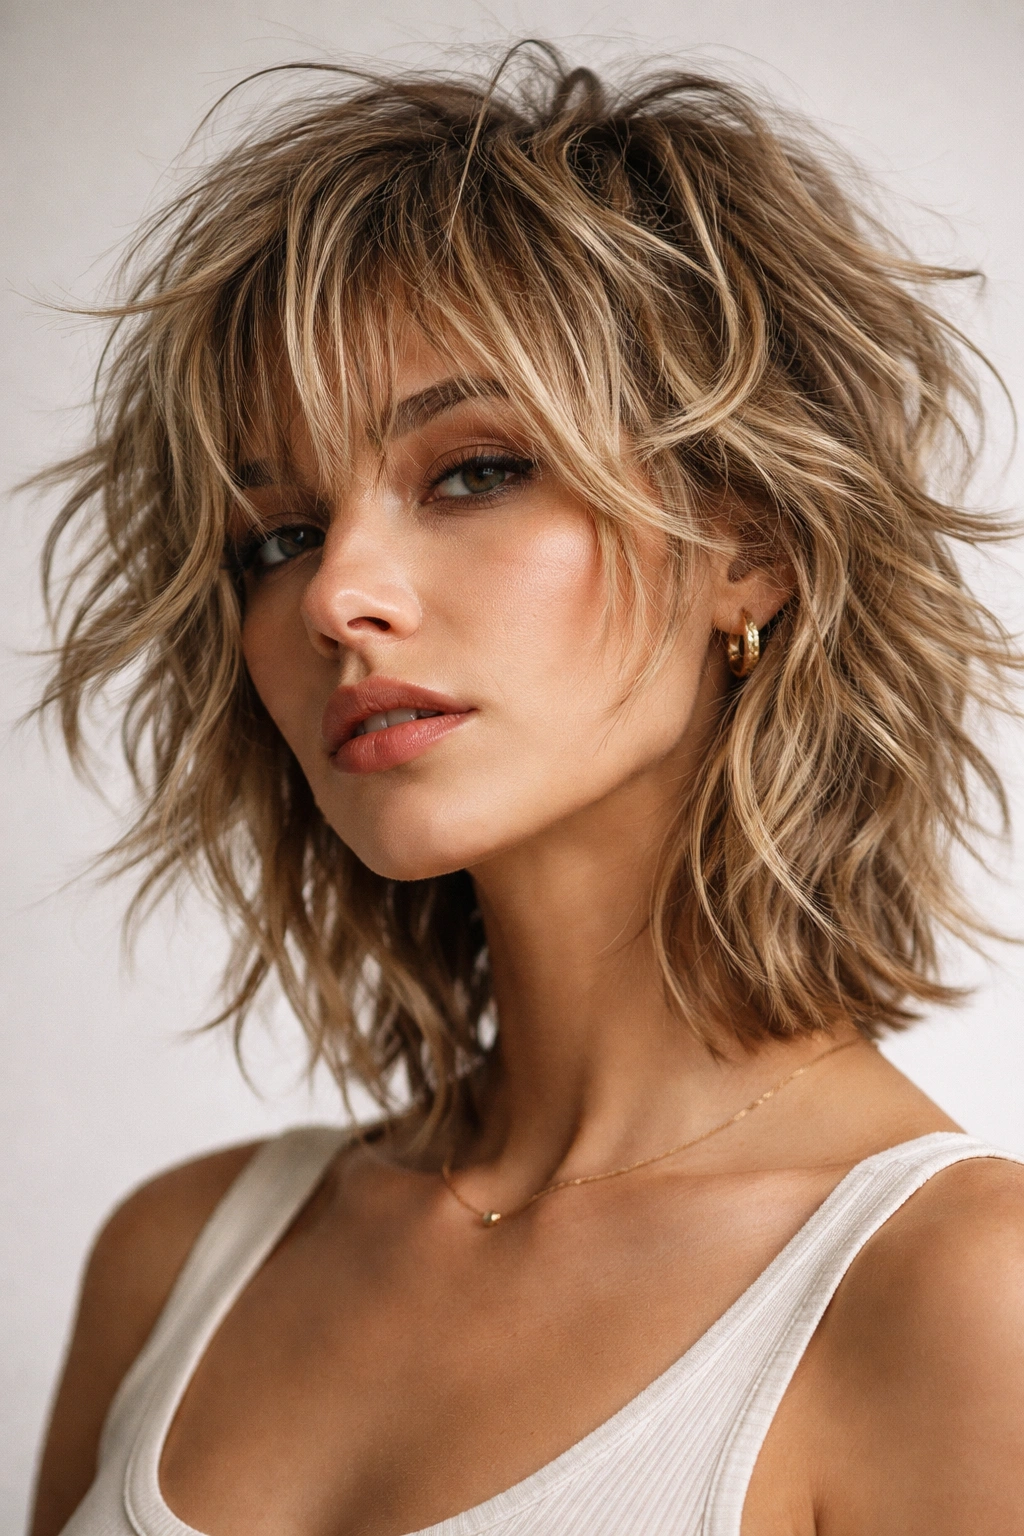
14. The Tousled Textured Shag with Long Fringe
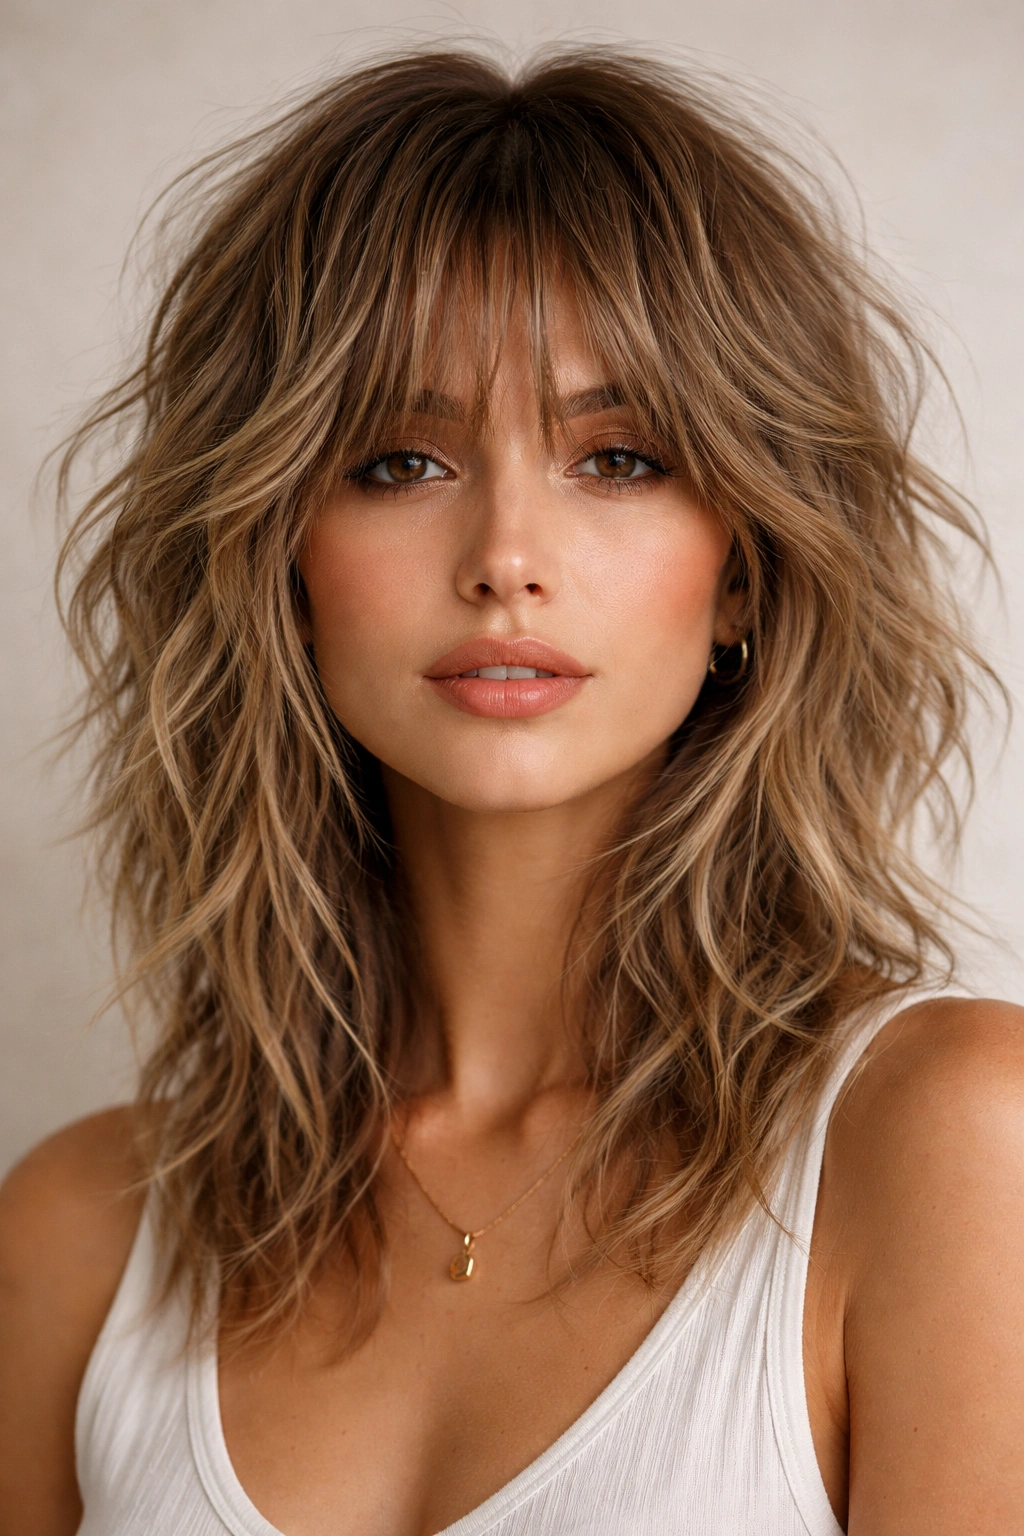
This interpretation features heavy layering throughout with a longer, choppy fringe that sits around eye level or slightly below. The fringe is specifically textured rather than blunt, creating multiple layers that can tousle and wave independently. The overall effect is that your hair has multiple focal points rather than a single line of focus.
Fringe as a Textural Element
A traditional blunt fringe can dominate a look, but a tousled, textured fringe becomes just one element of a fuller textured style. The waves in the fringe itself add dimension and softness, while the longer length gives you options for styling—wear it down for maximum impact, tuck it slightly behind your ears for a softer effect, or tousle it forward for peak messiness.
Fringe and Texture Styling Strategy
- Fringe wave creation: Apply curl-enhancing spray to damp fringe and dry it with your fingers to encourage waves rather than straight sections
- Fringe direction: Style your fringe to complement your face shape—sweep it to the side for angular faces, keep it more centered for rounder faces
- Overall texture: Apply mousse to roots and sea salt spray throughout before blow-drying to maximize waves and texture
- Fringe integration: Make sure your fringe waves coordinate with the rest of your hair’s waves for cohesive movement
Worth knowing: This style requires more styling attention than a simple fringe because the textured fringe can become frizzy or undefined if you’re not consistent with product and technique.
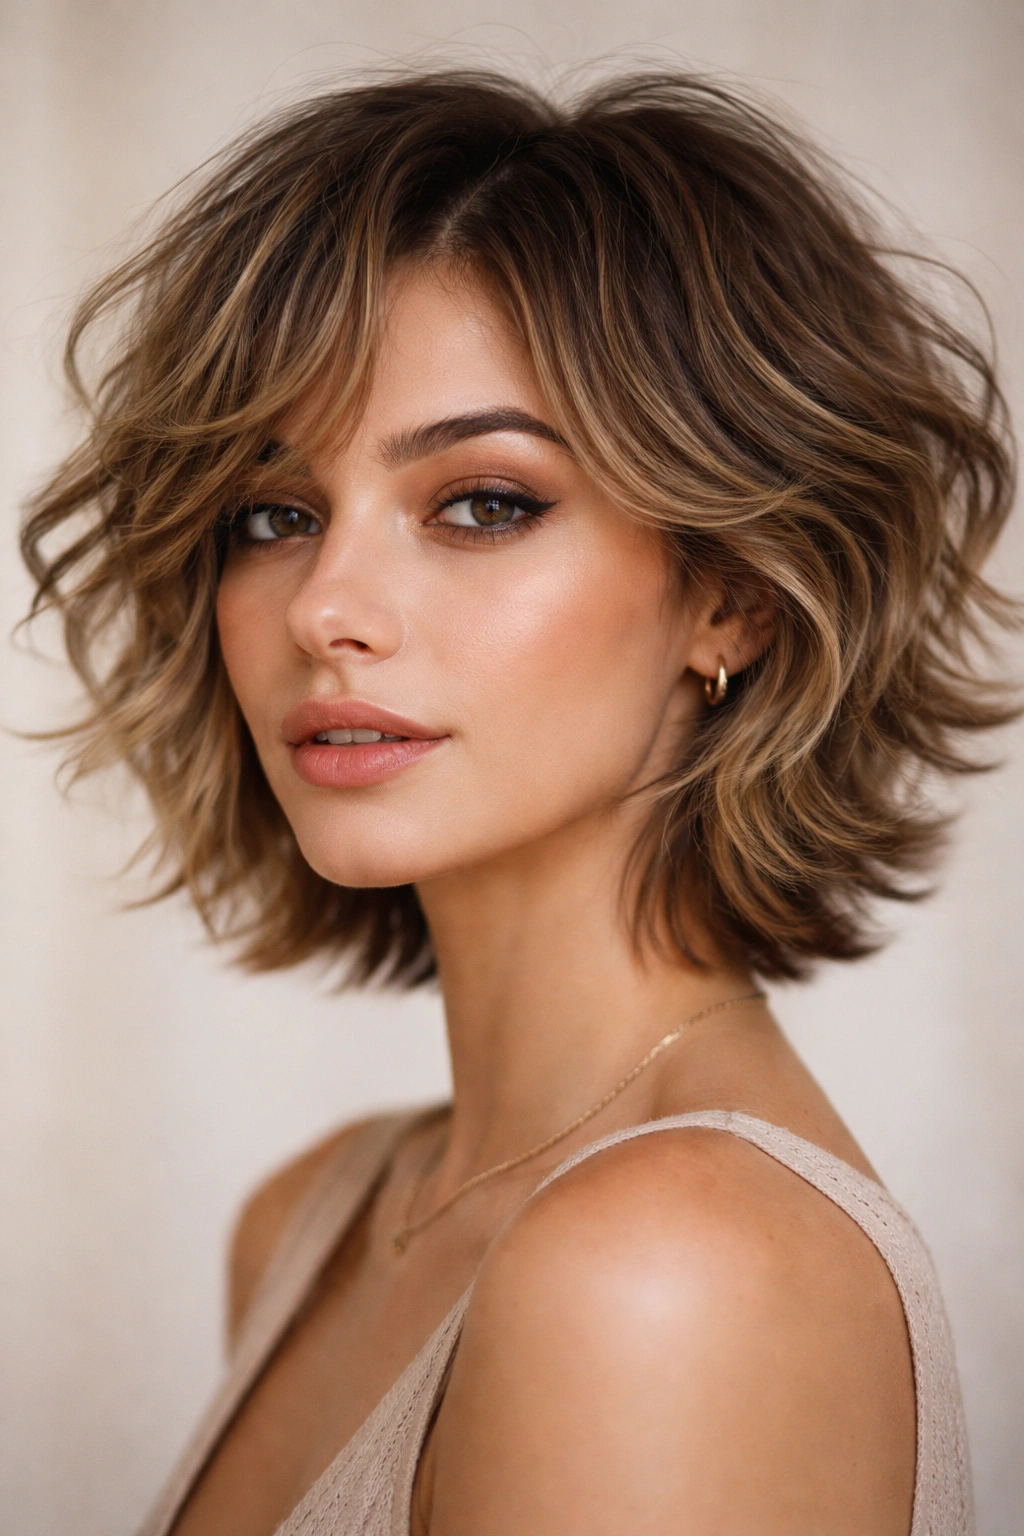
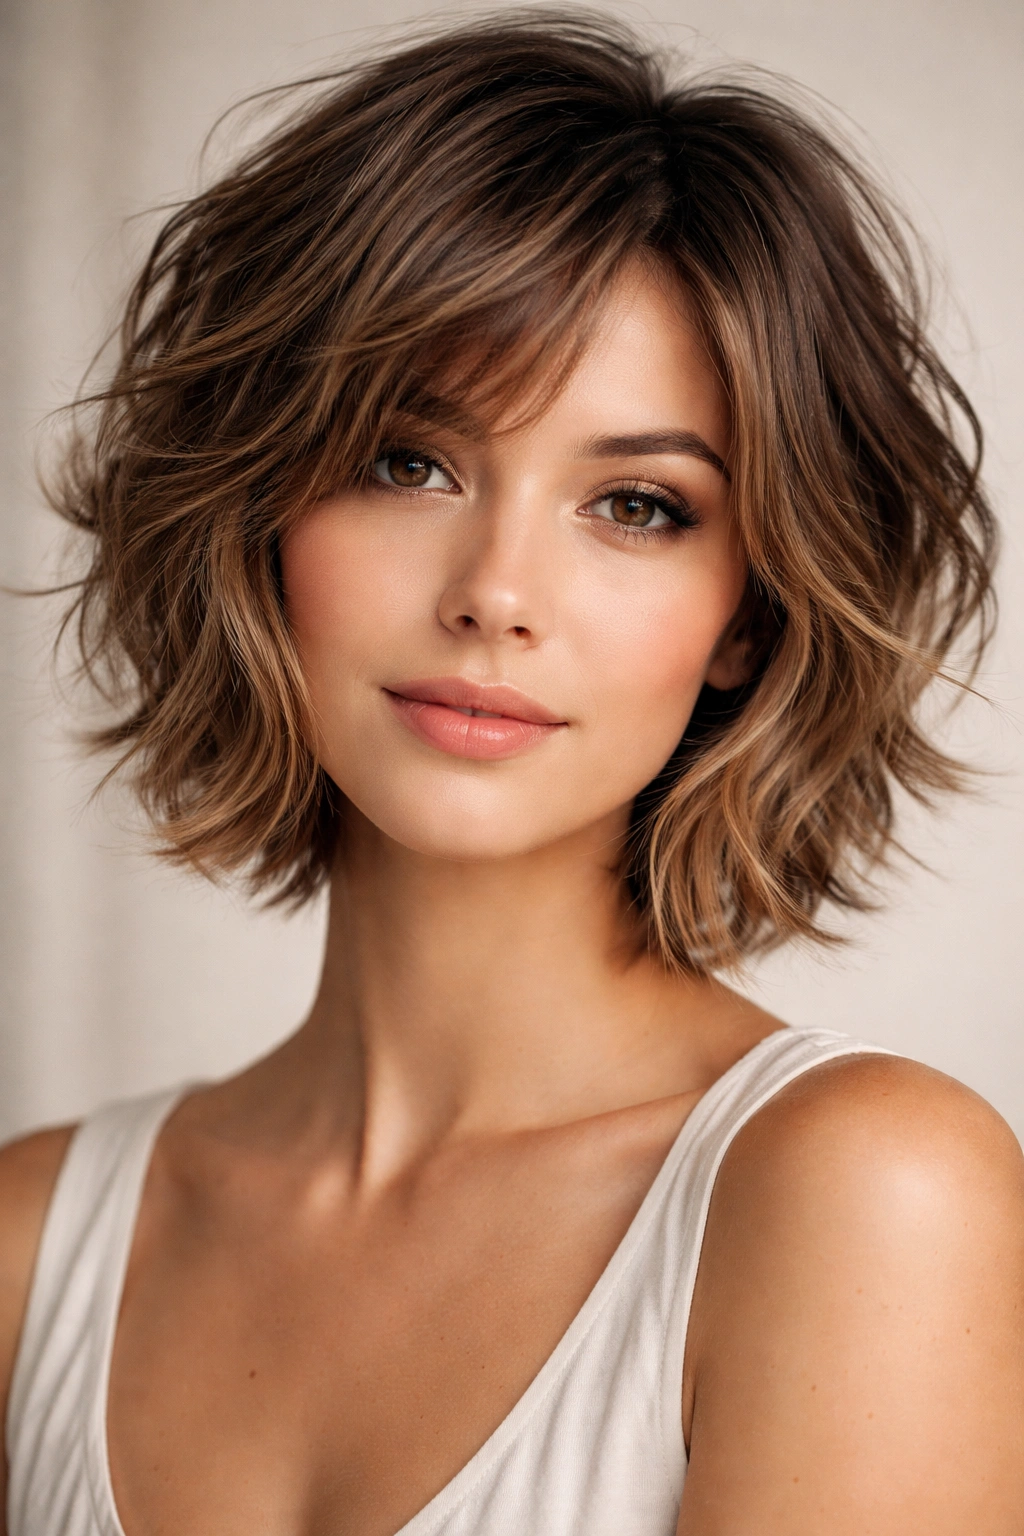
15. The Choppy Bob with Textured Layers and Depth
This style is a more textured, layered interpretation of the classic bob, sitting roughly chin-length with choppy, disconnected layers throughout. Unlike a standard choppy bob, this version emphasizes maximum texture and dimension, with pieces that truly seem to move independently. The layers are deliberate and pronounced rather than subtle.
Maximizing Depth in a Bob
While traditional bobs can appear flat, emphasizing choppy layers and texture creates significant depth and visual interest. Each layer catches light differently, waves have space to form and move, and the overall effect is far more dynamic than a standard bob shape. You get the practicality of a bob with the movement and personality of a much longer style.
Styling the Heavily Textured Bob
- Blow-dry foundation: Use a blow-dryer with a diffuser attachment, scrunching upward as you dry to encourage maximum wave formation
- Layer emphasis: After blow-drying, use your fingers to separate and define the choppy layers, pulling them away from your head to maximize dimension
- Texture spray placement: Apply texture spray throughout but concentrate on mid-lengths and ends where layers are most pronounced
- Styling cream layering: A light-hold styling cream applied to the top layers maintains separation without weighing down the waves
Quick facts about deeply textured bobs:
- This style works beautifully on all hair types but is particularly stunning on naturally wavy or curly hair
- The choppy layers mean this style requires trims every 5-6 weeks to maintain definition—more than a blunt bob
- Waves actually look more pronounced in this style than in longer cuts because the shorter length concentrates texture in visible areas
16. The Feathered Pixie Wave
A feathered pixie takes the spiky, short edges of a pixie and softens them with feathering—a technique where layers are cut at angles so they taper and blend rather than create blunt ends. The result is a pixie that looks soft and feathered rather than severe and sharp, with waves naturally following the feathered lines.
The Difference Feathering Makes
Feathering is the styling magic that transforms a pixie from edgy to approachable. Rather than creating distinct, separate pieces, feathering blends layers so they flow from one to the next. Waves actually enhance this effect, creating softness throughout while maintaining the short, practical length.
Styling the Feathered Pixie
- Product application: Work a light matte pomade or styling cream through damp hair, pushing sections in the direction of the feather lines
- Blow-dry technique: Use a concentrator nozzle on medium heat, directing the dryer to follow the feather direction rather than fighting it
- Texture emphasis: Apply sea salt spray to damp hair to enhance the feathered texture and encourage waves
- Separation approach: Use your fingers rather than a comb—this maintains the soft, feathered quality rather than creating sharp separation
Pro tip: Feathered pixies actually work well on most hair types because the technique is about cut direction rather than styling technique.
17. The Shaggy Textured Bob Hybrid
This style sits between a traditional shag and a textured bob, featuring layers throughout with particular emphasis on shorter pieces on top and slightly longer, shaggier pieces in the back. It’s not quite a shag because the sides are more controlled, and it’s not quite a bob because the texture is more aggressive and piece-y throughout.
The Hybrid Approach to Short Wavy Styles
By combining elements from multiple classic cuts, you create something that’s greater than the sum of its parts. This style gets the face-framing softness of a shag with the practicality and modern edge of a textured bob. The hybrid nature means you’re not locked into a single aesthetic—styling direction changes which classic cut it reads as.
Hybrid Bob-Shag Styling
- Flexible approach: This cut works with multiple styling methods—you can diffuse for maximum texture or blow-dry for more control
- Top layer texture: Focus product and styling attention on the top layers where shorter pieces create maximum impact
- Shag movement: Let the back, shaggier pieces move and flip naturally rather than controlling them too much
- Integrated styling: Rather than styling each element separately, treat the whole head as one textured shape and work with its natural movement
Worth knowing: This style is genuinely low-maintenance because the hybrid design means there’s no single “right” way to style it—messy texture is the point.
18. The Tousled Textured Crop with Longer Sides
This cut features a very short crop on top with longer, more textured sides that flip and wave around your face and ear area. It’s essentially an inverted undercut aesthetic without going as short underneath—instead, you’re keeping more length on the sides while going shorter on top. The texture and wave become really important in defining this style’s personality.
Creating Height and Contrast
By keeping top sections short and sides slightly longer, you create contrast that makes the style more interesting visually. The waves in the longer side pieces become a focal point, drawing attention to your face and jawline. The short top creates height and is incredibly easy to style each day.
Tousled Crop-with-Sides Styling
- Top texture: Style the short top section with mousse applied to damp hair, using your fingers to create small spikes or waves
- Side wave emphasis: Apply wave-enhancing spray specifically to the longer side sections to emphasize their wave pattern
- Blow-dry direction: Blow-dry the top slightly upward and forward for height, sides slightly forward and down to showcase the longer length and wave
- Daily texture spray: A light texture spray refreshes both the top spikes and side waves without requiring full restyling
Quick facts about crops with longer sides:
- This style is very flattering for face shapes with wider foreheads, as the longer sides draw attention lower
- The contrast between short and longer sections makes hair appear fuller and more textured
- Maintenance requires regular trims on top (every 3-4 weeks) while sides grow out more naturally
19. The Soft Wavy Crop with Piece-y Texture
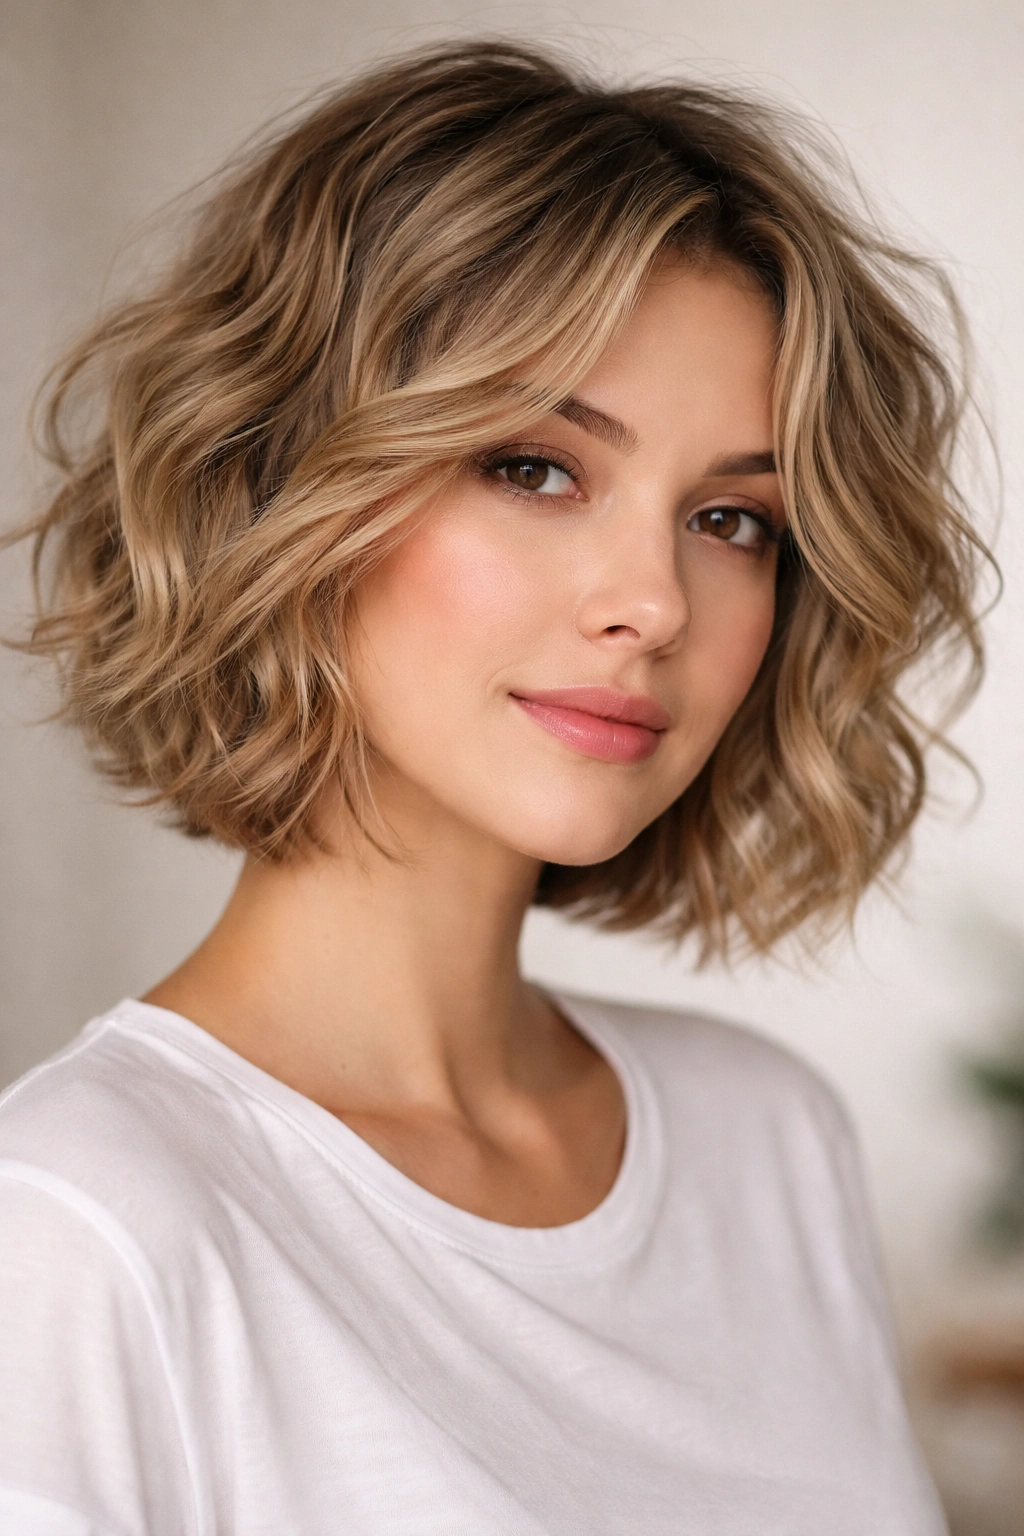
This style prioritizes softness and piece-y definition rather than heavy layering or sharp angles. It’s short all around—roughly chin-length or shorter—with subtle layers that create individual pieces without creating aggressive chop. The waves flow naturally through these pieces, creating an effortlessly soft aesthetic that reads as intentionally undone rather than undefined.
Softness as a Design Choice
Not every messy wavy style needs to be edgy or heavily textured. Sometimes messy simply means the hair flows naturally without being forced into a rigid shape. This interpretation celebrates that natural flow while still being clearly intentional through subtle, purposeful layering that creates individual pieces and movement.
Styling Soft, Piece-y Crops
- Gentle product: Use a light styling cream or mousse rather than heavier products—softness requires a light hand
- Scrunching technique: Apply product to damp hair and scrunch gently upward, encouraging waves without forcing texture
- Minimal blow-dry: A quick diffuse or even air-drying works beautifully for this style—you’re enhancing natural texture rather than creating it from scratch
- Piece separation: Use your fingers gently to separate pieces, creating softness rather than sharpness
Pro tip: This style genuinely looks better when you’re not actively trying to perfect it—the softness comes from accepting your hair’s natural texture rather than fighting it.
20. The Textured Pixie Bob Fusion
This final style represents the ultimate fusion: a cut that’s simultaneously a pixie and a bob, borrowing the best elements of each. It features short, almost pixie-like length in the back and sides with longer, textured layers in the front that reach toward chin-length. The layers are heavily textured throughout, creating maximum movement and dimension.
The Freedom of Fusion
Rather than committing fully to a pixie or a bob, this style gives you pieces of both, with wavy texture enhancing every element. You get the low-maintenance practicality of a pixie with the face-framing softness of a bob. The texturing makes every angle interesting and movement-oriented.
Fusion Style Maintenance and Styling
- Directional blow-dry: Blow-dry the shorter back sections upward for height and volume, front pieces slightly forward to showcase length and layers
- Product layering: Apply mousse to damp roots for volume, sea salt spray through mid-lengths and ends for texture definition
- Piece emphasis: Use your fingers to separate the longer front pieces from the shorter back, creating clear delineation between these distinct sections
- Maintenance strategy: The shorter back needs trims every 4 weeks, while front pieces might stretch to 6 weeks, requiring strategic trimming to maintain the fusion aesthetic
Quick facts about pixie-bob fusion:
- This style is remarkably flattering because it combines softening elements (the longer front) with edgy elements (the shorter back)
- Face-framing capability is automatic since front pieces are specifically longer—no need to request special face-framing layers
- This style is excellent for anyone who loves change—it reads completely differently depending on how you style that day
Key Takeaways
Short wavy hairstyles with intentional messiness aren’t actually hard to pull off; they’re specifically designed to work with your hair’s natural texture rather than against it. The cut is where the real magic happens—a stylist who understands how layers interact with wavy hair can create a style that looks effortlessly textured without requiring complicated styling routines each morning.
The most important factor in choosing your messy wavy style is honest assessment of your hair’s natural wave pattern, texture thickness, and how much daily styling effort you actually want to invest. Fine, thin wavy hair might thrive with a textured pixie that removes weight while emphasizing movement, while thick, coarse wavy hair might look stunning in a heavily layered shag where texture can move and breathe without becoming overwhelming.
Every style on this list shares the common thread of being genuinely low-maintenance compared to blunt, structured cuts. Once you’ve found your ideal messy short wavy style and gotten a great cut from a skilled stylist, your daily styling routine becomes simple: apply a light-hold product to damp hair, use your fingers rather than hot tools to encourage texture and waves, and embrace the fact that “perfect” is the exact opposite of the goal. That’s the entire appeal—you’re finally working with your hair’s natural texture instead of constantly fighting against it.