If you’ve got natural texture and you’re tired of forcing your hair into styles it wasn’t meant for, you’re about to discover that your natural crown is infinitely more versatile than you probably think. Natural afro hairstyles aren’t just about rocking your texture—they’re about claiming agency over how you present yourself, embracing styles that celebrate what your hair naturally does, and finding looks that work with your schedule, your mood, and your life. Whether you’re heading to the office, meeting friends for brunch, or just living your everyday life, natural afro styles offer flexibility, confidence, and genuine beauty that doesn’t require constant manipulation or damage.
The thing is, natural afro hair responds to styles that work with its inherent structure rather than against it. When you understand the mechanics of how your curls and coils actually behave, styling becomes less about fighting your hair and more about enhancing what’s already there. The 15 styles we’re covering here range from wash-and-go simplicity to styles that take a bit more intention but still look intentional rather than overdone. Some require daily maintenance, others last for weeks with minimal fussing, and all of them celebrate the natural texture you’ve got.
Your hair’s texture, density, and length will influence which styles feel most natural for you, but every single style here works across different hair types. What matters more than anything is finding the looks that make you feel like yourself—the ones you can wear confidently whether you’re stepping into a boardroom or spending a Saturday at home. Let’s explore the styles that let your natural hair shine.
1. The Classic Wash-and-Go

A true wash-and-go lives up to its name: you wash, condition, apply your styling products, and let your natural texture dry into its fullest, most defined form. This isn’t a style you “do”—it’s what happens when you stop trying to manipulate your hair and let it do what it wants to do naturally. The beauty of a wash-and-go is that it takes the actual time investment completely out of your routine, which means you can have a fresh, intentional look without touching your hair every single day.
Why It Works for Everyday Life
A wash-and-go works because it’s honest—you’re not creating the appearance of effort when there isn’t any. Your curls or coils define themselves, and because you’re using the right leave-in conditioner and curl cream for your specific hair texture, they dry into a shape that looks deliberate and polished. The moisture from your styling products keeps your hair defined without that dried-out, crunchy feeling that happens when products aren’t chosen correctly. For people with denser, tighter coils, a wash-and-go might look like beautifully defined spirals. For people with looser curls, it might be a softer, bouncier texture. Either way, it’s authentically your hair doing what it naturally does.
Product Application and Results
- Apply leave-in conditioner generously while hair is still wet—this is non-negotiable for definition
- Use a curl cream or gel suitable for your curl pattern on soaking wet hair, scrunching upward
- Plop your hair in a microfiber towel or cotton t-shirt for 10-20 minutes to remove excess moisture
- Air dry or use a diffuser on low heat, allowing curls to set completely before touching them
- Your hair will be softest and curliest the first 2-3 days after washing
Pro tip: The first wash-and-go after a fresh cut always looks the best because you have maximum curl definition and shape. If you find your wash-and-go looking less defined by day 5 or 6, it’s often not that your hair has changed—it’s that product buildup has weighified your curls. A light refresh spray (water mixed with leave-in conditioner) can revive definition without rewashing.
2. High Puff with Decorative Clips
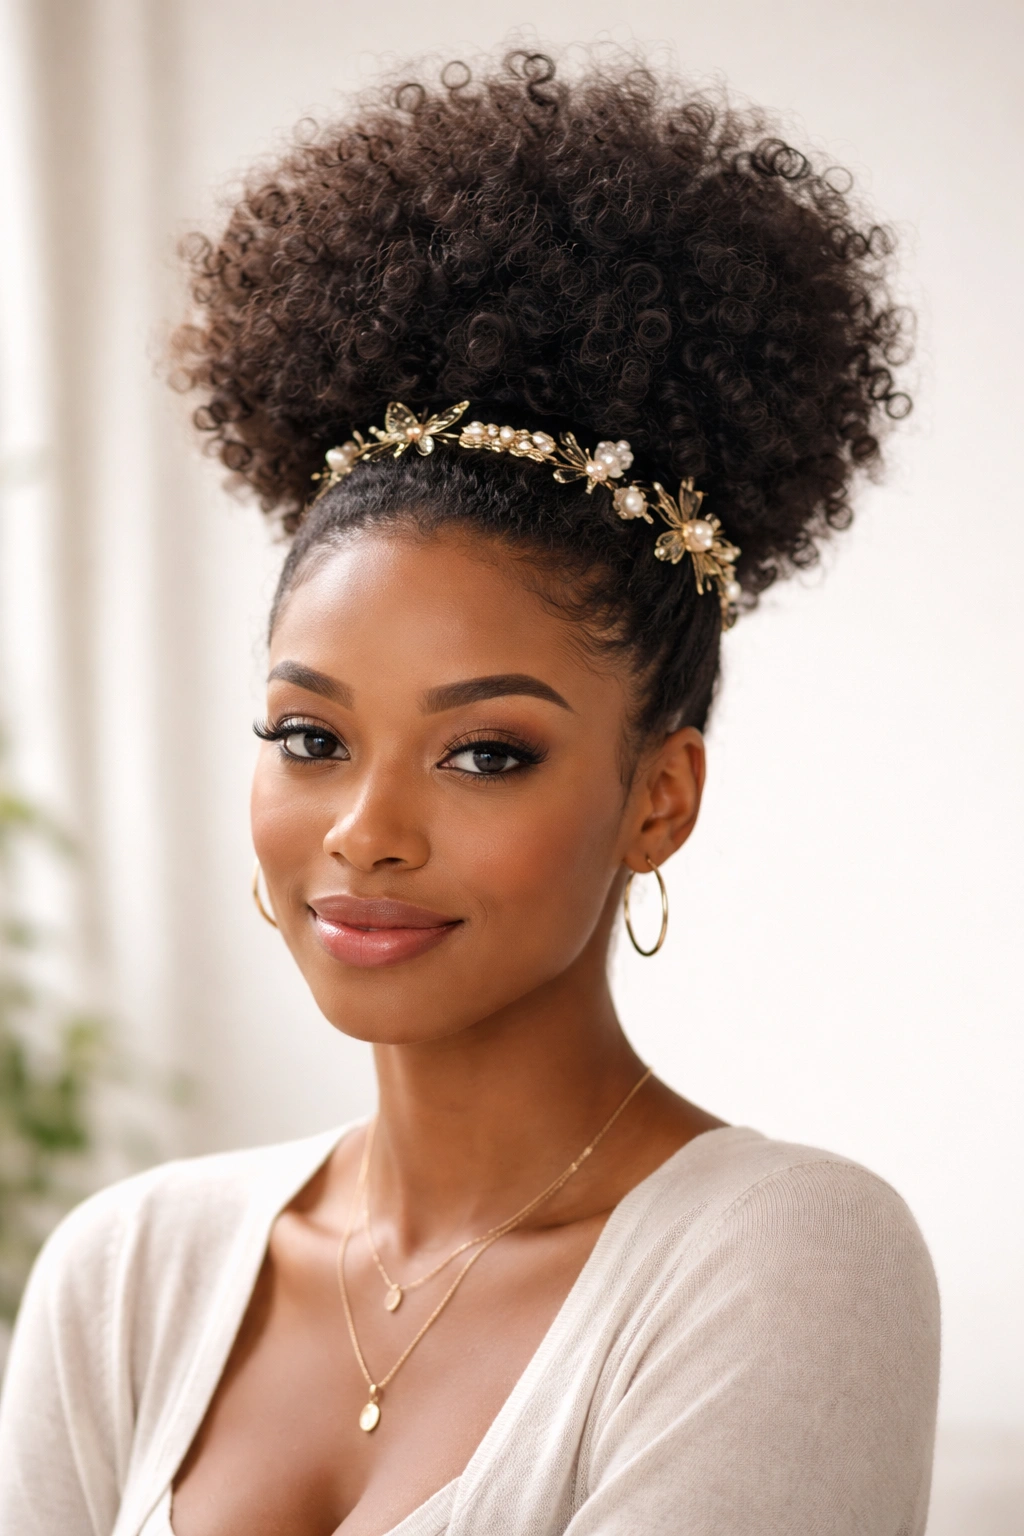
A high puff gathers your hair into a voluminous topknot positioned at the crown, creating immediate height and presence. The puff isn’t meant to look sleek or contained—it’s meant to showcase the full volume of your natural texture in all its glory. When you add decorative clips, claw clips, or hair jewelry, you transform a casual puff into something that feels intentional and styled without requiring complicated techniques or hours of work.
The Statement-Making Appeal
What makes a high puff with clips so effective is that it immediately reads as a choice rather than convenience hair. A plain puff might feel like you threw your hair up and called it a day, but a high puff paired with gold claw clips, colorful barrettes, or metallic clips says you meant to do this. The clips also serve a practical purpose—they add hold so your puff stays exactly where you put it throughout the day, and they give your hands something to do besides constantly touching your hair. You get all the visual impact of having styled your hair without the time investment of braiding, twisting, or using heat.
How to Build and Secure Your Puff
- Flip your head upside down and gather all hair at the crown, securing with a large elastic band
- Flip your head back up and arrange the gathered section so it sits at the exact crown (not tilted to one side)
- Gently lift and separate the puff with your fingers to create volume and a full, rounded shape
- Insert 2-4 decorative clips around the elastic band, tucking them slightly into the puff for security
- Leave a few face-framing pieces loose if you prefer softness around your face, or keep it fully gathered for a more graphic look
Worth knowing: The height of your puff depends entirely on how much hair you have and where you place it. A high puff works best on people with shoulder-length hair or longer, though people with shorter natural hair can still do a smaller, tighter version that sits at the crown.
3. Bantu Knots
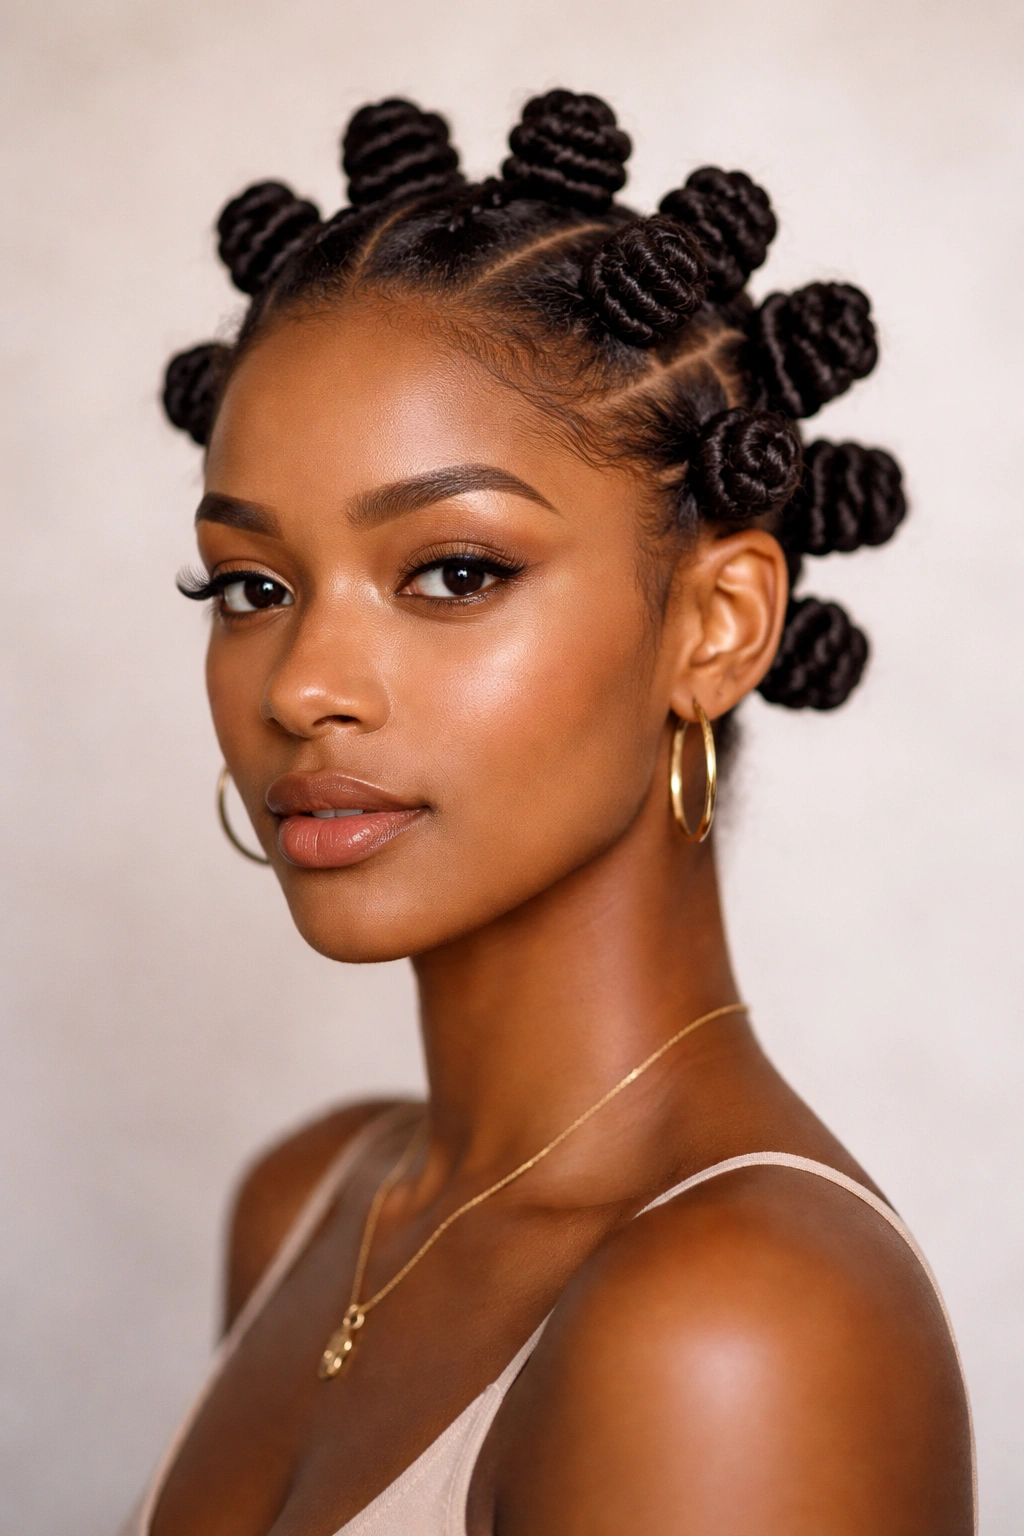
Bantu knots are individual twisted or coiled sections of hair that sit close to the scalp, creating a sculptural, architectural look. Each knot is its own small masterpiece—they can be left in as a finished style or unraveled to create defined coils or waves. Bantu knots are absolutely worth learning because they work across different hair types, they’re deeply rooted in African styling tradition, and they give you styling options you can’t get any other way.
The Technique and Time Investment
Creating Bantu knots requires you to section your hair (usually into 6-12 sections depending on density and how detailed you want to be), then twist or coil each section tightly, wrapping it around itself at the base until it creates a compact knot that sits against your scalp. The twisting and wrapping takes actual time—realistically 45 minutes to 2 hours depending on hair density and whether you’re doing a full head or just a few statement knots. But here’s the payoff: Bantu knots last 1-2 weeks, which means you do the work once and enjoy multiple styles throughout that period.
Wearing Bantu Knots and Unraveling Options
- Bantu knots left in as a finished style are bold, graphic, and unmistakably intentional
- Leave them in overnight or for 1-2 days, then unravel them to get defined spiraled curls or waves
- Unraveled Bantu knots create a particular type of curl definition that doesn’t happen naturally—it’s a distinct, bouncy texture
- If you unravel while hair is damp, you’ll get tighter, more defined curls; unraveling on dry hair gives you softer, more dramatic waves
- You can leave half your head in knots and unravel the other half for an asymmetrical look that reads as intentionally edgy
Pro tip: Bantu knots are one of the few styles where sleeping in them is actually good for the outcome. The pressure from your pillow helps set the spirals, so leaving them in overnight gives you better definition when you unravel. This means you can do them one evening and have a completely different style by the next morning.
4. Twist-Out with Defined Curl Pattern
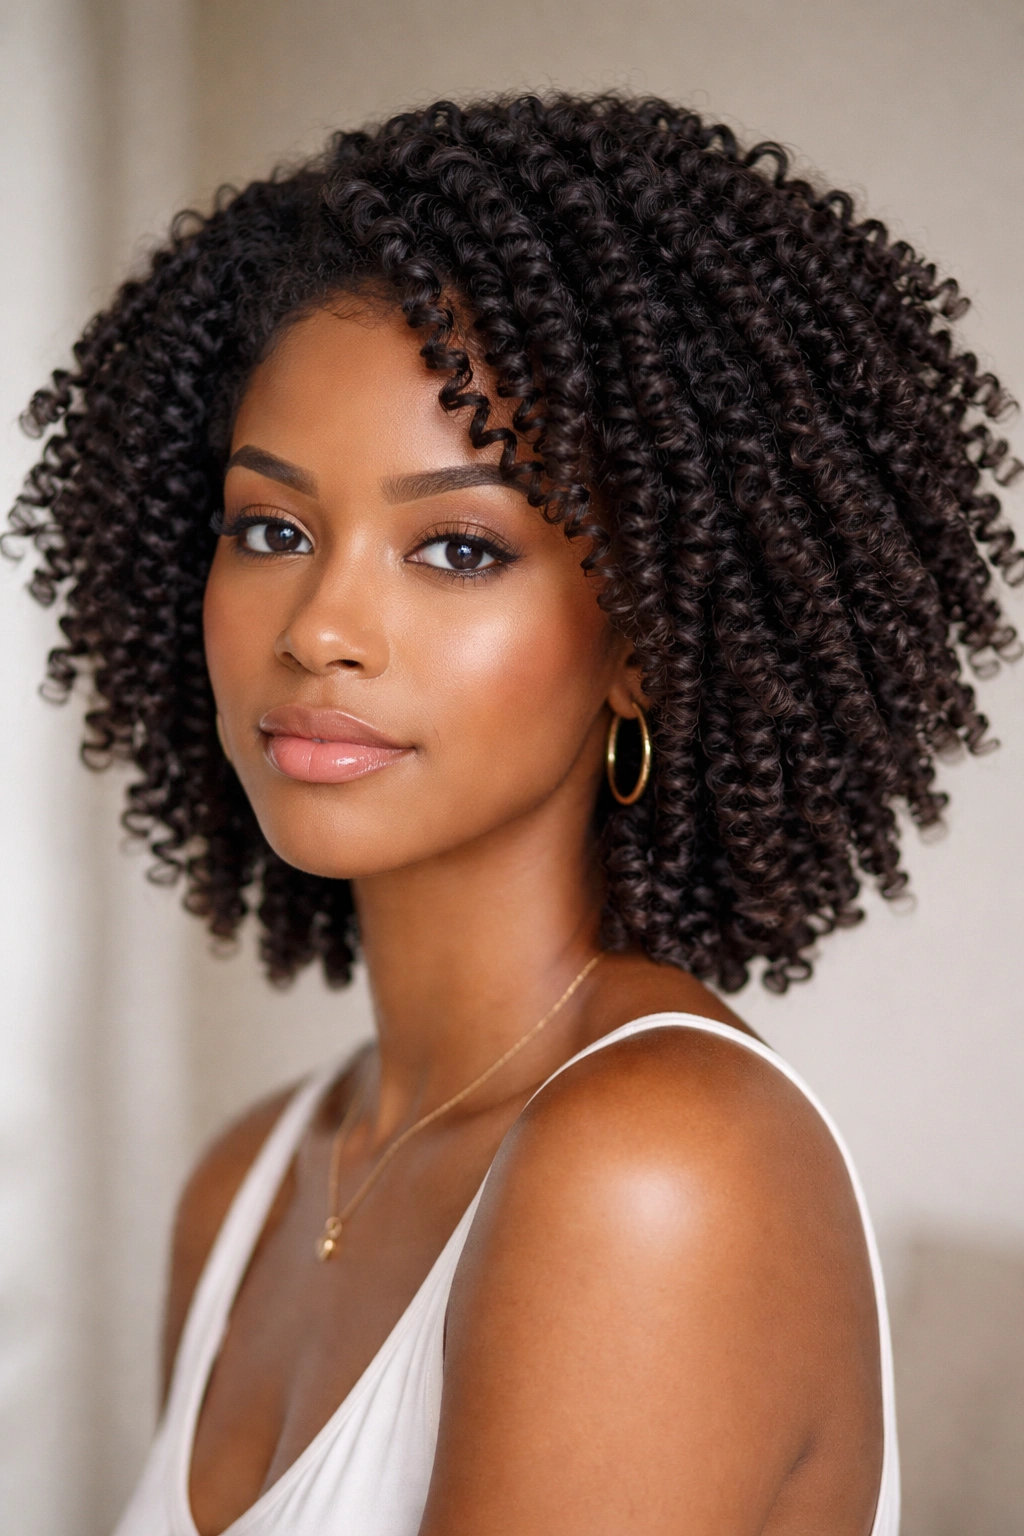
A twist-out starts with two-strand twists (sections of hair twisted together) that you leave in overnight or for several days, then gently unravel to reveal beautiful, defined curls. The curls from a twist-out have a particular springiness and definition because they’ve literally been shaped into that pattern while the hair was wet or damp. Unlike wash-and-go curls that form naturally, twist-out curls have extra separation and hold because they’ve been set that way.
Why Twist-Outs Create Superior Definition
When you twist two strands together tightly, you’re creating a mold that your curl pattern follows as it dries. The tighter you twist and the longer you leave it in, the more defined your curls become when you unravel them. This is particularly transformative for people whose natural wash-and-go curl pattern is looser or less defined—a twist-out can create the appearance of tighter, bouncier curls than your hair naturally falls into. The curls also hold their shape longer because they’ve been set rather than just dried in place, which means your style stays fresh and defined for 5-7 days instead of getting fuzzy after day 3.
Executing a Twist-Out That Lasts
- Divide clean, damp hair into 12-20 sections (more sections = tighter definition, fewer sections = softer waves)
- Apply curl cream or gel to each section, then twist two strands together tightly from root to end
- Leave twists in for a minimum of 8 hours (overnight is ideal) or up to 3-5 days for maximum definition
- Unravel each twist slowly and gently—rushing creates frizz—starting from the bottom and working upward
- Use your fingers to gently separate the unraveled curls if they’re sticking together
- Spritz lightly with water or refresher spray and let curls set for a few minutes before wearing
Worth knowing: The thickness of your twists affects the final curl size. Thinner twists create tighter, smaller curls; thicker twists give you larger, bouncier waves. Your preferred curl size is entirely a matter of personal preference, so experiment with different section sizes until you find what makes you feel most like yourself.
5. Sleek Side Part with Edge Control
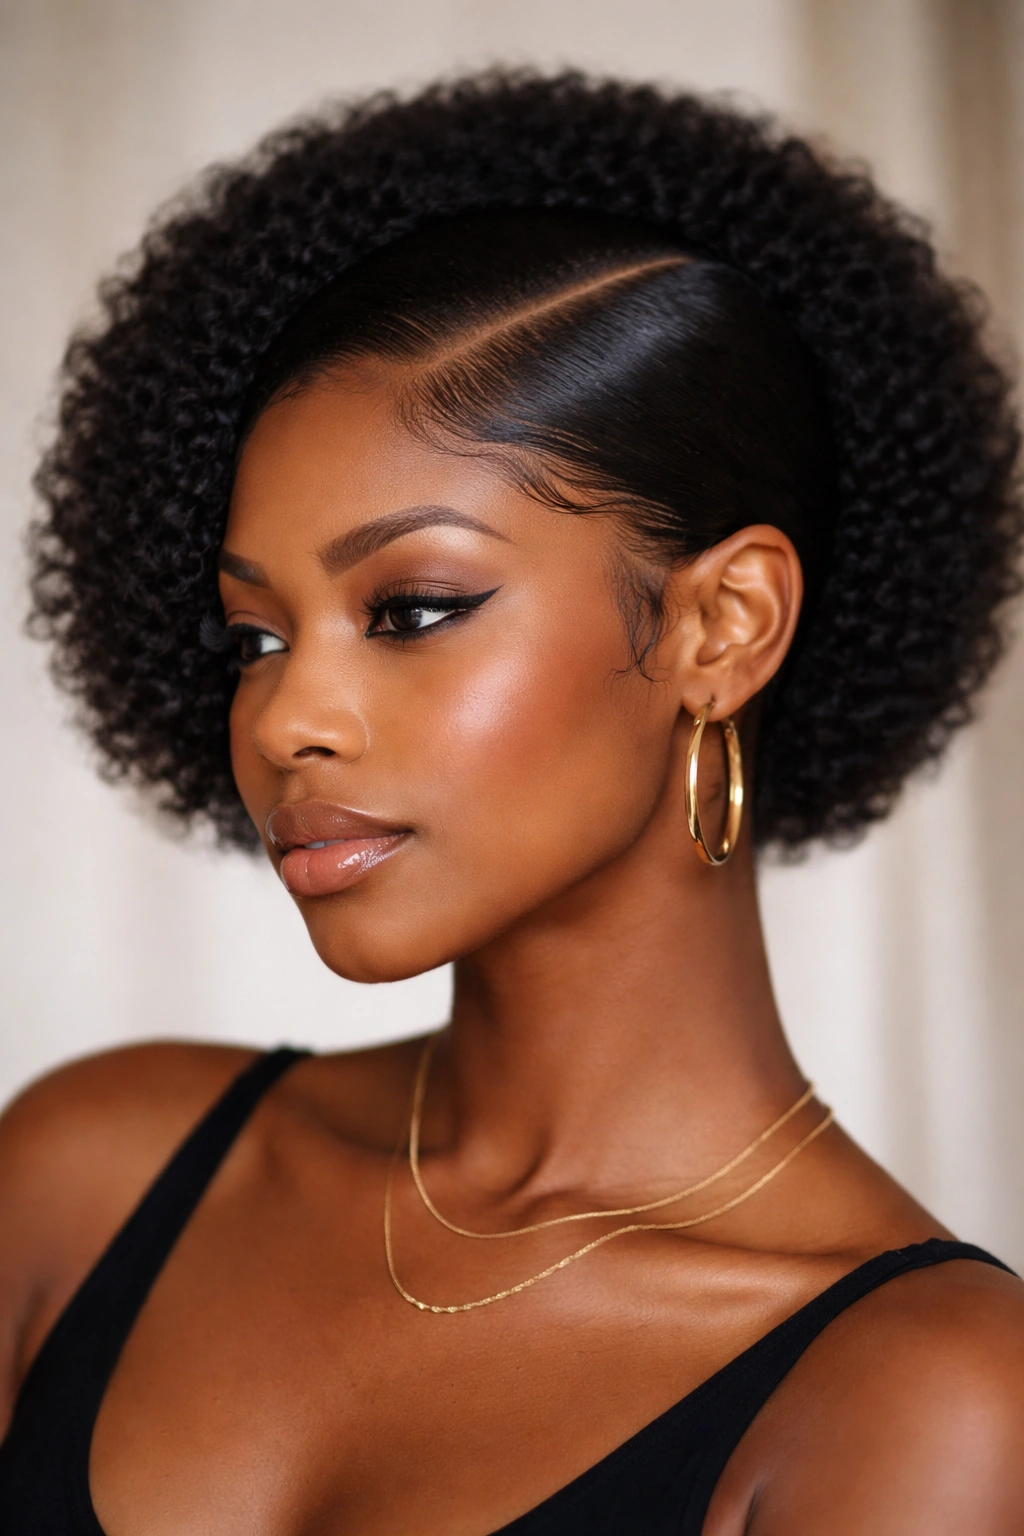
A sleek side part takes your natural texture and smooths it back with edge control, creating a polished, graphic look that emphasizes your face and reads as immediately intentional. This style works with your natural hair—you’re not straightening or dramatically altering it—you’re just directing where it goes and creating clean lines. The side part placement changes the entire shape of your face, which is why this simple style is so effective at completely transforming your look without doing anything complicated.
The Edge Control Technique
Edge control is a lightweight gel or cream that tames baby hairs and flyaways at your hairline, creating a smooth, defined frame. Applied correctly, edge control transforms a casual natural look into something that feels polished and intentional. The key is using a light hand—you want to smooth and define your edges, not slick them so aggressively that they look unnatural or feel stiff. Applied correctly, good edge control should be flexible enough that you don’t feel it when you move or touch your hair.
Creating Clean Lines and Lasting Results
- Apply a smooth, parting product (water mixed with leave-in conditioner works well) to create a sharp line where you want your part
- Use a fine-tooth comb or rattail comb to create a precise line from your hairline to your crown
- Apply edge control in the direction you want your hair to go, using a soft brush or your fingertips to smooth it down
- Tuck your hair behind your ear on the smaller side to emphasize the side part
- The edges will stay smooth and defined for 2-3 days; refresh with a light spritz of refresher spray or water on day 2 if needed
Pro tip: A side part combined with a defined curl pattern creates asymmetrical visual interest—the curls on one side of your head will look different from the curls on the other side because of how light hits them and how the curls sit. This is exactly what you want. It’s what makes this simple style look so polished and intentional.
6. Goddess Braids
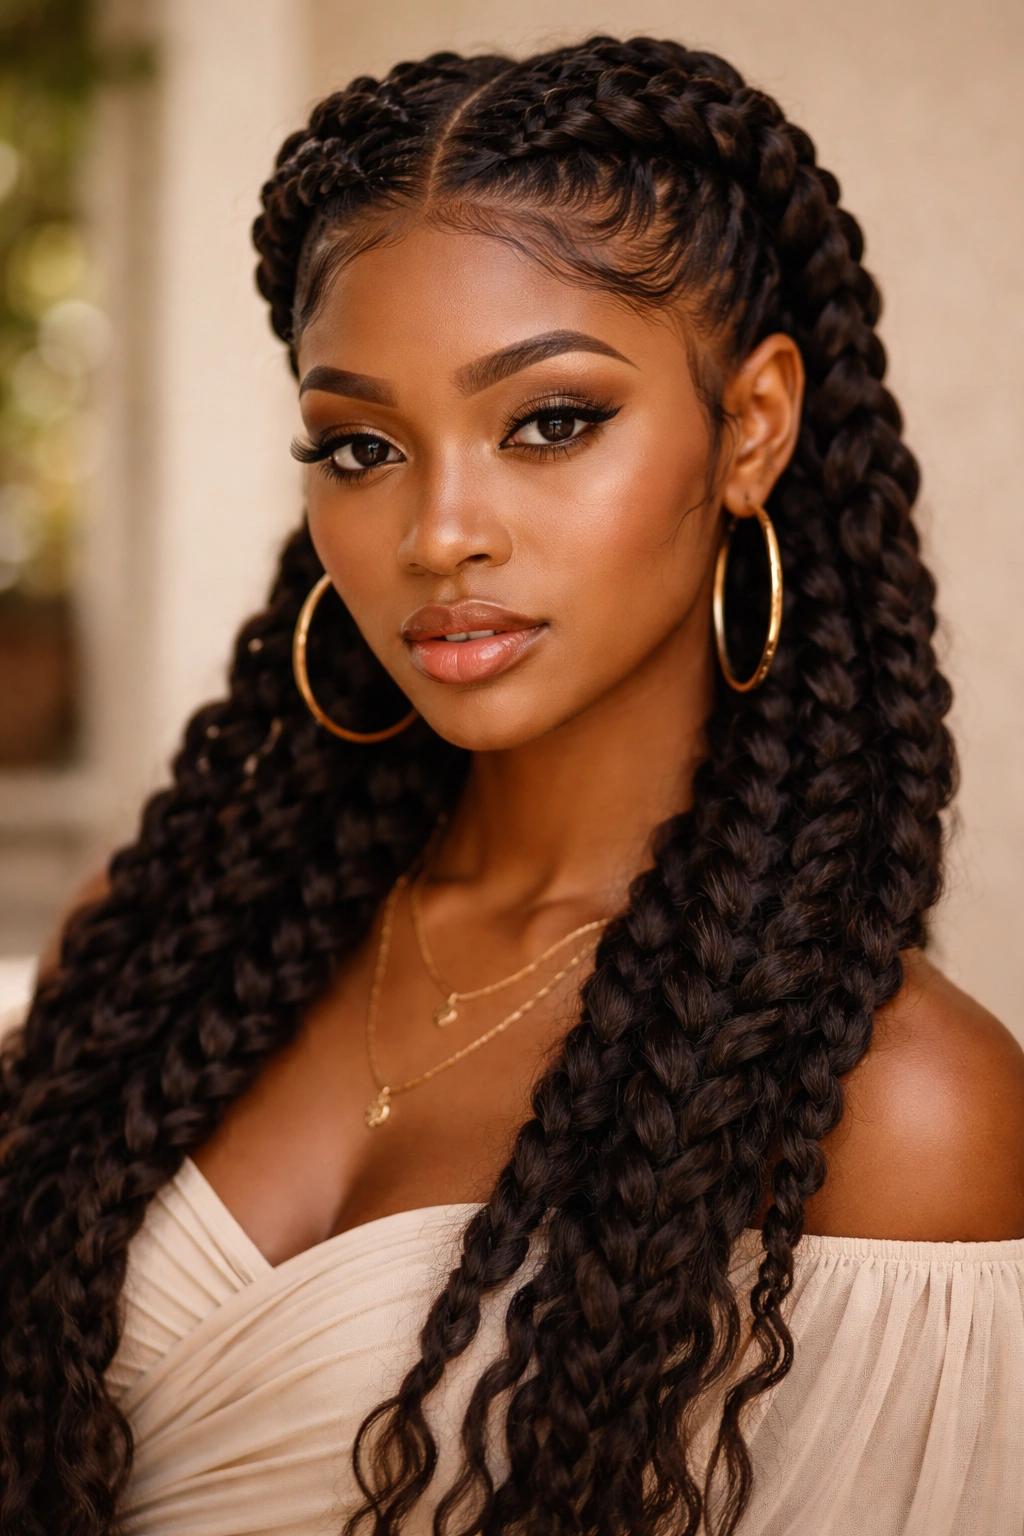
Goddess braids are thicker braids that run along the scalp (usually from the front hairline toward the back), creating a protective style that looks absolutely stunning and lasts 1-2 weeks. The braids themselves are usually larger and looser than cornrows, which means they’re easier to install, they put less tension on your scalp, and they give you a softer, more romantic look than typical protective styles. Goddess braids feel special—they have presence and visual weight—while still being wearable for everyday life.
Installation and Styling Variations
Goddess braids can be installed in a few different configurations: down the back in one or two braids, in a curved pattern following your crown, or multiple braids that create a crown effect around your head. Each configuration changes how the style reads and how it frames your face. The key to beautiful goddess braids is using a braid pattern that feels proportional to your face—someone with a smaller face might be overwhelmed by extremely thick braids, while someone with a larger face might feel that thin braids don’t have enough visual impact.
Maintenance and Refresh Strategy
- Goddess braids typically stay fresh and defined for 7-10 days with minimal care
- Wrap your braids in a silk or satin scarf at night to maintain smoothness and prevent frizz
- By day 5-7, you can lightly re-braid the portions near your hairline if they’ve loosened slightly
- Misting your braids lightly with water and a little leave-in conditioner keeps them looking fresh and prevents the pulled-back feeling
- Goddess braids work best when you have at least shoulder-length hair, though shorter hair can work with fewer or thinner braids
Worth knowing: The thickness and tightness of your goddess braids should be comfortable enough that you don’t feel constant tension at your scalp. If you’re getting headaches or noticing tenderness, your braids are installed too tightly, which puts unnecessary stress on your hair follicles. Loosening them slightly won’t ruin the style and will make you infinitely more comfortable.
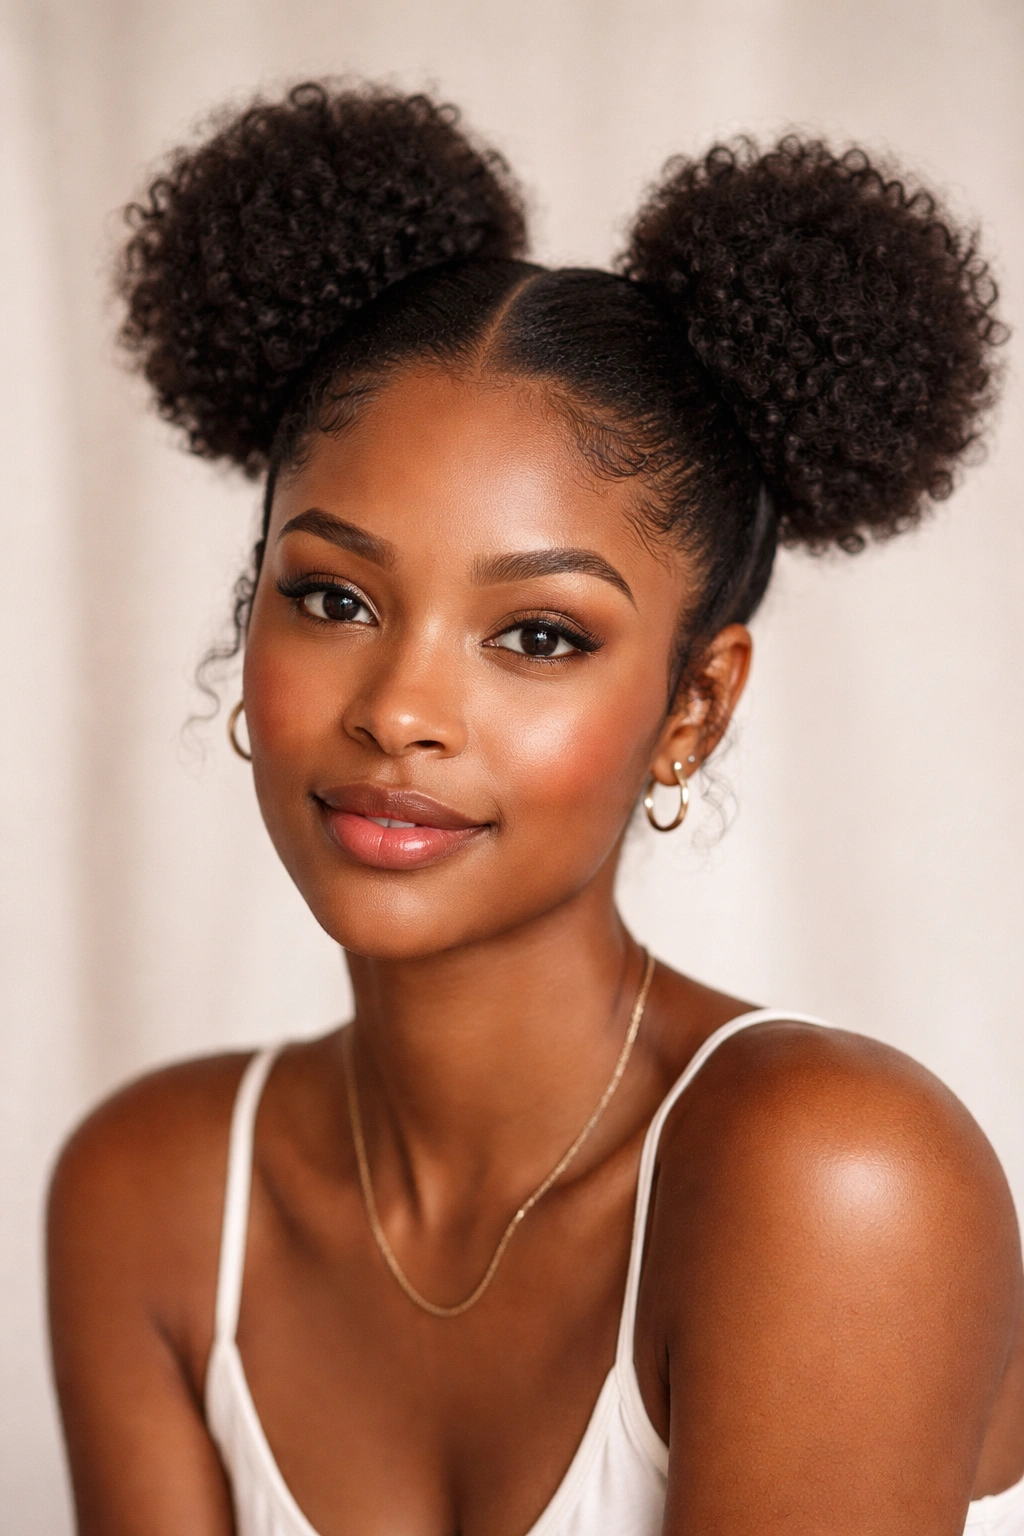
7. Space Buns
Space buns are two pigtail-style puffs positioned at the crown or sides of your head, creating a playful, youthful look that’s surprisingly versatile. When done with intention and styled with the right accessories, space buns aren’t just for kids—they’re a legitimate everyday style that works for adults who want a little personality in their look. The beauty of space buns is that they work across different ages and settings because they read as confident rather than trying-too-hard.
Positioning and Visual Impact
Where you position your space buns completely changes how the style reads. Buns positioned at the very crown create height and emphasize your cheekbones. Buns positioned slightly lower and toward the sides feel more playful and less graphic. High space buns also create an illusion of a longer neck, which is why they’re so flattering on most face shapes. The key is positioning them symmetrically so the look feels intentional rather than accidental.
Building Space Buns That Stay Secure
- Create a center part from your hairline to the nape of your neck to divide your hair into two equal sections
- Gather one section into a high ponytail at the crown, securing tightly with an elastic band
- Coil the ponytail around the base elastically, tucking the ends under and securing with bobby pins or a second smaller elastic
- Repeat on the other side, making sure both buns sit at the exact same height and distance from center
- Add decorative clips, rings, or cuffs around the base of each bun if you want visual interest
- To prevent them from flattening, sleep with them slightly loosened or wrapped in a silk scarf
Pro tip: Space buns look best with at least some volume in the puffs themselves. If your buns look too tight or too flat, gently lift and separate the hair to create roundness. A little volume makes the whole style look fresher and more intentional.
8. Twist-In Extensions
Twist-in extensions are a protective style where you twist your natural hair together with synthetic or human hair extensions in a two-strand twist pattern, creating longer, thicker twists that can last 2-4 weeks. This style is perfect when you want length and fullness without the commitment of braids, when you want a protective style that’s a bit softer than typical braiding styles, or when you want to experiment with hair color or texture without affecting your natural hair. Twist-ins offer serious staying power while still feeling lightweight and manageable.
The Installation Process and Realistic Timeline
Installing twist-in extensions takes time—realistically 3-6 hours depending on how many twists you’re doing and how thick you want them. But the payoff is that once they’re in, you’re done with your hair for weeks. You don’t have to restyle it daily, you don’t have to spend time maintaining it beyond wrapping it at night and light refreshing sprays. The extensions do the heavy lifting in terms of visual impact and volume, which means you get a complete style without daily effort.
Caring for Twist-Ins to Maximize Their Lifespan
- Wrap twists in a silk or satin bonnet every night to prevent frizz and maintain definition
- Spritz with a light refresher spray (water and leave-in conditioner) every few days to keep them looking fresh
- By week 2-3, some twists near your hairline may begin to loosen slightly; you can retighten them or leave them loose for a softer look
- Wash your twists gently with a sulfate-free shampoo every 2 weeks; wash only the scalp, not the twists themselves
- Remove twist-ins carefully by gently untwisting the extensions from your natural hair, working slowly to prevent tangling or breakage
Worth knowing: The quality of extensions you use completely affects how your twists look and how long they last. Cheap, synthetic extensions will look dull and feel stiff; quality extensions blend with your natural hair and create a look that’s actually attractive to wear. Invest in good extensions even if it costs more upfront, because they’ll look better and last longer.
9. Faux Hawk with Defined Texture
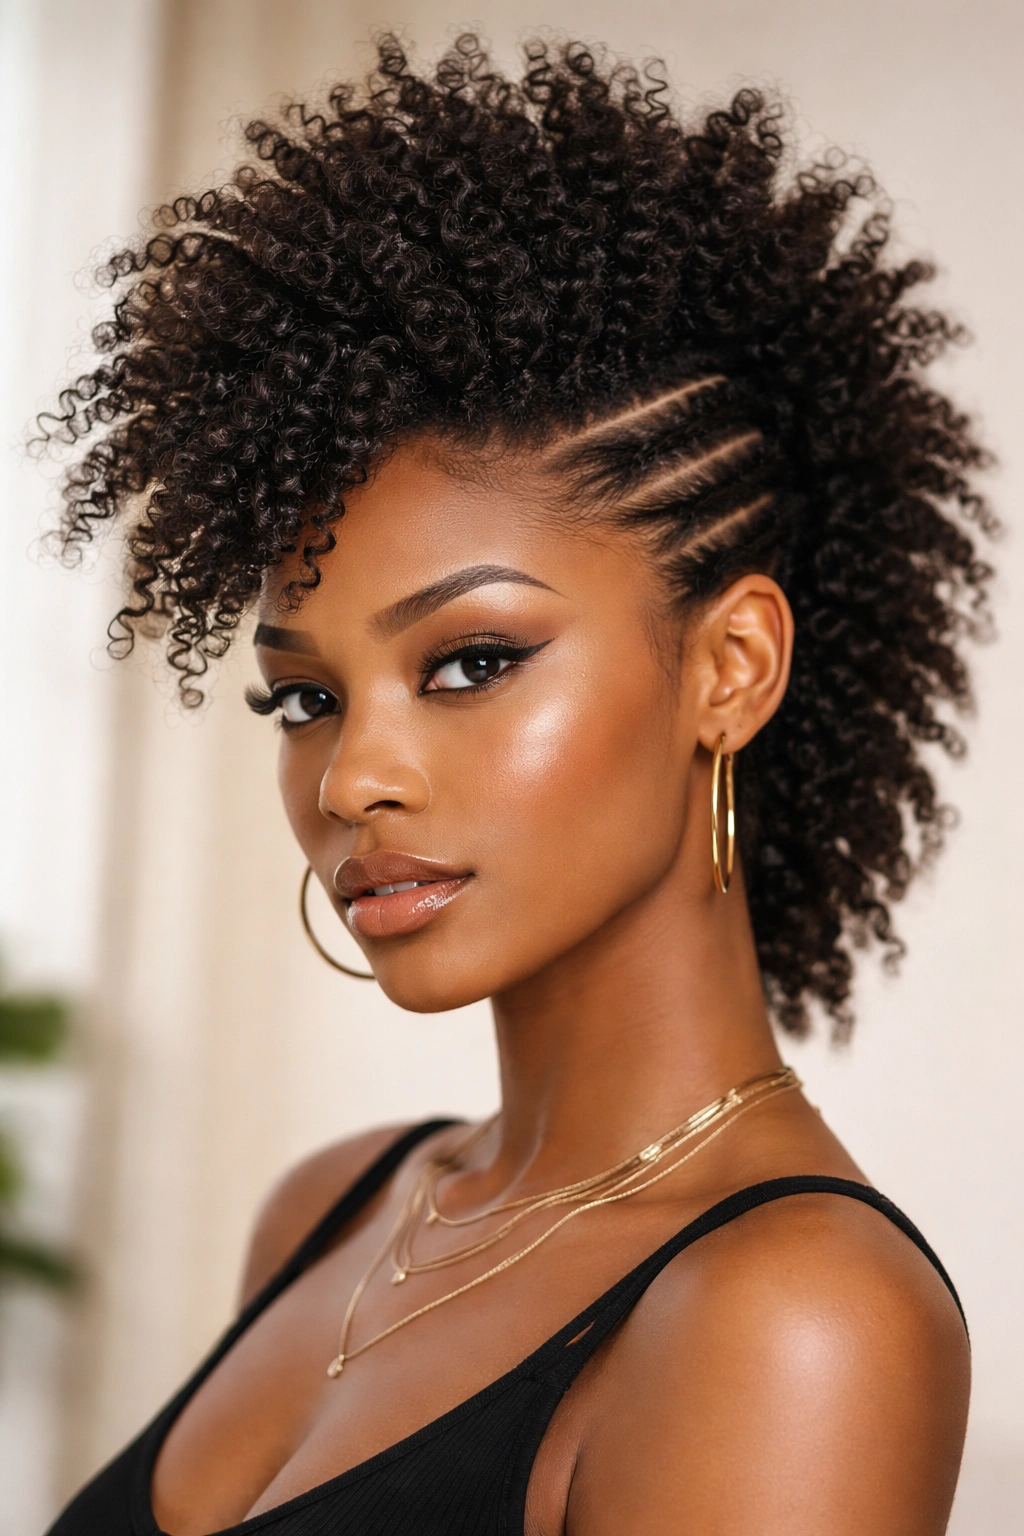
A faux hawk takes the sides of your head and tucks them back or under, creating the visual illusion of a traditional hawk while keeping all your hair attached. What makes a faux hawk with defined texture interesting is that you’re using your natural curl pattern as the visual interest—your curls are showing, just directed in a specific way. This is an edgy, confident look that works for people who want something bold but still want to wear their natural texture.
Creating Dimension Through Texture Direction
The key to making a faux hawk visually interesting is emphasizing the texture at the center. You’re trying to create a stark contrast between the smoothed or tucked sides and the voluminous, textured center. When your center section has maximum volume and definition (think wash-and-go curls at their fullest), the contrast makes the whole style pop. Some people enhance this by using more product on the center section to create extra definition, or by twisting or braiding the sides for visual interest against the loose texture in the middle.
Styling and Securing Your Faux Hawk
- Apply smoothing cream or gel to the sides of your head, creating smooth, defined sections
- Tuck or braid the sides back, securing them with bobby pins or small elastics
- Allow the center section of hair to sit free and voluminous, using your regular styling products for definition
- You can smooth the sides completely flat, or create twisted or braided patterns on the sides for more interest
- This style works best on people with at least shoulder-length hair, though shorter hair can create a more dramatic hawk effect
Pro tip: A faux hawk becomes even more visually striking when you add a bold lip color or graphic eyeliner—you’re already making a statement with your hair, so lean into the boldness with your makeup. The combination of a faux hawk and confident makeup reads as intentional and powerful.
10. Low Ponytail with Curl Definition

A low ponytail gathers your hair at the nape of your neck, creating an elegant, understated look that’s appropriate for professional settings while still celebrating your natural texture. The appeal of a low ponytail is that it keeps your hair off your face and neck (which means it stays defined longer because it’s not rubbing against anything), while the gathered section showcases your curl pattern. You’re getting a polished look without losing the texture that defines your style.
Hair Placement and Face-Framing
Where you position your low ponytail changes the entire vibe—a ponytail positioned directly at the very nape of your neck reads as sleek and polished. A ponytail positioned slightly higher, around where your ears line up with your neck, feels slightly softer and less severe. Some people prefer to leave a few face-framing pieces loose to soften the look, while others prefer everything gathered for a cleaner line. The positioning should feel comfortable and natural to you—if you’re constantly feeling tension or discomfort, adjust the height.
Achieving Definition and Longevity
- Smooth your hairline with edge control while your hair is still in its styled state
- Gather hair at your desired point, using your hands to smooth any flyaways
- Secure with an elastic band that matches your hair color (this makes the ponytail look neater)
- Use a second elastic band wrapped around the base to hide the first elastic and create a polished finish
- Wrap a small section of hair around the base elastics and secure with a bobby pin for a completely polished look
- A low ponytail will stay defined for 3-4 days; refresh with a light spritz of water and product on day 2-3
Worth knowing: How thick your ponytail looks depends on how much you smooth it versus how much you leave slightly textured. A completely smooth, tight ponytail reads as very polished and formal. A slightly textured ponytail with some curl definition showing reads as more relaxed and everyday. Both are correct—it’s about what matches your mood and the occasion.
11. Crown Braid with Loose Curls
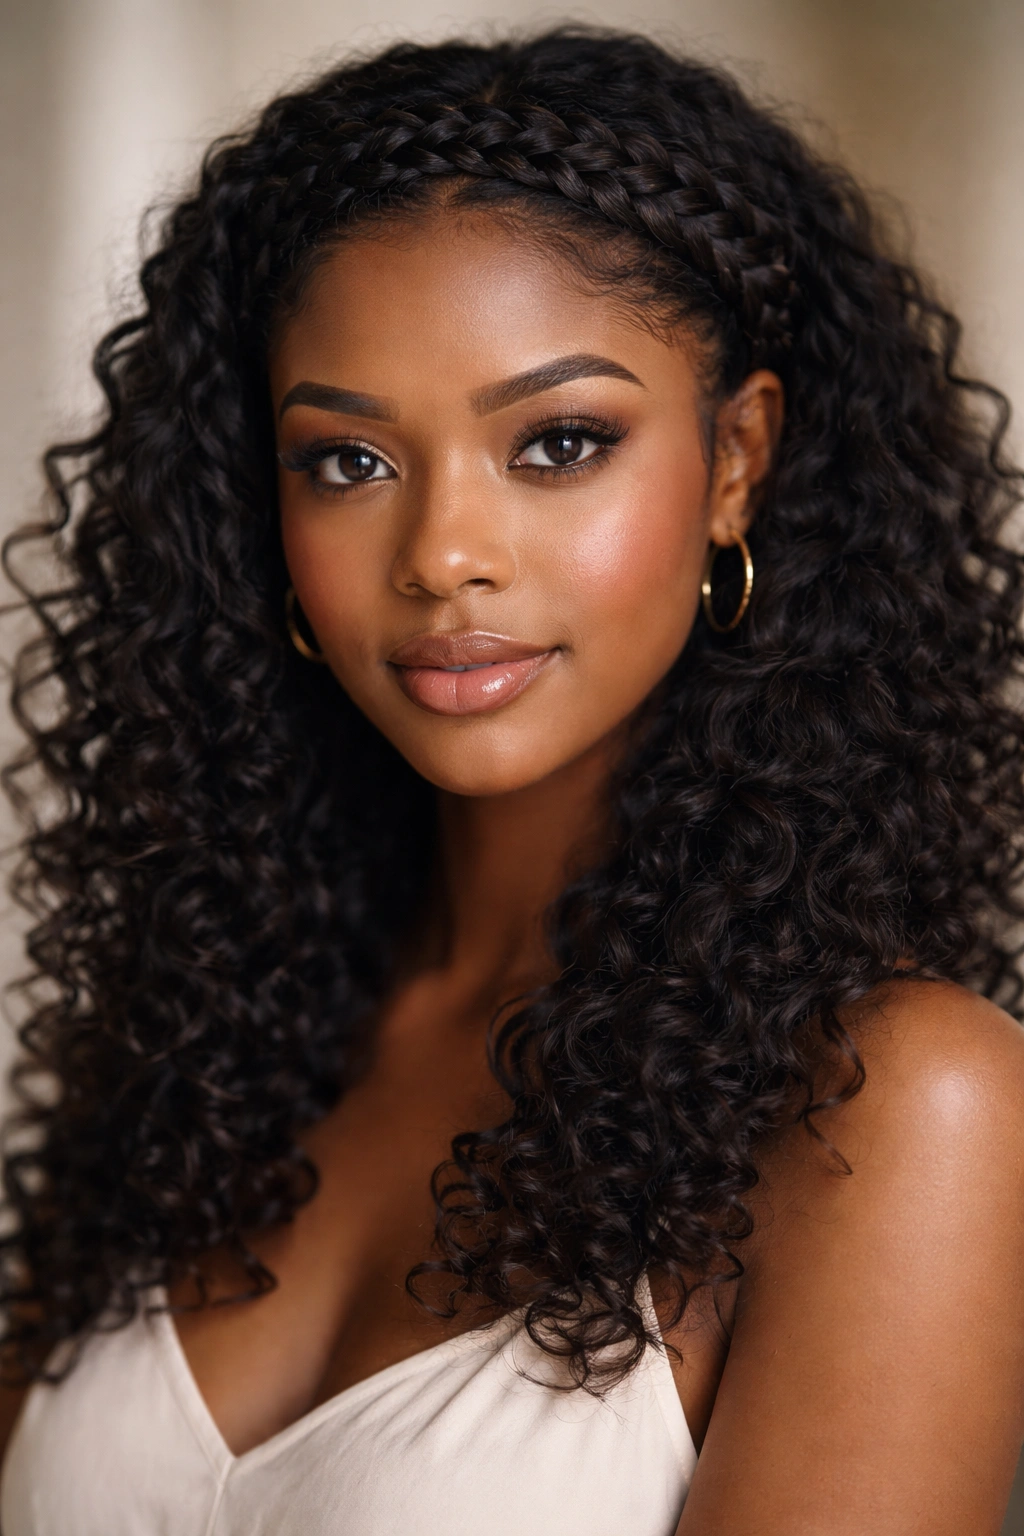
A crown braid runs along your hairline, creating a halo effect that frames your face while the rest of your hair stays down in loose, defined curls. This style combines the protective benefits of braiding (since the most fragile hair at your hairline is secured) with the freedom of wearing your natural texture down. It’s romantic without being fussy, protective without looking severe, and it works across different hair types and lengths.
Braiding Technique for a Secure, Pretty Result
A crown braid requires you to braid from one side of your head to the other, starting at one ear and ending at the opposite ear. The braid sits close to your scalp, following the curve of your head, which means it needs to be tight enough to stay secure but not so tight that you’re creating tension. The key is picking up small sections as you braid, which keeps the braid neat and defined. Larger, looser sections create a softer, more romantic braid that feels less controlled.
Styling the Loose Curls Beneath
- Before braiding, style your hair with your regular leave-in conditioner and curl cream for definition
- Create your crown braid while hair is slightly damp, so it sets as it dries
- The curls underneath the braid will be more defined because they’ve dried in a specific shape
- You can braid loosely and deliberately allow curl definition to show through, or braid tightly for a cleaner line
- This style works best on shoulder-length hair or longer; very short hair may not have enough length to braid
Pro tip: A crown braid is a perfect style for day 2 or 3 hair—when your wash-and-go curls are starting to feel a little loose or undefined. The braid adds structure back to your look while the curls underneath still look intentional and fresh.
12. Braided Crown with Upswept Back
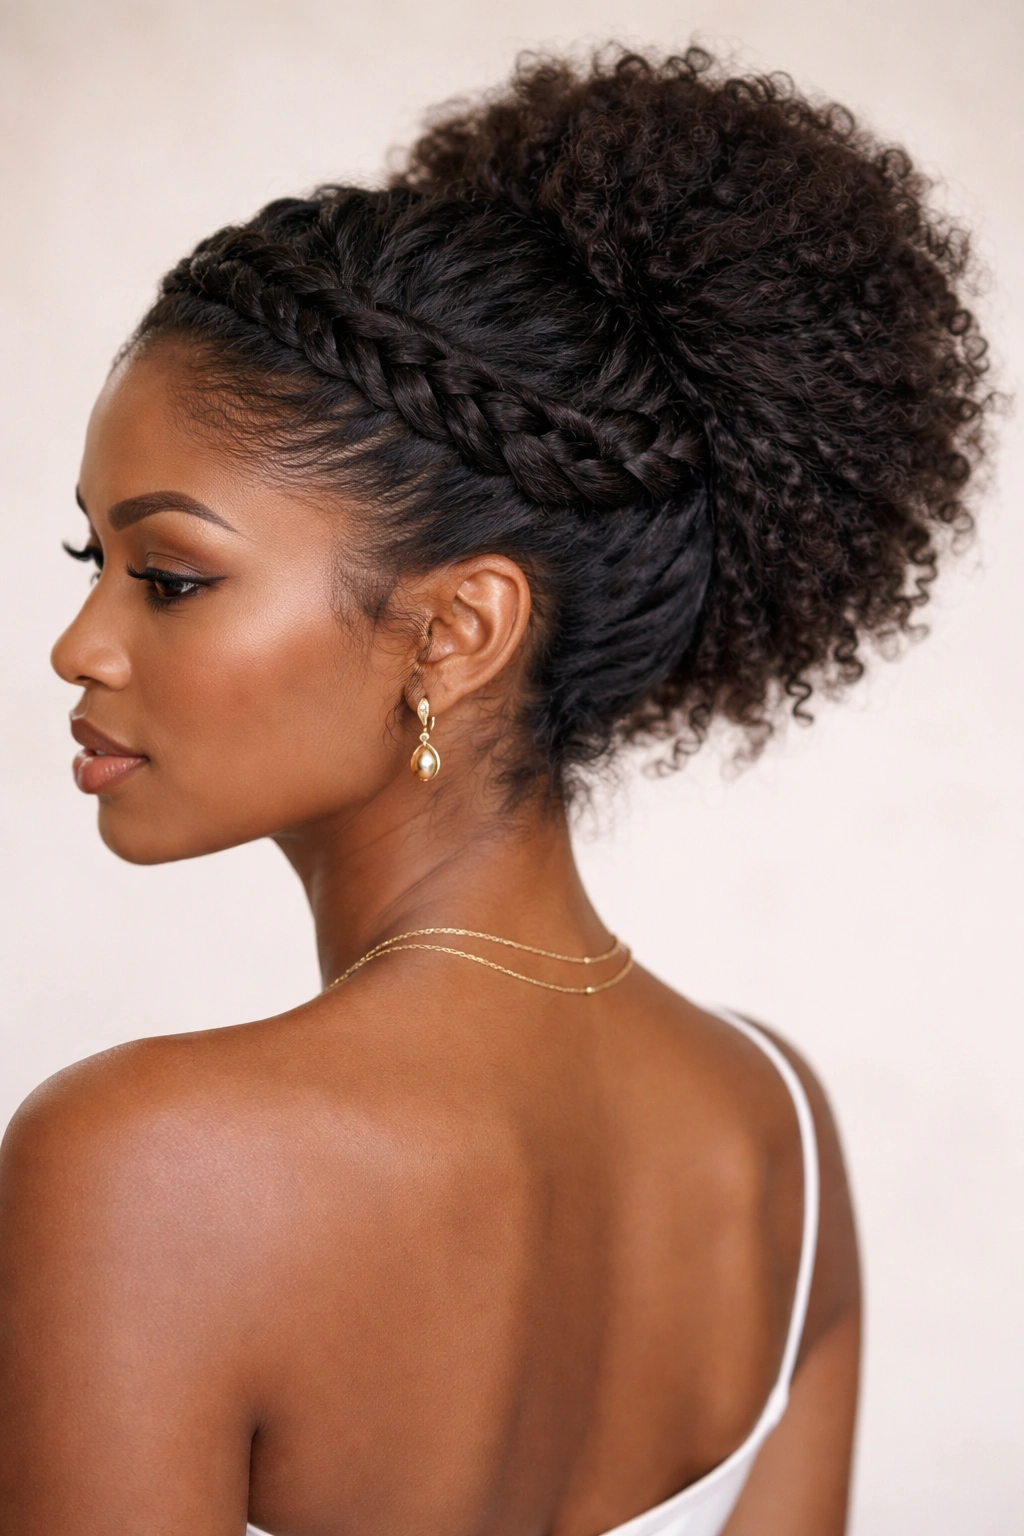
A braided crown with an upswept back combines two protective elements: a braid or set of braids that sit at your crown, and hair gathered at the back of your head, creating a fuller, more romantic look than a simple braid. This style works beautifully for special occasions or professional events because it reads as intentional and styled, but it’s simple enough to do regularly if you want to. The braids protect your hairline while the gathered-back section creates height and volume.
Creating Visual Interest and Balance
This style is most effective when your braids are substantial enough to be visually interesting—thin, delicate braids can get lost in the back gathering. Two thick braids that meet in the back, or a set of four or five medium braids arranged across your crown, create clear visual definition. The upswept back should sit above your braids, creating a tiered effect where you’ve got braid texture at the crown and voluminous curls in the back.
Building a Braided Crown That Stays Secure
- Create two thick braids from your temples toward the back of your head, or multiple thinner braids across your crown
- Gather the remaining hair at the back of your head into a section above the base of your braids
- You can leave the back section down and voluminous, or braid or twist it for more definition
- Secure everything with bobby pins or a hair cuff that matches your style
- Sleep with this style loosely wrapped in a silk scarf to maintain the braid definition and curl pattern
Worth knowing: This style works best when your hair is at least shoulder-length and relatively thick or dense. Very fine or thin hair may not create the voluminous effect this style is designed to achieve.
13. Claw Clip Curl Definition
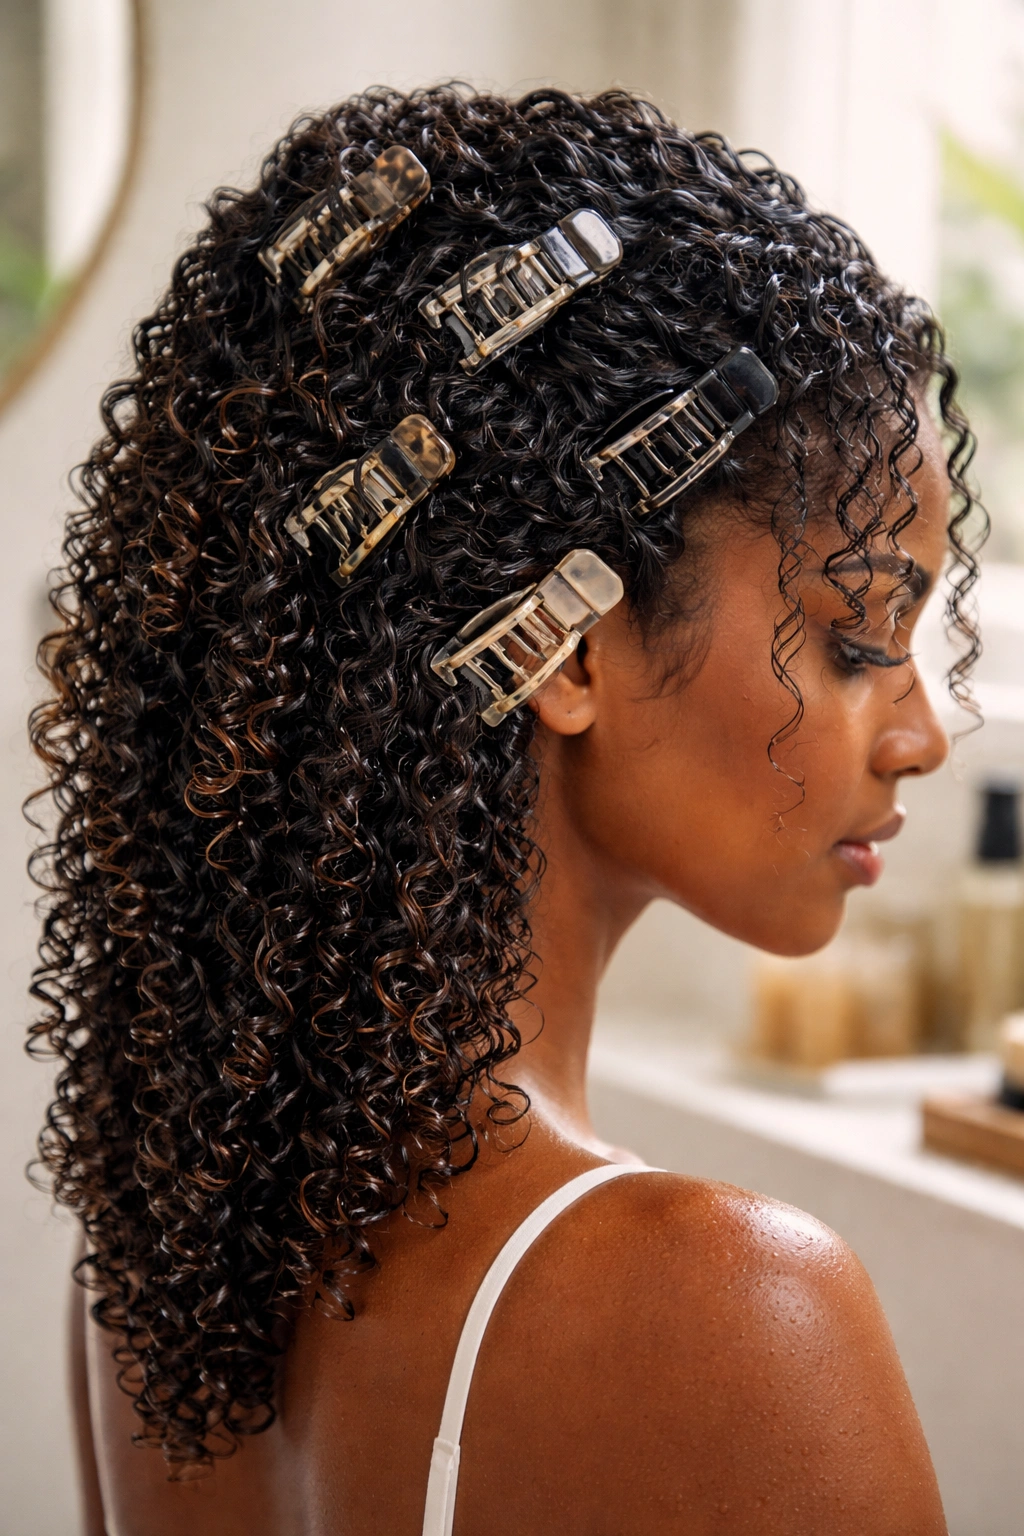
Claw clips aren’t just for holding hair back—they’re actually styling tools that can create curl definition when used strategically. When you clip sections of your hair while it’s wet or damp with product, the clips hold those curls in place as they dry, essentially creating a heatless set that results in bouncier, tighter curls. The beauty of this method is that it’s completely heatless, it requires no special skills, and it turns your claw clips into legitimate styling tools.
The Wet Set Process
Start with clean, freshly product-applied hair that’s still quite wet. Divide your hair into 4-8 sections (depending on how many curls you want to define), apply your styling product to each section, then clip each section close to your scalp with a claw clip. As your hair dries—which takes several hours or overnight—the clips hold the curls in place, essentially setting them. When you release the clips, you’ve got beautifully defined curls that hold their shape longer than air-dried curls.
Results and Style Versatility
- Curls set this way will be tighter and more defined than your natural wash-and-go pattern
- The set lasts 3-5 days depending on how active you are and what your hair naturally does
- You can leave curls loose after releasing the clips, or gather them into a style (high ponytail, buns, etc.)
- This method works on all curl patterns, though it’s particularly effective for people whose natural curls are looser or less defined
- Sleeping in claw clips is uncomfortable, so only use this method during waking hours
Pro tip: Using multiple claw clips (6-8) instead of just a couple gives you more curl definition and creates a fuller look. The clips don’t slip out easily, so don’t worry about them falling—just make sure they’re clipped securely close to your scalp.
14. Side-Swept High Ponytail with Volume
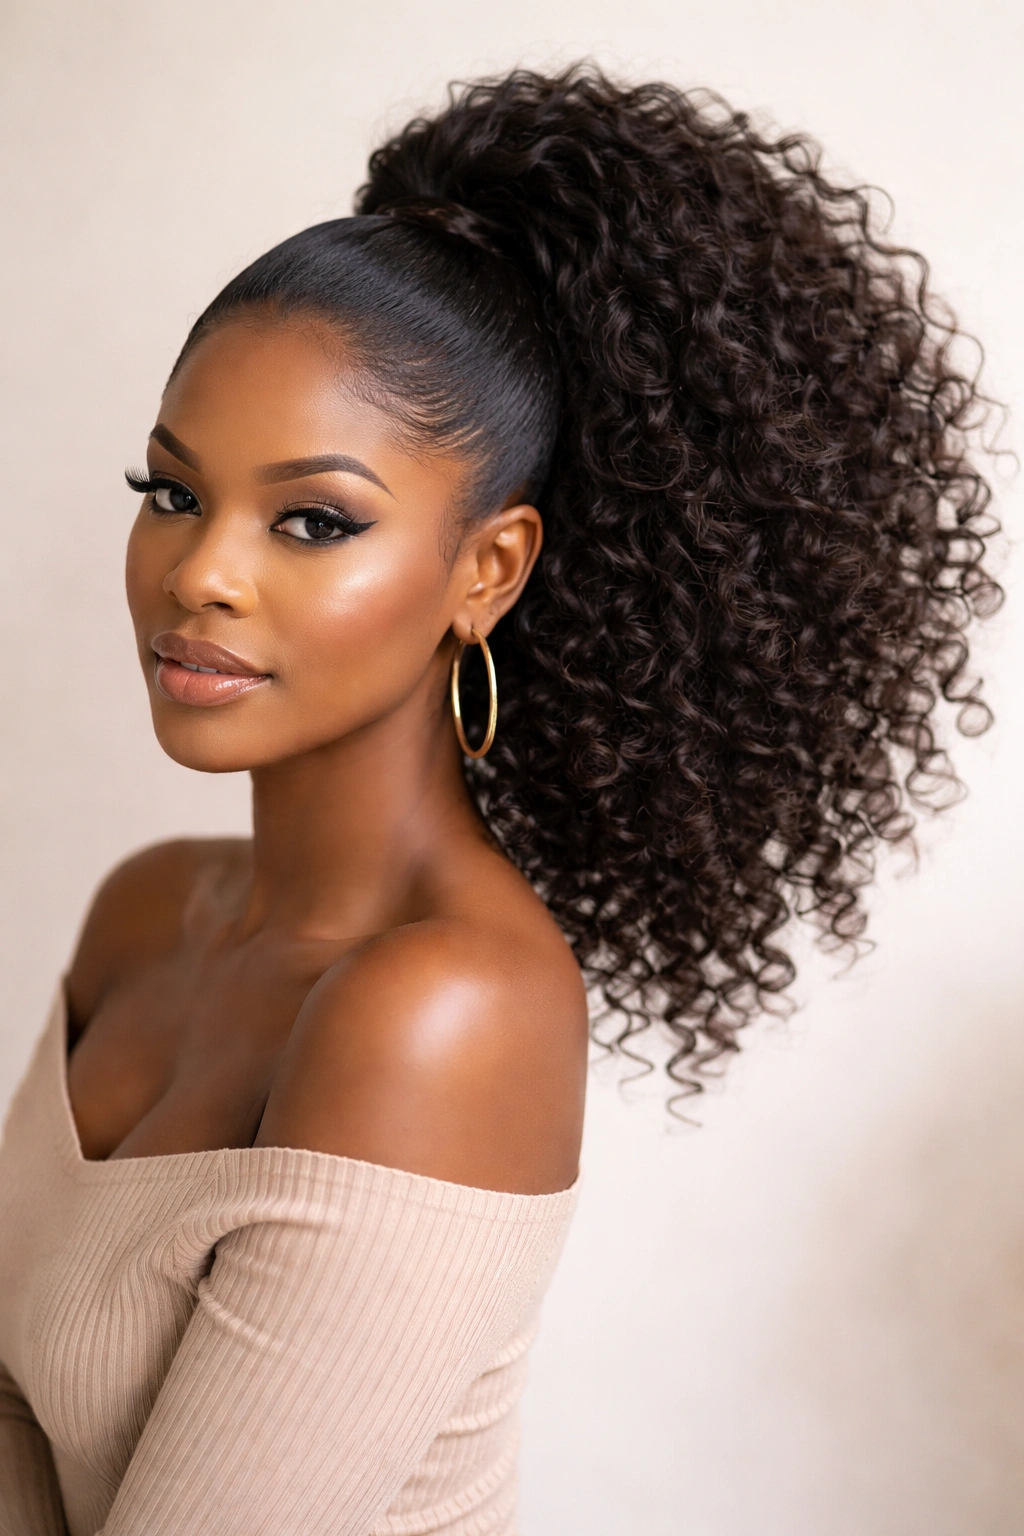
A side-swept high ponytail gathers your hair toward one side at the crown, creating an asymmetrical, voluminous look that’s playful and flattering. By positioning the ponytail to one side instead of center, you create an illusion of height and movement. This style works beautifully for casual settings, and it’s also a smart choice for when your hair’s natural curl pattern is looking a bit loose—the styling and product application tightens everything back up.
Positioning for Maximum Visual Impact
The side-sweep comes from how far to the side you position your ponytail. Positioning it directly at your temple creates a dramatic side-swept look. Positioning it halfway between center and your temple creates a softer asymmetry. The further to the side you go, the bolder the statement becomes. You want your ponytail to sit high enough that it creates visible height at the crown, but positioned toward one side to create that distinctive asymmetrical shape.
Creating Volume and Bounce
- Apply volumizing mousse or texture spray to your roots before gathering your ponytail (this creates lift at the crown)
- Tease gently at the crown to create a small cushion of texture before gathering your ponytail
- Gather your ponytail tightly and secure at your desired side position with an elastic band
- Gently lift and separate the ponytail at the base to create roundness and volume
- Smooth your hairline and any flyaways with edge control
- The ponytail itself should show your natural curl definition—don’t flatten it by over-smoothing
Worth knowing: A side-swept high ponytail is one of the most flattering styles for round or square face shapes because the asymmetry and height create the illusion of a longer, narrower face. If you have these face shapes, this style is worth experimenting with.
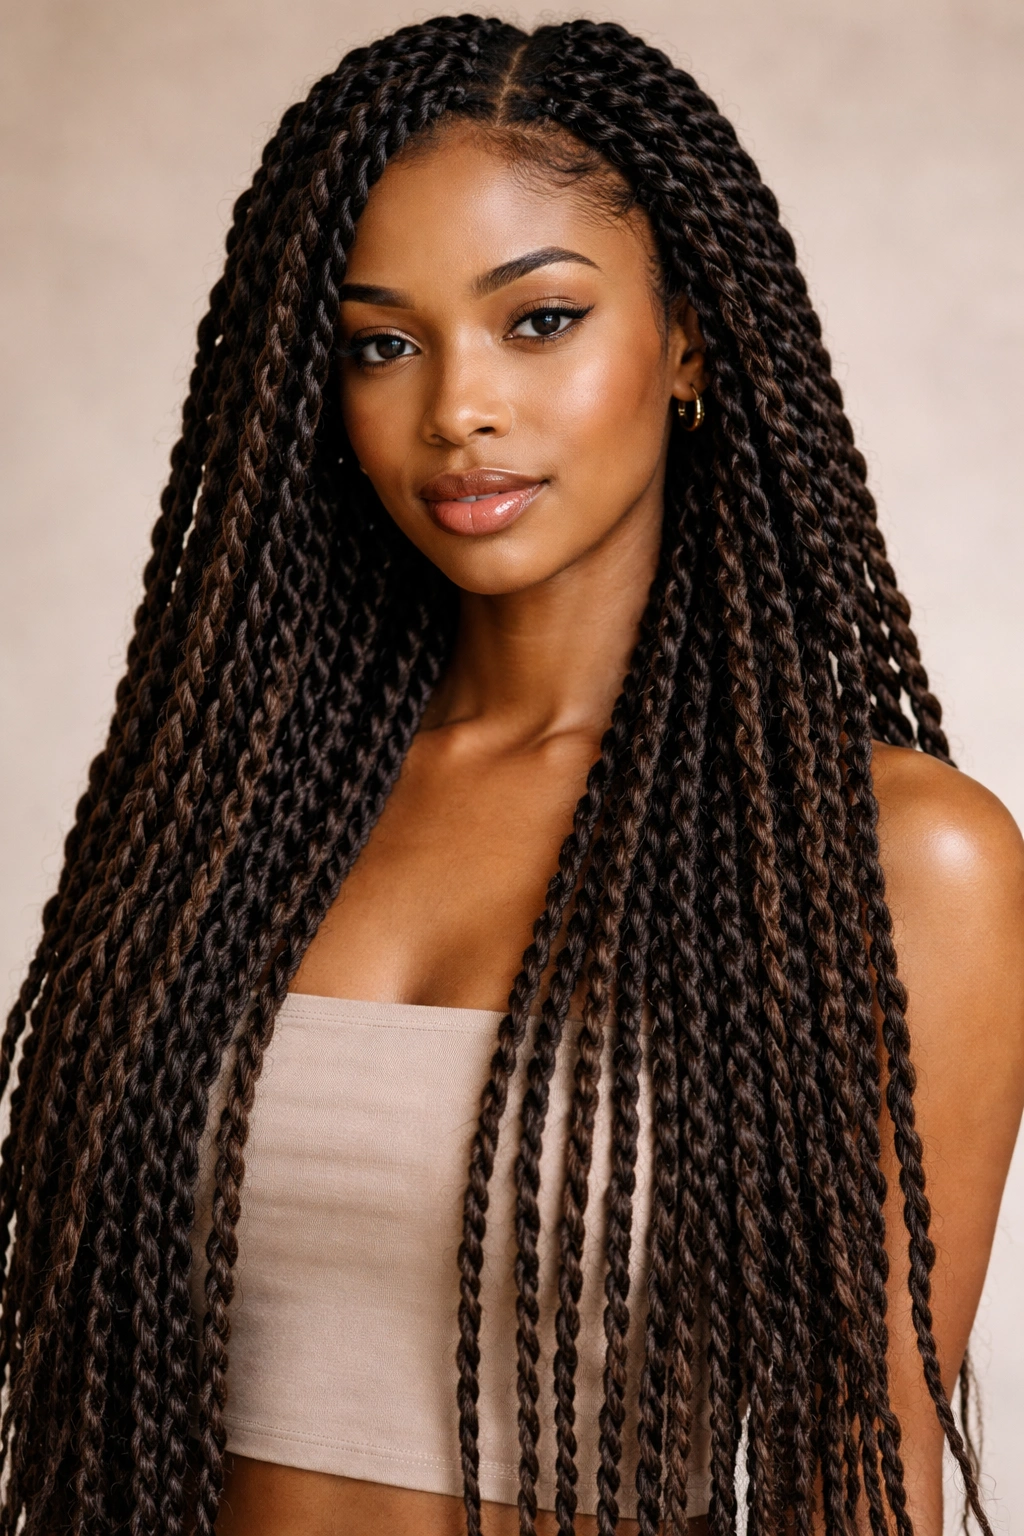
15. Mini Twists or Locs
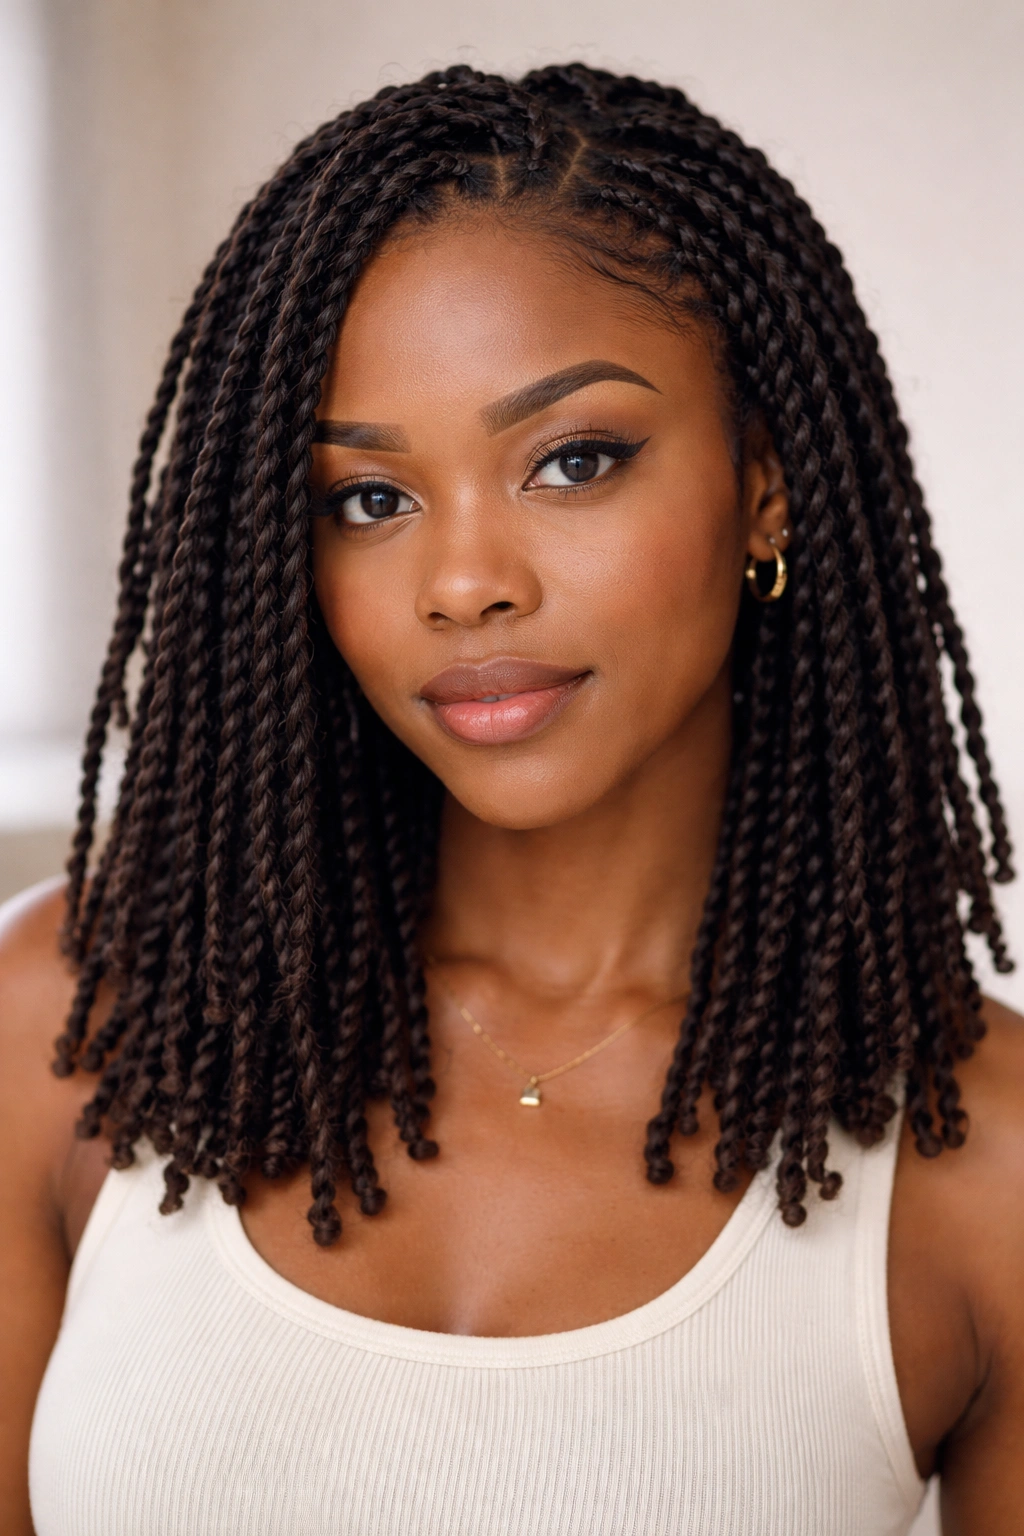
Mini twists (sometimes called micro twists) are individual two-strand twists installed throughout your entire head, creating a fully protective style that can last 4-8 weeks depending on how well you maintain it. Mini twists offer serious protective benefits because every single strand is secured in a twist, which means minimal manipulation of your natural hair underneath. This is one of the most popular protective styles for good reason—they’re versatile, they last a long time, and they look polished while still showing personality.
Installation and Realistic Time Investment
Installing mini twists from scratch takes serious time—typically 6-10 hours depending on hair density, whether you’re using extensions, and how many twists you’re creating. Most people get mini twists installed in a salon, though some people with patience do them at home. The upfront time investment is significant, but the payoff is massive: you get 4-8 weeks of zero styling needed. You wash, wrap at night, and that’s it. Your hair is completely protected and you still look intentionally styled.
Styling Versatility and Maintenance
- Mini twists can be worn down for maximum visual impact and volume
- You can gather them into ponytails, buns, or upswept styles for variety
- Wrap twists in a silk bonnet nightly to maintain definition and prevent frizz
- Wash your scalp every 1-2 weeks by parting the twists gently and shampooing the scalp (don’t wash the twists themselves)
- You can sleep on mini twists without worry—they’re secure and durable enough to handle any sleeping position
- By week 4-6, your roots will have grown out, which creates a natural, textured look at the base of each twist
Pro tip: Mini twists are one of the few protective styles that actually improve over time. The first week, they look tight and fresh. By week 3-4, they’ve relaxed slightly and look more natural and less severe. Some people intentionally wait a week before wearing their twists down because they prefer the softer look of slightly relaxed twists.
Final Thoughts
The right natural afro hairstyle is the one that makes you feel like yourself, that works with your actual life and schedule, and that celebrates your texture instead of fighting against it. Some of these styles take 10 minutes, others take hours to install—the important thing is knowing which styles match what you actually have time for on any given day. Your natural texture is genuinely versatile, and once you understand how it behaves and what enhances it, you can create looks that are both beautiful and authentically yours.
The most important thing to remember is that experimentation matters. The style that looks stunning on someone else might not feel right for you, and that’s completely fine. Your hair is uniquely yours—its density, curl pattern, porosity, and length create their own set of possibilities. The styles that make you feel confident and comfortable are the ones worth returning to, regardless of what’s trending or what anyone else is wearing. Your crown, styled the way you want it, is always the best look you can possibly achieve.