Wavy layered blowouts defined an entire decade of hair — and they’re making a serious comeback. There’s something undeniably appealing about the effortless-looking texture, movement, and volume that these styles deliver. The magic wasn’t actually effortless, though. Achieving these signature ’90s waves required the right technique, the perfect products, and hair that could hold a shape. What made these hairstyles iconic wasn’t just the waves themselves, but how the layers worked together to create depth, dimension, and that coveted “I just woke up like this” vibe that everyone wanted.
The beauty of these styles is that they transcend the decade entirely. Modern variations of ’90s layered blowouts are everywhere because they genuinely work for most hair types, face shapes, and lifestyle preferences. They’re versatile enough to dress up or down, textured enough to hide imperfections, and movement-focused enough to feel dynamic and alive. Whether you’re looking to recreate an exact throwback look or adapt one of these styles to your current aesthetic, understanding what made each one work is the first step to pulling it off successfully.
1. The Shag
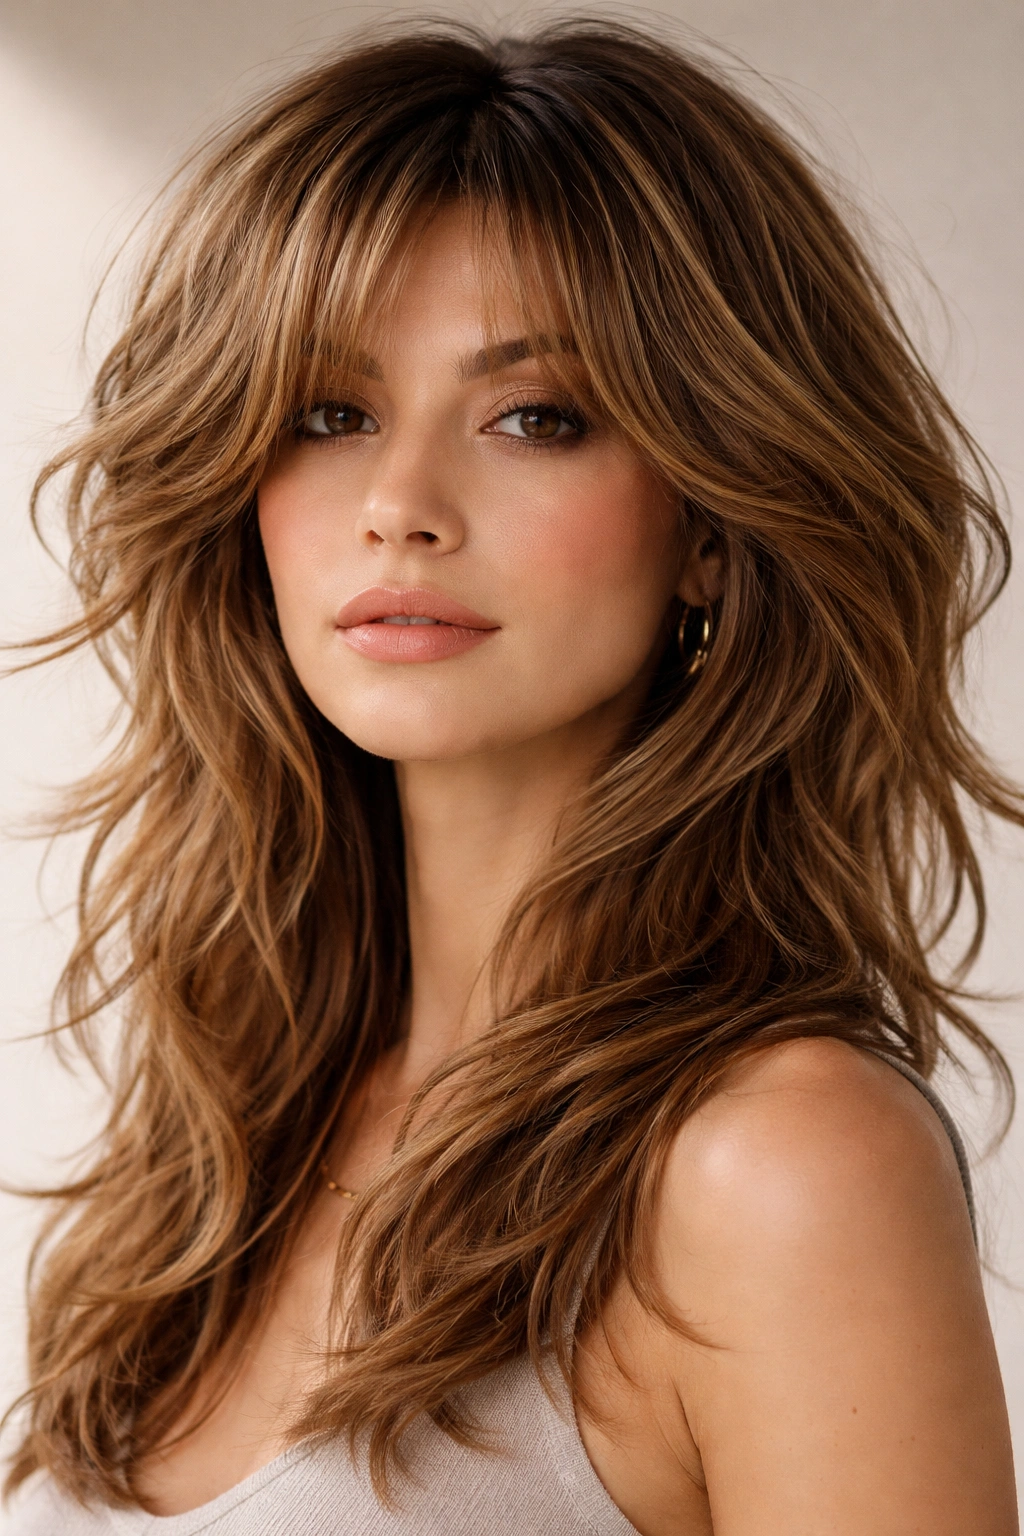
The shag is the ultimate ’90s power move — choppy, textured layers throughout with maximum movement and volume. This style features shorter layers on top that create lift at the crown, mid-length layers that add dimension and texture, and longer pieces underneath that create movement and flow. The genius of the shag is that it works with nearly every hair texture, from bone-straight to naturally curly. When blow-dried with the right technique, it creates waves that feel organic rather than rigidly curled.
Why It Was Revolutionary
The shag challenged the idea that longer hair meant sleek, blunt ends. Instead, it embraced choppy texture and deliberate movement. The key to its popularity was that it looked intentional and styled while still having an undone quality. Celebrities wore variations of the shag throughout the decade, and people couldn’t get enough of the attitude it conveyed. It signaled confidence and a willingness to take risks with hair.
How to Achieve the Shag
- Ask your stylist for layers starting at mid-length that gradually get shorter toward the crown, creating a stacked effect
- Request point-cut ends (not blunt) so the layers blend naturally and create feathered movement
- Aim for 4-6 distinct layers rather than a completely choppy, sparse look — you want texture without looking stringy
- Pair the cut with a blow-dry that emphasizes the layers; use a round brush on the crown for lift and a concentrator nozzle to direct the mid-length and bottom layers outward
Pro tip: The shag looks best when your roots have a bit of texture to them, so consider scrunching mousse into damp hair before blow-drying to maximize natural wave pattern and volume.
2. The Rachel
The Rachel was perhaps the most famous haircut of the entire decade — a collaboration between celebrity hairstylist Chris McMillan and a television show that made everyone demand this exact cut. The style features face-framing layers that begin around the cheekbones, choppy texture throughout the mid-lengths, and longer underlayers that create movement and shape. When blow-dried, the face-framing pieces wave away from the face while the underlayers create fullness and texture throughout.
What Made It Iconic
Part of the Rachel’s appeal was its celebrity association, but the real reason it became a phenomenon was that it genuinely worked. The face-framing layers were flattering, the texture was achievable with regular blow-dries, and it had enough movement to feel dynamic and alive. The style conveyed sophistication, confidence, and access to good hair care. It became a status symbol, in a way — if you had the Rachel, you had time and money to maintain it properly.
The Modern Approach to This Style
- Get a cut with longer layers that start at the cheekbones and blend down through the shoulders
- Ask for choppy texture in the mid-lengths and a tapered, feathered finish on the ends
- The key to pulling this off is regular trims every 4-6 weeks to maintain the shape and prevent the layers from looking overgrown
- Style it with a blow-dryer, round brush, and volumizing mousse applied to damp hair before drying
- Wave the face-framing pieces away from your face while blow-drying, and use a curling iron to touch up the waves if needed
Worth knowing: The Rachel requires dedication to styling. If you’re not willing to blow-dry and style regularly, this cut won’t deliver its intended effect — it won’t look intentional or chic if you let it air dry.
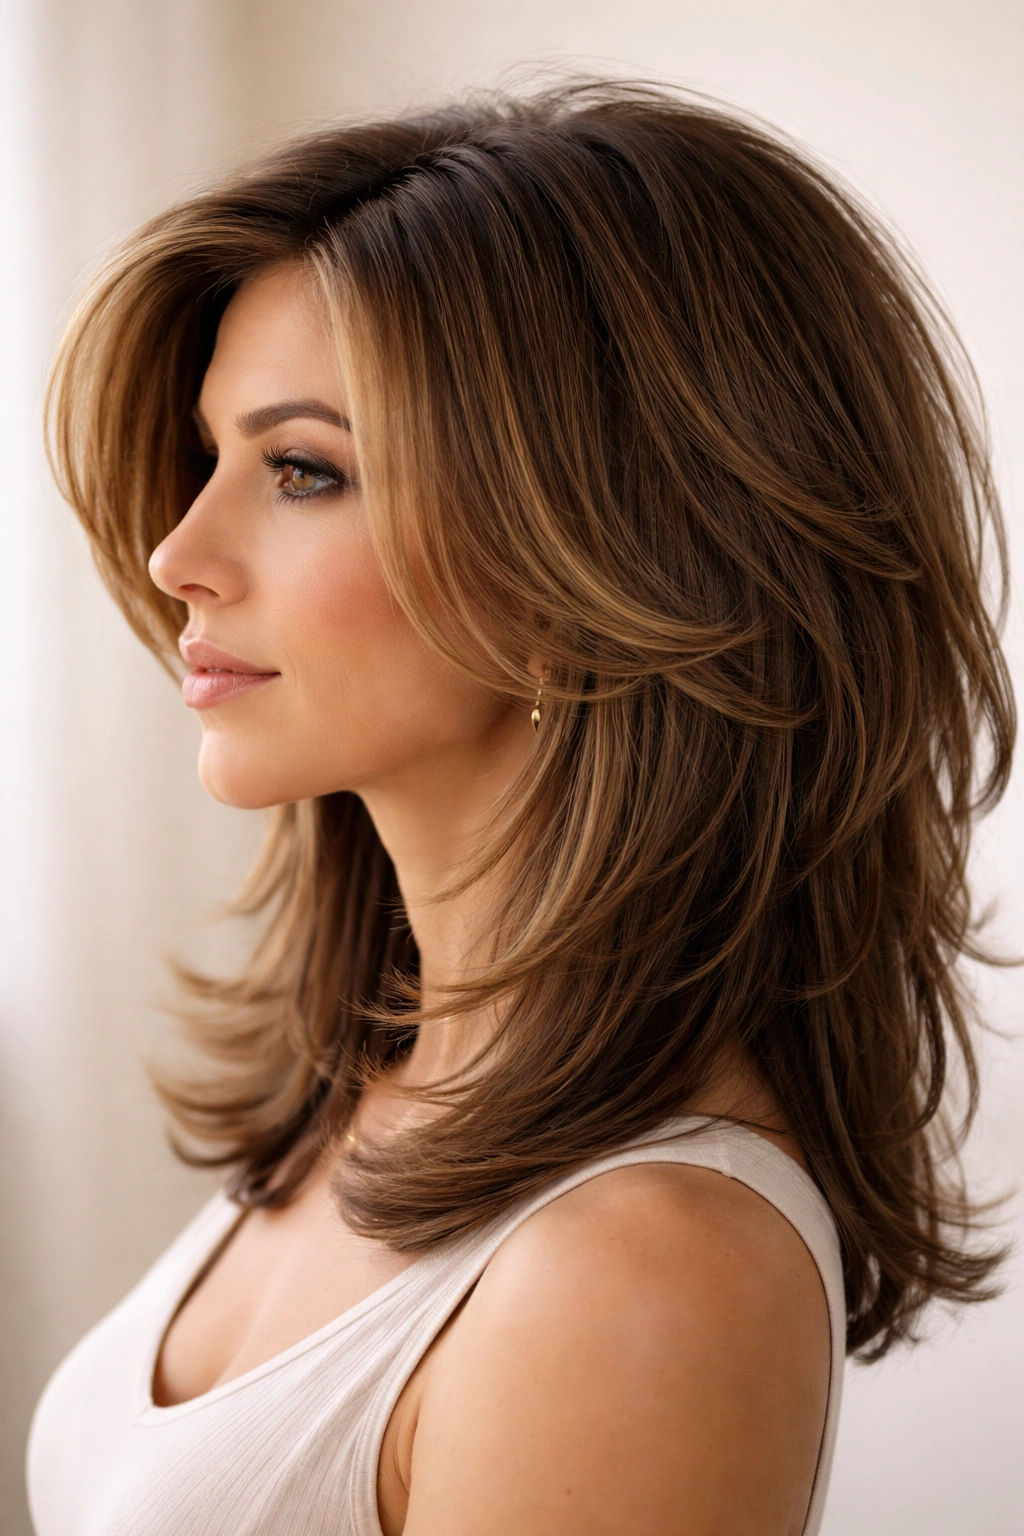
3. The Butterfly Layers
This style earned its name from the way the layers moved and shaped the head — they fanned out like butterfly wings. The cut features very short, choppy layers on top that create volume at the crown, progressively longer layers through the mid-section that create width and movement, and longer pieces underneath that add length and flow. When blow-dried properly, these layers create a shape that’s rounded and full, with waves that move independently throughout the head.
The Technique Behind the Shape
The butterfly layers work because each layer is deliberately shorter than the one beneath it, creating a stacked, sculptural effect. The top layers dry faster and create lift, while the longer underlayers provide movement and allow the hair to flow naturally. This creates a silhouette that’s fuller at the crown and gradually tapers, which is flattering for most face shapes. The choppy texture means you’re not fighting against your natural wave pattern — you’re working with it.
How to Create This Look
- Request very choppy, point-cut layers that create obvious texture and separation throughout
- Start with much shorter layers at the crown (ask your stylist to show you the length before cutting) and graduate to shoulder-length or longer underneath
- Ask for plenty of texture in the ends — this prevents the style from looking heavy or blunt
- Blow-dry with a round brush, working section by section and creating volume at the crown
- Finish with a curling iron or wand to enhance the wave pattern if your hair doesn’t naturally wave
Insider note: This style photographs beautifully because the layers catch light differently, creating dimension and depth that reads well in photos and in person.
4. The Curtain Bangs Blowout
Curtain bangs became a defining feature of ’90s hair, and when paired with layered blowouts, they created an ultra-chic frame for the face. This style combines face-framing bangs that split down the middle and curve away from the face with soft, wavy layers throughout the rest of the hair. The bangs create movement and softness, while the body of the hair is layered to create texture and flow that complements the face-framing effect.
Why Curtain Bangs Were Game-Changing
Curtain bangs offered an alternative to blunt bangs or no bangs at all — they provided face-framing without the commitment. They were forgiving because they grew out gracefully, they looked good on nearly every face shape, and they created movement that made hair look more voluminous. Paired with layered waves, they created a cohesive, intentional look that felt expensive and considered.
Building the Curtain Bang Blowout
- Get a long-layered cut that creates texture and movement throughout
- Ask your stylist to add curtain bangs that start longer at the center and taper gradually to create that face-framing curve
- The bangs should blend seamlessly into the layers below, not look like a separate element
- When blow-drying, direct the bangs away from your face using a small round brush and a blow-dryer, encouraging them to curve outward
- Use a 1.25-inch curling iron to add wave and shape to both the bangs and the body of your hair
Pro tip: Curtain bangs look best when they’re swept fully away from your face, not falling straight down. This shows off the movement and creates that signature ’90s moment.
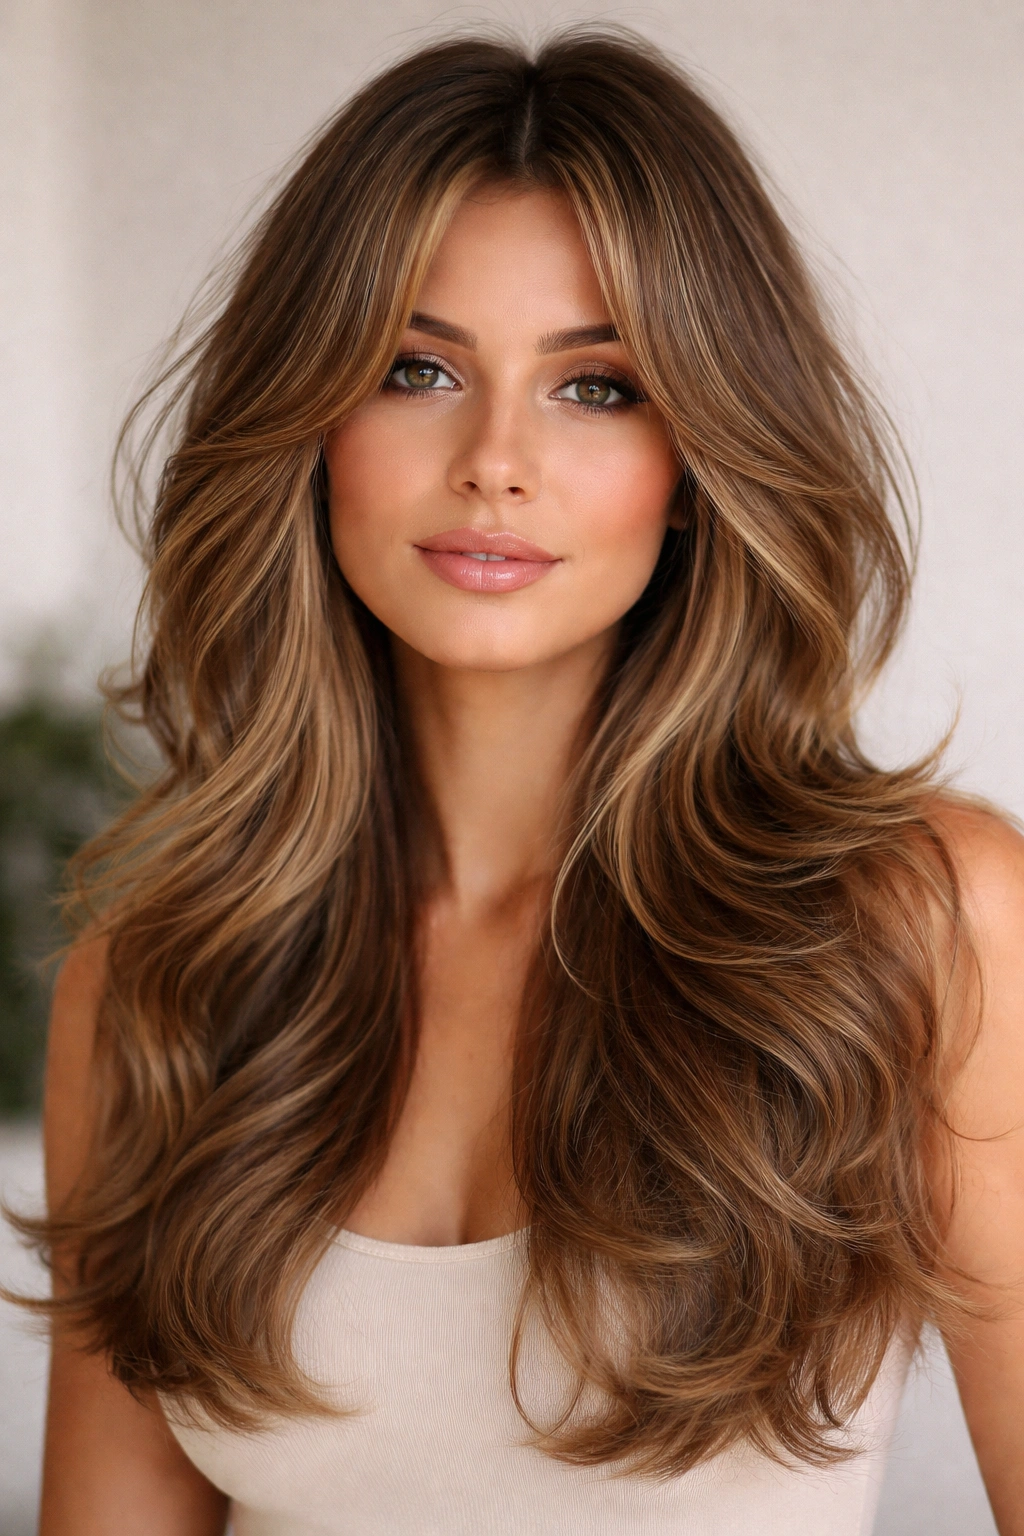
5. The Face-Framing Waves
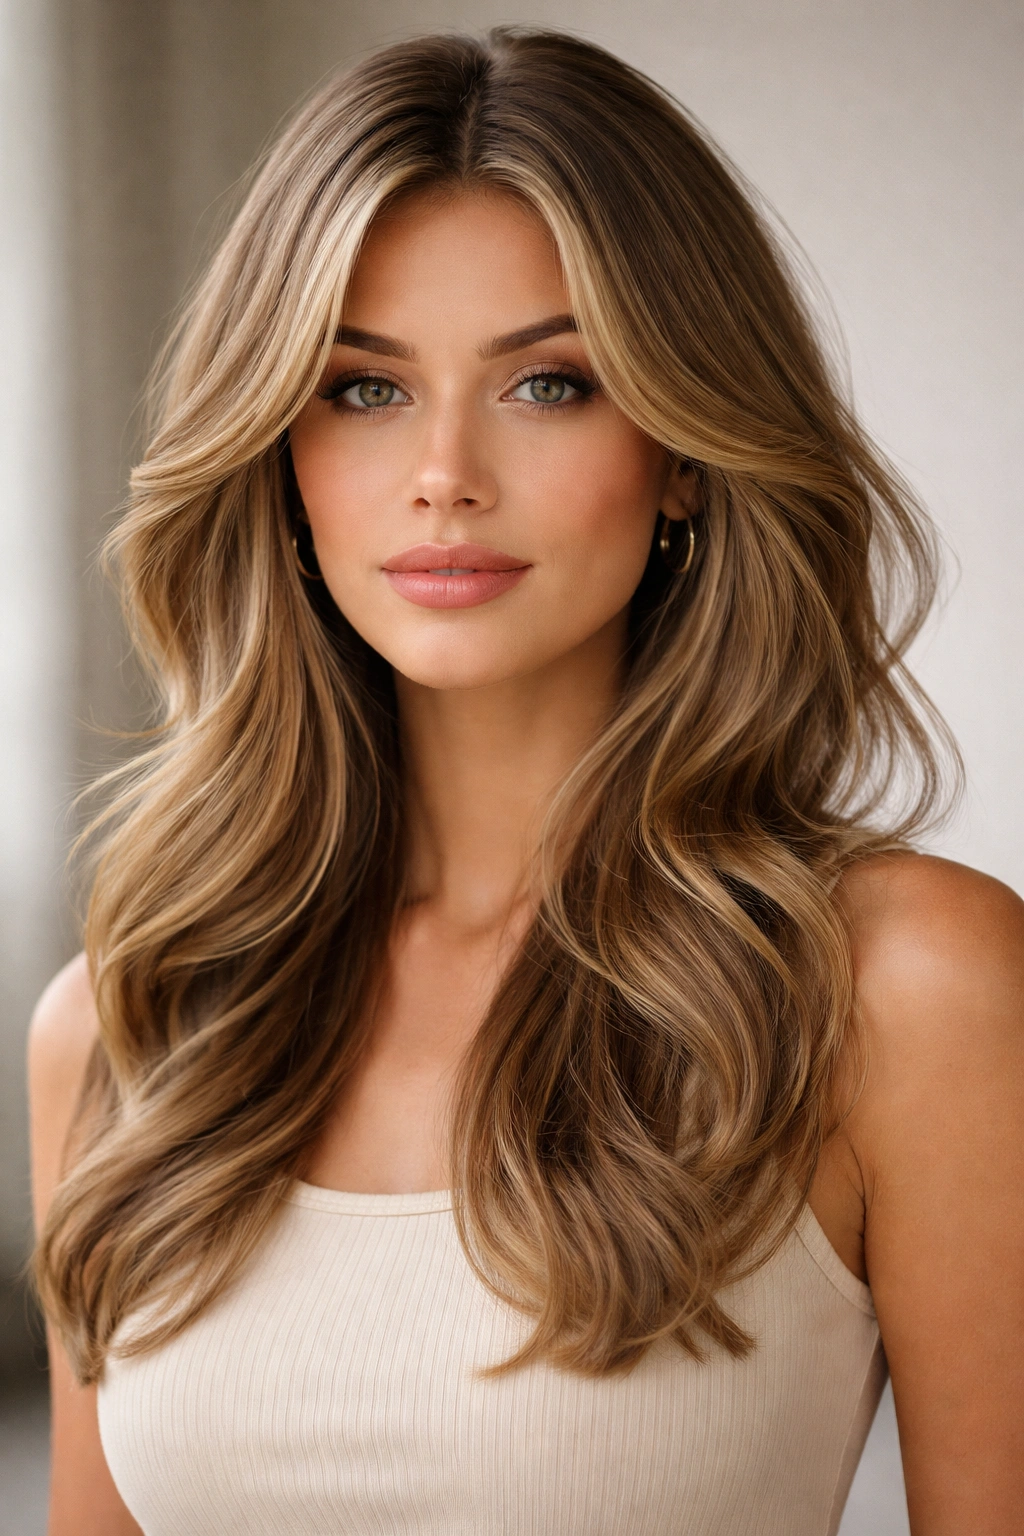
This style strips away some of the choppy texture in favor of smoother, more controlled waves that are strategically placed to frame and flatter the face. The hair features shorter, softer layers around the face and through the crown area, longer length overall, and waves that are intentionally directed to enhance facial features. The effect is sophisticated and polished while still maintaining the movement and texture that defined ’90s hair.
The Elegance of Strategic Layering
Face-framing waves work because they focus styling effort where it matters most — around the face. Rather than choppy texture throughout, this style relies on larger, more deliberate waves that are achieved through blow-drying technique and strategic curling. The layers are present but subtle, supporting the wave pattern rather than creating obvious choppiness. This creates a more refined, expensive-looking result that appeals to people who want movement without chaos.
Styling This Look
- Get a layered cut that creates face-framing shorter pieces and longer length overall
- The layers should be subtle and blended rather than choppy and obvious
- When blow-drying, focus on creating volume at the crown using a round brush
- Use a medium or large barrel curling iron to create soft waves through the mid-lengths and ends
- Direct the waves away from your face and ensure they curve in a way that flatters your face shape
Worth knowing: This style requires blow-drying and styling to achieve the wave pattern — it won’t happen on its own unless you have naturally wavy hair. The payoff is worth the effort because the result looks high-end and intentional.
6. The Tousled Shoulder Length
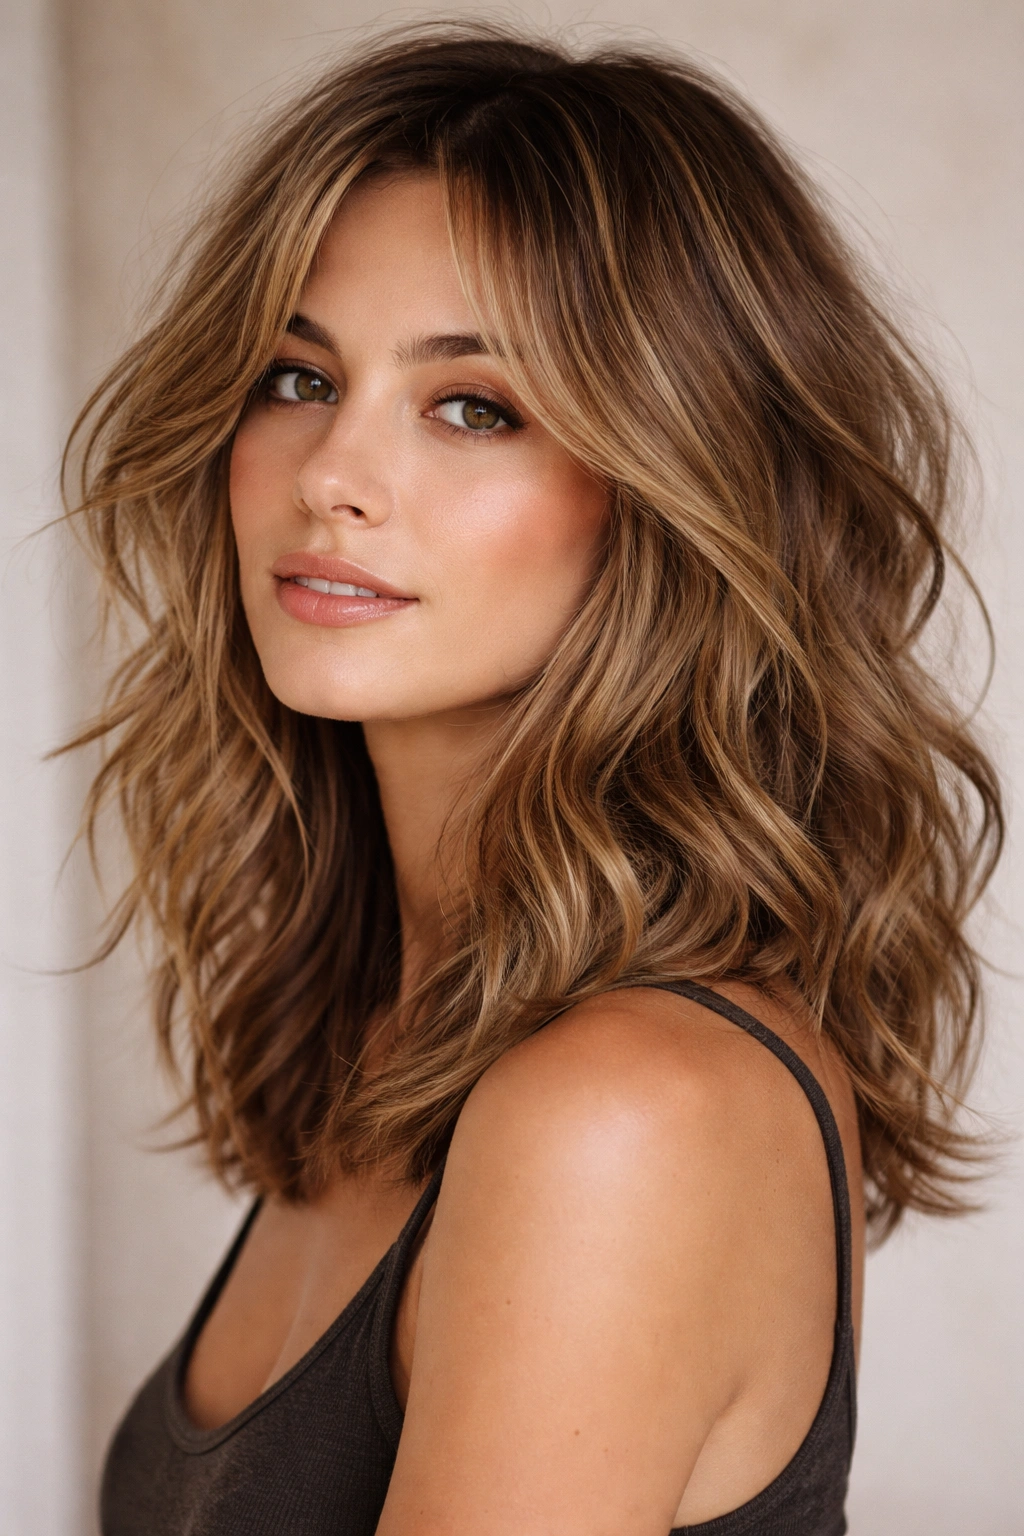
This style captures the essence of ’90s effortlessness by combining choppy layers in shoulder-length hair with tousled waves that look deliberately undone. The cut features layers that create movement and texture, ending approximately at shoulder length where the longest pieces create shape and flow. When blow-dried and textured, the hair looks like you just came from the beach or threw it together without much effort — even though achieving this look actually requires technique and intention.
The Art of Looking Effortless
The tousled shoulder-length look works because it embraces texture and movement without requiring rigidity or perfection. The slightly choppy layers create separation and dimension, while the tousled wave pattern prevents the style from looking too polished or stiff. This is the closest thing to a “wash and go” approach in the ’90s blowout category, though it still requires some styling effort to achieve the intentional tousled effect.
Creating the Tousled Effect
- Get a choppy, layered cut that falls around shoulder length with texture throughout
- The layers should feel organic and blended, not overly styled or sculpted
- To style, apply texturizing spray or sea salt spray to damp hair for grip and separation
- Blow-dry with your fingers rather than a brush to create texture and movement
- Use a curling iron to add waves, then run your fingers through the waves to break them apart
- Finish with a light hairspray that holds without looking stiff or crunchy
Pro tip: This style actually looks better if it’s not perfectly smooth or perfectly waved — embrace a little messiness and texture for authenticity.
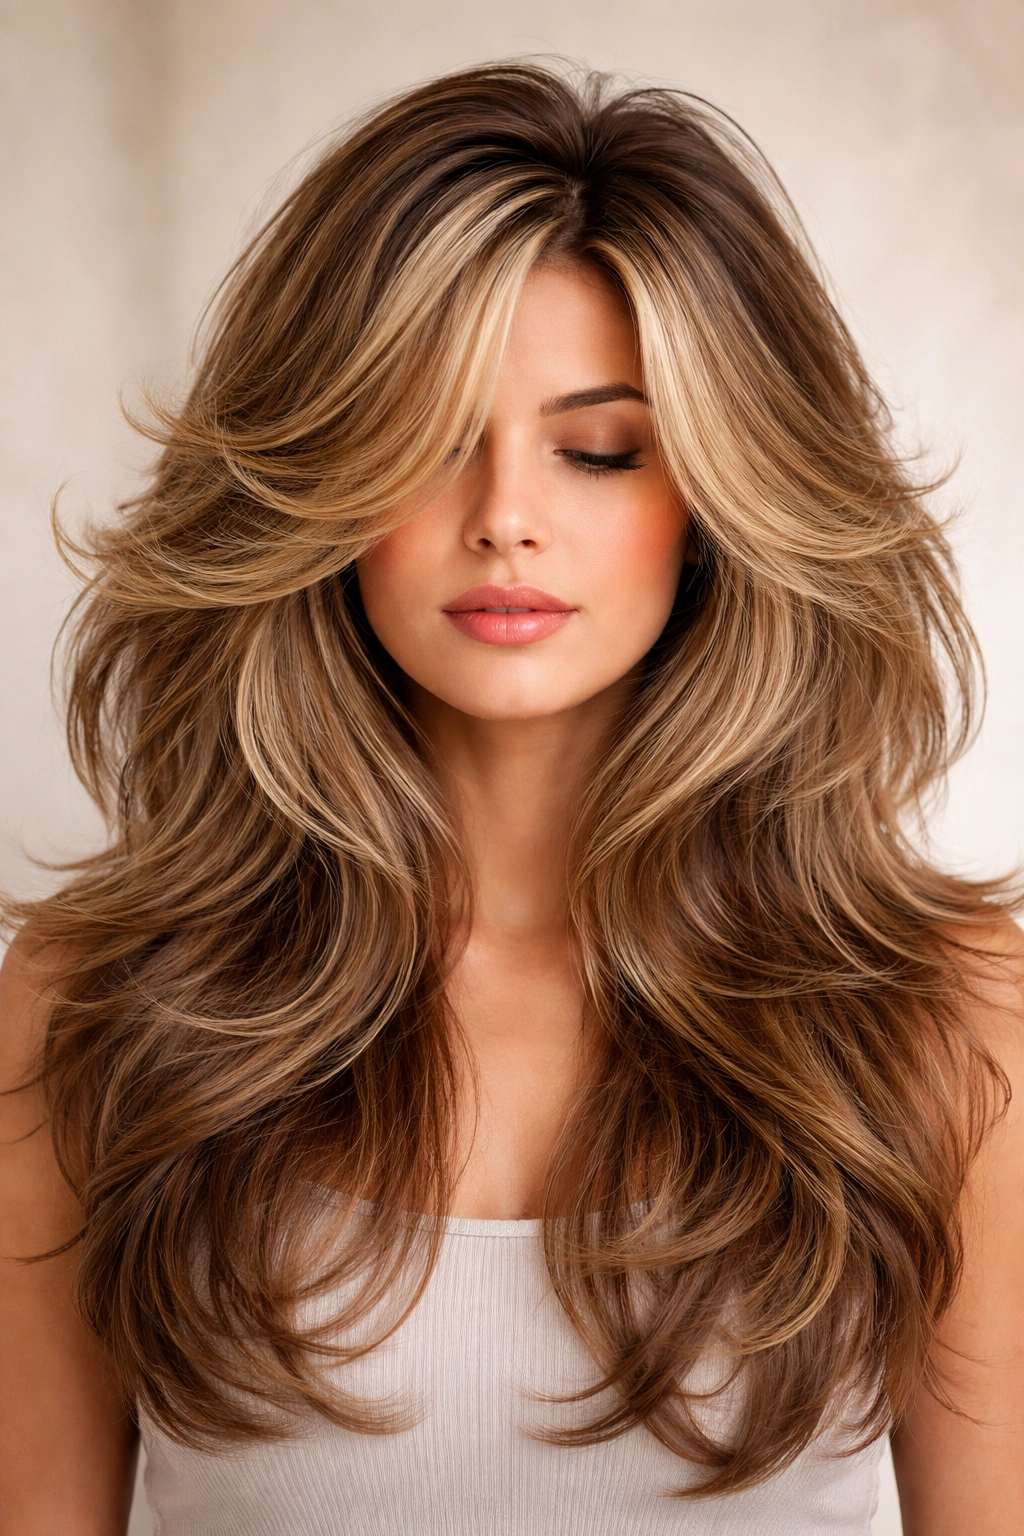
7. The Multi-Layered Feathered Look
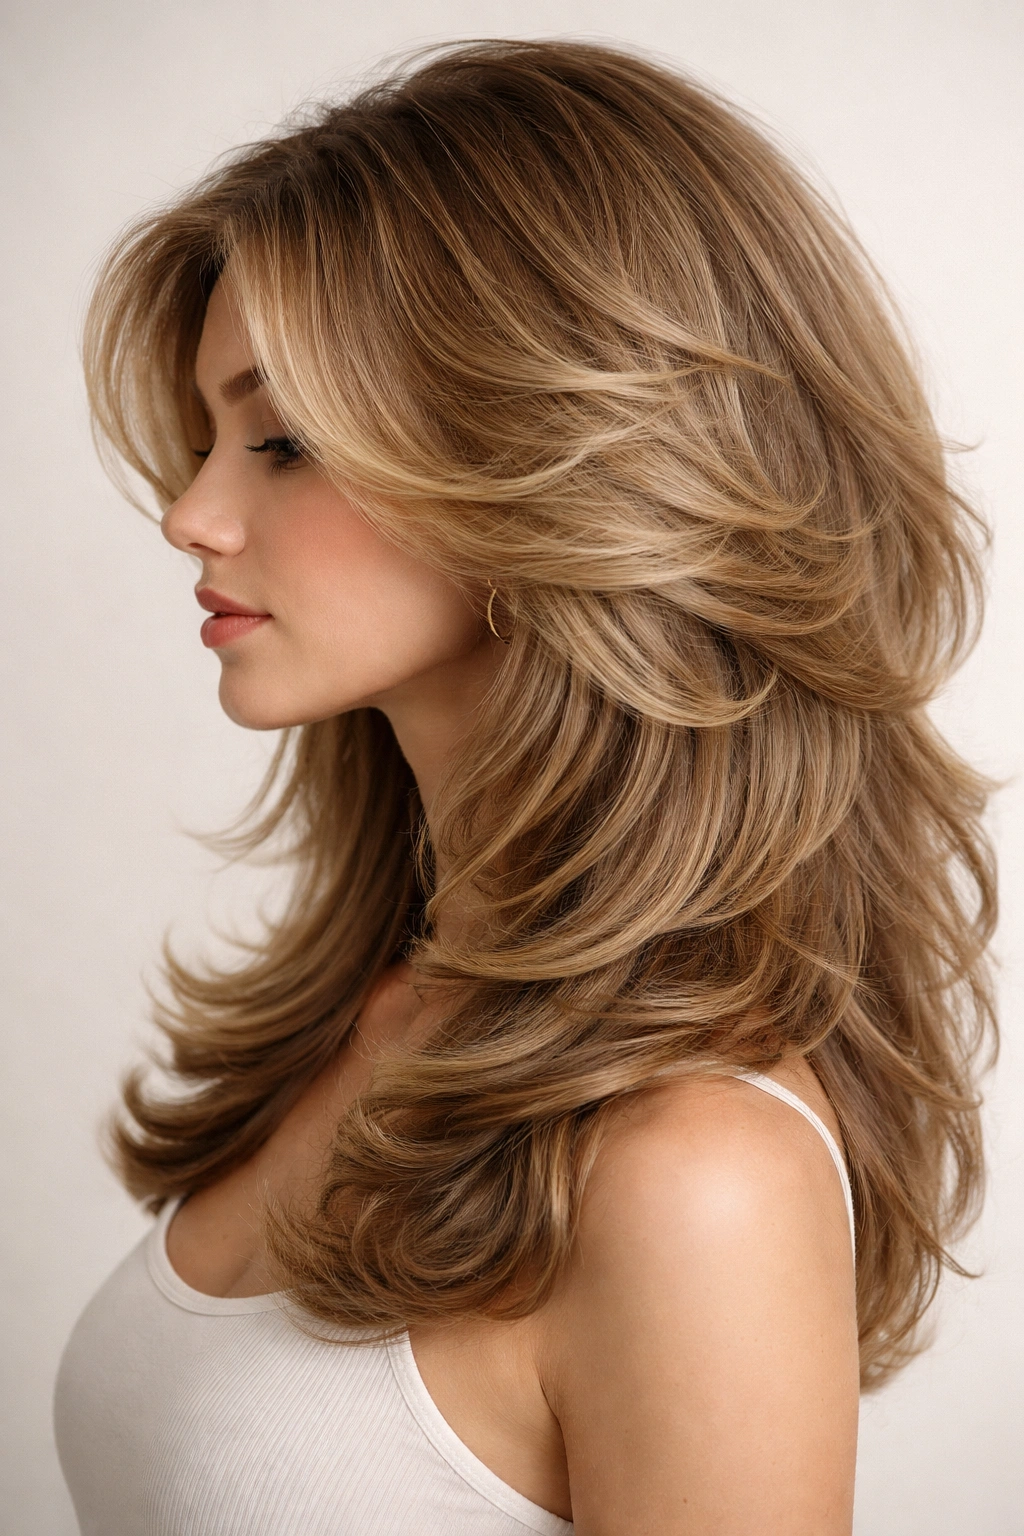
This style takes layering to its maximum with feathered pieces throughout that create movement, volume, and visual interest from every angle. The cut features multiple layers of varying lengths that all blend together seamlessly, creating a shape that’s rounded and full. The feathering technique (rather than choppy cutting) creates softer texture and movement, and when blow-dried, these layers create waves that move fluidly rather than in obvious, distinct sections.
Understanding the Feathering Technique
Feathering differs from chopping because it involves cutting the hair at an angle to create softer edges that blend and blend gradually rather than create obvious separation. This approach works beautifully for creating waves because each feathered layer catches and holds the wave pattern. The result is hair that looks textured and dimensional without looking choppy or sparse. This technique requires skill from your stylist, so it’s worth seeking out someone experienced with this approach.
Achieving the Feathered Wave
- Ask your stylist to use feathering technique throughout, creating multiple blended layers of varying lengths
- Request soft texture rather than choppy, obvious texture — the effect should be subtle and refined
- When blow-drying, work section by section with a medium round brush to create volume and movement
- Use a 1.5-inch curling iron to create waves that follow the feathered layers
- The waves should feel natural and flowing, moving independently rather than looking sculpted
Insider note: This style works particularly well for people with fine or thin hair because the feathering creates the illusion of volume without actual bulk or weight.
8. The Sleek Yet Textured Waves
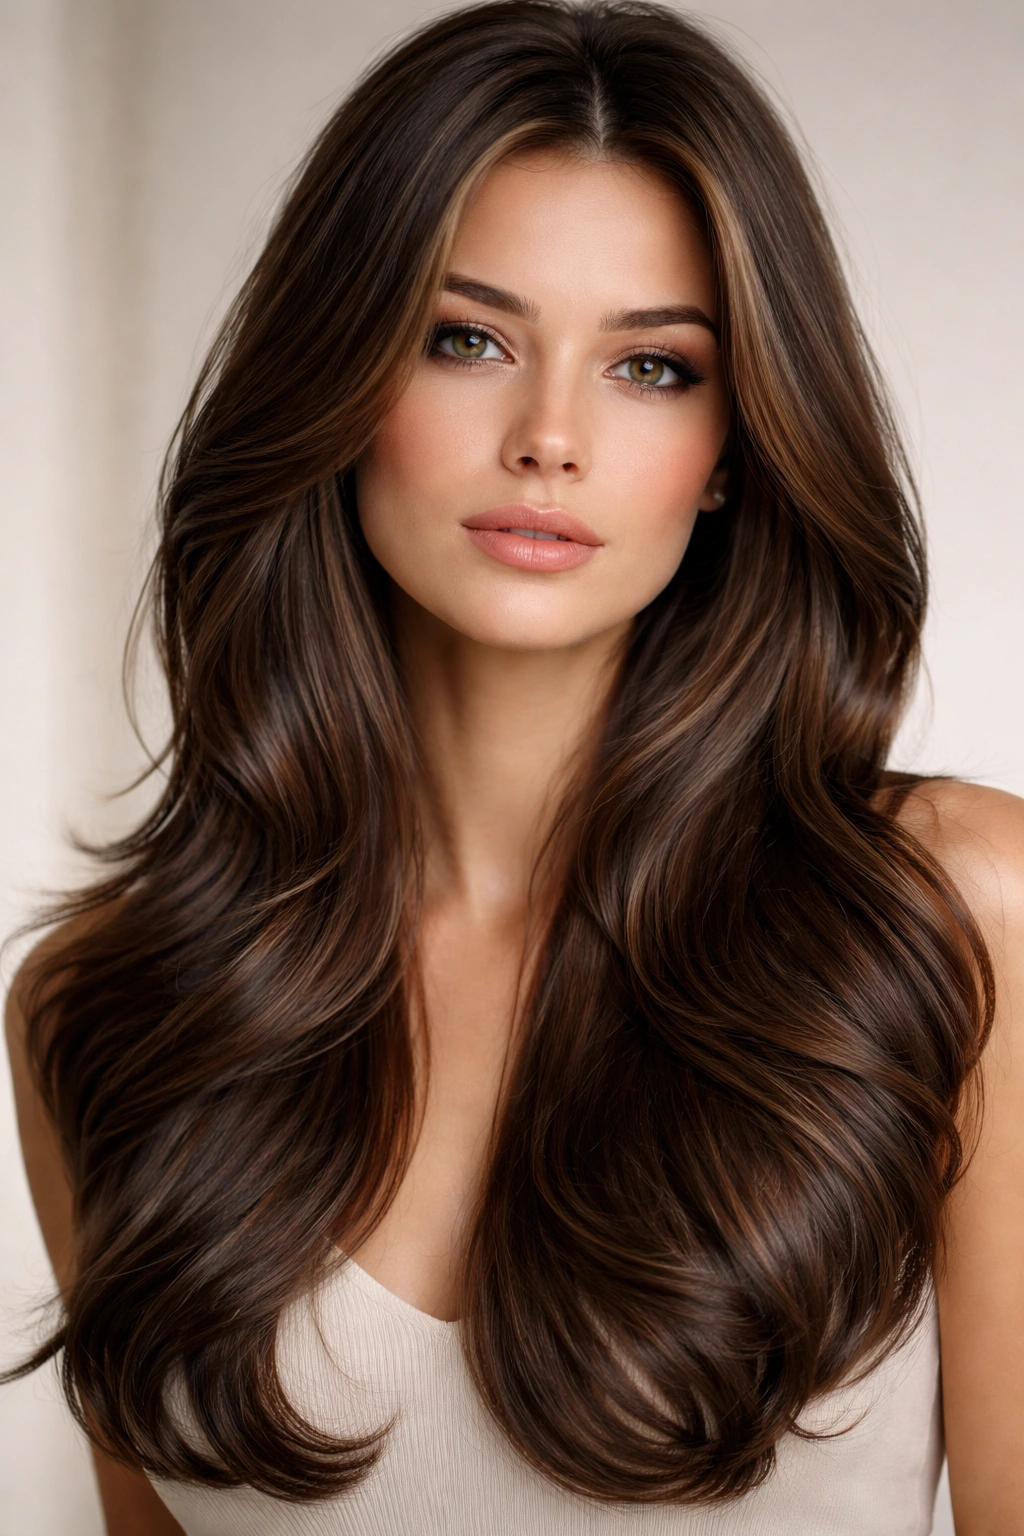
This final style balances polished smoothness with textured movement, creating a look that’s sophisticated and intentional. The hair features long or medium length with strategic layers that create texture and wave capability, but the styling approach is more controlled and refined than the more tousled options. The waves are smooth and deliberate, with a polished finish that suggests professional styling rather than just washing and air-drying.
The Sophistication Factor
This style works for people who wanted the ’90s wave aesthetic but also wanted to look polished and put-together. Rather than tousled or undone, the waves are intentional and controlled. The hair might be slightly longer, the waves might be more regular and consistent, and the overall effect is more elegant. This was the style choice for professional settings, formal events, or simply people who preferred a more refined approach to the wave trend.
Building Your Sleek Textured Style
- Get a layered cut with strategic shorter pieces for movement and longer pieces for shape and swing
- The layers should be obvious enough to allow waves to sit naturally but subtle enough to maintain polish
- Use a smoothing serum or anti-frizz product on damp hair to create a base of sleekness
- Blow-dry with a round brush to create volume at the crown and smooth waves through the lengths
- Use a curling iron to add precise waves, maintaining consistency and control throughout
- Finish with a flexible-hold hairspray that sets the style without creating crunchiness
Worth knowing: This style requires maintenance and regular touch-ups. The waves won’t hold as long as some of the choppier, more textured styles, so you may need to restyle every 1-2 days or use a curling iron to refresh the waves.
Final Thoughts

The ’90s wavy layered blowout isn’t just a nostalgic trend — it’s a genuinely wearable, flattering hair category that works across hair types, face shapes, and personal styles. Whether you’re drawn to the maximum texture of the shag, the sophistication of face-framing waves, or the tousled ease of shoulder-length layers, there’s a version of this look that suits you. The common thread among all eight styles is that they combine intentional cutting with deliberate styling to create movement, dimension, and volume that feels alive and dynamic.
Getting these looks right starts with finding a stylist who understands layering and texture — this isn’t a cut you can achieve at a budget salon with someone unfamiliar with feathering or choppy techniques. Bring photos, discuss your hair type and styling commitment, and be honest about how much time you’re willing to spend blow-drying and styling. Once you have the cut, invest in good styling products: a volumizing mousse, a texturizing spray, a quality blow-dryer, and a curling iron that gets hot enough to create lasting waves.
The most important realization about these styles is that they’re achievable. You don’t need naturally perfect hair or hours of styling time — you need the right cut, the right products, and a technique that works with your hair’s natural pattern rather than against it. Start with the style that speaks to you, commit to regular trims to maintain the shape, and give yourself permission to experiment with different styling approaches until you find what makes you feel confident and like the best version of yourself.