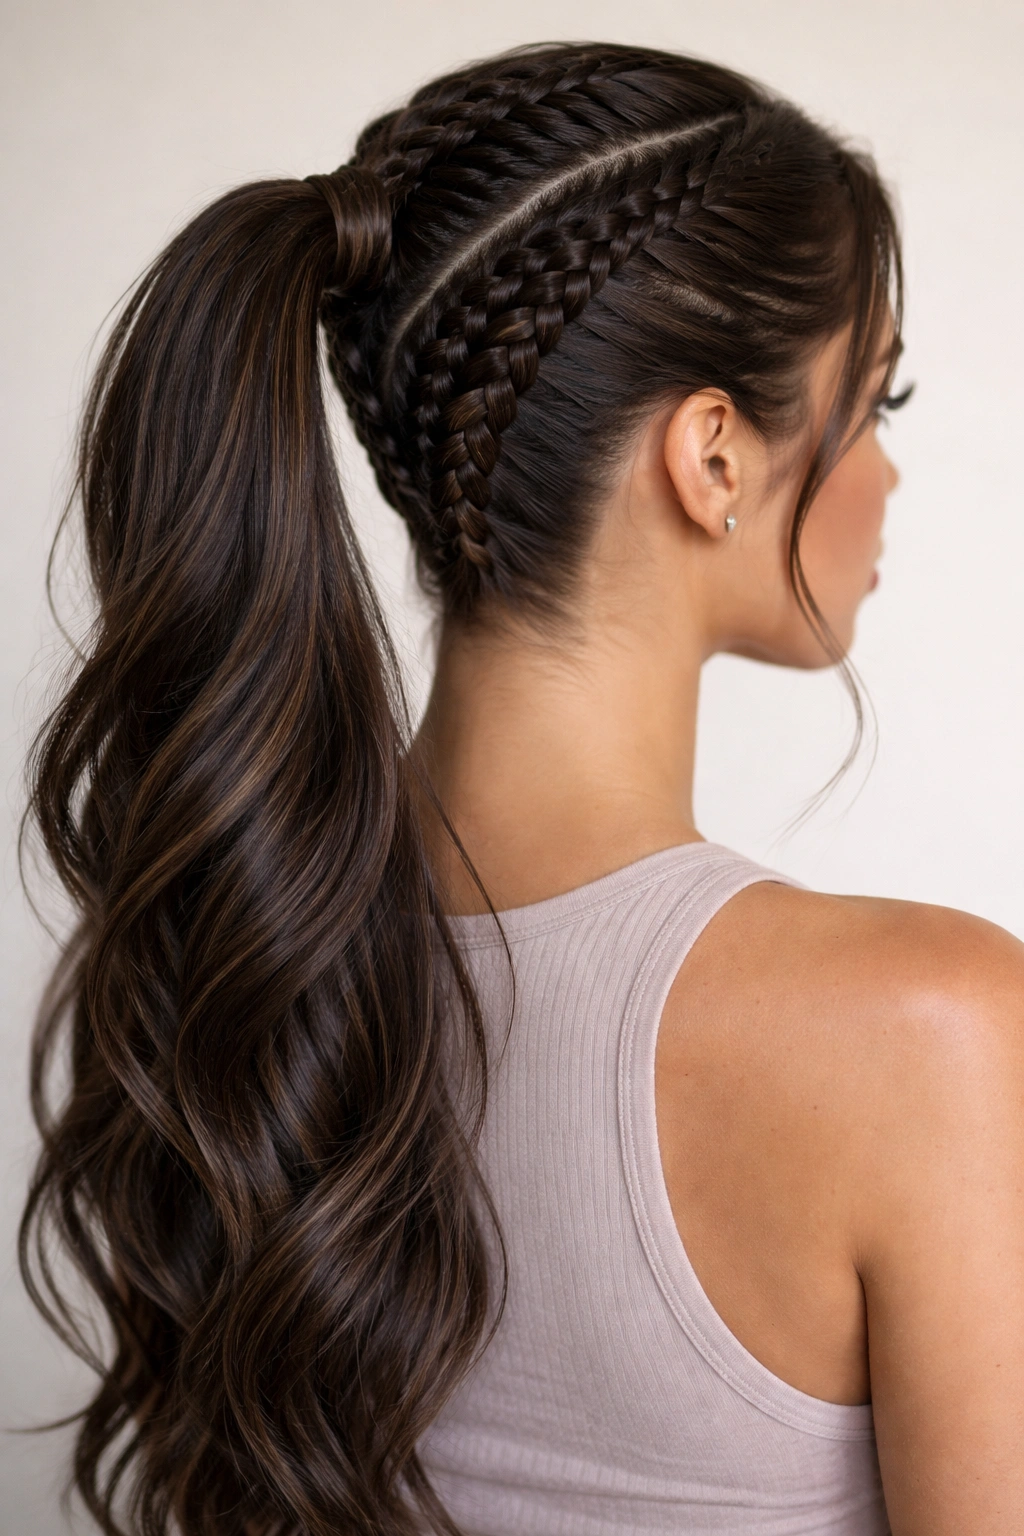
Stitch braids have become one of the most sought-after techniques for creating polished, intricate hairstyles that look far more complicated than they actually are. When combined with a ponytail, they transform an everyday style into something that feels elevated, intentional, and undeniably neat. The beauty of stitch braiding lies in its versatility—the same basic technique creates completely different effects depending on where you place it, how tight you pull, and whether you incorporate your ponytail into the braid itself or position the braid alongside it. Whether you’re heading to work, a special event, or simply want to elevate your everyday look, a stitch braid ponytail delivers that coveted polished aesthetic without requiring hours at the salon.
The term “stitch braid” comes from the way the braid resembles thread stitching through fabric, with individual sections of hair woven together in a pattern that’s tighter and more defined than a traditional three-strand braid. What makes this technique so appealing is that it works beautifully on various hair textures, from pin-straight to wavy to curly. The neat, structured appearance of a stitch braid paired with a ponytail creates visual dimension and catches light in ways that a simple ponytail never could. More importantly, once you understand the fundamental technique, you can adapt it to create dozens of different styles tailored to your hair type, face shape, and personal style preference.
This guide walks you through ten distinct stitch braid ponytail styles, each with its own character and purpose. Some are bold and dramatic, perfect for making a statement. Others are subtle and refined, ideal for professional settings. You’ll discover how small adjustments in braid placement, braid thickness, and ponytail height completely change the overall impression of the style. By the end, you’ll have a full toolkit of stitch braid ponytail options to rotate through your styling repertoire depending on your mood, occasion, and hair condition.
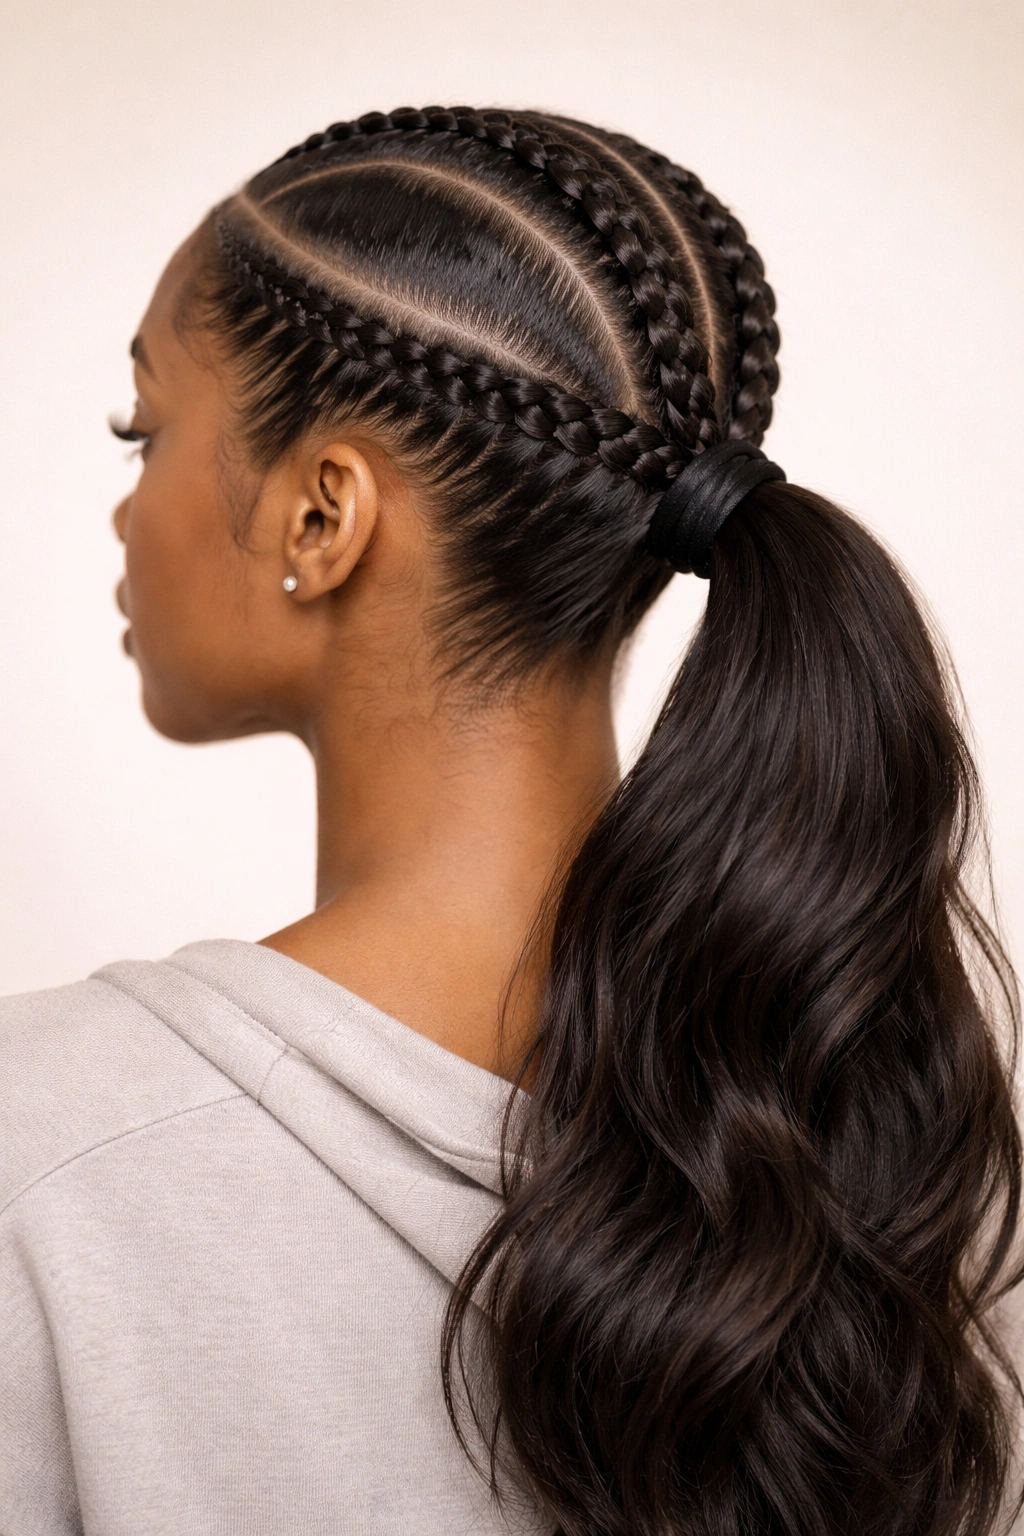
1. Center-Placed Stitch Braid Ponytail
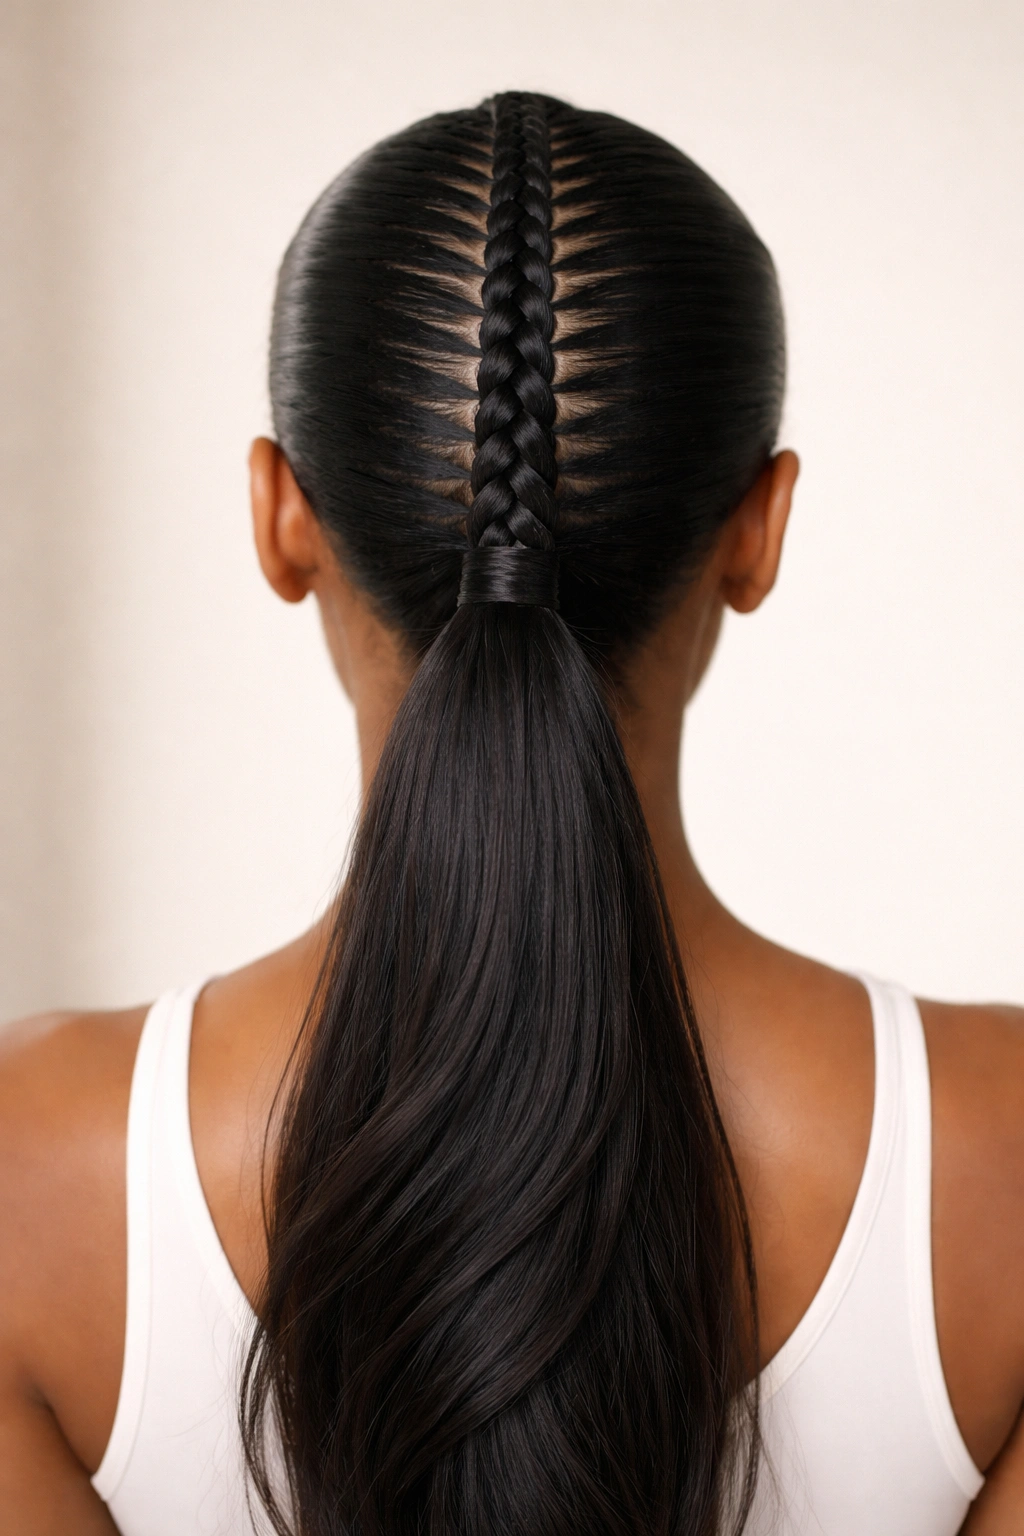
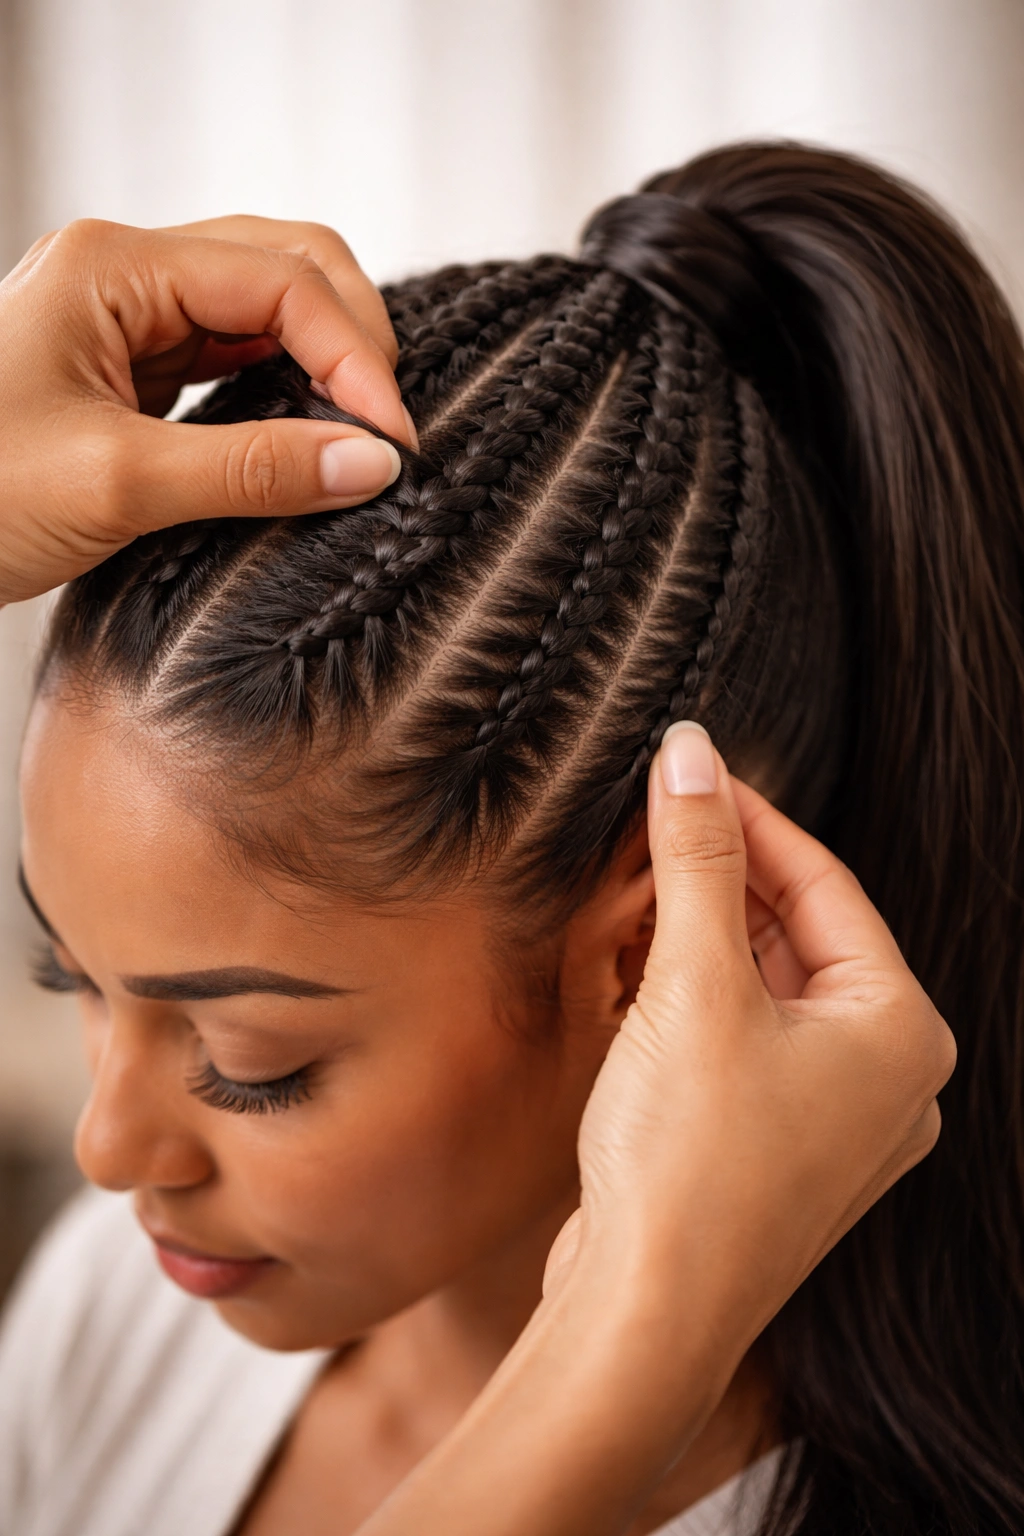
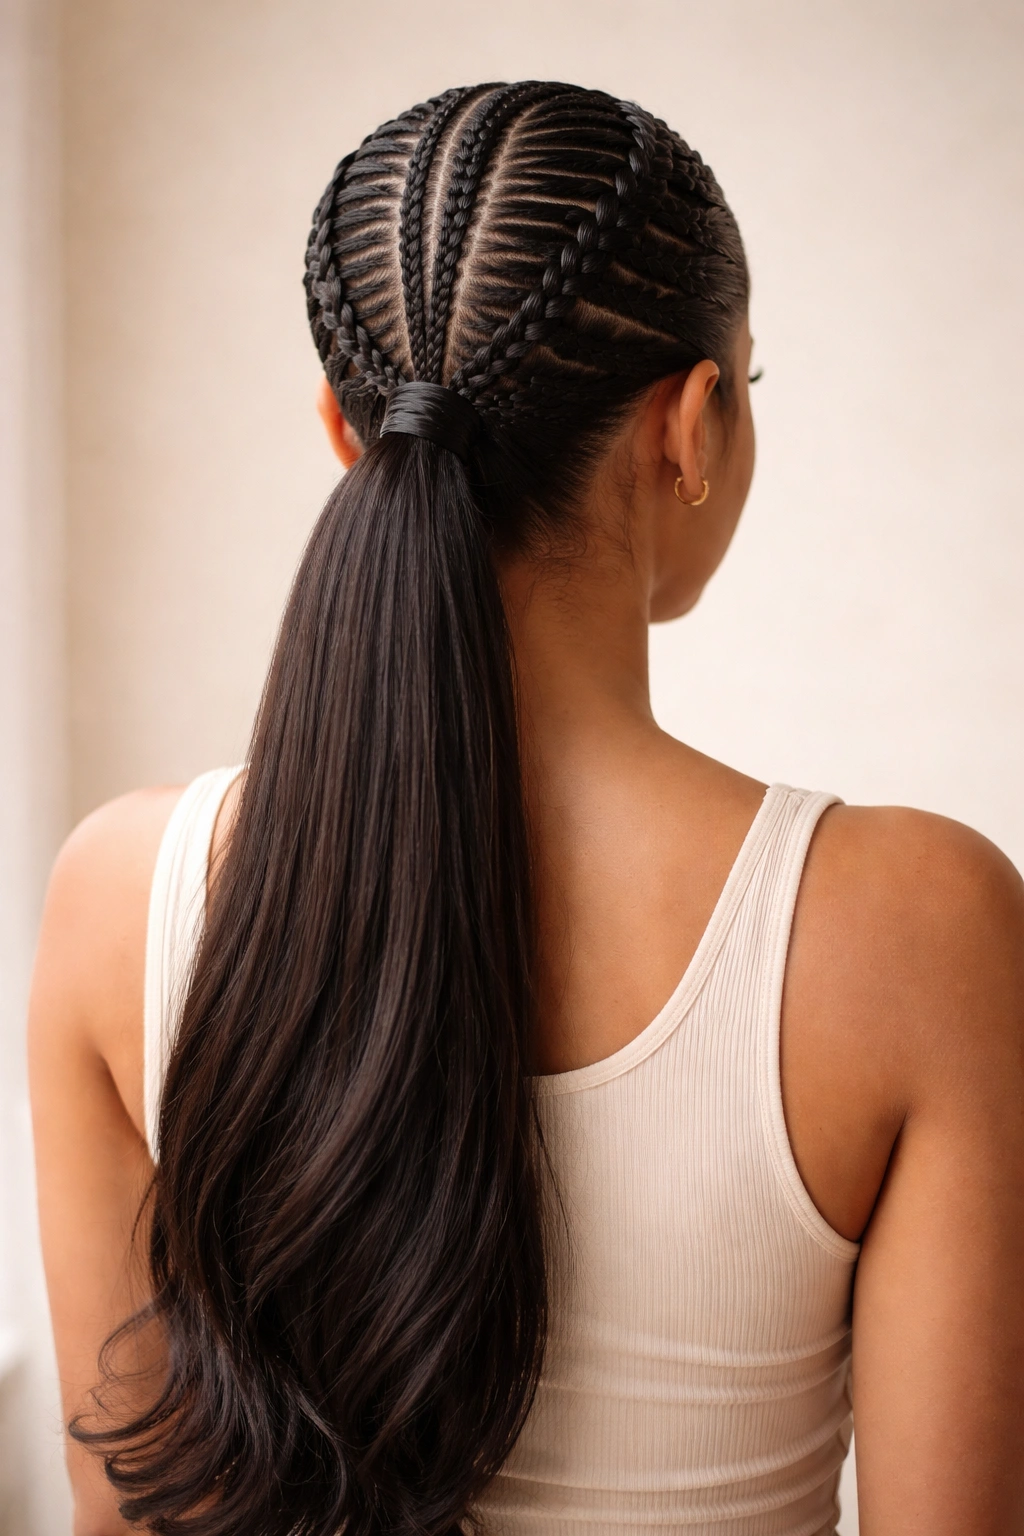
This is the foundational stitch braid ponytail style, and it’s the perfect place to start if you’re new to the technique. A single stitch braid runs down the center of your head, beginning at your hairline and continuing to the base of your ponytail. The braid itself becomes part of the ponytail structure, creating a seamless look that appears incredibly intentional and put-together.
Why This Works So Well
The center placement immediately draws the eye upward and creates the illusion of lifted height, which is why it’s particularly flattering for round or square face shapes. The stitch braid technique creates texture and visual interest that a simple ponytail lacks, but the centered position keeps the overall aesthetic clean and balanced rather than busy or trendy. This style works beautifully on all hair textures because the braid structure itself holds the hair neatly in place, making it an excellent choice if your ponytail tends to slip or loosen throughout the day.
How to Create It
Start by sectioning a triangle-shaped piece of hair at the crown, then begin your stitch braid at the hairline. If you’re unfamiliar with the stitch braid technique, the key difference from a regular three-strand braid is that you’re only picking up hair on one side with each pass—typically the right side. This creates that characteristic “stitched” appearance where the braid appears to be sewn onto the hair rather than woven through it. Continue braiding down the center of your head, gathering the braid into your ponytail at the nape of your neck. You can tie the entire ponytail (including the braid) with an elastic, or secure the braid separately and allow the ponytail to flow freely below it. Pull a few face-framing pieces to soften the look.
Pro tip: Tease your hair gently at the crown before starting your braid—this creates grip and prevents slipping, and it also adds volume that makes the finished style look fuller and more polished.
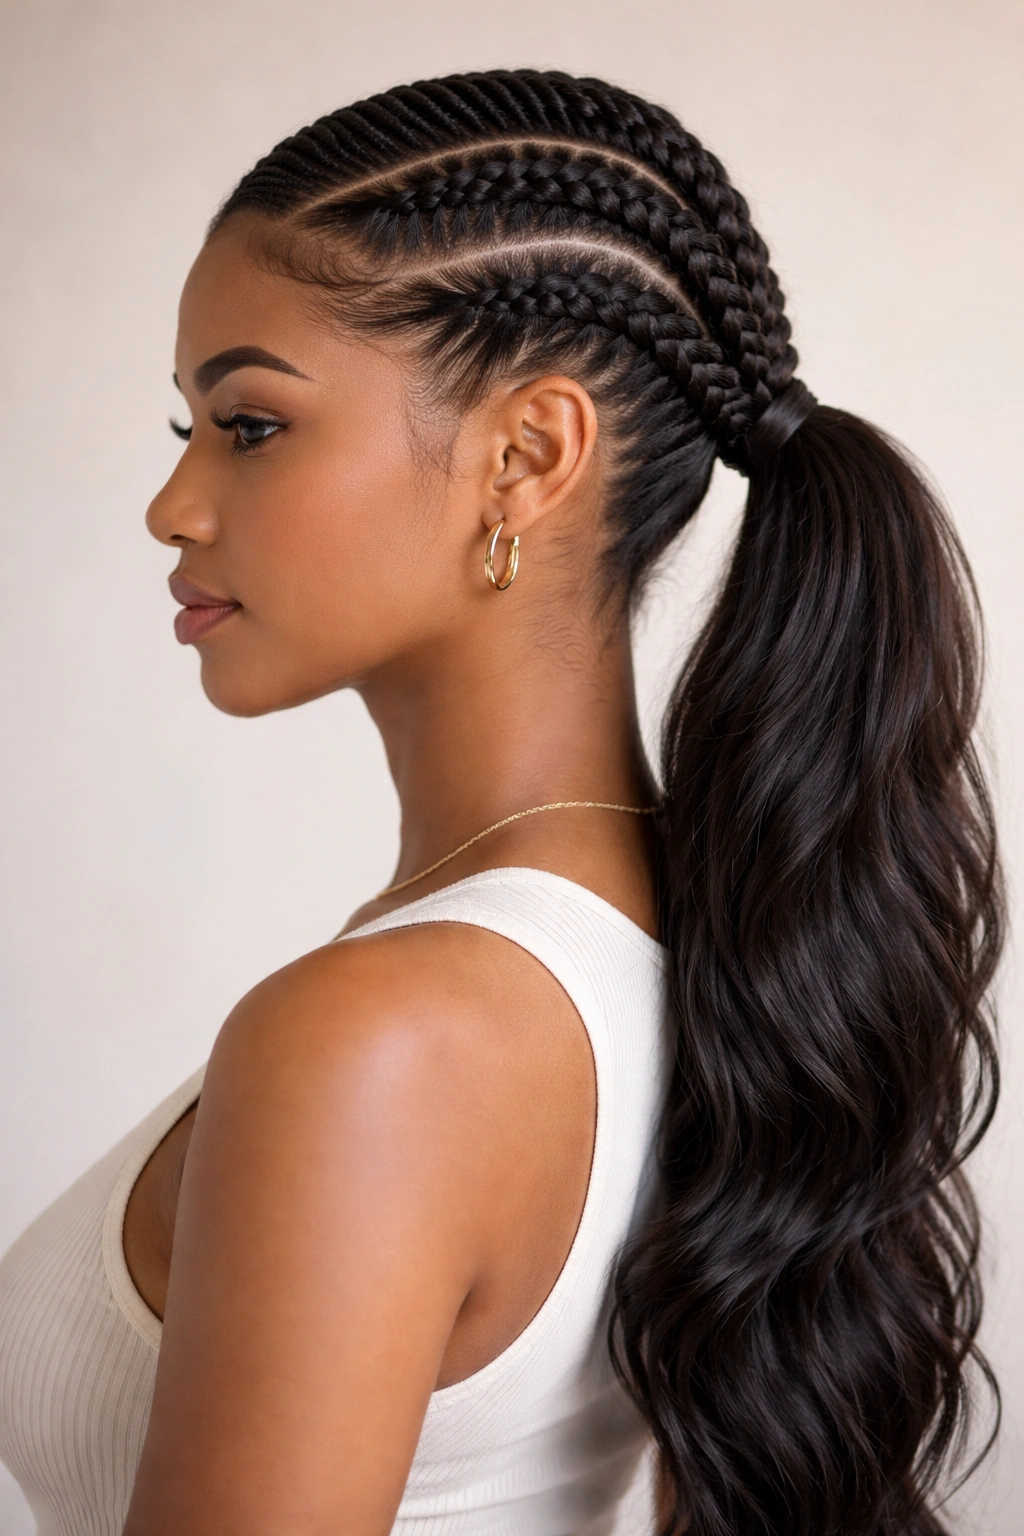
2. Dual Stitch Braid Ponytail with Side Part
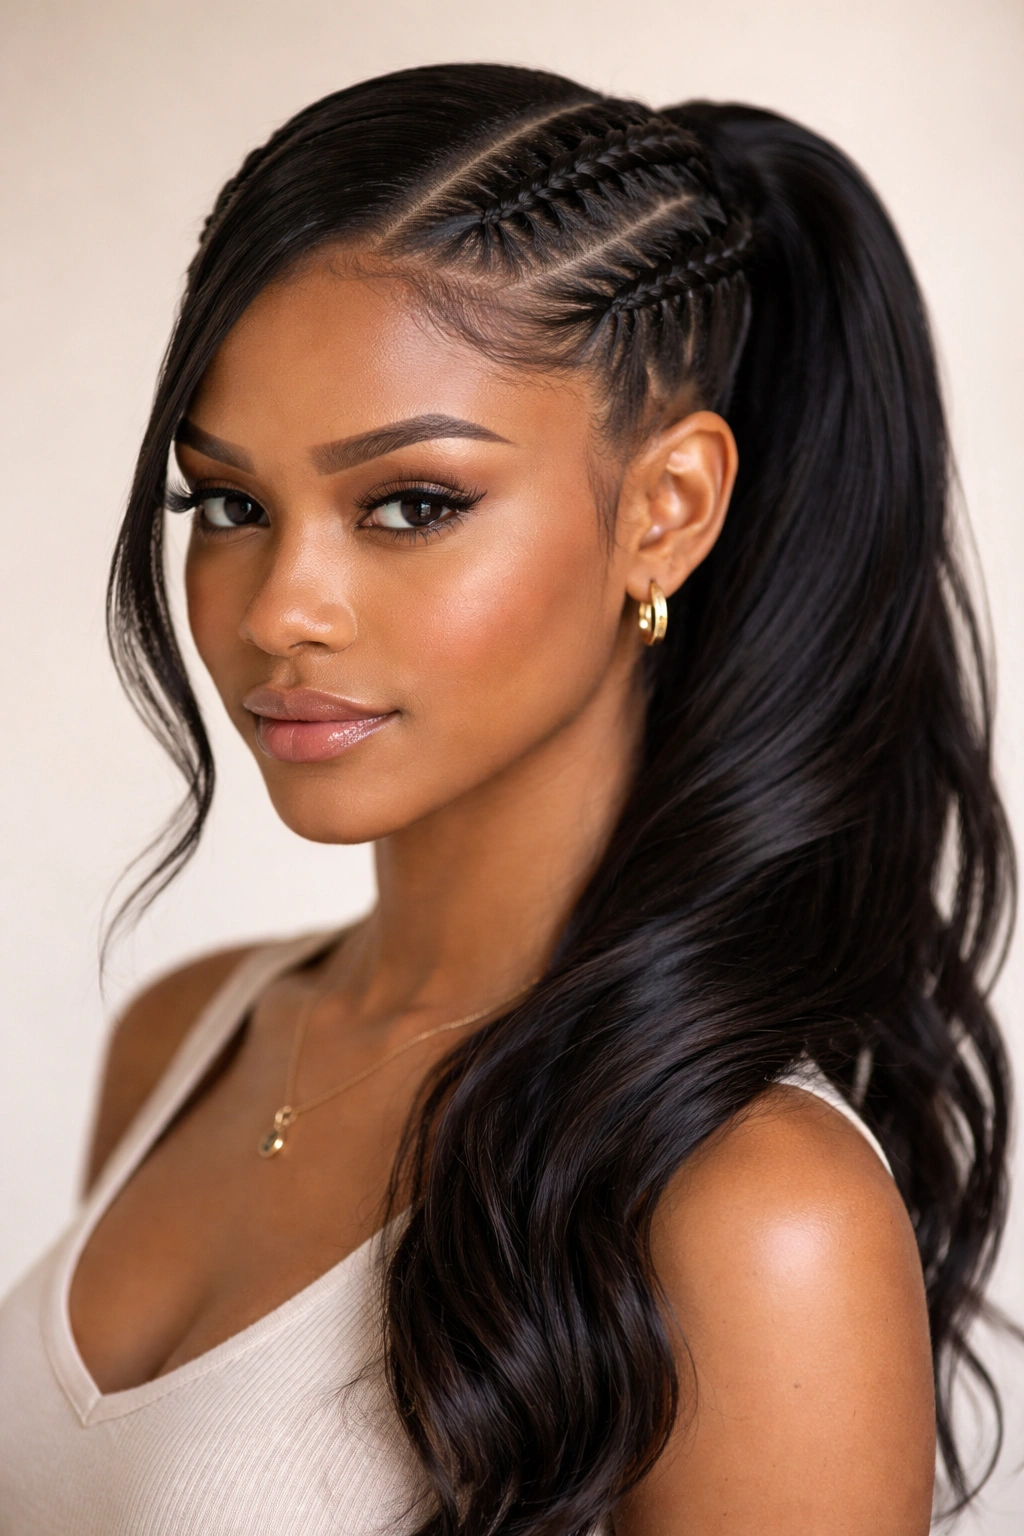
Taking the concept one step further, the dual stitch braid ponytail uses two symmetrical braids that frame the face and lead into a side-parted ponytail. One braid starts near your part line on each side of your head, and both braids meet at the base of your ponytail, creating a cohesive frame around your face while maintaining that neat, structured aesthetic.
The Balance and Symmetry Factor
This style is incredibly flattering because the two braids create perfect symmetry while the side-parted ponytail adds movement and softness. The dual-braid approach works particularly well for heart-shaped faces or those with wider foreheads, as the braids draw the eye downward and toward the center of the face. The braids also keep any flyaways perfectly contained while framing your features without the severity of a full center part.
Step-by-Step Creation Process
Begin by creating a deep side part, then take a section of hair near the part line on one side and start a stitch braid at the temple. Braid down toward the nape, maintaining even tension so the braid sits flat against your head. Repeat on the opposite side with a mirror-image braid. When both braids reach the nape, gather them together with the remaining loose hair and secure everything into a ponytail. The result is braids that frame your face while leading seamlessly into your ponytail. You can keep the ponytail smooth for a sleek look or add curls and texture for contrast.
This style pairs beautifully with a low, full ponytail that sits at the nape, creating a romantic, polished aesthetic.
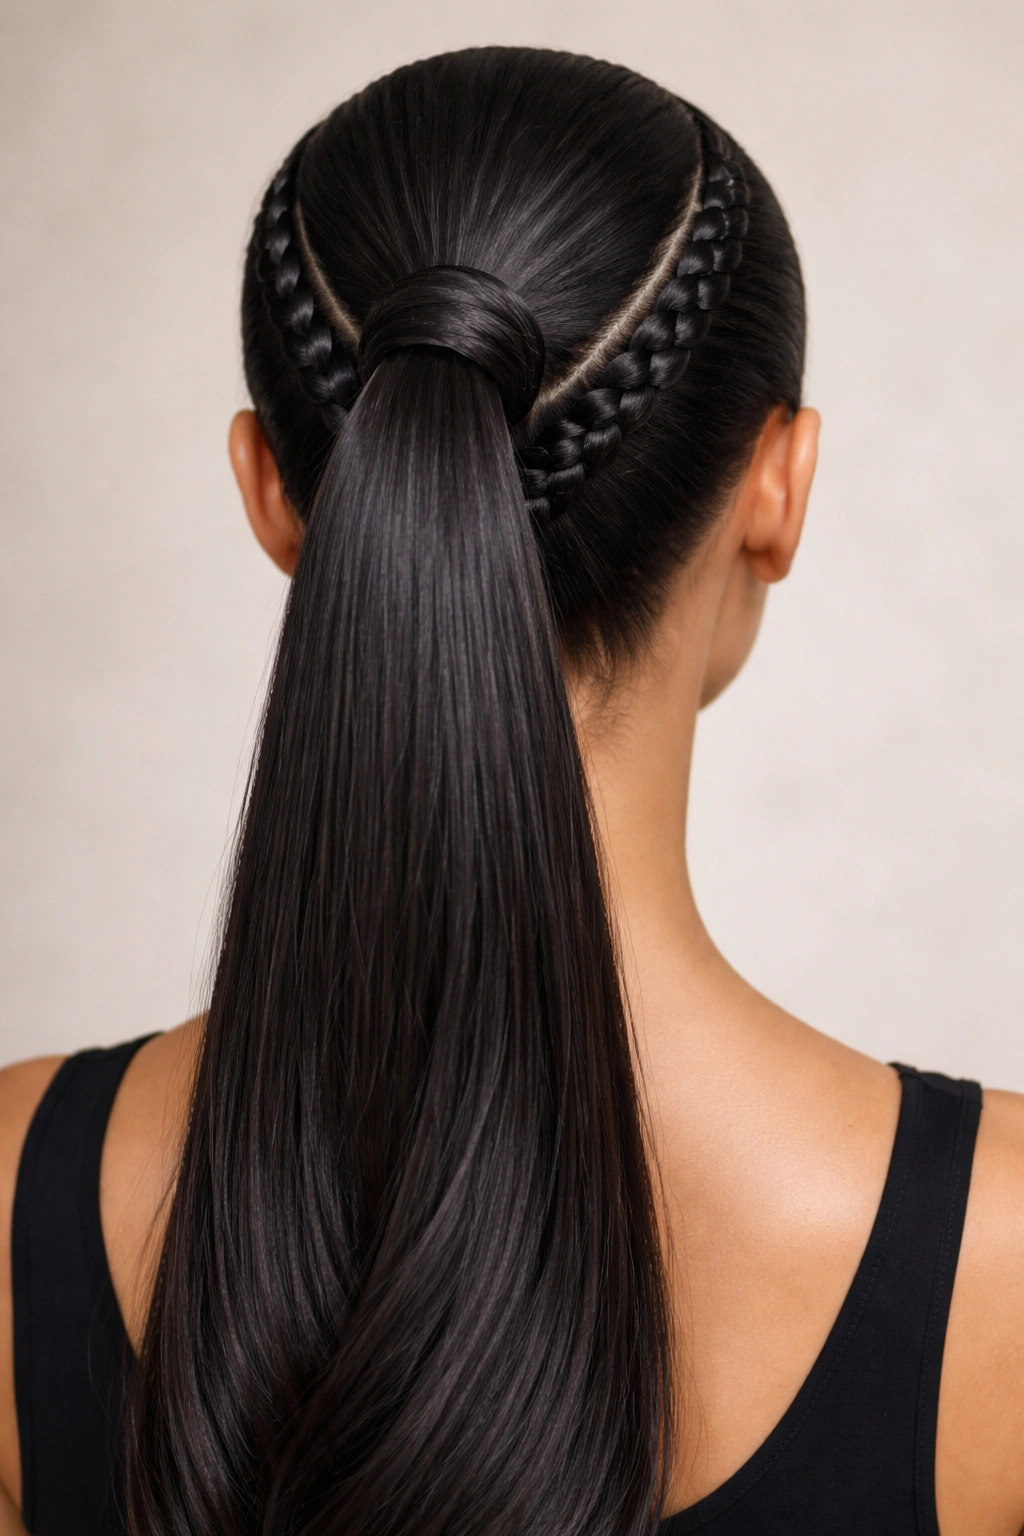
3. Stitch Braid Wrapped Ponytail
In this variation, the stitch braid doesn’t travel down the center or sides of your head in the traditional sense. Instead, you create your ponytail first, then braid a section of the ponytail itself and wrap it around the base of the ponytail to disguise the elastic and create a finished, intentional appearance. This technique is brilliant for disguising ponytail creases and adding visual interest without requiring the structural support of a full-length braid.
Why This Approach Works Differently
The wrapped stitch braid adds luxury and intentionality to an otherwise simple ponytail with minimal effort. Unlike braids that run the entire length of your hair, this technique only requires you to braid a small section, making it fast to execute and ideal for mornings when you’re short on time. The braid wrap also serves a practical purpose—it covers any imperfections in your elastic or hair tie, creating a polished finish that looks salon-quality.
Execution and Variations
Gather your hair into a ponytail at whatever height you prefer—high, mid-level, or low. Secure it with an elastic. Then, take a thin section of hair from the base of the ponytail (either before you fully tightened it or by gently pulling a section from the ponytail itself) and braid it using the stitch braid technique. Wrap this braid around the base of your ponytail, concealing the elastic completely, and secure the end of the braid with a bobby pin hidden beneath the ponytail. The final effect is a ponytail that appears to have an intentional braided detail at the base.
Quick fact: This technique works on all ponytail heights and textures, making it endlessly adaptable for different occasions and hair types.
4. Curved Stitch Braid Ponytail
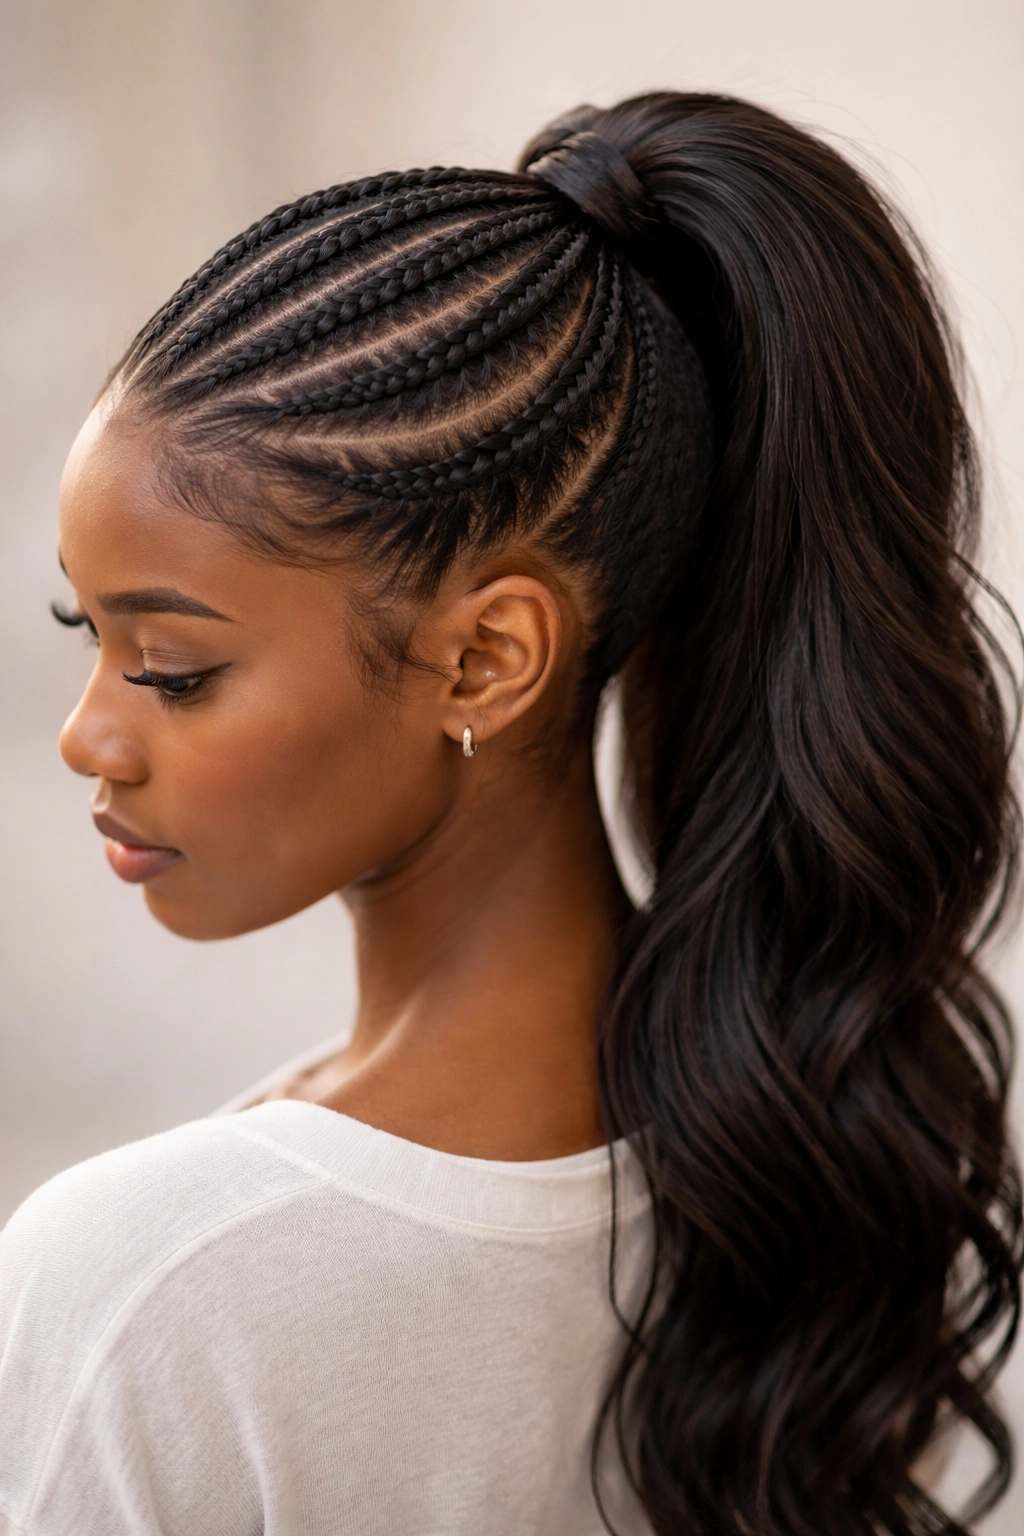
For something more dynamic and visually interesting than a straight center braid, the curved stitch braid follows the natural shape of your head, creating a graceful arc from one side to the other before dropping into a ponytail. This style requires slightly more advanced braiding skills, but the payoff in terms of visual impact is substantial.
The Visual Flow and Appeal
The curved braid creates movement and dimension that catches light beautifully in photographs. The arc follows the contour of your skull, which feels more organic and intentional than a perfectly straight braid down the middle. This style is particularly striking on longer hair because the curve becomes more pronounced and dramatic. It’s also an excellent choice if you want the structure and neatness of a stitch braid without the severity of a centered line.
How to Create the Curve
Begin your stitch braid slightly off-center at your crown, angling it gradually as you braid downward so it curves across the back of your head. The curve can be subtle—just a gentle slope across one side of your head—or more pronounced, looping from one temple area around to the opposite side of your neck. The key is maintaining even braid tension throughout the curve so it appears intentional rather than accidental. Once your braid reaches the desired endpoint (usually near the opposite ear or at the nape), gather it into your ponytail.
The curved braid works beautifully on wavy or textured hair, as the natural texture of your hair complements the flowing line of the braid.
5. Stitch Braid Halo Ponytail
The halo configuration positions stitch braids around your entire head in a circular pattern, with the ponytail anchored at the back or side. This creates a crown-like effect that’s both romantic and statement-making. It’s ideal for special occasions, photoshoots, or any time you want your hair to feel particularly special and intentional.
Creating the Crown Effect
The halo stitch braid ponytail works by starting braids on each side of your head at approximately temple level and bringing them around the back of your head, creating a circular frame that encompasses your entire crown. These braids meet at the back, often at the point where your ponytail begins. The result is a halo effect that draws attention upward and frames your face with texture and dimension on all sides.
Styling Steps and Considerations
This is a more complex style that typically requires patience and practice (or a second set of hands). Begin with two stitch braids, one starting near each temple. Braid these sections around the back of your head, picking up small sections of hair as you go to create a fuller braid. When the braids meet at the back of your head, secure them together and allow the rest of your hair to cascade down as a ponytail. For the most polished finish, tease your ponytail gently to add volume and make the finished style feel cohesive.
Worth knowing: The halo ponytail is one of the most flexible styles in terms of dress code—it looks equally beautiful with casual weekend outfits and formal occasion attire.
6. Twisted Stitch Braid Side Ponytail
This variation moves away from traditional center or dual placements by positioning both the braid and ponytail to one side of your head. The stitch braid spirals down one side of your head and leads directly into a side-positioned ponytail, creating an asymmetrical, modern aesthetic that’s equal parts edgy and polished.
The Modern Appeal of Asymmetry
Side ponytails with stitch braids feel contemporary and fashion-forward while maintaining the neat, structured quality that makes braids so attractive. The off-center positioning is flattering for many face shapes, particularly those with longer faces that benefit from horizontal visual interest. The asymmetrical placement also makes the style feel more intentional and styled compared to a centered braid.
Creating the Side Placement
Start your stitch braid at the crown or temple on one side of your head, braiding down and across toward the opposite side of your neck. The braid should curve naturally around the back of your head as it moves toward your nape. Once you’ve reached the desired length, gather the braid with the remaining loose hair and secure everything into a side ponytail (positioned roughly where the braid ends). You can wear your side ponytail high and dramatic or lower and more romantic, depending on the occasion.
Pull the finished ponytail slightly away from your head for volume and texture; this counteracts any flatness that can happen when styling one side of your head.
7. Double-Wrapped Stitch Braid Ponytail
This technique uses two stitch braids positioned on either side of your head, both running at an angle toward your nape where they wrap around the base of a centered ponytail. Rather than the braids themselves becoming part of the ponytail, they serve as decorative frames that hold your hair up and add visual interest while the main ponytail remains clean and simple.
Why This Hybrid Approach Works
The double-wrapped style gives you the best of both worlds: the neat, intentional appearance of braids combined with the simplicity and ease of a straightforward ponytail. This approach is particularly useful if your hair is on the thinner side, as it allows you to create visual interest through braiding without requiring all your hair to be incorporated into the braid structure itself.
Execution and Styling Notes
Create two stitch braids beginning on either side of your head, angling them toward your nape. Rather than incorporating these braids into your ponytail, stop them at the base and wrap them around the elastic that’s securing your ponytail, pinning them in place with bobby pins. Your main ponytail remains intact beneath the wrapped braids, creating layers of visual interest. This style is ideal for days when you want your ponytail to feel polished without actually having to braid all your hair.
Pro tip: Use bobby pins that match your hair color exactly—they should be invisible within the braid wraps.
8. Stitch Braid Dutch Braid Hybrid Ponytail
For those who love texture and dimension, combining a stitch braid with a Dutch braid (where the braid sits raised on top of the scalp rather than flush against it) creates a striking two-toned braided effect. This style requires two distinct braiding techniques working in concert, creating visual complexity that looks far more advanced than it actually is.
Understanding the Two-Technique Approach
A Dutch braid creates a raised, three-dimensional appearance because you’re braiding outward and upward rather than under and through. When you combine this with the flatter, more stitched appearance of a stitch braid, you create contrast and depth. One braid can be positioned down the center while a Dutch braid frames one or both sides, or you can position them side by side for a bold, textured look.
How to Build This Combination
Start with a stitch braid down the center of your head (or to one side), then begin a Dutch braid alongside it using a section of hair from the crown. The Dutch braid should begin near where your stitch braid starts, giving them a parallel path down your head. Both braids should meet at your ponytail base, creating a cohesive, braided ponytail anchoring system. The contrast between the flat stitch braid and the raised Dutch braid creates significant visual interest.
This style is particularly striking on darker hair with highlights or layers, as the braiding technique itself creates additional depth and dimension.
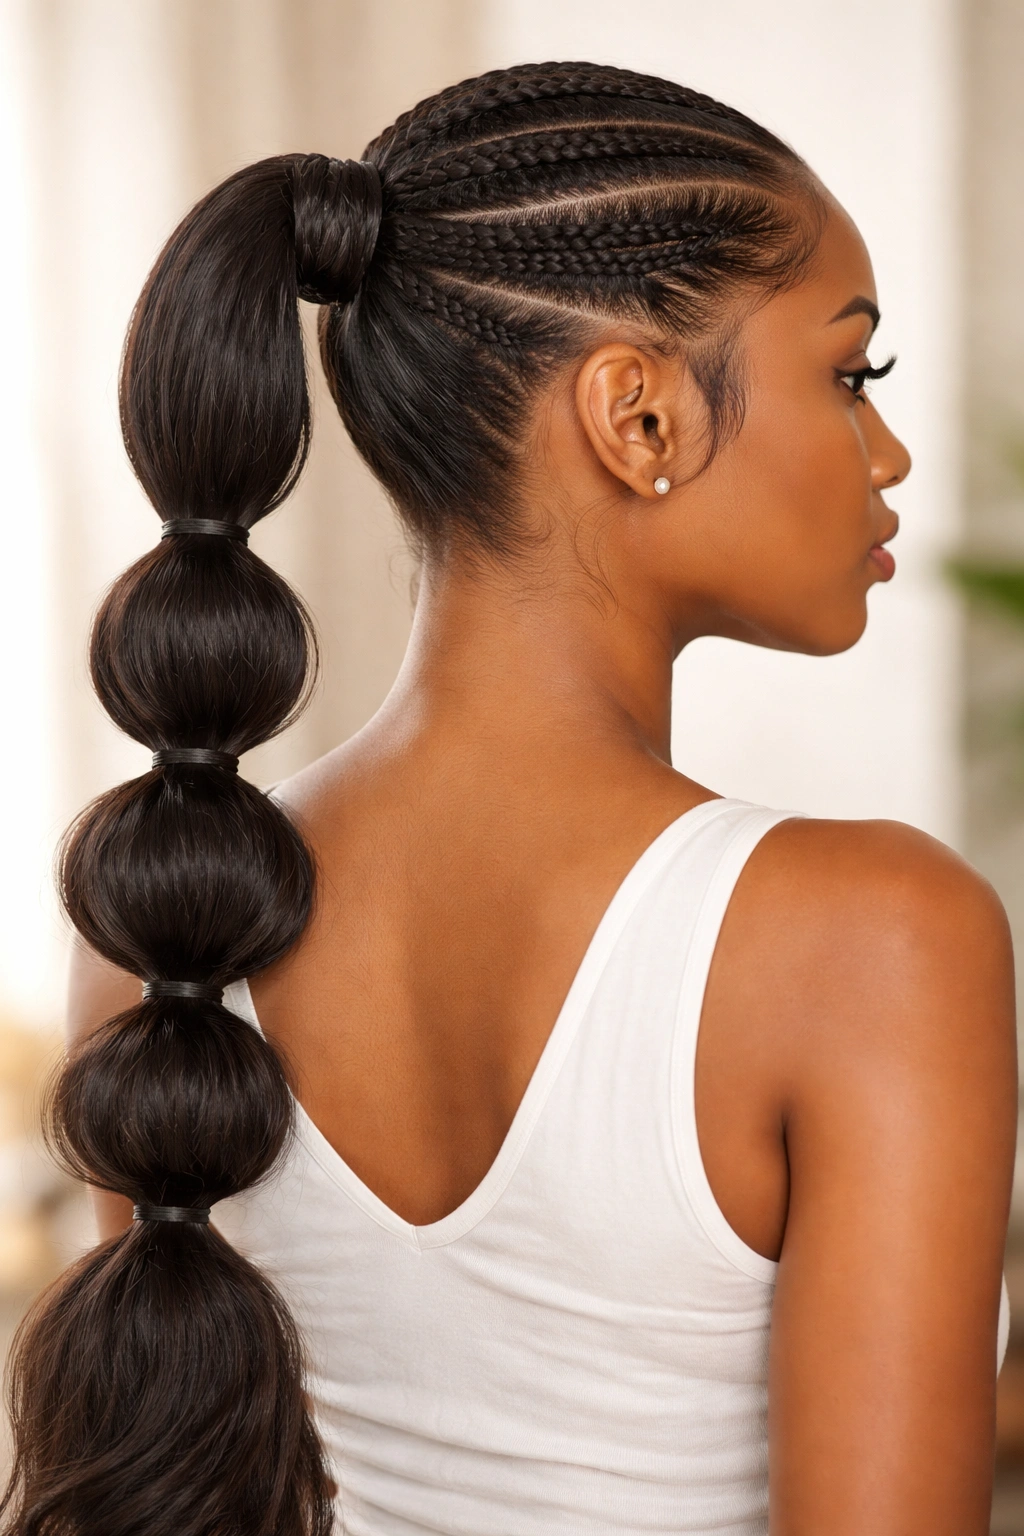
9. Stitch Braid Bubble Ponytail Hybrid
Bubble ponytails use multiple elastic bands positioned down the length of the ponytail to create segmented sections, giving the appearance of stacked bubbles. When you combine this technique with stitch braids that run up the sides of your head, you create a style that’s playful yet structured, making it appropriate for both casual and semi-formal settings.
The Segmented Texture Appeal
The combination of braids and bubble sections creates visual interest that a smooth ponytail can’t match. Each bubble adds dimension and texture, while the braids frame your face and provide the structure that keeps the entire style looking intentional and neat. This style works beautifully on medium to long hair and is particularly striking when your hair has some natural wave or when you add curls to the bubbles.
Creating the Bubble Effect
After completing your stitch braids (whether centered, dual-sided, or curved), gather all your hair into a ponytail at your preferred height. Secure with an elastic, then divide the ponytail into three to five sections depending on length. Place an elastic around each section, starting about 2-3 inches below the first elastic and repeating down the length of your ponytail. Gently pull each bubble section outward and upward to create the characteristic puffy appearance. The braids at the top anchor everything while the bubbles add playful texture below.
Worth knowing: Bubble ponytails hold up remarkably well throughout the day—the multiple elastics prevent the style from slipping or losing shape the way a simple ponytail might.
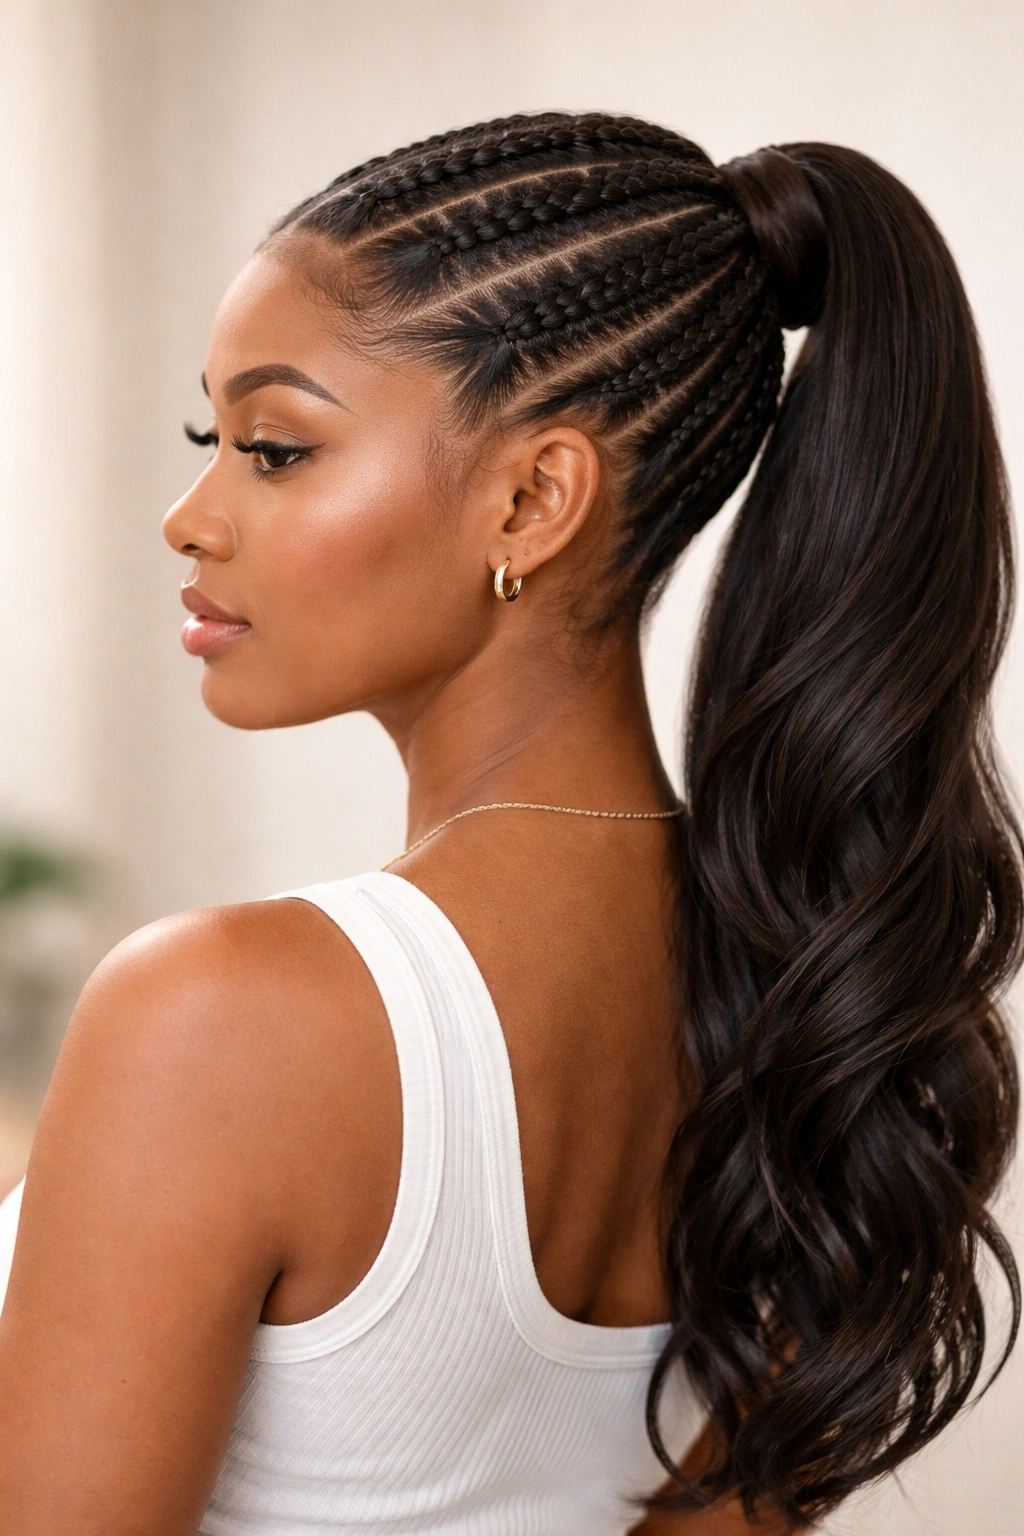
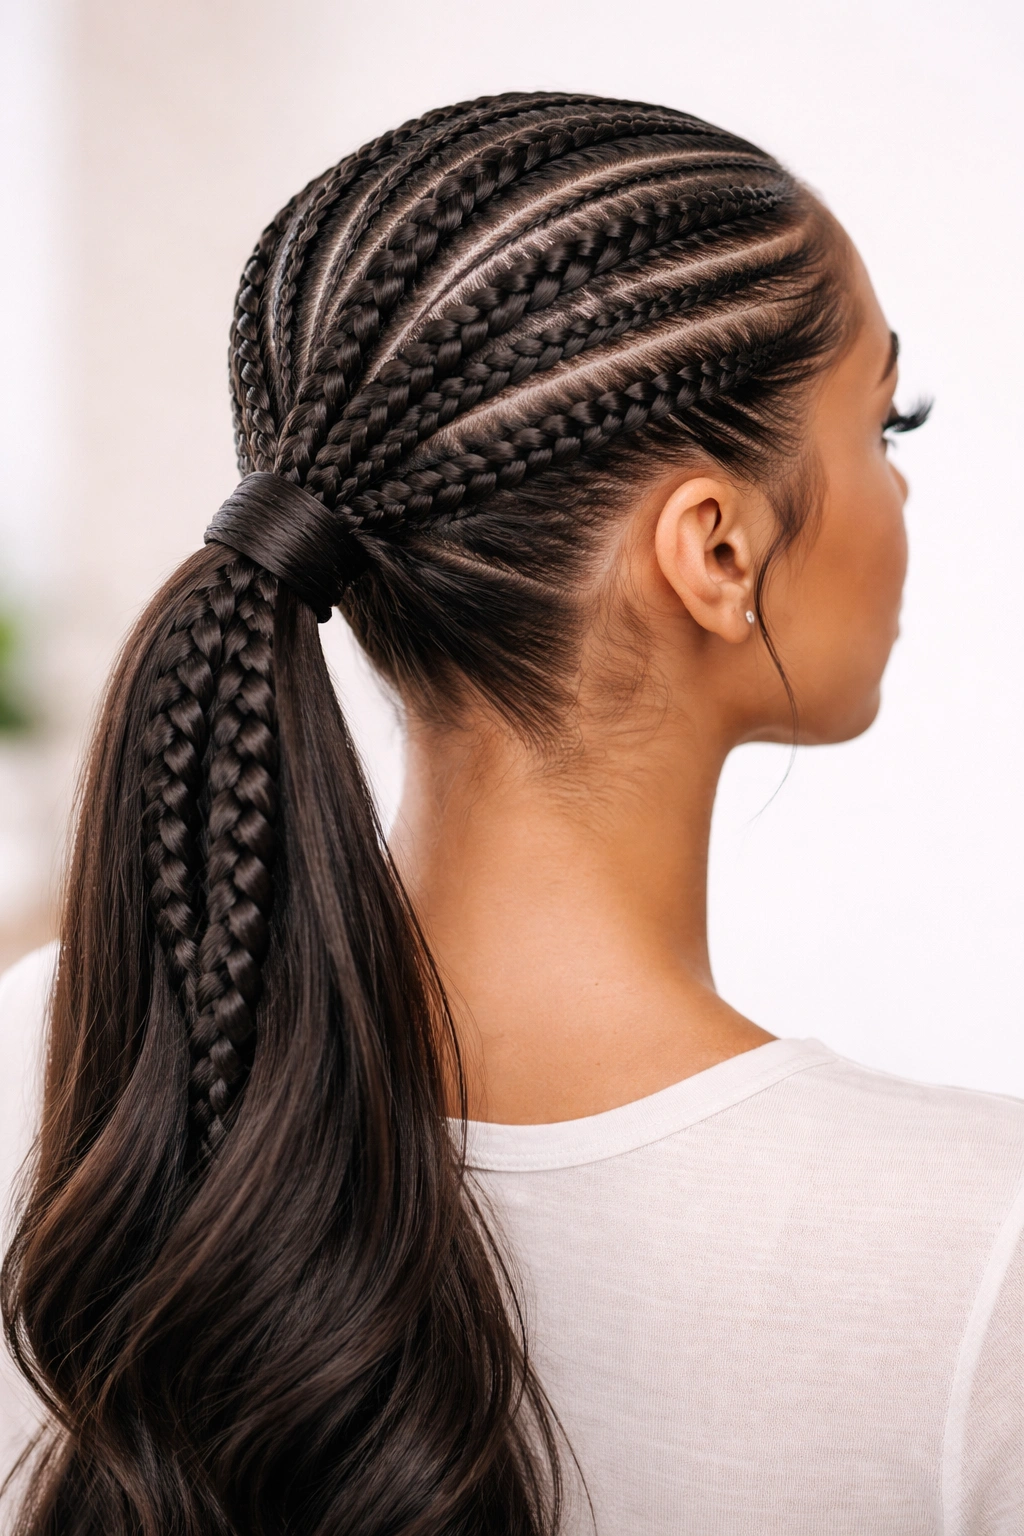
10. Intricate Multi-Stitch Braid Ponytail
For the ultimate in complexity and visual impact, the multi-stitch braid ponytail incorporates three or more stitch braids working together to create an incredibly intricate, textured look. This style demands more time and skill, but the payoff is a hairstyle that looks professionally done and turns heads.
Building Complexity Thoughtfully
Rather than random braids scattered throughout your hair, an effective multi-stitch braid ponytail uses three distinct braids positioned to create balance and visual flow. One common configuration uses a center braid with two angled braids on either side, all meeting at the ponytail base. Another approach uses parallel braids running down the back of your head. The key is creating a coherent visual pattern rather than an overwhelming tangle of braids.
Planning and Execution Strategy
Begin by mentally dividing your head into three sections—left side, center, and right side. Start a stitch braid in each section, ensuring they’re proportional to the amount of hair available. All three braids should reach your nape at approximately the same time so they can be gathered into your ponytail simultaneously. The resulting style is intricate enough to be truly statement-making while still appearing balanced and intentional.
This style works best on thicker hair or on days when you’ve added hair extensions, as you need adequate volume in each section to create three distinct, full-looking braids.
Troubleshooting Common Stitch Braid Ponytail Challenges
Even experienced hair stylists encounter challenges when creating stitch braid ponytails. Understanding how to troubleshoot common issues makes the difference between a style that falls flat and one that looks polished and intentional throughout your entire day.
The most frequent issue is uneven braid tension, where one section of your braid appears tighter or looser than the others. This typically happens when you’re learning the technique or when you’re braiding your own hair (since it’s harder to maintain consistent tension when you can’t see everything you’re doing). The fix is to practice regularly, braid more slowly, and maintain even hand movements throughout. If your braid keeps slipping or loosening, your hair is likely too smooth or too clean—try braiding with slightly dirty hair (day-old hair or hair with dry shampoo) or add a light texturizing spray before braiding.
Another challenge is the stitch braid itself looking too fat or too thin. If your braid appears chunky and thick, you’re picking up too much hair with each pass. Reduce the amount of hair you’re gathering with each stitch and pull tighter for a more delicate appearance. Conversely, if your braid looks skeletal and narrow, you need to pick up slightly more hair or ensure you’re pulling each section snug against the previous one so the braid sits compactly against your head.
Adapting Stitch Braids for Different Hair Types

Stitch braid ponytails work across all hair textures, but the approach varies slightly depending on what you’re working with. Understanding these adjustments ensures your braids look beautiful and stay put regardless of your hair’s natural characteristics.
Fine or thin hair benefits from starting with texturizing products—dry shampoo, texturizing spray, or even a light sea salt spray—which creates grip and prevents your braids from sliding out. You might also consider slightly looser braiding tension to avoid flattening already-delicate hair. Tease gently at the crown before braiding to create volume and fullness. Conversely, thick, coarse, or curly hair usually benefits from slight dampness (not soaking wet, but with a spray bottle of water applied before braiding) to keep strands in place and prevent frizz. Curly hair in particular can benefit from applying a light styling cream or mousse before braiding, which defines curls while providing grip.
Wavy hair is perhaps the most forgiving for stitch braids because the texture naturally holds in place. You can get away with tighter braiding and less preparation product. Coily hair might require slightly more tension and possibly a bit of product to define curls and prevent the braid from loosening, but the texture actually showcases the stitch braid beautifully—each curl reads distinctly within the braid structure.
Styling Products and Tools That Elevate Your Braids

While stitch braid ponytails can be created with minimal products, certain tools and products make the process easier and the final result more polished. A fine-tooth comb helps you section hair cleanly and work through any tangles before braiding. Sectioning clips let you isolate the hair you’re braiding from the rest of your head, making the process significantly less overwhelming, especially for multi-braid styles.
For product application, a lightweight texturizing spray is invaluable—it creates grip without making hair look dirty or damp. A smoothing serum or anti-frizz cream tames flyaways and gives braids a shinier, more polished appearance. Dry shampoo, applied and massaged into your hair the night before braiding, is surprisingly effective at creating texture and grip without requiring you to skip a wash day.
Clear elastics and bobby pins are essential, but quality matters. Cheap elastics pull hair and cause breakage; invest in hair-safe elastics that don’t have metal components. Bobby pins that match your hair color fade into your braids rather than standing out. For intricate styles, keep several bobby pins on hand—you’ll likely need more than you expect.
Final Thoughts
Mastering stitch braid ponytails opens up a world of styling possibilities that work for every occasion, face shape, and hair type. What makes these styles so appealing is the balance they strike between intentional, polished beauty and manageable execution. Unlike other intricate hairstyles that require salon visits or endless YouTube tutorials, most stitch braid ponytail variations become achievable with practice and the right foundational understanding of the technique.
The styles outlined here—from the foundational center-placed braid to the elaborate multi-braid configurations—give you a complete toolkit. Start with whichever style appeals to you most. If you prefer the simplicity of a single center braid, begin there and master that technique before moving to dual braids or more complex variations. Each style teaches you something new about braid tension, sectioning, and styling that makes the next style easier to execute.
Remember that your first few attempts likely won’t look like polished salon work—and that’s completely normal. Braiding is a skill that improves with repetition. After a dozen attempts, the motions become muscle memory. After twenty attempts, you’ll notice the difference between adequate tension and optimal tension. Keep practicing, and soon you’ll find yourself creating these styles as quickly and easily as you’d throw your hair into a basic ponytail. The investment of learning pays dividends every single day when you can create a hairstyle that looks professionally styled in just ten to twenty minutes.