French braids intimidate most people who’ve never tried them, but the truth is that mastering a few beginner-friendly versions can transform your entire hairstyling toolkit. A French braid ponytail combines the elegant, polished look of a braid with the practicality of a ponytail—your hair stays neatly secured while that woven detail catches light and frames your face beautifully. Whether you’re heading to work, preparing for a casual day at home, or styling for a special occasion, these techniques work across all hair types and textures, from stick-straight to thick and curly.
The reason so many people think French braids are difficult comes down to a single misunderstanding: they’re not actually harder than regular braids, just different. Once your fingers understand the three-strand pattern and where each new section of hair feeds into the braid, the motion becomes automatic. The learning curve exists, sure, but it’s shockingly short—most people nail the basic technique within their third or fourth attempt.
What makes these ten styles perfect for beginners is that each one works with, rather than against, your natural skill level. Some styles hide imperfect braiding with purposeful messiness. Others use side-swept angles to make loose sections look intentional. A few use clever double-braid tricks that actually simplify the overall technique. By the time you’ve practiced these ten variations, you won’t just have a collection of hairstyles—you’ll have genuine confidence in your braiding ability.
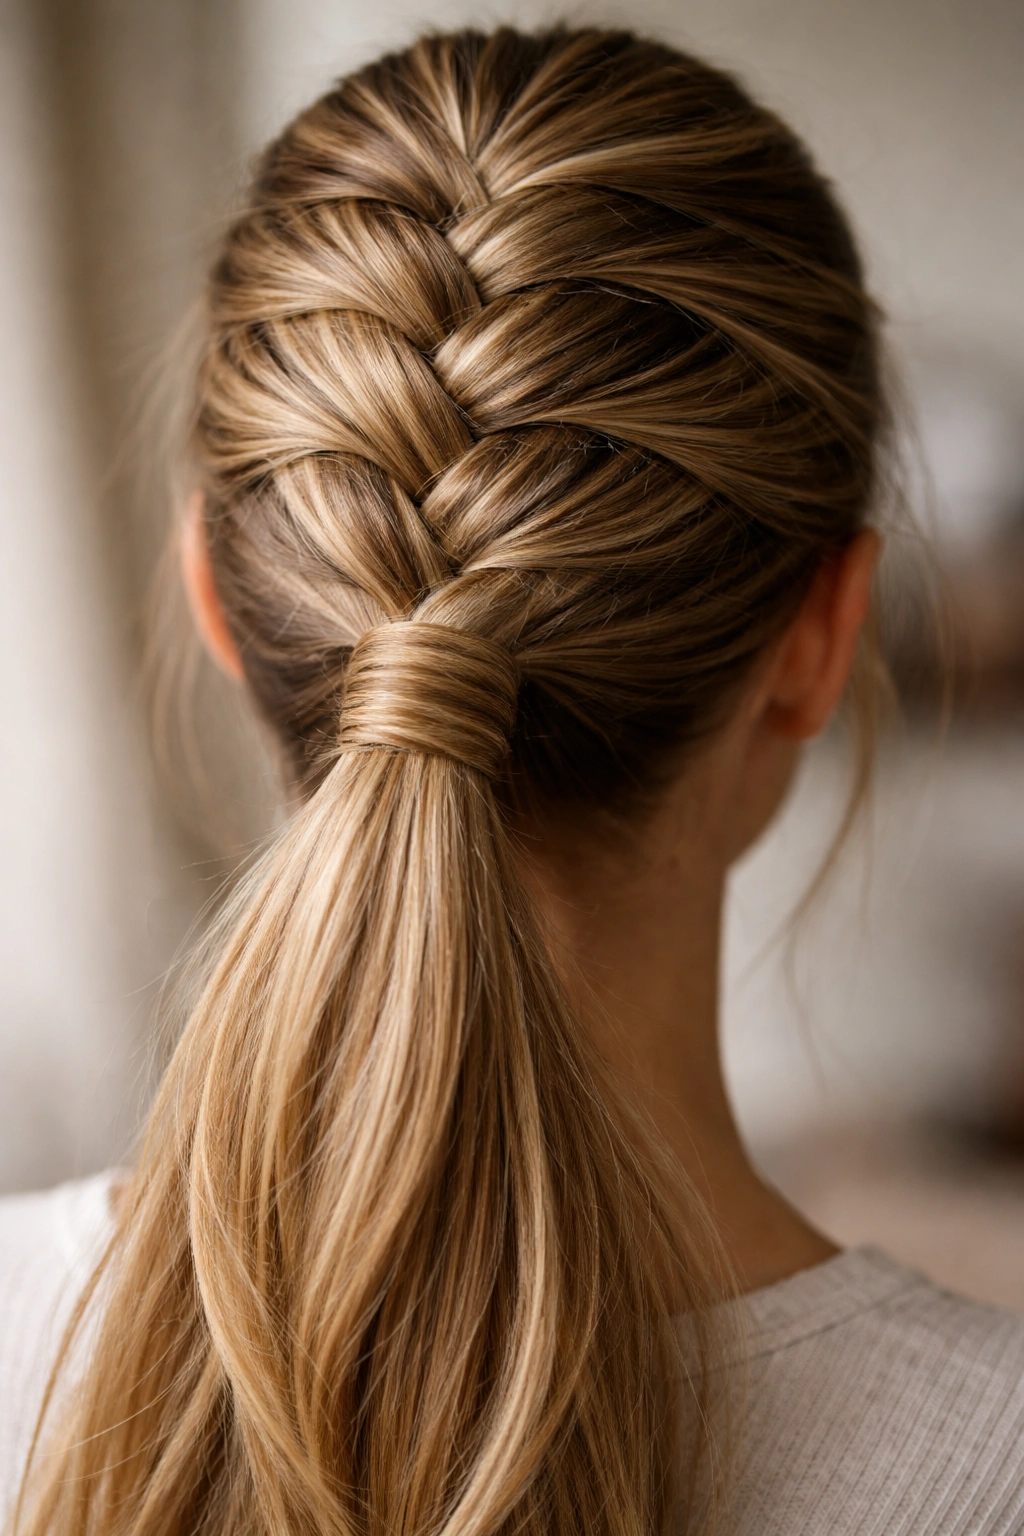
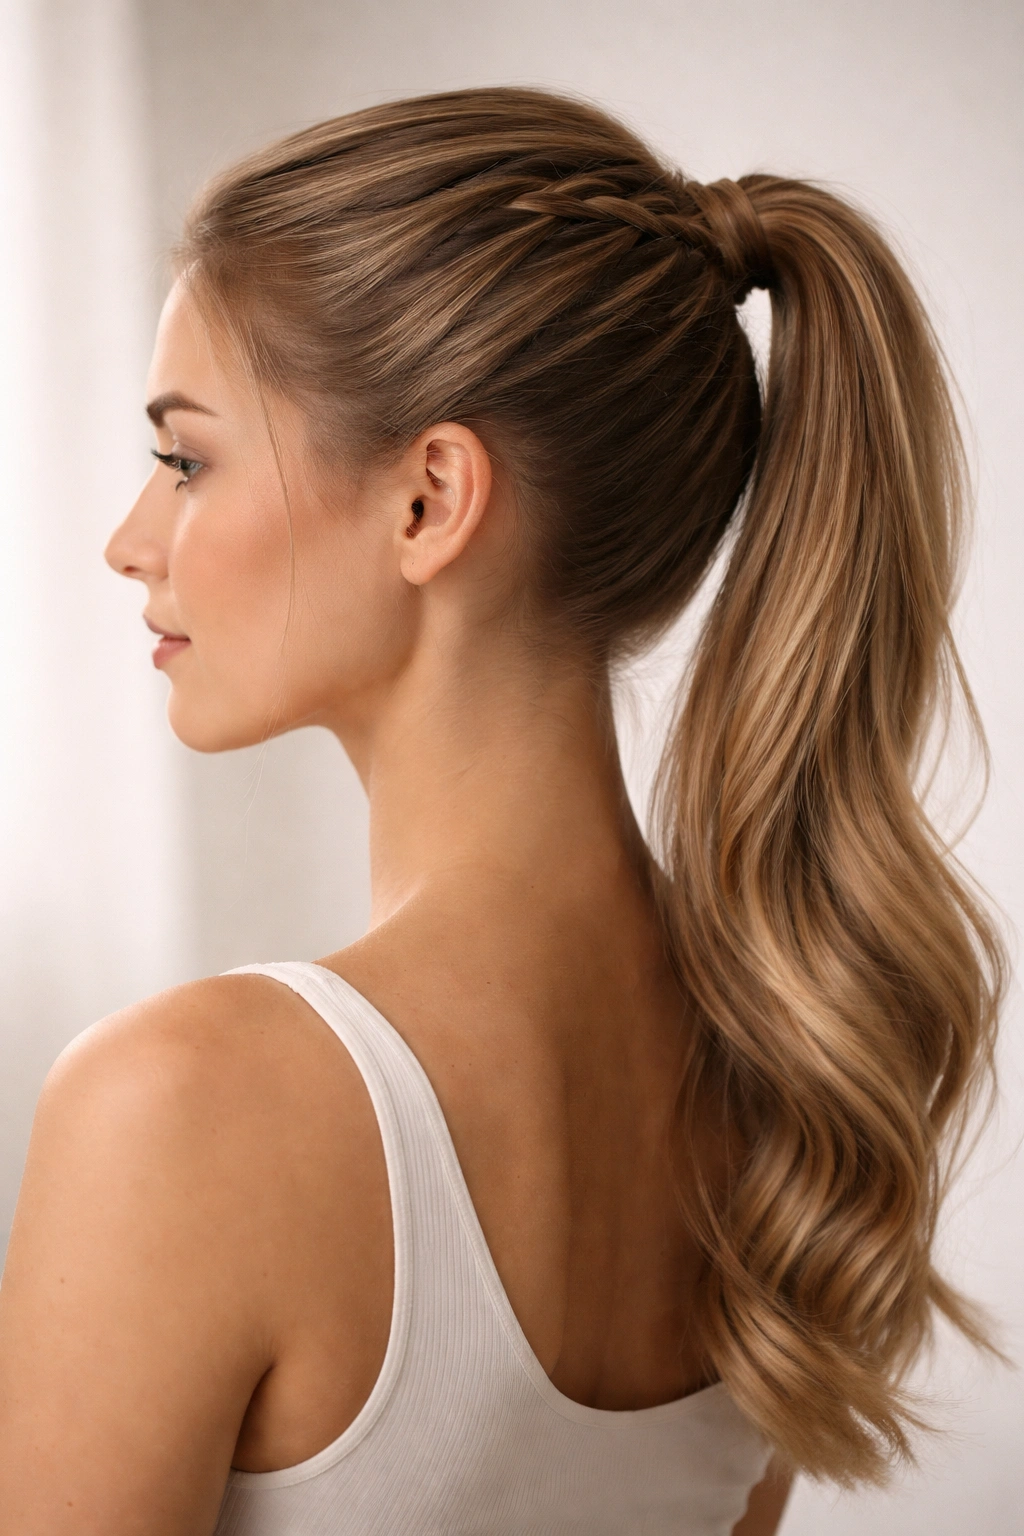
1. Classic French Braid into High Ponytail
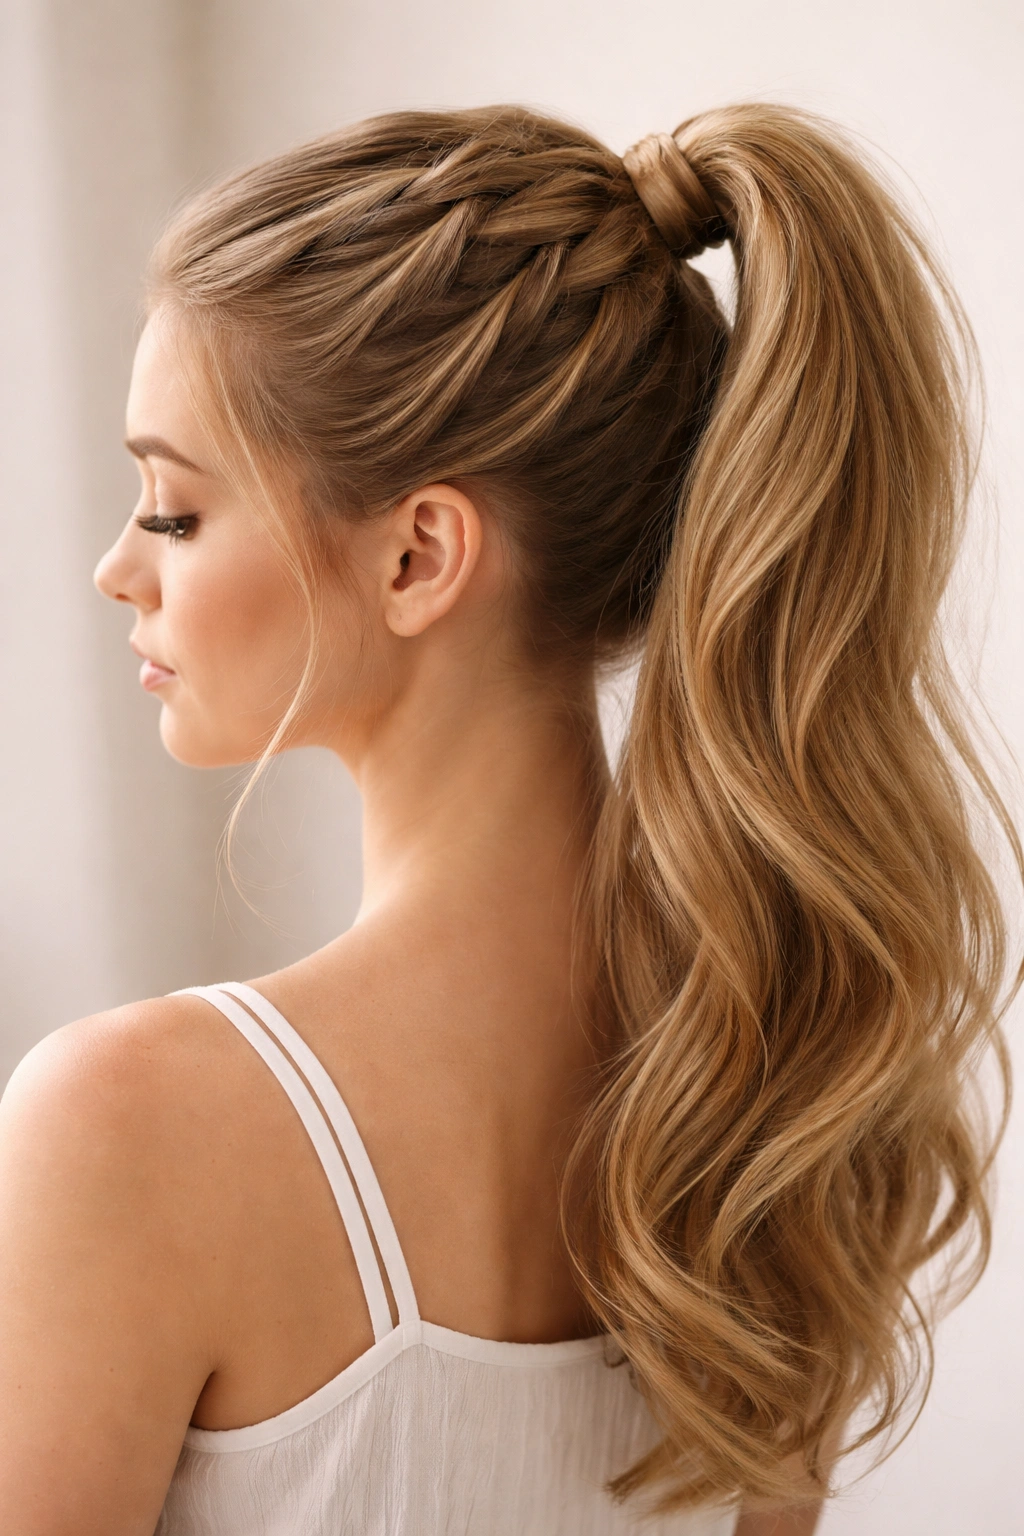
This is the purest, most straightforward entry point into French braid ponytails, and it’s the foundation every other style builds on. You begin at the crown of your head, braid downward while picking up small sections of hair from each side as you descend, and finish by collecting everything into a high ponytail at the back of your head. The braid becomes a decorative element that travels from the top of your head down into the base of the ponytail itself.
How to Master This Style
Start with completely dry or lightly damp hair—damp hair has just enough slip to work smoothly without being so wet that it’s difficult to grip. Section off a small triangle at the very crown of your head, divide it into three equal strands, and begin your braid. Here’s the critical part: as you cross each outer strand over the center strand, simultaneously pick up a thin new section of hair from that side and add it to the strand before crossing. Think of it as a continuous loop—cross over while gathering new hair simultaneously.
Why It’s Ideal for Beginners
This style is forgiving because imperfections actually enhance the look. Slightly uneven sections, wispy baby hairs at the temples, and subtle looseness create a naturally elegant rather than overly perfect aesthetic. The high ponytail secures everything at the end, so even if your braid isn’t camera-ready on the first try, the ponytail base hides any rough sections.
Quick Practice Tips
- Use a handheld mirror to watch your hands while you braid the back of your head—it’s worth the slight awkwardness
- Braid slowly at first; speed naturally comes after a dozen or so attempts
- Tease your crown lightly with a comb before starting—more grip makes picking up sections easier
- Hold finished sections gently; too-tight tension makes the braid look stiff and uncomfortable
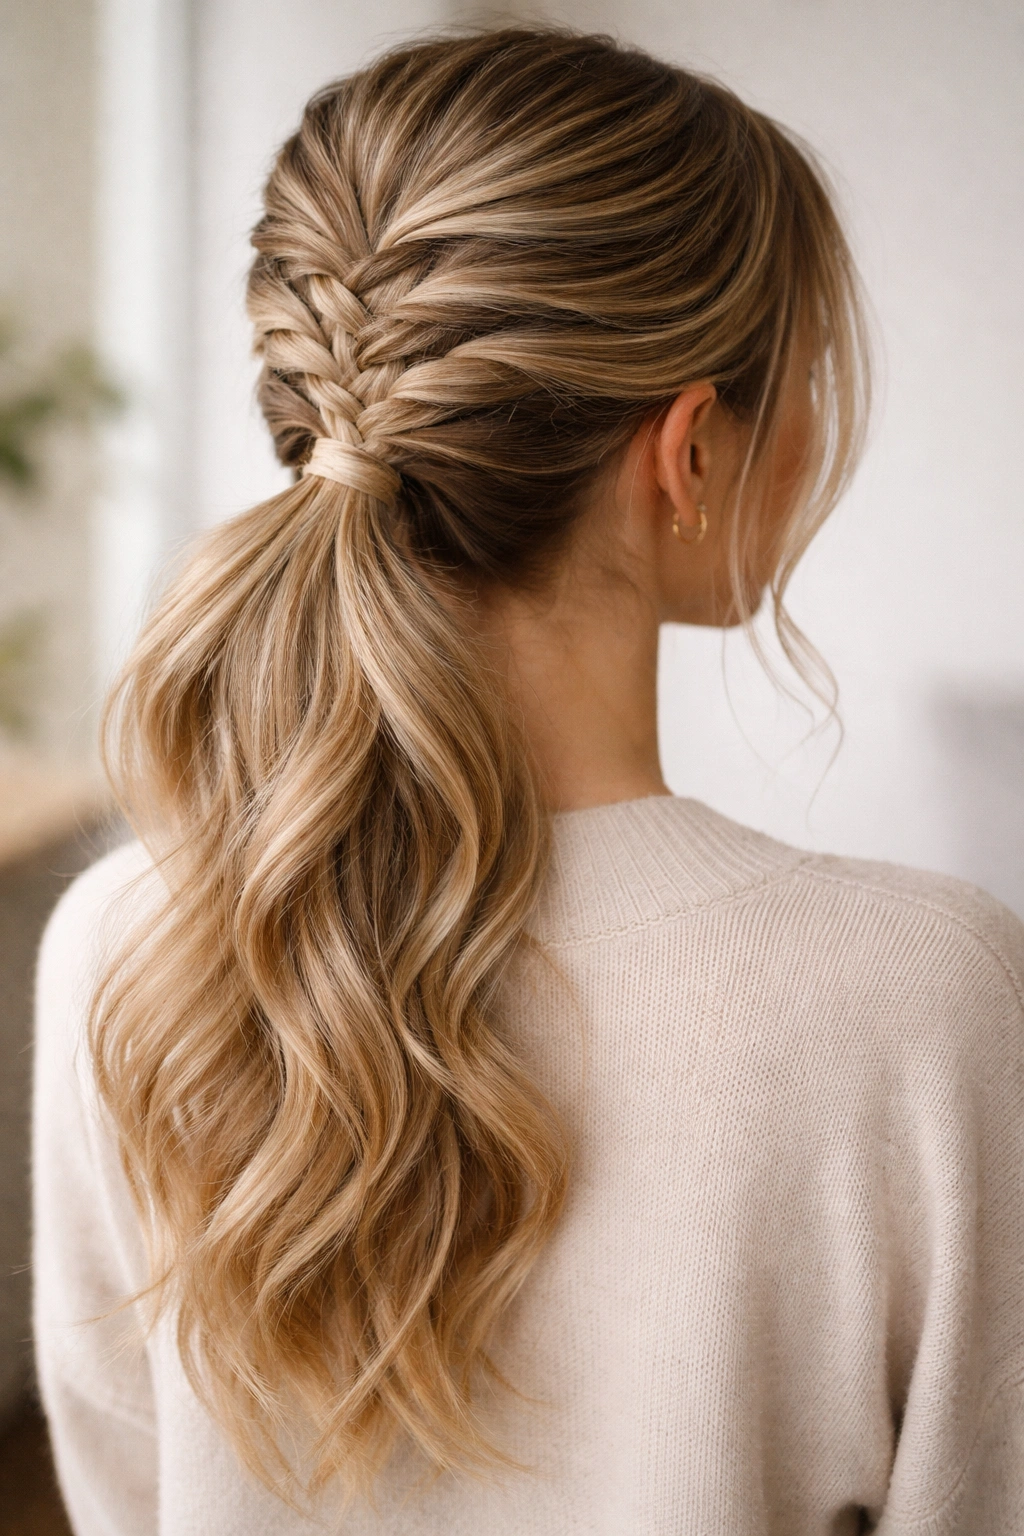
2. Side-Swept French Braid Ponytail
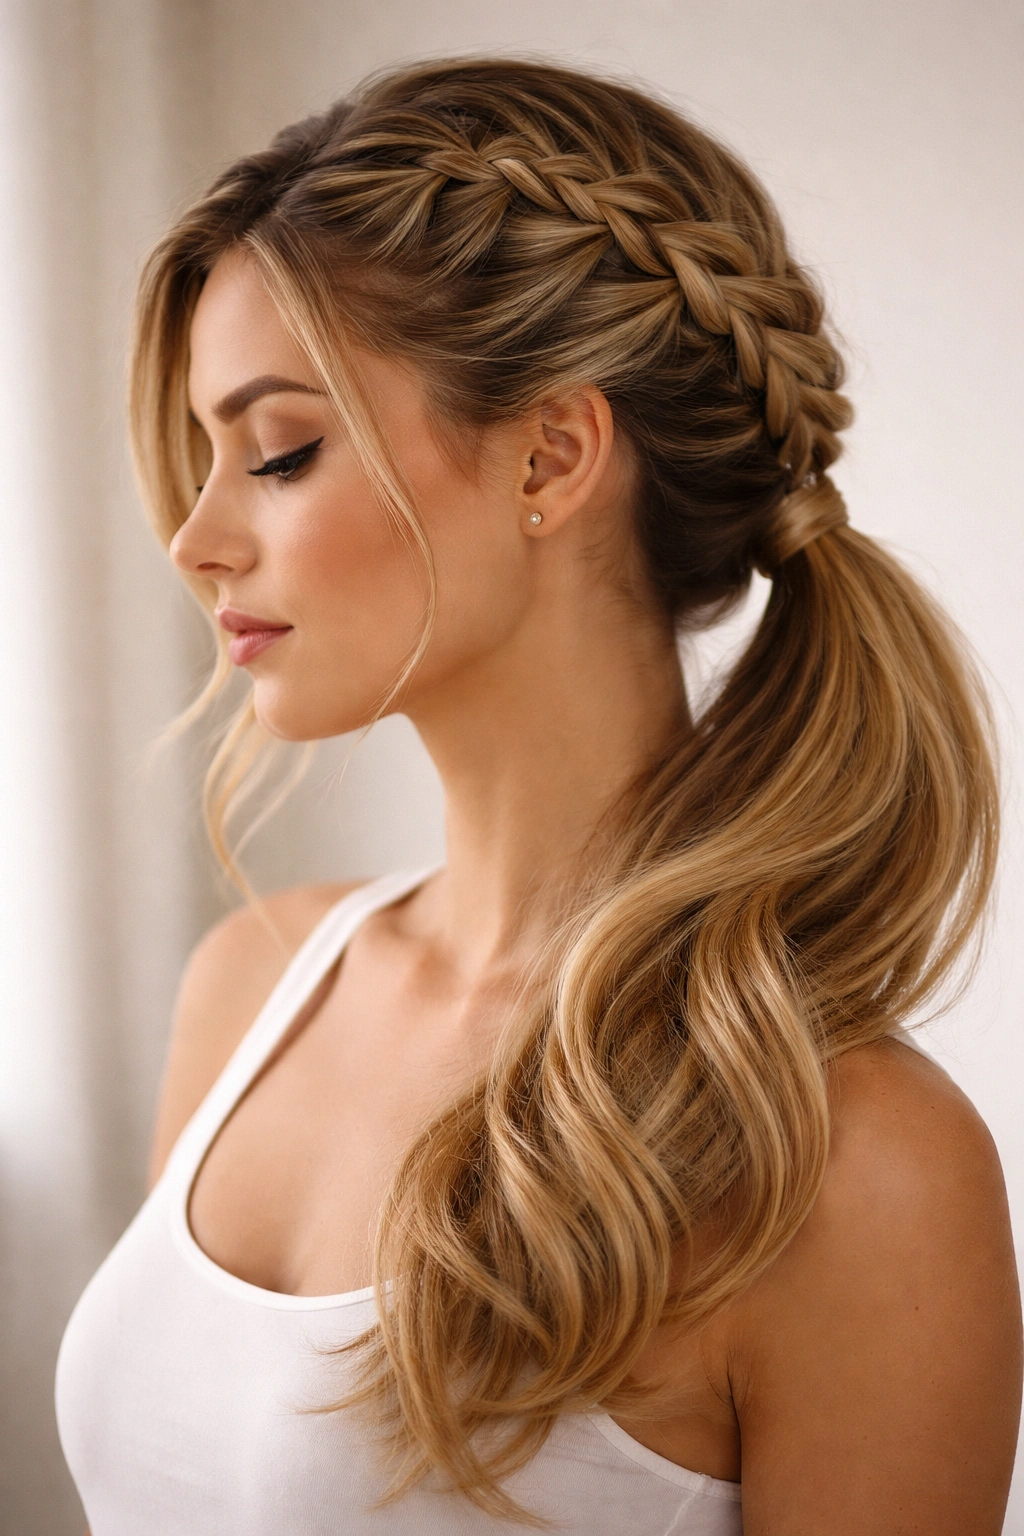
This diagonal approach creates a completely different visual impact than the centered braid and works especially well for people with longer faces or for anyone who prefers asymmetrical styling. Instead of starting at the crown and braiding straight down the center back, you begin over one ear and braid diagonally across the back of your head toward the opposite shoulder. The braid sweeps across, and the final ponytail sits lower and to one side.
The Beauty of the Angle
A side-swept braid automatically softens your face because it creates a diagonal line that draws the eye along your features rather than straight down. It also makes the braid more visible and prominent, which means any slight imperfections read as intentional texture rather than sloppy technique. The asymmetrical placement also makes this style feel more fashion-forward than the centered version, even though the actual braiding difficulty is identical.
How to Position and Braid
Begin your braid at the temple area on one side, using the same three-strand technique as the classic version but angling your braid path across the back of your head rather than straight down. This requires slightly more conscious positioning as you work, since you’re fighting against the natural gravity-down motion. The trick is to keep your hands and working braid slightly ahead of where you want the final path to be, letting gravity and the weight of your hair naturally drift backward.
Styling Variations
- Romantic version: Gently loosen each section of the braid by pinching and pulling slightly once complete—this creates a softer, fuller appearance
- Sleek version: Use a smoothing serum and keep the braid snug for a polished, sharp look
- Textured version: Tease small sections before braiding for a pre-styled, undone aesthetic
3. Dutch Braid Ponytail (Reverse French Braid)
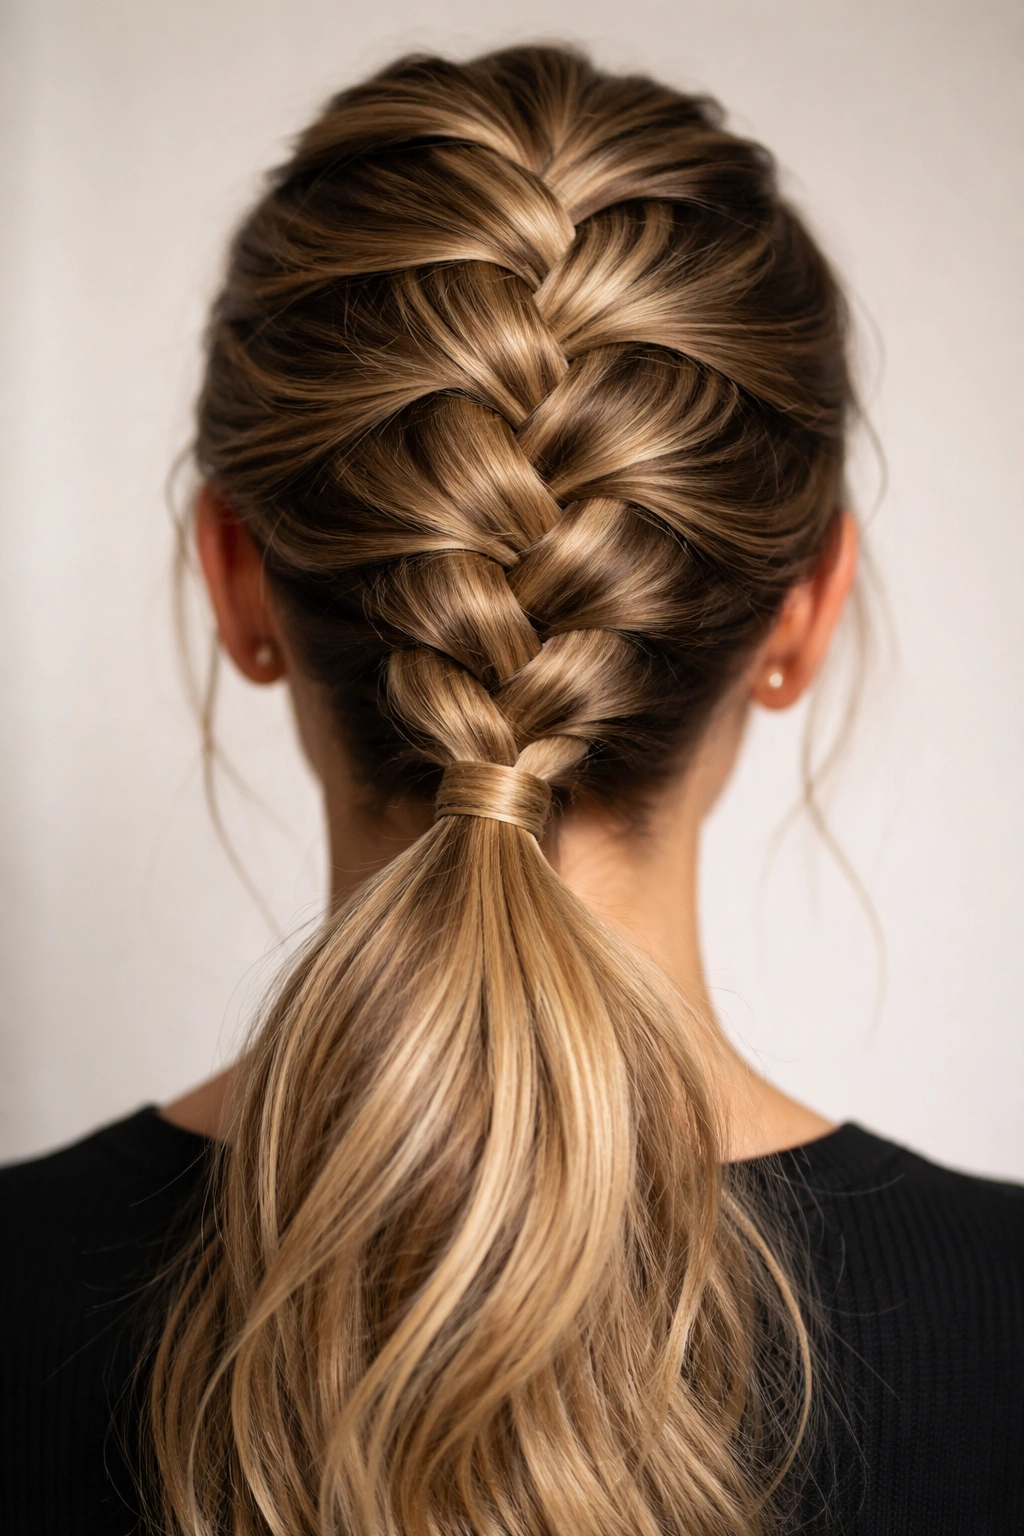
If you’ve mastered the French braid but want something that looks distinctly different, the Dutch braid (which braids “outward” instead of “inward”) is your next natural step. Instead of crossing outer strands over the center strand like a French braid, you cross them under, which flips the visual direction of the weave. The braid looks bolder, more textured, and surprisingly three-dimensional compared to its French cousin.
Why the Technique Is Almost Identical
The only real difference is the direction of the crossover—under instead of over. Your finger positioning stays the same. Your head position stays the same. The motion and speed stay the same. Yet the final result looks completely different, which makes this feel like a breakthrough moment for most beginners. Suddenly you realize that hairstyling is more about small adjustments than entirely new skills.
Building the Reverse Motion
Start with your three strands at the crown. Take the right strand and cross it under the center strand (instead of over it), so the right strand becomes the new center. Now take the left strand and cross it under the new center. As you do this, pick up small new sections of hair from each side just like the French braid. The motion feels slightly more unnatural the first few times because we’re trained to cross things over, not under, but it becomes muscle memory remarkably fast.
Visual Impact Compared to French
- Dutch braids photograph with more definition and dimension
- The braid stands out more against lighter hair colors
- This style works especially well on thicker or curlier hair, where the dimensional aspect is amplified
- Dutch braids feel edgier and less traditionally feminine, which some people strongly prefer
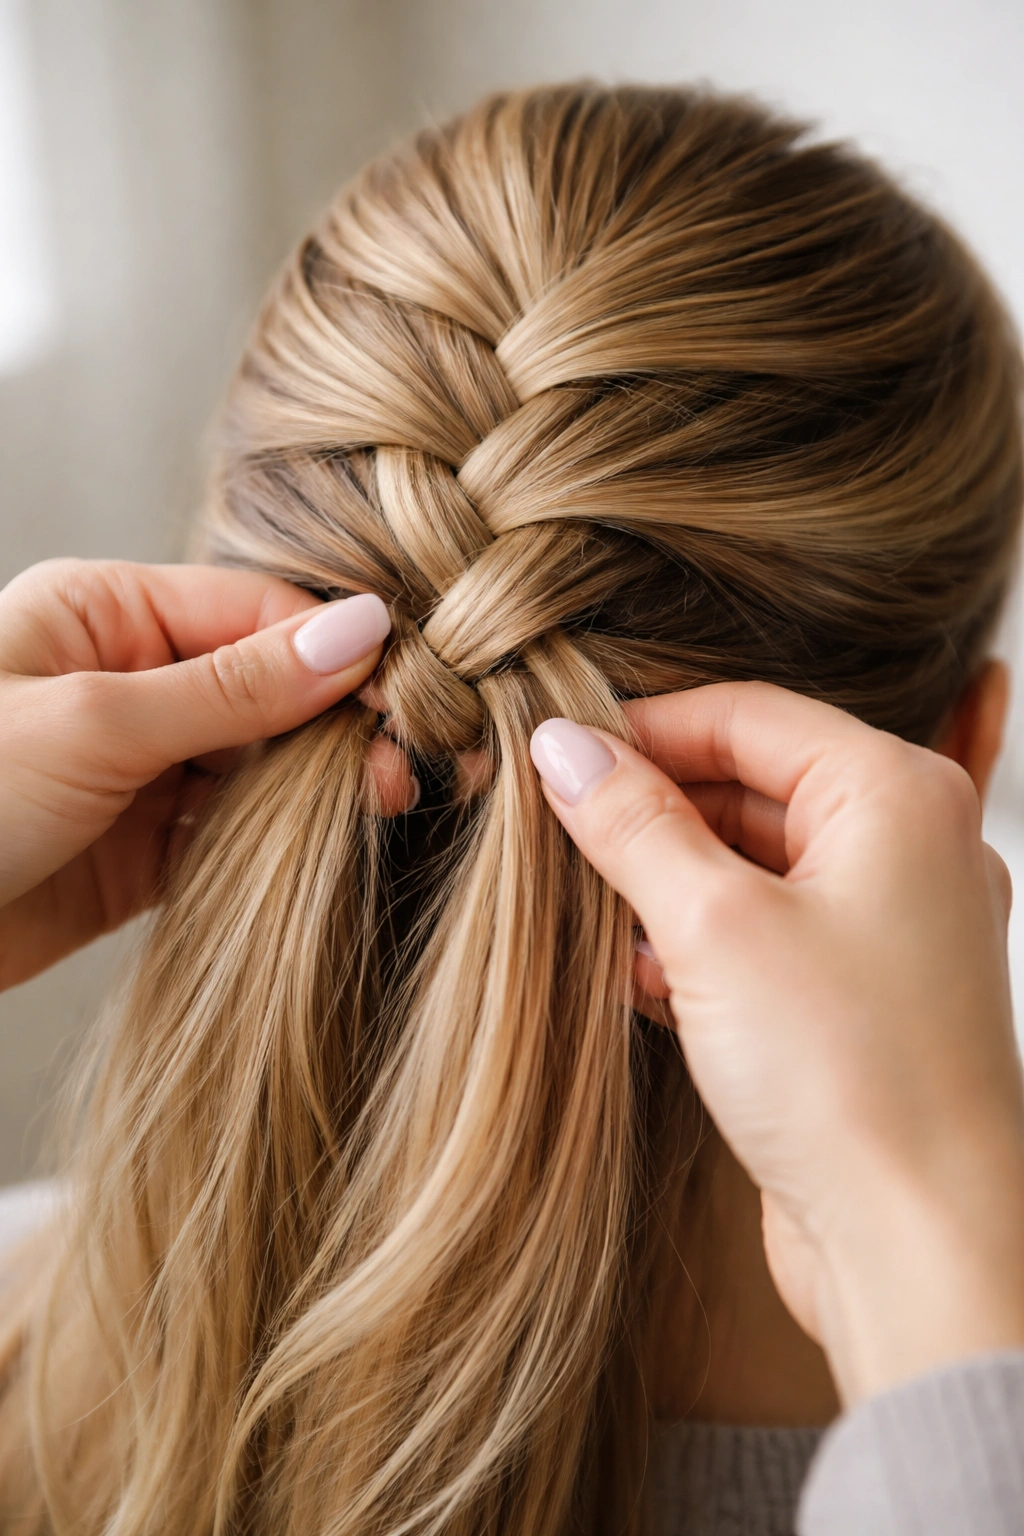
4. Half-Up French Braid Ponytail
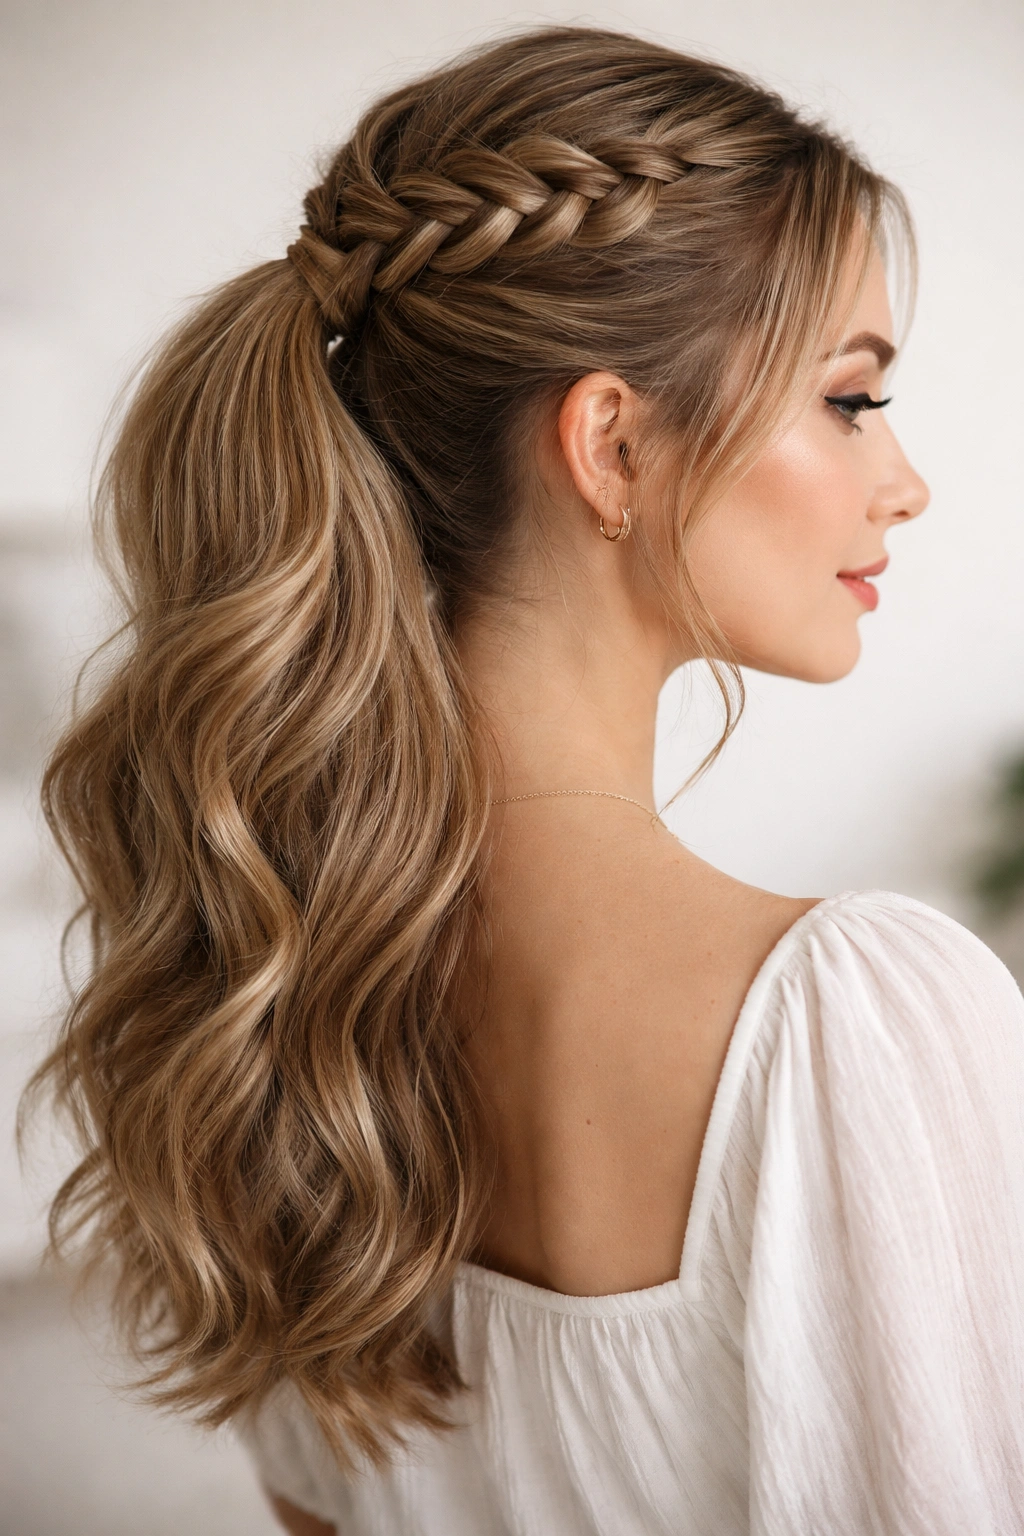
This elegant middle ground keeps some hair down while braiding the upper half, creating a softer overall look than a full ponytail while maintaining all the polished appeal of a French braid. The braid runs from the crown down to roughly the middle of the back of your head, where it meets a half-up, half-down ponytail. This is the hairstyle you’ve definitely seen on Instagram and thought looked effortlessly sophisticated.
Why This Works Beautifully for All Hair Lengths
Half-up styles are inherently more flattering because they frame the face while showing off length. The French braid at the crown adds visual interest and complexity that a simple half-up ponytail lacks, but it requires less technical skill than controlling a full head of hair for a traditional braid. If you have shoulder-length or longer hair, this style looks stunning. Even with shorter hair (collarbone length and below), it creates dimension.
How to Position the Braid
Begin your braid exactly as you would for a classic French braid at the crown. Continue braiding while picking up sections, but stop once you’ve braided roughly halfway down the back of your head—usually around ear level when you look at your head from the side. Instead of continuing the braid all the way down, gather the braided section plus all the loose hair below it into a half-up ponytail positioned right where the braid ends. Secure with an elastic that matches your hair color.
Securing It Properly
- Use a small, clear elastic or one that matches your hair color so it doesn’t interrupt the visual line
- Position the ponytail elastic right at the base of where your braid ends for a seamless transition
- Gently loosen the braid slightly once finished for a fuller, softer appearance
- This style holds beautifully for 6-8 hours without needing touch-ups
5. Double French Braid Ponytail
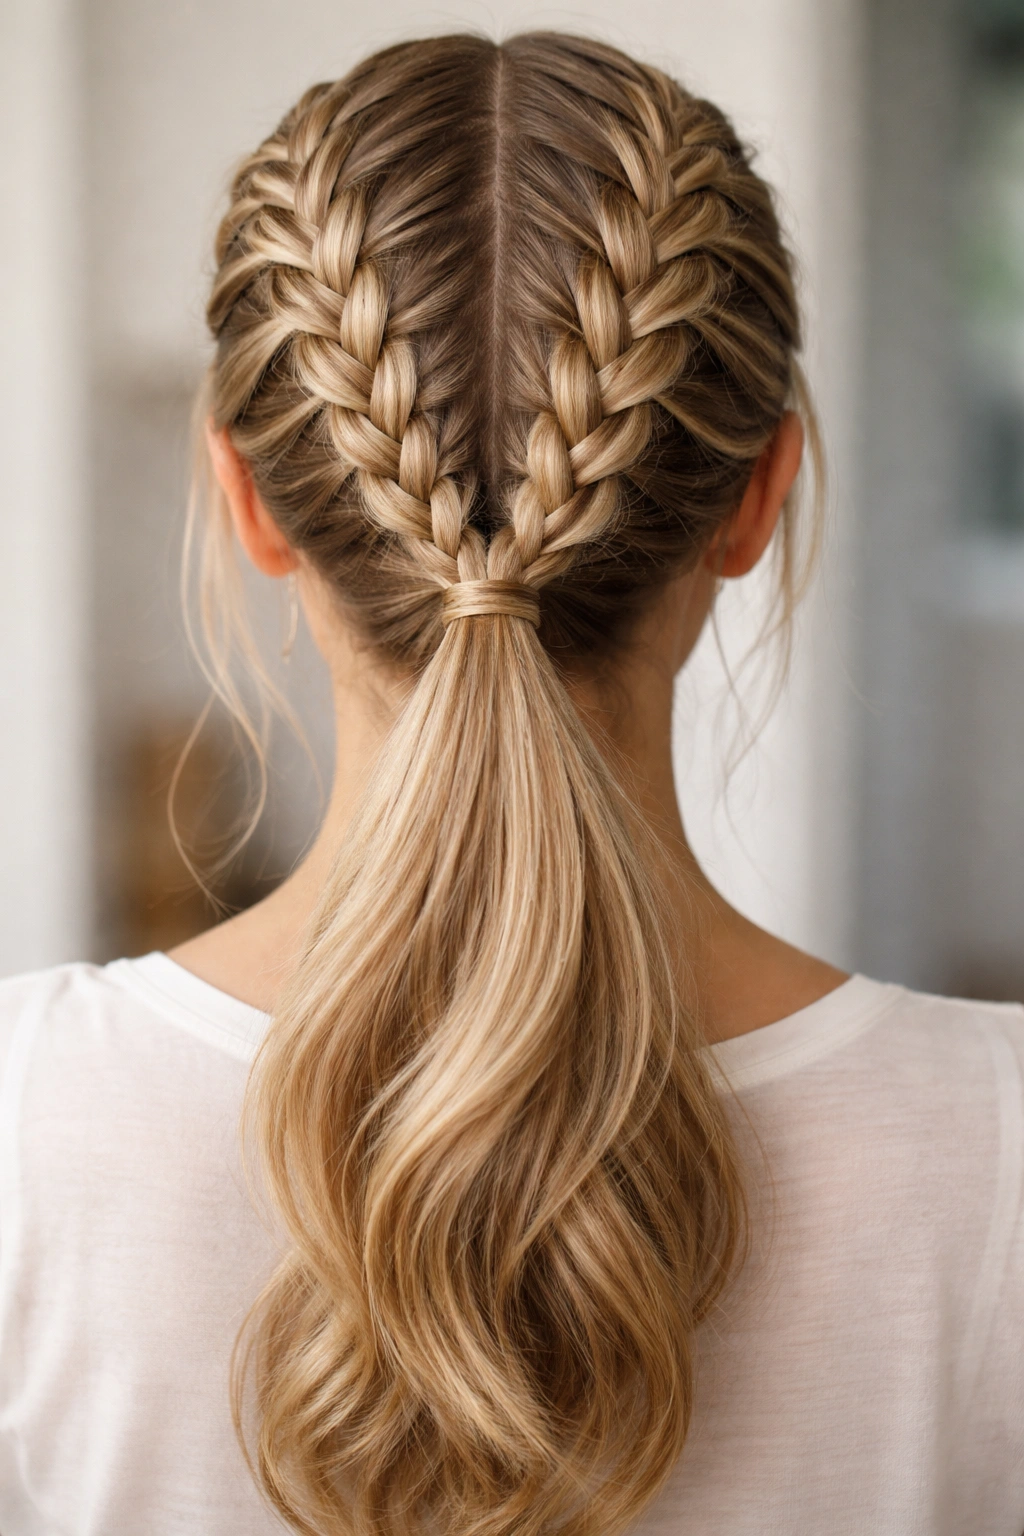
Two braids are actually easier than you’d think, and they create an immediately polished, intricate-looking style that has serious visual impact. This involves parting your hair down the middle and creating two separate French braids—one on each side of your head—that converge into a single ponytail at the back. It looks complicated but is genuinely simpler than it appears because you’re working with less hair on each side, making each individual braid easier to control.
The Parting Game-Changer
The success of this style depends entirely on a clean center part. Wet your hair lightly, use a rattail comb to part a straight line from your forehead to the nape of your neck, and secure each side separately with a small clip while you work on one side at a time. This prevents one side from interfering with the other and makes the whole process less chaotic. Most beginners’ struggles with double braids come from trying to manage both sides simultaneously; doing them sequentially makes everything easier.
Executing Each Braid
Once one side is clipped, take the other side and begin your French braid at the temple, braiding toward the back center of your head. The braid should travel from front to back (toward the nape area) rather than down the side. This ensures both braids meet naturally at the back where they’ll be combined into the ponytail. Braid until you’ve incorporated all the hair from that section, then release the clipped side and repeat on the other half.
Combining Into the Ponytail
- Gather both braids together at the center back of your head
- Position them at the same height for symmetry
- Secure with an elastic around the base of both braids together
- You can wrap a small section of hair around the elastic to hide it for a more finished look
- This style looks equally beautiful left loose or with the tails braided further and pinned up
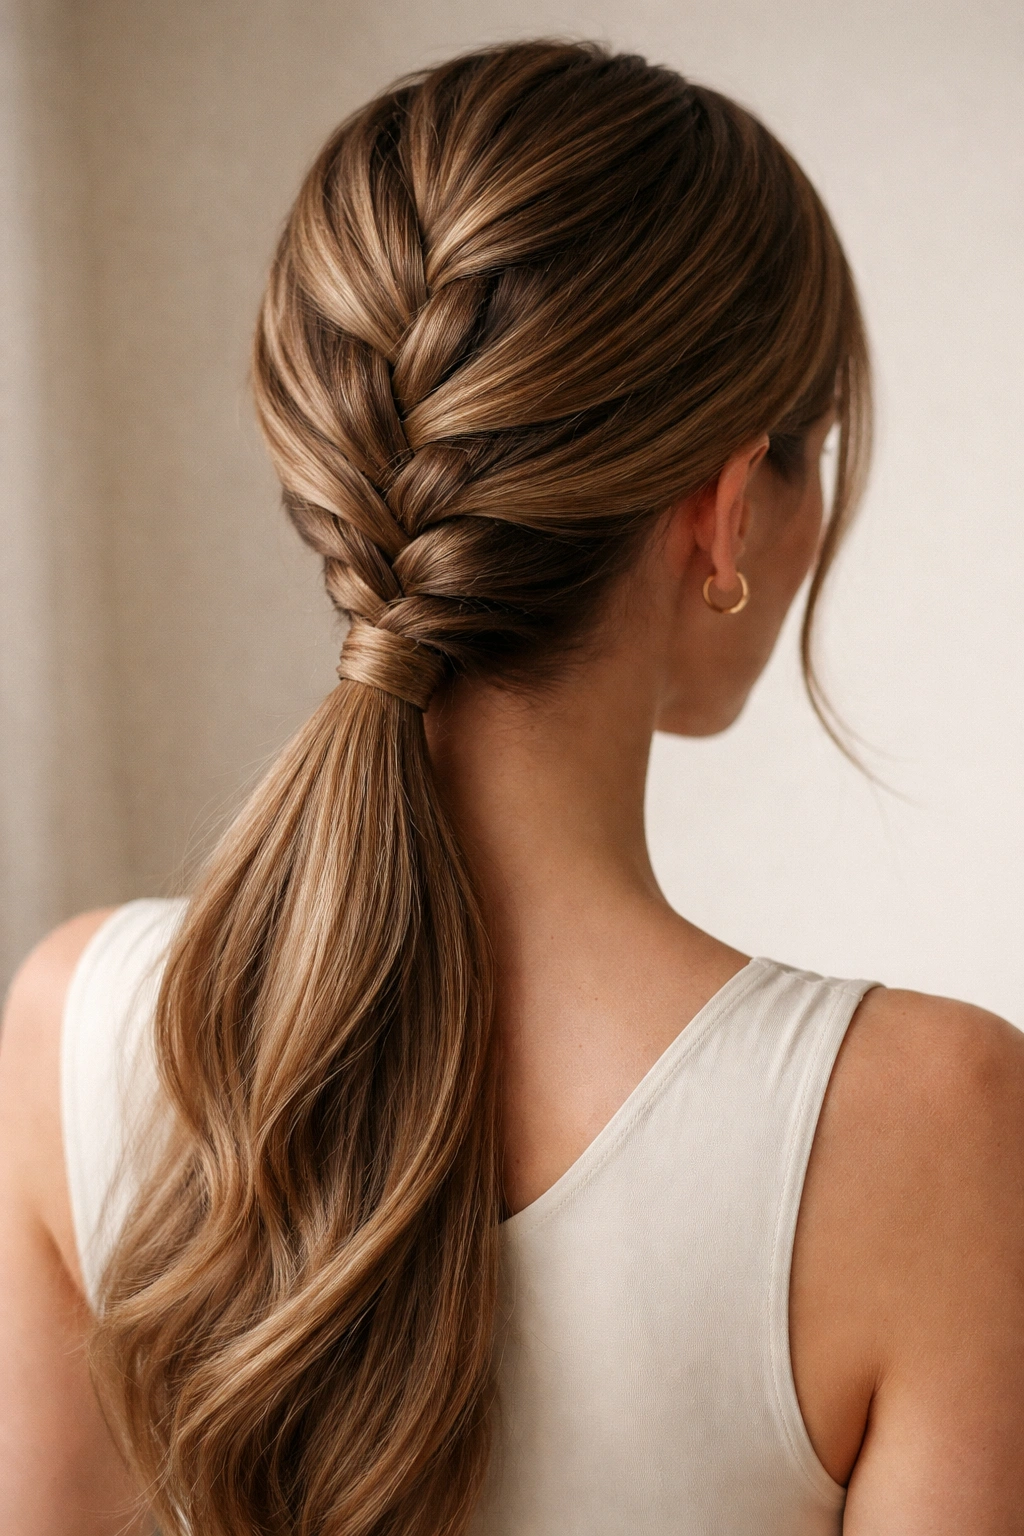
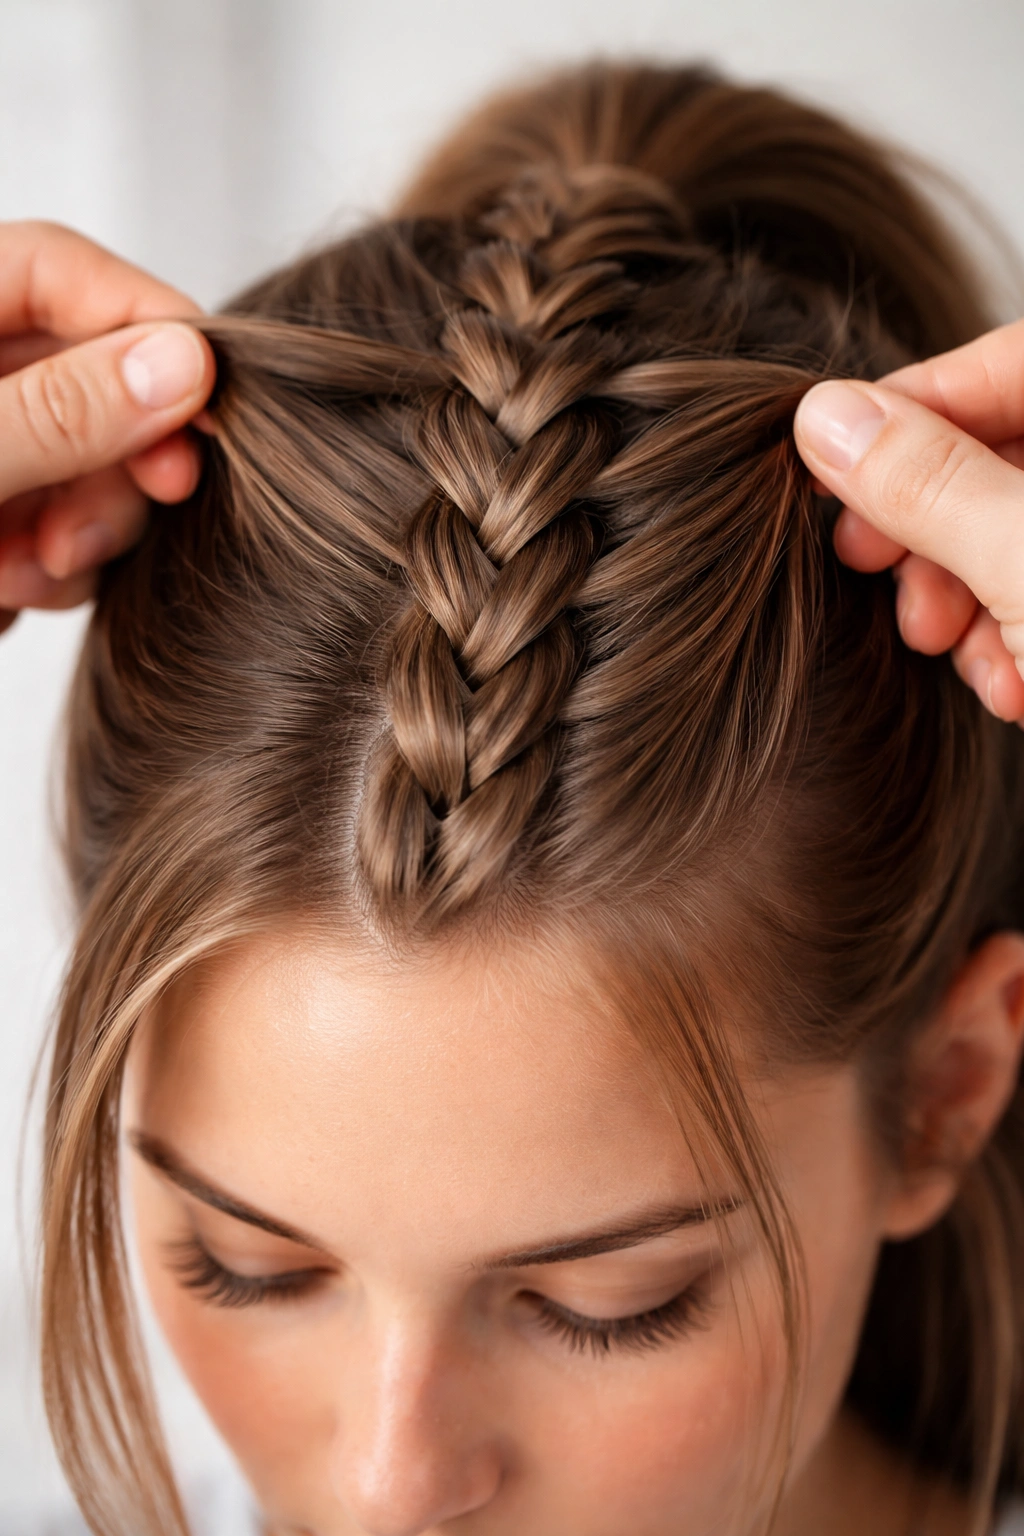
6. Fishtail French Braid Ponytail
The fishtail braid uses a four-strand pattern instead of the traditional three-strand pattern, creating a delicate, intricately woven appearance that looks far more complex than it actually is. Combined with a ponytail, it creates an ethereal, romantic style that photographs beautifully and works for everything from casual brunches to wedding guest appearances.
Understanding the Four-Strand Technique
A fishtail braid begins like a French braid but uses four strands instead of three. Divide your crown section into four equal parts instead of three. The motion involves crossing the outer left strand over the adjacent left-center strand, then crossing the outer right strand over the adjacent right-center strand. It’s a back-and-forth rhythm that, once you understand the pattern, flows naturally. Most people pick it up within two or three attempts.
The Magical Simplification
Here’s what makes fishtail braids easier than they look: the four strands are actually thinner than three strands would be, which means your hands don’t have to grip as much hair simultaneously. This is especially helpful for people with smaller hands or less hand strength. The fishtail pattern also forgives imperfection beautifully—slight inconsistency in thickness creates intentional-looking texture and dimension rather than looking sloppy.
Converting to a Ponytail Version
- Braid your fishtail all the way down the back of your head, picking up new sections as you descend
- Stop about an inch or two before you run out of hair
- Gather the final braid and all loose hair into a ponytail base
- For maximum impact, gently pull the braid apart widthwise to create a fuller, airier appearance
- This style pairs beautifully with delicate accessories like small jeweled clips or ribbons woven through the braid
7. Messy Textured French Braid Ponytail
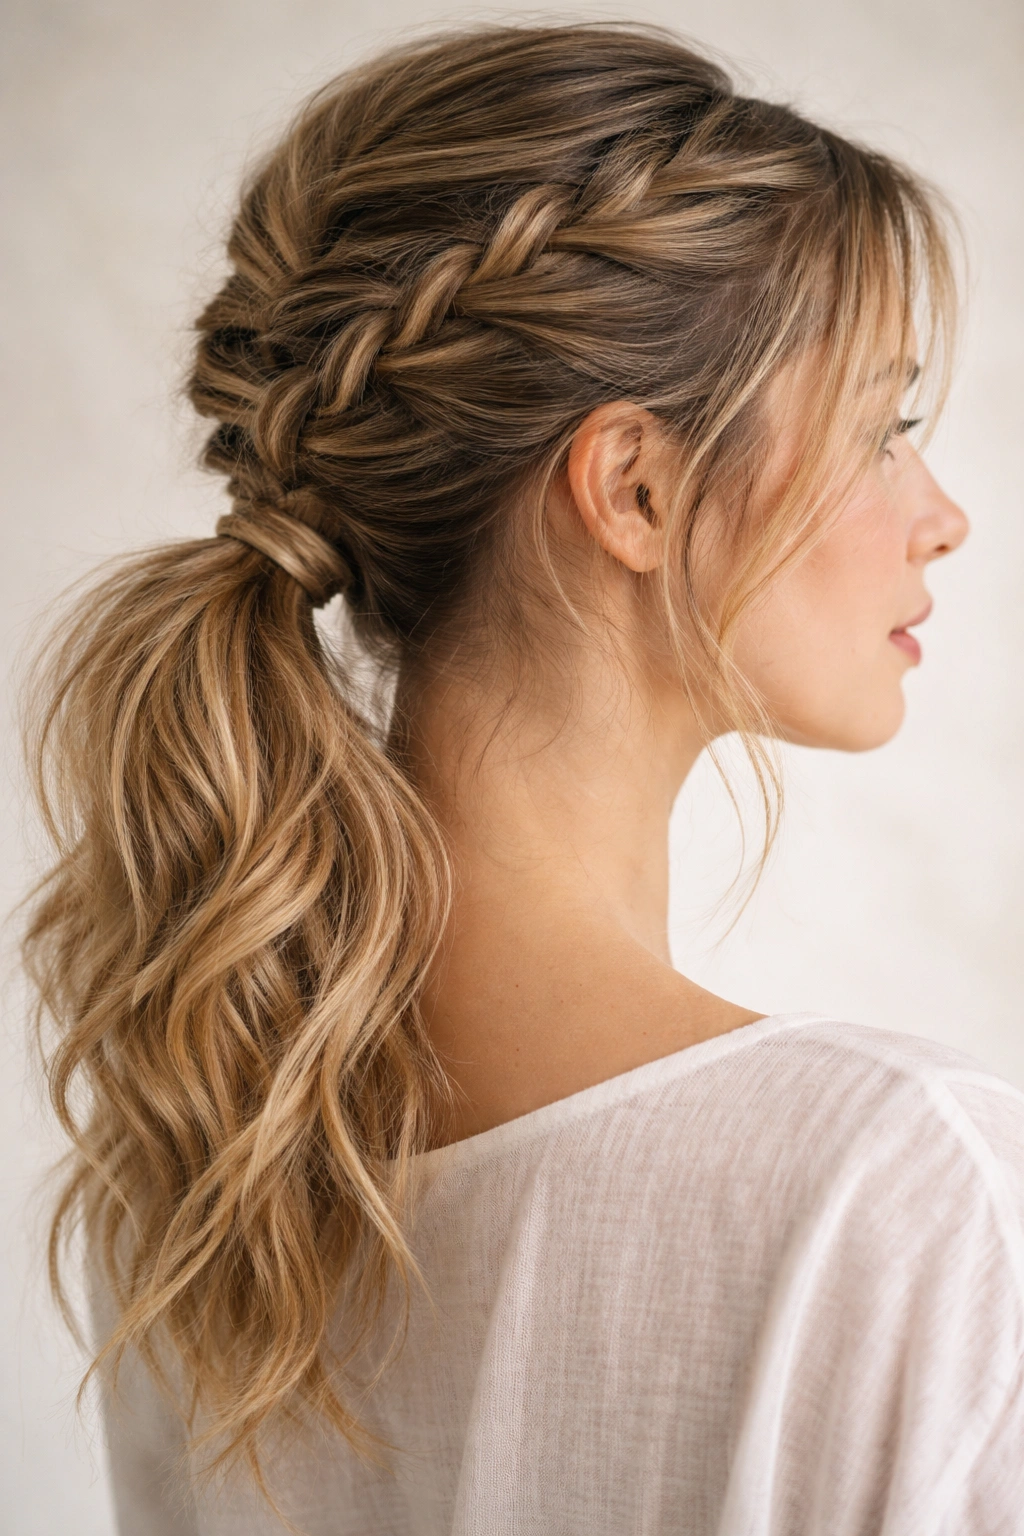
Perfection is not always the goal, and this style proves it beautifully. A deliberately textured French braid ponytail embraces looseness and airiness, creating a “effortlessly put-together” aesthetic that’s actually harder to achieve when you’re going for precision. The technique is identical to the classic French braid, but the finishing work—gentle pulling, teasing, and strategic loosening—transforms it into something that looks intentionally undone.
Why “Messy” Is a Specific Technique
Messy doesn’t mean careless—it means strategically loose. You’ll braid normally, but once finished, you’ll go back through and gently pinch and pull the outer edges of the braid, releasing it slightly. This creates a fuller, fluffier appearance. You can tease small sections of the braid with a fine-tooth comb before pulling to add even more texture. The result should look like you didn’t spend three hours on your hair, even though you actually did.
Building Intentional Texture
Start with a clean, completely dry braid. Once finished, take your fingers and work through the braid from the crown downward, gently pulling the side sections outward. Don’t aim for uniform looseness—vary which sections you loosen more. A few sections slightly tighter, others noticeably loose, creates the right balance. Hit the braid with some light texture spray or dry shampoo before pulling to give your hair grip and make the loosening process easier.
The Finishing Touches
- Use bobby pins or small clips to secure any sections that feel like they might slip
- A light mist of flexible-hold hairspray sets everything without making it feel stiff
- Pull out a few face-framing pieces for softness around the face
- This style actually holds better than you’d expect—the intentional looseness creates friction that keeps everything secure
8. Low-Slung French Braid Ponytail
Instead of positioning your ponytail at the crown or even mid-back, move it to the nape of your neck for a more romantic, sophisticated aesthetic. This low placement completely changes the proportion of the style and works especially well for formal events, professional settings, or when you want your hair completely off your face and neck. The braid travels the full length of your head, making it more prominent and visible.
The Advantage of the Lower Position
A low ponytail is inherently more mature and polished-looking than a high one, which is why it’s a go-to for formal occasions. The French braid becomes the primary visual element, running prominently down the back of your head where it’s clearly visible and can be appreciated. This style also works beautifully with thinner hair because the low position and full-head braid create an illusion of more volume than a high, tight style.
Executing the Extended Braid
Begin your French braid at the crown exactly as usual, but continue braiding all the way down to the nape of your neck. Keep picking up small sections of hair throughout the entire length—this is key to achieving the full, integrated look. Once you reach the nape, gather all remaining hair and the final braid into a low ponytail. The total braid-to-ponytail combination creates a long, elegant visual line that’s exceptionally flattering.
Styling for Different Occasions
- Professional: Keep the braid snug and neat; gather hair into a sleek, tight low ponytail
- Romantic: Gently loosen the braid and add curls or waves to the ponytail for softness
- Formal: Add decorative pins or a small comb into the braid for extra polish and detail
- Casual: Keep some wispy pieces loose around the face for a relaxed look
9. French Braid Ponytail with a Wrapped Twist
This variation adds an unexpected finishing detail that elevates a standard French braid ponytail into something special: wrapping a small section of hair from the ponytail around its base. This hides the elastic, creates a seamless visual line, and adds a professional, finished quality that looks like you’ve taken genuine time with your hair. It’s a simple extra step that multiplies the perceived sophistication of the style.
The Wrapping Technique Explained
After you’ve secured your French braid and ponytail into place with an elastic, take a thin section of hair from within the ponytail base—about the thickness of a pencil or your pinky finger. Wrap this section around the elastic and the base of the ponytail several times, completely covering the elastic from view. Secure the wrapped section with a bobby pin hidden underneath, tucked into the base of the ponytail itself. The result looks polished and intentional.
Why This Detail Matters
The wrapped base eliminates the visual interruption of a bare elastic, creating a continuous line from the braid through to the ponytail. It’s the kind of detail that signals “this person actually cares about their appearance,” which is surprisingly powerful in professional and formal settings. It also makes the overall style feel more refined and thoughtfully constructed, elevating even a casual French braid into something special.
Perfecting the Wrap
- Take your thin hair section and wrap it clockwise around the base 2-3 times for full coverage
- Secure with a bobby pin that matches your hair color, angled parallel to the elastic
- Make sure the wrapped section is snug but not so tight that it causes discomfort or leaves marks
- This technique works with every French braid variation, so practice it once and you can apply it to any style
10. Bubble French Braid Ponytail

This playful, contemporary style combines a French braid with bubble sections—segments of hair between elastic bands that puff outward for a fun, dimensional look. It’s perfect for when you want something that feels fresh and modern while still being technically manageable for a beginner. The French braid portion uses the exact same technique you’ve already learned; the “bubble” part is just elastic placement and gentle pulling.
Building the Braid Structure
Create your French braid exactly as you would for a classic high ponytail, braiding from crown to the base of your ponytail at the back of your head. The key difference is that instead of securing it into one single ponytail elastic, you’ll use multiple small elastics spaced about 1-1.5 inches apart along the braid. This creates defined segments. These elastics should be positioned so they’re visible and intentional, not hidden.
Creating the Bubble Effect
Once you’ve secured all your elastic bands along the length of the braid, gently pull and loosen the sections of hair between each elastic. Each section will puff outward, creating a dimensional, almost sculptural quality. Pull more aggressively for a bolder look, or gently for something subtle. You control the intensity of the bubble effect through how much you pull and loosen each segment.
Perfect For
- Casual styling where you want personality and fun
- Younger people or more fashion-forward aesthetics
- Creating height and dimension without teasing
- Days when you want something that reads as playful rather than serious
- This style actually holds surprisingly well—the multiple elastics create multiple anchor points that keep everything secure throughout the day
How to Master the Basic French Braid
Before attempting any of the ten styles above, you need to truly understand the fundamental motion of the French braid. The technical explanation is simple: you’re doing a three-strand braid while continuously adding new sections of hair from your head into that braid. But the actual motor skill requires practice, and most people benefit from breaking it down into specific, manageable phases rather than trying to nail the whole thing at once.
Phase One: The Three-Strand Foundation
Start without adding new hair—just practice creating a clean three-strand braid. Take a section of hair (from one spot, not from your scalp), divide it into three equal strands, and braid: right over center, left over center, right over center. Repeat until you’ve finished the section. This becomes automatic after thirty seconds of practice. The brain’s job here is learning the crossover motion and rhythm without the complication of managing new hair sections simultaneously.
Phase Two: Adding Hair Sections
Once the three-strand rhythm is muscle memory, add the complexity of incorporating new hair. Take a section at your crown, divide it into three strands, and do one crossover (right over center). Before you cross the left strand, stop and pick up a small new section of hair from the left side of your head and add it to the left strand. Now cross that combined strand over center. This is the critical moment where people often mess up—the new section needs to be added to the outer strand, not separate from it.
Phase Three: Full-Head Integration
Combine both skills: maintain the three-strand rhythm while continuously picking up small new sections from each side as you descend the back of your head. Work slowly at first. The motion is right-over-center-while-gathering-new-right-section, then left-over-center-while-gathering-new-left-section. The key is synchronizing the gathering motion with the crossover motion so they happen simultaneously.
Common Breakthrough Moments
Most people experience a sudden “click” moment somewhere around their third or fourth attempt, where suddenly the motion feels natural instead of impossible. This is completely normal and happens to virtually everyone. Before that moment, it feels clumsy. After it, the motion becomes automatic. Trust that this moment will arrive for you too.
Common Beginner Mistakes to Avoid
Understanding what goes wrong is just as important as knowing what goes right, because most of the struggles beginners face come down to a few consistent mistakes that are completely preventable.
Picking Up Hair That’s Too Thick
The most common error is gathering hair sections that are far too large. When your new section is thick, the braid becomes uneven and lumpy, and the whole thing feels hard to manage. Practice picking up sections about the thickness of a pencil or the width of your pinky finger. This thin-section habit is what creates the refined, intricate-looking braid that people admire. Thin sections seem tedious at first, but they’re actually what makes the technique feel easy and the result look professional.
Braiding Too Tightly
Beginners often pull hard on the strands, thinking tension equals control and security. Actually, excessive tension makes the braid less secure because it restricts movement and creates stress points where hair can snap or slip. Braid with relaxed tension—imagine you’re braiding with a confidence that the hair will cooperate, not a death grip that forces it to. A slightly loose braid can be tightened in post-processing (by pulling it), but an overly tight braid can’t be loosened without unraveling the whole thing.
Starting Too Far Forward
Some people begin their braid at the very top of the head, right at the hairline. This creates a weird forward angle and makes picking up sections awkward. Start your braid at the crown—the highest point of your head when you’re looking straight ahead. This gives you a natural, centered starting point and makes the descending motion feel effortless.
Inconsistent Section Thickness
Novices often pick up progressively larger sections as they go down the head, which creates a braid that looks thick at the crown and thinner at the nape. Practice picking up the same thickness each time—set a mental standard (“pencil width”) and stick to it throughout. This consistency is what separates amateur from polished.
Forgetting to Braid Slowly
Speed comes naturally after practice. Rushing the process when you’re still learning creates mistakes and frustration. Braid deliberately and slowly your first ten times. By time fifteen, you’ll naturally speed up. Your hands already know the motion; they just need time to trust it.
Tools and Products That Make French Braids Easier
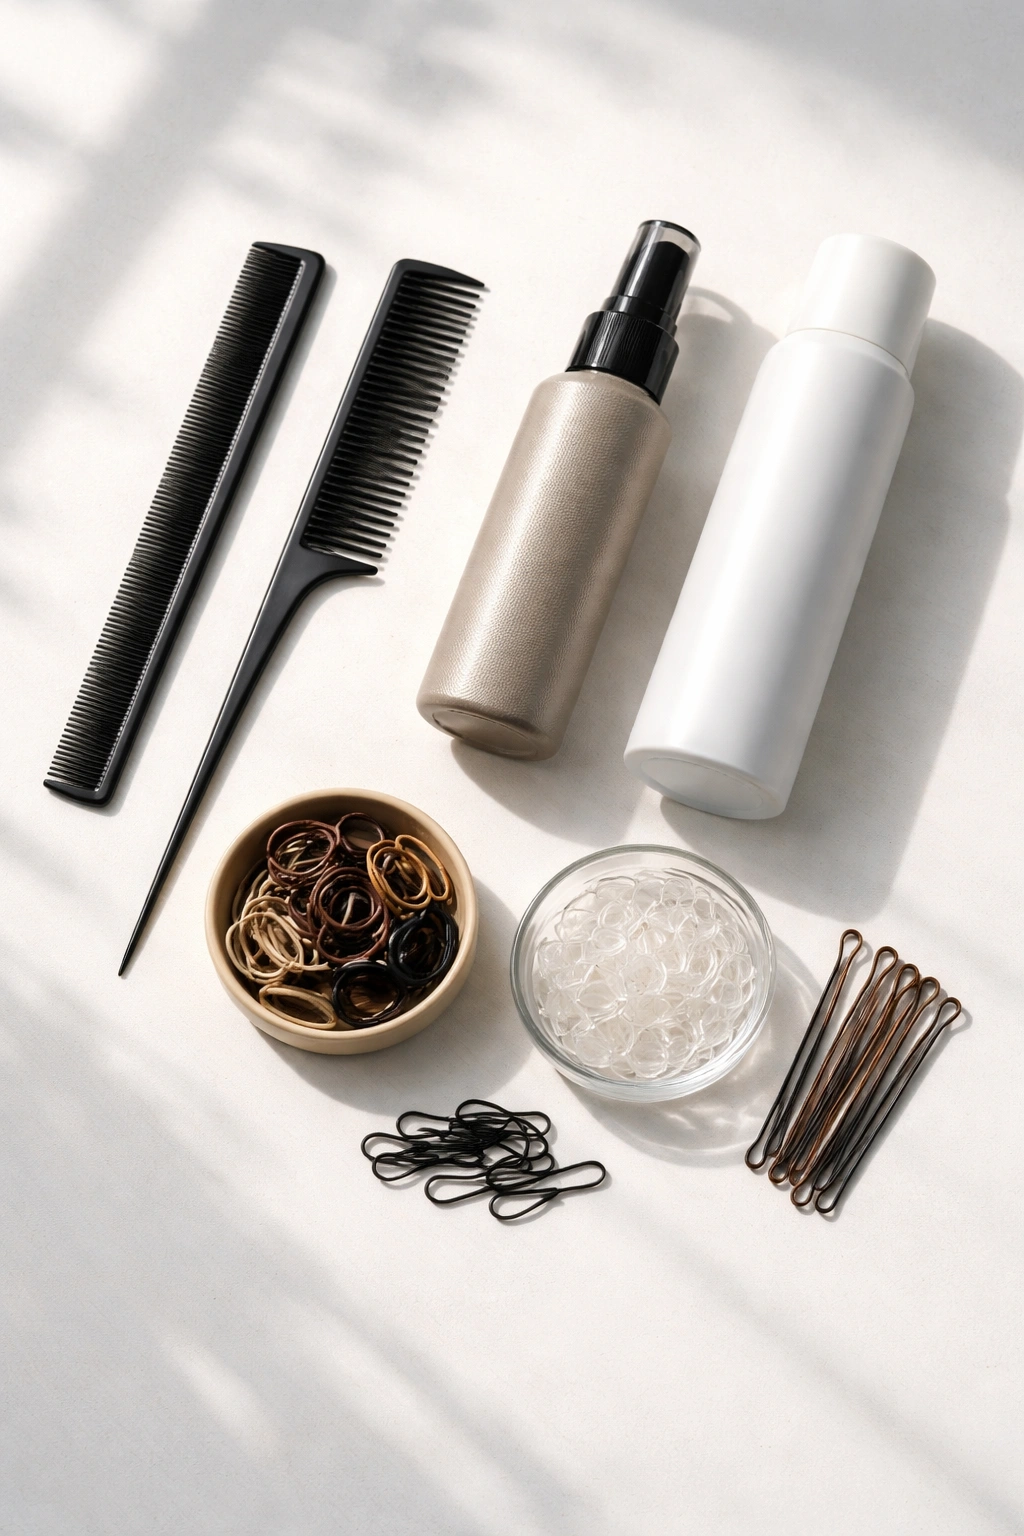
While you don’t need fancy equipment to braid successfully, a few specific tools and products genuinely make the process smoother, especially when you’re learning.
The Right Brush Matters
A fine-tooth comb is invaluable for detangling before you start and for gently teasing your crown for better grip. Brush through your entire head thoroughly before braiding—tangles catch mid-braid and destroy your momentum. A rattail comb (thin metal comb with a pointed handle) is perfect for creating clean partitions if you’re doing side-swept or double braids.
Texture Products Are Your Friend
Texture spray or dry shampoo adds grip to slippery hair, making sections easier to control and less likely to slip out of your hands. If your hair is naturally very silky or fine, a light mist of texture product before braiding changes everything. This isn’t cheating—it’s using the right tool for your hair type.
Hair Elastics and Pins
Invest in small, elastic bands that match your hair color. Clear elastics work universally, but ones that match your shade are less visible. Bobby pins in your hair color should be stocked like office supplies—you’ll use them constantly. A few decorative pins or clips add finishing polish without requiring any additional skill.
Mirrors and Lighting
A handheld mirror for watching the back of your head while you braid is genuinely helpful, even if it feels awkward at first. And good lighting makes everything easier—practice by a window or under a bright lamp rather than in dim light. You can’t fix what you can’t see.
Final Thoughts
The ten French braid ponytail styles above represent a complete journey from total beginner to someone genuinely confident in their braiding ability. You’re not just learning ten separate hairstyles—you’re building a single core skill that multiplies into endless variations and possibilities. The fundamental three-strand-with-new-sections motion is the foundation for every single variation.
Start with the classic French braid into a high ponytail and practice it a minimum of five times before moving to the next style. Give yourself permission to have messy attempts. Perfect braids are boring anyway; the best ones always have a little texture and personality. By the time you’ve worked through these ten versions, you won’t even remember why you thought French braids were intimidating. They’ll feel as natural as regular braids, and you’ll be the person everyone asks for hairstyle advice.
The real magic isn’t in achieving perfection on the first try—it’s in realizing that your hands can learn to do things you didn’t think possible. That confidence carries into every other area of your life. Now go practice.