Fine thin hair can make updos feel rude. You pin, twist, spray, and smooth, then the crown flops flat while the bun shrinks into something barely bigger than a plum.
The best easy updos for fine thin hair do not depend on fake bulk. They depend on shape, placement, and a little grip — usually from dry shampoo, texture spray, or hair that isn’t freshly washed and slippery as glass.
A lot of the styles that work here are not big braids or dramatic knot work. They’re tucked twists, low rolls, looped ponytails, and braids that do one quiet job well: hide the sparse spots and make the hair sit where it already wants to sit. Tiny is not the enemy. Tiny can look sharp.
If your hair tends to slide out by lunchtime, start with a rough blow-dry, keep conditioner off the roots, and have matte bobby pins nearby instead of shiny decorative ones. The styles below lean on that kind of practical support, and the first one starts where fine hair usually behaves best — low, close to the neck, and nicely controlled.
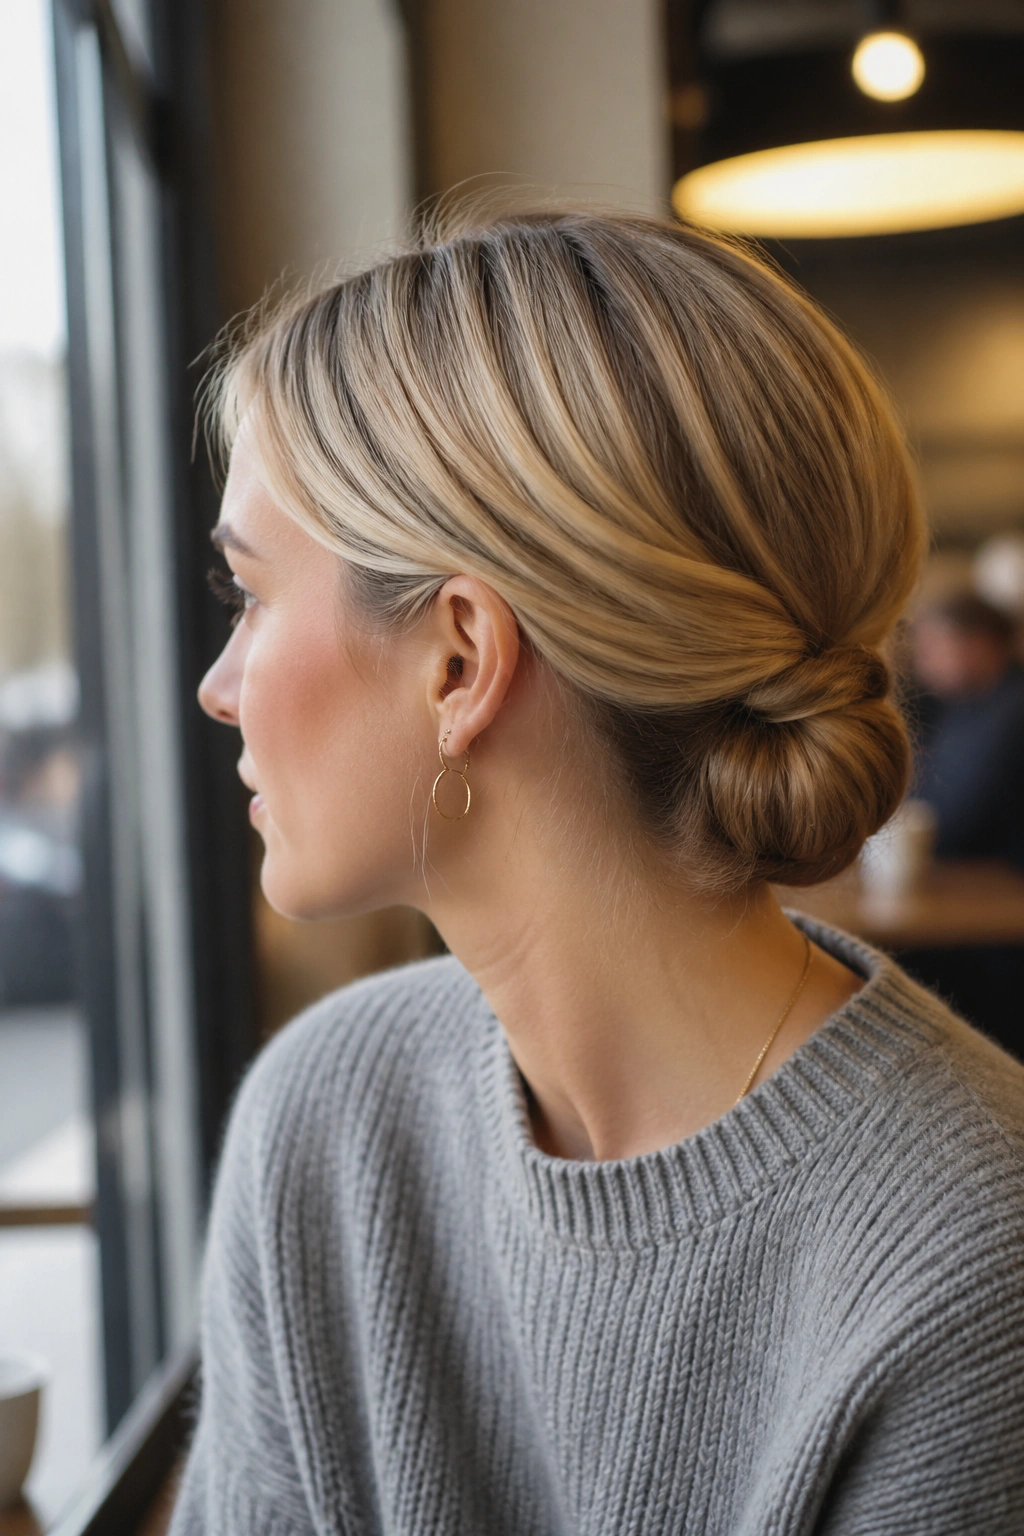
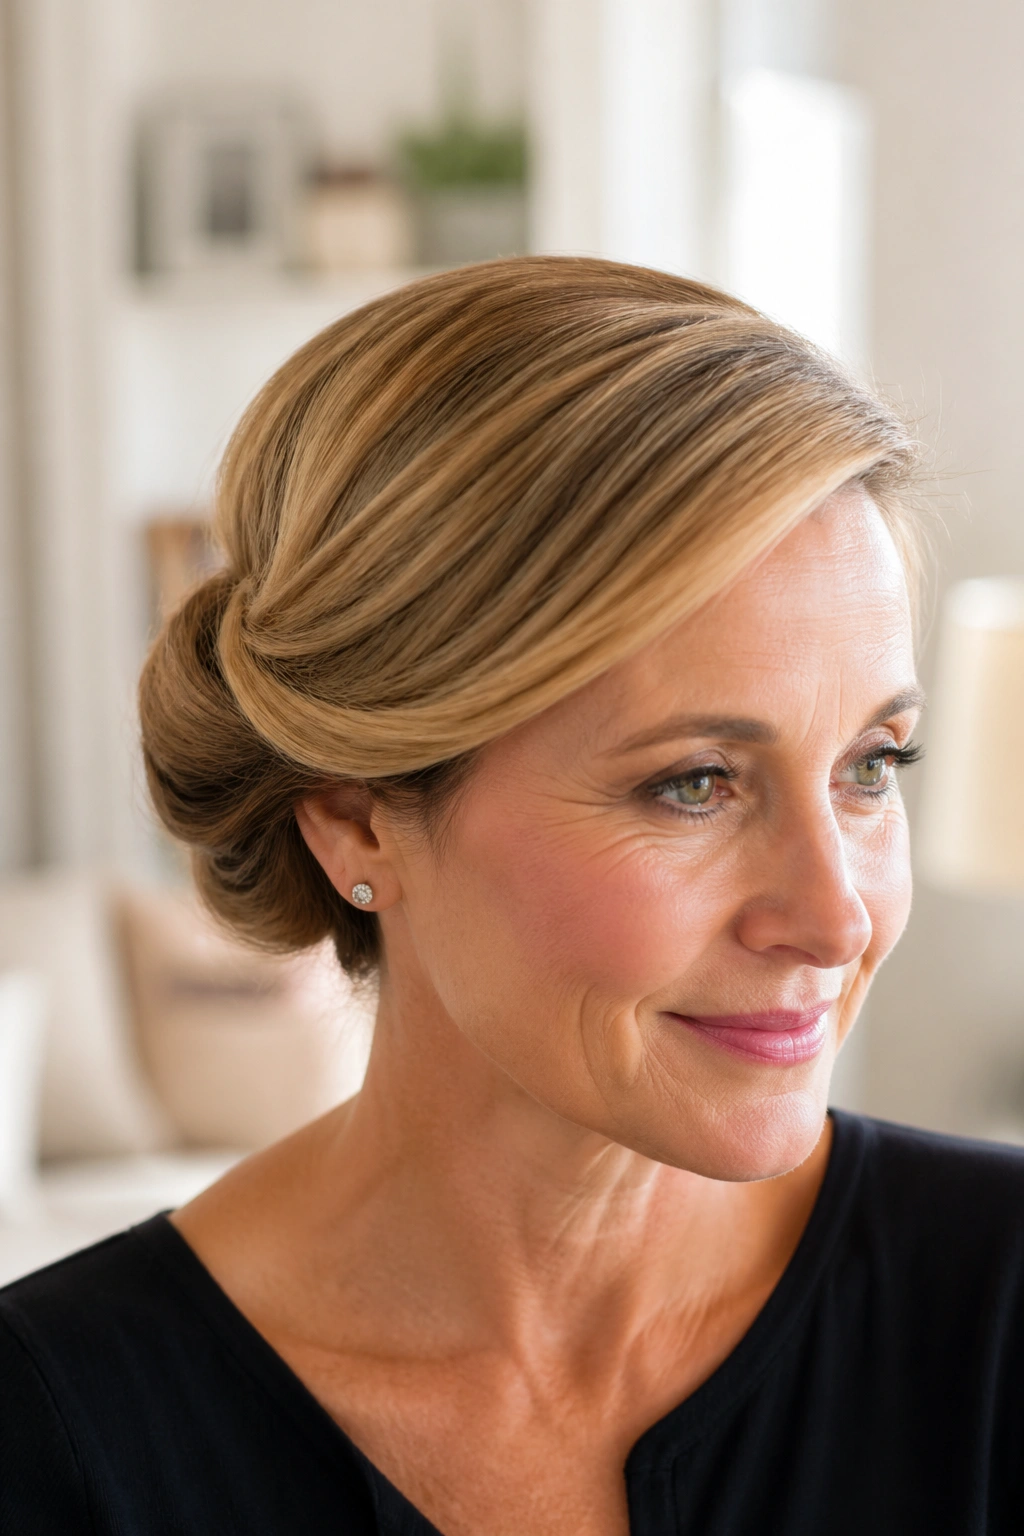
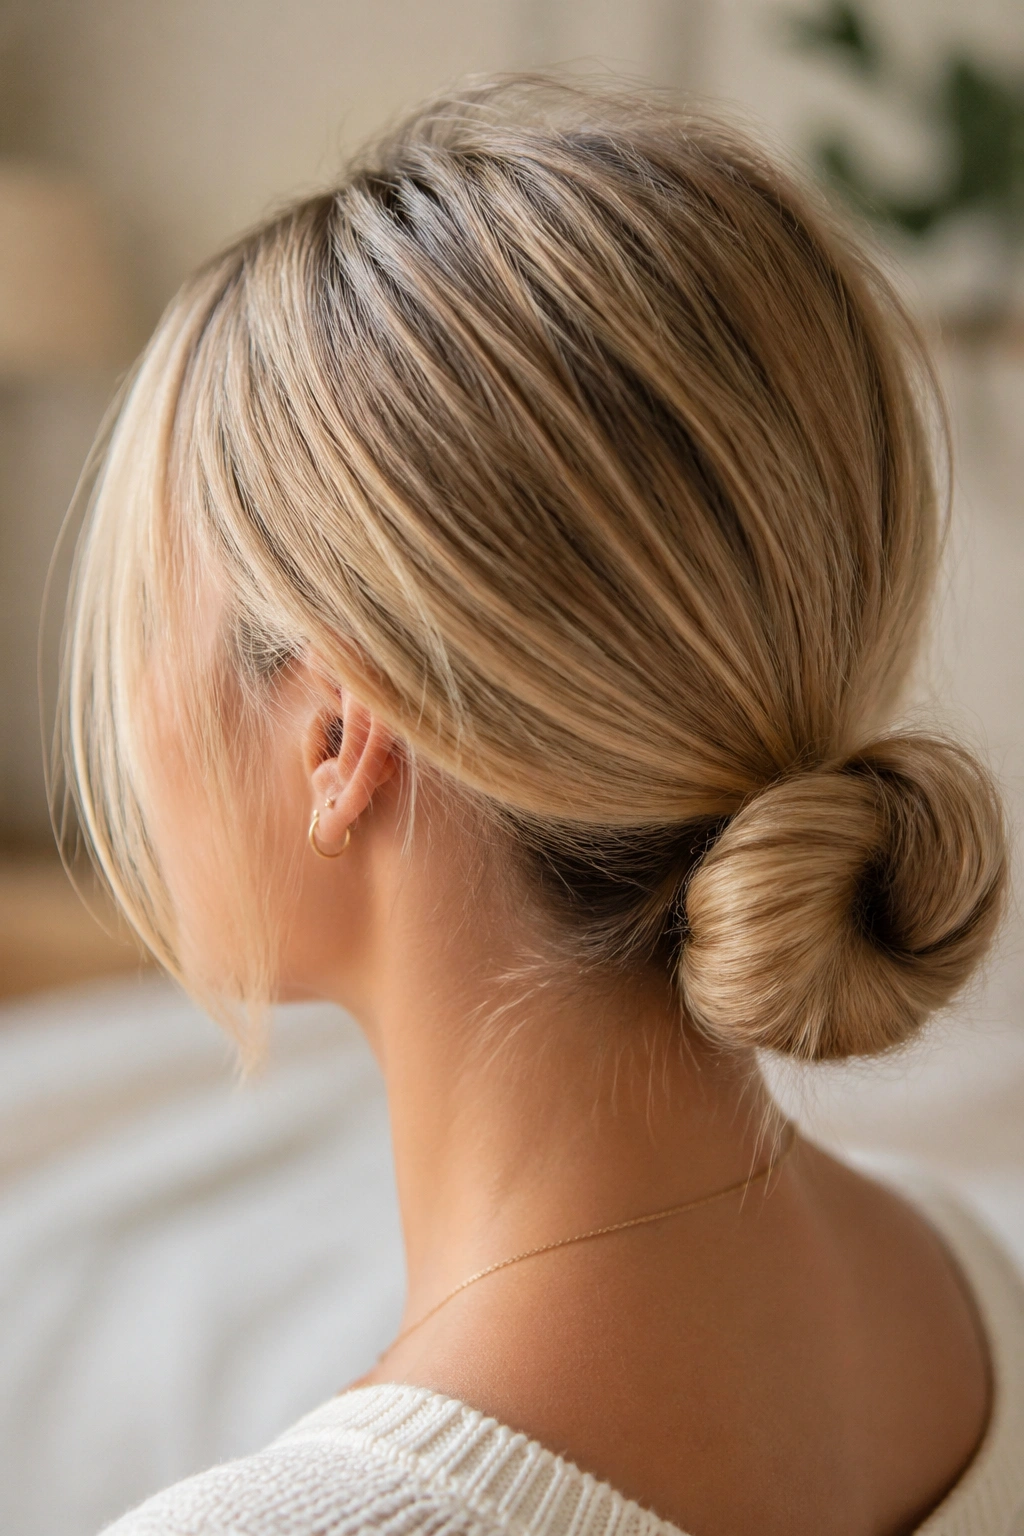
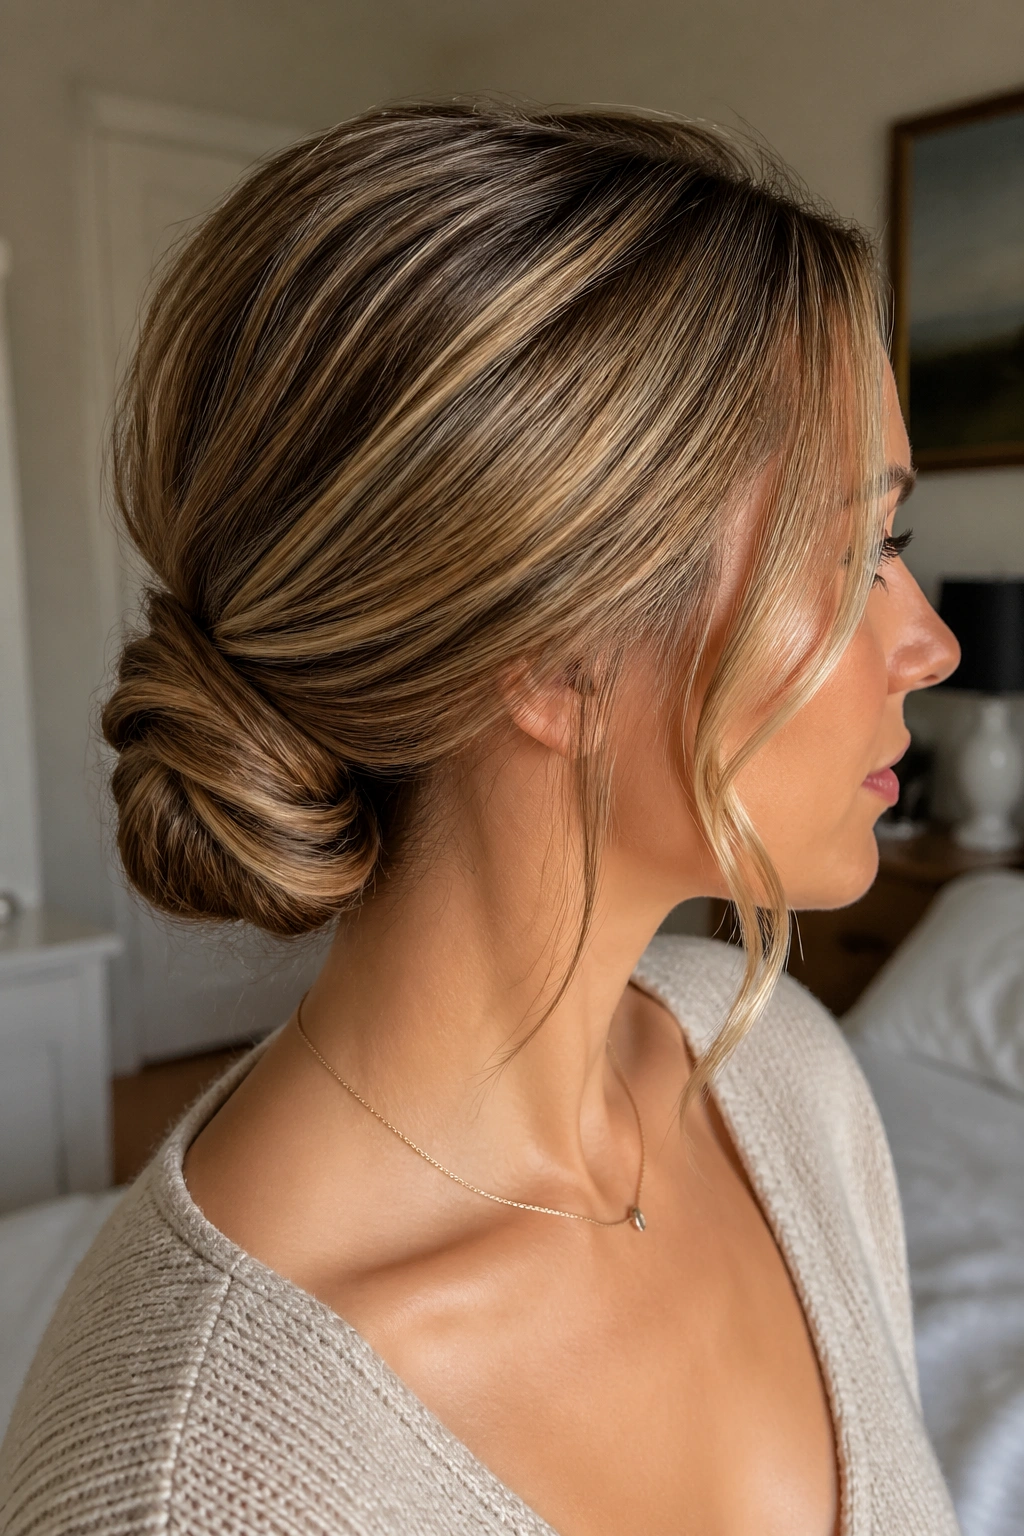
1. The Low Twisted Chignon
A low twisted chignon is one of those styles that makes fine hair look more deliberate than “done up.” The low placement keeps the shape anchored where the hair looks fullest, and the twist gives you a little width without demanding actual bulk.
Why It Flatters Fine Hair
The nape is forgiving. Hair there tends to sit flatter and tighter, which means the style looks neat even if the rest of the head is a bit wispy. Leave the crown slightly lifted, and the eye reads the whole thing as fuller than it is.
- Pull the hair into a low ponytail at the base of the skull.
- Twist the tail once or twice, then fold it upward into a loose coil.
- Pin with 3 to 5 bobby pins, sliding them diagonally into the base.
- Leave two thin face-framing pieces out if the front looks too severe.
Pin tip: cross two pins over each other in an X. It holds better than one straight pin, especially on soft strands.
2. The Sleek Knot That Stays Small
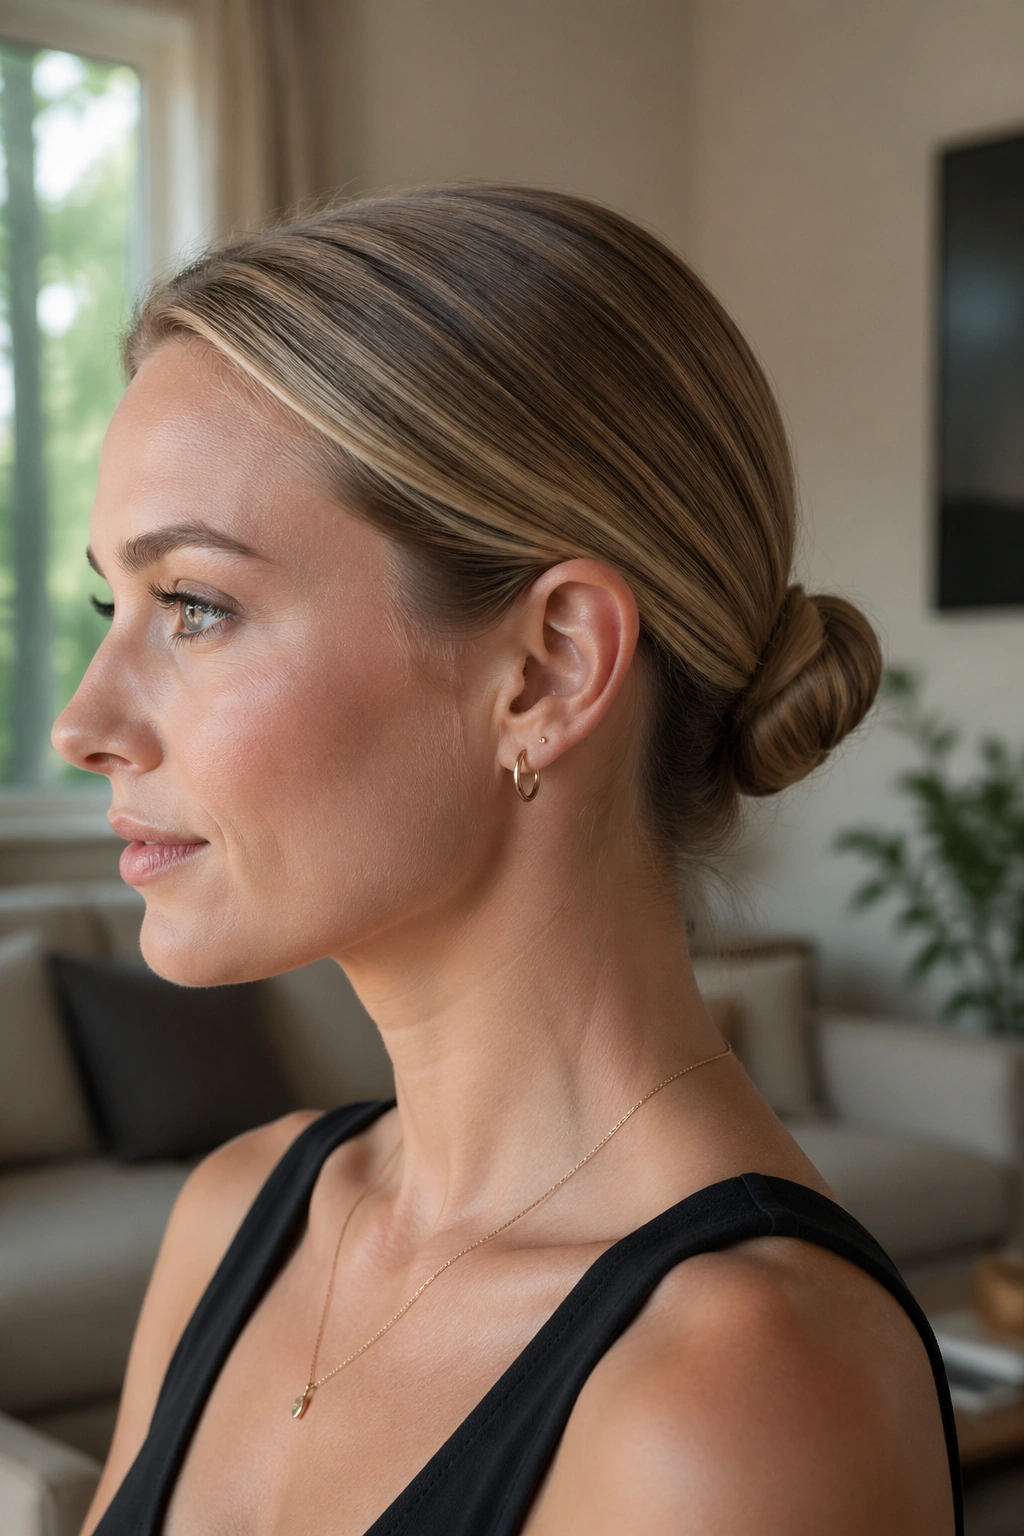
A tight knot can look thicker than a fluffy bun on thin hair. That sounds backward, but it’s true. When the hair is fine, too much pulling and puffing often makes the bun look patchy instead of full.
Use a small amount of smoothing cream on the mid-lengths, not the roots. Gather the hair low, twist it into a tight knot, and wrap the tail end under the base so the ends disappear. The result is clean and neat, with no loose halo of flyaways fighting for attention.
This one works especially well when your hair is straight or only slightly wavy. If it’s freshly washed, add dry shampoo first and wait about 2 minutes before styling. That tiny pause matters. The strands grip better once the powder has had time to settle.
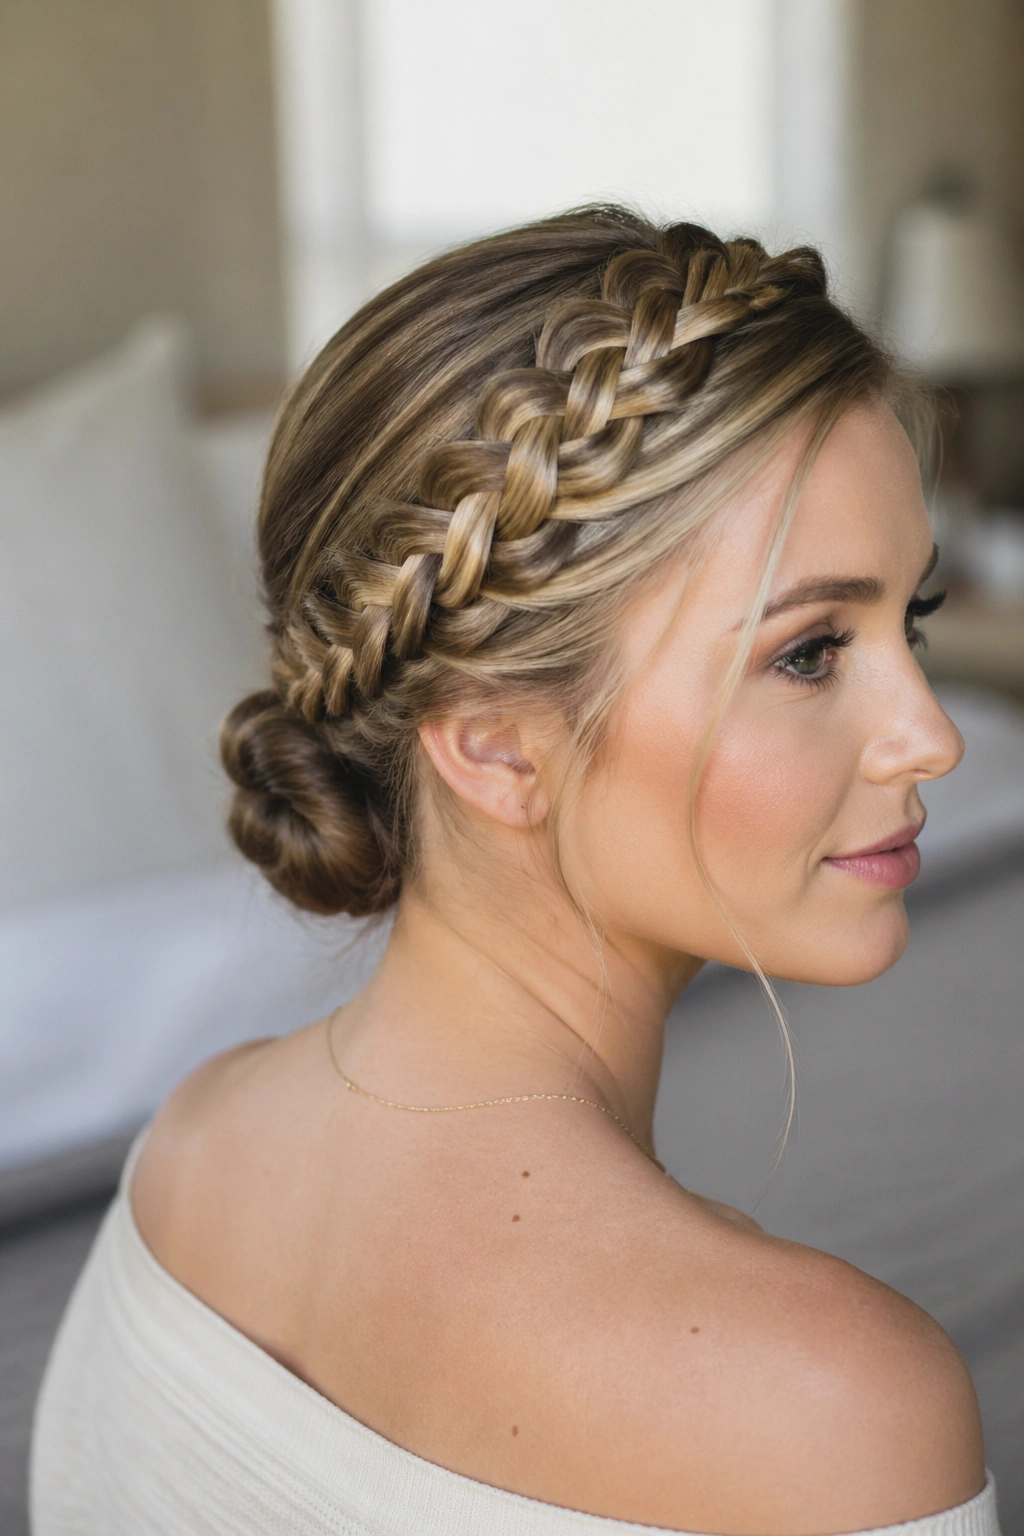
3. The Crown Braid Tucked Into a Bun

Can a braid make thin hair look fuller? Yes — if the braid is shallow and not pulled too tight. A crown braid gives the top of the head a bit of structure, then the tucked bun at the back finishes the style without exposing every single layer.
How to Keep It from Collapsing
Start the braid near one temple and keep it loose enough that it lies flat. When you reach the opposite side, secure it with a clear elastic and tuck the length into a low bun. If the braid looks narrow, pinch each side gently with your fingers to widen it by a few millimeters.
- Mist the roots with texture spray before braiding.
- Braid only the top section; leave the lower hair free until the tuck.
- Use U-pins for the bun if regular pins keep slipping.
- Finish with a light mist of hairspray from about 8 inches away.
That little bit of lift at the crown does the heavy lifting here. The bun can stay small.
4. The Bubble Ponytail Bun
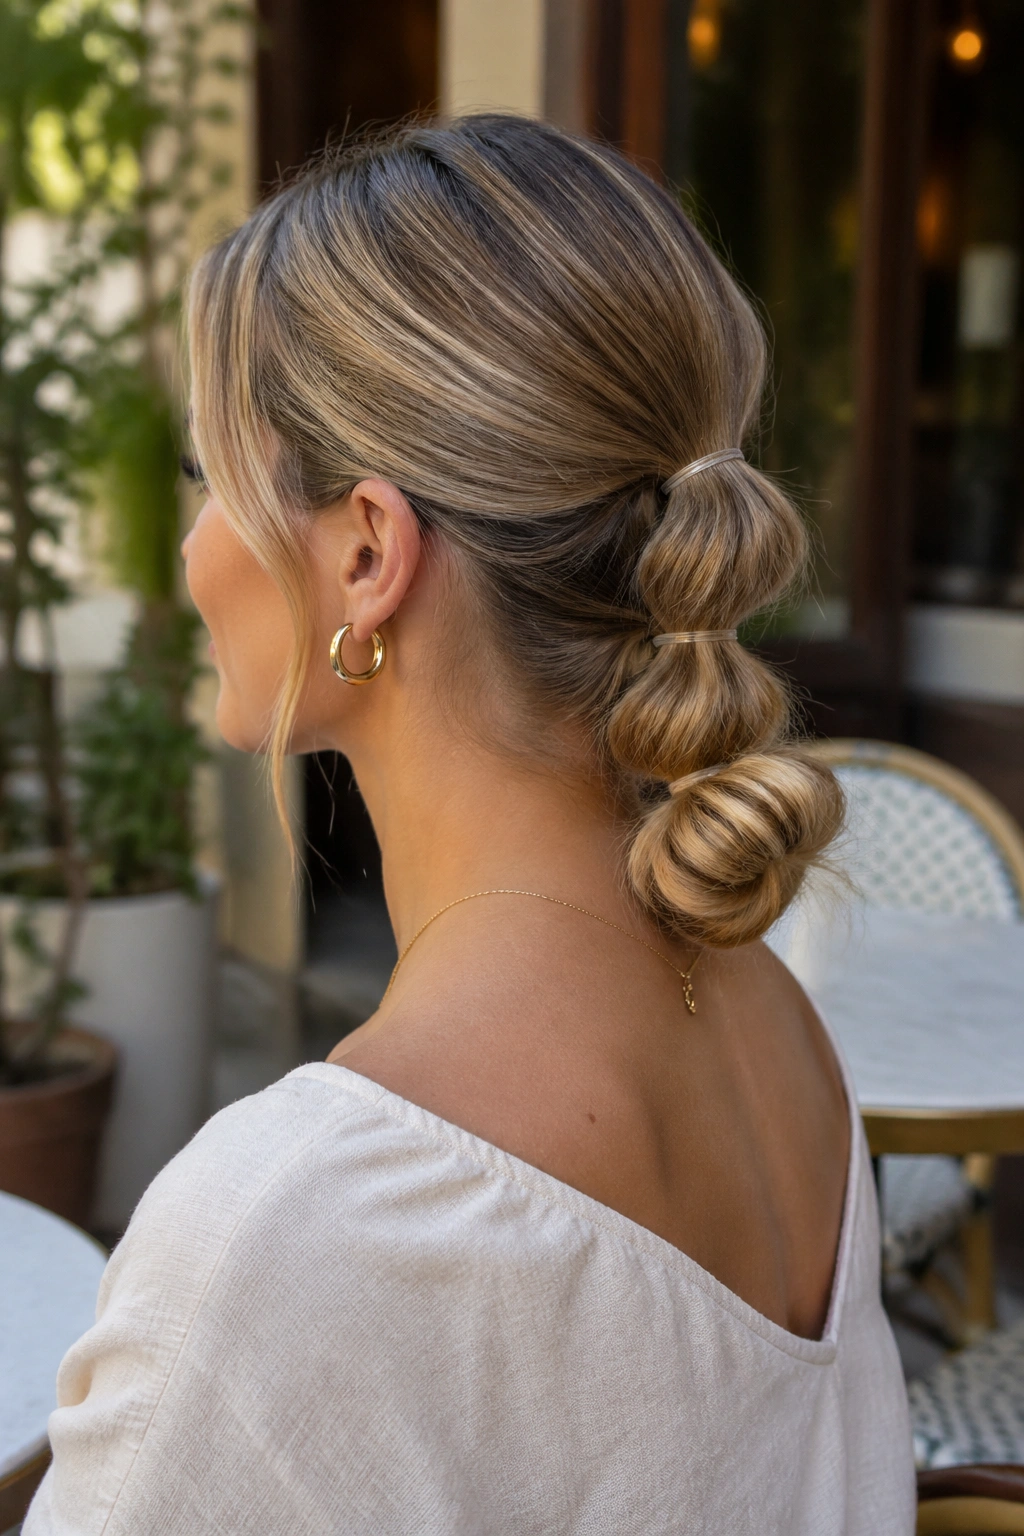
If you’ve got five minutes and exactly three bobby pins, this is the style. The bubble ponytail bun uses repeated sections to fake density, and fine hair usually loves anything that creates visible breaks in the line.
Gather the hair into a low ponytail, then add clear elastics every 1½ to 2 inches down the length. Gently tug each section outward so the ponytail looks rounded instead of flat. Wrap the bubbled tail around the base and pin the ends underneath.
- Best for hair that falls just past the shoulders.
- Clear elastics keep the line clean.
- Small bubbles look more convincing than giant ones.
- A matte finishing spray helps the sections hold shape.
The charm here is that it doesn’t ask the hair to be bigger than it is. It just organizes what’s already there.
5. The Loose French Roll at the Nape
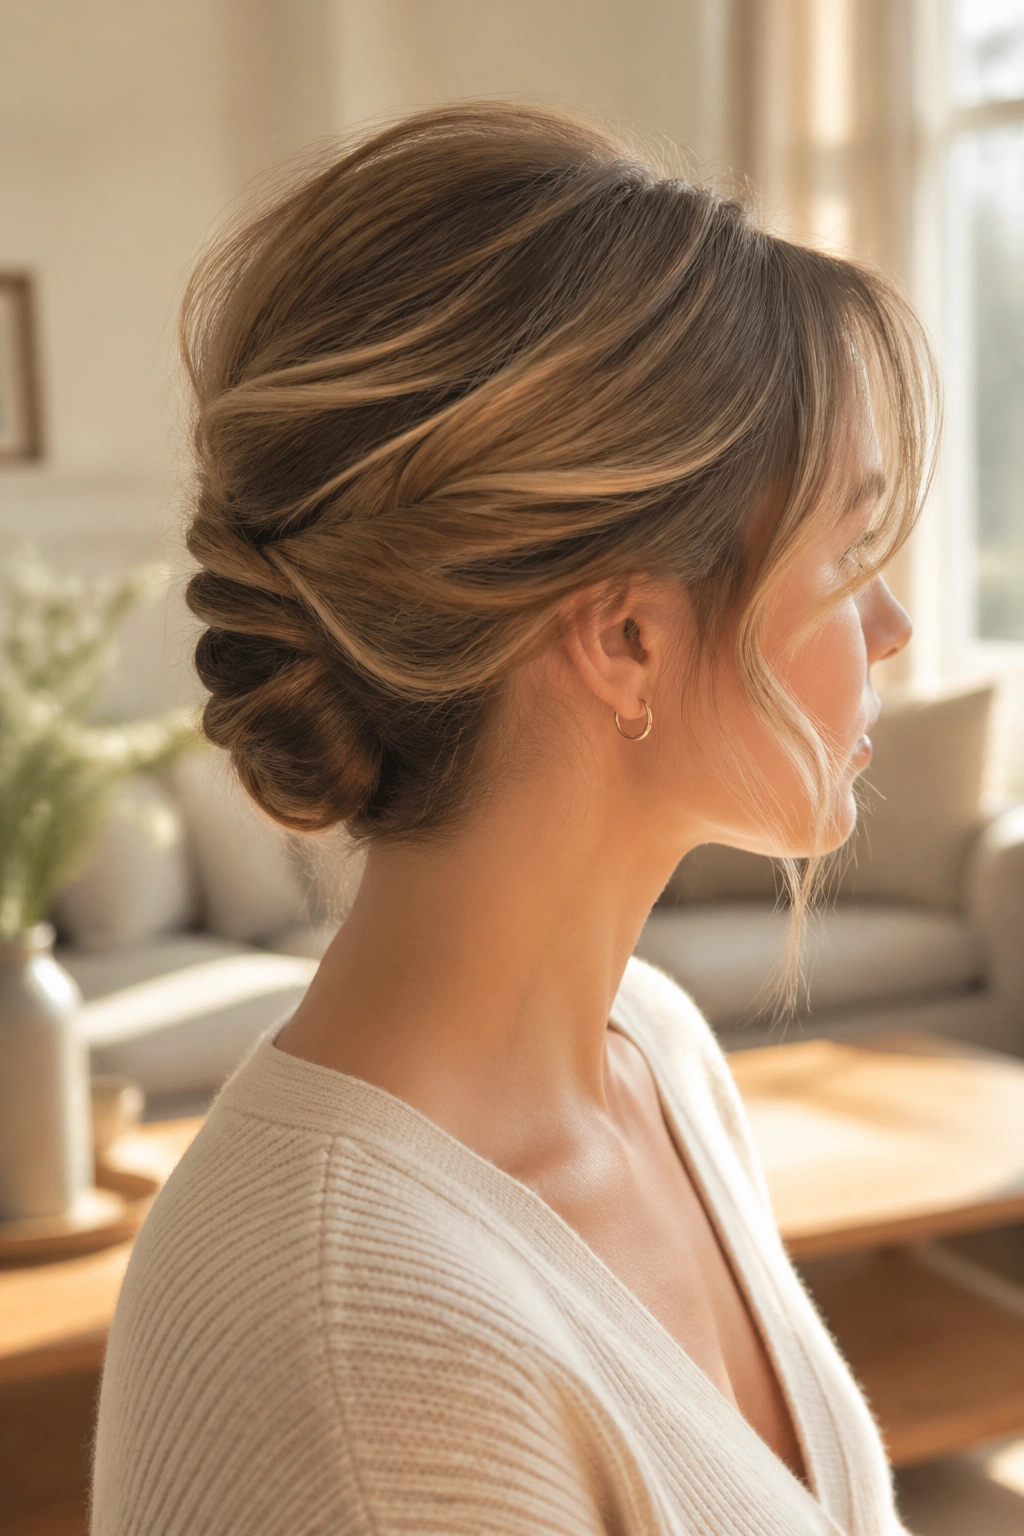
A French roll sounds fancy, but on fine hair it can be surprisingly forgiving. The trick is not to build a stiff shell. You want a soft roll that sits against the head and looks like it belongs there.
Start with a side part or a soft center part, then gather the hair loosely toward one side at the back. Roll it upward along the nape, tucking the ends inside as you go. A small comb clip or two long pins can hold the shape better than a fistful of tiny pins, which only add clutter.
The best part is the silhouette. A roll creates a clean vertical line, and that line gives the illusion of more hair than a loose bun does. If your hair layers out too much, mist the ends with hairspray before you tuck them. They’ll behave.
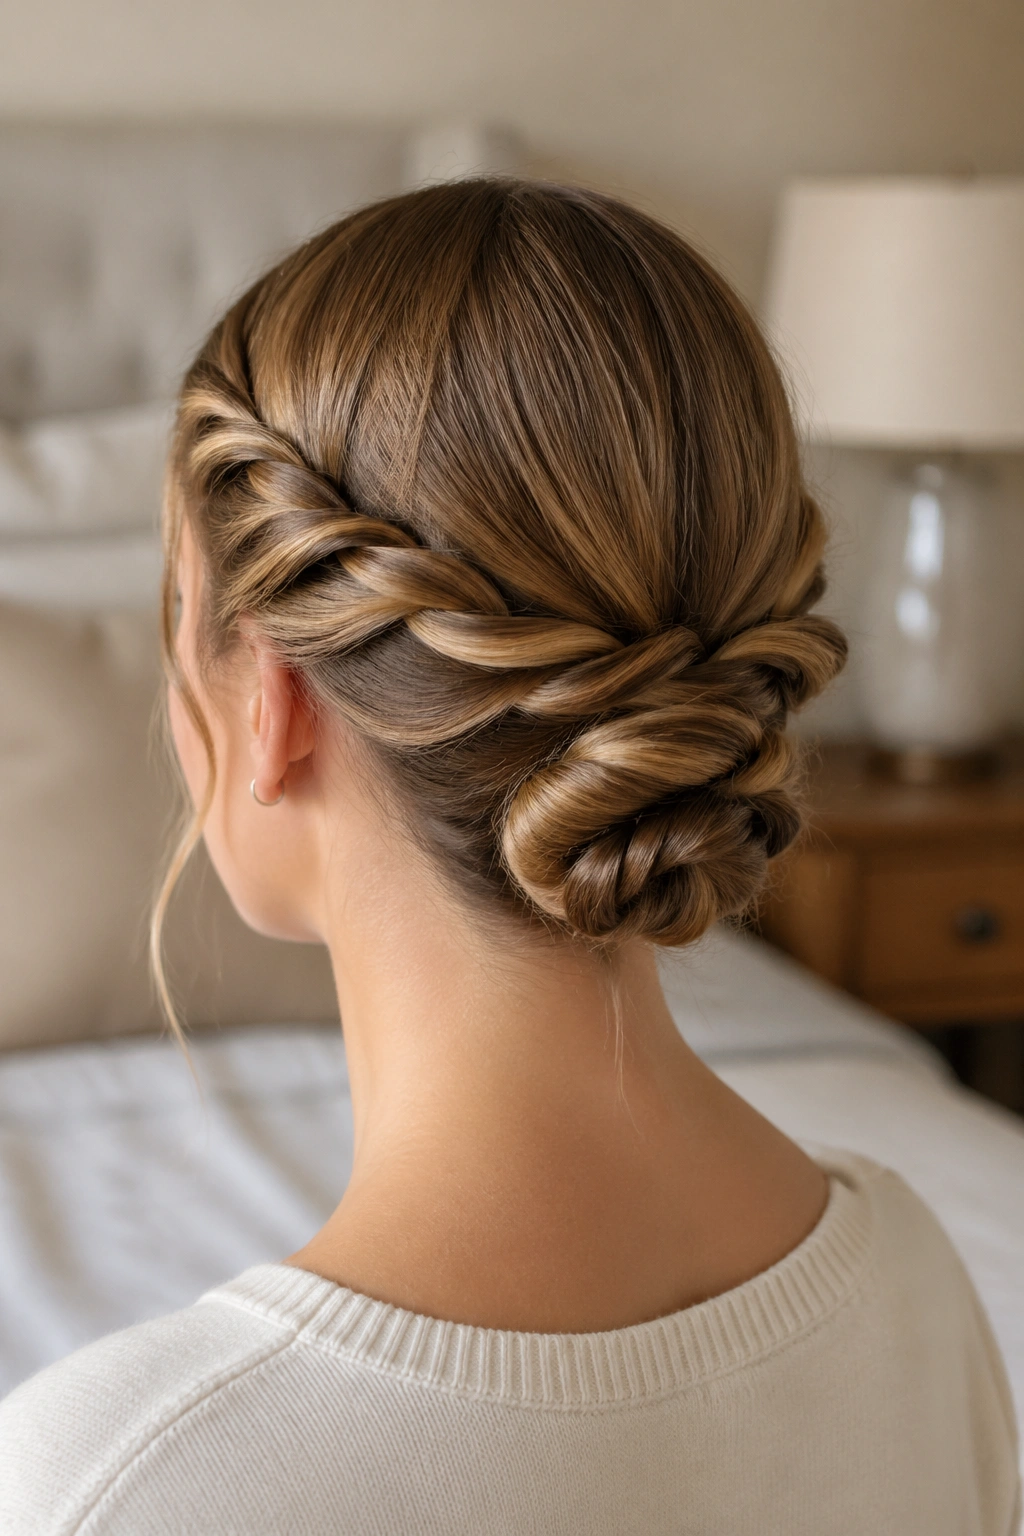
6. Two Rope Twists Into One Bun
Two rope twists grip better than one big braid on slippery hair. That’s the real reason this style keeps showing up in salons. It’s quick, it holds well, and it gives fine strands a little more texture without making them look overworked.
Take a front section from each side of the head, twist each piece away from the face, then bring both twists back to the nape. Join them into a low bun and pin the ends under the coil. The twists should stay visible. If they disappear, you’ve made them too tight.
This style is especially good for layered hair that tends to poke out of ordinary buns. The rope twist keeps the shorter bits trapped in the twist path, which means fewer strays around the ears. Clean, neat, done.
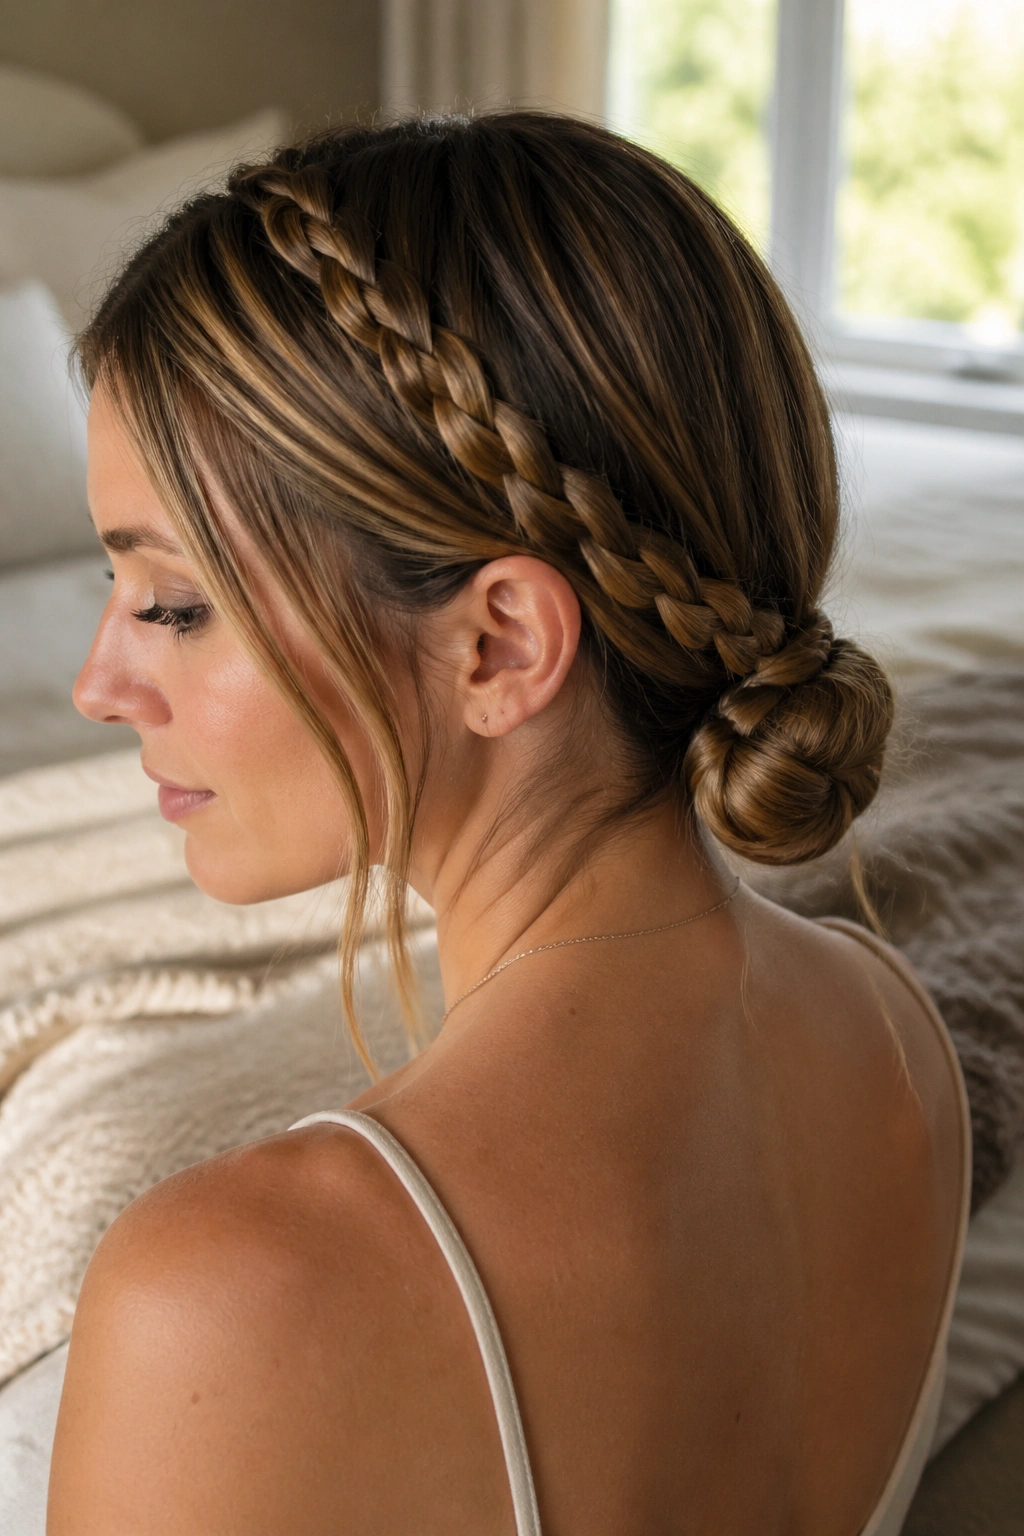
7. The Halo Braid Rolled Into a Nape Knot
The halo braid gives fine hair a little frame without requiring a ton of volume. Once it’s rolled into a knot at the nape, the whole style looks more finished than a standard bun and less severe than a tight chignon.
What Makes It Work
The braid acts like a band, which means the eye follows the line around the head instead of fixating on how much hair is actually there. That’s the useful bit. Fine hair often looks strongest when it’s organized into a shape that has a clear outline.
- Start the braid near one ear and travel along the hairline.
- Keep the braid low and loose; a hard braid looks thinner.
- Roll the remaining tail into a small knot at the neck.
- Use 4 to 6 pins placed in different directions, not all lined up.
If your hair is very soft, rough up the braid with dry shampoo first. That one move makes the whole style easier to hold.
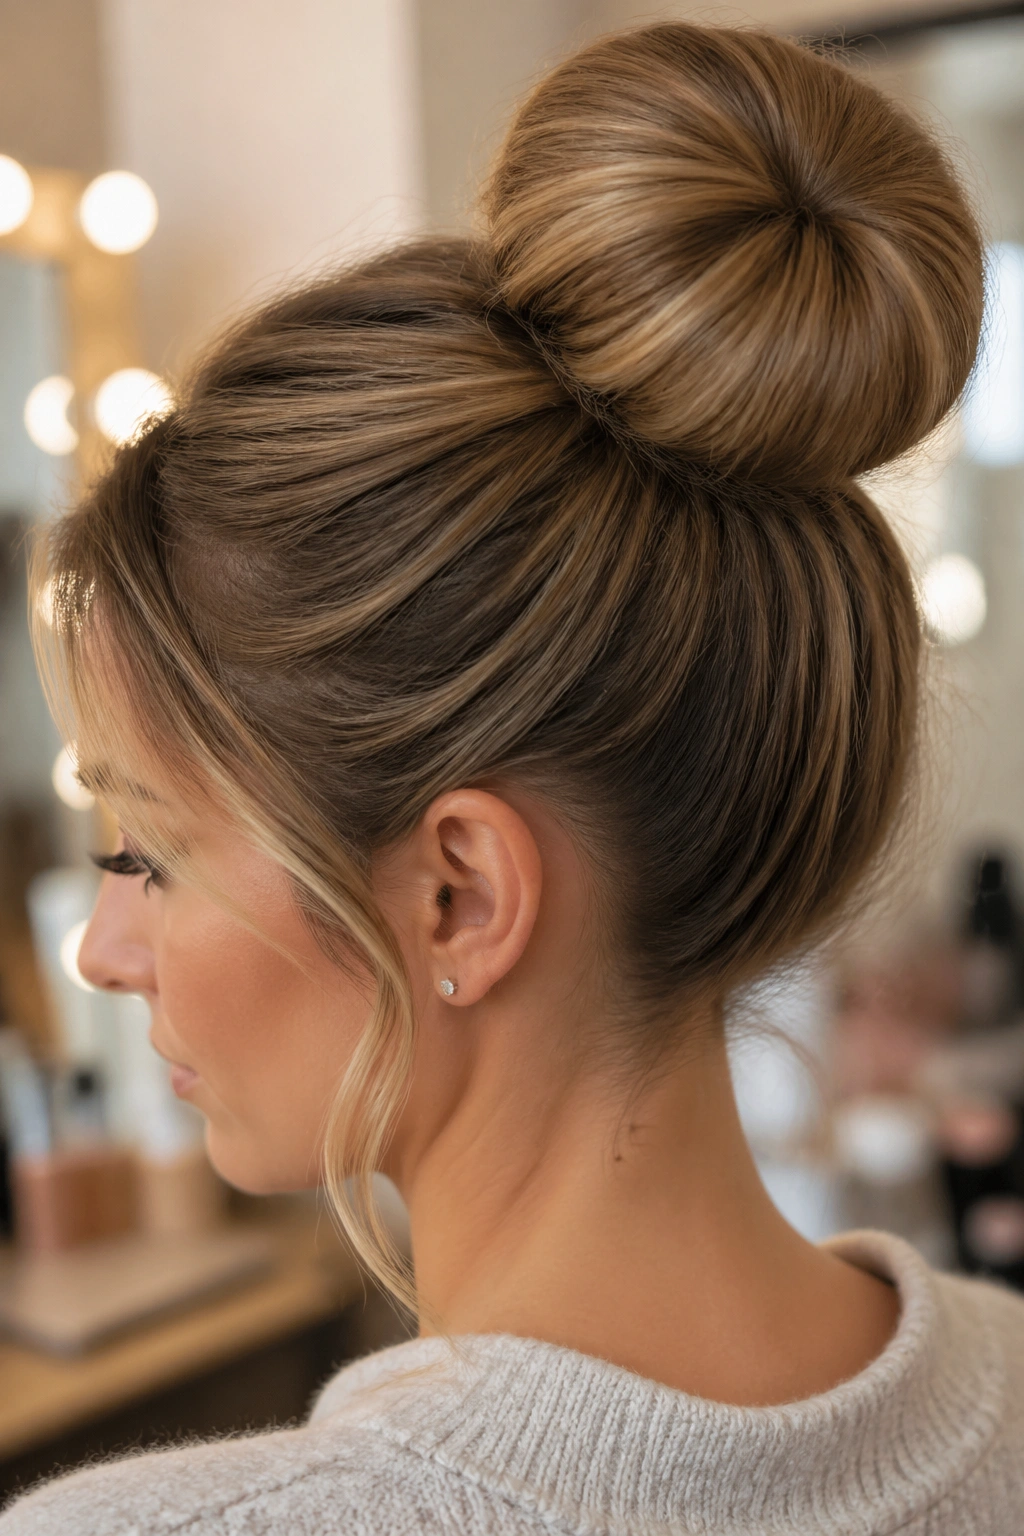
8. The Mini Top Knot With a Wrapped Base
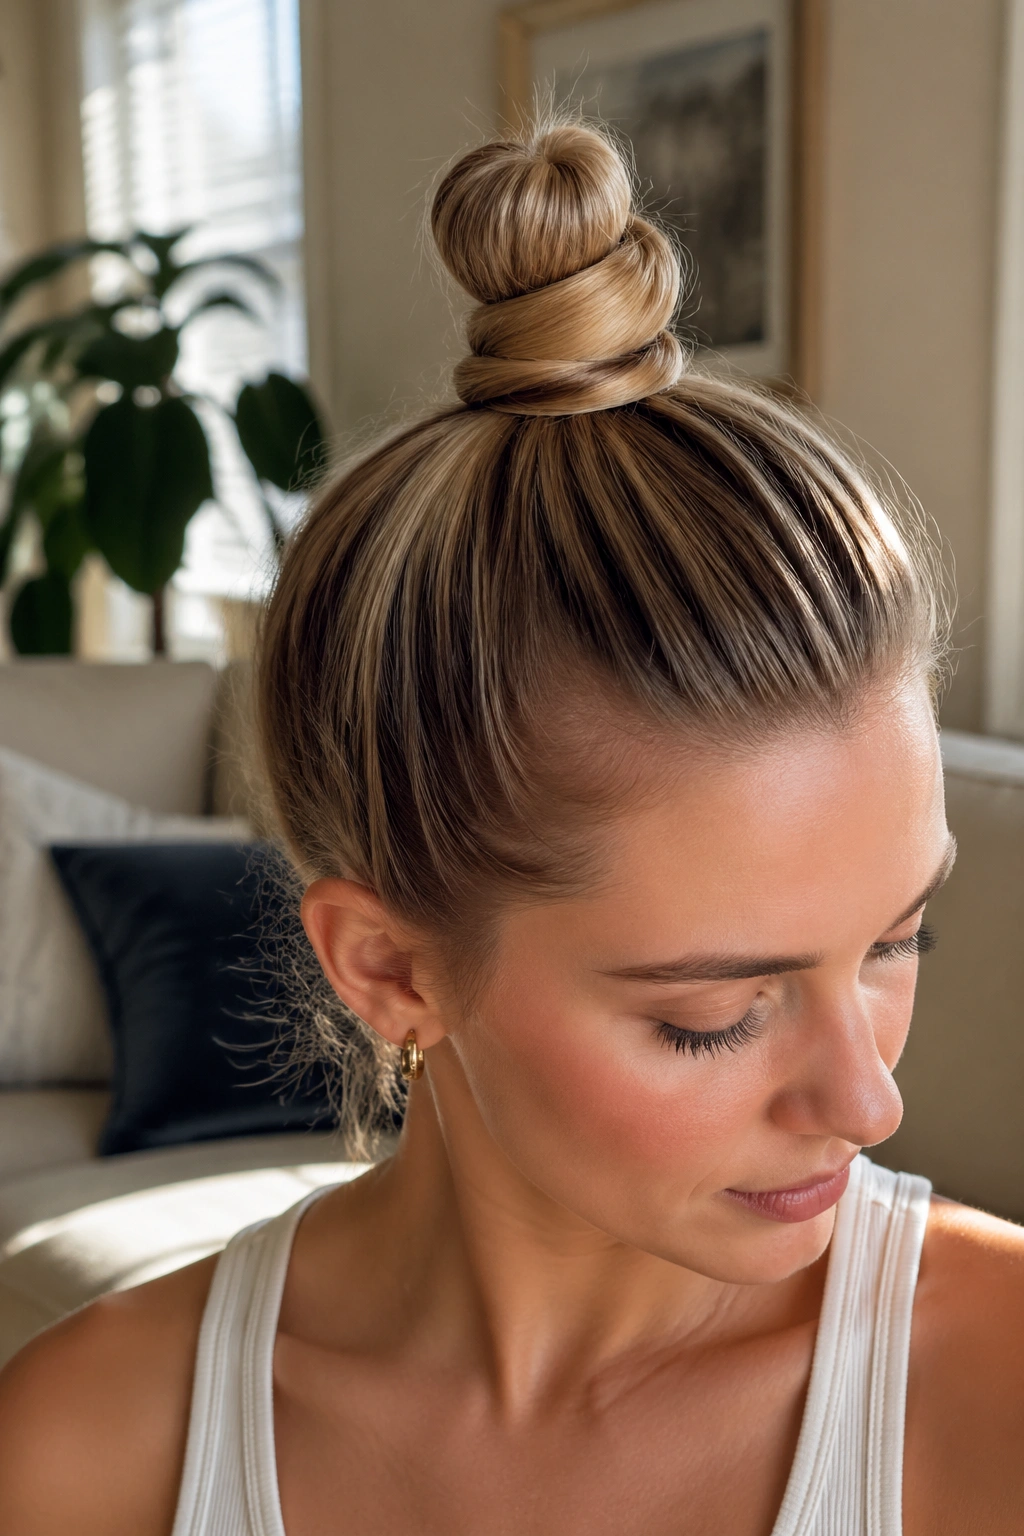
Small can still look intentional. A mini top knot is one of the few styles that doesn’t punish fine hair for being fine. You keep the knot tiny, wrap the base so the elastic disappears, and let the style look crisp instead of overfilled.
This works best when the hair has second-day texture or a little dry shampoo at the roots. Pull the hair into a high ponytail, twist the length once, and coil it into a small knot at the crown. Wrap a thin strand around the elastic and pin it underneath so the base looks neat.
Do not overstuff it. That’s the mistake. A tight, modest top knot often reads as chic; a swollen one can look like you tried to build volume that wasn’t there. Keep it compact, and it holds its shape much better through the day.
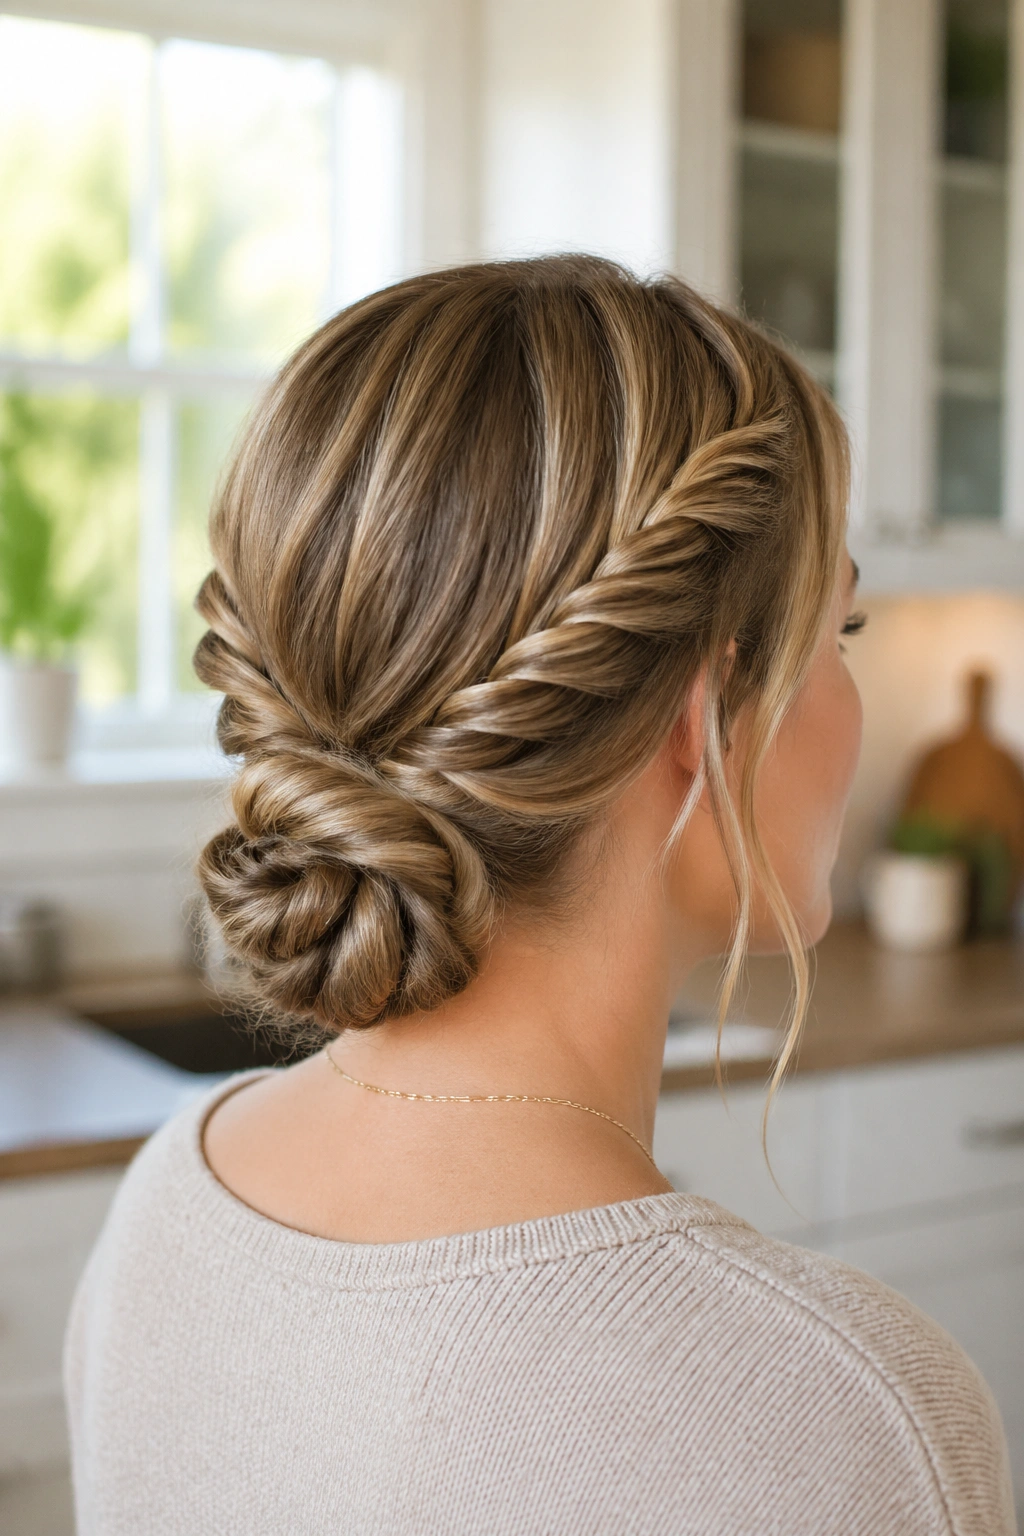
9. The Rope-Braid Bun
Why do rope braids hold so well on thin hair? Because they’re tight, clean, and they create a little spiral memory in the strand. On soft hair, that matters more than people think.
How to Use It
Part the hair into two sections, twist each section clockwise, then wrap them around each other counterclockwise. That’s the rope braid. Bring it to the nape, coil it into a bun, and pin the tail underneath.
If the braid starts to unravel, the sections are probably too big. Use smaller pieces, about 1 to 1½ inches wide, and twist them firmly. The shape should feel snug in your hands before it ever reaches the bun.
This one is a smart pick for hair that’s too short for a full braid but long enough to twist. It gives you texture without making the style bulky.
10. The Gibson Tuck
The Gibson tuck is one of those old-school styles that quietly solves a lot of thin-hair problems. It keeps the neck open, hides the ends, and leaves the top section smooth enough to look tidy even if the hair itself is not very dense.
A soft ponytail is the starting point. Make a small gap above the elastic, flip the ponytail through that opening, then tuck the tail upward and inward until the hair rolls into itself. Pin the roll along the base so it stays in place.
- Works well on shoulder-length hair.
- Better on hair with a slight bend than on pin-straight strands.
- A small spin pin can replace several bobby pins.
- Keep the roll low so the style doesn’t slide upward.
It’s a clean, quiet style. Not fussy. That’s why it keeps working.
11. The Side-Swept Pin Roll
A side-swept pin roll gives fine hair a little movement without asking it to do something dramatic. One side disappears into the roll, the other side stays soft, and the whole style ends up looking fuller than a straight-back pin-up.
Start with a deep side part. Take the heavier side and roll it backward toward the ear, pinning as you go so the curve sits close to the head. Let the remaining length gather into a soft low tuck at the back. The roll should feel secure but not stiff. If it starts to look helmet-like, you’ve pinned too tightly.
This is a good style for bangs or shorter front layers because the roll gives those pieces a place to go. The shape is gentle, which helps fine hair look more controlled and less see-through.
12. The Scarf-Wrapped Low Bun
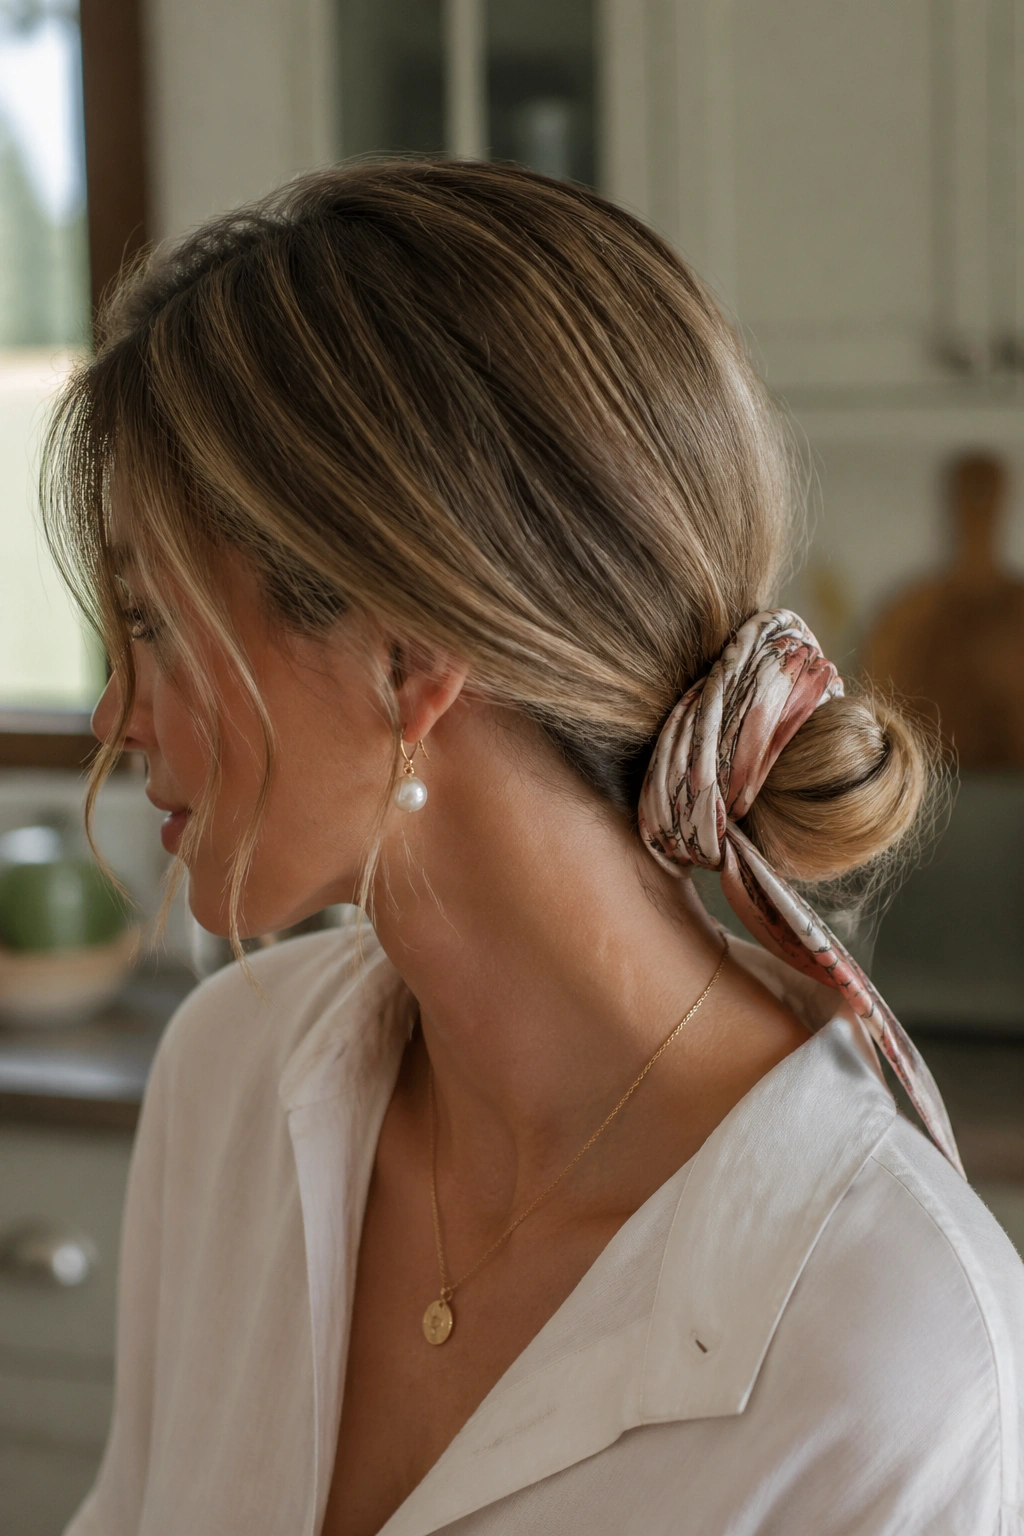
A thin scarf can do more for fine hair than a stack of pins. It adds width, hides sparse spots, and gives the bun a little structure without making it heavy.
Tie the hair into a low bun first, then wrap a narrow silk or cotton scarf around the base. Knot it off-center or at the side, depending on where you want the eye to land. The scarf should be thin enough that it doesn’t overpower the style; wide fabric can swallow fine hair whole.
This one is especially helpful when the ends don’t want to stay tucked. The scarf covers the exact area where the bun tends to look weakest. If you want the style to read cleaner, pick a scarf close to your hair color. If you want contrast, go bold and keep the bun simple.
13. The Clipped Faux French Twist
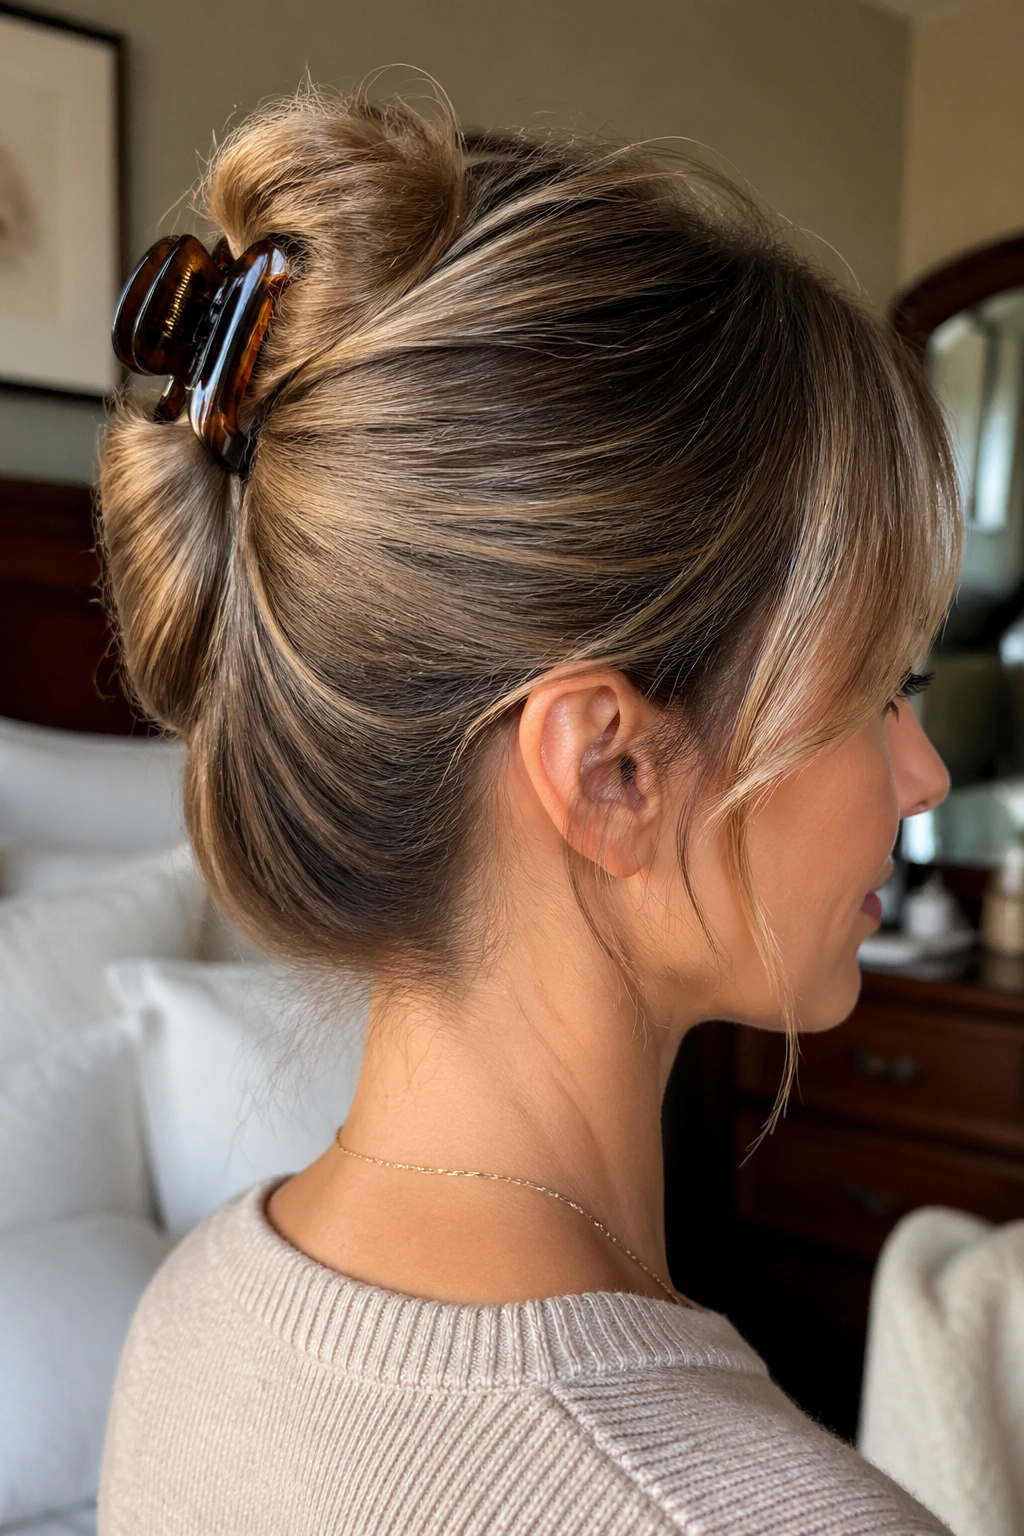
A faux French twist is one of the easiest tricks for fine thin hair, mostly because the clip does half the work. You get the shape of a roll without needing the kind of dense hair that a classic twist usually asks for.
Why the Clip Helps
A strong clip grips more hair at once than separate pins do. That matters on soft strands, because fine hair often slips out of tiny pins before you’re done adjusting the shape.
- Lightly tease the crown with a tail comb.
- Sweep the hair toward one side and twist it upward.
- Slide a French twist clip or a sturdy banana clip over the roll.
- Tuck the ends inside and smooth the top with your fingertips.
If the crown feels flat, lift only the top layer and mist a little texture spray underneath. You do not need much. A small amount of lift makes the twist look fuller without turning it into a puffed mess.
14. The Half-Up Top Knot With a Full Bottom Layer
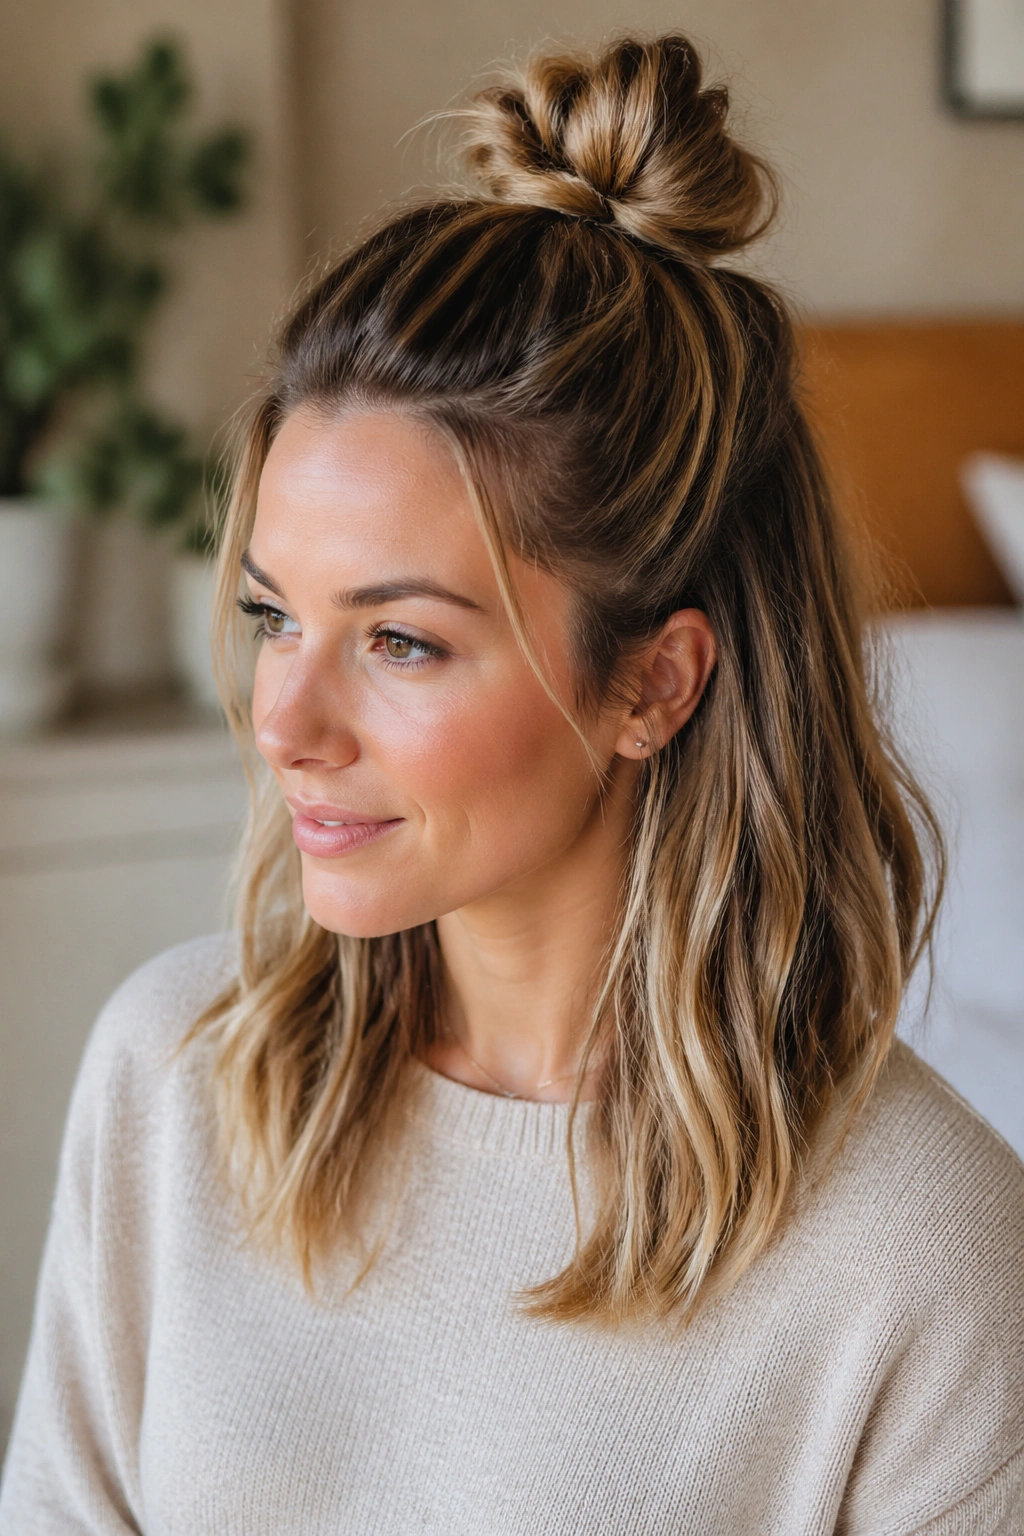
Leaving the bottom section down can make thin hair look thicker than a full updo. That’s the payoff. You keep most of the length loose, which gives the style more mass, and you only pull the top layer into a knot.
Gather the hair from temple to temple into a high half-up ponytail. Twist that ponytail into a small knot and pin it down. Let the lower half hang straight, wavy, or softly curled — whatever shape your hair already has. The contrast between the small knot and the fuller lower section keeps the style from looking skimpy.
This works especially well when the hair is long but fine. Full updos can sometimes expose too much scalp near the temples. The half-up knot sidesteps that problem and still keeps hair off the face.
15. The Low Looped Pony Bun
Can one looped ponytail really count as an updo? Absolutely, if you tuck it right. It’s one of the fastest fine-hair styles to fake fullness because the loop itself creates a round shape before you even pin anything.
How to Get the Most From It
Make a low ponytail, then pull the hair only halfway through the elastic on the last wrap so it forms a loop. Spread the loop outward with your fingers, then wrap the remaining tail around the base and secure it with a pin or two.
- Keep the loop slightly off-center if the crown is sparse.
- Use a small elastic so the base doesn’t bulge.
- Leave the loop loose enough to fan out.
- Finish with a light spray over the top only.
It’s a fast style, and that’s not a downside here. Thin hair often looks better when you stop before it gets overworked.
16. The Dutch Braid Into a Round Bun
A Dutch braid gives thin hair a little raised texture, which is useful because raised texture is easier to see than flat smoothness. Feed that braid into a round bun and the style suddenly has more shape from the back.
Start at the crown or just behind one ear, braid outward rather than over, and keep the braid loose enough to pancake later. Once you reach the nape, coil the tail into a round bun and pin it flat. Then gently tug the braid edges with your fingers until each ridge is soft and a little wider.
- Best on hair that has been sprayed with dry shampoo.
- The braid should feel firm, not tight.
- Pancake only the outer edges.
- Use spin pins if the bun keeps slipping.
The whole point is to add a visible line through the center of the head. Fine hair loves that kind of structure.
17. The Sock-Donut Bun That Looks Bigger
A donut bun can help fine hair look fuller without pretending the hair itself is thicker. That’s the distinction. You’re using a shape tool, not forcing the strand to do a job it can’t do on its own.
Choose a donut that matches your hair color as closely as possible. Pull the hair into a ponytail, slide the donut over the base, and spread the hair evenly around it before tucking the ends under. If the donut is too big, the bun can look hollow. A smaller one usually works better for thin hair because the hair covers it more evenly.
The best version of this style has a soft outer edge and no obvious gaps. If you see gaps, add a second thin layer of hair around the donut or pin a few loose strands across the open spots. It sounds picky. It is picky.
18. The Temple Twists Tucked Into a Nape Knot
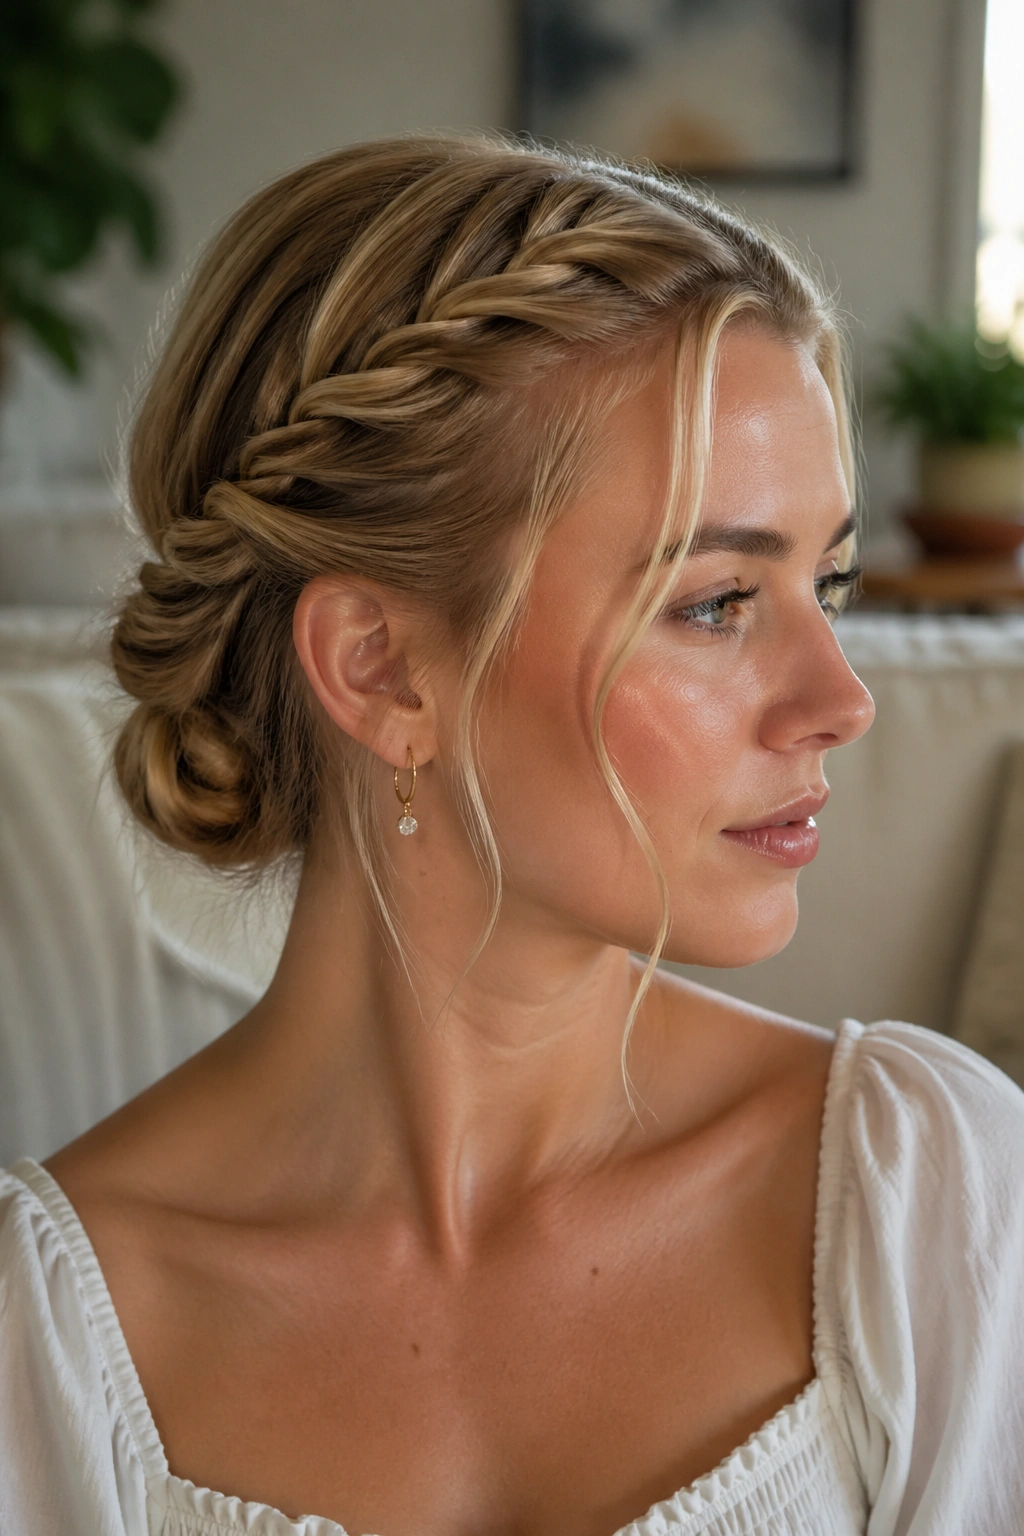
Unlike a full halo braid, temple twists leave most of the hair available for the knot itself. That’s useful when you want a style that looks detailed but doesn’t eat up length.
Take two small sections from near each temple, twist them back along the head, and join them at the nape in a low knot. The twist lines frame the face and pull attention away from any thin spots at the crown. Keep the twists loose enough that they flatten softly against the head instead of drawing tight grooves.
This one is especially kind to layered cuts. Shorter pieces near the front can be tucked into the twists instead of escaping from them. If a few strands still fall out, let them. A bit of softness helps the style, and too much control can make thin hair look harder than it needs to.
19. The Pinwheel Bun With Four Mini Twists
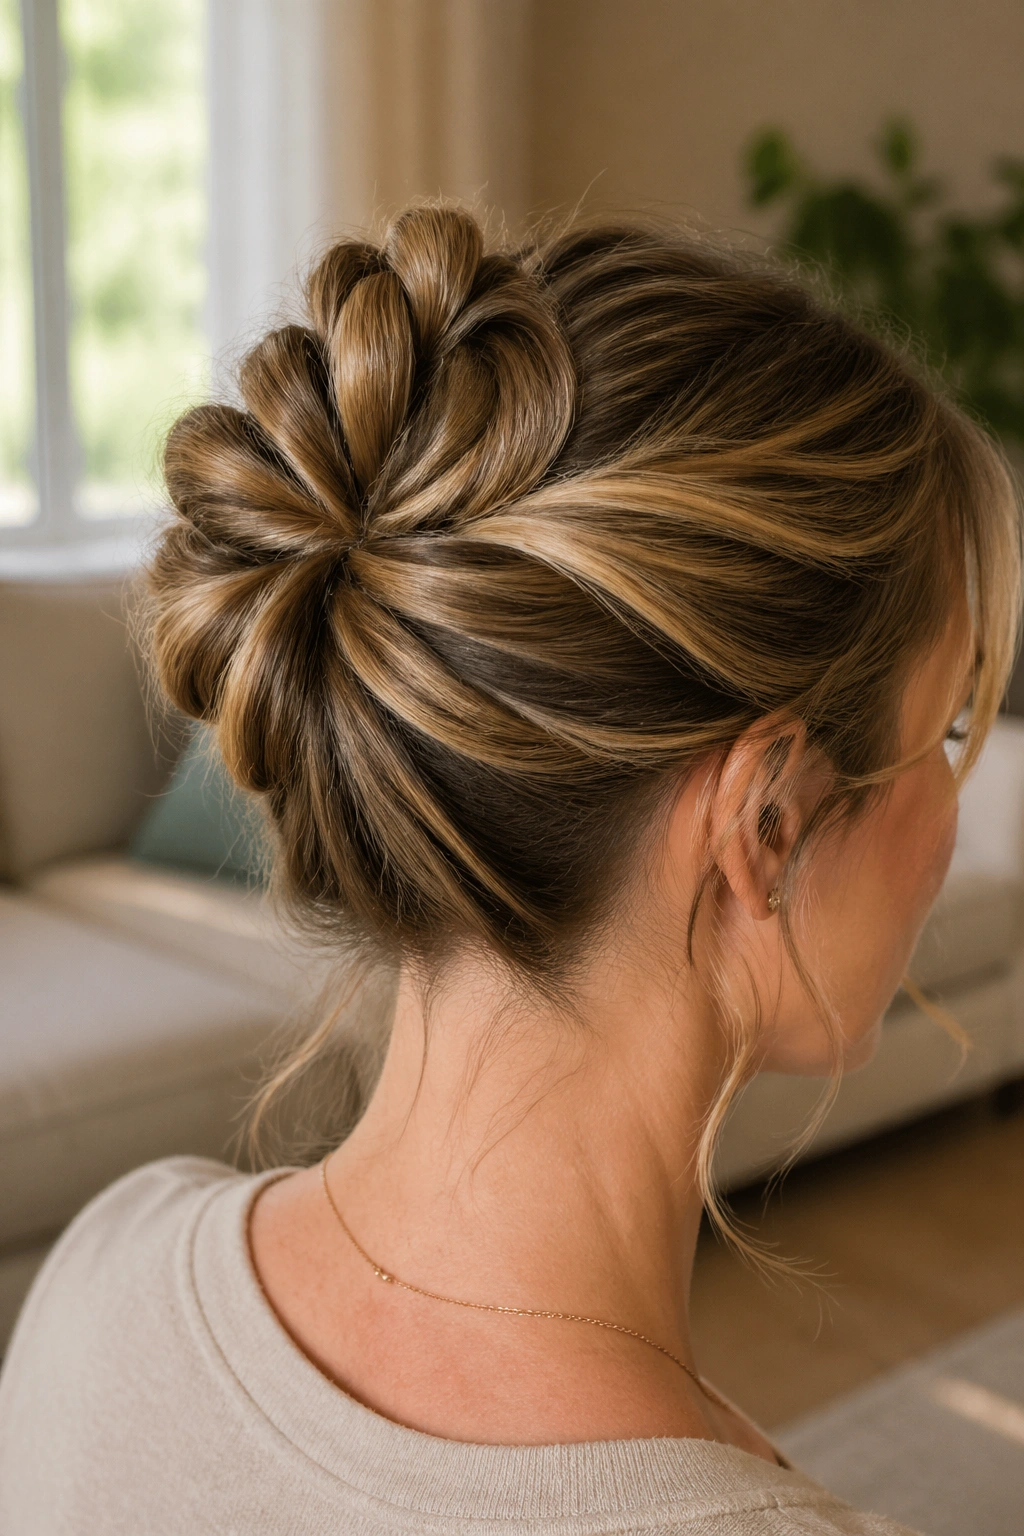
A pinwheel bun sounds fancier than it is. You divide the hair into four sections, twist each one, and arrange them around a center point so the bun spreads out like a little wheel.
Why It Gives Thin Hair More Shape
The separate twists create multiple lines of texture instead of one single knot. That matters because thin hair often needs visual breaks to look fuller. A pinwheel bun gives those breaks without making the style messy.
- Start with a low ponytail.
- Split the tail into four even pieces.
- Twist each piece and lay it around the base.
- Pin each twist where it meets the center.
The final shape should be round and tidy, not floppy. If one twist keeps slipping, shorten it and pin the end closer to the base. Four small pieces hold better than one giant coil, and that’s the whole trick.
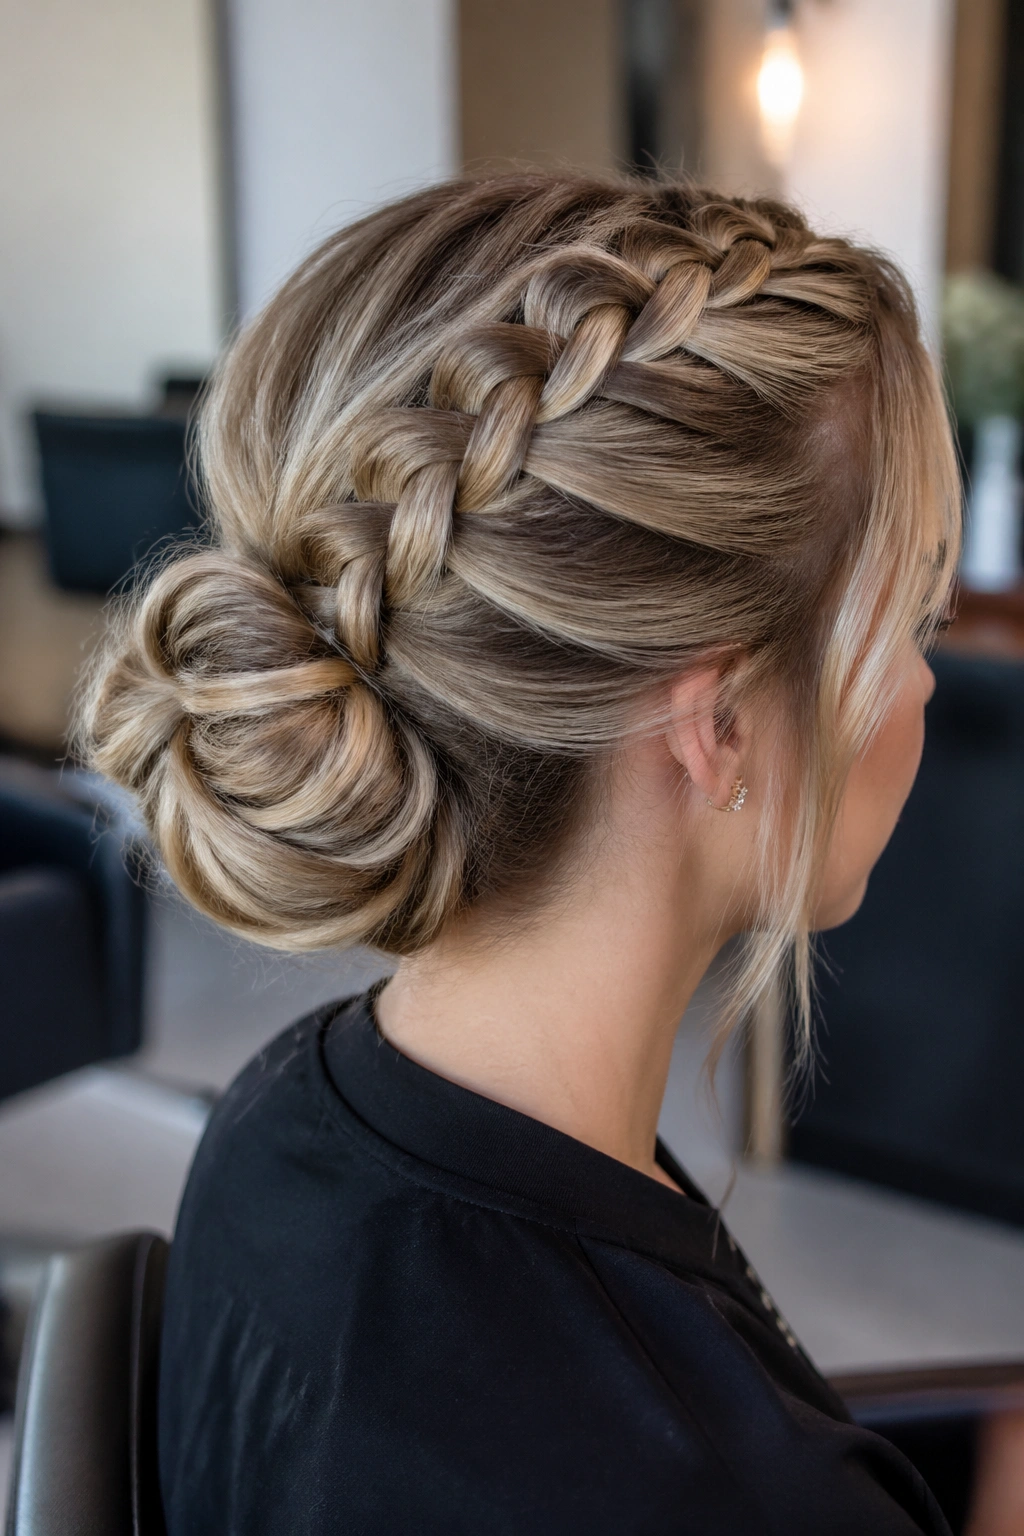
20. The Two Braids Feeding a Low Knot
Two braids can widen the head shape in a way thin hair rarely does on its own. That sounds dramatic, but the result is practical: the temples look fuller, the knot looks neater, and the style has a little balance from side to side.
Part the hair down the middle or slightly off-center, braid each side from the front toward the back, then bring both braids together at the nape. Twist the remaining length into a low knot and pin it in place. The braids act like built-in structure, so the knot doesn’t have to do all the work.
This is a good choice when the top of your head is flatter than you’d like. The braids create width where the eye notices it most, and the knot keeps the style from feeling too young or too sporty.
21. The Sleek Wrap Bun With a Braid Accent
What if you need one style that works for a workday, a dinner plan, and the kind of morning when your hair has decided to go limp? This is the one. A sleek wrap bun with a slim braid accent gives fine thin hair enough control to look tidy, but the braid keeps it from feeling plain.
Start with a low ponytail, braid a thin section from one side, and let that braid wrap around the base of the bun before you pin it down. Smooth the rest of the hair into a tight coil and tuck the ends under the wrap. Keep the braid skinny. A thick braid can overwhelm fine hair fast.
The style works because it gives the eye three things to read: the smooth crown, the braid line, and the bun itself. That’s a lot of shape from a small amount of hair.
Use 2 to 4 strong pins near the base, not scattered all over the place. And if the hair at the crown starts to separate, stop smoothing it. A tiny bit of texture is better than a slick top that shows every part line.