A good updo isn’t one hairstyle. It’s a small system of choices.
Fine hair, thick hair, curly hair, coily hair, short hair, long hair — they all behave differently once you start twisting, pinning, and tucking. That’s why some styles look gorgeous on one person and collapse on another by lunchtime. Updos for every hair type have to be built with the hair you actually have, not the hair you wish you had on a humid Tuesday.
Fine strands need grip. Curly hair needs room. Coily hair needs support at the base, not a dozen pins jammed in at random. Shorter layers need a little patience, because the problem usually isn’t the style itself — it’s figuring out where the ends should go and how much tension the hair can handle before it starts slipping.
The styles below lean on real fixes: a little texture spray on slippery hair, a stronger anchor braid for heavy lengths, a softer tuck for shoulder-length cuts, and the odd pin trick that saves a style when your hair has its own opinions. None of that is glamorous. It works, though.
And that’s the point. The best updo is the one that holds, feels like your hair, and doesn’t leave you redoing it in a bathroom mirror.
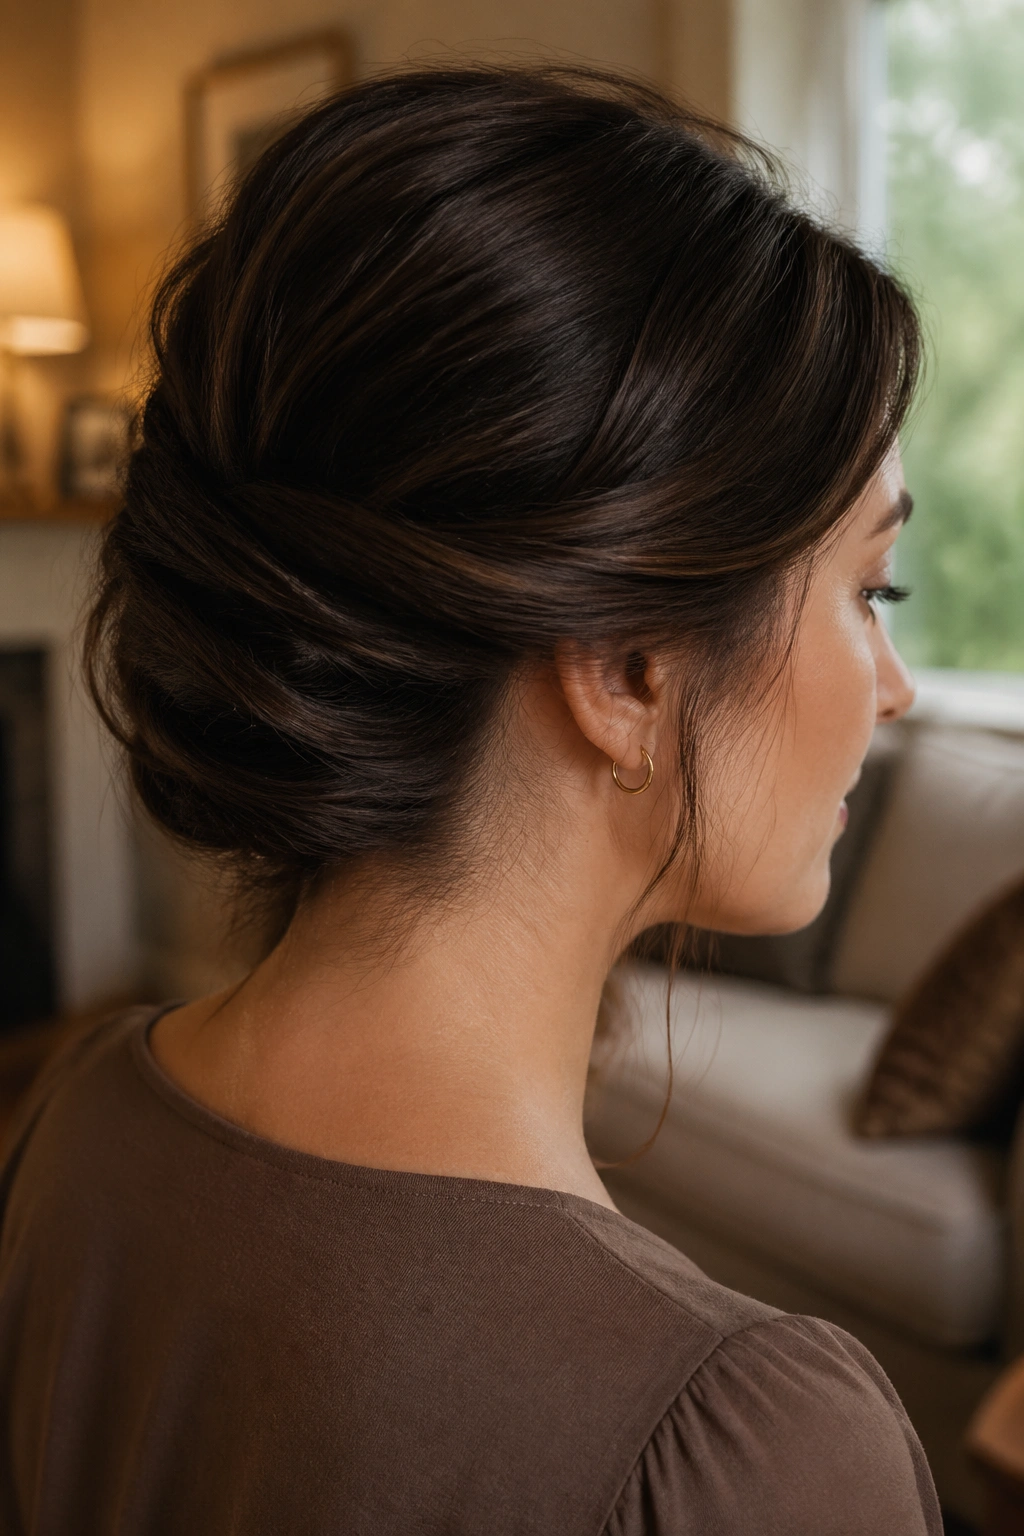
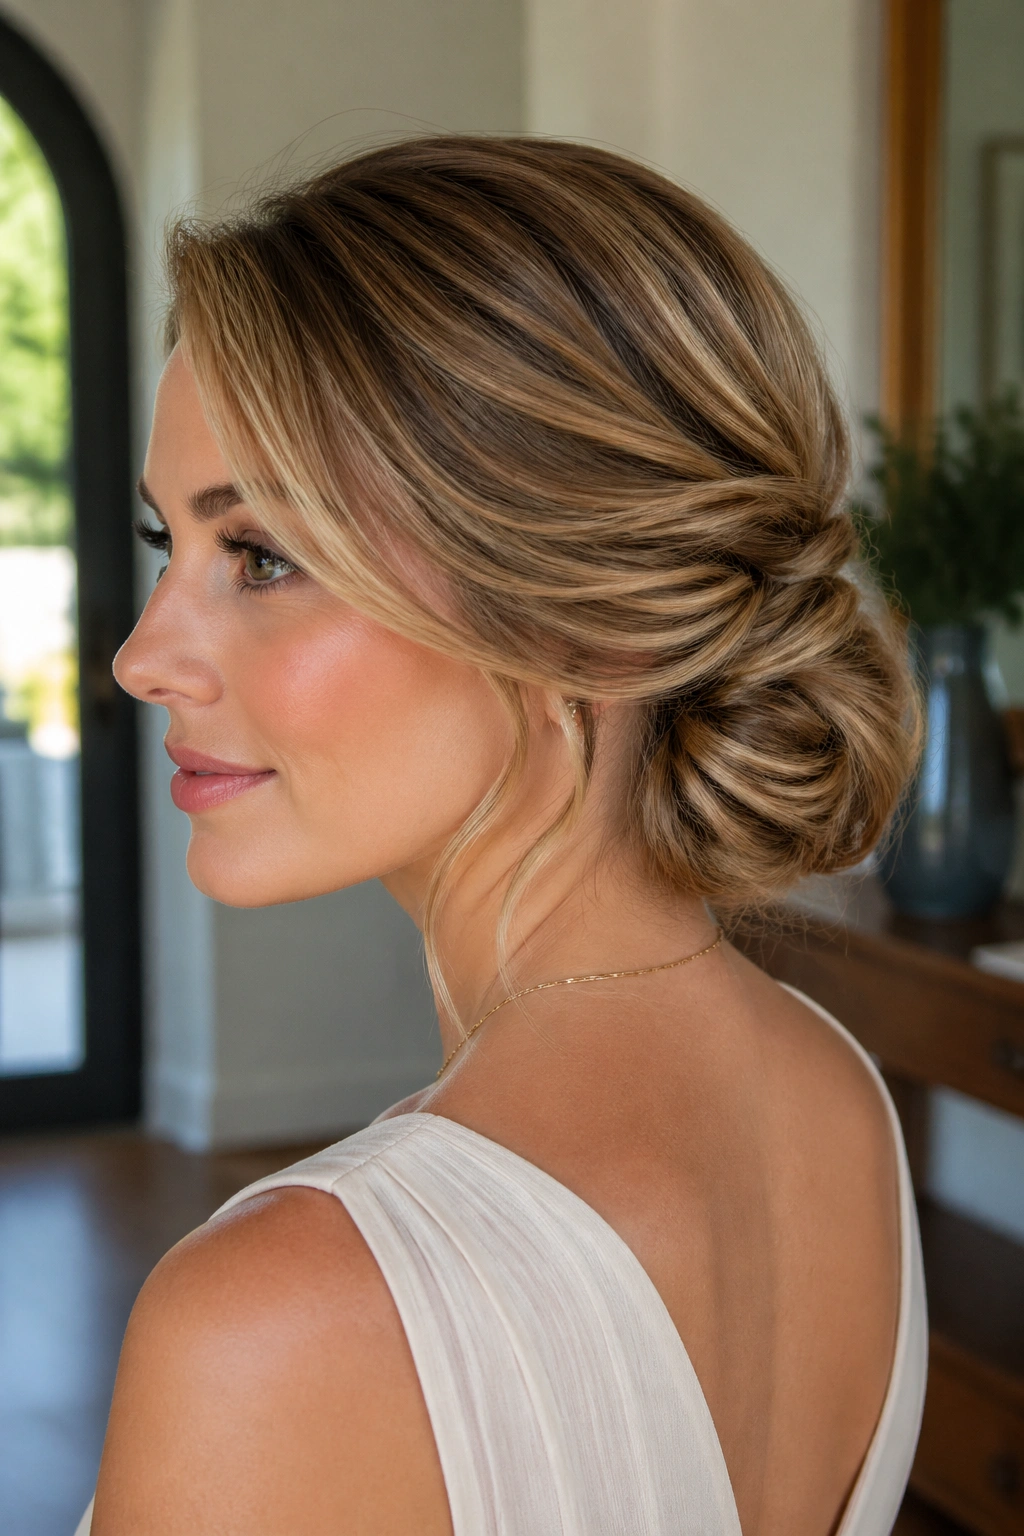
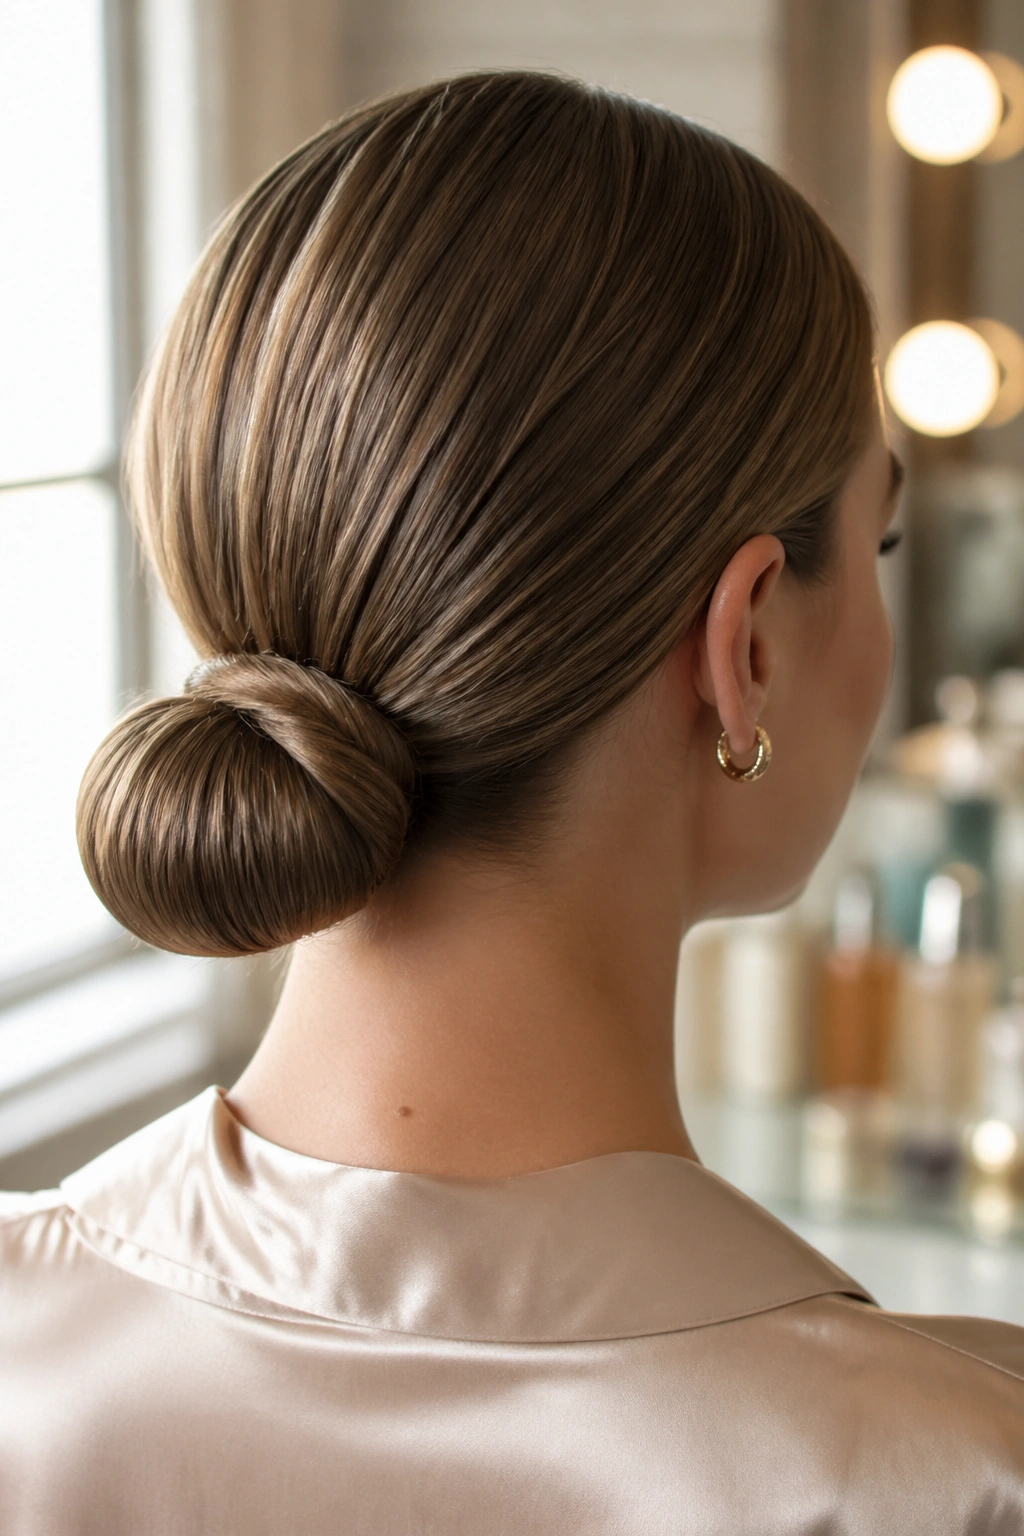
1. The Sleek Low Bun That Gives Fine Hair a Clean Shape
Fine hair can look thin fast if you pile it into a big bun and hope for the best. Don’t. A sleek low bun works because it uses what fine hair already does well: it lies flat, bends easily, and takes shape without fighting you.
Start with a little mousse at the roots, then blow-dry or air-dry with a side part if you want extra lift at the crown. Gather the hair at the nape, twist it into a compact coil, and keep the bun small. A bun that is too large on fine hair tends to look wispy around the edges. A tighter shape reads cleaner and lasts longer.
What Makes It Work
- Use a thin elastic so the base doesn’t get bulky.
- Backcomb the crown lightly if you want more height.
- Pin the bun flat against the head with two crossed bobby pins.
- Finish with a light mist of hairspray, not a heavy oil.
Best move: work on second-day hair. Freshly washed fine hair is slippery, and it usually needs extra grip before it will behave.
2. The Textured French Twist That Keeps Straight Hair From Sliding Out
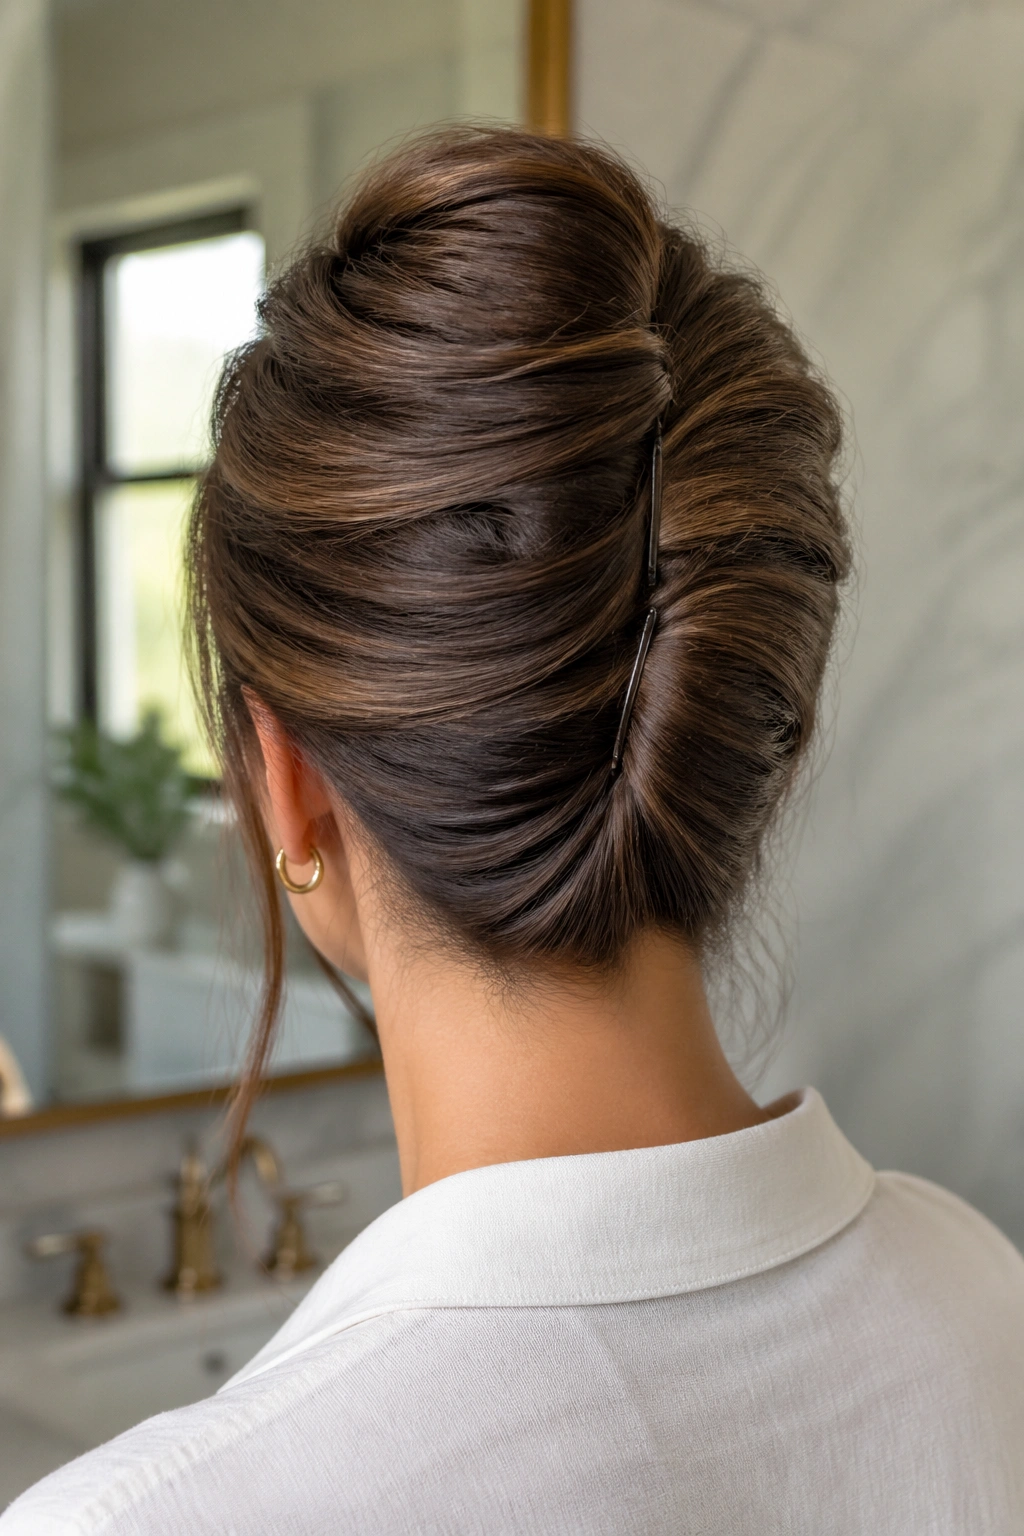
Why does a French twist fall apart on straight hair so quickly? Because straight strands don’t catch each other as easily. They slide. Smooth, glossy hair looks great, but it is annoyingly good at escaping pins.
That’s why the textured version works better. Add a little dry shampoo or texturizing spray through the mid-lengths, then lightly rough up the roots at the crown with your fingertips. Gather the hair as if you’re making a low ponytail, twist upward, and tuck the ends into the roll. A couple of U-pins along the seam are usually better than one dramatic pin in the center.
How to Get the Hold
A French twist does not need to be stiff. It needs anchor points. If the hair is very slippery, tease a small strip at the back of the crown and let that rough patch hide under the twist.
You can also leave the top section a little looser than the ends. Strange as it sounds, that gives the twist a softer grip and keeps it from looking helmet-like. The shape should feel secure, not frozen.
3. The Curly Pineapple Updo That Lets Curls Stay Curls
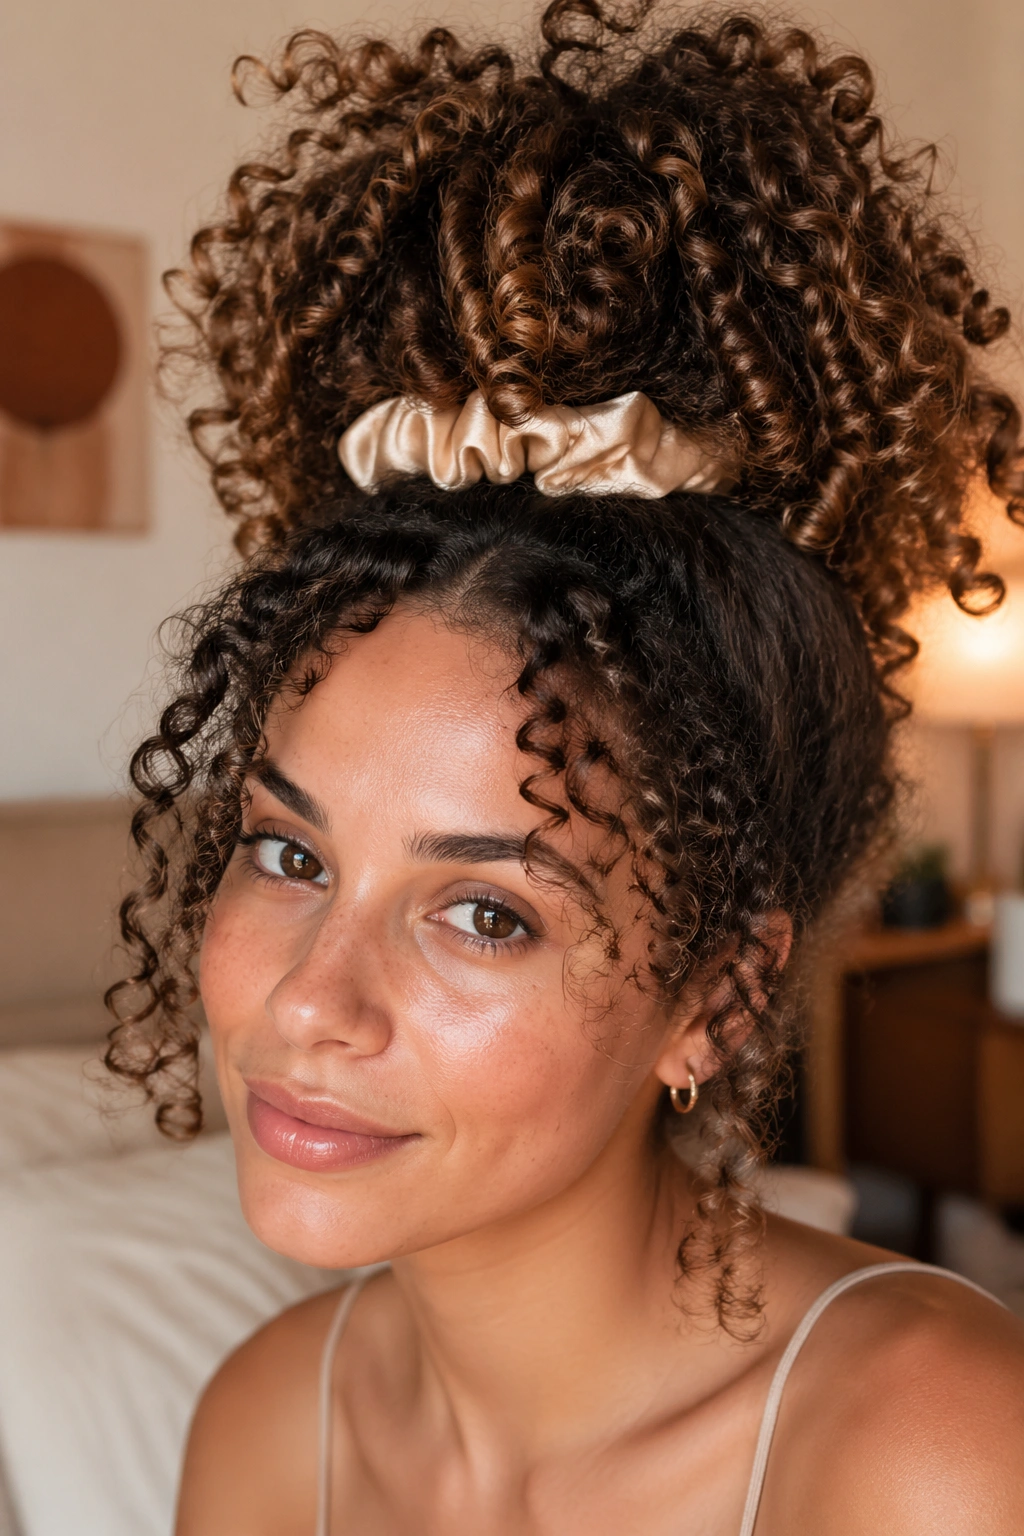
Curly hair does not want to be flattened into obedience. Good. It shouldn’t have to be. The pineapple updo keeps the curl pattern alive by piling the curls high without crushing them.
Use a satin scrunchie or a soft elastic and gather the hair near the crown, not at the very top of the head if your curls are dense. Leave the curls loose enough to fall over the base. That little lift gives the style shape while keeping the spirals bouncy instead of squashed.
What to Leave Alone
A lot of people make the mistake of brushing curly hair too much before an updo. That’s how you get frizz and a halo that nobody asked for. Keep the curl clumps intact. If a few front pieces want to escape, let them. They soften the style and make the whole thing look intentional rather than overworked.
A bit of leave-in conditioner on the ends helps too. So does a quick refresh with water and a tiny amount of curl cream before pinning. The style holds better when the hair is hydrated and slightly stretchy.
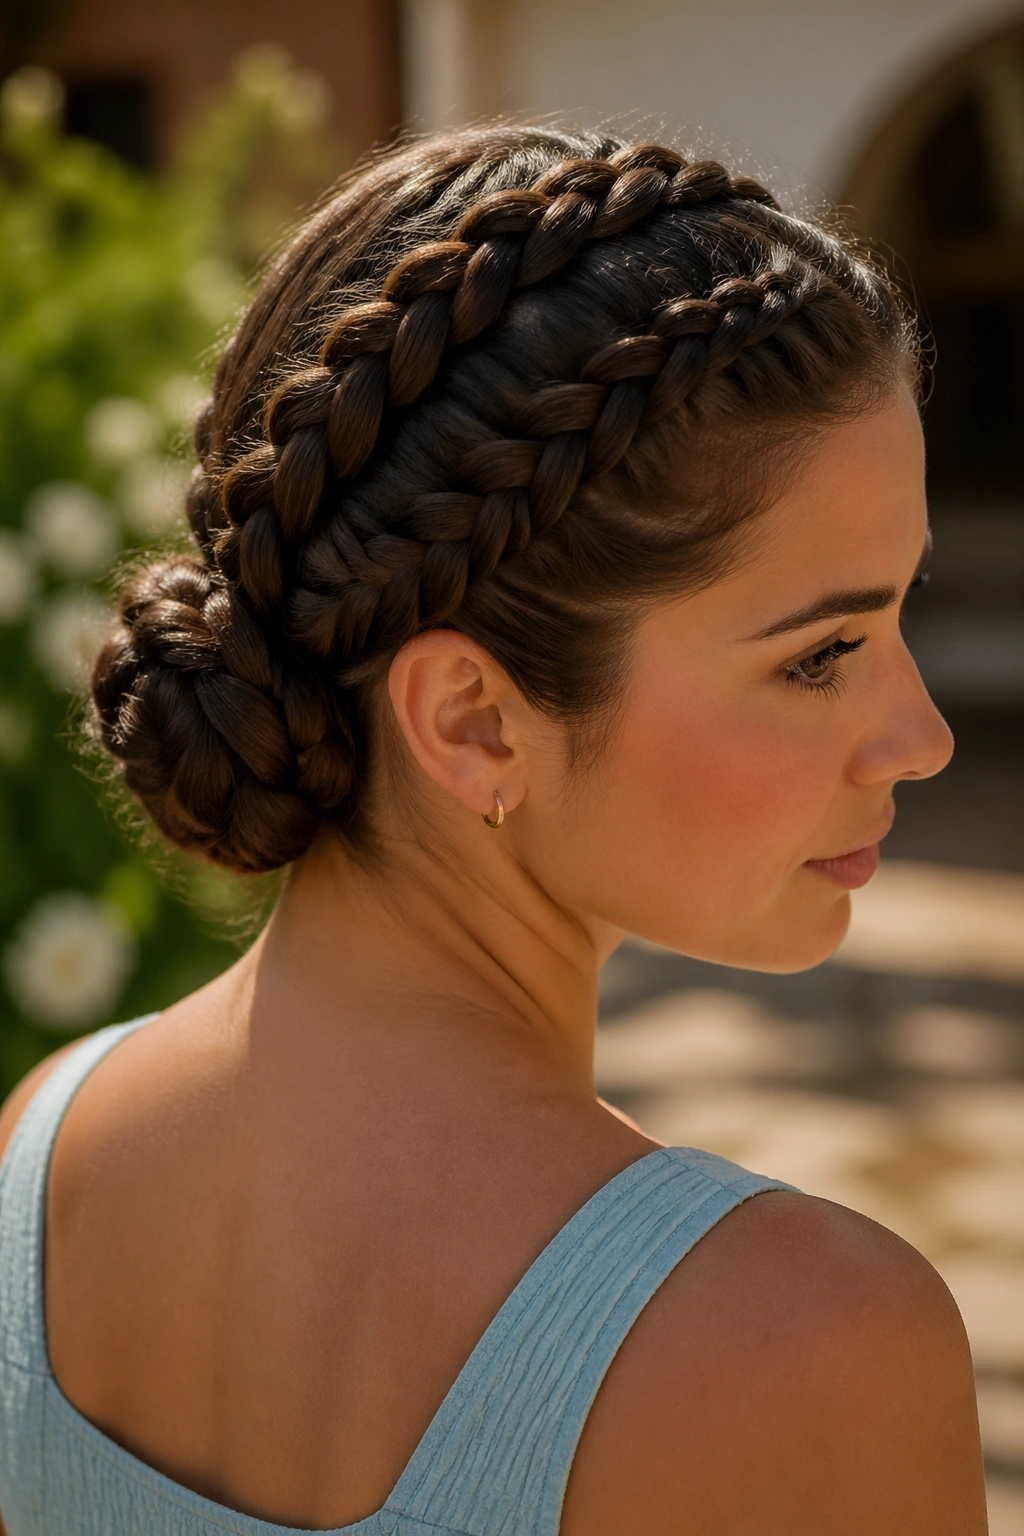
4. The Braided Crown Bun That Lifts Long Hair Off Your Neck
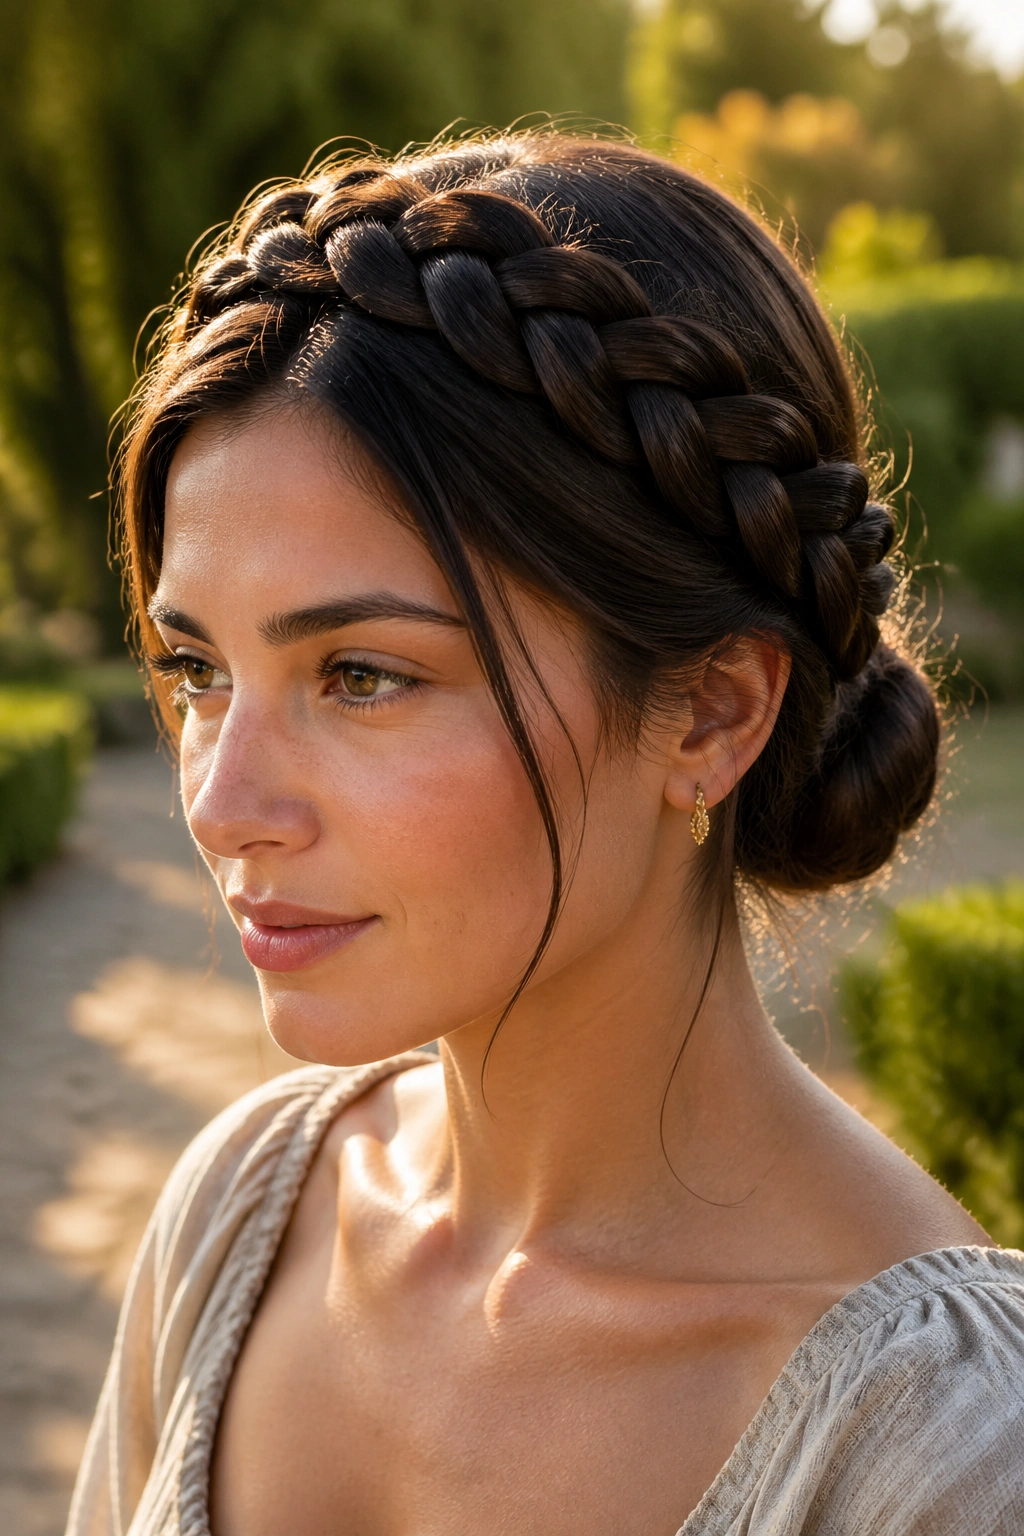
Long hair can turn a simple bun into a heavy lump if you don’t spread the weight out. A braided crown bun fixes that problem by building structure before the hair ever reaches the bun itself. It’s one of those styles that looks more complicated than it is.
Create two braids from the temples or from just behind the ears, then wrap them toward the back and join them into a low bun. If your hair is very long, a Dutch braid gives more grip than a loose three-strand braid. The braid acts like a built-in scaffold, so the bun has something solid to sit on.
This is one of my favorite options for people whose long hair feels too much for a plain twist. The braid takes some of the weight and stops the bun from sagging at the sides by midafternoon. It also looks good with a middle part, which is not always easy to say about formal styles.
A small detail matters here: smooth the braid only enough to make it neat. Too slick, and the crown starts to slide. Too fluffy, and the shape gets messy in a bad way.
5. The Claw Clip Roll That Makes Medium Hair Look Effortless
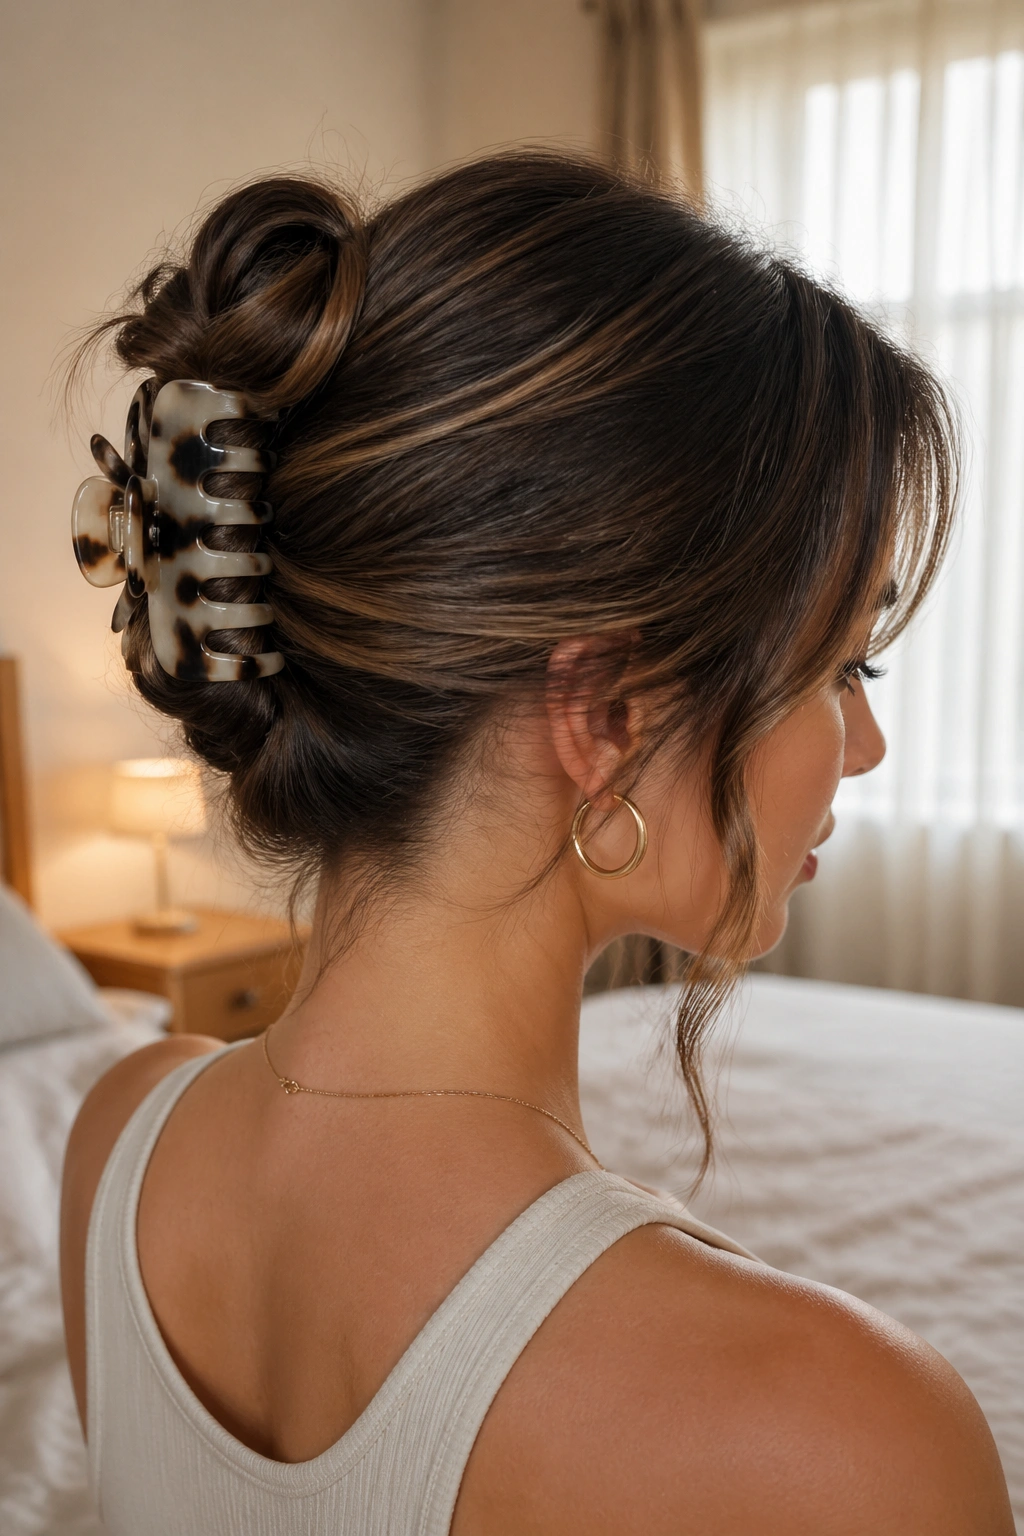
The claw clip works best when the hair is not freshly washed and baby-soft. On medium-length hair, it creates a rolled updo in seconds, but only if the clip has enough grip and the twist is tight enough to hold.
Flip the hair back, twist it upward once, then fold the length so the ends tuck in. Clamp the clip over the twist, catching hair from both sides. If your hair stops just past the shoulders, a medium clip usually does the job. Longer or thicker hair needs a larger clip with stronger teeth.
Tiny Things That Matter
- Add texture spray at the roots if the hair is silky.
- Leave a few shorter layers out around the face.
- Choose a clip with curved teeth, not flat ones.
- Don’t overload the clip with too much hair at once.
This style is fast, which is exactly why it gets underestimated. Done well, it can look cleaner than a bun and feel less fussy. Done badly, it turns into a crooked hinge in the back of your head. The difference is mostly tension.
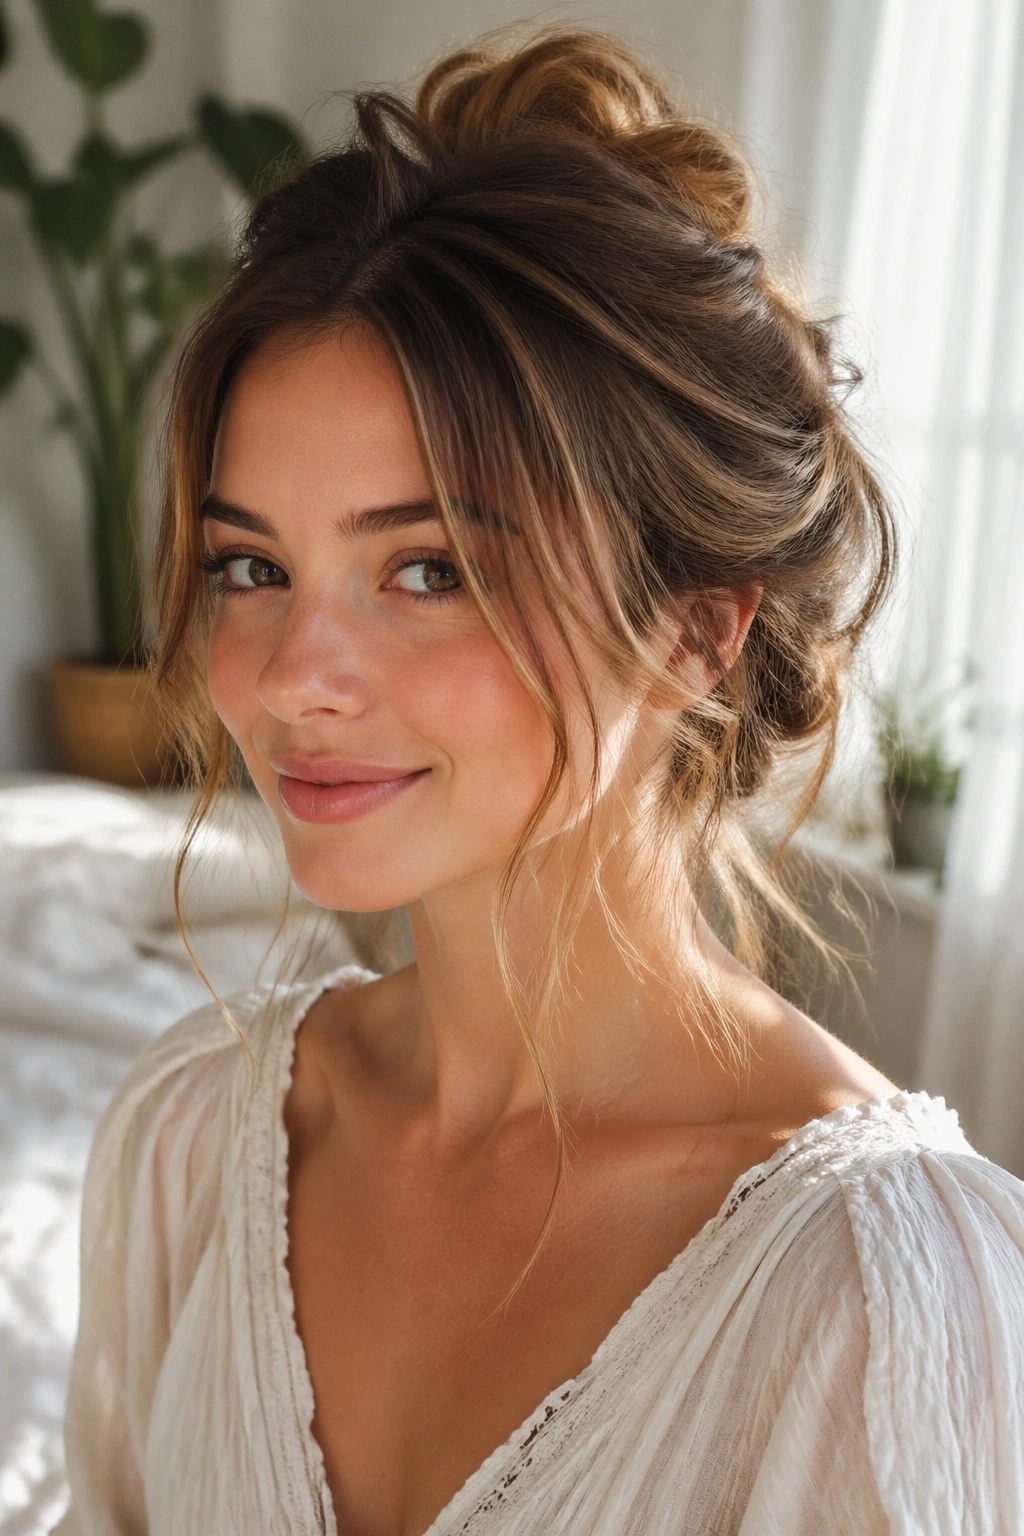
6. The Messy Top Knot That Loves Wavy Hair
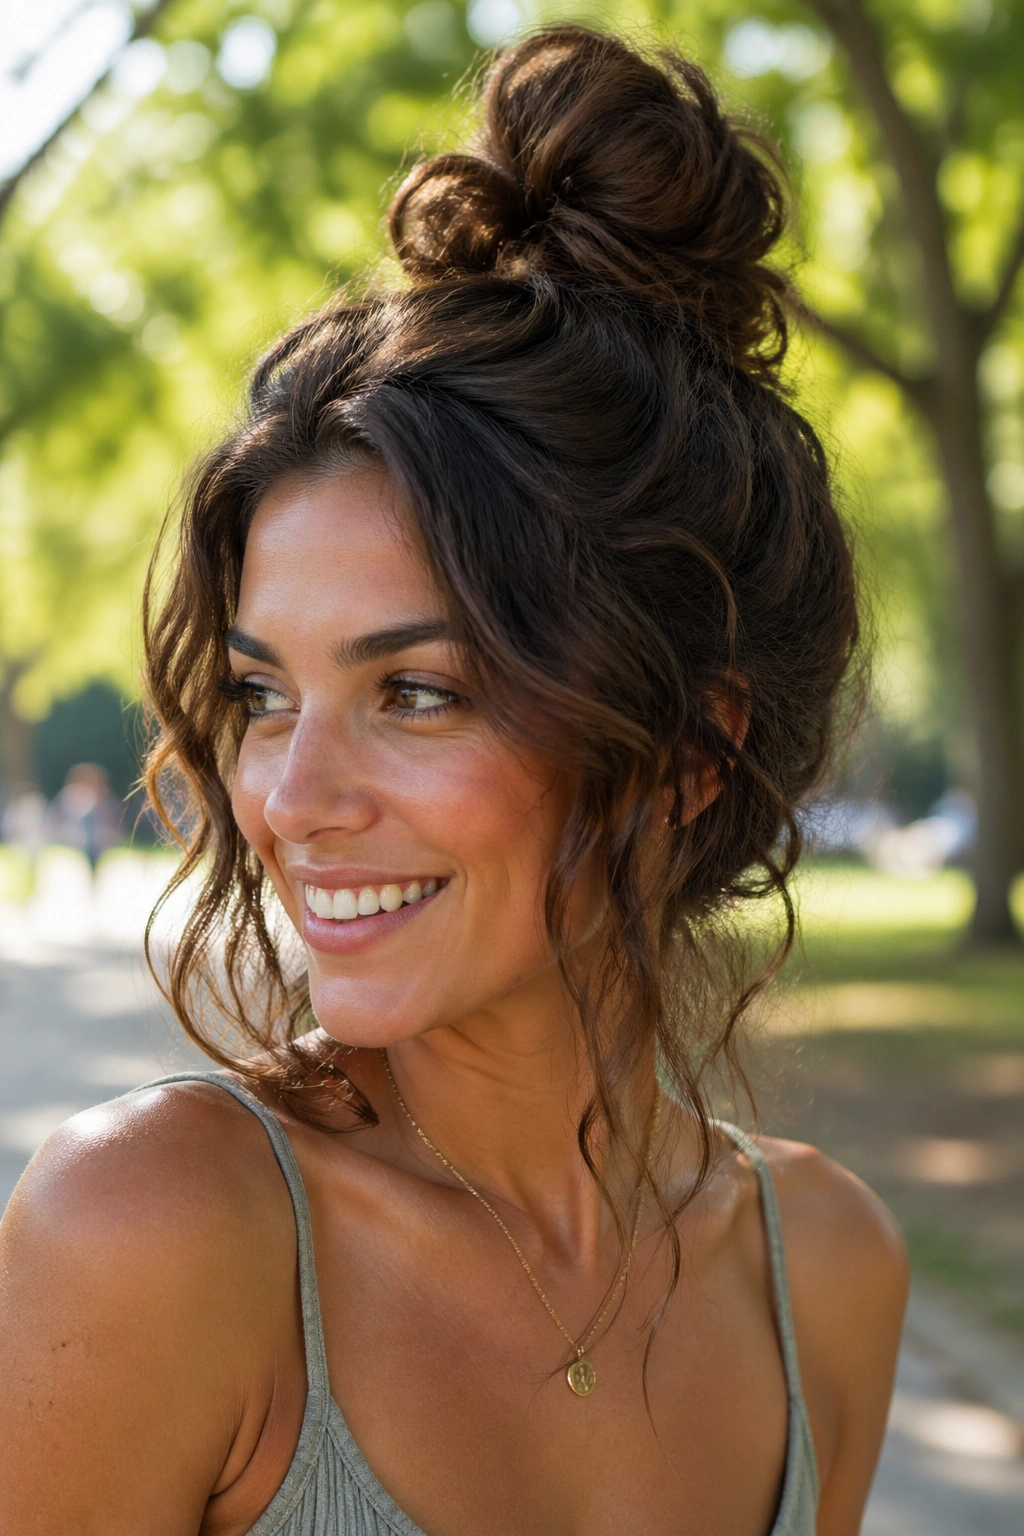
Wavy hair is built for a top knot. It already has bend, volume, and a little natural friction, which means you are not fighting the texture from the start. You’re working with it.
On day two or day three, gather the hair high on the head, twist it loosely, and let the ends poke out a little before pinning. A perfectly round bun can look fake on waves. A slightly uneven knot looks like the hair meant to do that.
The real trick is restraint. If you pull wavy hair too tight at the scalp, the crown goes flat and the ends puff up in all the wrong places. Leave some lift around the roots, and don’t spend forever smoothing every strand. The style wants a little mess. Not chaos. Just enough looseness to keep the wave pattern visible.
A few face-framing pieces help a lot here. So does a matte finish spray if your hair tends to go limp fast. If the knot needs more support, slide a second pin through the center instead of wrapping on more elastics. That keeps the shape light.
7. The Gibson Tuck That Works Better Than People Expect on Shoulder-Length Hair
Can shoulder-length hair really make a Gibson tuck? Yes. And when it’s cut well, the result looks cleaner than half the tutorials on the internet.
The style starts with a low ponytail, but not a tight one. Leave enough slack to roll the lengths upward and inward through the space above the elastic. The ends disappear into the fold, which creates that tucked, old-school shape without needing long hair. A fine-tooth comb at the crown helps if you want a smoother finish, though a softer part works too.
The Part Most People Skip
The tuck stays best when the hair is not too freshly washed. A little grit makes the roll hold, especially if your hair is layered at the ends. For shorter layers, bobby pins placed horizontally across the fold help trap the loose pieces.
If the hair barely reaches the collarbone, don’t force a full roll. Tuck in the sides first, then pin the back piece separately. That small adjustment keeps the whole thing from unraveling halfway through dinner.
The Gibson tuck has a nice balance to it. It looks neat, but not severe. That’s rare.
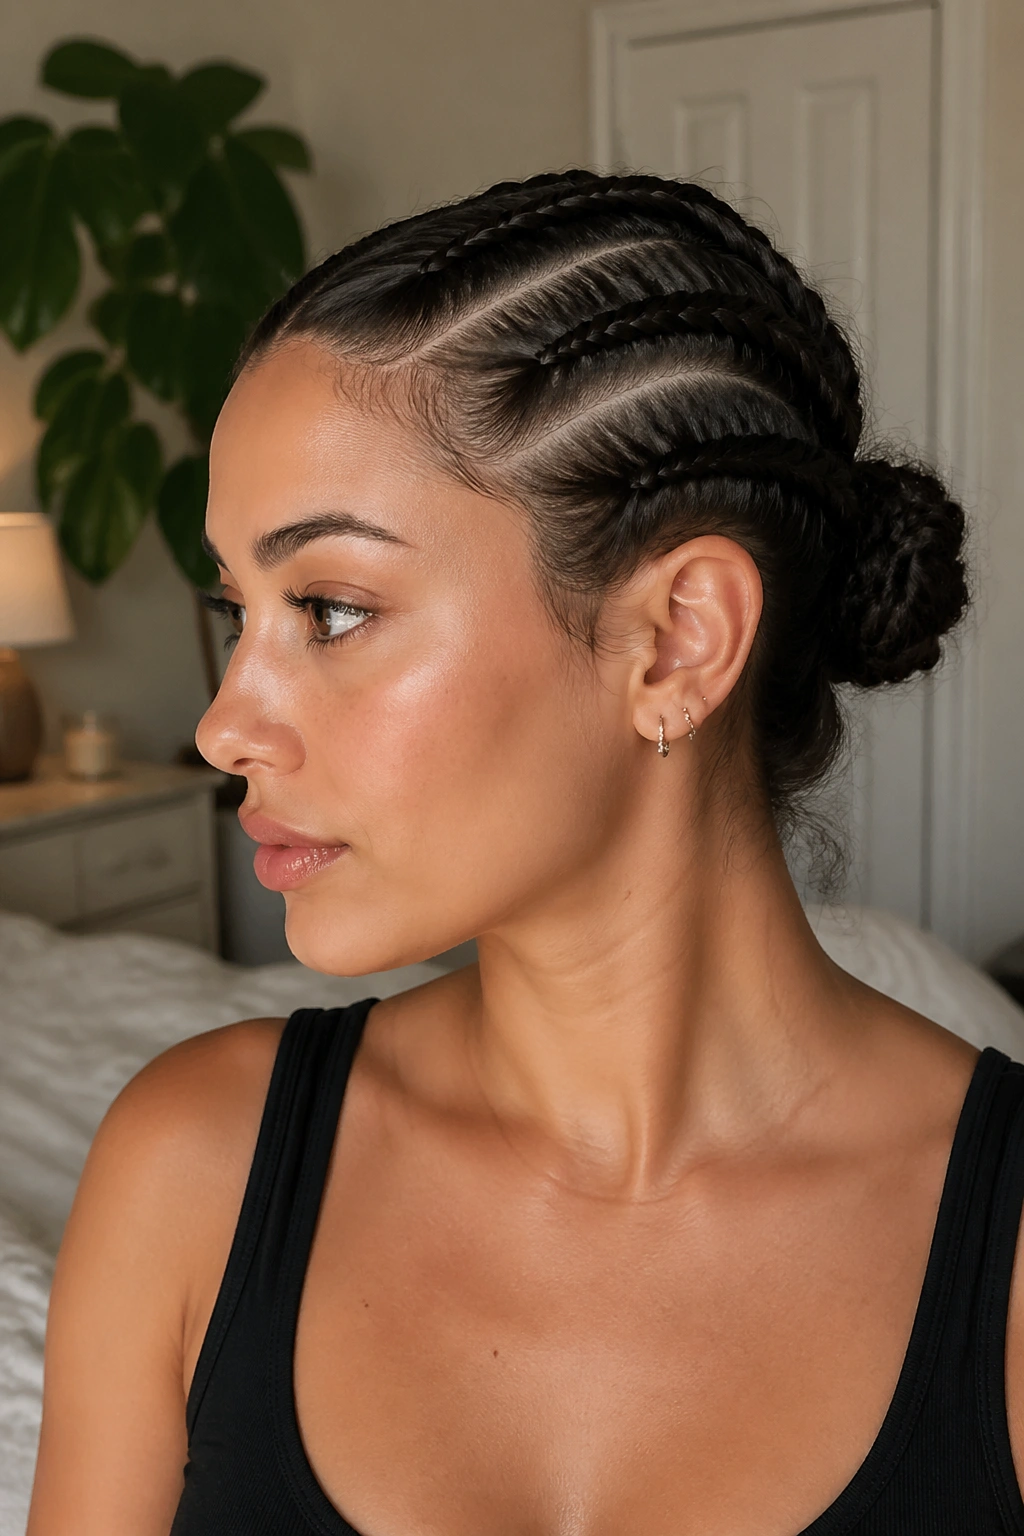
8. The Double Dutch Braids Into a Bun That Handles Thick Hair Without Piling It Too High
Thick hair does not need more teasing. It needs an anchor.
That’s why double Dutch braids into a bun work so well. The braids control the bulk from the scalp down, so you are not trying to wrestle the full weight of the hair into a single twist at the end. Start with a center part, braid each side tightly along the scalp, then join the lengths into a low or mid bun. The braids create a built-in path for the hair to follow.
What Helps Most
- Use two small elastics at the braid ends.
- Keep the braid tension even from root to tip.
- Pin the bun in sections, not with one giant ring of pins.
- Add a little setting spray at the braid seams.
This style is a lifesaver for hot days, workouts, and long shifts on your feet. It keeps thick hair from ballooning out at the sides, which is the usual problem with looser styles. It also looks more finished than a plain bun, even when you do not spend much time on it.
If your hair is very dense, braid it while it’s slightly damp. Not wet. Just damp enough to shape.
9. The Low Knot With Face-Framing Pieces That Flatters Fine to Medium Hair
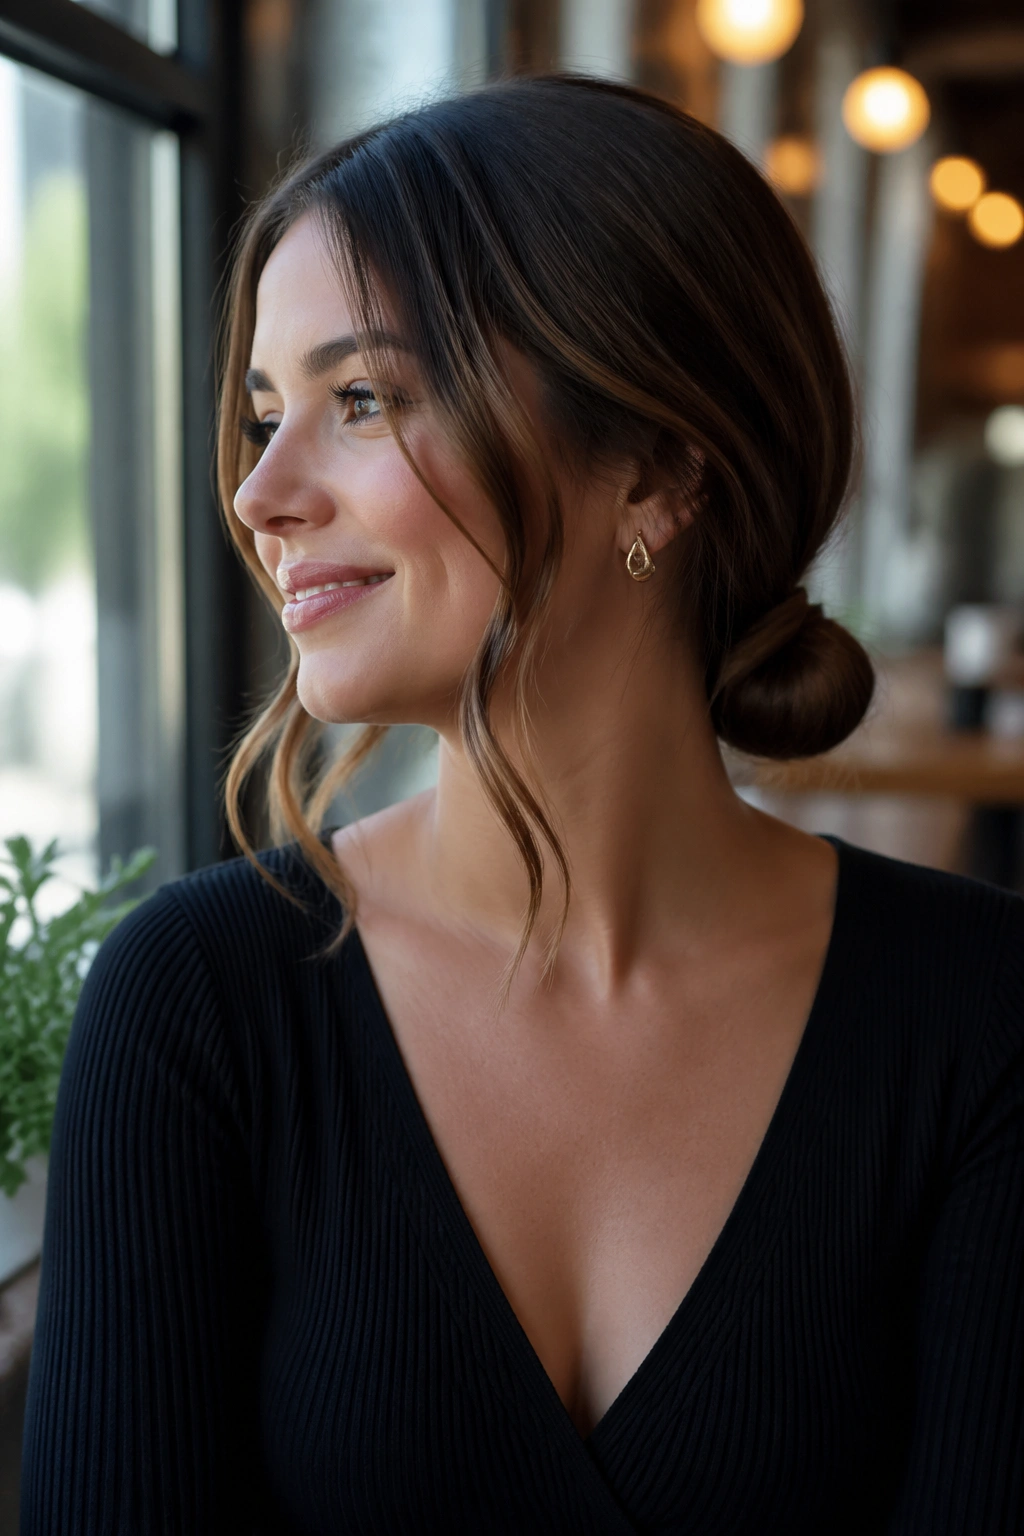
There’s a reason people keep returning to the low knot. It gives structure without asking the hair to do too much. For fine to medium hair, that matters.
Pull the hair into a low ponytail, twist it once or twice, and wrap it into a small knot at the nape. Leave two slim pieces out near the temples or the cheekbones. Those pieces change the whole mood of the style. Without them, the knot can feel strict. With them, it feels softer and easier to wear for a full day.
If the front pieces are short, curl them with a 1-inch iron and let them fall naturally instead of pinning them rigidly to the side. That little bend makes the style look finished without making it look stiff. A shine mist at the ends helps if the hair tends to separate.
This is the kind of updo that works for office days, dinner plans, or any time you want your face clear but your hair still present. Small knot. Big payoff.
10. The Side-Swept Twisted Chignon That Handles Layered Hair Better Than a Center Bun
Layered hair can be fussy in the wrong style. A center bun often shows the uneven lengths right away, especially around the nape. A side-swept twisted chignon hides that problem by making the layers part of the shape instead of fighting them.
Start with a deep side part. Sweep the heavier side across the back, twist the lengths toward one ear, and tuck them into a low chignon slightly off-center. The side placement gives the hair a natural line to follow, which is why this works so well on layers that would otherwise stick out.
It’s also forgiving. If a few shorter pieces escape, they don’t ruin the look. They add movement. That is one reason I prefer this to a perfectly centered bun for layered cuts — the style looks more alive, less pinned down.
A small claw clip can help before you pin, especially if the hair wants to separate at the back. Use pins that match your hair color, and hide them under the twist. No need to overdo it. The shape should feel easy from the side and secure from behind.
11. The High Curly Puff That Gives Coily Hair Height and Shape
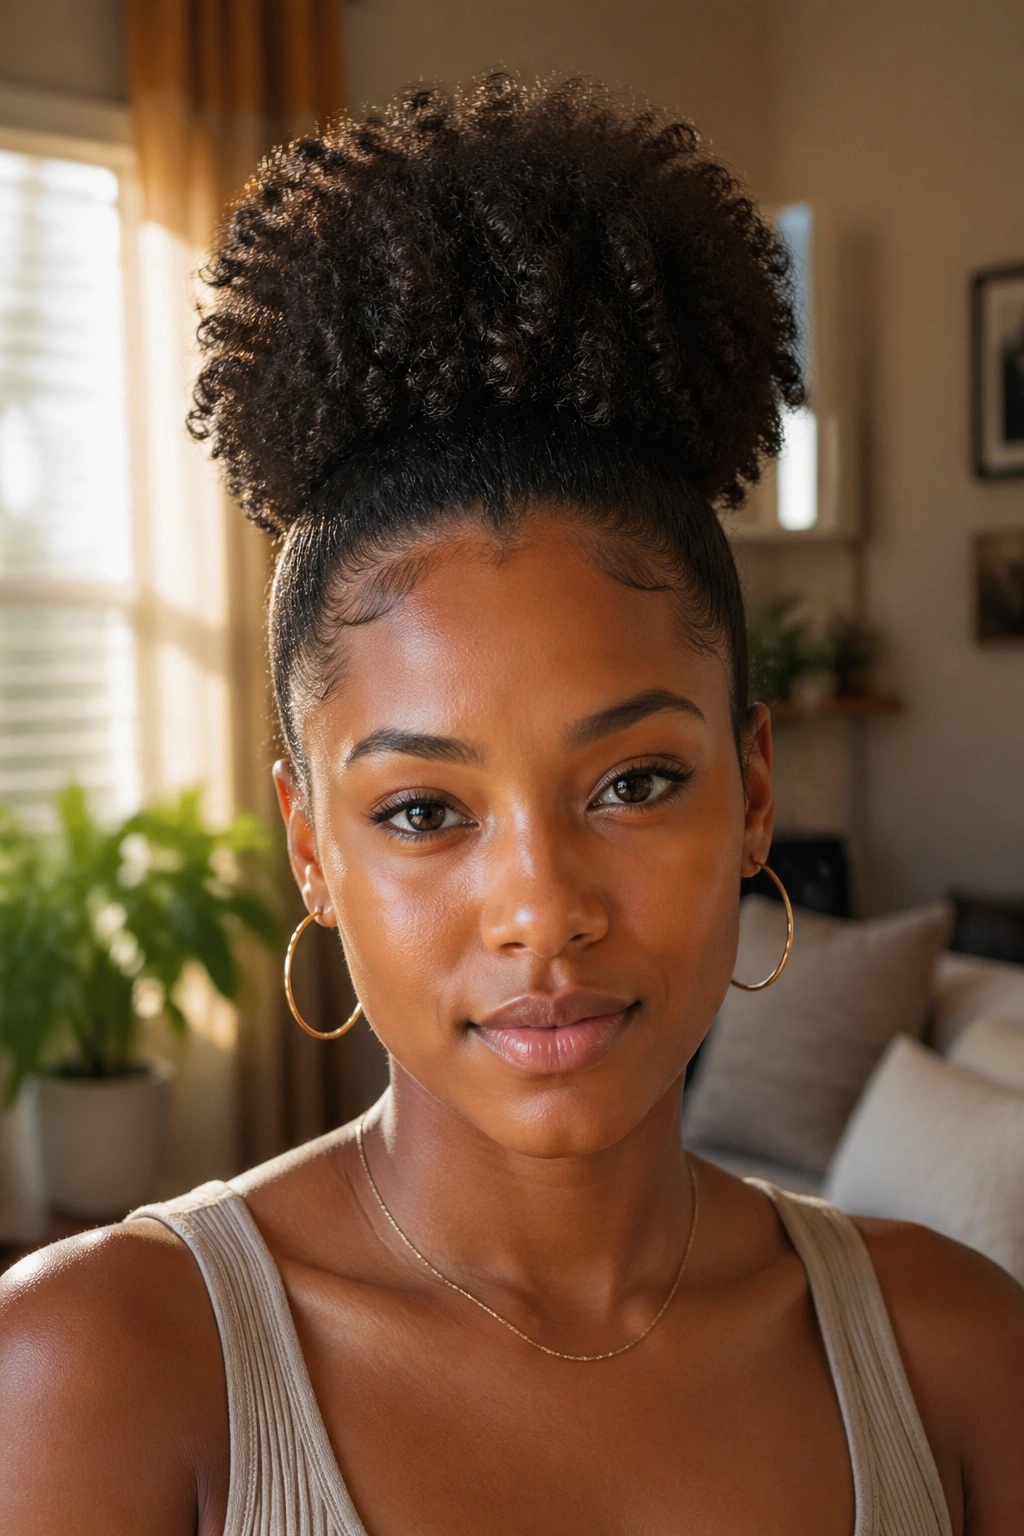
A good puff sits high, feels soft at the edges, and keeps the curls inside it from getting crushed. That sounds simple. It isn’t, really. Coily hair needs the right amount of stretch and a base that holds without pulling.
First, moisturize. A leave-in and a small amount of cream or gel at the roots helps the puff stay shaped instead of fraying. Gather the hair with a satin band or a strong puff cuff, then place it high or mid-high depending on how much lift you want. The hair should spring up without being forced.
How to Shape the Base
Use your fingers or a wide-tooth comb to smooth the sides, but don’t flatten them completely. A little texture keeps the style from looking tight and stiff. If you want more height, stretch the hair gently beforehand with banding or a blow-dry on low heat.
One more thing. A puff is not supposed to sit like a helmet. The silhouette should feel rounded, airy, and confident. That’s the entire charm. If the edges are too slick, the style loses its softness. If they’re too loose, the base slips. Somewhere in the middle is where it lives.
12. The Rope-Braid Bun That Gives Straight Hair More Grip
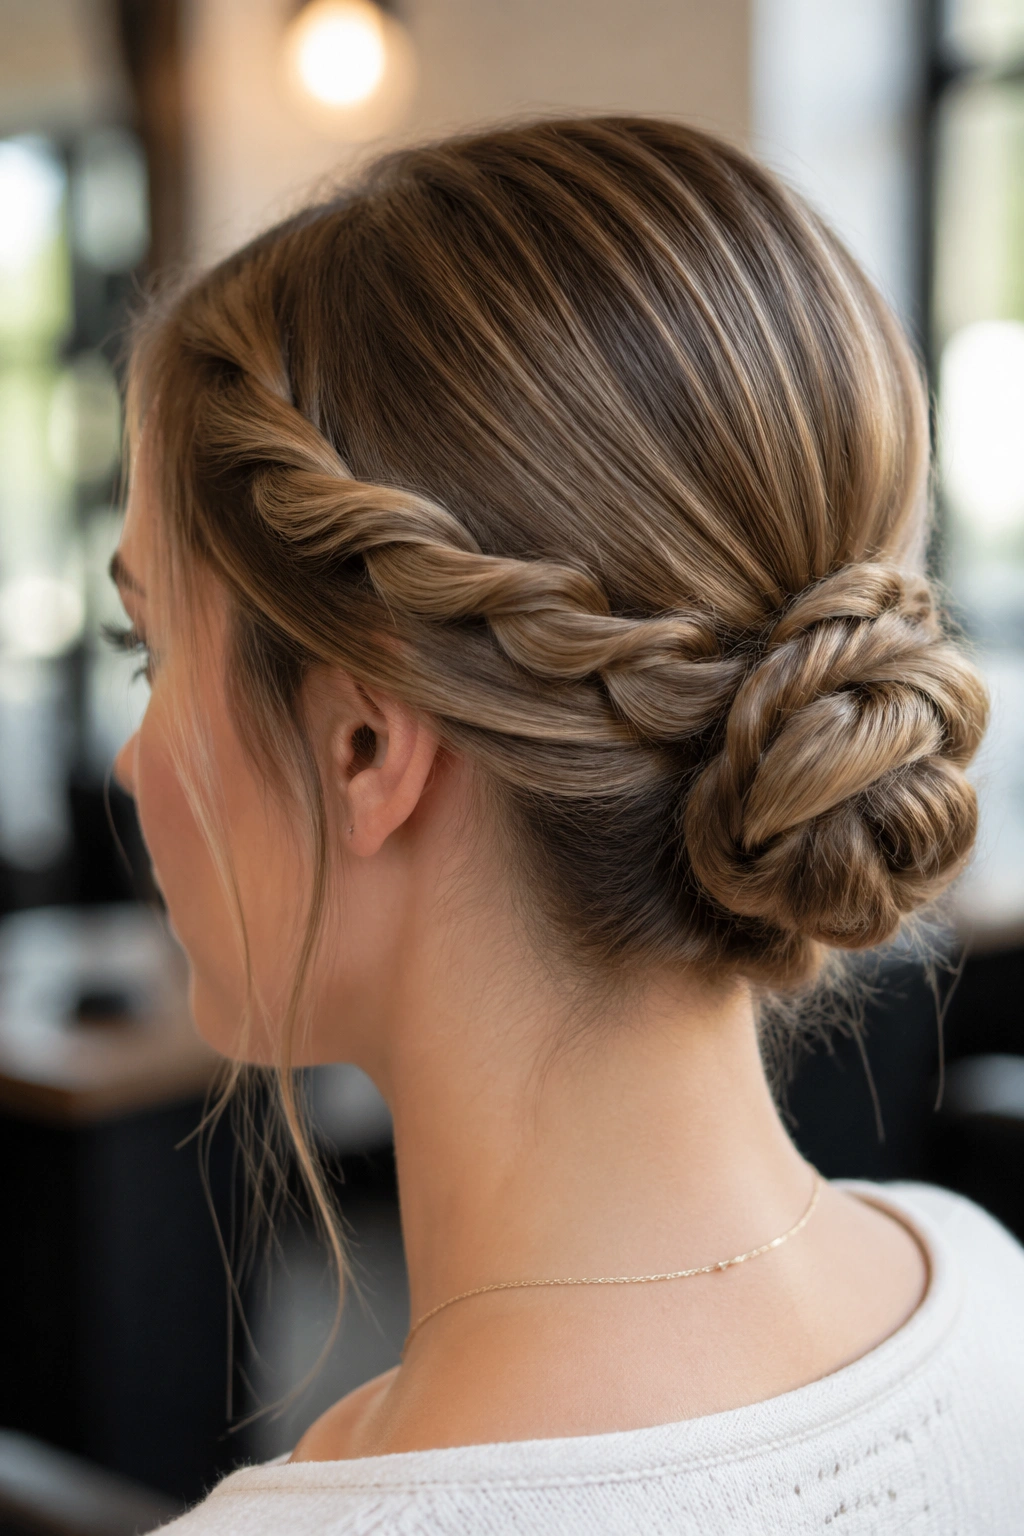
Rope braids do something plain twists can’t: they lock the sections around each other in a way that gives straight or slightly wavy hair more hold. That makes them ideal when you want an updo that looks neat but doesn’t require a full braid.
Split the hair into two sections, twist each section in the same direction, then wrap them around each other in the opposite direction. That counter-twist is the whole trick. Once you coil the rope braid into a bun, it tends to stay compact because the structure is built into the braid itself.
Use this when you want something that feels a little smarter than a messy knot. It’s cleaner than a topknot, less formal than a French twist, and easier to keep in place than a plain twisted bun on silky hair.
Best detail: if your hair is very fine, tease just the ponytail base before you start twisting. Not the whole head. Just the base. That small bit of grip makes the rope braid much less likely to unravel.
13. The Mini-Braid Bun That Gives Short Hair Enough Shape to Stay Up
Short hair can absolutely go up. It just needs a different plan.
Instead of chasing one big bun, build the style out of smaller pieces. Make two to four mini braids across the top or sides of the head, then gather the remaining length into a compact bun or tucked knot at the back. The braids help catch short layers that would otherwise stick out or fall free.
Why This Works on Shorter Cuts
- Tiny braids give the pins something to hold.
- A tucked bun hides ends that are too short to wrap.
- Clear elastics can disappear better than thick ones.
- A little paste or pomade on the ends stops flyaways.
This style is especially useful if your hair hits the jawline or grazes the collar. That awkward middle zone is where most updos fail. Mini braids solve the problem by giving the shortest pieces their own job instead of asking them to act like long hair.
It is not the fastest style on this list, but it is one of the smartest. Short hair deserves good engineering.
14. The Half-Up Twisted Updo That Lets Long Layers Stay Loose

Half-up styles often get dismissed as the lazy answer. Sometimes they are lazy. Sometimes they’re exactly right.
For long layers, a half-up twisted updo can keep the front and crown controlled while leaving the length down and moving. Twist two sections from the temples back toward the crown, then join them into a small loop or knot. The longer layers stay free, which means you keep the shape of the haircut instead of burying it under pins.
The Trick With Slippery Ends
If the layers are smooth, backcomb a tiny bit where the twist will sit. A little grit helps the twist hold without needing a mountain of hairspray. You can also curl the loose ends with a 1¼-inch iron if you want the lower half to look more intentional.
This style is useful when you want to show off length but keep hair off your face. It also works when the ends are too layered for a full bun. Not every updo needs to hide everything. Sometimes the smart move is leaving half the hair alone.
15. The Bubble Ponytail Updo That Keeps Thick Long Hair under Control
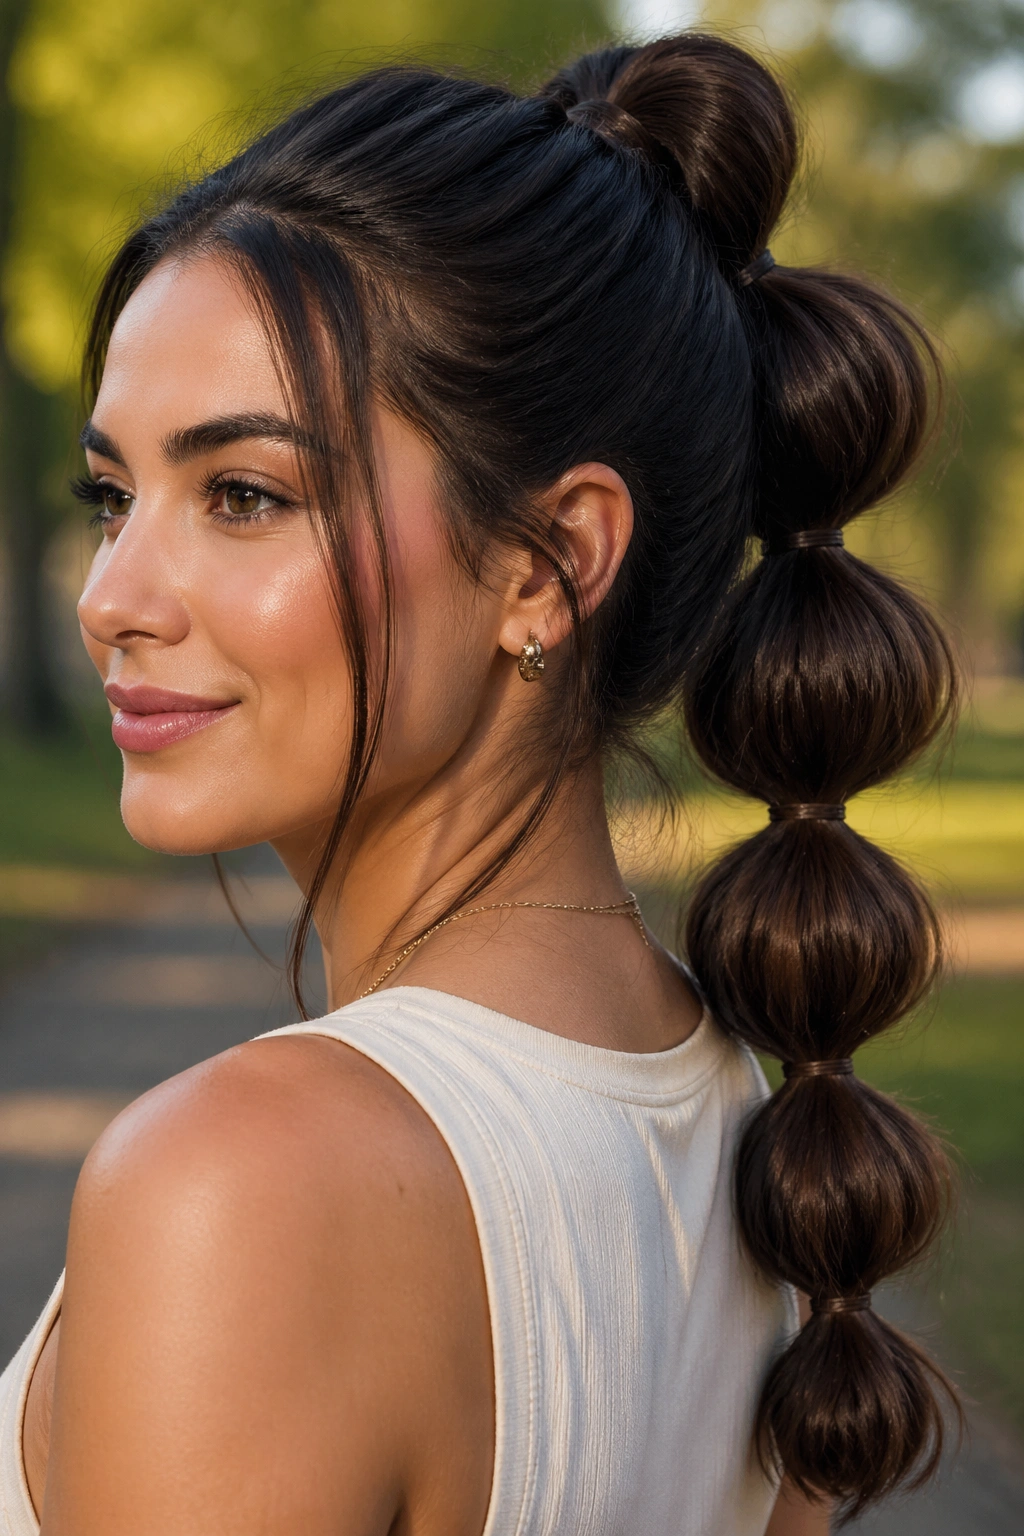
Thick hair likes structure. The bubble ponytail gives it that in a way a sleek twist often cannot.
Start with a high or low ponytail, depending on where you want the weight to sit. Add elastics every 2 to 3 inches down the length, then gently tug each section to form bubbles. If you want to turn it into an updo, fold the last bubble under and pin it near the base so the end disappears.
The effect is strong because the hair is segmented. Instead of trying to tame one giant fall of length, you break it into smaller shapes. That makes thick hair easier to manage and keeps the style from turning into a bulky knot.
A small amount of smoothing cream at the top helps if the hair puffs at the crown. Keep the bubbles full, though. If you flatten them too much, the whole style loses its point. It should look deliberate, not squeezed.
This one is excellent for days when thick hair feels like a lot. It still looks like hair. Just better behaved.
16. The Milkmaid Braid That Stays Put on Slippery Fine Hair
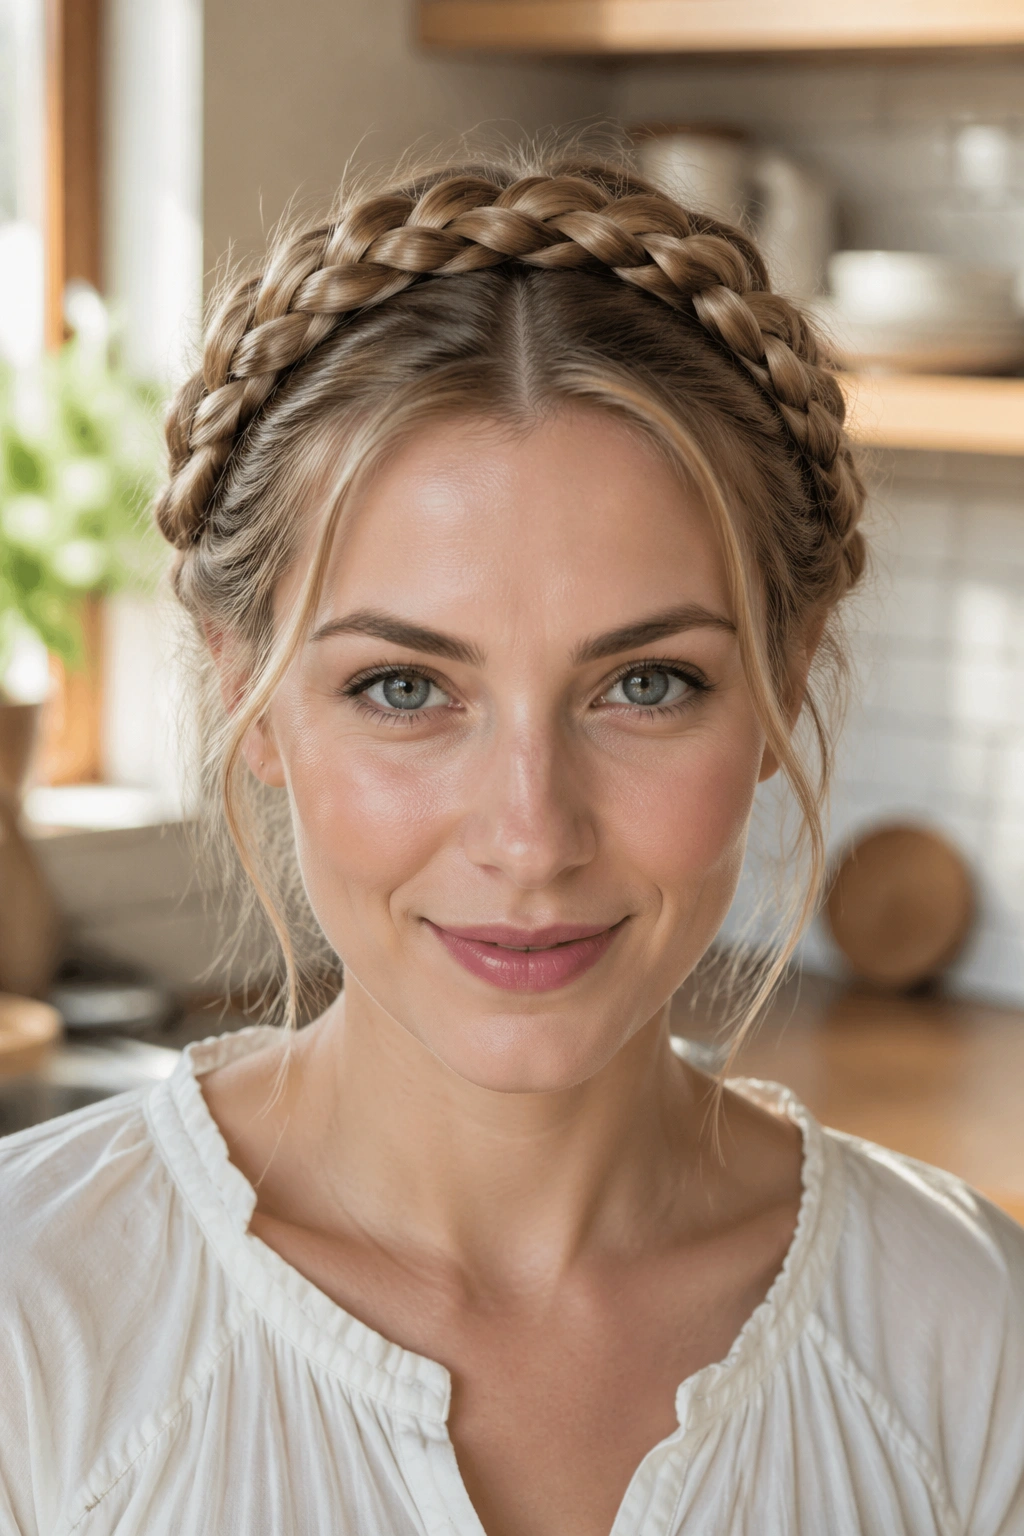
Fine, silky hair can make a milkmaid braid seem impossible. It isn’t impossible. It just needs a little extra grip and a flat path around the head.
Braid two sections, one on each side, then cross them over the crown and pin them in place. Unlike a loose crown braid, the milkmaid braid sits closer to the head, which helps it stay anchored on hair that tends to slide. A bit of teasing under the braids gives the pins something to catch.
Who It’s Best For
This style shines on hair that is soft, straight, and a little stubborn. If your hair has no natural texture, start with dry shampoo or a styling powder at the roots. That matters more than most people think. Fine hair needs friction.
The style also works well if you want something that reads a little vintage without going full costume. It frames the face, keeps the hair off the neck, and does not need a ton of length. That last part matters. You do not need waist-length hair to make a crown braid look good.
17. The Twisted Halo Bun That Feels Secure Enough for a Formal Night
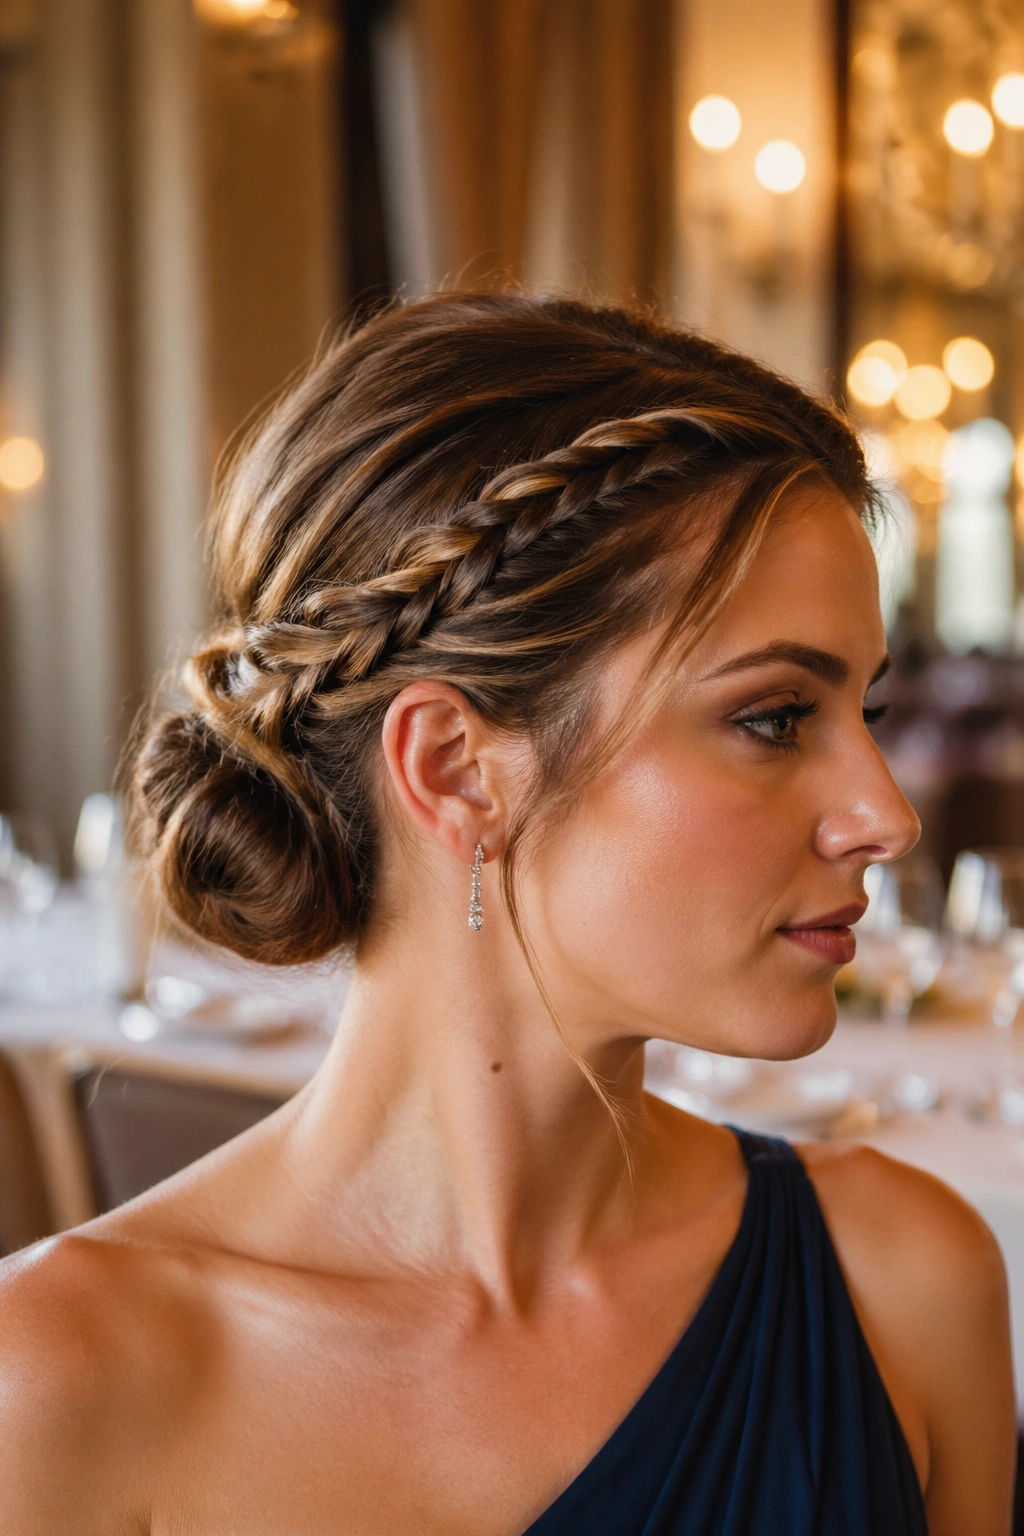
A twisted halo bun has a graceful shape, but the real appeal is practical: it keeps the hair wrapped close to the head and away from the neck while still looking finished.
Create two twists starting from the front sections or the temples, bring them around the sides, and meet them at the back where they tuck into a low bun. The halo effect comes from the line the twists make around the head. The bun keeps the style from looking too flat or too precious.
This one works on straight, wavy, and relaxed curly hair, though very curly hair may need a little stretch first so the twists lie smoothly. Use bobby pins that match the hair color and place them under the twist line, not across the visible top. That keeps the style cleaner.
It’s a good choice for dinners, weddings, or any occasion where you want your hair to feel dressed up without looking stiff. Soft edges help here. So does a few face-framing strands if the style needs warmth.
18. The Folded Tuck Updo That Saves Bob and Lob Lengths

Can a bob or lob go into an updo? Yes — if you stop trying to force it into a style meant for longer hair.
The folded tuck works because it folds the ends up and in rather than winding them around and hoping they stay. Gather the hair low at the back, fold the lengths under themselves, and pin the fold in place with two or three sturdy pins. If the cut is blunt, the tuck looks especially clean.
How to Get the Tuck to Stay
- Start with hair that has a little texture.
- Use pins in a crisscross pattern.
- Pin closer to the scalp than the ends.
- Leave a tiny bit of softness at the hairline.
This style is one of the best answers for shoulder-skimming cuts that never seem long enough for a bun but are too long to ignore. It also looks good with a side part and can be made neat or a little loose depending on the setting.
Shorter lengths often do better when you work with small folds instead of one big wrap. That’s the whole game here.
19. The Four-Strand Braid Bun That Gives Heavy Hair a Better Foundation
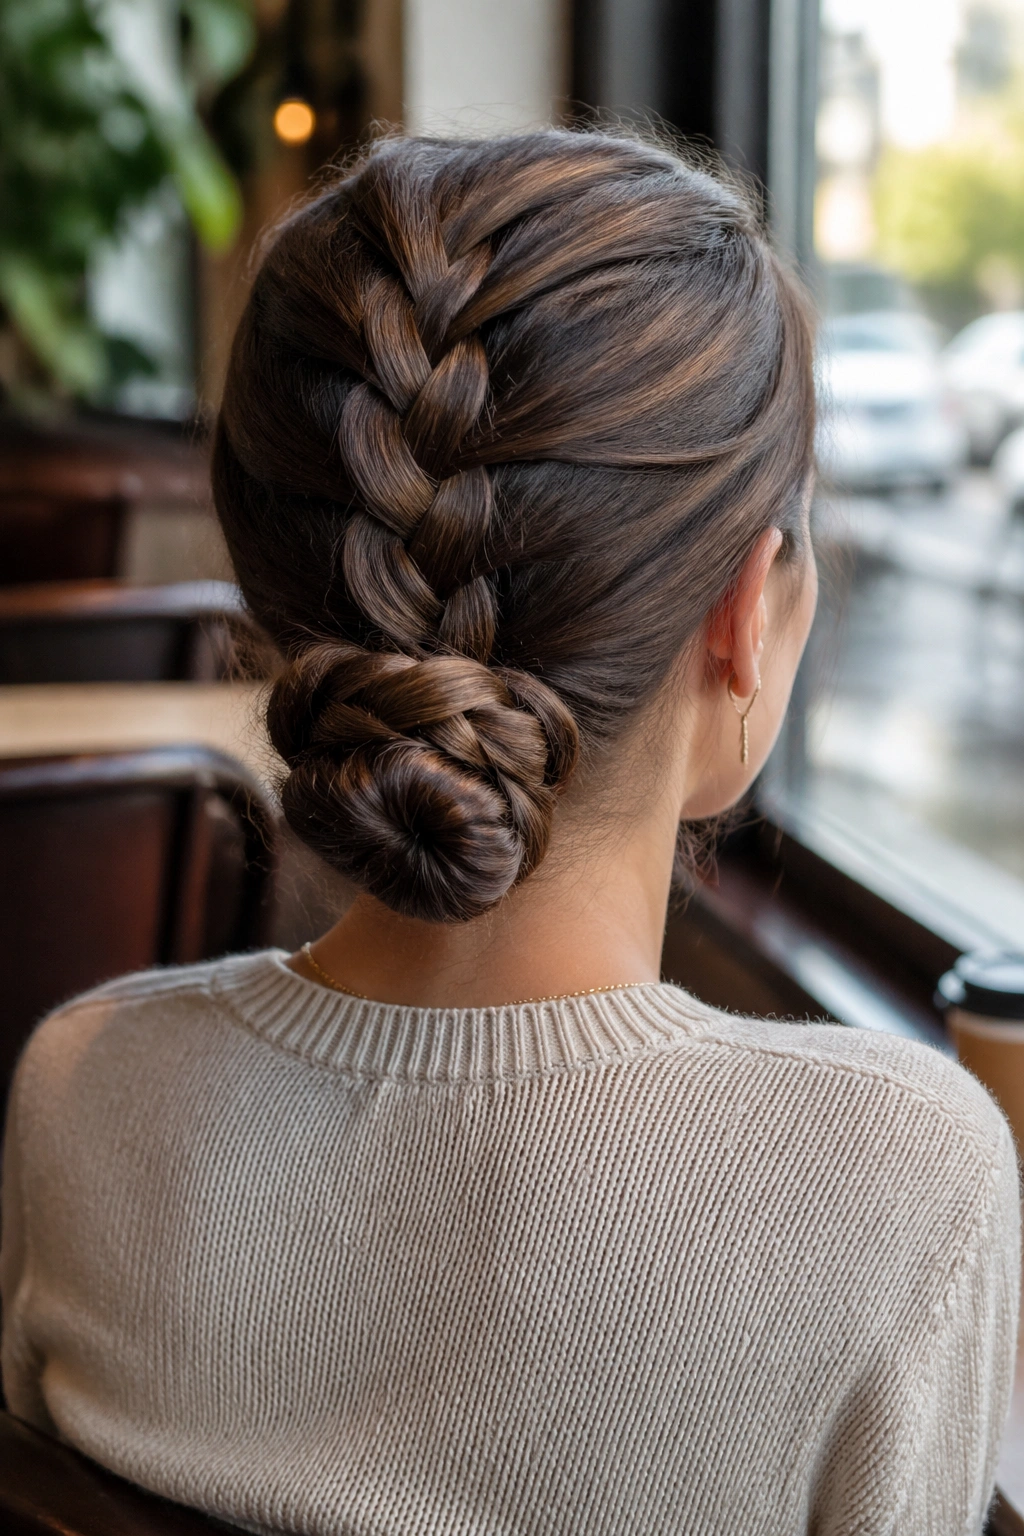
A four-strand braid sounds fussy until you try it on thick or layered hair and realize how much cleaner it holds. The extra strand creates a flatter, wider braid that spreads the weight better than a standard braid.
Braid the hair down the back or slightly off-center, then coil the braid into a bun at the nape. The braid itself acts as a support beam, which is useful when the hair is dense or when layers keep breaking away from the shape. If you’ve ever had a bun collapse because the braid underneath was too loose, this is the fix.
Why Four Strands Beat Three Here
The braid lies smoother. It also has more surface area, which means pins grip it better. That sounds technical, but in practice it just means the style holds longer and looks more intentional.
This is not the fastest option on the list. Fine. Not everything needs to be fast. If you need an updo for a long day, a formal event, or a strong gust of wind, the extra time pays off.
20. The Low Wrapped Pony Bun That Fits Busy Days and Fussy Hair

Some days call for a style that looks calm while your hair is acting like a problem.
The low wrapped pony bun does that job without much drama. Pull the hair into a low ponytail, take a small section from underneath, and wrap it around the elastic. Then twist the length into a bun and pin the end under the base. It’s tidy, quick, and easy to refresh if a few pieces loosen later.
This is one of the most useful updos for mid-length hair, but it also works on longer lengths if you keep the bun compact. Thick hair may need a stronger elastic at the base, while fine hair tends to benefit from a little texturizing spray first. The shape is simple enough to wear with a blazer, a knit sweater, or a dress.
What I like most is that it doesn’t scream for attention. It just does the work. You can wear it to a meeting, then change earrings and walk straight into dinner without redoing the whole thing.
21. The Loose Romantic Updo That Softens Almost Any Hair Type
A loose romantic updo works because it leaves room for the hair to look like hair. Not every style needs to be tight, glossy, and pinned within an inch of its life. Sometimes the better move is to shape the hair lightly and let a few pieces move.
Start by curling or waving the lengths in medium sections, then pin them into a soft low arrangement at the back. Leave some ends out. Leave a few face pieces loose too. If the hair is fine, use pins to create overlap. If it is thick, build the shape in small sections so it doesn’t turn into one heavy mass.
This style is forgiving on layered cuts, curly textures, and hair that refuses to stay perfectly smooth. It also works well when you want a softer finish for an event but do not want your hair to feel locked in place all night.
The best version never looks forced. It looks assembled. That small difference matters.
Final Thoughts
The easiest updo is rarely the best one for your hair. The smartest one is the one that matches your texture, length, and the amount of time you actually want to spend in front of the mirror.
Fine hair wants grip. Thick hair wants structure. Curly and coily hair want support without flattening the shape that makes them look good in the first place. Once you start choosing styles that way, updos get a lot less frustrating.
And if one of these looks nearly right but not quite, adjust the base, not the whole idea. A stronger elastic, a looser twist, a different pin angle — that tiny change is often the thing that makes the style stay.