Sitting in a stylist’s chair for eight or nine hours is a test of endurance that only those of us in the braiding community truly understand. But there is a specific kind of magic that happens when you finally stand up, shake out your hair, and see those crisp, geometric lines reflecting in the mirror. Small triangle-part knotless box braids have become the gold standard for anyone who wants that intersection of high-fashion geometry and scalp-saving comfort. While traditional box braids rely on a heavy knot at the base that can pull on your edges, the knotless method feeds the extension hair in gradually, creating a flat, seamless transition that feels like your own hair—just a lot longer and more versatile.
The move toward triangle parts isn’t just about being different; it’s about the visual rhythm it creates on the scalp. Squares are classic, sure, but triangles offer a sharper, more modern edge that catches the eye from every angle. When you go small with the size, you’re opting for maximum density and movement. Small braids behave more like loose hair—they swing, they bunch into effortless buns, and they don’t feel like a heavy helmet on your head. If you’ve ever had “braid headaches” from the sheer weight of jumbo styles, transitioning to small knotless braids is like finally taking off a pair of shoes that were two sizes too small.
Choosing this style is a commitment to your hair’s health, provided you do the prep work. Because there is no knot to anchor the braid, your natural hair bears the weight more evenly, but it also means your parts are on full display. This is a style where precision is everything. You want a stylist who treats a rat-tail comb like a surgical instrument. We are talking about clean, distinct lines that look like they were mapped out by an architect. From deep honey blondes to classic jet black, the ways you can customize this geometric look are nearly endless, but the foundation remains the same: healthy hair, a patient stylist, and a clear vision of your finished look.
Before you book that appointment, you need to think about the logistics of the “small” part of the equation. Small braids take time—sometimes two full days if your hair is particularly thick or if you’re going for floor-grazing lengths. You’ll want to arrive with your hair thoroughly detangled and stretched. Whether you blow-dry it yourself or have your stylist do it, starting with a smooth canvas is what prevents those tiny, annoying frizzies from popping out of the braid three days later. It’s an investment in both time and money, but for a look that lasts six to eight weeks and looks this polished, it’s a trade-off most of us are more than happy to make.
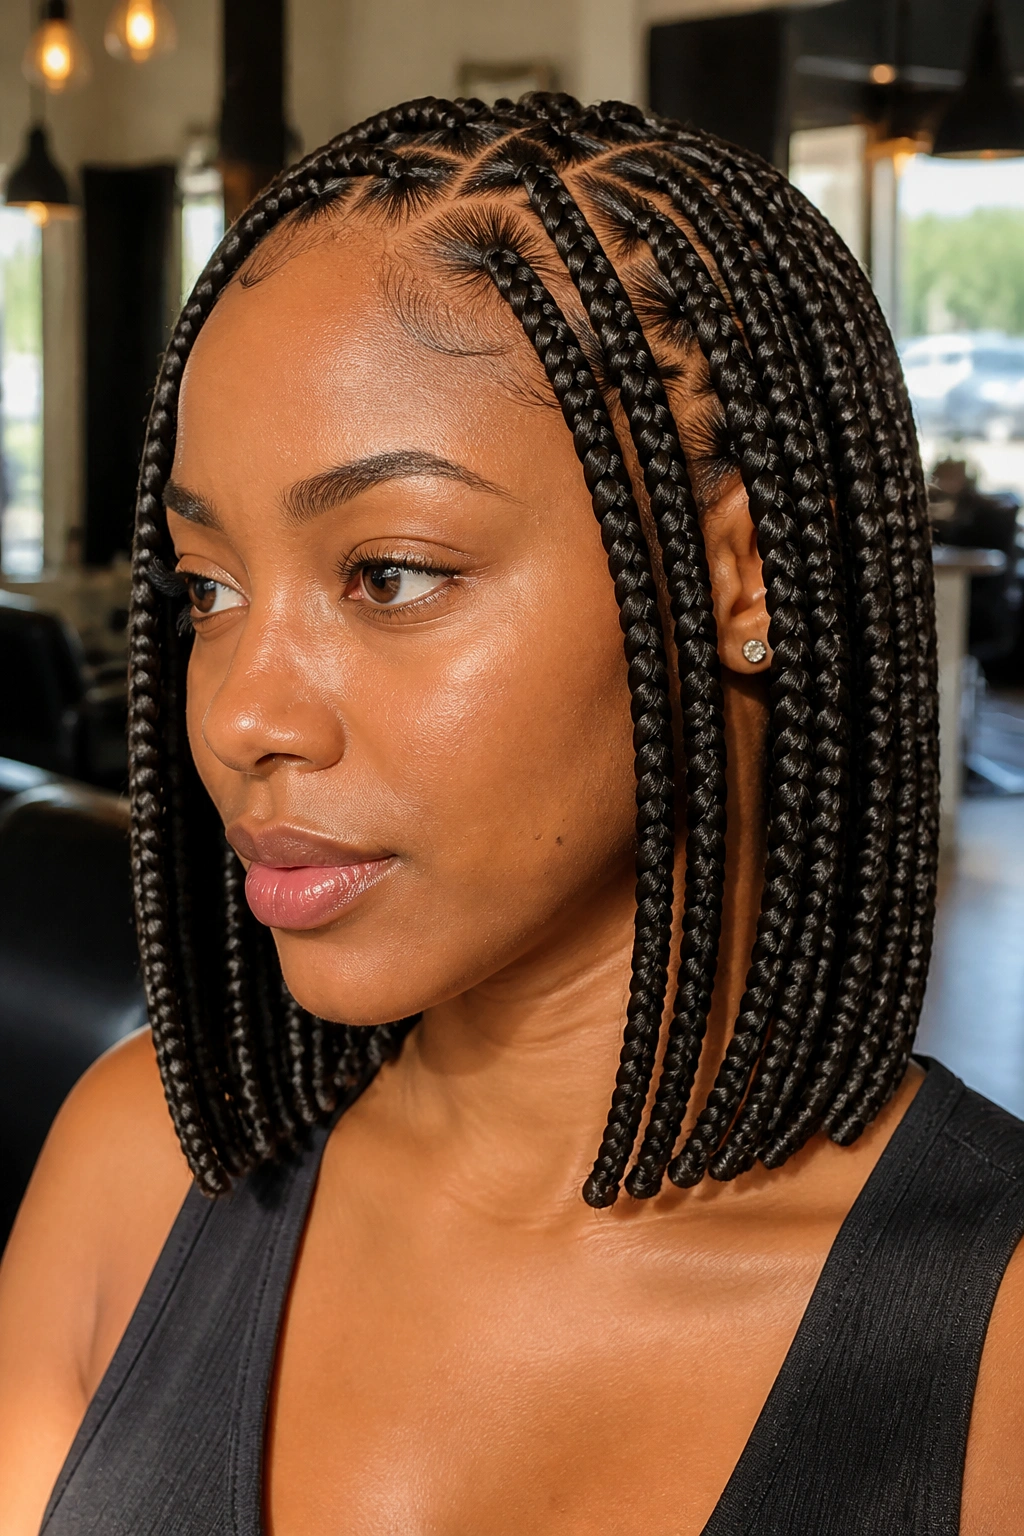
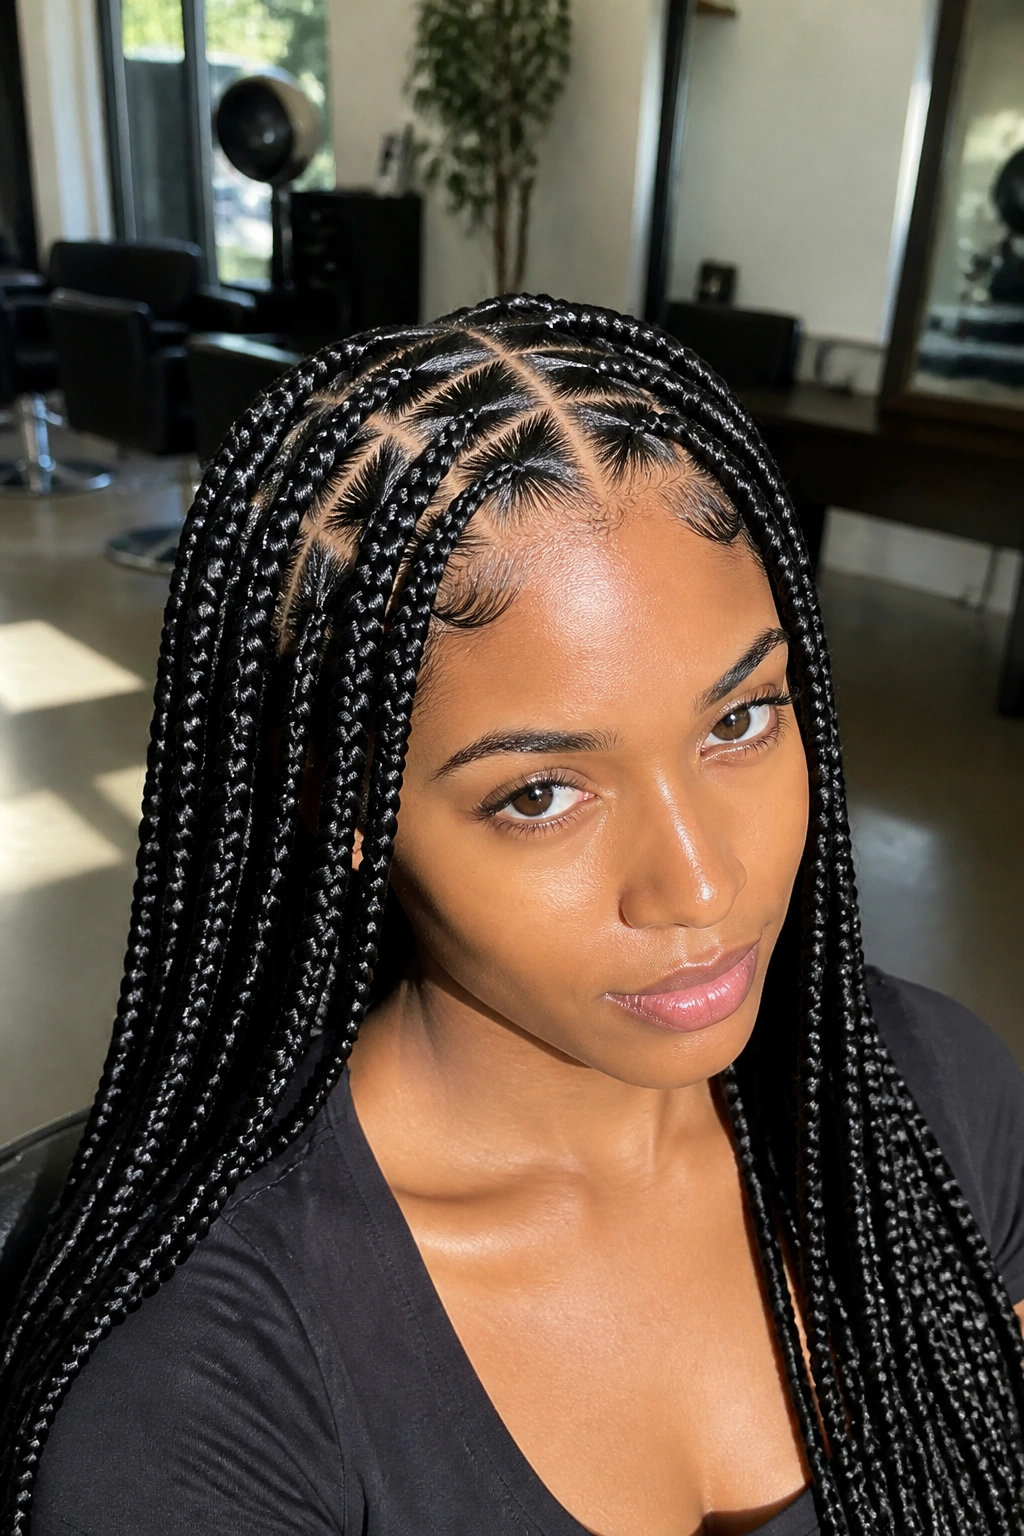
1. Classic Midnight Black with Razor-Sharp Parts
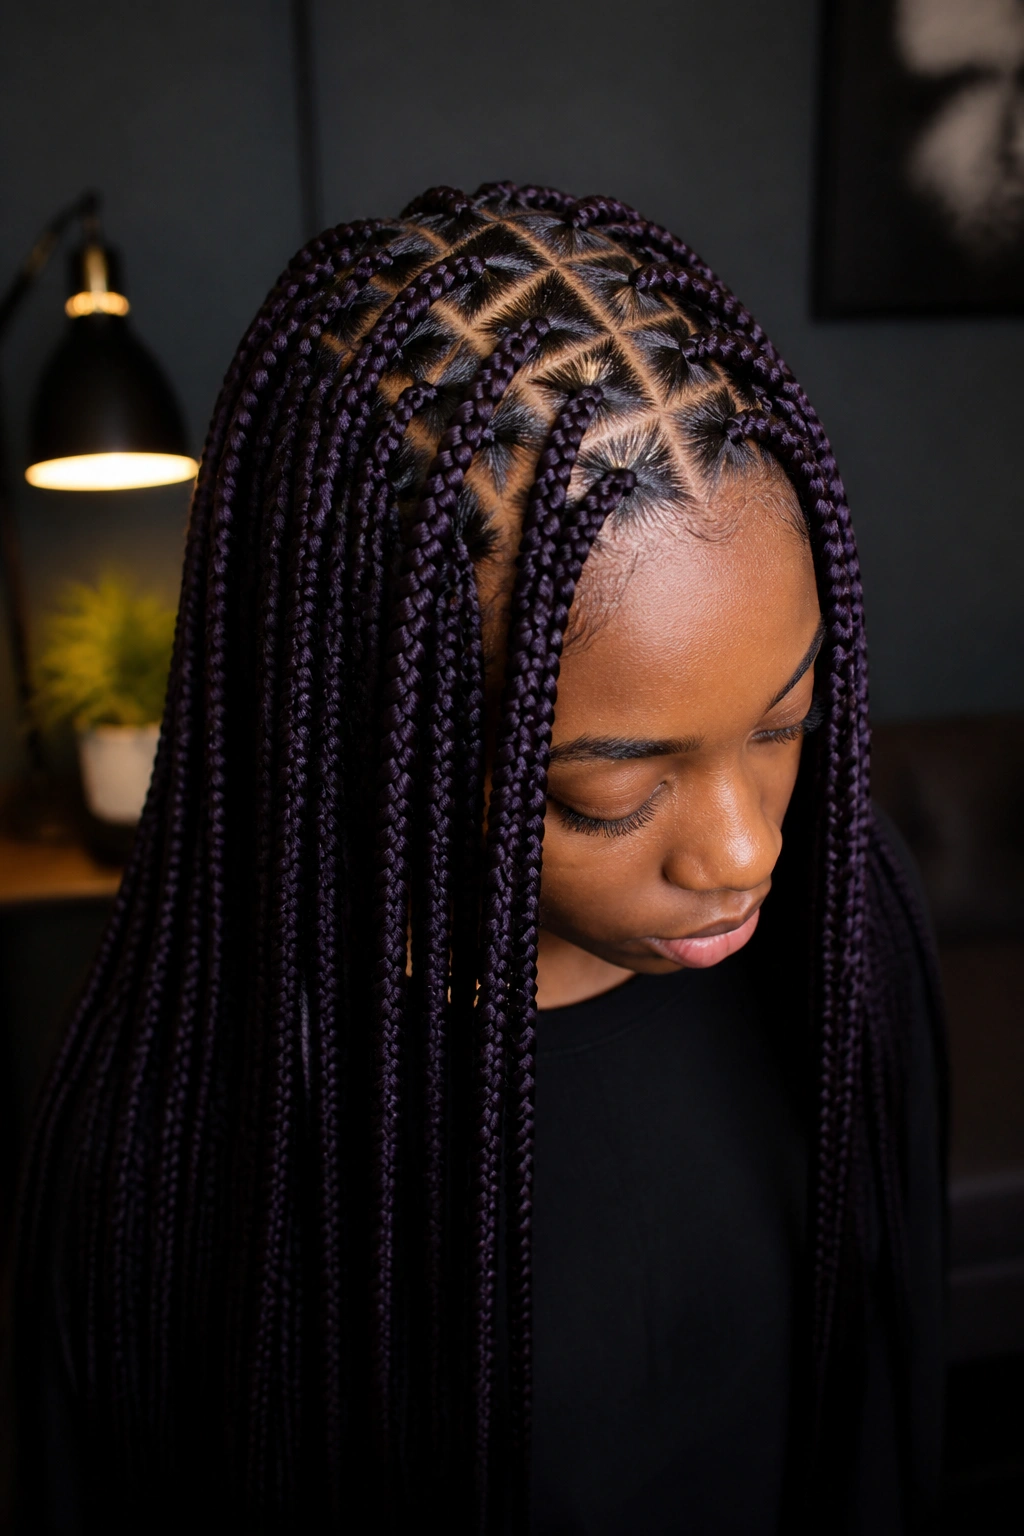
There is something undeniably sophisticated about a deep, jet-black set of braids that look like they were carved out of obsidian. When you pair this timeless color with small triangle parts, the focus shifts entirely to the precision of the work. The dark hair creates a high-contrast background against the scalp, making those triangular divisions pop with incredible clarity. This isn’t just a hairstyle; it’s a statement of discipline and detail.
Why This Style Remains a Staple
Classic black doesn’t hide mistakes, which is exactly why it’s so impressive when done correctly. The lack of color allows the eye to appreciate the uniformity of the braiding tension. In small sizes, these braids offer a fluid movement that mimics natural hair, allowing you to flip your hair over one shoulder or tie it into a high ponytail without the bulk associated with larger sections.
Key Details for Longevity
- Braid Length: Aim for mid-back or waist-length to balance the “small” diameter.
- Sectioning: Ensure the triangles are equilateral for the most balanced look across the crown.
- Product Tip: Use a high-shine braiding pomade during the process to keep the black synthetic hair from looking dull.
- Edge Care: Because the parts are so visible, keep your edges laid with a non-flaking gel.
Pro tip: Ask your stylist to use a “stitch” technique on the initial passes of the braid to make those triangle parts look even more defined and intentional.
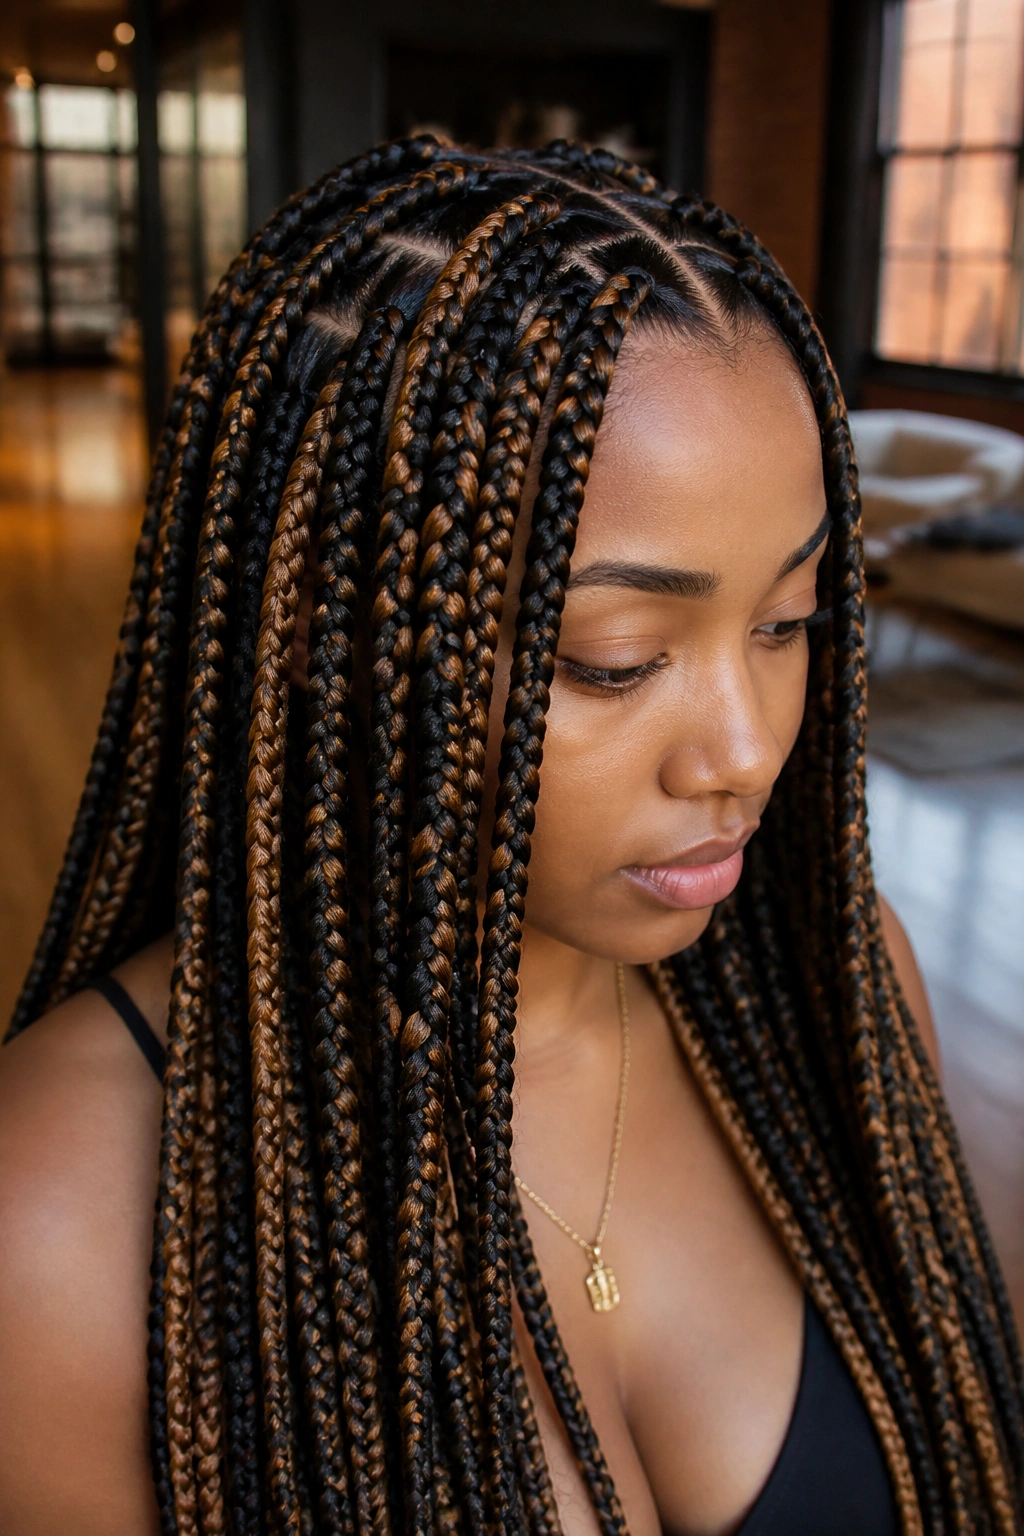
2. Honey Blonde Ombre for Warmth and Dimension
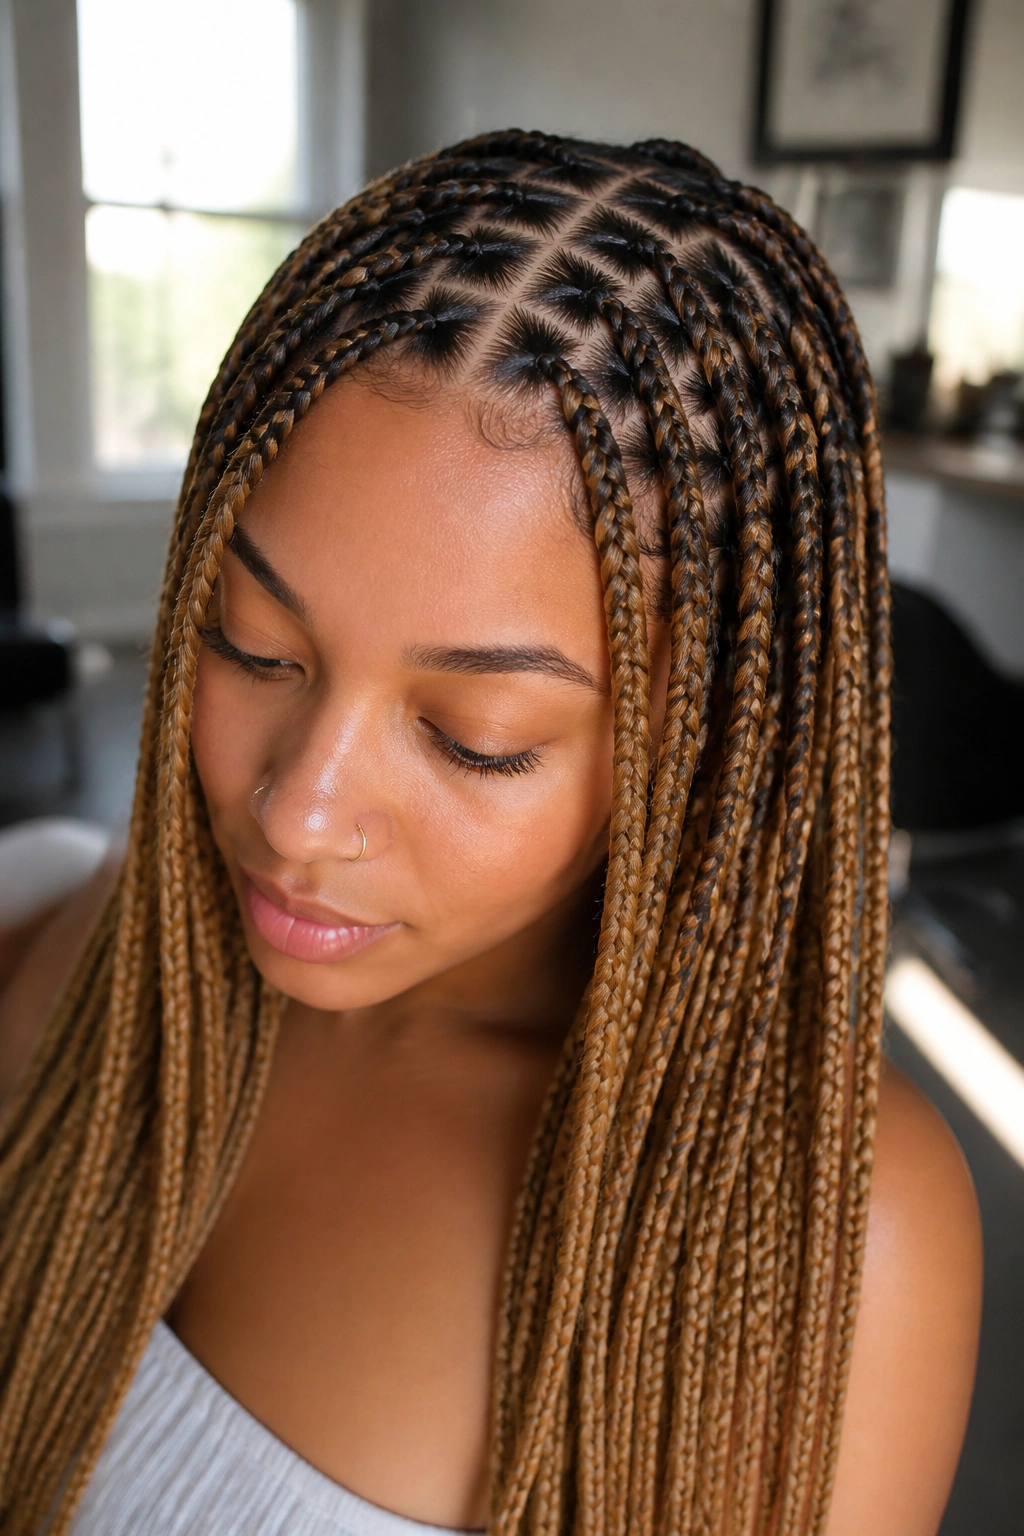
Adding color to small knotless braids can completely change the vibe from “corporate chic” to “summer goddess.” Honey blonde is a particularly forgiving and flattering shade because it complements a wide range of skin undertones. By using an ombre technique—keeping the roots dark and transitioning to blonde—you avoid the harsh look of a solid bright color against the scalp, which can sometimes look unnatural.
Starting with your natural hair color at the root and gradually feeding in blonde extensions is the secret to a seamless transition. This approach also makes the triangle parts look more organic. As the blonde hair is woven in, it creates a “flicker” effect throughout the length of the braid, adding depth that solid colors just can’t match. It’s vibrant, it’s warm, and it has a way of making even a simple t-shirt look like a planned outfit.
The practical application here is all about the “feed-in” ratio. For a natural look, the blonde should start appearing about two inches down from the scalp. This ensures that the tension is kept low at the root, which is the whole point of going knotless. Plus, as your hair grows out, the dark roots of the ombre will blend perfectly with your new growth, potentially giving you an extra week or two of wear before the style starts looking “old.”
3. Bohemian Curly Ends with Geometric Precision
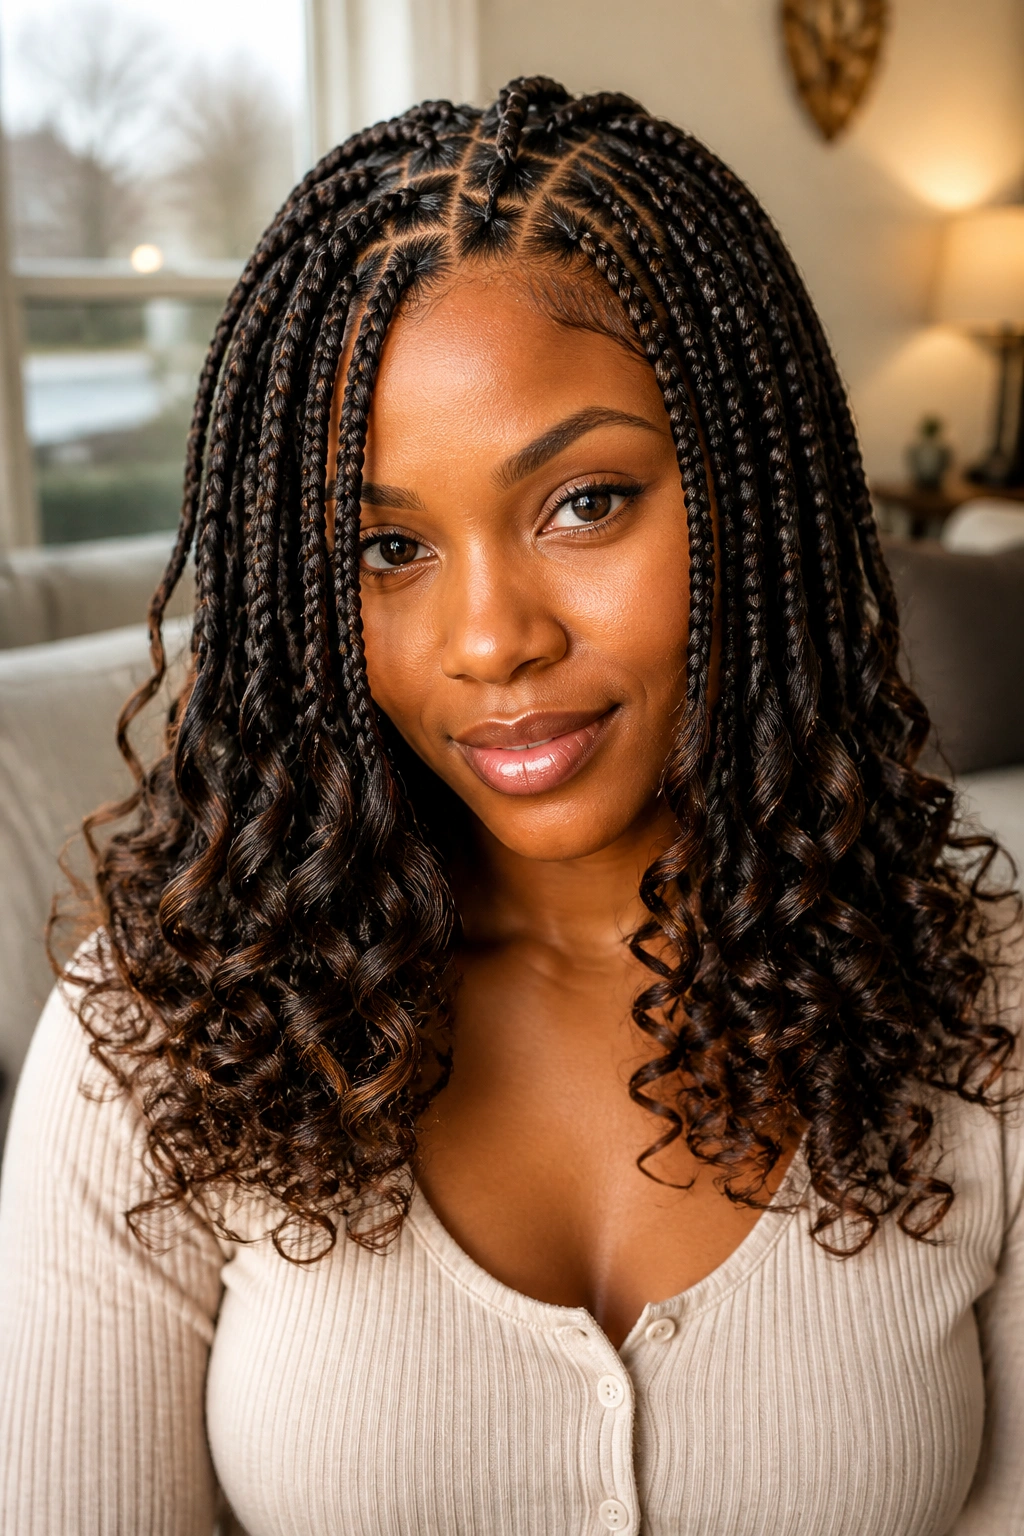
What happens when you mix the strictness of triangle parts with the wild, free-spirited look of curly ends? You get the “Boho” knotless look, and it is currently one of the most requested variations for a reason. By leaving the last three to four inches of the braid unplaited and using a hot-water set or pre-curled human hair, you soften the overall aesthetic. The result is a style that feels romantic and “undone,” despite the hours of work that went into it.
Does This Style Require More Maintenance?
Yes, it absolutely does. Unlike fully braided ends that you can just dip in hot water and forget, curly ends need a bit of daily love. You’ll want to keep a small bottle of mousse or a lightweight leave-in conditioner nearby to keep the curls from tangling or turning into a matted mess. However, the trade-off is a look that has incredible volume and a soft, feminine silhouette that frames the face beautifully.
How to Style the Curls
- Daytime: Let them hang loose to show off the texture contrast.
- Nighttime: Loosely braid the curly ends together in 4-5 large sections to prevent matting while you sleep.
- Refresh: Use a wide-tooth comb and a bit of water to detangle the ends every other day.
4. Goddess Triangles with Human Hair Inserts
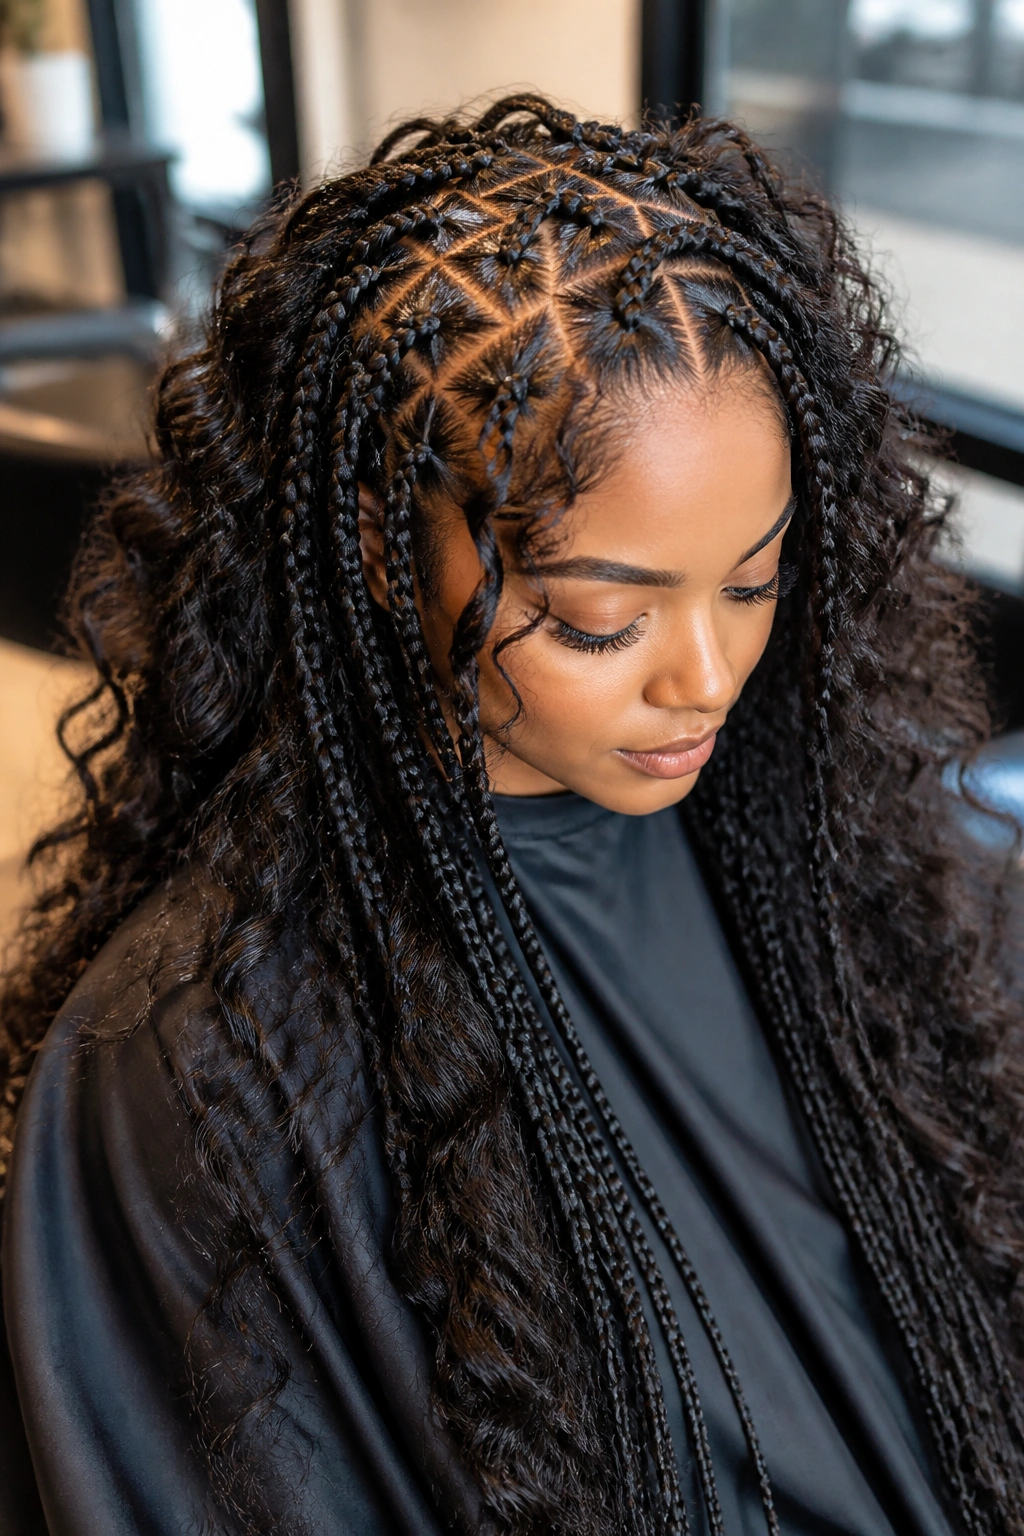
The “Goddess” variation takes the boho look a step further by weaving loose strands of hair into the sides of the braids themselves, not just at the ends. When you do this with small triangle parts, you end up with a massive amount of volume. It creates a “cloud” of hair that looks incredibly luxurious. Using human hair for the loose pieces is non-negotiable here; synthetic hair will tangle within 48 hours of constant friction against your clothes.
The beauty of this style is in the “peek-a-boo” curls that sprout from the braids. Because the parts are triangular, the curls fall at different angles than they would with square parts, giving the hair a more multi-dimensional, 360-degree appeal. It’s a high-maintenance look, but it’s the closest thing to a “braided weave” you can get. You get the protection of braids with the glamour of long, flowing waves.
Pro tip: Focus the curly inserts around the face and the top layers of the hair. You don’t need as many in the back or the bottom layers, which helps reduce the weight and the potential for tangling at the nape of the neck.
5. Rich Burgundy and Deep Red Wine Tones
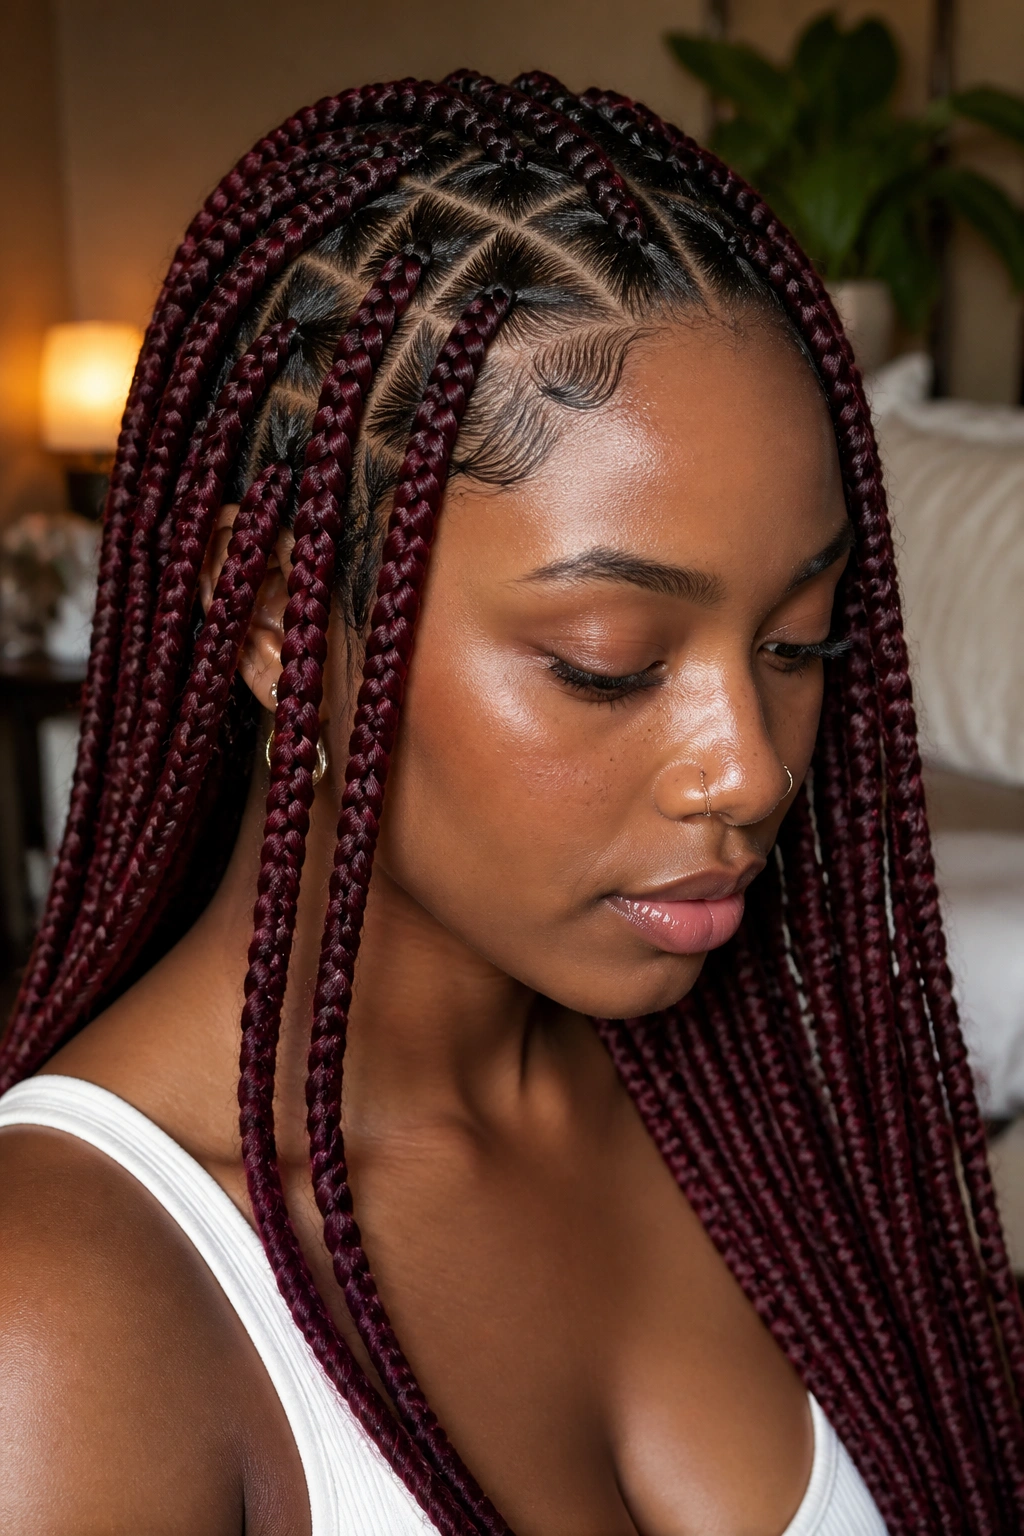
Red is a power color, but for many, a bright fire-engine red feels a bit too loud. Enter burgundy. It’s a sophisticated, “grown-up” way to experiment with color. In a small triangle-part style, burgundy hair takes on a regal quality. It catches the light in a way that black hair doesn’t, highlighting the intricate “over-under” pattern of each individual braid.
Unlike lighter colors that can sometimes look “plastic-y” in synthetic form, deep reds often have a more natural-looking luster. This color works exceptionally well for the triangle-parting system because the red tones create a soft shadow effect on the scalp. It’s less about the stark contrast of black and white and more about a harmonious, tonal look that feels warm and inviting.
I’ve found that burgundy braids tend to look better as they age. While some colors start to look dull, the “fuzz” of natural hair that eventually peeks through the braid blends into the red tones more gracefully than it does with bright blondes or neons. It’s a great choice for someone who wants to stand out without feeling like they’re wearing a costume.
6. Platinum Accents on a Dark Base
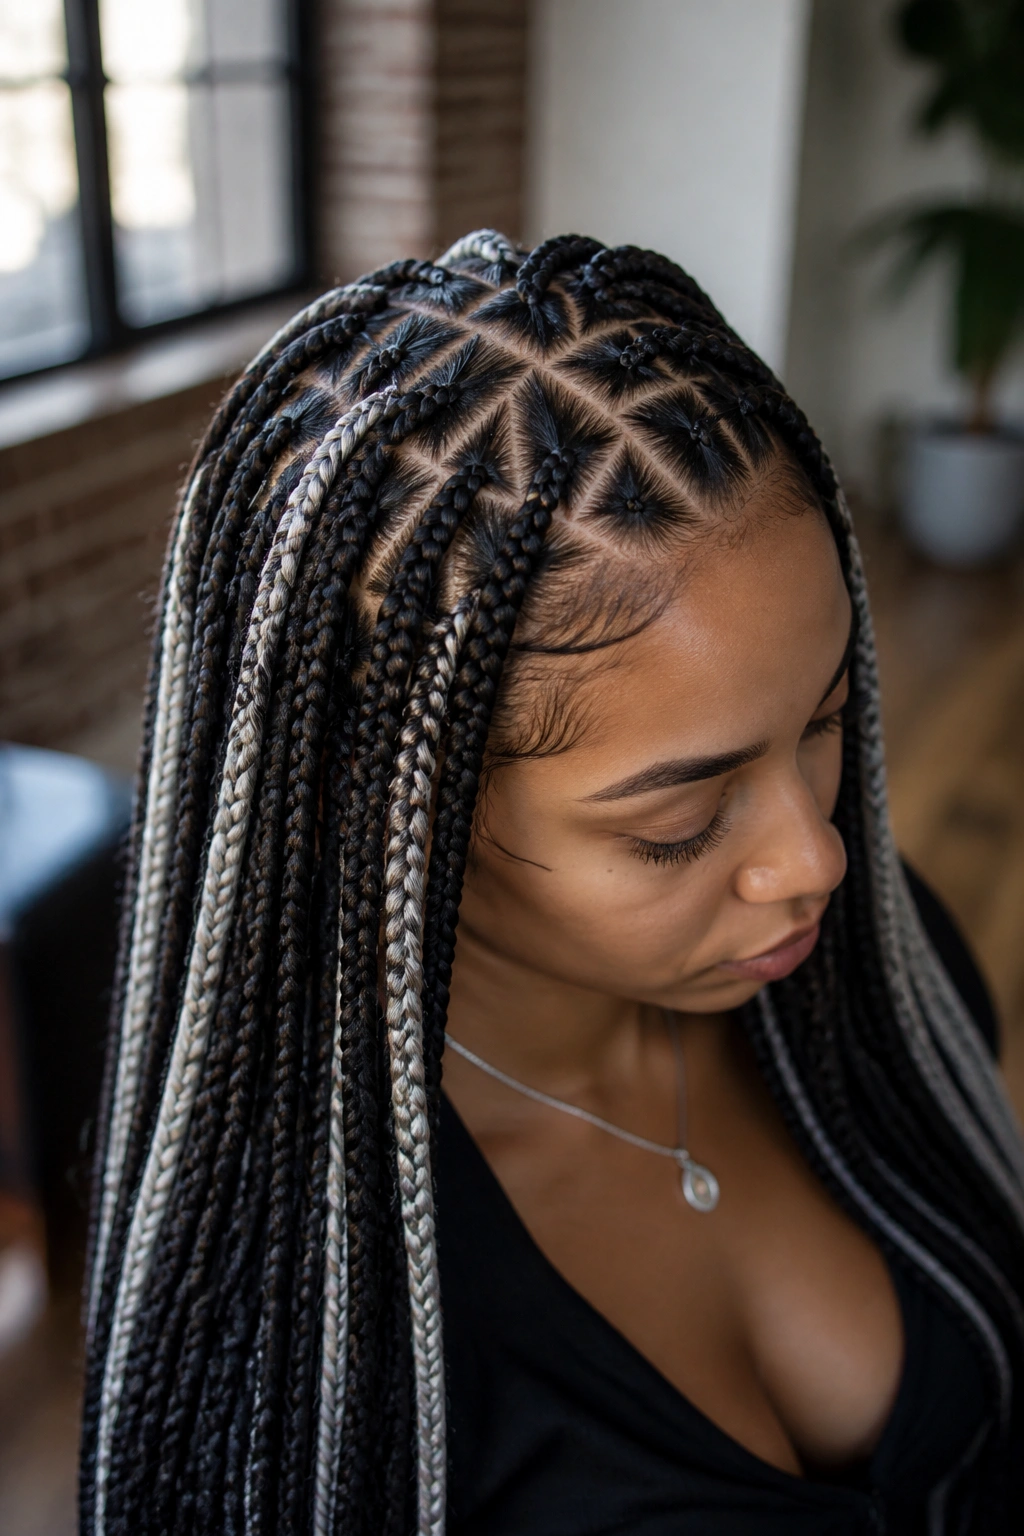
If you’re not ready to go full blonde, platinum accents—often called “skunk stripe” or “money piece” highlights—are the perfect middle ground. By placing a few small, platinum-colored braids right at the hairline or scattered throughout the back, you create a high-fashion, edgy look. The triangle parts add to this futuristic vibe, making the style look very “editorial.”
The Visual Mechanism of Highlights
By scattering the color, you break up the visual weight of the hair. If you have very dense hair, a solid block of dark braids can look heavy. Adding platinum pieces acts as a “light source,” drawing the eye to specific areas and making the style feel more dynamic. It’s a technique borrowed from traditional hair coloring and it works brilliantly in the world of braiding.
Who Should Try This?
- Trend-seekers: Those who want a look that feels current and bold.
- The Undecided: If you’re nervous about blonde, starting with 5-10 accent braids is a safe test.
- The Low-Maintenance: Since the base is dark, you don’t have to worry about your natural roots showing.
7. Tucked Ends for a Blunt, Polished Finish
Most people leave the ends of their braids thin and tapered, but there is a growing movement toward “tucked” or “blunt” ends. This involves braiding all the way to the very tip and then sealing it in a way that keeps the diameter of the braid consistent from root to tip. When combined with small triangle parts, this creates a very structured, almost architectural look.
This style is for the person who loves clean lines above all else. There is no “frizzle” at the end, no wispy bits—just solid, uniform cylinders of hair. It feels heavier than tapered ends, but it also stays looking “new” for much longer. Because the ends are sealed tightly, they don’t unravel or get “fuzzy” after a few weeks of rubbing against your sweaters or coats.
To get this right, your stylist needs to be very skilled at the “tuck” method—hiding your natural hair inside the extension hair as they reach the end. If your natural hair is longer than the braids, this style won’t work well, as the ends of your real hair will eventually poke out. This is best suited for those whose natural hair ends at least four inches before the braid does.
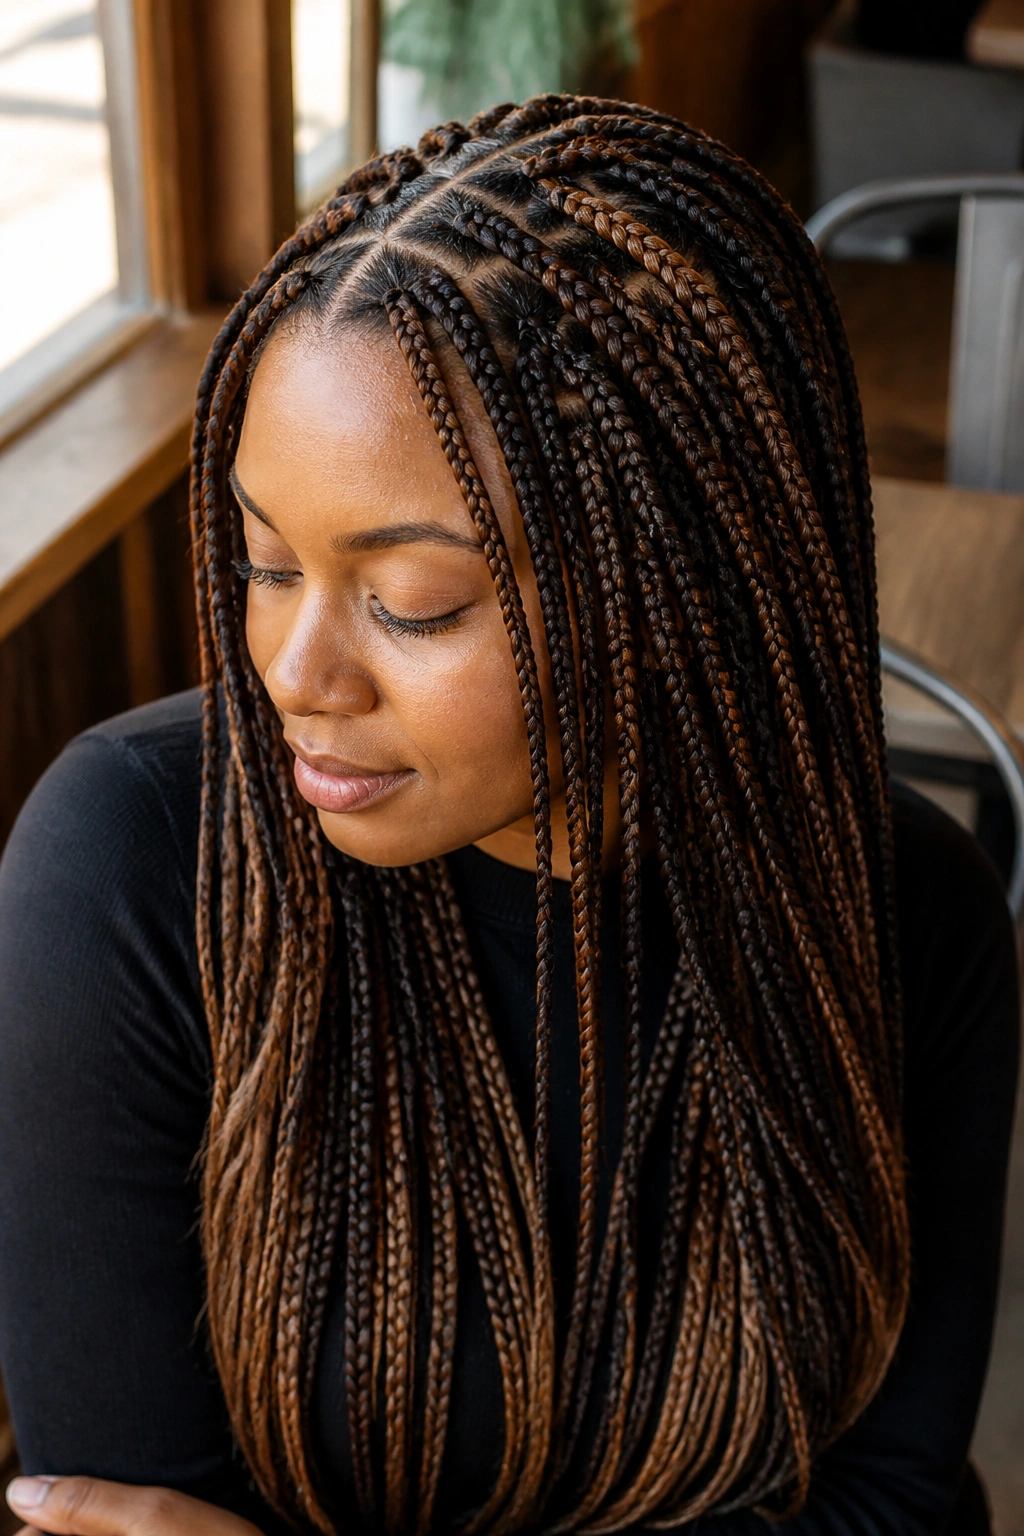
8. The “Bronde” Mix: Brown and Blonde Dimensions

“Bronde” is that perfect, sandy mixture of light brown and honey blonde that looks like you’ve spent a month at the beach. In the context of small knotless braids, this is achieved by mixing two or three different shades of hair together before braiding. This creates a “twine” effect where every braid has multiple colors swirling through it. It is, in my opinion, the most natural-looking way to do colored braids.
Triangular parts help this color mix shine because they allow the hair to fall in a more randomized, natural pattern than square parts do. When you move your head, the different shades of brown and blonde catch the light, creating a shimmering effect. It’s less “stripey” than highlights and more of a cohesive, sun-kissed glow.
From a practical standpoint, this mix is excellent at hiding the transition between your natural hair and the extensions. Because there are so many colors involved, any slight mismatch in texture or shade is completely camouflaged. It’s a sophisticated choice that works as well in a courtroom as it does at a music festival.
9. Royal Blue Peek-a-boo Highlights
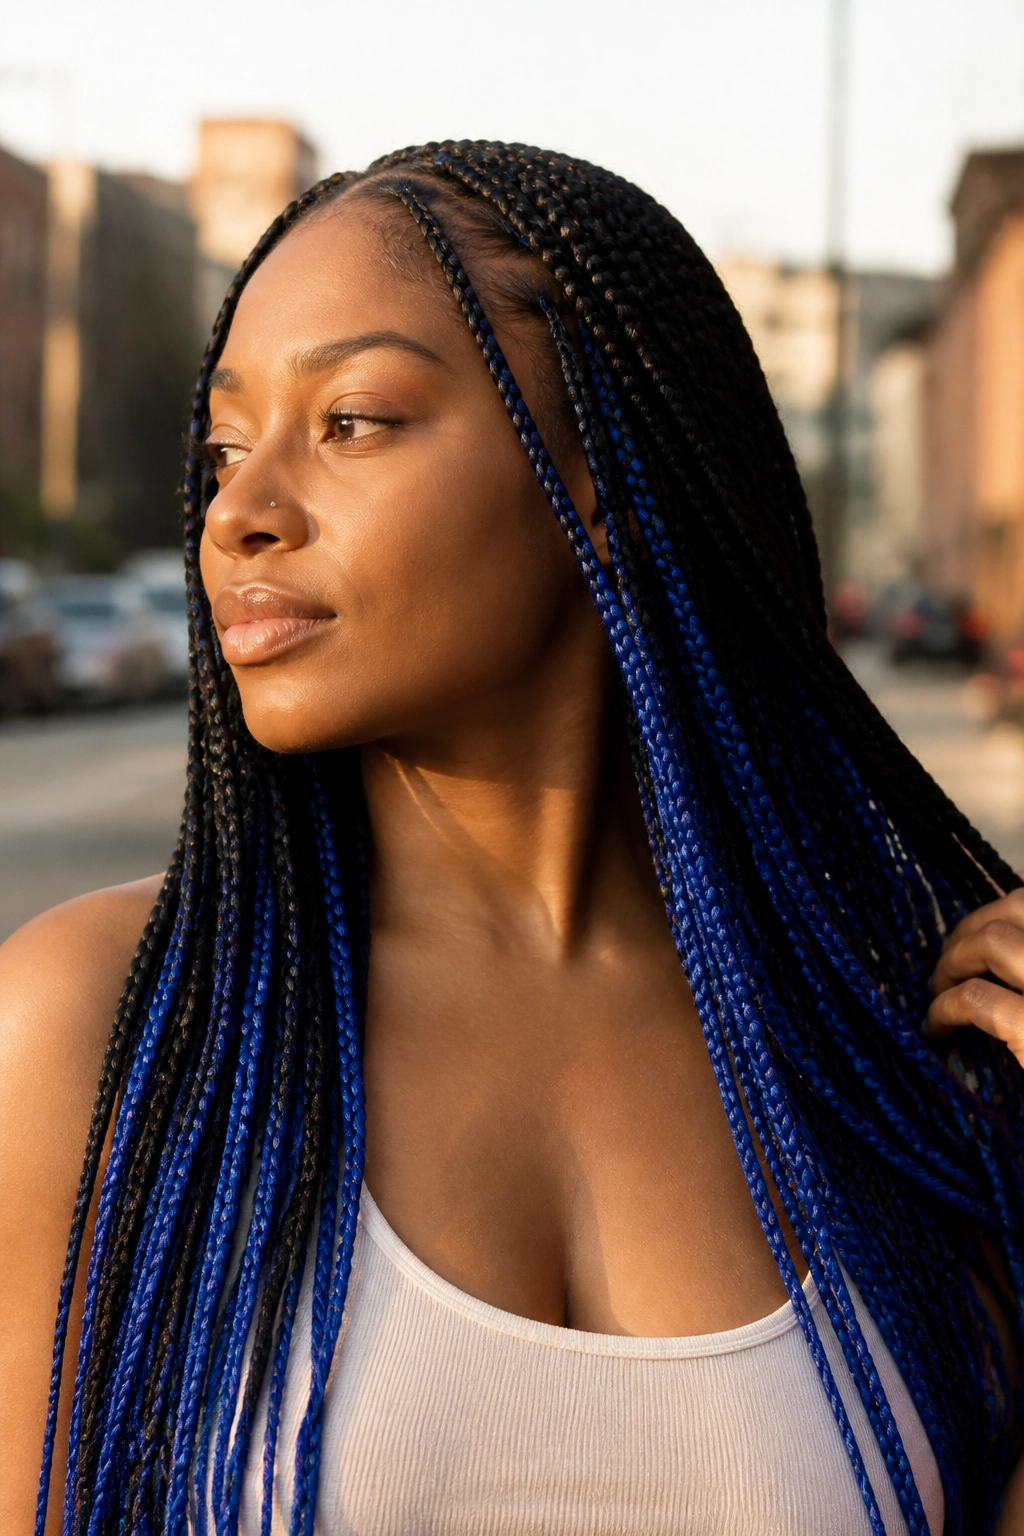
Sometimes you just want a bit of “main character” energy. Royal blue is a stunning choice for dark hair because it’s a cool-toned color that doesn’t feel overly “loud” until the light hits it just right. By placing the blue braids in the bottom layers (the “peek-a-boo” style), you only see the color when the hair is in motion or when you pull it up into a half-up, half-down style.
Why It Works with Triangles
The geometry of triangle parts means that the “layers” of your braids are shifted. This allows the peek-a-boo colors to show through more readily than they would with a traditional grid. You get these little flashes of electric blue that highlight the sharp angles of your parts. It’s a subtle way to be bold.
Color Coordination
- Outfit: Looks incredible with denim or crisp white shirts.
- Skin Tone: Cool-toned blues look best on those with neutral or cool undertones.
- Maintenance: Blue synthetic hair can sometimes bleed slightly if it gets wet, so be careful with white pillowcases for the first few days!
10. Pastel Pink and Lavender Dream Triangles
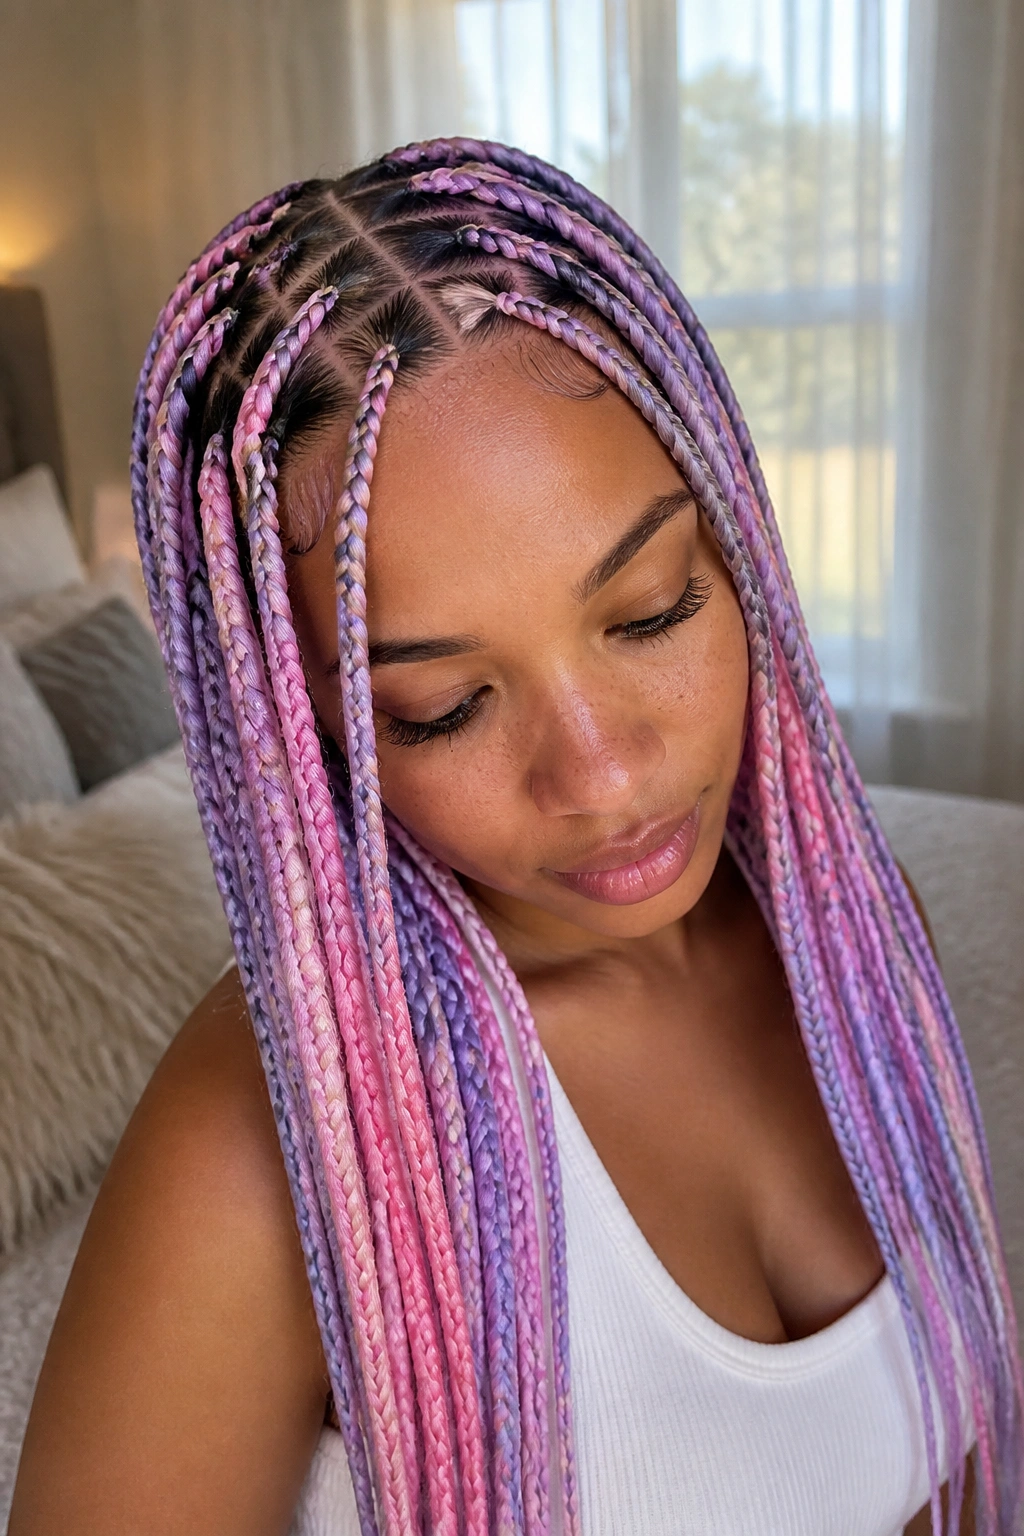
We are seeing a massive surge in “soft girl” aesthetics, and nothing fits that vibe better than pastel-colored braids. Small triangle parts in a soft rose pink or a dusty lavender feel whimsical and modern. It’s a departure from the “toughness” sometimes associated with long braids, replacing it with something airy and light.
This is a high-commitment color. Unlike dark burgundy or bronde, pastel hair will show every single stray flyaway. You have to be meticulous with your edge control and your nighttime routine. However, the visual payoff is massive. There is something undeniably cool about the contrast between the sharp, aggressive geometry of triangle parts and the soft, “candy-floss” colors of the hair itself.
If you’re going this route, I highly recommend using a “clear” braiding gel rather than a colored one. Any residue from a dark or amber-colored gel will be immediately visible against the light pink hair, ruining that clean, pastel look. Keep it fresh, keep it clean, and be prepared for a lot of people asking to take photos of your hair.
11. Caramel Swirl Highlights for Warm Complexity
Caramel is the cousin to honey blonde, but with more red and brown undertones. It’s a “richer” color that feels very expensive. When swirled through small black or dark brown braids, it creates a look reminiscent of a high-end salon dye job. The triangle parts provide the perfect “grid” to showcase this color complexity.
How to Achieve the “Swirl”
Instead of doing a full braid in caramel, have your stylist feed in the caramel hair alongside the black hair from the very beginning. This creates a “marbled” look within each braid. It’s a more subtle way to do color than chunky highlights, and it looks incredibly professional. It adds a level of sophistication that makes the style feel like a permanent part of your look rather than a temporary protective style.
Styling Recommendations
- The Bun: A high bun with marbled braids looks like a piece of art, showcasing all the different tones.
- The Side Sweep: Pushing all the braids to one side emphasizes the color transition across the crown.
- Accessories: Gold hair cuffs or rings look phenomenal against caramel tones.
12. Extra-Long, Floor-Sweeping Lengths

If you have the patience to sit in the chair and the neck strength to carry them, floor-sweeping or “butt-length” braids are the ultimate flex. When you combine this extreme length with small diameters and triangle parts, you’re basically creating a cape of hair. It’s a high-fashion, high-drama look that demands attention.
The secret to pulling off this length without losing your edges is the knotless technique. Because the hair is fed in slowly, the weight is distributed down the length of the braid rather than being concentrated at the root. However, you still need to be careful. Small braids at this length can be heavy, especially when wet. I always tell people: if you go this long, your “wash day” is going to be a “wash weekend.”
The triangle parts are actually a functional choice for extra-long braids. The angles of the triangles allow the braids to sit closer together at the root without feeling crowded, which gives you that full, dense look that long hair needs to look intentional. It’s a regal, statuesque style that makes you feel like royalty every time you walk into a room.
13. Beaded Geometric Ends
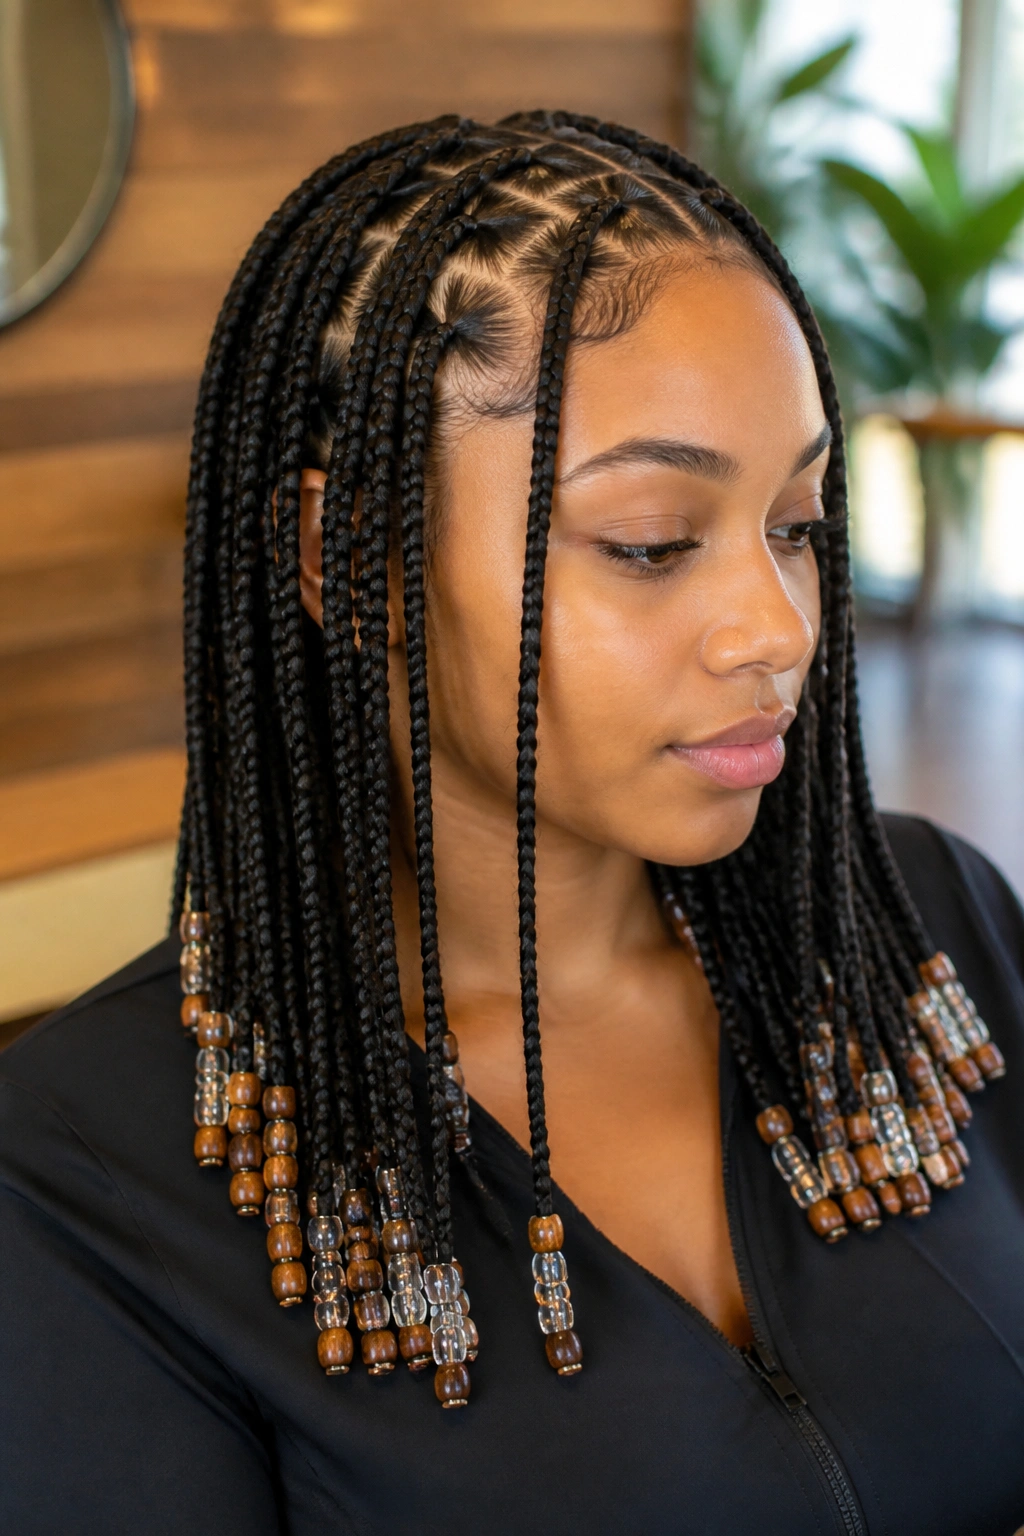
For a bit of a throwback to traditional African styles, adding beads to the ends of your small triangle-part braids is a fantastic way to add personality and a bit of “clink.” You can go with classic wooden beads for an earthy feel or clear “ice” beads for something more modern. The weight of the beads also helps the braids hang straight, emphasizing the sharp lines of your triangle parts.
The “small” size of the braids allows you to use smaller, more delicate beads that won’t feel like a workout for your neck. You can create patterns with the colors or keep it monochromatic for a sleeker look. It’s a rhythmic style—the sound of the beads moving is as much a part of the experience as the look itself.
Pro tip: Use a bead loader and secure the ends with small, clear rubber bands. To avoid the beads falling off, double-wrap the band and then “tuck” the very end of the braid back up into the last bead for a clean, professional finish.
14. Grey and Silver for Mature Sophistication
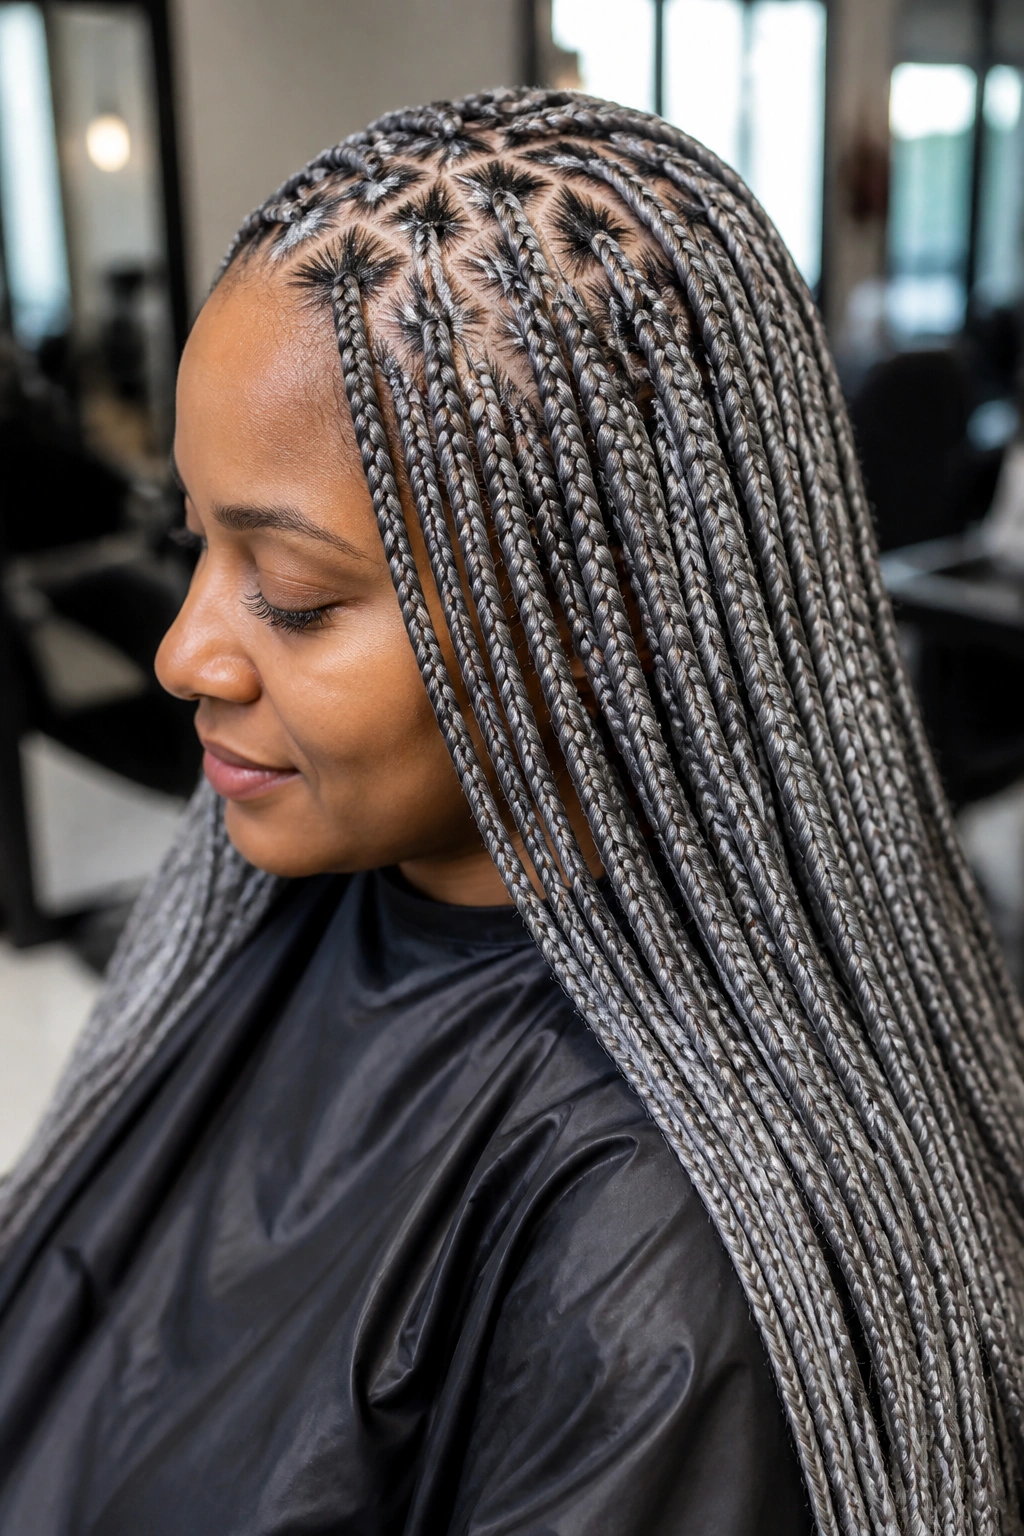
Grey hair is no longer something to hide; it’s a fashion choice. We are seeing more and more people—both young and old—opting for silver or “salt and pepper” braids. Small triangle-part knotless braids in grey are incredibly striking. The silver hair reflects light brilliantly, and the triangle parts give the style a contemporary edge that keeps it from feeling “dated.”
For those transitioning to their natural grey, this is the perfect protective style. You can match the extension hair to your natural silver roots, making the grow-out process completely seamless. It’s a way to embrace the change while still having the length and volume you love. The triangle parts add a bit of “zip” to the look, making it clear that this was a deliberate, stylish choice.
Silver hair can sometimes be a bit coarser than other colors in synthetic form, so make sure your stylist is using a good amount of moisturizing mousse to keep the braids looking sleek rather than “crunchy.” A little bit of oil sheen at the end will make that silver glow like actual metal.
15. Neon Green for the Festival-Ready Bold

This is for the daring. Neon green, “slime” green, or “electric lime” is a color that refuses to be ignored. When you combine such a loud color with the disciplined, sharp lines of small triangle parts, the result is something that looks almost digital. It’s very “cyberpunk” and perfect for summer festivals or anyone who lives life out loud.
The contrast between the bright green hair and the dark lines of the scalp creates a stunning visual map. It’s one of those styles that people will stop you on the street to ask about. Because it’s such a bright color, the triangle parts need to be flawless. Any crooked line will be magnified by the neon hair.
If you’re worried about the color being too much, you can do a “gradient” look where only the bottom half of the braids are neon. But honestly? If you’re going neon, go all the way. It’s a temporary style, and there’s no better time to experiment with the wildest colors on the spectrum.
16. Copper Sunset Vibrancy
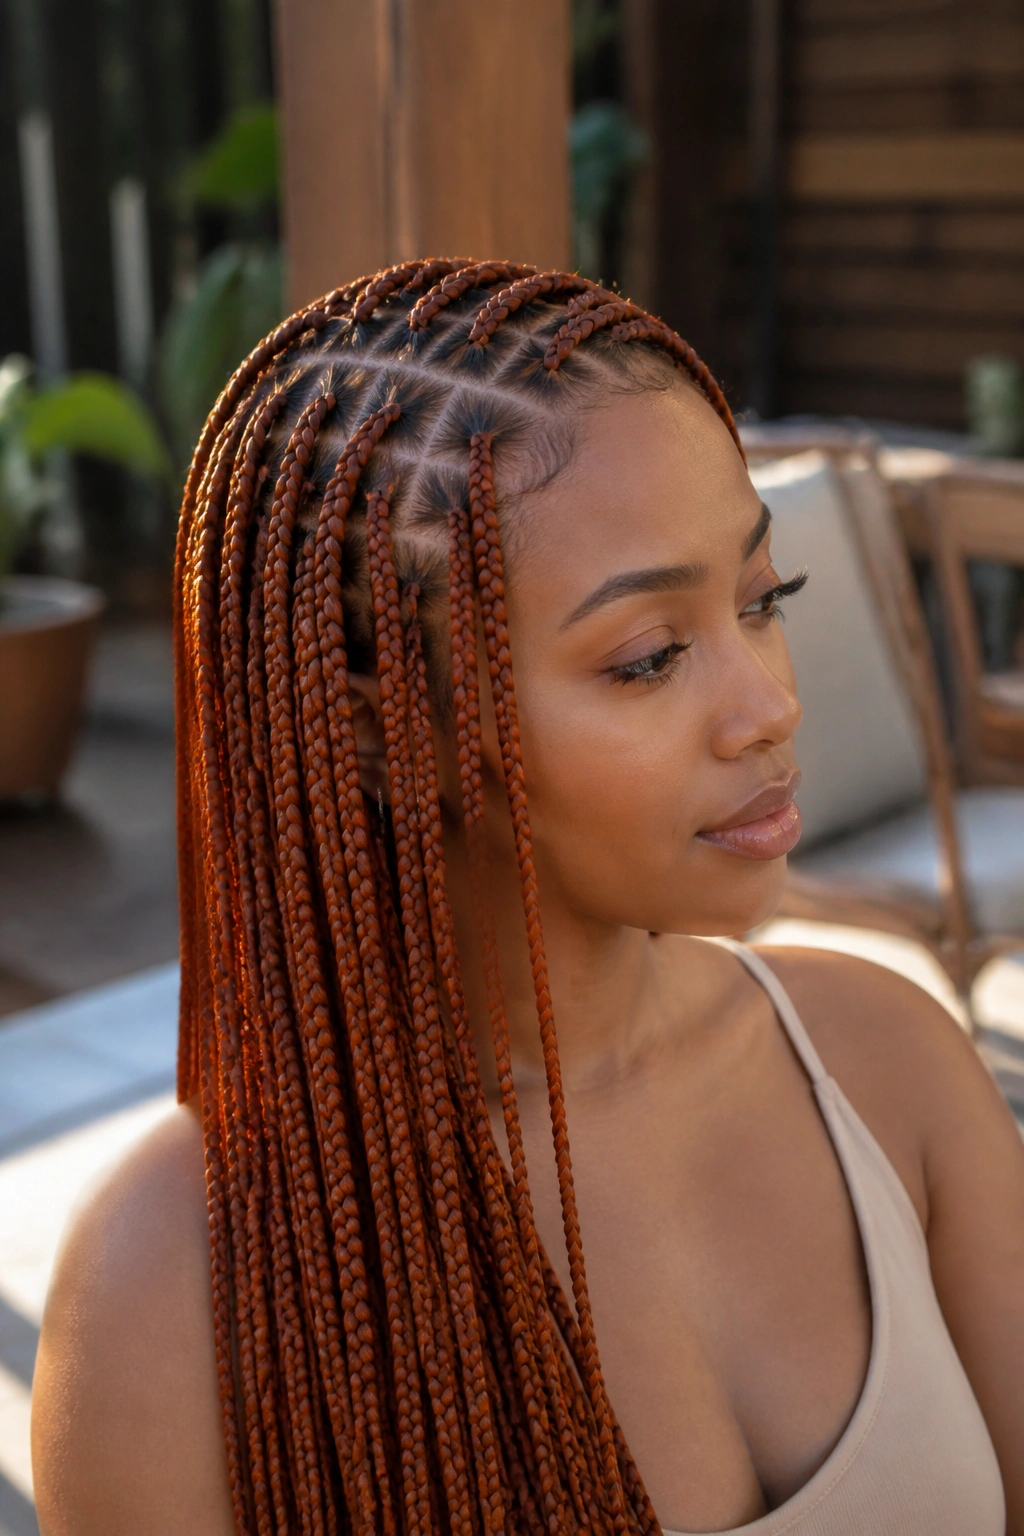
Copper is the trend that won’t quit. It’s warmer than burgundy but more grounded than bright orange. It’s a “natural” red that looks incredible against deep skin tones. In small triangle-part braids, copper hair looks like a sunset. It has a glow that feels both earthy and high-fashion.
The beauty of copper is its versatility. You can go for a metallic, shiny copper or a more “matte” ginger shade. Both look fantastic with the geometric parting. The triangle parts break up the color, allowing glimpses of the scalp which, in this case, helps ground the bright copper tones and makes the whole look feel more cohesive.
This is a great color for people who want to transition from black or brown but aren’t quite ready for the maintenance of blonde. Copper is much more forgiving and tends to stay looking vibrant for the full six weeks of the style’s lifespan.
17. Midnight Purple for a Royal Touch
Deep purple is a color of mystery and luxury. Unlike bright violet, midnight purple looks almost black until the light hits it. This “hidden” color is perfect for someone who wants a professional look with a secret. The small triangle parts add to the sophisticated feel, giving the hair a structured, polished silhouette.
As a stylist, I love working with deep purples because they have a naturally high shine. When you braid them small and knotless, they create a “sheen” across the head that looks incredibly healthy. The triangle parts provide the perfect geometric canvas for this rich color to shine.
It’s a great choice for those with cool skin undertones. Pair it with silver hair accessories to lean into that “galactic” look, or keep it plain for a subtle, elegant vibe. It’s one of those colors that people have to look twice at to really “see,” which is half the fun.
18. Mixed Multi-Tonal Earthy Browns
If “nature” were a hairstyle, this would be it. By mixing shades of dark chocolate, chestnut, and coffee brown, you create a look that has incredible depth without any “artificial” brightness. It’s the ultimate “quiet luxury” braiding style. The small triangle parts keep it modern, while the earthy colors keep it timeless.
This multi-tonal approach is much more interesting than a solid brown. Each braid looks slightly different, mimicking the way natural hair has various highlights and lowlights. The triangle parts are the “structure” that holds all this organic color together. It’s a balanced, beautiful look that works for every occasion imaginable.
This is also the best style for anyone concerned about “frizz.” Because the colors are so close to natural hair tones, any little bits of your own hair that escape the braid over time will just look like part of the color mix. It’s the lowest-maintenance color option on this list, but arguably one of the most beautiful.
Preparing Your Hair for the Long Haul
A style as intricate as small triangle-part knotless braids requires a foundation of healthy hair. You cannot simply show up to the salon and hope for the best. The preparation starts at least a week before you sit in the chair. You want your hair to be at its strongest because, while knotless braids are gentler, they are still a long-term weight on your follicles.
Start with a deep-conditioning treatment or a light protein treatment a few days before your appointment. This ensures the hair shaft is reinforced and hydrated. On the day of, make sure your hair is freshly washed and completely free of heavy oils or butters. While it seems counterintuitive, most stylists need “naked” hair to get the best grip and the cleanest parts. If your hair is too greasy, the parting won’t be as crisp, and the braids may slip.
Stretching your hair is the final, crucial step. Whether you use a blow dryer with a comb attachment or the “banding” method, having your hair stretched reduces the amount of “frizz” that will occur during the braiding process. It also helps the stylist see the true length of your hair, ensuring they feed in the extensions at the right points to protect your ends.
Maintaining the Geometry and Scalp Health
Once you have these beautiful braids, the real work begins. The “curse” of the triangle part is that it exposes more of your scalp than traditional square parts. This means any dryness, flaking, or irritation is going to be front and center. You need a dedicated scalp care routine that doesn’t involve heavy greases that will clog your pores.
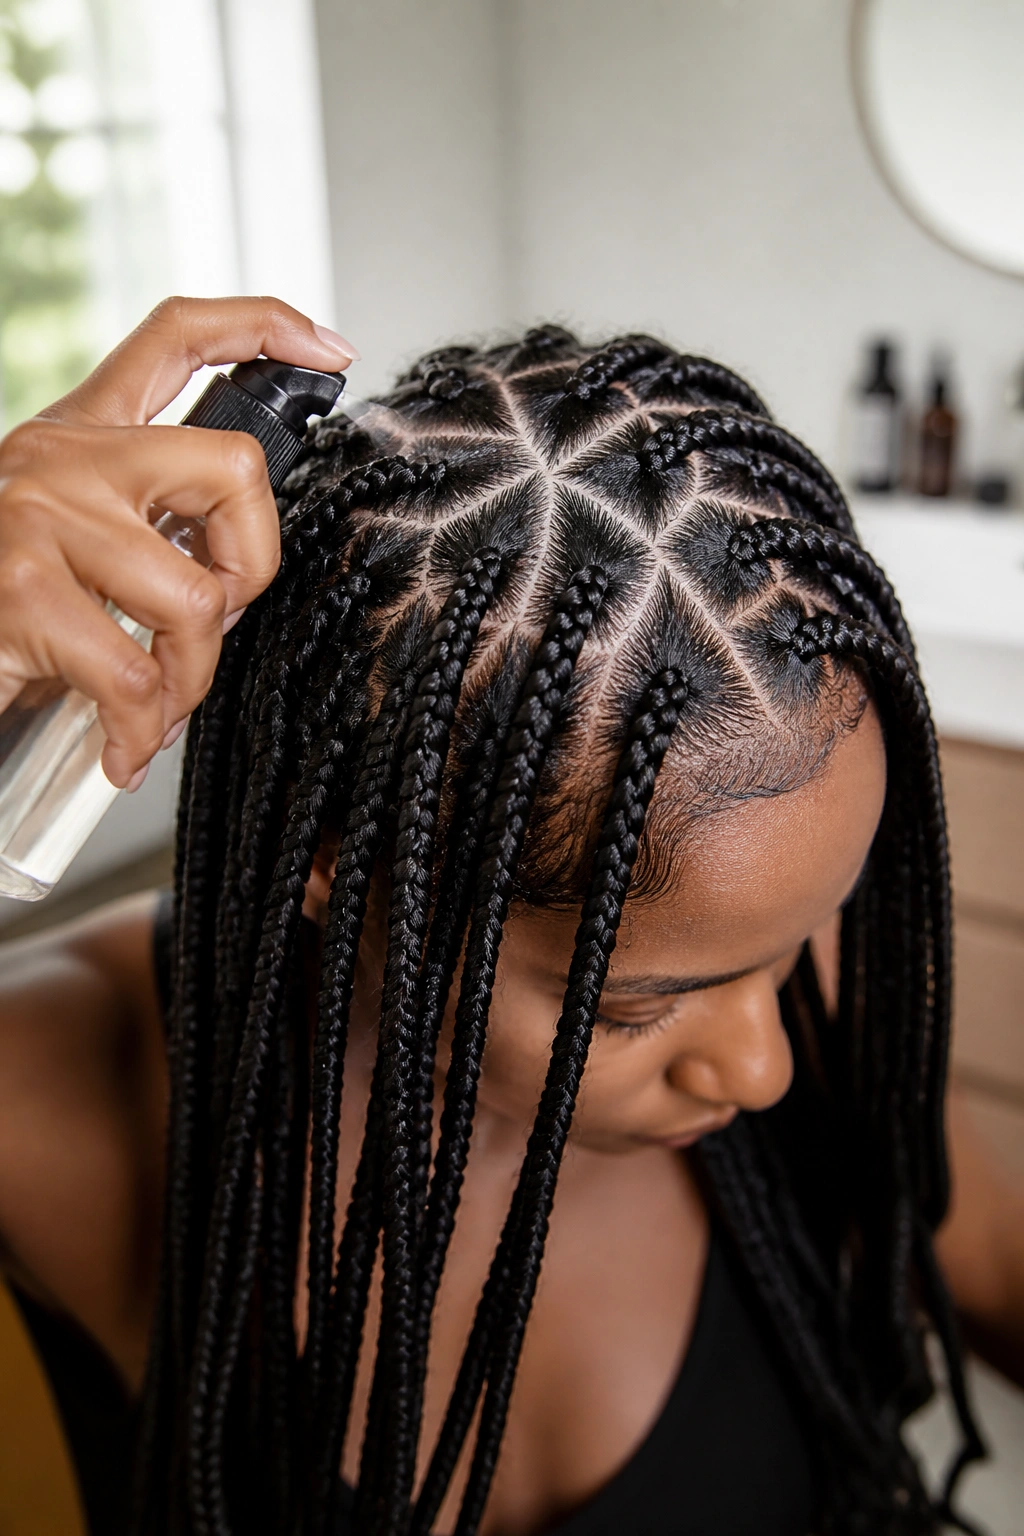
The Scalp Care Checklist
- Hydration: Use a lightweight, watery scalp spray with tea tree or peppermint oil to keep the skin hydrated and itch-free.
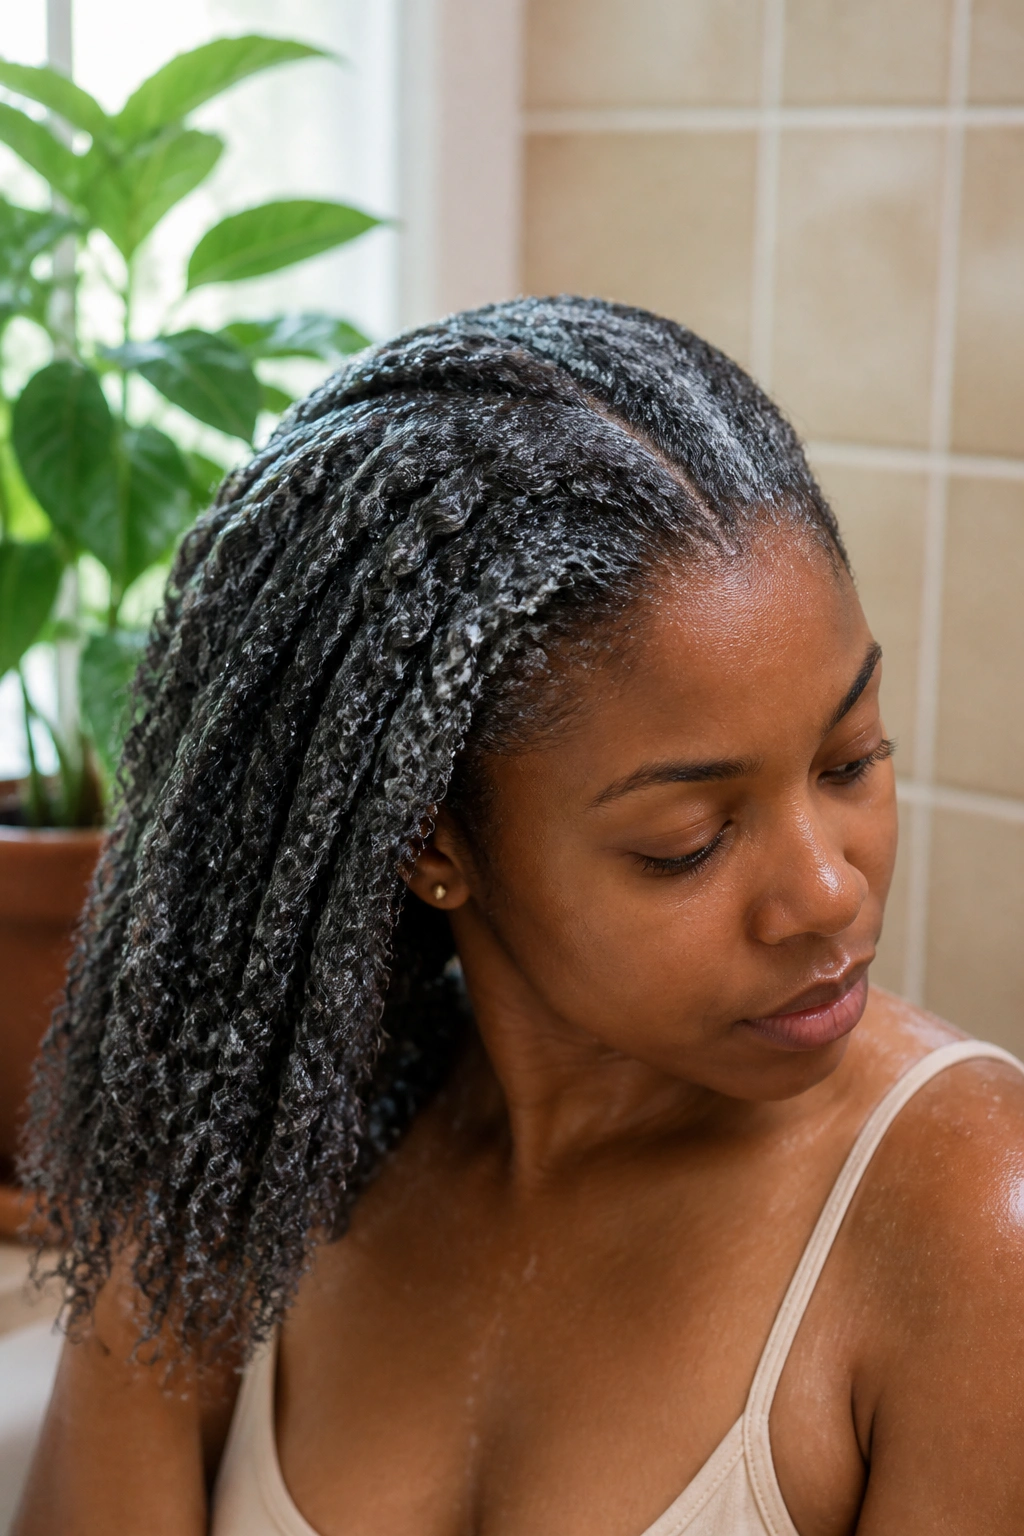
- Cleansing: Don’t be afraid to wash your braids, but do it carefully. Focus a diluted shampoo on the “lanes” of your scalp and rinse thoroughly.
- Drying: This is the most important part. If you get your braids wet, they must be dried completely. Damp braids are a breeding ground for mildew (often called “braid funk”). Use a hooded dryer or a hand dryer on a cool setting.
- Oil: Only apply oil to the scalp if it feels truly tight. A few drops of jojoba or grapeseed oil are usually enough.
The braids themselves need care, too. To keep the “small” diameter looking sleek, apply a foaming mousse once or twice a week and tie them down with a silk or satin scarf until dry. This flattens any flyaways and keeps the braids looking like they were done yesterday.
The Night Routine: Protecting Your Investment
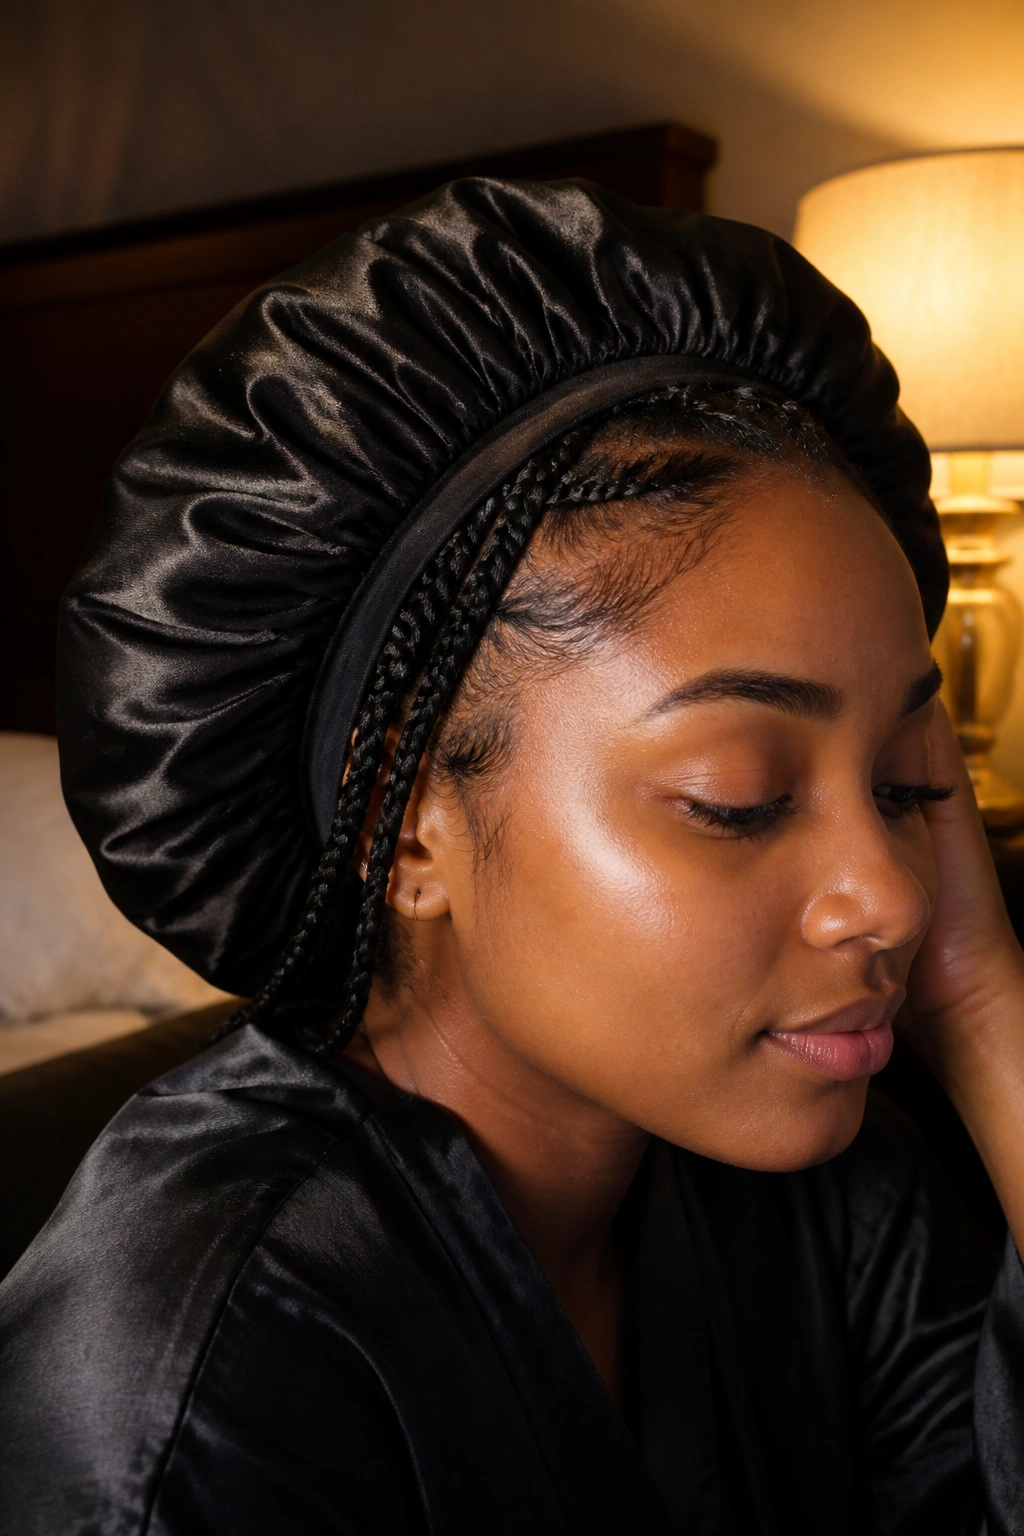
You wouldn’t buy an expensive silk dress and then crumple it up on the floor, and you shouldn’t treat your braids that way either. Your nighttime routine is what determines if your braids last four weeks or eight. Friction is the enemy of the knotless braid. When you rub your head against a cotton pillowcase, you are essentially “sanding” your hair, creating frizz and loosening the tension at the root.
Invest in a jumbo-sized satin bonnet. Because small braids have a lot of volume, a standard bonnet will be too tight and might actually “crush” the parts, making them look messy. Alternatively, you can do two large, loose plaits and wrap your head in a silk scarf. This keeps the braids directed downward, preventing them from tangling or pulling on your edges as you toss and turn.
If you have those boho or goddess curly ends, you have an extra step. You should lightly moisturize the curls and put them in a loose “pineapple” (a high ponytail at the very front of your head) before putting on your bonnet. This prevents the curls from being flattened and matted by the weight of your head.
Safe Removal and Post-Braid Recovery

When the time comes to say goodbye to your braids—usually around the 6-to-8-week mark—do not rush the process. Most hair breakage happens during removal, not while the braids are in. Small braids take a long time to take down, but patience is your best friend here.
How to Take Down Small Braids Safely
- Cut with Caution: If you had extensions added, you can cut the ends of the braids, but only if you are 100% sure where your natural hair ends. When in doubt, don’t cut.
- The “Un-Braid” Tool: Use a rat-tail comb (the tail part) or a specialized take-down tool to gently unweave the hair. Start from the bottom and work your way up.
- Detangle as You Go: This is the golden rule. As you finish each braid, you will find a small “clump” of shed hair and lint at the base. Do not leave this! Gently detangle that section with your fingers and a bit of oil or detangling spray before moving to the next braid. If you wait until the whole head is done to detangle, you will end up with a massive, matted knot.
- The Deep Clean: Once all the braids are out, do a thorough clarifying wash to remove all the product buildup and shed hair. Follow this with a heavy-duty deep conditioning mask.
Your hair needs a break after a style this small. Give your scalp at least two weeks (ideally four) to breathe and recover before jumping back into another braided style. This prevents “traction alopecia” and keeps your follicles strong and healthy for the long term.
The Bottom Line
Small triangle-part knotless box braids are more than just a trend; they are a sophisticated evolution of a classic protective style. They offer a level of detail and aesthetic precision that square parts simply can’t match, while the knotless technique ensures your hair health isn’t sacrificed for the sake of beauty. Whether you go for a classic black, a vibrant neon, or a soft bohemian mix, the key to success lies in the details—from the sharp angles of the parts to the consistency of the tension.
This style is an investment of time, money, and care. It requires a skilled hand to create and a disciplined routine to maintain. But for those who value the intersection of geometry and glamour, there is no better choice. It’s a look that feels personal, professional, and undeniably powerful. By choosing the right color, length, and texture, you can tailor this style to reflect exactly who you are, all while giving your natural hair the protection it needs to thrive. Keep your scalp hydrated, your edges protected, and your parts crisp, and you’ll find that these braids aren’t just a hairstyle—they’re a confidence booster that lasts for months.