Grey highlights can change box braids faster than a haircut can. A few silver strands threaded through a dark base make grey highlighted box braids look sharp, cool, and a little bit tailored — even when the braid pattern stays simple.
The trick is placement. Thin gray ribbons, smoky ombré ends, face-framing money pieces, or a soft salt-and-pepper blend each give the same protective style a different mood, and the difference is bigger than most people expect. One version reads polished and clean. Another feels edgy. Another looks almost soft enough to wear with a white T-shirt and no other accessories, which is honestly my favorite kind of hair look.
A lot of people worry gray will look flat or too mature. Braids solve that problem better than loose hair does, because the texture catches light in a dozen tiny ways. Silver, ash, charcoal, platinum — those tones do not sit still. They shift every time you turn your head.
The styles below lean into that movement from different angles. Some are bold, some subtle, some a little more playful than they probably need to be. That range is the fun part.
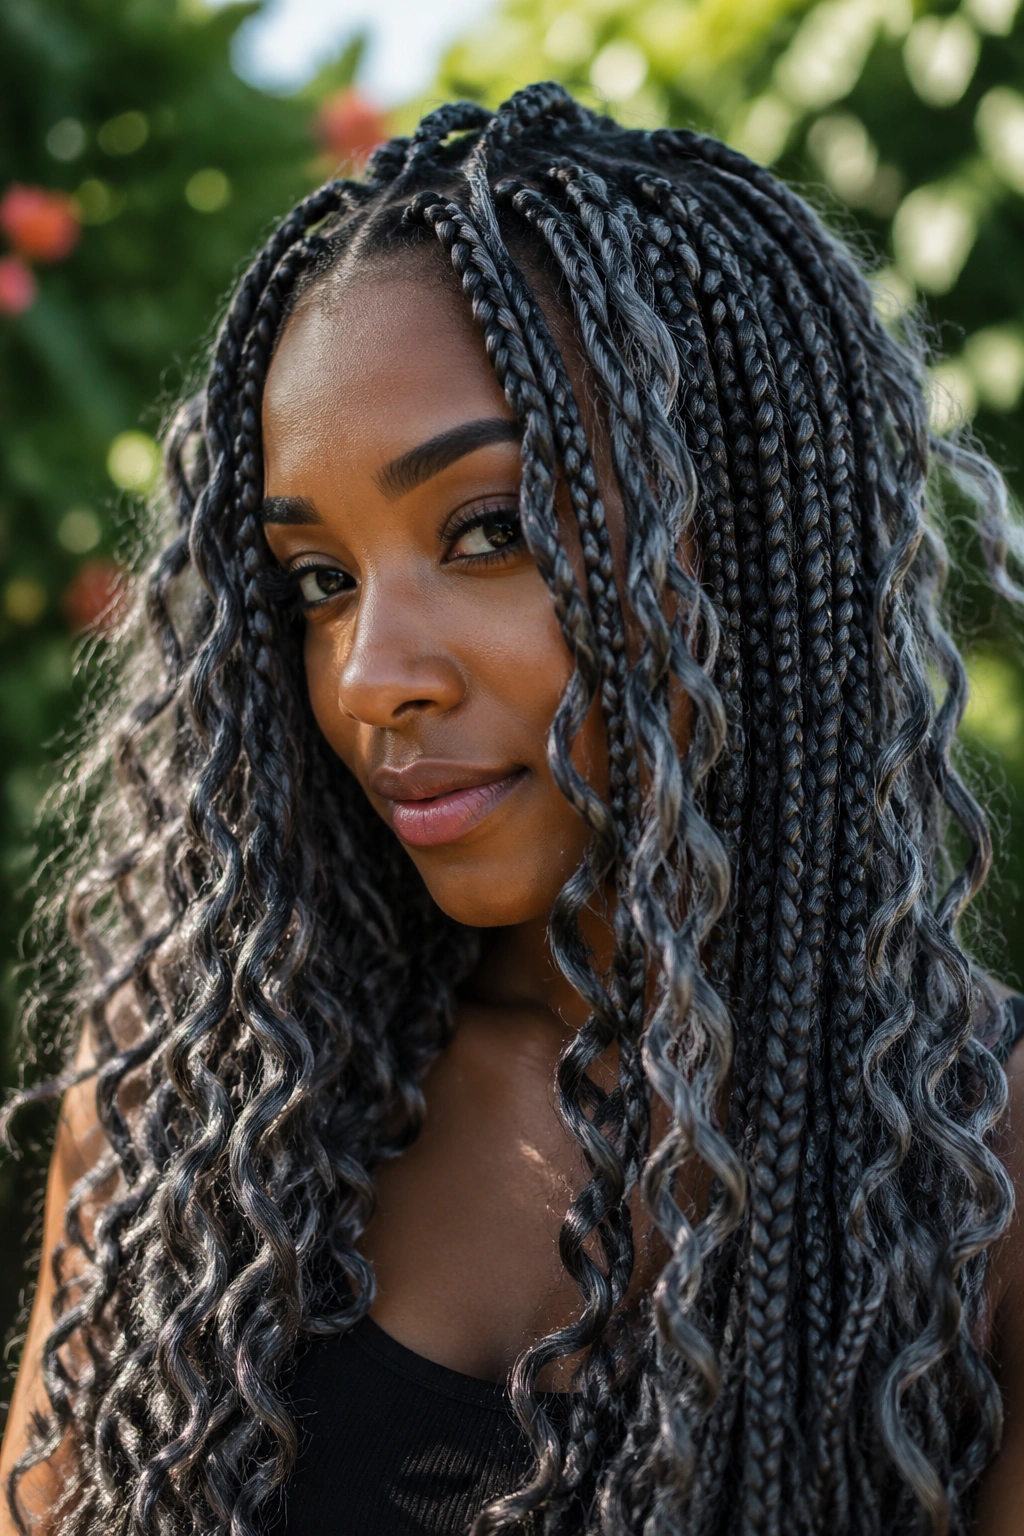
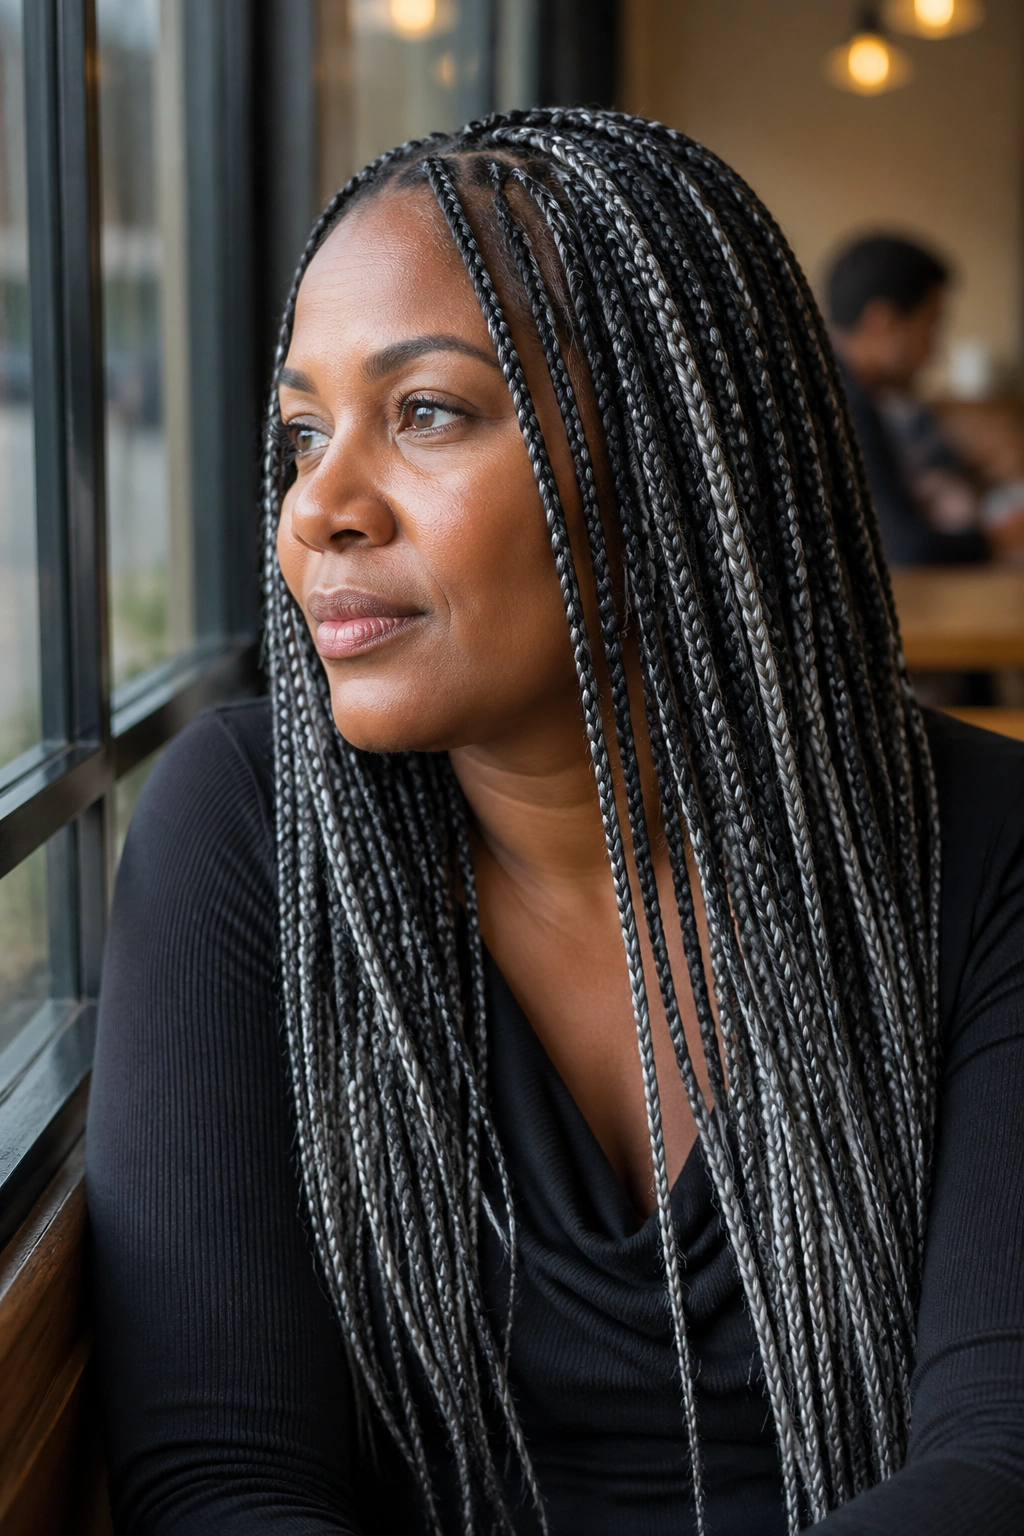
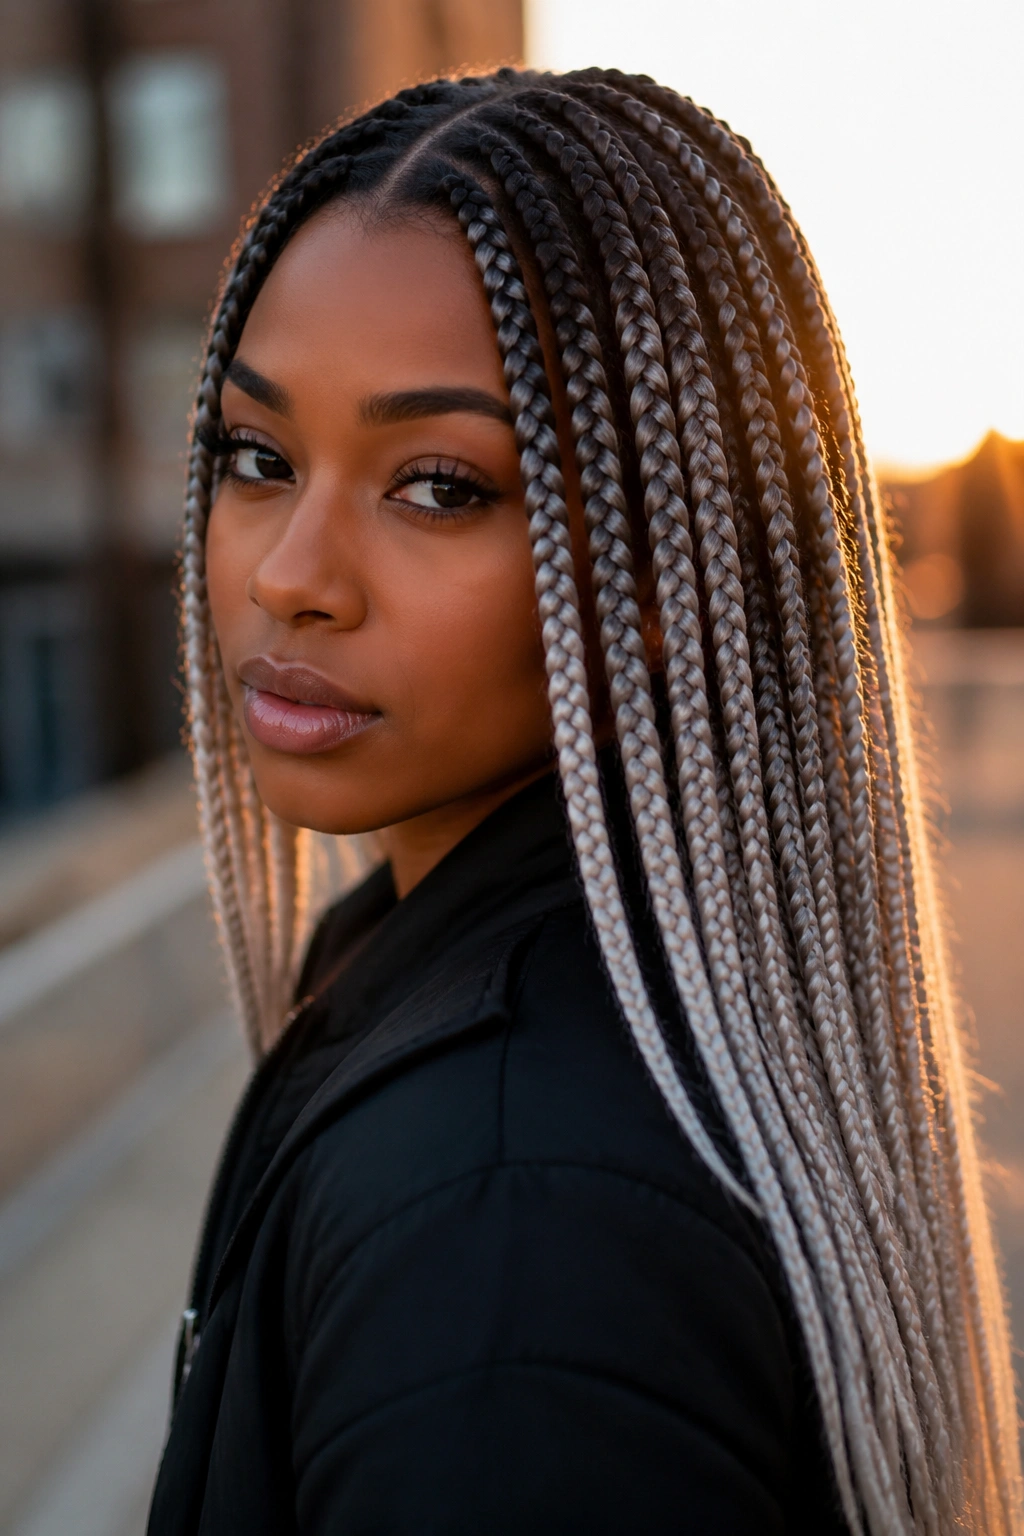
1. Waist-Length Grey Highlighted Box Braids with Thin Silver Threads
This is the cleanest way to wear gray in box braids, and I keep coming back to it because it never looks forced. The base stays dark — usually 1B or deep brown — while thin silver-gray strands run through the braids like fine lines in a good suit.
Why It Works
The eye reads the color change as movement, not noise. That matters. On waist-length braids, the gray has room to show up as the hair sways, which makes the style feel richer than a single flat color ever could.
Keep the highlight strands narrow, about 1/8 to 1/4 inch wide, if you want the look to stay sleek. Wider streaks can be fun, but they start to dominate fast, especially on smaller braids.
- Best with medium-small box parts so the gray doesn’t feel scattered
- Works well when the highlights are placed every third or fourth braid
- Looks strongest on a dark base with cool silver threads
- Pairs nicely with plain ends, not heavily curled ones
Pro tip: ask your braider to place a few brighter strands near the front hairline; that tiny change makes the whole style read more intentional.
2. Smoky Ombré Grey Box Braids
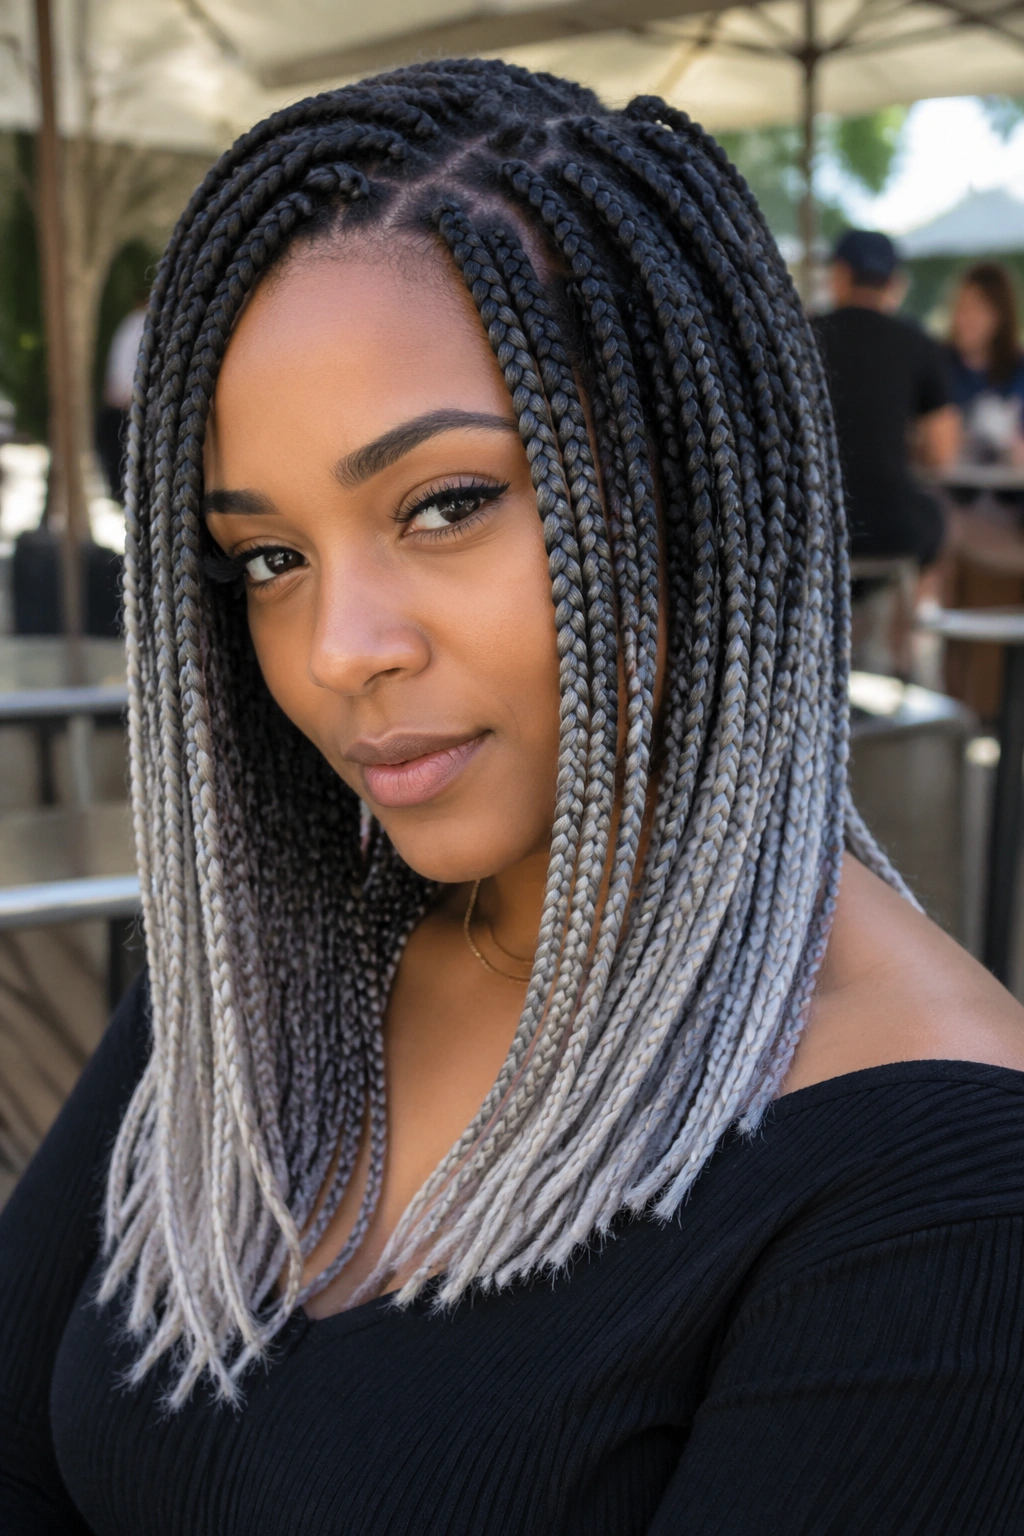
The ends look like they were dipped in ash, and that’s the appeal. Smoky ombré gray braids start dark at the roots, soften through the mid-lengths, and finish in a clouded silver tone that feels smooth instead of stripey.
The best versions do not shout. They drift. That gradual shift gives the style a calm, expensive-looking finish, even when the braid pattern itself is very simple.
What I like most about this version is how forgiving it is once your roots start growing in. The darker top half blends into fresh growth better than a bright all-over gray, so the style stays wearable longer without looking messy too quickly.
If you want the gray to feel soft rather than sharp, ask for a transition of 4 to 6 inches from dark to light. Shorter fades can look choppy. Longer fades look smoother, and they’re worth the extra detail.
One more thing. Ombré gray works best on braids that are at least shoulder length or longer. There just isn’t enough room for the color story on a tiny bob.
3. Grey Highlighted Box Braids with Face-Framing Money Pieces
Want the gray to show before anyone even notices the braids themselves? Put the lightest strands right at the front.
What Makes It Different
Face-framing money pieces pull attention to the cheekbones, eyes, and jawline. On box braids, that small shift changes the entire look. A dark braid set with two or four silver front pieces can feel much bolder than a full head of evenly mixed highlights.
This style works especially well with a middle part or a soft off-center part, because the bright strands frame the face like a built-in border. If you wear glasses, keep the front pieces a little thinner so the look doesn’t crowd your temples.
- Put the brightest gray near the first two braids on each side
- Keep the rest of the head darker for contrast
- Let the front pieces fall a little shorter if you want more face shape
- Ask for cool gray, not warm beige-gray, so the contrast stays crisp
How to wear it: tuck one side behind the ear and let the other side fall forward. That tiny asymmetry makes the highlights feel deliberate instead of accidental.
4. Jumbo Grey Highlighted Box Braids
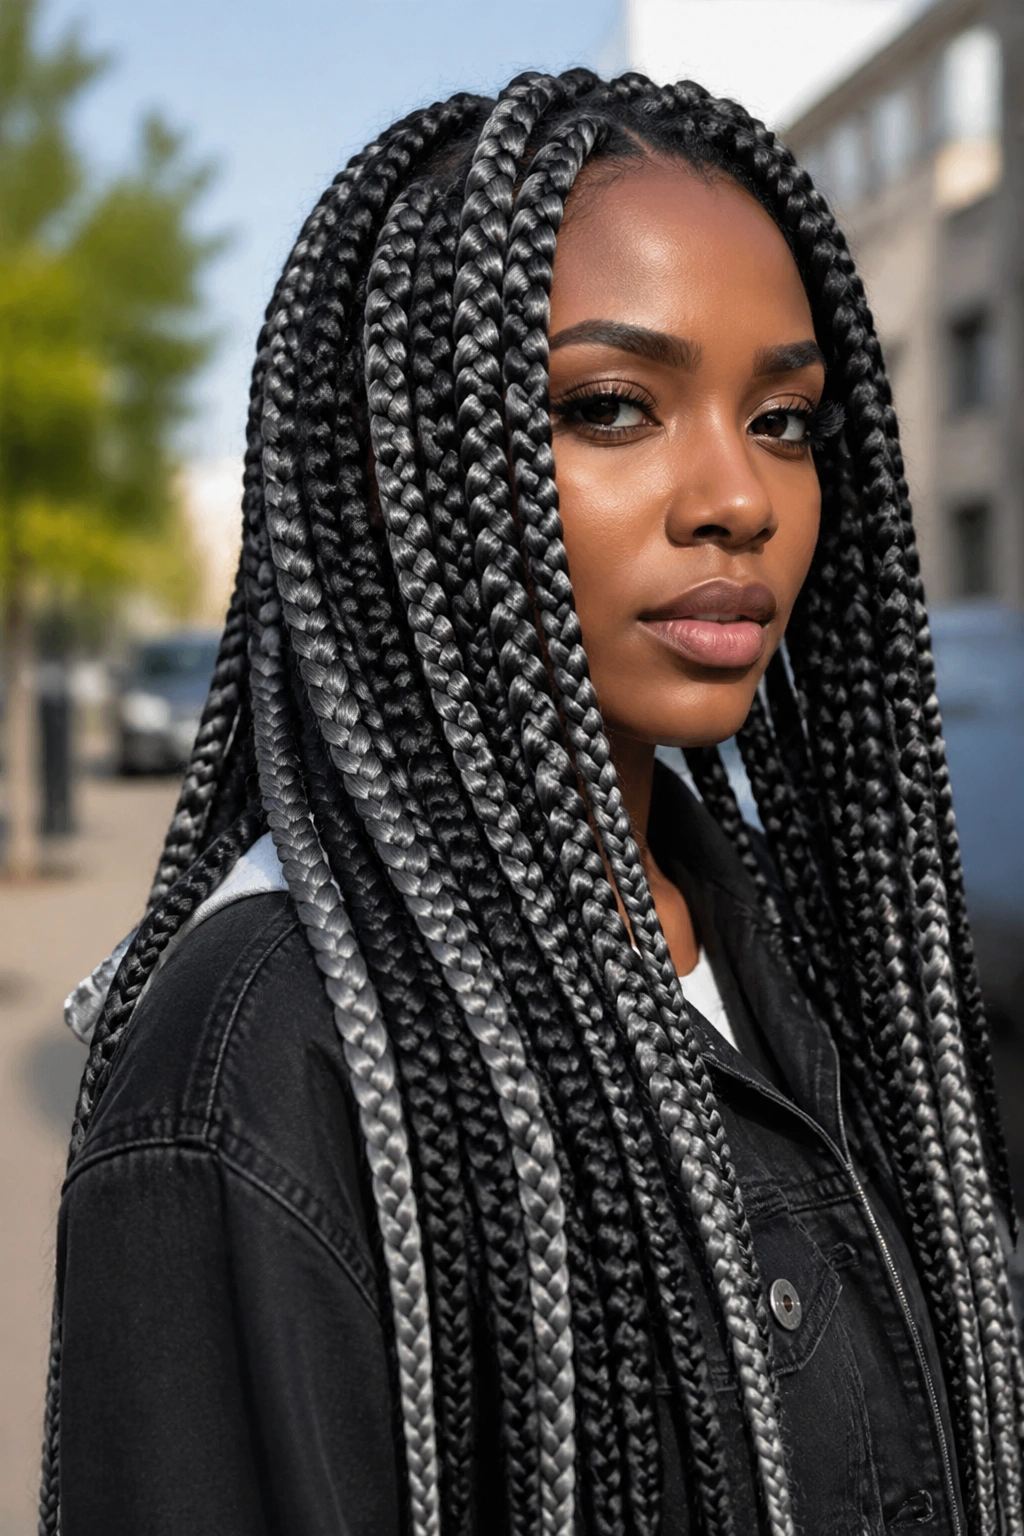
If you want a style that looks full from across a room, jumbo braids do the job without asking permission. They are thick, direct, and unapologetic. Add gray highlights to them and the color reads in bigger, cleaner bands.
That larger braid size changes the whole effect. Instead of tiny silver threads, you get broad stripes of gray that feel graphic. It’s a stronger look, plain and simple.
Jumbo braids also install faster than smaller ones, which is part of their appeal. But there’s a tradeoff. They sit heavier, especially if the braids are long, so the highlight placement needs to be balanced or the style can feel top-heavy.
I’d choose this version for someone who likes a strong silhouette and doesn’t mind a little more weight. If that sounds like you, good. You’ll probably love it.
The gray looks best when it’s placed in a few concentrated sections rather than spread evenly everywhere. Too much uniform highlighting on jumbo braids can blur the shape. A few bold streaks, though? Those look right.
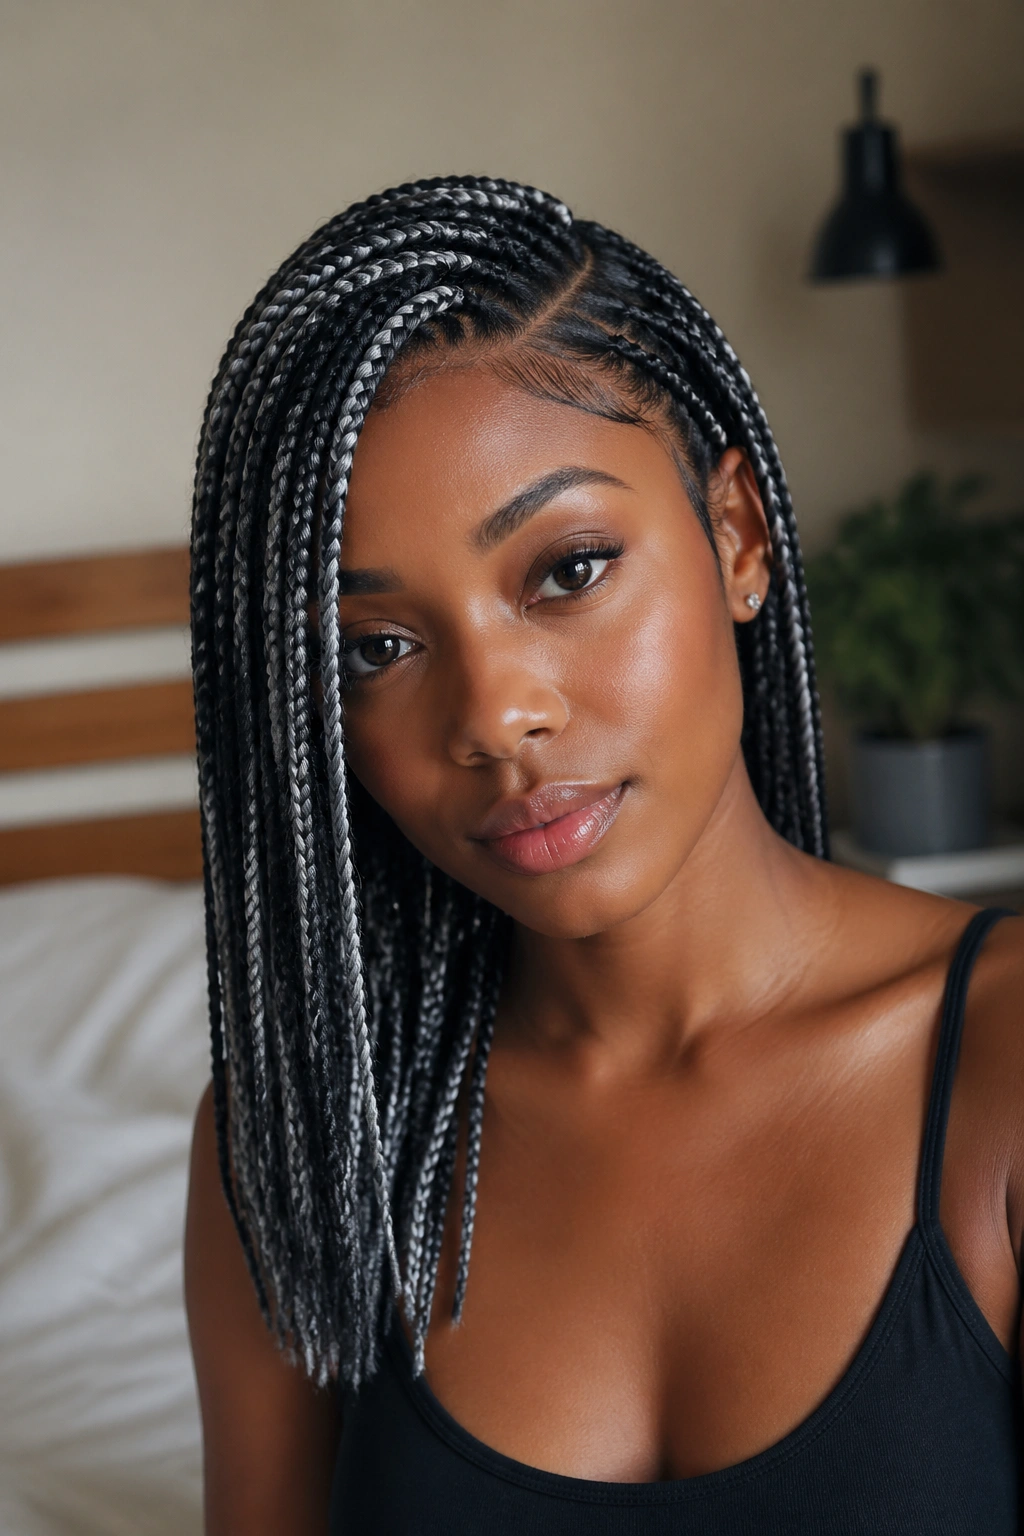
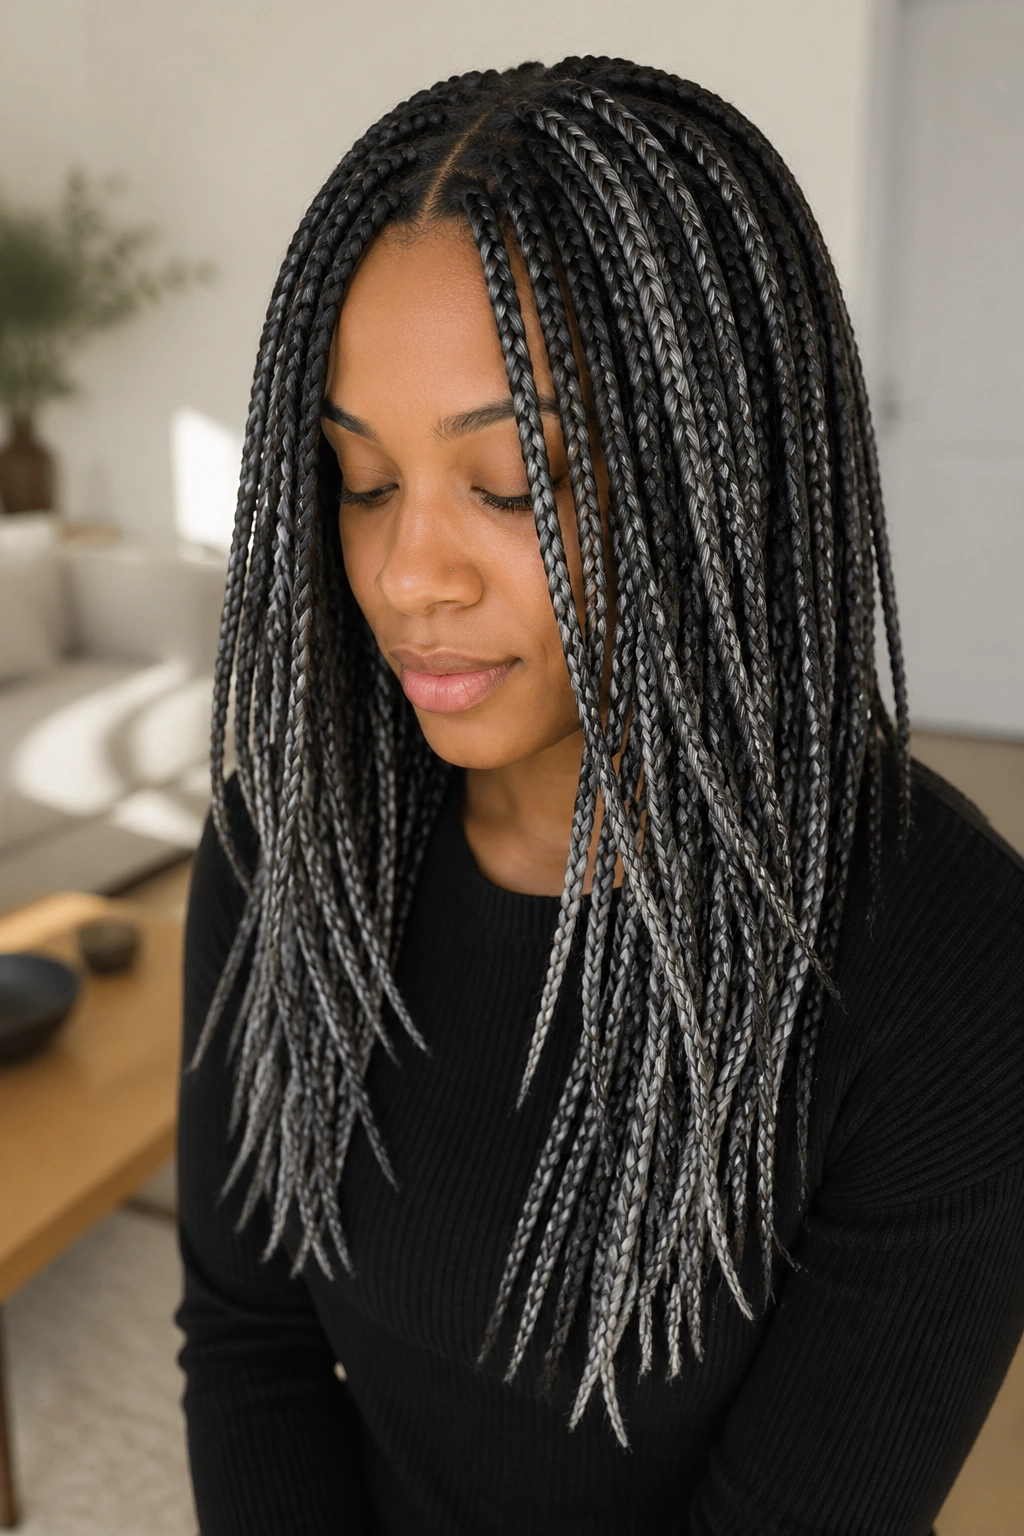
5. Shoulder-Length Grey Highlighted Box Braids with Blunt Ends
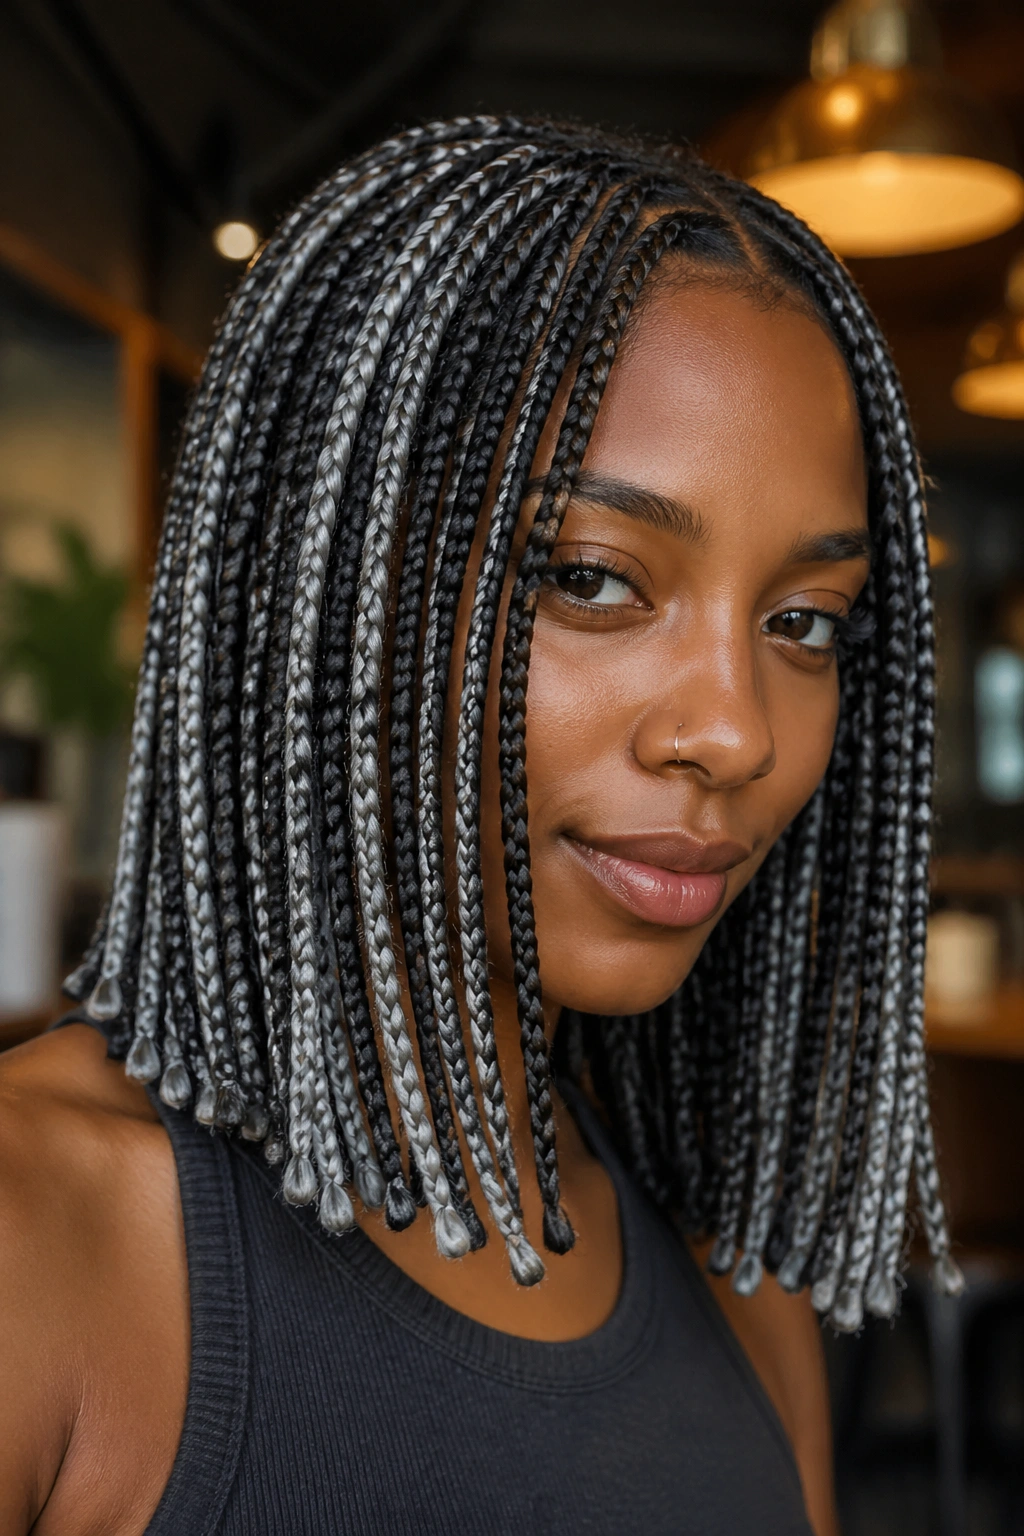
Shorter braids get dismissed too fast.
Shoulder-length box braids with blunt ends feel crisp, cool, and easy to live with. The gray highlights stand out more because there’s less hair to compete with, and the ends give the whole style a neat finish instead of a floating, stretched-out look.
Who It’s Best For
This is the kind of style I’d hand to someone who wants their braids to behave. They sit better under jackets, don’t drag on the neck, and usually feel lighter on wash day. The shape also holds up nicely if you wear a lot of structured clothes — collars, blazers, anything with a clean line.
- Best length for people who hate hair on the back of the shoulders
- Easier to wash and dry than waist-length braids
- Shows off gray streaks without needing a lot of length
- Looks especially good with sharp, sealed ends
The blunt finish matters. If the ends get fuzzy or uneven, the gray can look accidental instead of polished. A clean set of ends keeps the whole thing looking deliberate.
6. Grey Highlighted Boho Box Braids
Picture neat box braids with loose curls spilling out here and there. That’s the boho version, and gray highlights make it feel softer instead of busier.
The curls break up the braid grid, which is useful if you think full-on box braids can look too structured on your face. A few wispy pieces around the front, plus a few more tucked through the lengths, keep the style relaxed without turning it into a mess.
This is one of those styles where restraint matters. Use curly pieces on maybe one braid in five or six, not on every single braid, or the finish gets noisy fast. The gray threads should still be the main thing people notice.
- Ask for curls that match the gray tone, not a random warm brown
- Use mousse lightly so the boho pieces don’t puff up too much
- Keep a satin bonnet on at night to save the curl pattern
- Refresh front curls with a little water and mousse, not a heavy product layer
The style looks best when it feels a little undone, but not sloppy. That line is thinner than people think.
7. Side-Part Grey Highlighted Box Braids
A side part can change the whole braid story.
With gray highlights, the side part creates a strong visual line before the color even enters the picture. The braids fall to one side, the highlights gather a little more weight on that side, and the result feels more styled than a center-part set.
The nice thing about a side part is that it softens hard features without hiding them. If your face feels broad in a middle part, shifting the braids over a few inches can make the whole look feel more balanced. If your jawline is already soft, the side part adds shape without making the hair look stiff.
The part itself should be clean and placed with care. Too shallow, and it barely reads. Too deep, and the whole style starts to collapse toward one side. A good side part usually starts above the arch of the eyebrow and curves back naturally.
Gray highlights work especially well here because the asymmetry gives them a little drama. You don’t need a lot of color. You need the right placement.
8. Knotless Grey Highlighted Box Braids
Knotless braids are the version I reach for when scalp comfort matters. They start with a feed-in technique, so the root lies flatter, and the gray can be threaded in more softly instead of sitting in one hard block at the base.
What Makes Them Different
The biggest difference is the feel. Knotless braids usually pull less at the scalp, which makes them easier to wear for long stretches. They also move more naturally, so the gray highlights look like they belong inside the braid rather than sitting on top of it.
That softer root line is useful if you want the color to feel subtle. You can start with dark roots and bring the gray in a few inches down, which keeps the crown from looking too busy.
- Feels lighter at the scalp than traditional knot braids
- Shows gray in a smoother, more blended way
- Works well for small to medium braid sizes
- Takes longer to install, so patience helps
The catch is time. Knotless braids ask more from the braider, and the sectioning has to be neat or the roots can look uneven. But when they’re done right, the payoff is worth it.
9. Half-Up Top Knot Grey Braids
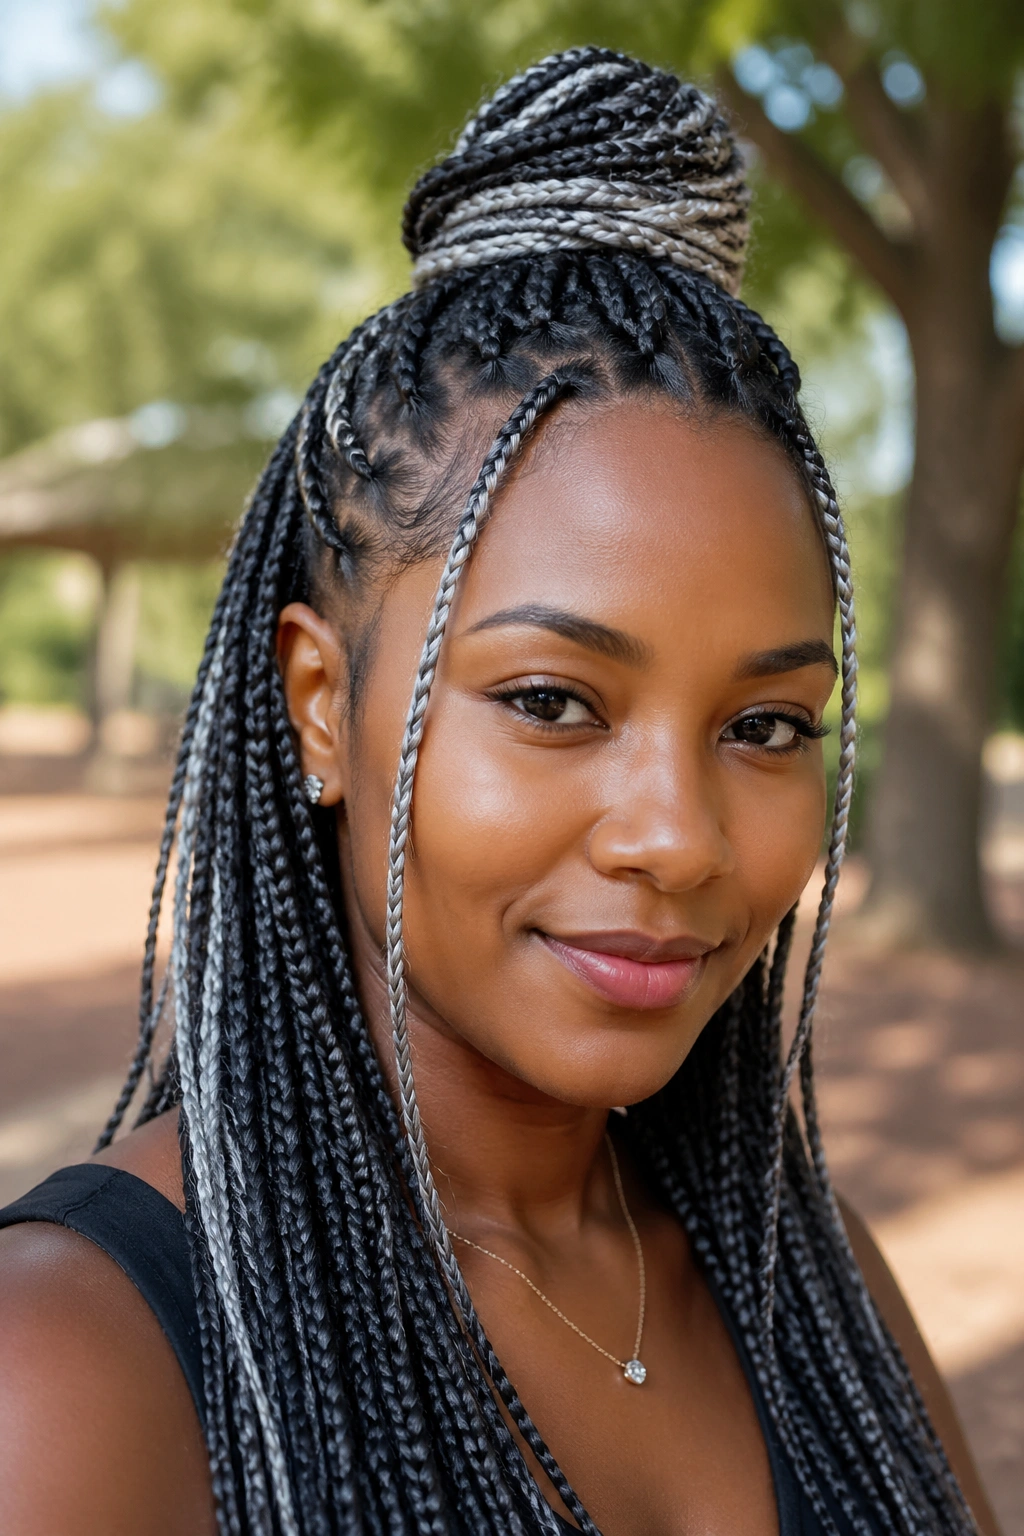
Pull the top half up, and the gray suddenly becomes the point.
That’s why this style works. The top knot lifts the braid set away from the face, exposes the highlight mix underneath, and creates a quick shape change without needing a full restyle. It’s one of the easiest ways to make grey highlighted box braids look fresh again on day two, day five, or whenever the mood drops.
How to Style It in Under Two Minutes
Gather the top third of the braids, not half the head if you want the shape to stay light. Wrap them once into a loose knot or bun, then secure it with a snag-free band or a padded tie. Leave a few front braids loose so the face still feels framed.
- Use the top third, not the whole crown
- Keep the knot loose so the braids don’t flatten
- Let the gray pieces peek out near the hairline
- Avoid over-tightening the front; it gives you a headache and crushes the shape
A half-up knot also works well when the gray is concentrated near the outer layers. It shows the contrast without making the style feel loud all over.
10. Triangle Part Grey Highlighted Box Braids
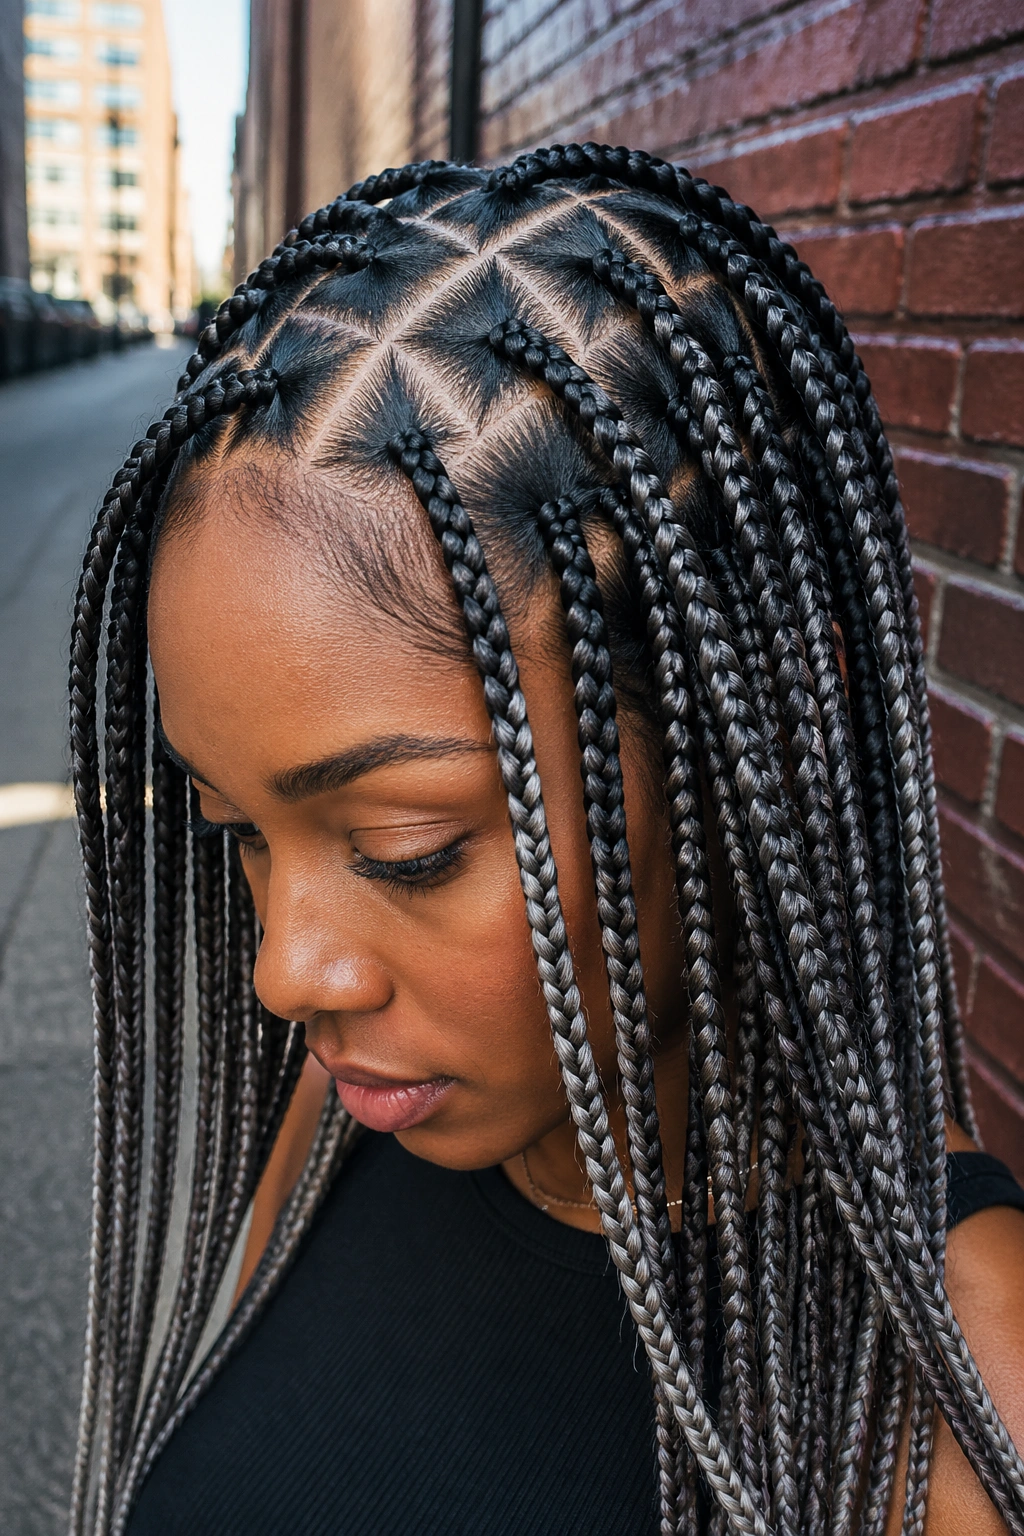
Square parts are common. Triangle parts change the whole mood.
The geometric sectioning makes the scalp design part of the look, and gray highlights play off those angled sections in a way that feels sharper than the usual grid. It’s a small shift, but it matters. Hair with triangle parts looks a little more styled from the start, even before the braids settle in.
That sharper pattern works best with medium-size braids. Tiny braids can make the triangle work disappear. Jumbo braids can crowd the scalp. Medium sections give the parts enough room to show up without turning the head into a busy pattern board.
Key Visual Details
- Keep triangle sections consistent in size
- Place gray in a repeating pattern so the angles have rhythm
- Use a clean middle or side part before the triangles begin
- Skip extra accessories if you want the parting to stay visible
This style is for people who notice details. The kind who actually care whether the sections are even. I respect that.
11. Grey Highlighted Box Braids with Beads and Metal Cuffs
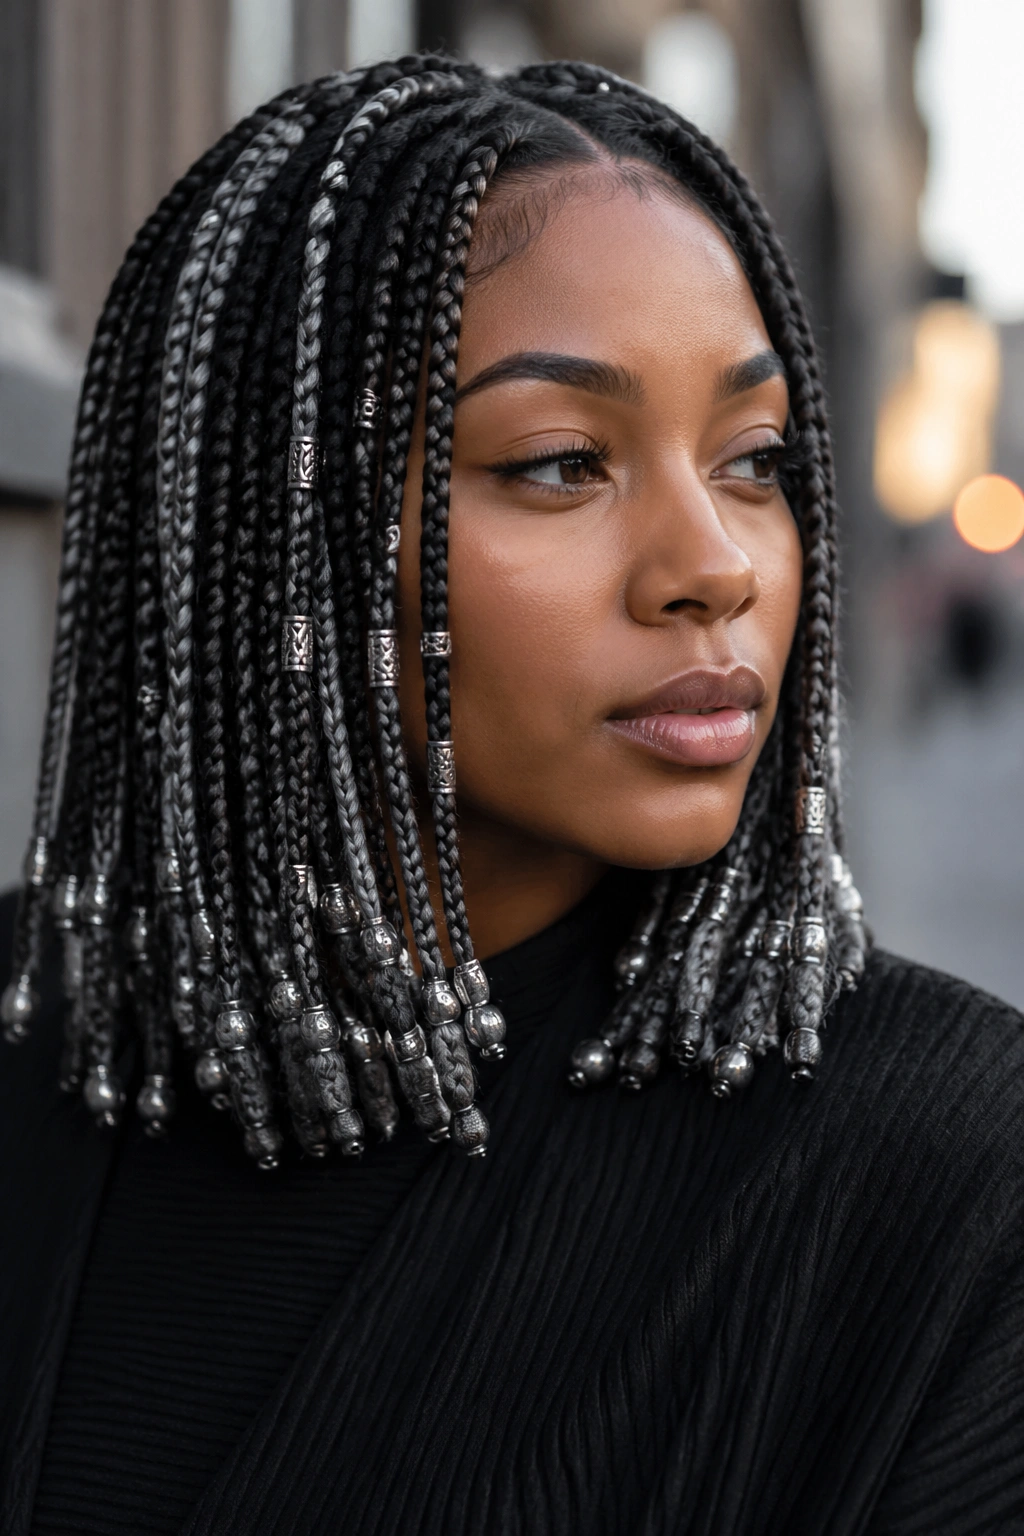
Can beads and cuffs work with gray highlights without looking crowded? Yes — if you keep the metal story under control.
Silver cuffs echo the gray in the braids, which makes the whole style feel cohesive. Matte black beads give it a little weight and keep it from drifting into all sparkle, all the time. The trick is repetition. Pick one finish and stick with it.
How to Avoid Clutter
Too many accessories can make the braids look busy, especially if the highlights are already bright. I’d keep it to 6 to 12 pieces total for most heads, depending on length. Put the cuffs near the mid-lengths or lower third so the scalp stays clean.
- Use one metal finish instead of mixing everything
- Place cuffs on every other braid, not every braid
- Keep heavier beads near the ends, where they won’t pull as much
- Remove a few accessories before sleeping if they snag
This style gives you a little shine without turning the hair into costume territory. That line matters.
12. Bob-Length Grey Box Braids
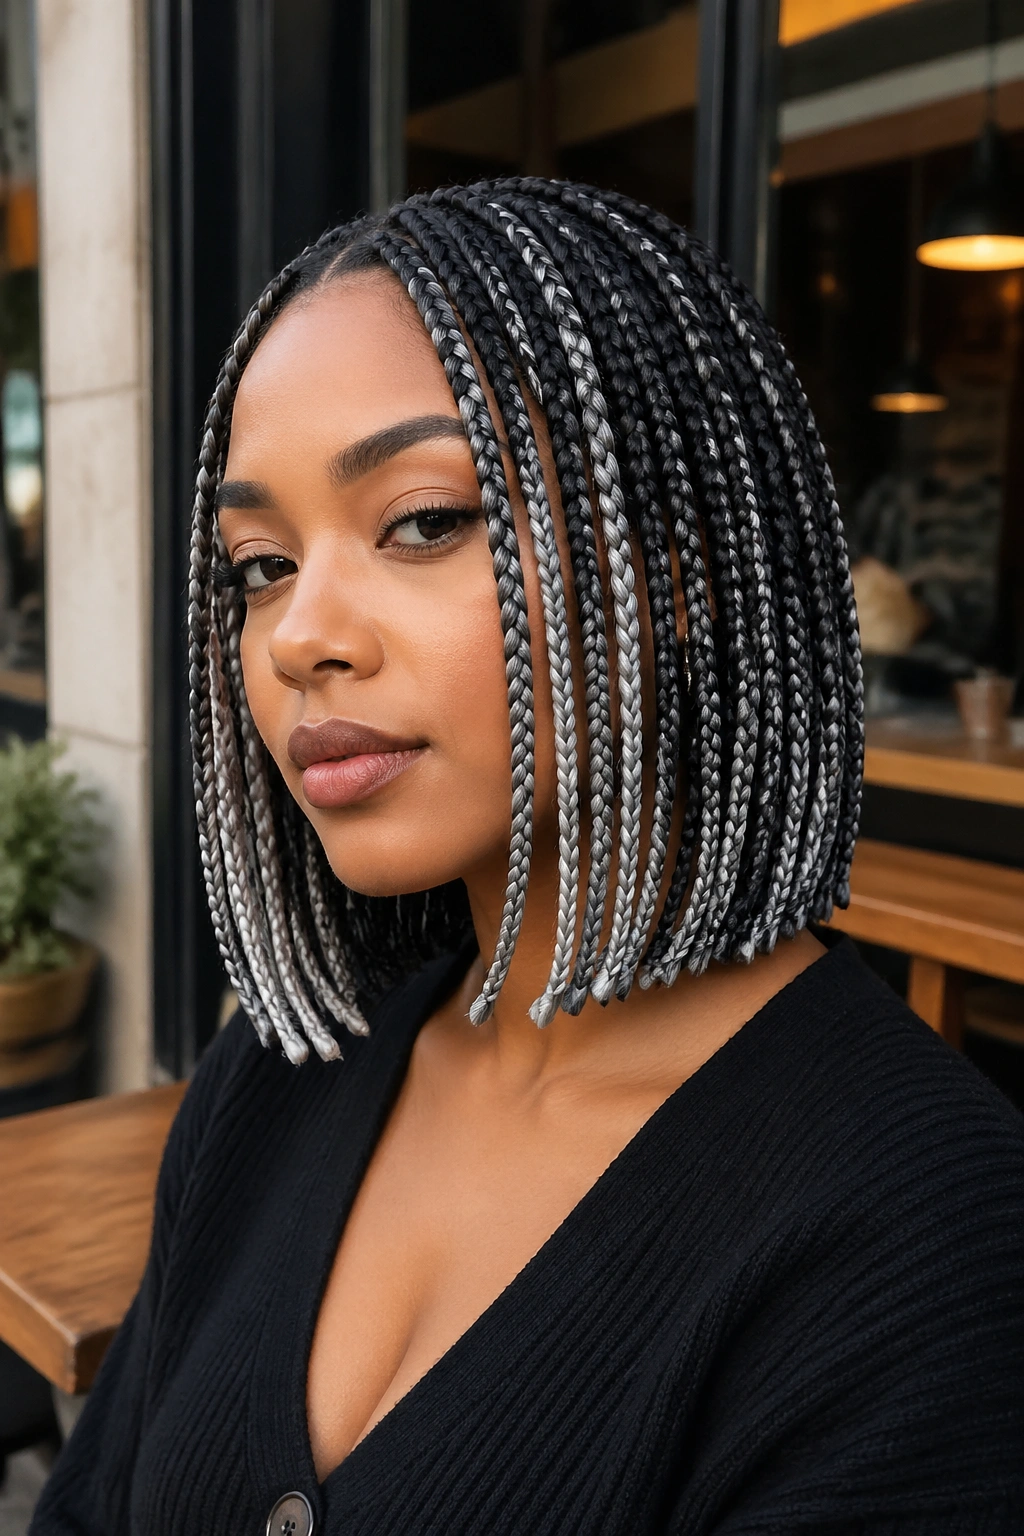
A bob changes the mood fast.
Grey highlights on a bob-length braid set feel sharper because there’s less length to hide the color pattern. The braids skim the jawline, the neck stays open, and the whole style looks a little more direct. I like that. It has teeth.
Short braids also make the gray appear cleaner. Instead of fading off into long lengths, the highlights land closer to the face and shoulders, where they do more work with less effort. If you’re choosing between a long braid set and a bob, the bob will usually read more fashion-forward, while the longer version reads more relaxed.
The shape matters here. A blunt bob gives you a neat edge. A slight curve around the front softens the look if you don’t want it too hard. Either way, keep the ends neat. Frayed ends make a bob look unfinished in a way that’s hard to ignore.
And yes, it’s easier to live with. Less shoulder drag, less tangling, less braid-flip drama in a car seat. Small wins count.
13. Grey Highlighted Goddess Box Braids
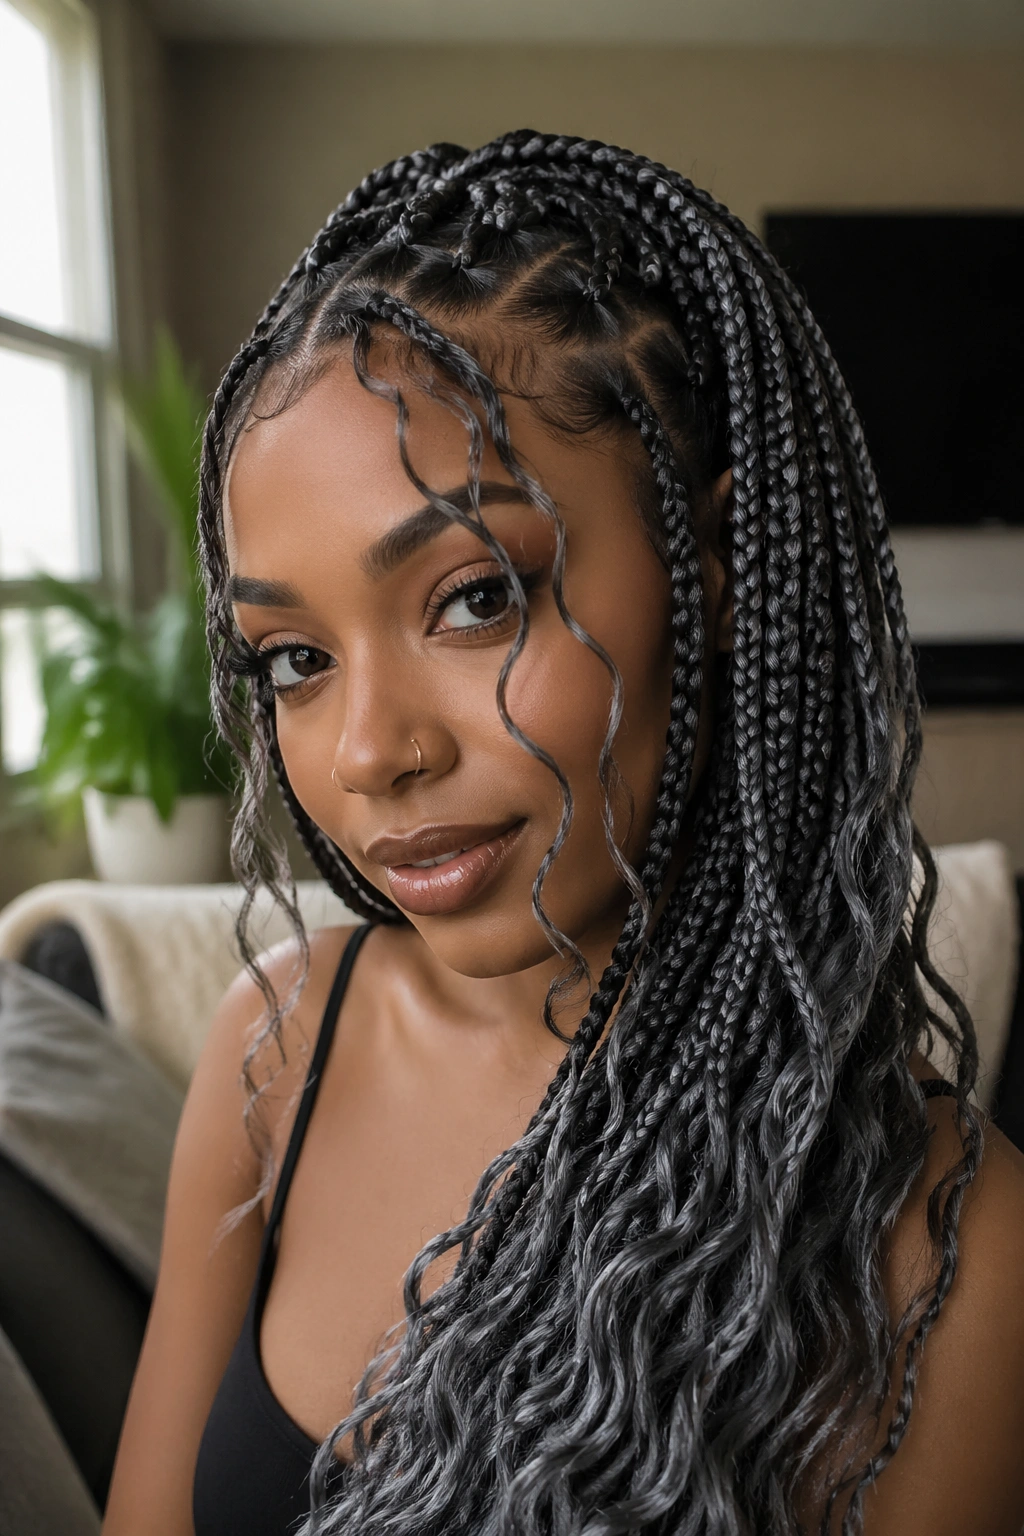
Softness can still look structured.
That’s the whole appeal of goddess-style box braids with gray highlights. You keep the braid base, but you leave a few curly tendrils around the face and scattered through the lengths. The curls make the gray look airy instead of rigid, which is a nice change if your natural instinct is to go for a very neat braid set.
The Texture Mix
The braid and curl combo works best when the contrast feels planned. If every braid has loose pieces, the style gets fuzzy. If only the front carries the curls, the look stays cleaner and the gray highlights get a frame.
- Leave curly pieces at the front and through a few mid-length braids
- Use curls that match the gray tone or stay within one shade of it
- Refresh the pieces with water and mousse, not heavy cream
- Trim stray frizz from the curly bits when they start to look blown out
The gray is what keeps this style from getting too sweet. A cool silver tone cuts through the softness and gives the whole thing a little edge.
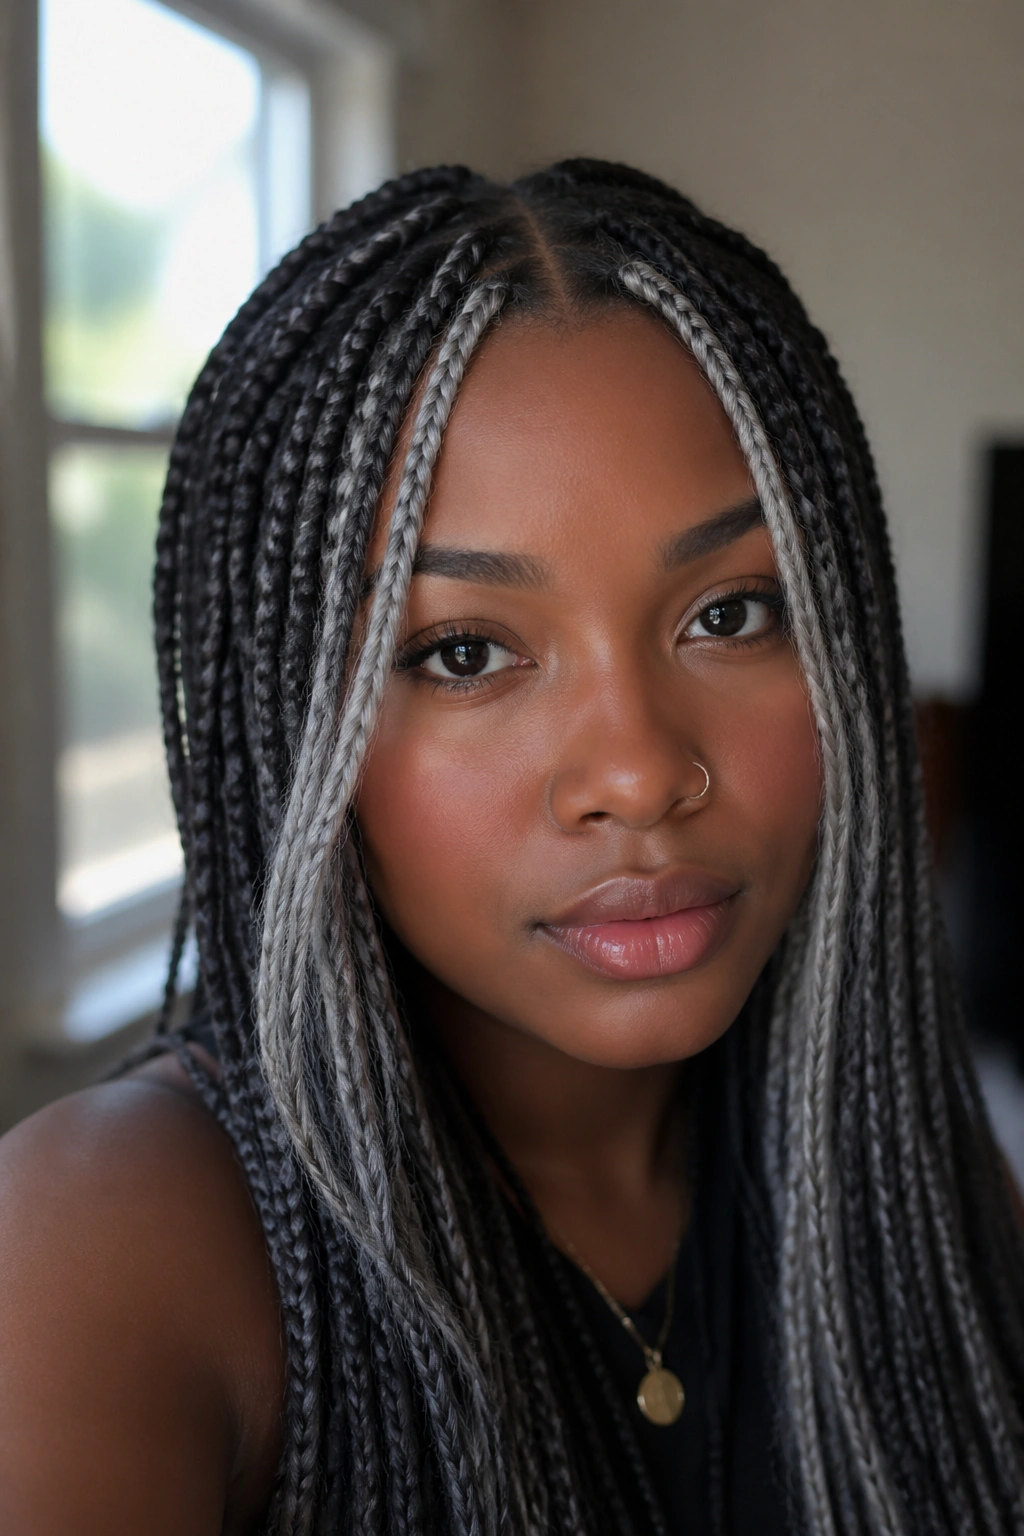
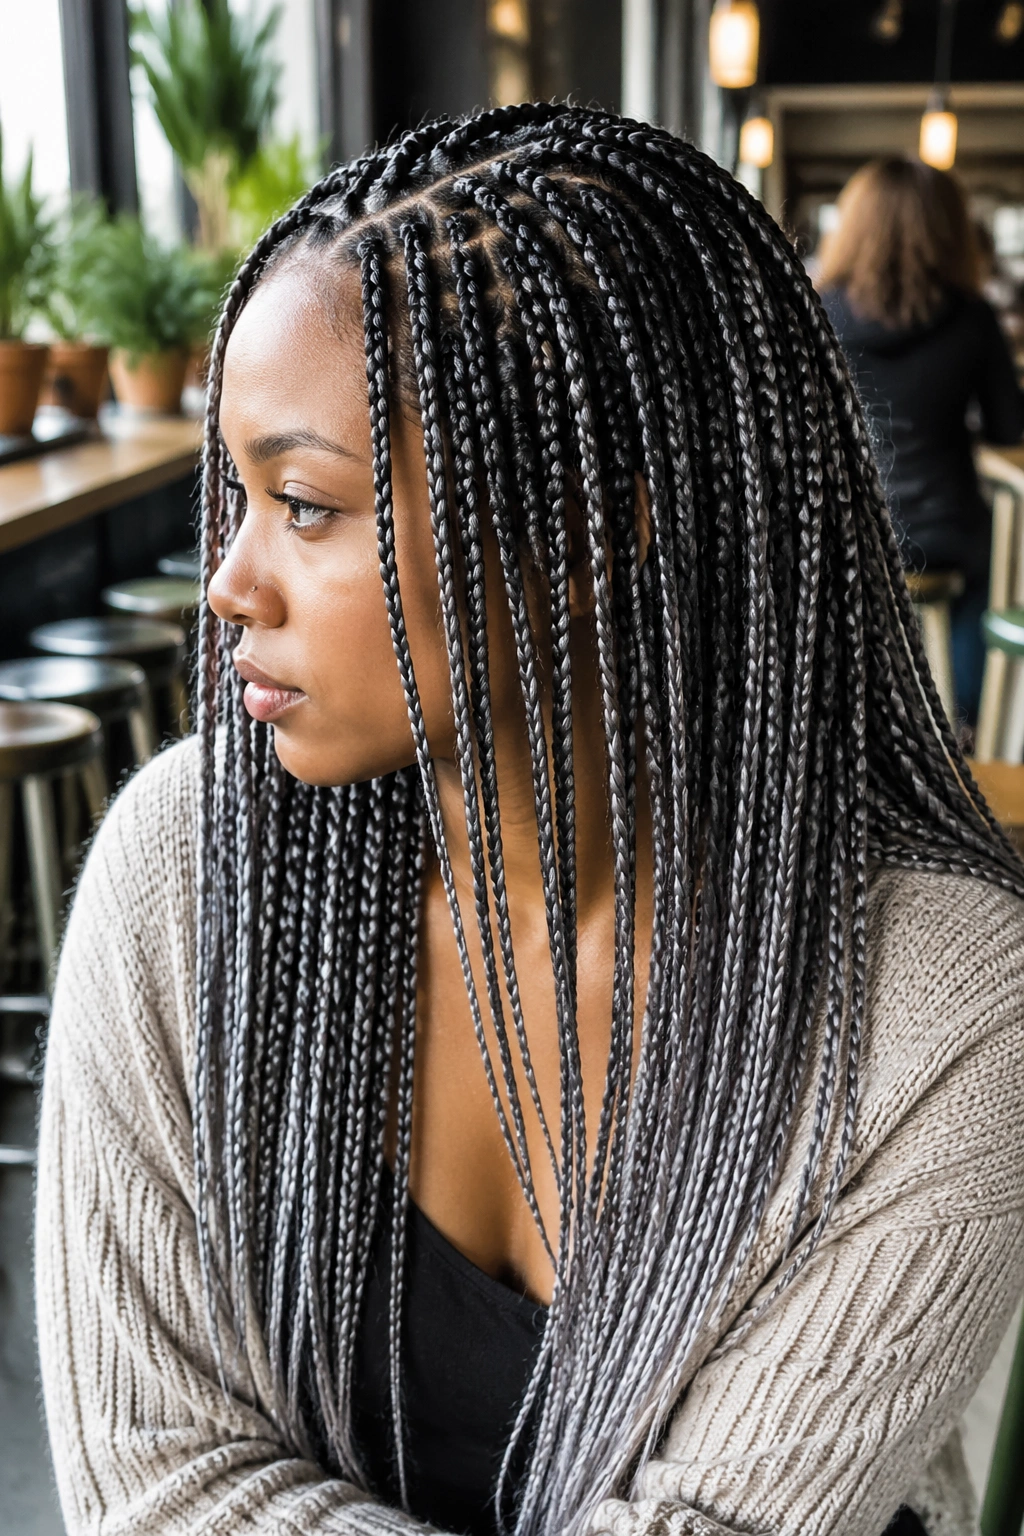
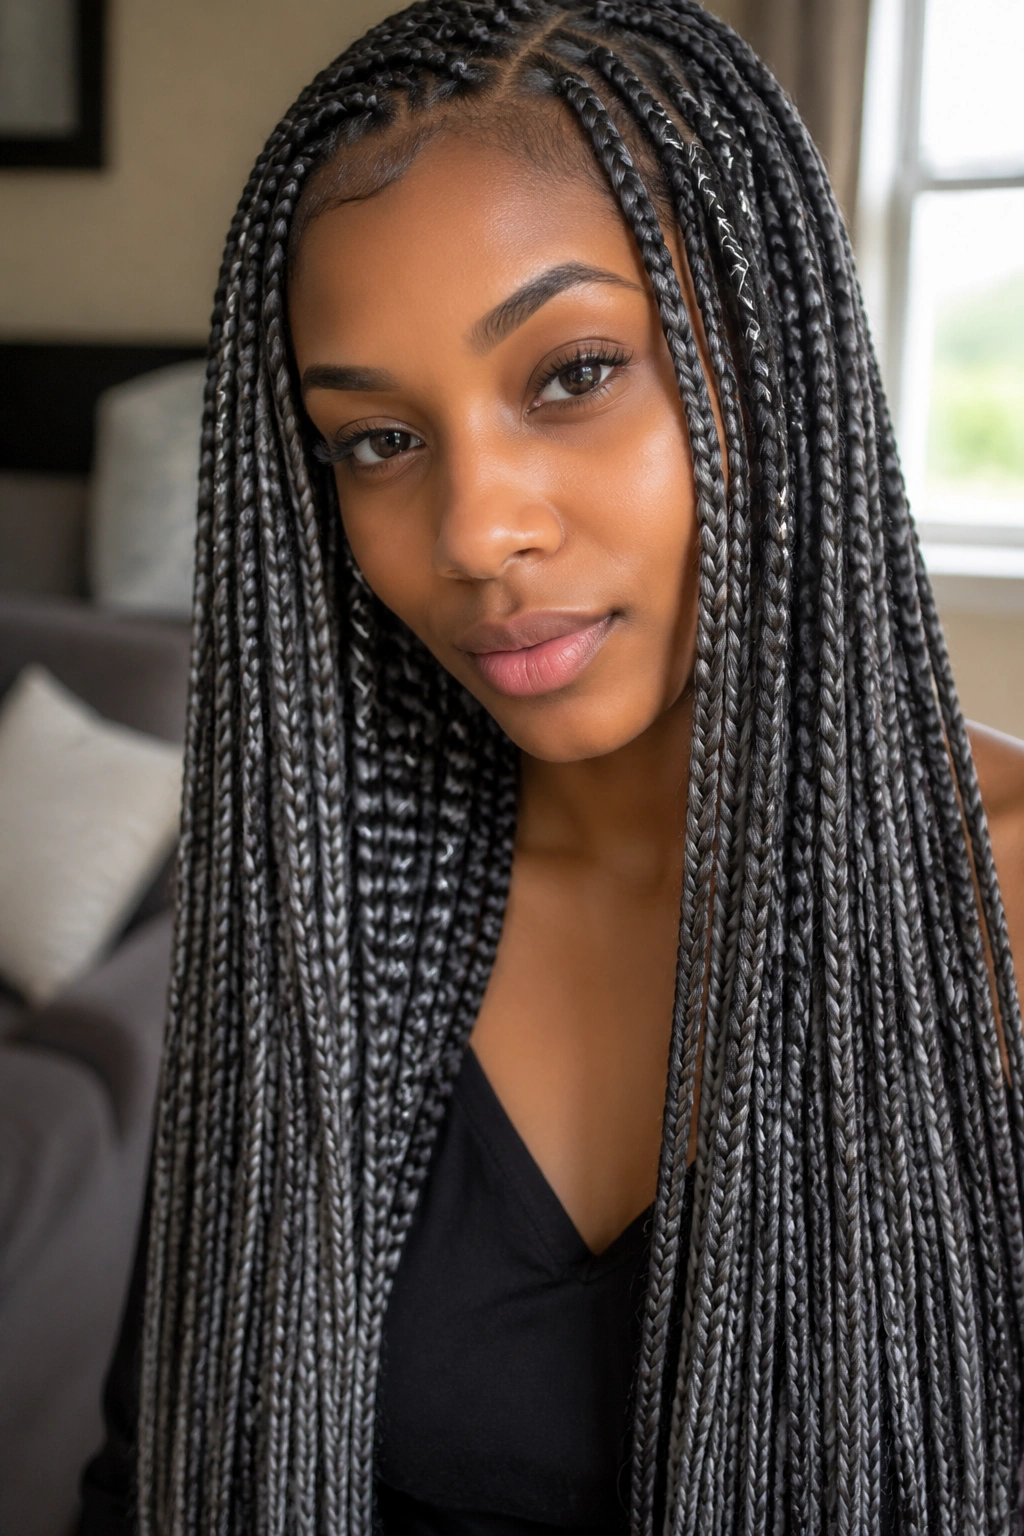
14. Salt-and-Pepper Mix Grey Box Braids
Sometimes the best gray highlight is the one nobody notices right away.
That’s the salt-and-pepper version. Instead of obvious streaks, gray strands are woven through the braid pattern in a way that reads more like depth than decoration. You notice the color shift when the light moves, and that’s the point. It feels understated without feeling dull.
This style is ideal if you want gray to blend rather than stand apart. On darker bases, a mix of 20 to 30 percent gray strands can be enough to create contrast without turning the braids into stripes. On medium-brown bases, you can often use less and still get the effect.
The finish is also useful in professional settings or anywhere you want color that doesn’t shout first. It has a calmer feel than high-contrast silver, but it’s not plain. Not even close.
I think of this one as the grown-up version of highlights — not because it’s older, but because it knows how to keep its voice down.
15. Burgundy Base with Grey Highlights
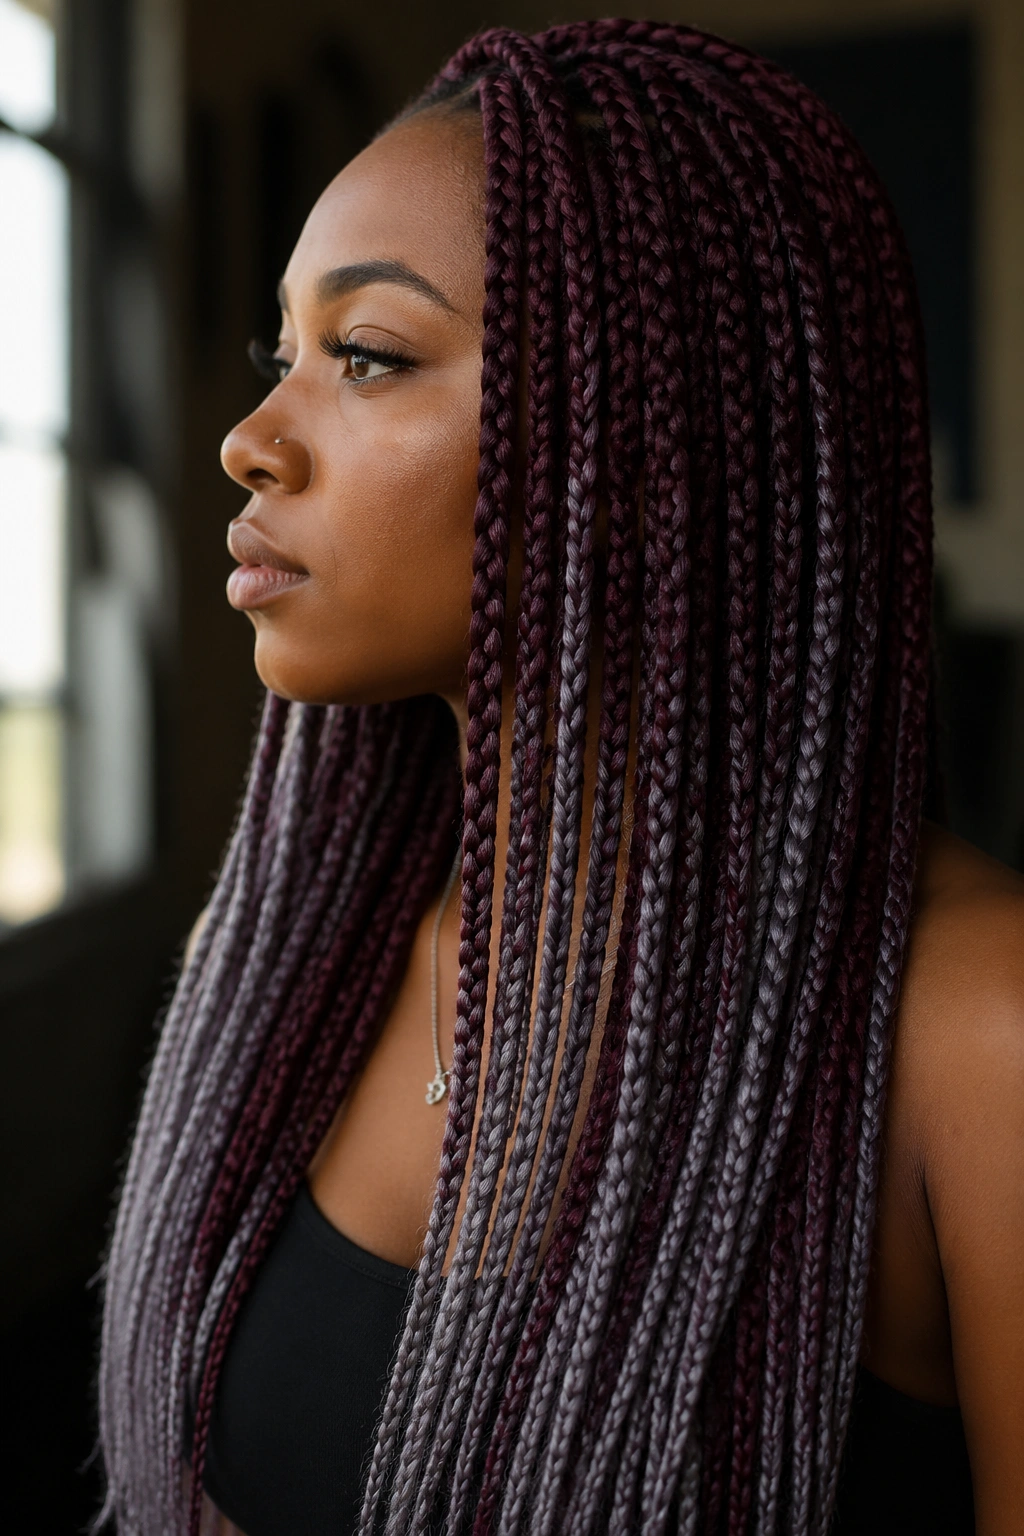
Burgundy and gray can look sharp together if you keep the gray cool.
The burgundy gives the braids warmth and depth. The gray cuts through that warmth and pulls the whole look toward smoky wine territory, which is far more interesting than a flat red-brown set. When it works, it feels moody in a good way.
Color Notes
This combo looks best when the burgundy is deep — think wine, plum, or dark cherry — rather than bright red. A cool ash gray plays better here than a warm gray, because the temperature contrast keeps the style from turning muddy.
- Choose a deep burgundy base instead of a bright one
- Keep the gray concentrated in mids and ends if you want a smoother blend
- Add only a few silver cuffs; too much shine competes with the color
- Avoid warm blond-gray tones, which can fight the burgundy
The most successful versions don’t split the colors evenly. They let one lead and the other support.
16. Feed-In Grey Highlighted Box Braids
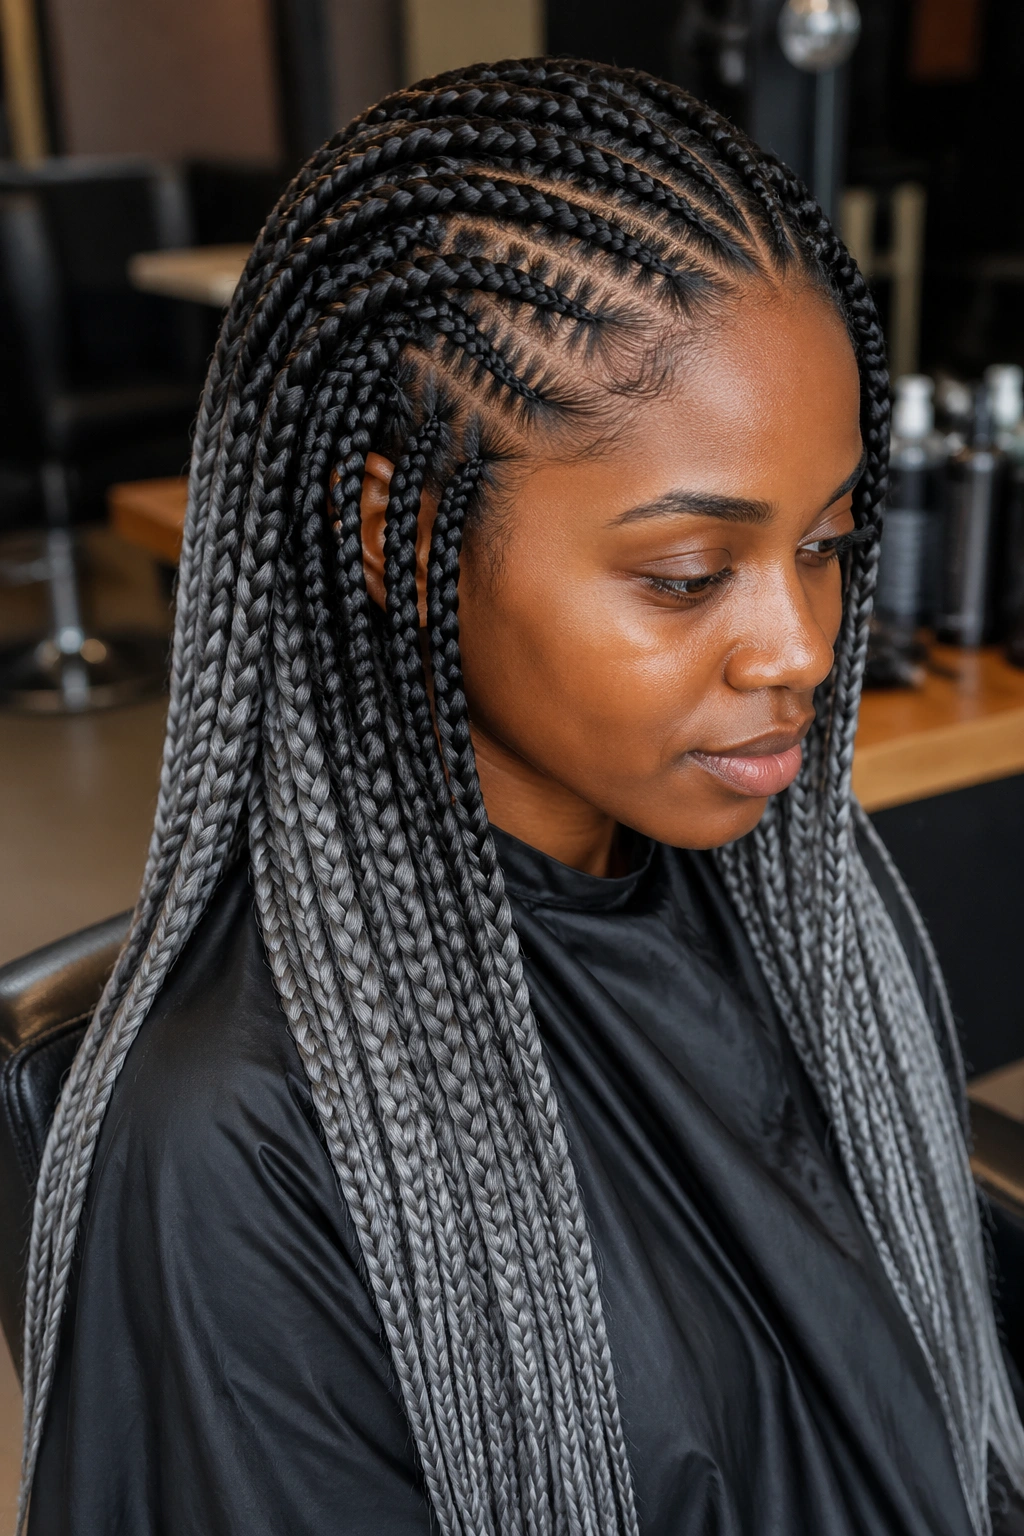
The braid is the point, but the start of the braid decides whether the style feels heavy.
Feed-in gray highlighted braids begin with smaller sections at the scalp and grow wider as the braid builds. That means the roots lie flatter, the tension feels easier, and the gray can appear gradually instead of all at once. It’s a clean effect. Very clean.
What to Ask For
Tell your braider where you want the gray to begin. If you start the highlight at the second or third feed-in section, the root line stays darker and more natural-looking. That matters if you want the color to feel woven into the braid instead of pasted on top.
- Start with a dark root and feed gray in gradually
- Keep the highlight placement even across the head
- Use medium or small sections so the feed-in detail shows
- Ask for smooth parting near the crown, where the eye looks first
This style can take longer to install, but the payoff is a braid set that sits flat and reads polished from the first day through the last.
17. Layered Grey Highlighted Box Braids
Braids do not have to hang in one flat sheet.
Layered lengths give gray highlighted box braids movement, and that movement is what makes the color feel alive. Shorter pieces near the front, longer lengths in the back, maybe a middle zone between them — that shape keeps the style from feeling heavy.
The layering also helps if you want the highlights to show up in different places as you move. A single long curtain of braids can make color look static. Layers break that up. They catch the eye at the jaw, the collarbone, then lower down, which feels much more dynamic.
How to Keep the Shape Clean
- Keep the length changes to 2 or 3 zones, not a dozen
- Trim the ends after the braids settle so the layers stay even
- Keep the gray placement consistent in each zone
- Avoid too many accessory pieces, or the layer line gets lost
This version is good for anyone who wants motion without sacrificing neatness. There’s a difference. Big one.
18. Platinum-Tipped Grey Highlighted Box Braids
Platinum-tipped gray highlighted box braids are the loudest version here, and that’s the point.
Dark roots flowing into bright silver or platinum ends give you a frosted finish that looks sharp, cool, and a little dramatic. The contrast is bigger than a soft ombré, and it reads that way from a distance. If you want the braid set to lead the whole look, this is the one.
The tips need attention. Bright ends show frizz faster than darker ones, so a neat seal and a little mousse go a long way. That’s the part people skip, and then they wonder why the ends look tired after a few days. They need upkeep. Not a lot, but enough.
Small Choices That Matter
- Keep the base dark so the platinum tips stand out
- Limit the bright section to the last 3 to 5 inches of the braid
- Smooth the ends with mousse when they start to puff
- Pair the braids with simple clothes if you want the color to carry the look
This style is for someone who likes strong contrast and doesn’t mind being noticed. Subtle? No. Effective? Absolutely.
Final Thoughts
Grey highlights work best when they have a reason to be where they are. Thin silver threads, smoky ends, face-framing pieces, or a salt-and-pepper blend all change the mood in a different way, and the braid size matters just as much as the color. Big braids make gray feel bold. Small braids make it feel detailed.
If you’re choosing between styles, think about how much you want to see the gray on day one, and how much work you want to do on day ten. The most wearable grey highlighted box braids are the ones that fit your life without asking for a full production every morning.
And if you’re sitting in a stylist’s chair, bring two photos: one for the color placement and one for the parting. That tiny bit of clarity saves a lot of guessing.