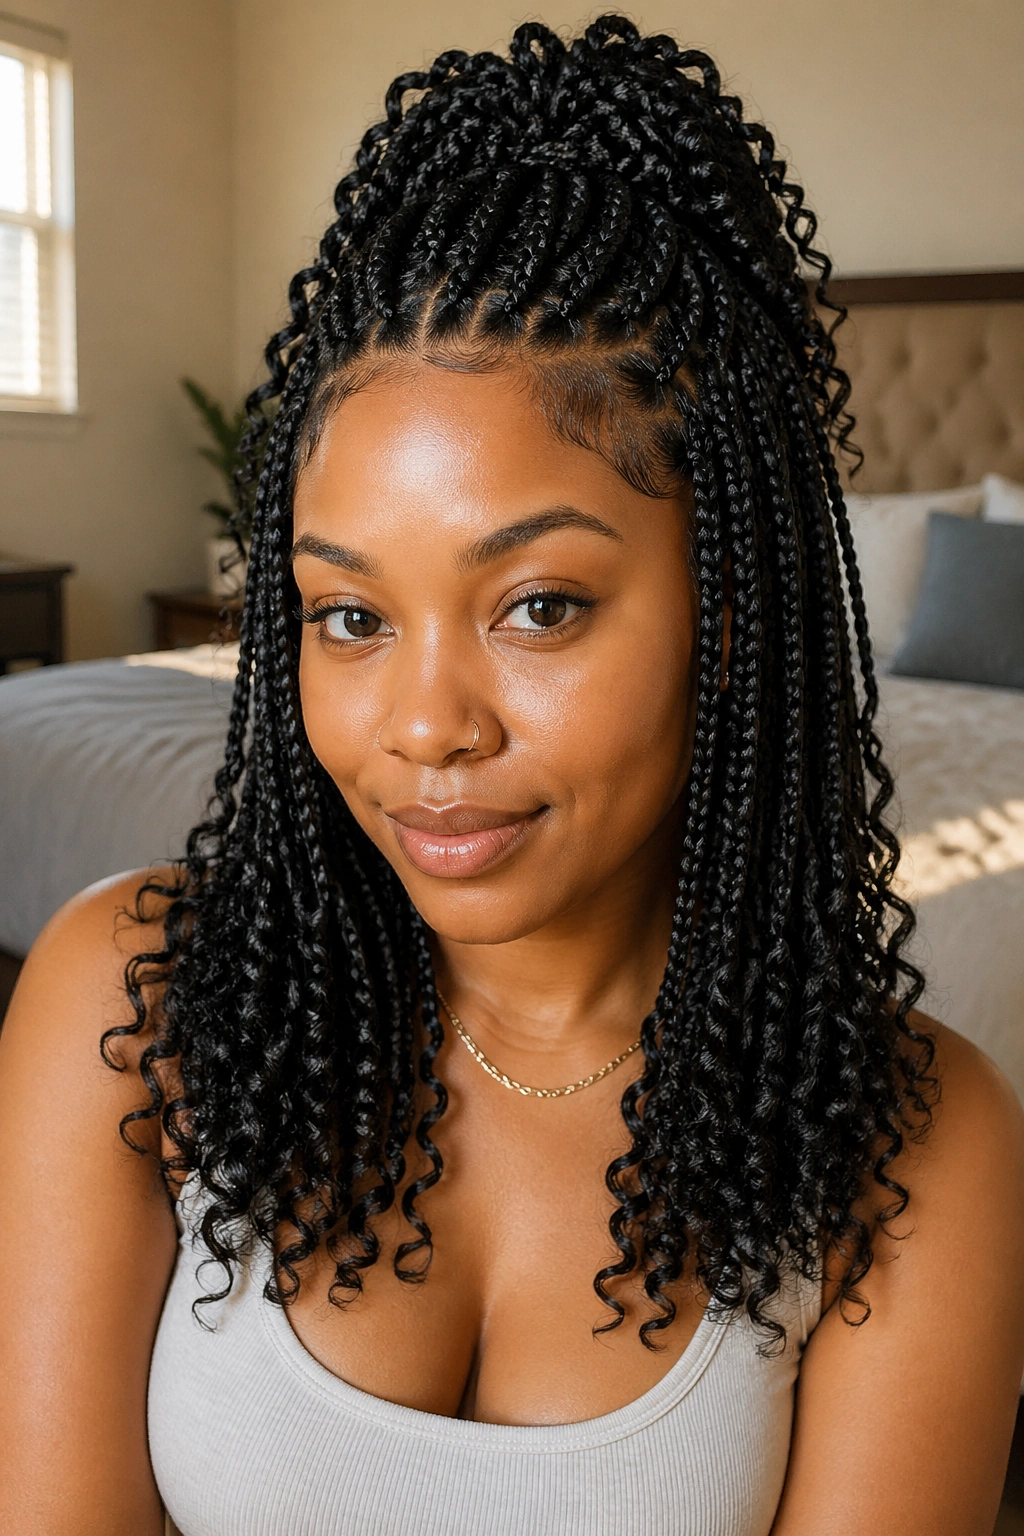
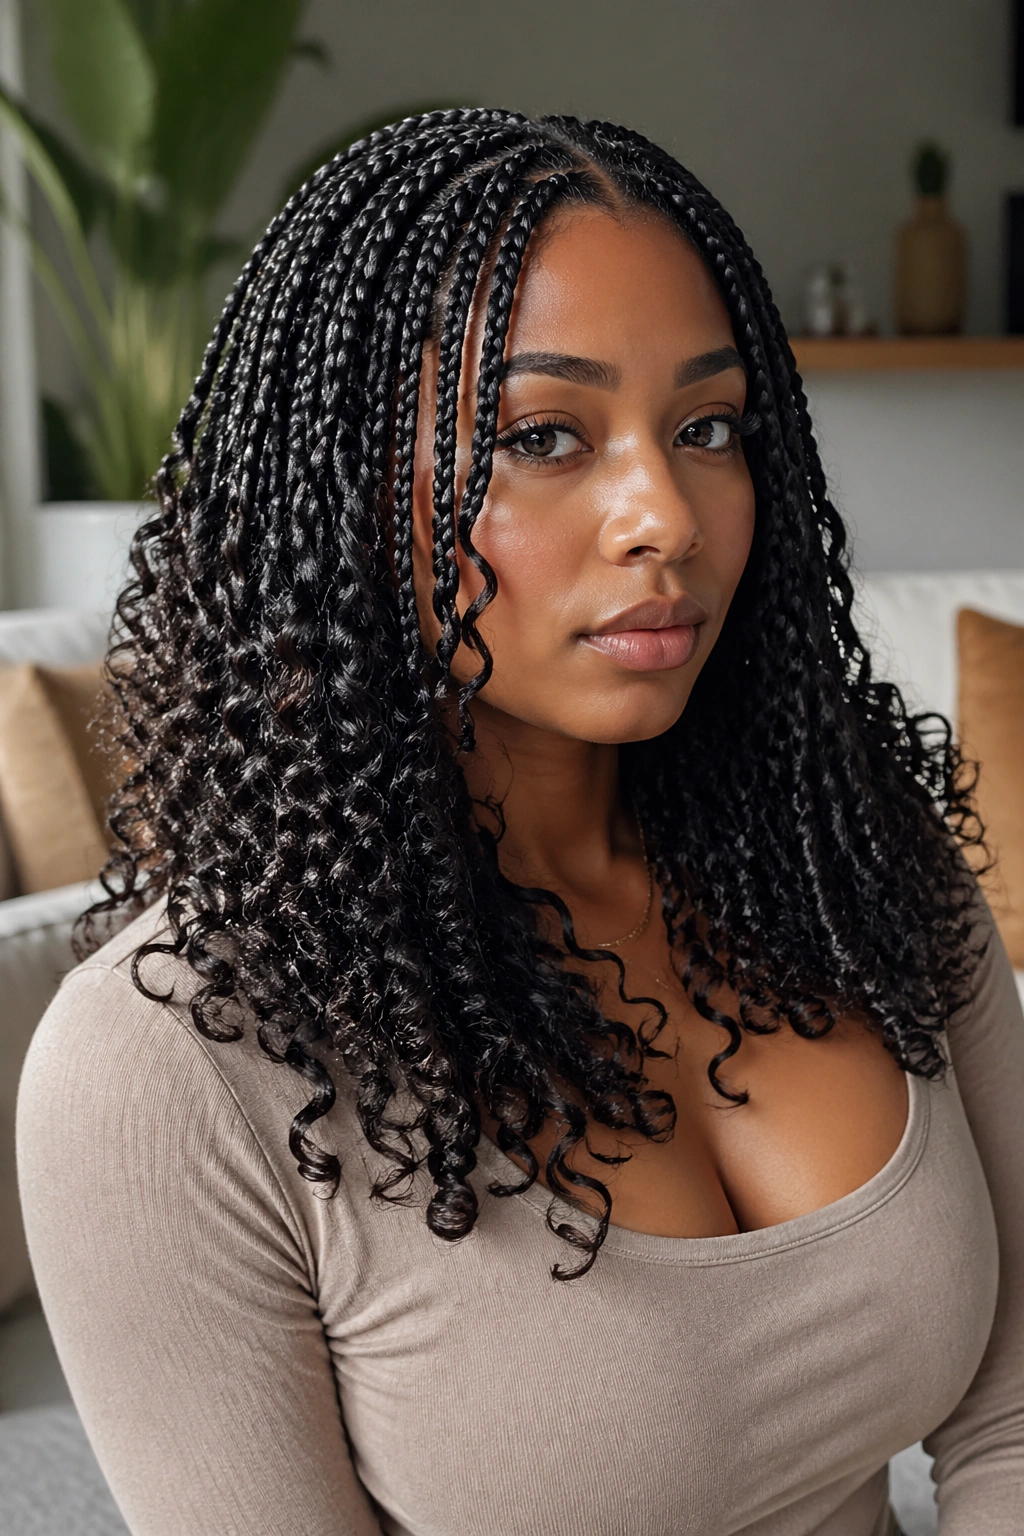
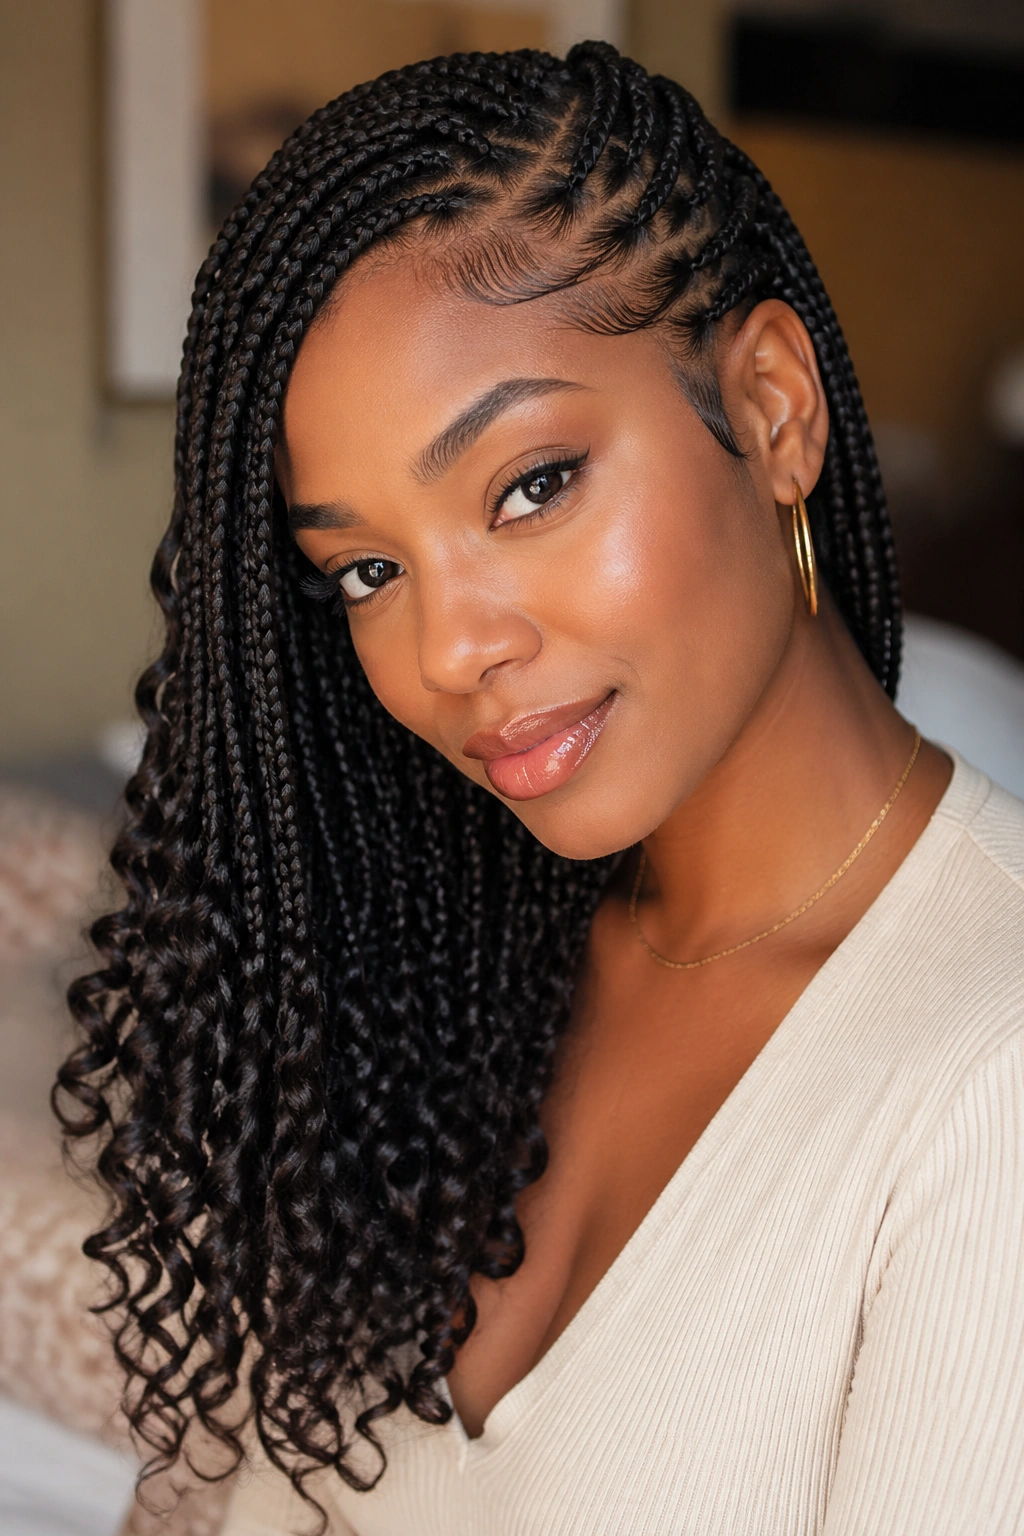
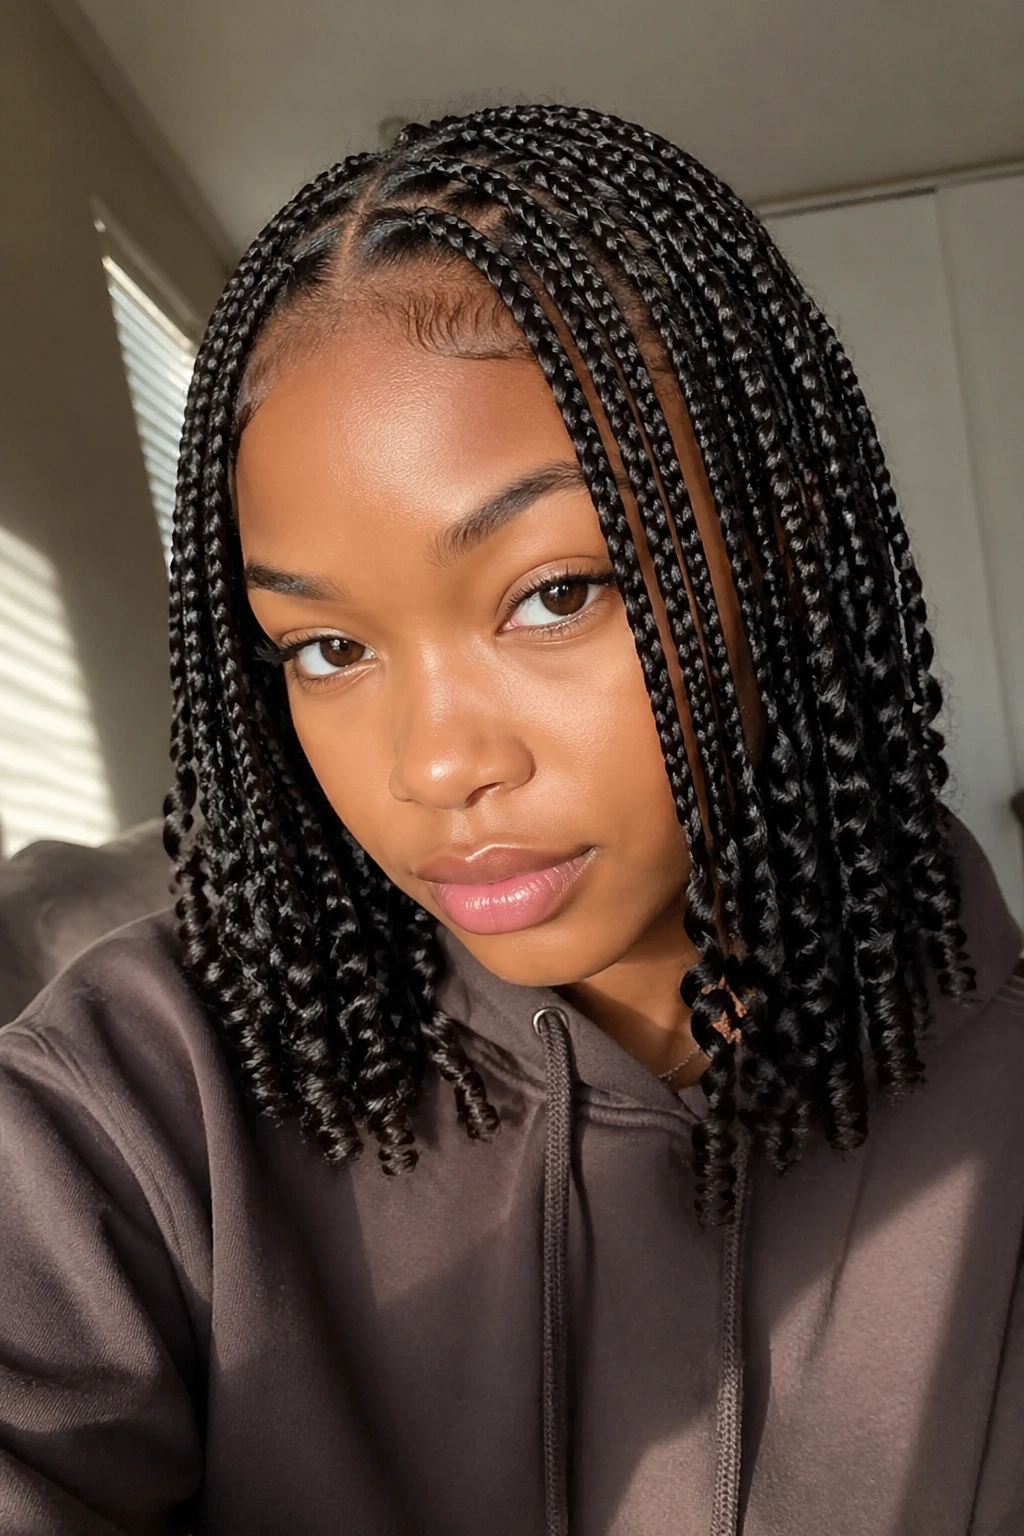
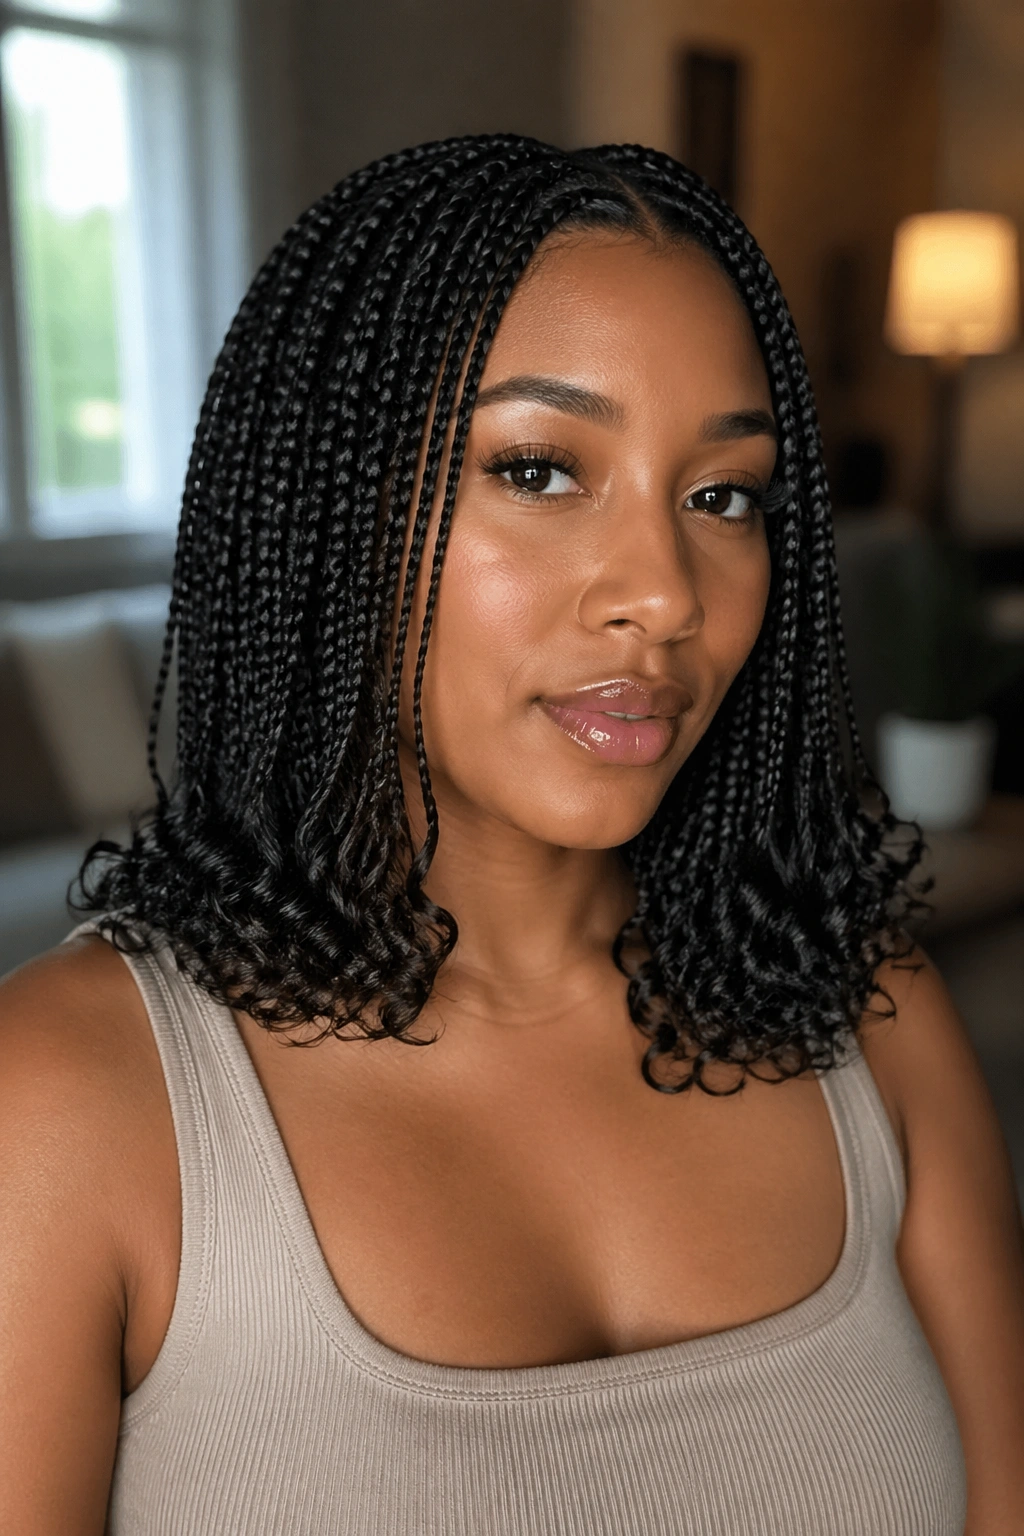
Small medium-length knotless box braids with curly ends hit a sweet spot that a lot of people want and not enough people get right. The braid gives structure. The curl at the bottom gives movement, softness, and a little bit of attitude without turning the whole look into a heavy curtain.
That balance matters more than people think. When braids stop around the collarbone or just below it, they sit close enough to the body to stay easy, but long enough to swing when you turn your head. Add curly ends, and the style stops looking rigid. It feels lived-in, which is part of the appeal.
The tricky part is restraint. Too much length and the curls droop. Too much thickness and the style starts to feel bulky at the scalp. Too many extras — beads, cuffs, color, deep layers, dramatic parts all at once — and the whole thing gets noisy fast.
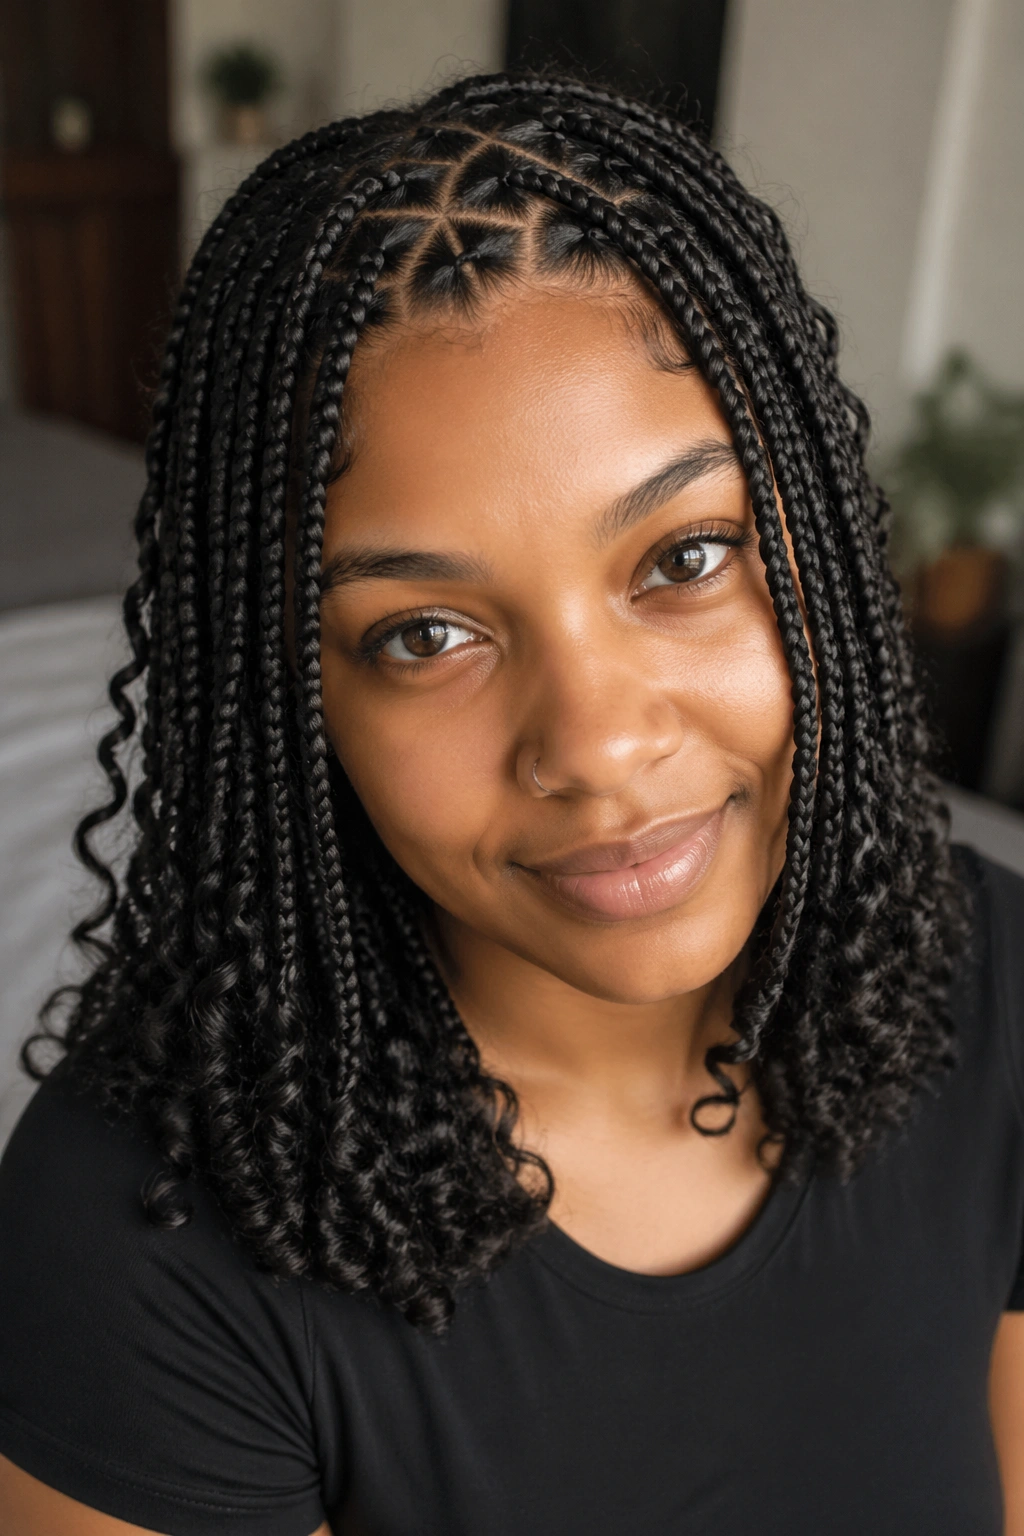
1. Collarbone-Length Knotless Box Braids With Curly Ends
This is the cleanest version of the look. Collarbone-length braids with curly ends give you the movement people want without the drag that comes with longer installs. When the braids stop right around the collarbone, the curls can still show, but they do not get lost under your jacket, scarf, or tote strap.
Why the silhouette works
The shape is easy on the eyes because it follows the body. Small braids keep the scalp line neat, and the curly ends add softness at the bottom instead of making the whole style look stiff. I like this version for anyone who wants their hair to look done without looking overworked.
A few details make it better than a vague “medium” braid set.
- Ask for braids that land just at or slightly below the collarbone.
- Keep the curly ends long enough to show, usually 2 to 4 inches past the braid ends.
- Use a curl pattern with enough spring to bounce back after sleeping, like water wave or a similar texture.
- Keep the braid size consistent so the ends do not look patchy.
Tip: If the curls are too loose, the style can start to look stringy by the second week. Ask for a curl pattern with a little body, not limp waves.
2. Side-Part Knotless Box Braids With Curly Ends
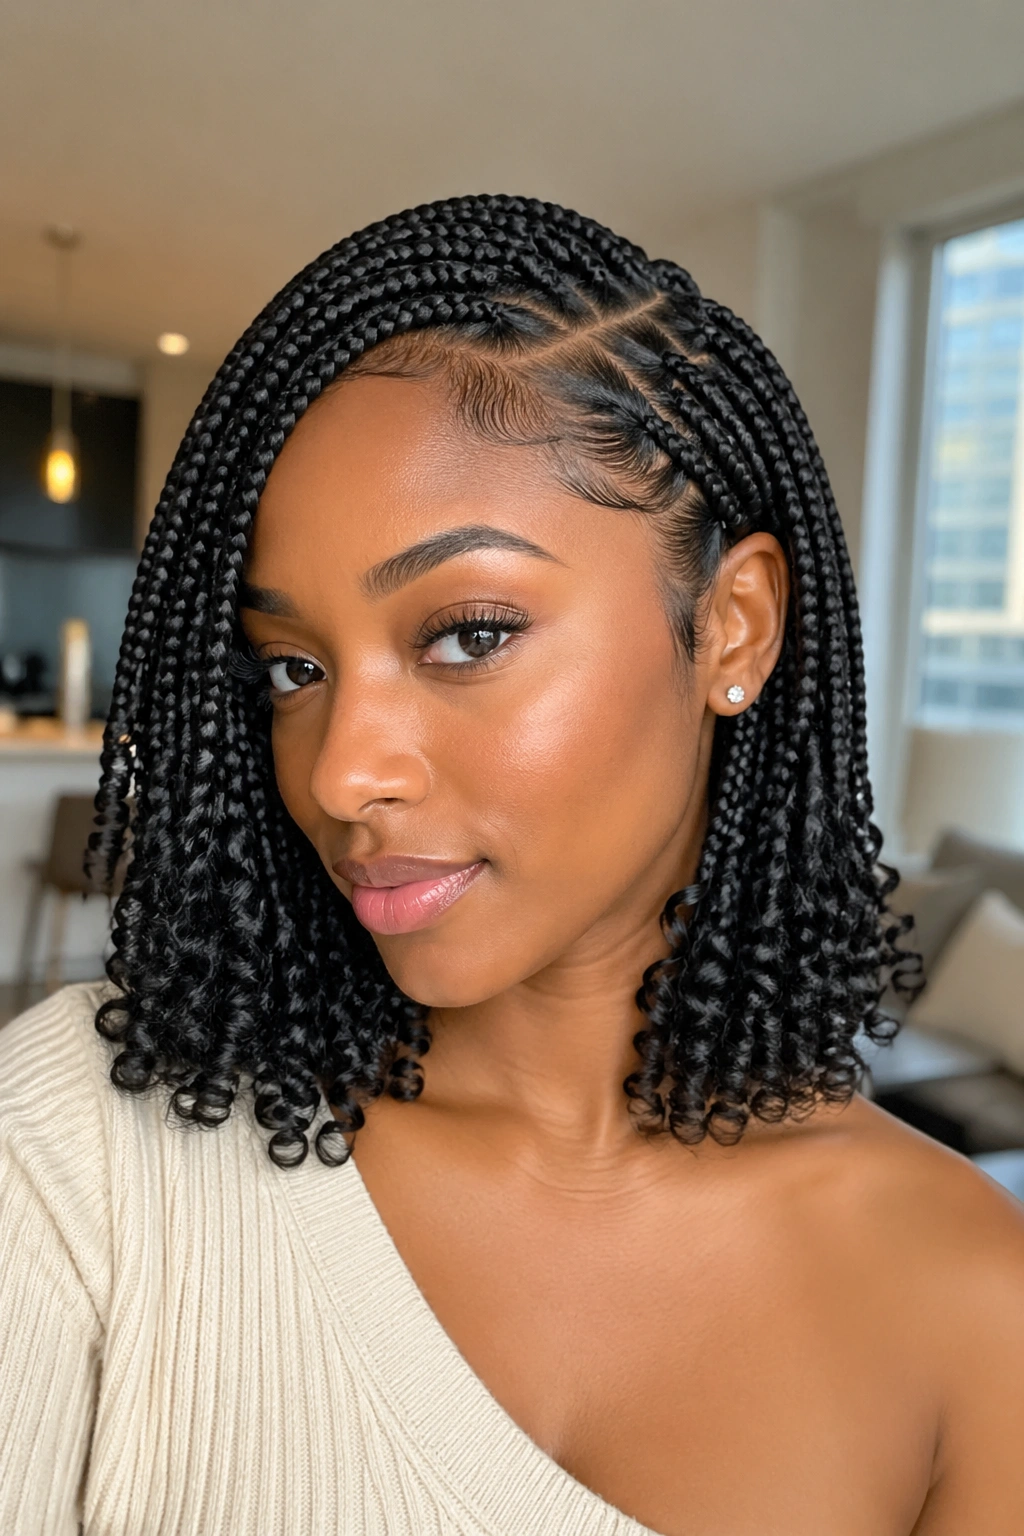
Want a style that gives the whole set a little more shape without changing the length? A side part does that fast. It shifts the weight of the braids to one side, opens up the face, and makes the curly ends feel more playful because they fall at an angle instead of straight down.
The best side-part versions are not dramatic in a cartoonish way. They are soft, just off-center, and clean near the hairline. That slight offset is enough to make the style feel different from the usual middle-part braid set.
How to wear it
A deep side part works well if you like a little drama around the forehead and temple. A softer side part is easier to wear every day, especially if you want the braids to tuck behind one ear without fighting the rest of the style.
- Keep the heavier side of the part on the side you naturally favor.
- Let the front curls fall near the cheekbone, not right in the eye.
- Smooth the part with a tiny amount of mousse or edge product, then let it dry before you touch it again.
- Sleep with the part protected, or it can puff up and lose the clean line.
This one looks especially nice with simple earrings. The braids do not need much else.
3. Half-Up Knotless Box Braids With Curly Ends
Picture this: you want your hair off your face, but you do not want the whole style pinned back into a tight knot. Half-up braids solve that problem without making the curls disappear. The top section gets lifted, the bottom section stays loose, and the curly ends keep moving.
It is one of the easiest ways to make medium-length braids feel a little more styled. The crown sits neater, the neckline stays open, and the ends still get to do their thing. On busy days, this version saves you from having to think too hard.
You can keep the top section small or make it bold. A smaller half-up looks softer and more wearable. A bigger lift at the crown gives a more obvious shape, which can be nice if the braids are especially dense.
- Gather only the top 6 to 8 braids from each side if you want a light half-up.
- Wrap one braid around the elastic so the base looks finished.
- Leave the lower curls loose so they still bounce.
- If the crown feels too tight, loosen it a little before it dries in place.
That last point matters. Tight half-up styles can flatten the top and make the whole install feel less relaxed.
4. Center-Part Braids With Face-Framing Pieces
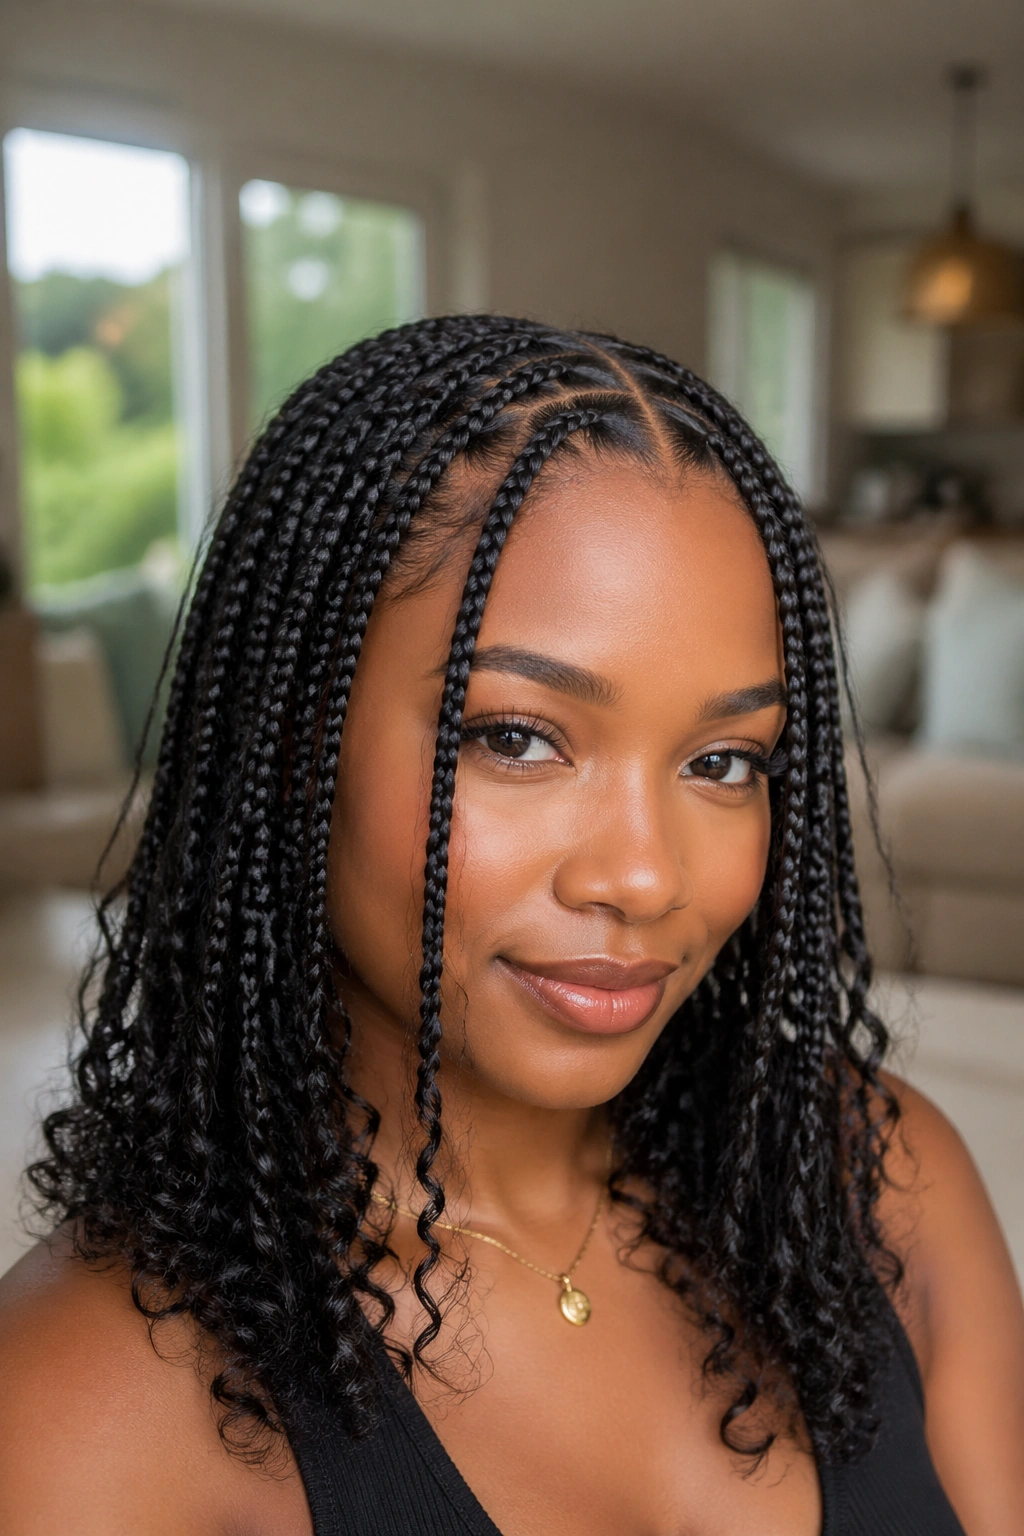
A center part is a clean move, but it gets even better when you leave a few face-framing pieces out near the front. That tiny change keeps the style from reading too severe. You still get the symmetry of the middle part, but the loose pieces soften the line and keep the curly ends from feeling like an afterthought.
This is the version I reach for when I want the braids to look neat without looking hard. It works well with glasses, longer earrings, or a strong brow because the hair does not compete with the face. It just frames it.
The face-framing pieces should be narrow. If they get too thick, the front of the style starts to look heavy, and the clean part gets lost. Better to keep them slim and let the ends do the talking.
Choose this style if you like balance. It is also a smart pick if you wear your hair down most of the time and do not want to fuss with constant pinning. The center line keeps everything anchored, and the loose front pieces stop it from feeling flat.
5. Blunt Bob Knotless Braids With Curly Tips
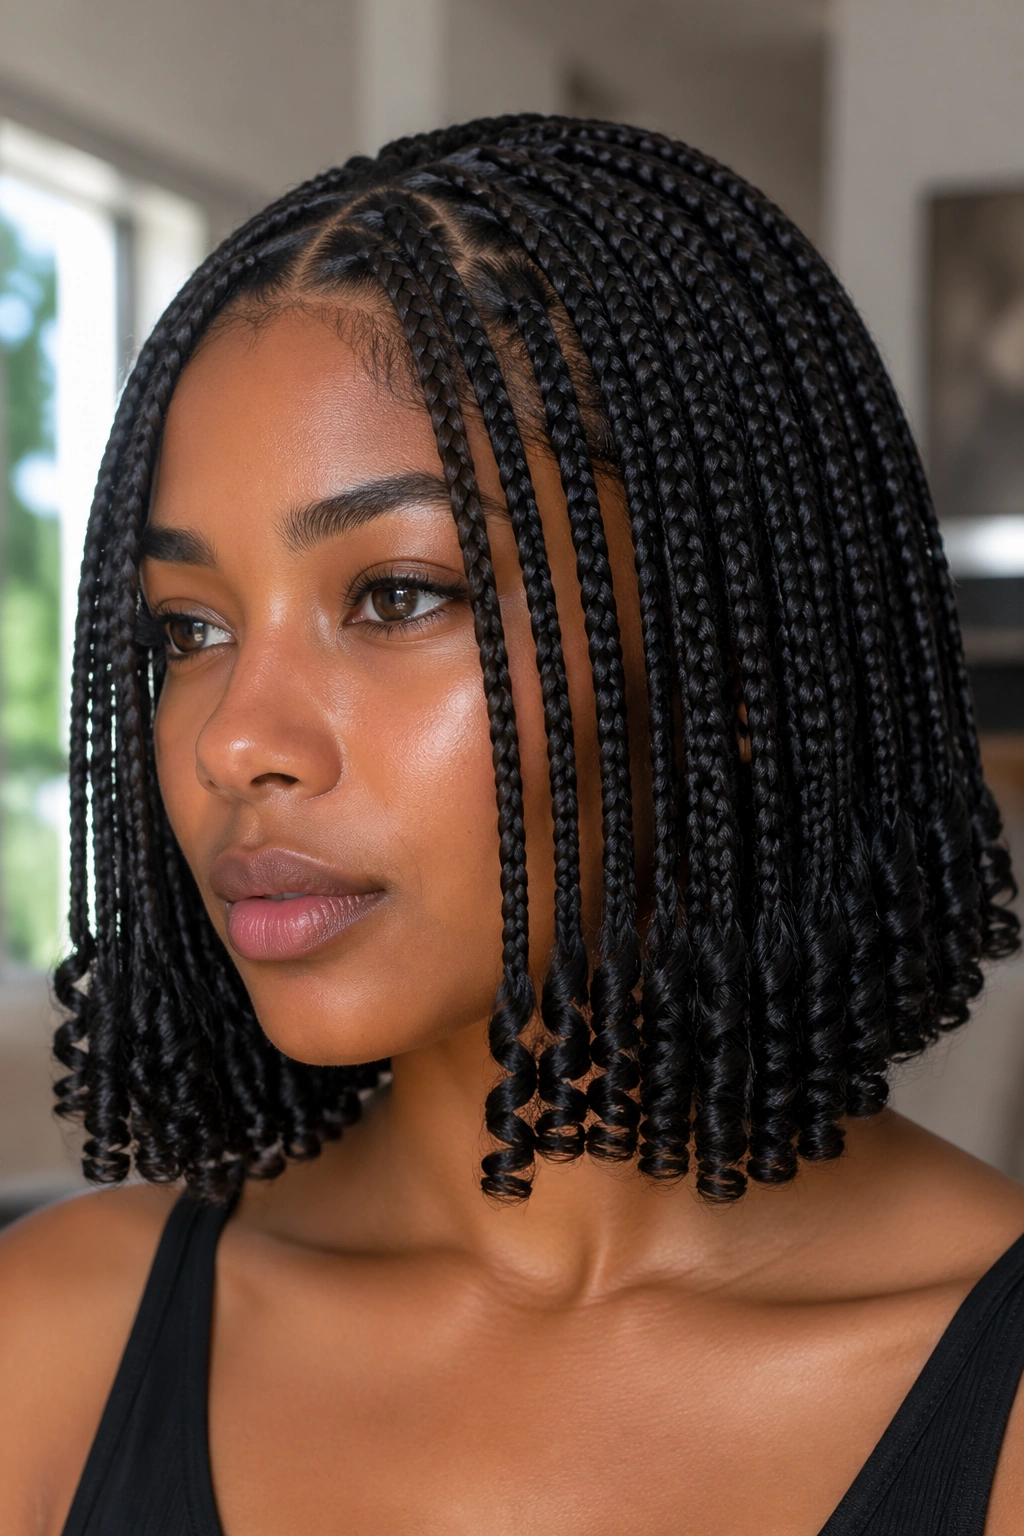
A blunt bob with curly tips looks simple until you wear one. Then you notice how much shape it gives your neck, jawline, and shoulders. The braids stop in a straight line, and the curls add just enough movement so the ends do not feel heavy or boxy.
That straight edge is the whole point. If the braid lengths are too uneven, the bob starts to look choppy. If they are too long, you lose the sharp outline that makes the style work in the first place. A good blunt bob feels deliberate from every angle.
The curly tips keep it from looking harsh. They soften the bottom line and add a little swing when you walk, which is part of why this cut stays flattering. It looks neat with a buttoned shirt and still feels easy with a sweatshirt. Not a bad trick.
I also like this version for people who are tired of hair getting caught on straps and collars. Shorter braids are easier to live with. They tangle less at the ends, dry faster after a wash, and usually stay looking fresh longer if you sleep in a satin bonnet or scarf.
6. Triangle-Part Small Box Braids With Soft Ends
Triangle parts change the whole mood of the braids. The scalp pattern looks sharper, almost like a set of tiny facets, and the clean geometry makes the curly ends stand out more. Even from a few feet away, the parting looks different from the usual grid.
What makes the parting matter
Triangle parts work because they break the straight-up-and-down feeling of traditional sections. The shape draws the eye across the head instead of only down the braid length, which is useful when you want small braids to feel special without adding accessories.
A few things help the style hold together.
- Keep the triangles consistent in size across the crown.
- Ask for clean, crisp corners near the hairline so the parting reads clearly.
- Match the curl pattern at the ends so the style still feels unified.
- Keep the braids medium in length; triangle parts look best when you can actually see them.
Triangle parts are one of those details people notice even if they cannot name them. That is the appeal. The style feels custom.
Tip: If the parts are uneven, the whole install looks rushed. Better to keep the sections a little simpler and cleaner than to chase fancy shapes that do not line up.
7. Low Bun With Curly Tail Pieces
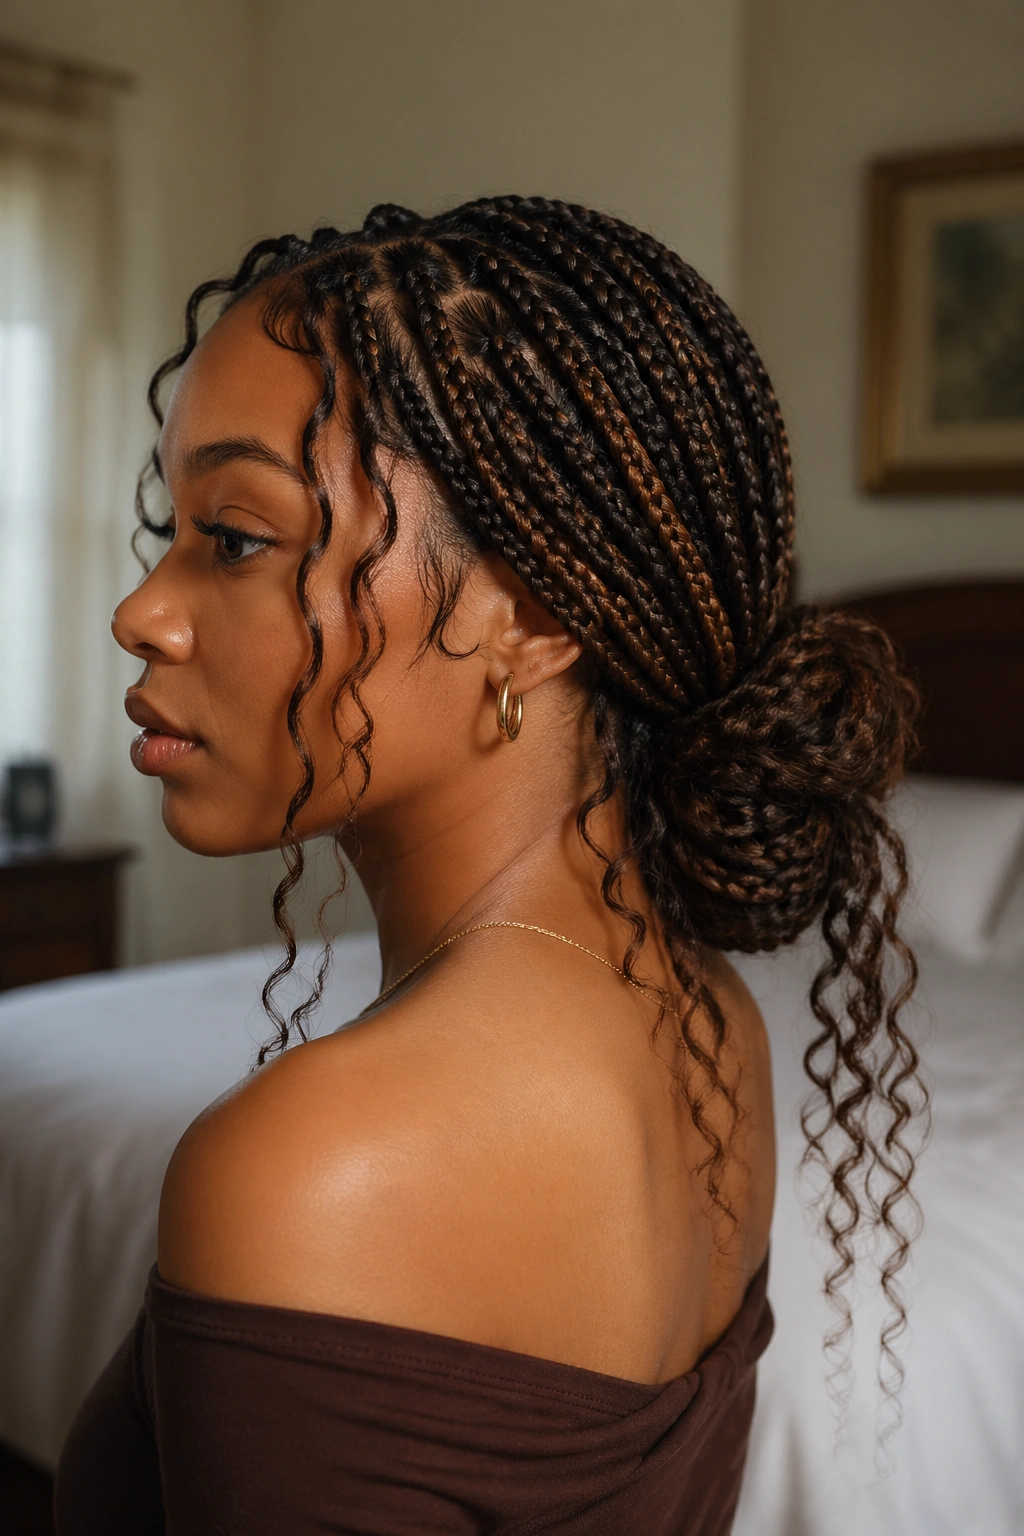
A low bun makes curly ends look intentional instead of accidental. Pull the braids down to the nape, twist them into a small bun, and let a few curly tail pieces hang out behind it. The result is tidy, but not severe. It has enough movement to keep the style from feeling pinned down.
This version works when you want your hair off your neck without hiding the full install. You still get to show the length, but the shape is more controlled. That matters on long days, gym days, or any day when you want the braids to behave.
The bun should sit low and loose enough that the curls do not get crushed. If you twist the braids too tightly, the ends lose their bounce and the bun starts to look stiff. A few U-pins or a small snag-free elastic usually does the job better than trying to force everything into place.
I like this look most when the curly tail pieces are left uneven on purpose. A little irregularity makes the style feel lived-in. It also keeps the bun from looking too polished in that fake, sprayed-on way that never lasts past lunch.
8. Box Braids With Beads and Small Gold Cuffs

Can beads work on small braids? Absolutely. You just have to use them with a little restraint. The charm of small medium-length knotless box braids with curly ends is the movement, and too many heavy accessories can drag that movement down fast.
Where to place the beads
The smartest placements are near the ends or on the outer braids where they frame the face. That keeps the accessories visible without making the crown feel crowded. Gold cuffs work well too, especially on the front rows, because they add shine without much weight.
- Put one or two beads on 4 to 6 braids total, not every braid.
- Use cuffs on the braids that fall near the temples or cheekbones.
- Keep heavier beads closer to the bottom, where they do not tug as much.
- Let some braids stay bare so the curls still stand out.
There is also a sound factor here, and I say that as someone who actually notices it. Too many beads click against each other and start to feel busy. A few pieces sound playful. A whole head of them can get irritating.
The best version of this look still lets the curls be the main event. The accessories should frame the style, not fight it.
9. Colored Knotless Braids With Dark Roots
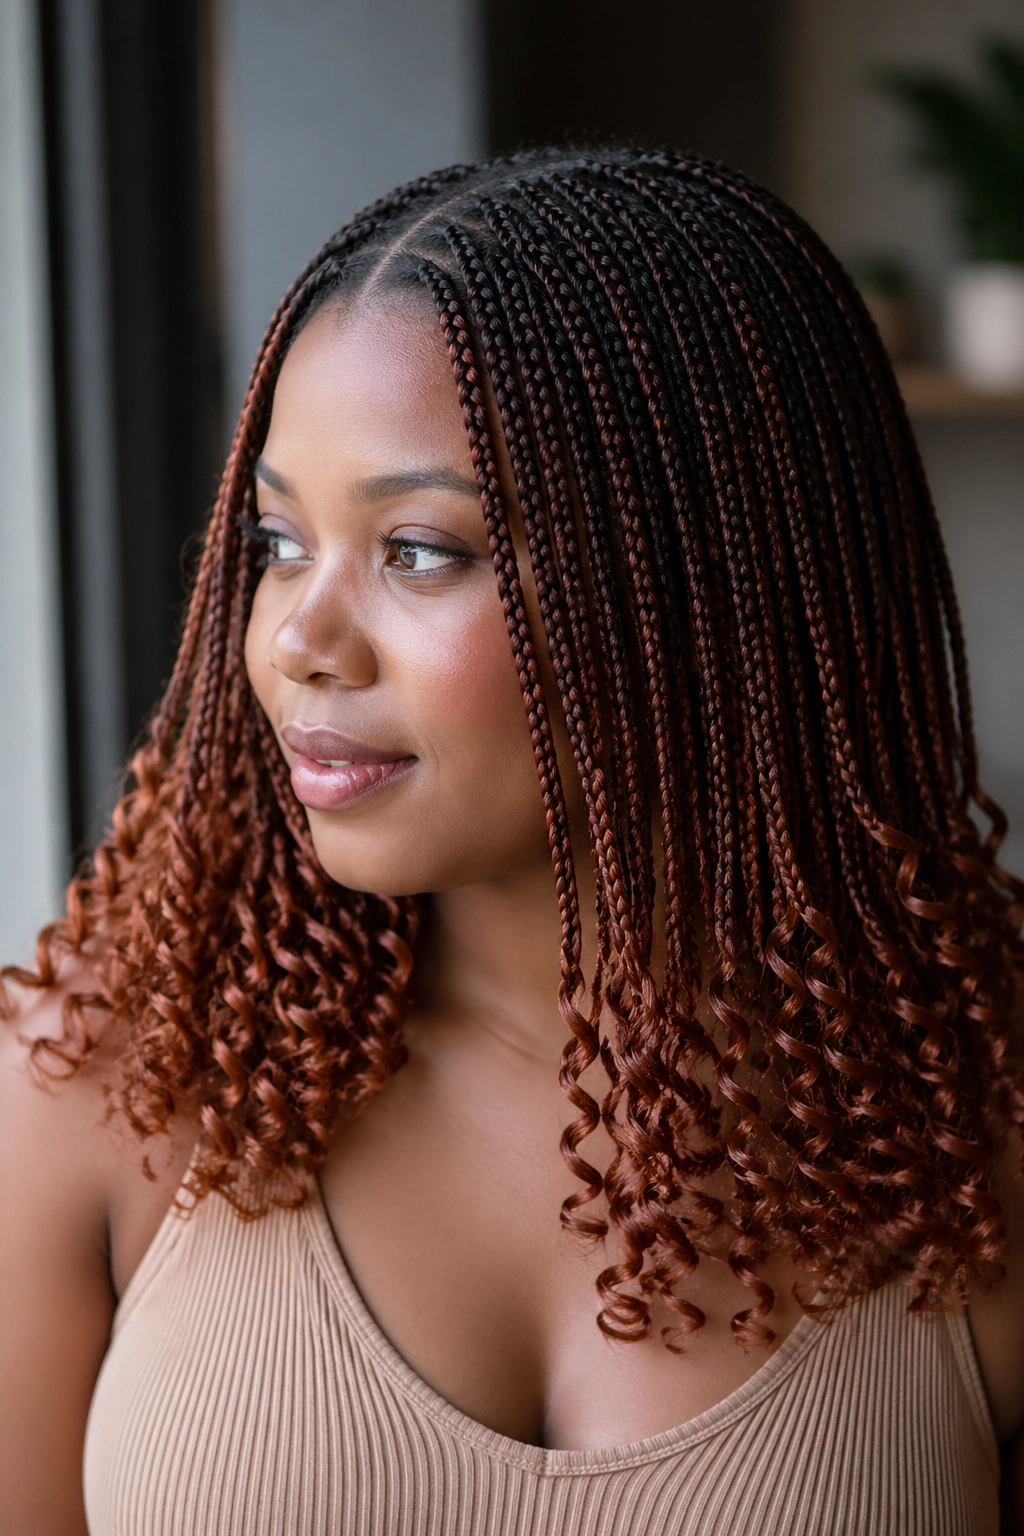
If you want dimension without bleaching your own hair, colored extensions are the easiest path. Dark roots with lighter braid lengths give the style depth, and curly ends soften the color shift so it does not look harsh at the bottom.
Chestnut, copper, honey brown, burgundy, soft blond, and smoky auburn all work well here. The trick is to keep the root tone grounded and let the color build gradually as it moves down the braid. The curly ends blur the edge just enough to make the whole thing feel smoother.
This is a smart style if you want people to notice the braids from across a room without going full neon. The color does the talking first. The curls finish the sentence.
- Choose a color that still reads in indoor light, not only in bright sun.
- Ask for a fade that starts about one-third of the way down if you want a softer effect.
- Keep the braid size small so the color looks detailed instead of bulky.
- Pair bright ends with a neat parting so the style does not feel chaotic.
I prefer this look when the color is richer than loud. Loud can be fun, sure. Rich tends to age better.
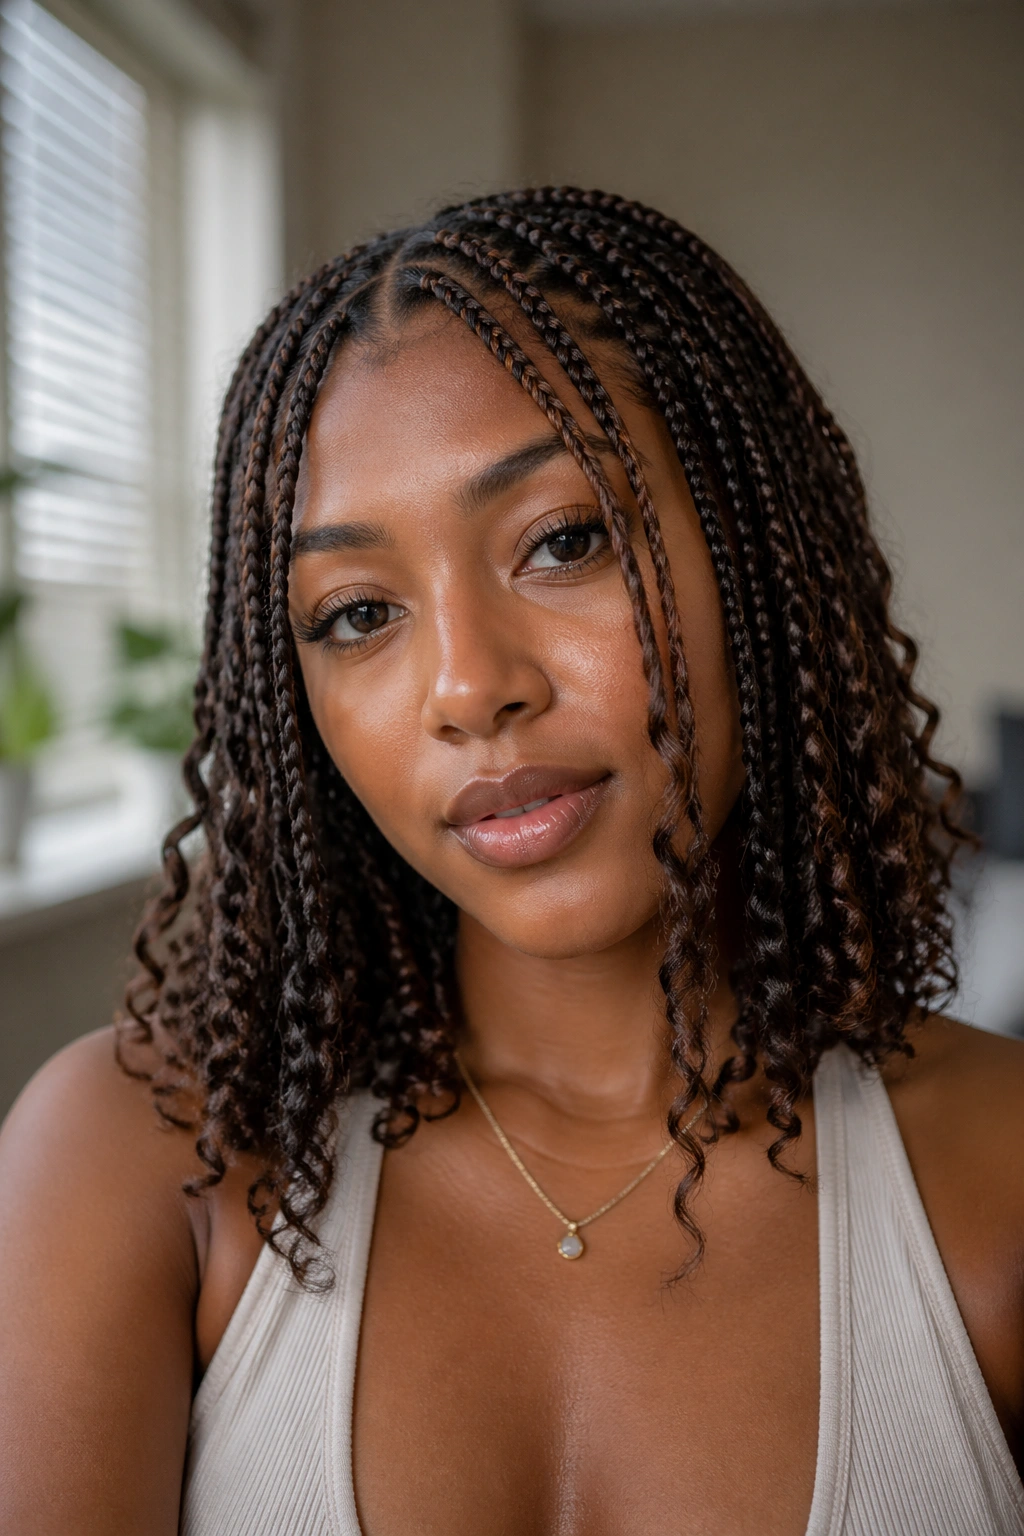
10. Layered Medium-Length Braids With Mixed Curl Patterns
Unlike one-length braids, layered braids move. Some sit a little higher around the face, some fall lower at the back, and the mixed lengths create a shape that feels lighter even when the install is full. Add curly ends with slightly different curl tightness, and the whole style gets more depth.
That layered shape is especially useful if your face gets swallowed by straight-down hair. The shorter pieces near the front open things up, while the longer back pieces keep the style from looking chopped off. It is a nice middle ground between bobbed and shoulder-skimming.
The curl pattern can do some of the work too. A tighter curl near the front gives a little lift, while looser curls in back keep the style from getting too busy. That tiny contrast makes the finish feel more natural.
This is a good pick if you want motion more than strict symmetry. A layered install asks for a braider with a decent eye, though. If the cut is off, you will notice it. There is no hiding a bad layer once the curls start to move.
11. Deep Side Sweep With Tucked Ear Lines
One side draped over the shoulder and the other tucked behind the ear gives the whole style a cleaner outline than a middle part ever will. It makes the curly ends fall in a more obvious curve, and that curve is flattering because it follows the shape of the neck and jaw.
This version feels a little more dressed up, even when the braids themselves are simple. The tucked side opens the face, which is handy if you want to show earrings or keep hair away from one cheek. The swept side carries the movement. That asymmetry is doing a lot of work.
The best way to wear it is to keep the tucked side smooth and the heavy side loose. If both sides get volume, the shape gets muddy. A light mist of mousse on the side you want flat helps, and a satin scarf at night keeps that side from puffing up.
I like this look more than I probably should. It has a quiet confidence to it without trying too hard, and that is rare with braid styles that include curly ends.
12. Curtain-Bang Braids With Loose Front Pieces
The first time you leave two narrow braid pieces hanging at the front, the whole style suddenly feels lighter. Curtain-bang braids give you that soft split around the forehead without forcing you into actual bangs, which is a relief if you like change but do not want commitment.
The loose pieces should be slim and slightly longer than the rest of the front row. That way they can curve toward the cheekbones instead of sitting straight out like little antennas. A soft curl at the ends makes the front look finished instead of accidental.
- Keep the front pieces narrow enough to move easily.
- Let them start a little higher on the crown so they fall naturally.
- Clip them back when you want a cleaner face shape.
- Use a small amount of mousse on the ends, not the roots, so they stay light.
This style is good for anyone who wants softness around the face without crowding the eyes. It also gives you options. Wear the pieces loose one day, pin them back the next, and keep the rest of the braids exactly the same.
That flexibility is a nice thing to have.
13. Wrapped Ponytail Knotless Braids
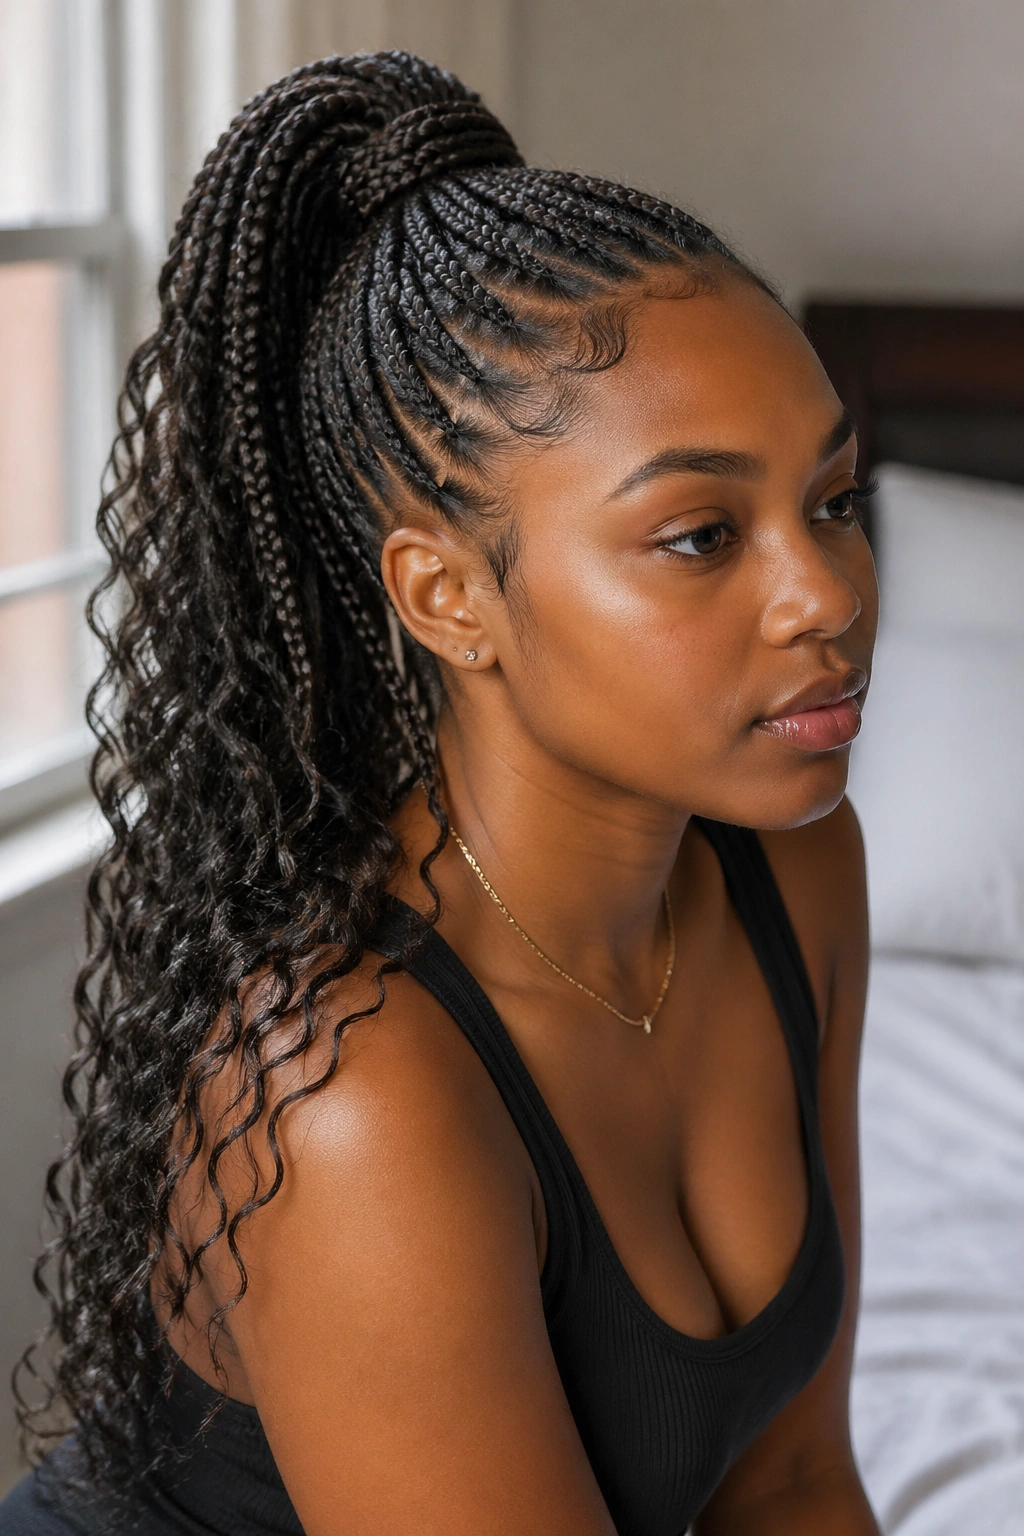
A wrapped ponytail base turns a simple ponytail into something sharper. Pull the braids into a mid or high ponytail, then wrap one braid around the elastic so the base looks finished instead of random. The curly ends can fall free as a tail, which keeps the style from feeling too rigid.
Best for
- Days when you want your neck free.
- Outfits with strong collars, high necks, or wide shoulder lines.
- Hair that needs to switch from loose to tied back fast.
- People who like a pulled-together look without a slicked-back finish.
The key is not to pull the ponytail so tight that the front goes flat and the curls lose their shape. A snug hold is enough. If the base is overdone, the style starts to look strained, and knotless braids are supposed to feel easier than that.
A wrapped ponytail also works well with medium-length braids because the tail still has enough weight to hang in a nice line. If the braids are too short, the ponytail can stick out. If they are too long, the wrap gets buried. This length range is the sweet spot.
14. Braids With Shells, Rings, and Accent Clips
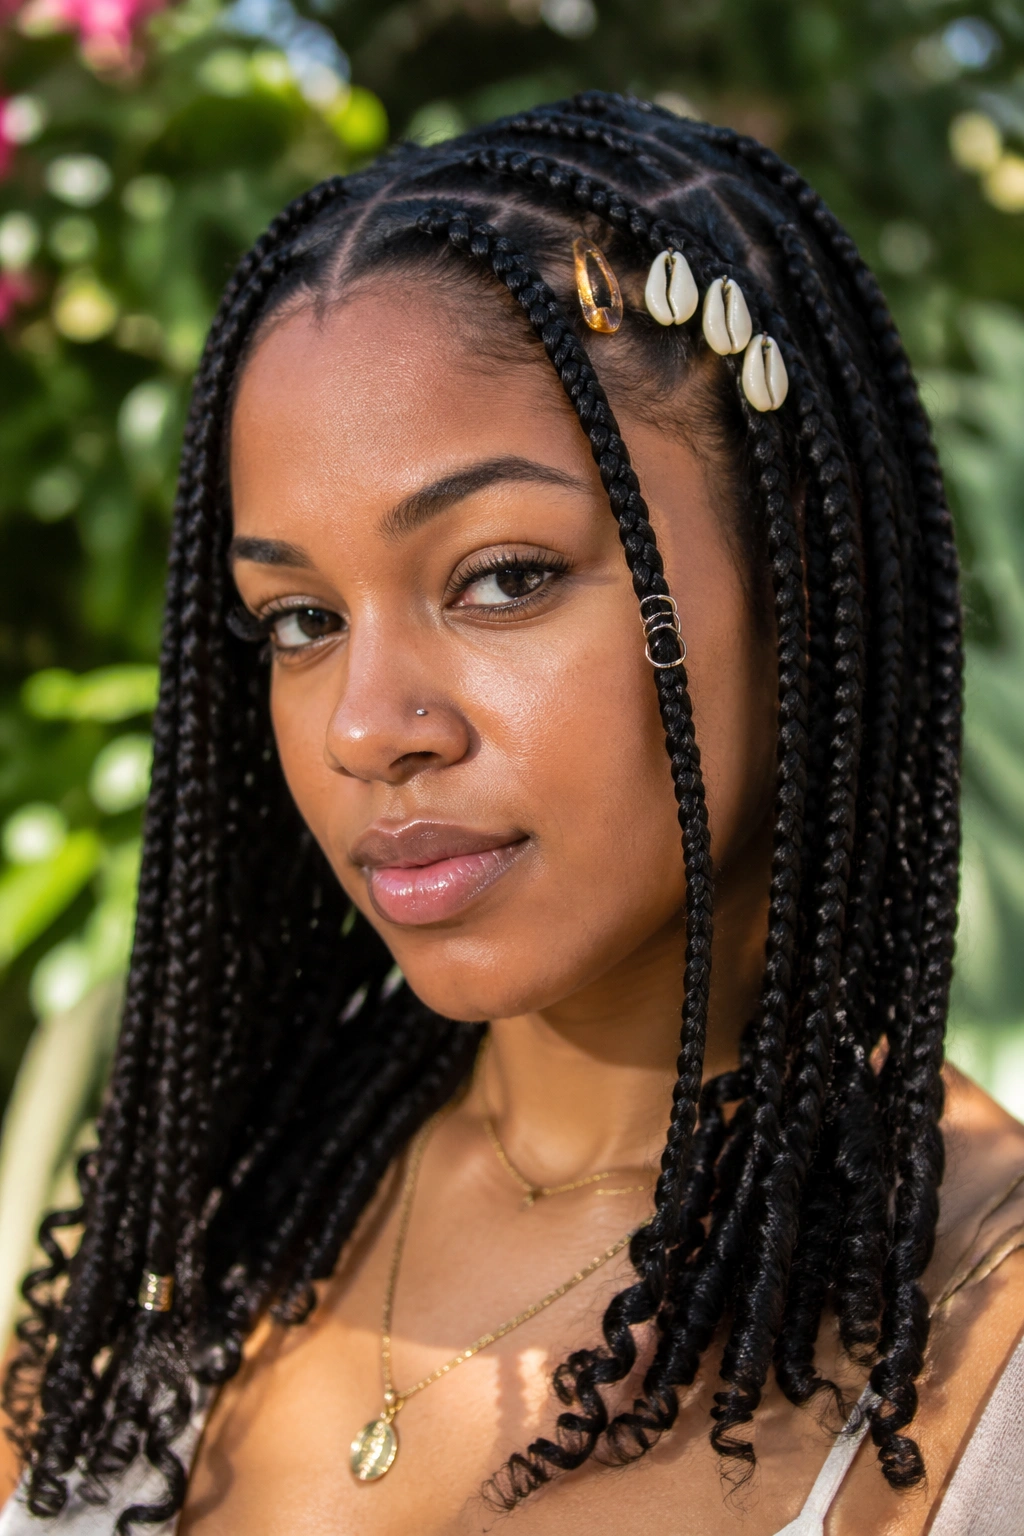
Want personality without piling on color or extra curl? Accessories do the job fast. Small shells, thin rings, and a few accent clips can change the mood of a braid set without touching the actual structure. The trick is to place them with some discipline.
How to keep it balanced
The best accessory styling is selective. A shell cluster near one temple, a thin ring on a front braid, and one bright clip near the part is enough. If every braid gets something, the look starts to feel crowded.
- Stick to one metal finish if you are using rings and cuffs.
- Keep shell pieces to one or two clusters.
- Put clips where the braids naturally separate, not in the middle of the densest section.
- Let the curls stay visible so the accessories do not steal the whole show.
I also like this styling choice because it gives you room to change your mind. You can remove a clip or add one without touching the install itself. That is useful if you like your hair to evolve a little over the wear period.
The best accent pieces frame the braids. They should not fight the ends or cover up the parting work.
15. Minimalist Small Knotless Braids With Defined Spiral Ends
The cleanest version is often the plainest one. No beads. No color streaks. No oversized bun. Just small knotless braids, tidy sections, and spiral ends that stay defined enough to read as a finish, not a mess.
That simplicity is what makes it work. When the parts are even and the curls are shaped well, you do not need extra decoration. The style already has enough contrast: smooth braid, soft curl, neat root, loose end. A good install can carry itself.
This version is especially nice if you like wearing hoodies, structured jackets, or simple jewelry. The braids do not have to compete with the rest of your look. They sit there and do their job. Quietly. Which, in braid land, is underrated.
Maintenance matters a little more here because there is less visual distraction. Freshen the curls with a light mist of water and foam, separate any pieces that start to clump, and resist the urge to pack on oil. Too much product will weigh the ends down and make the spiral look sleepy instead of springy.
If you want a braid style that still looks good when the accessories come off, this is the one I’d pick.
One Last Thing
Small medium-length knotless box braids with curly ends work best when the style has a clear main idea. Maybe it is the parting. Maybe it is the color. Maybe it is the curl pattern at the bottom. If everything is shouting at once, the look loses its shape.
The length matters because it keeps the curls visible without dragging the braids down. That is why collarbone, jawline, and shoulder-skimming cuts keep showing up in strong versions of this style. They hold the shape, and they let the movement stay visible.
Pick the version you can live with when the curls are a little fuzzier and the front row has softened up. That is the real test. The braid style that lasts best is not the one that looks perfect on day one — it is the one you still like when you catch your reflection a week later and think, yes, this still works.