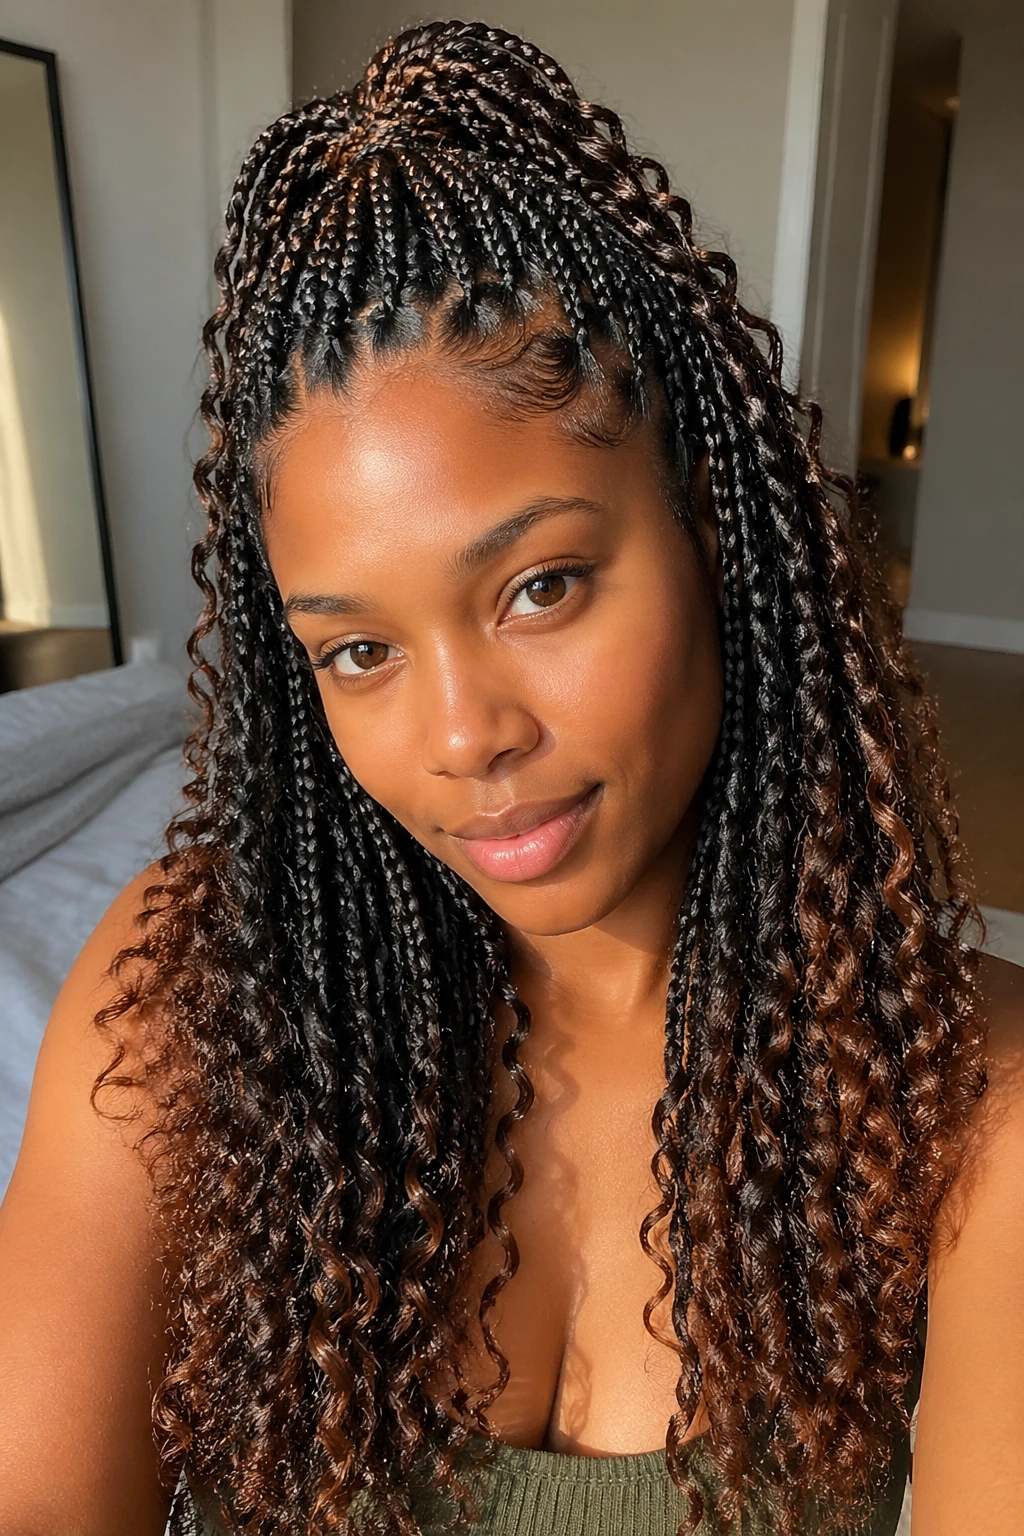
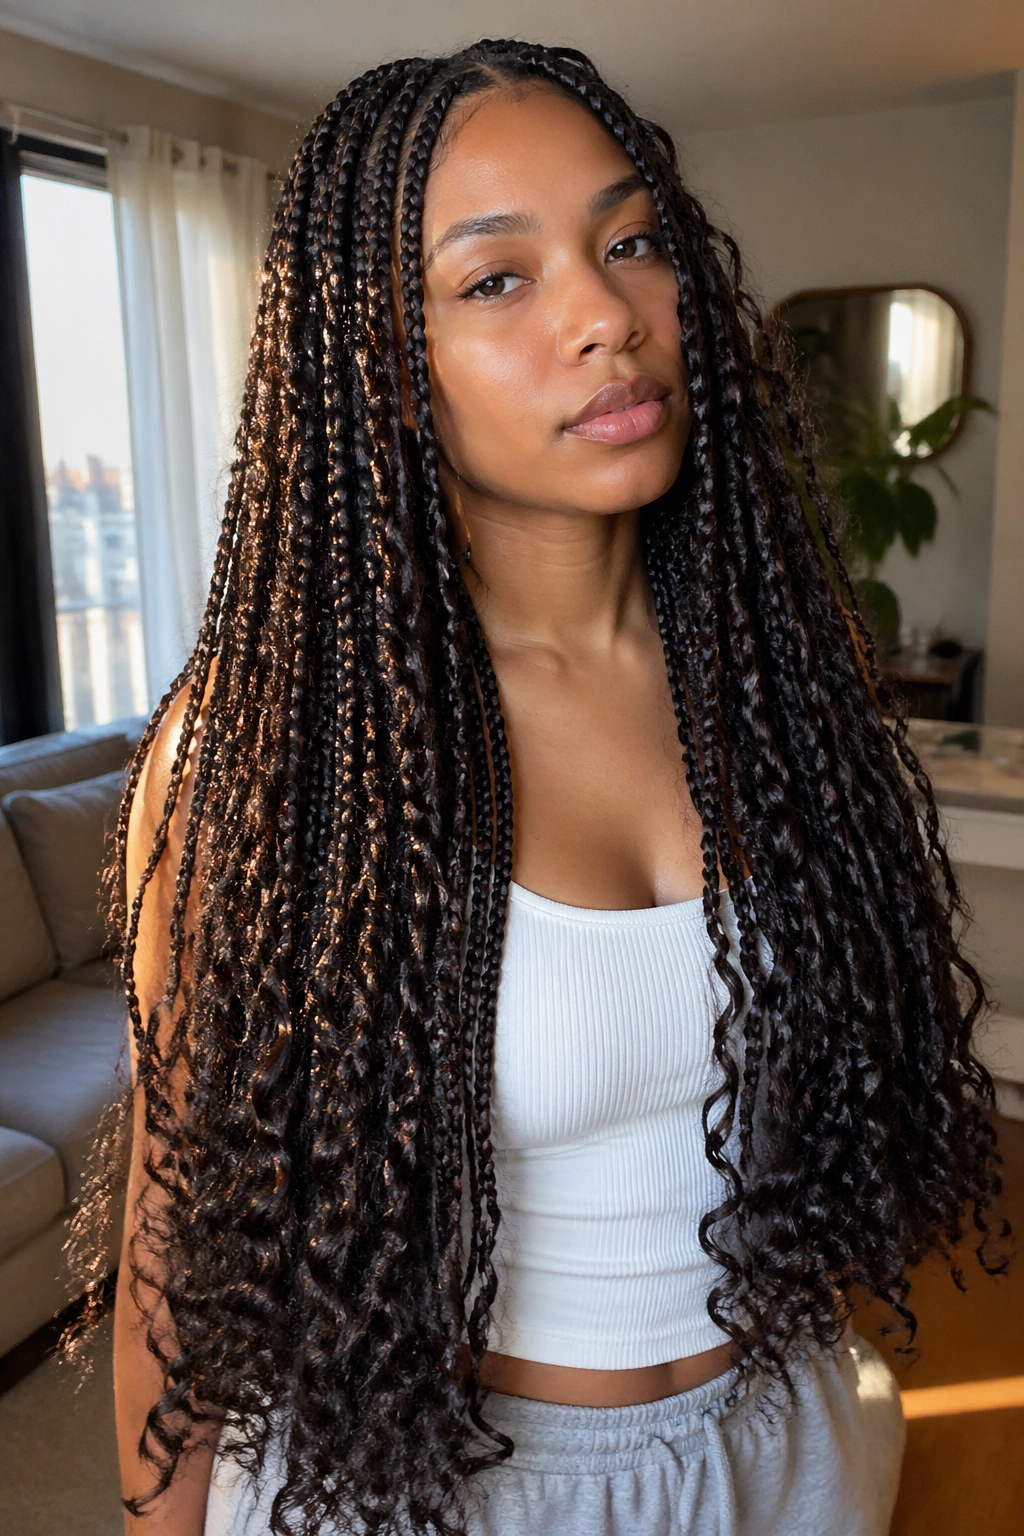
Small goddess knotless box braids with curly ends have a way of looking soft the second they move. The roots stay neat, the braid pattern stays clean, and the ends keep the whole style from feeling stiff or heavy.
The funny thing is how fast the look changes. Shift the length by a few inches, move the part to one side, or leave a few face-framing pieces loose, and suddenly the same braid set feels sweeter, sharper, or more dressed up. Knotless braids matter here too — they sit flatter at the scalp and usually feel lighter than a tight knotted start, which is a big reason people keep returning to them.
Curly ends do a lot of the heavy lifting. If the curl is tight and defined, the style looks polished. If the ends are frizzy or cut blunt, the whole set loses that airy finish. That little swirl at the bottom is not an afterthought. It’s the part that makes the braids move.
The versions below each solve a different styling problem: length, face shape, polish, comfort, color, or ease. Some are soft and romantic. Some are cleaner and more structured. A few are a little louder. That’s the point.
1. Waist-Length Small Goddess Knotless Box Braids With Curly Ends
This is the version people picture first, and honestly, there’s a reason it stays popular. Waist-length braids give the curls room to swing, which makes the ends look intentional instead of tacked on at the last minute. The length also gives the style a little drama without needing beads, cuffs, or color to carry it.
Small braids help keep the shape from turning bulky. That matters more than people think. If the braids are too thick at waist length, the style can start to feel like a heavy curtain. Small sections keep the body light, and the curls at the ends keep the whole thing from looking too severe.
Why the length matters
The longer length lets the braid fall in layers against your clothes, shoulders, and back, so the ends show movement even when you’re standing still. It also gives you more room to style the hair into a low ponytail or a loose half-up look without the finish disappearing.
- Best when you want a full, flowing silhouette
- Works well with center parts and deep side parts
- Keeps the curls visible even when the braids are tucked behind your shoulders
- Looks best when the last inch of each braid is kept neat before the curl begins
My blunt advice: keep the braid-to-curl transition clean. If that line is messy, the style looks rushed no matter how good the rest of the install is.
2. Shoulder-Length Small Goddess Knotless Box Braids With Curly Ends
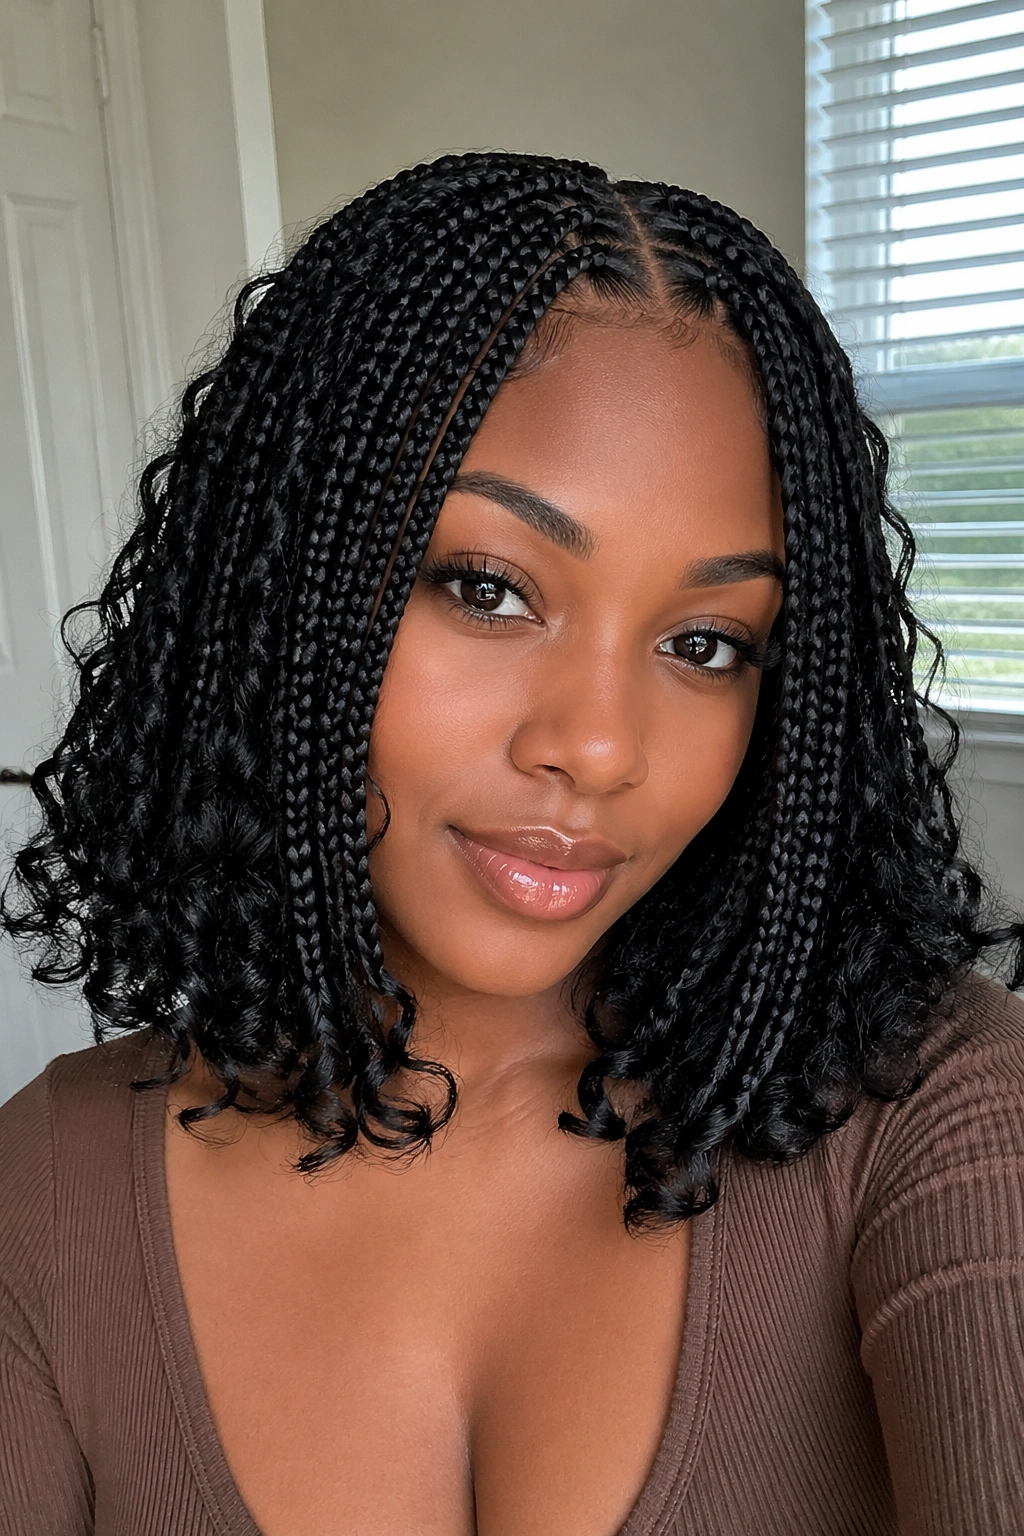
Why do shoulder-length versions feel so fresh? Because they give you the braid texture without the weight that comes with longer sets. The curls sit right around the collarbone and jaw, which means the style gets movement where people actually notice it.
This length is one of my favorites for everyday wear. It doesn’t fight with coat collars, scarf knots, seatbelts, or a backpack strap. And because the curly ends land higher on the body, they tend to stay springy and visible instead of getting buried under layers of hair.
How to wear it
A shoulder-length set looks especially good when the ends are left a little uneven in the best way — not choppy, just softly staggered so every curl doesn’t end at the exact same point. That small difference keeps the style from looking boxy.
- Great for anyone who wants less weight on the scalp
- Easy to tuck behind the ears without losing the shape
- Pairs well with a middle part or a soft side part
- Keeps the curly ends near the face, where they can soften sharper features
A shoulder-length set can look plain if the parting is sloppy. It also needs the curls to be defined, because shorter braids don’t have extra length to hide weak finishing.
3. Face-Framing Layers With Soft Curtain Curls
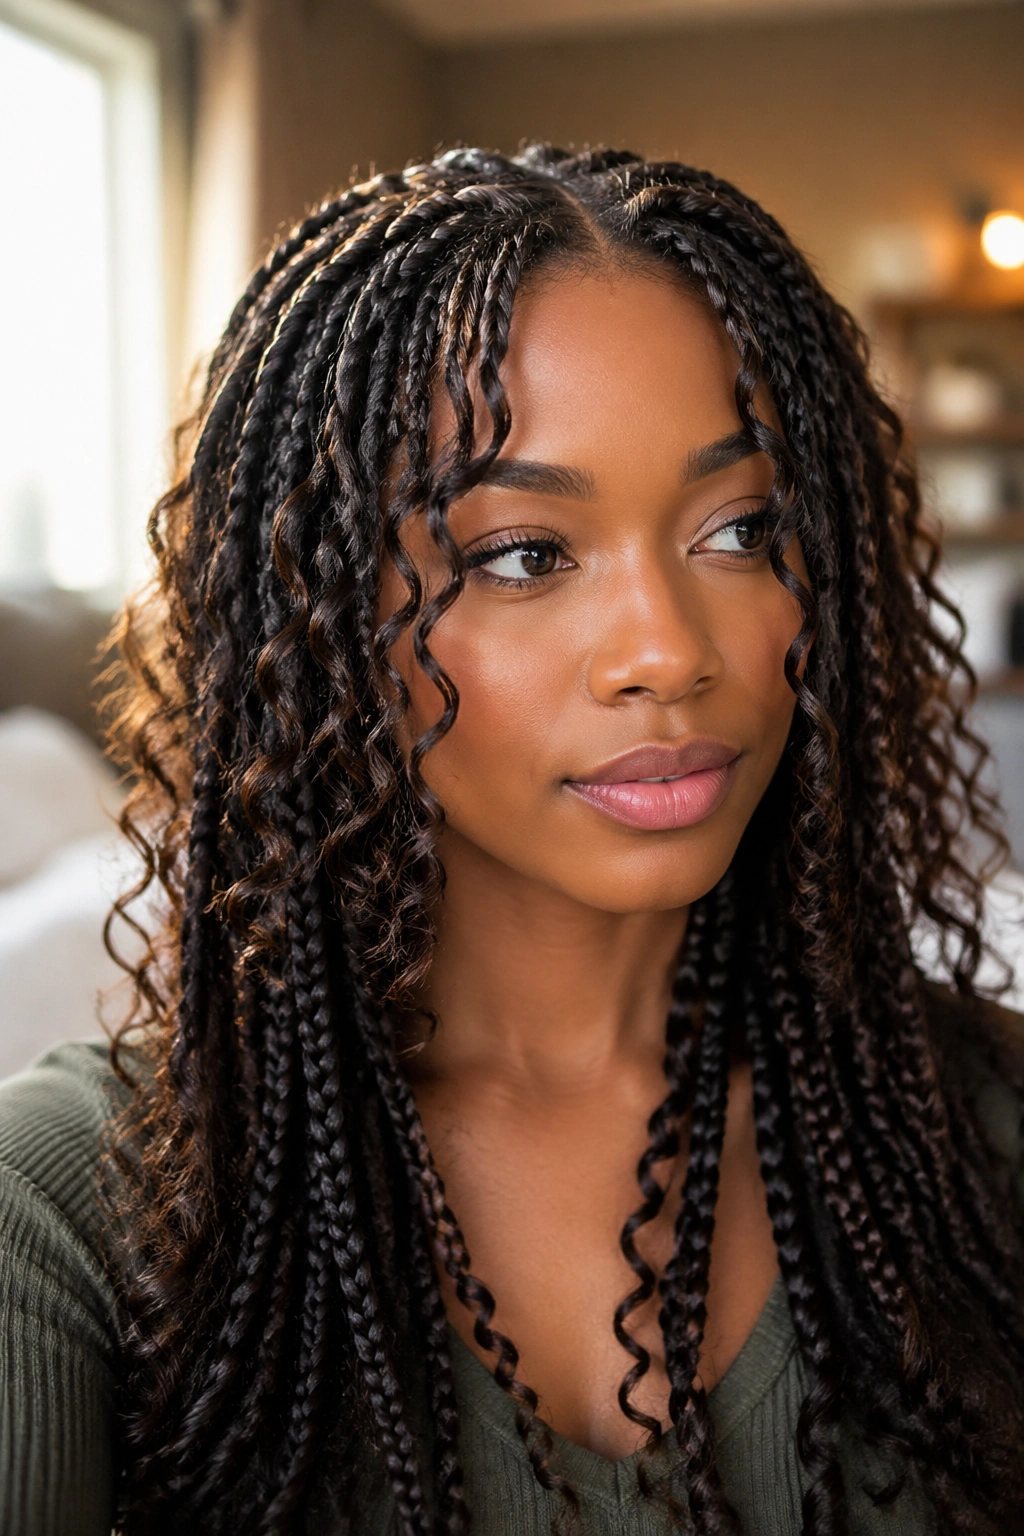
You know the problem: a braid style looks neat from the front and flat from the side. Face-framing layers fix that. A few shorter braids around the temples and cheekbones pull the eye inward, which gives the style shape without adding bulk at the crown.
The curls make the difference here. A soft curtain curl near the front of the face feels lighter than a straight braid hanging beside the cheek. It moves when you turn your head, and that little bit of motion stops the style from reading too severe.
What to ask for
Leave a few braids slightly shorter near the temples, then let the curls begin around cheekbone or chin level rather than all the way at the ends. That keeps the frame soft and stops the front from looking too busy.
- Keep 2 to 4 front pieces looser than the rest
- Ask for the curls to sit at cheekbone, mouth, or chin height
- Keep the middle and back rows full so the shape still feels balanced
- Use the front layers to soften high foreheads or strong jawlines
The best part is that you get shape without having to sacrifice the neatness of knotless braids. The look still feels controlled. It just breathes a little more.
4. Clean Center Part And Symmetrical Curly Ends
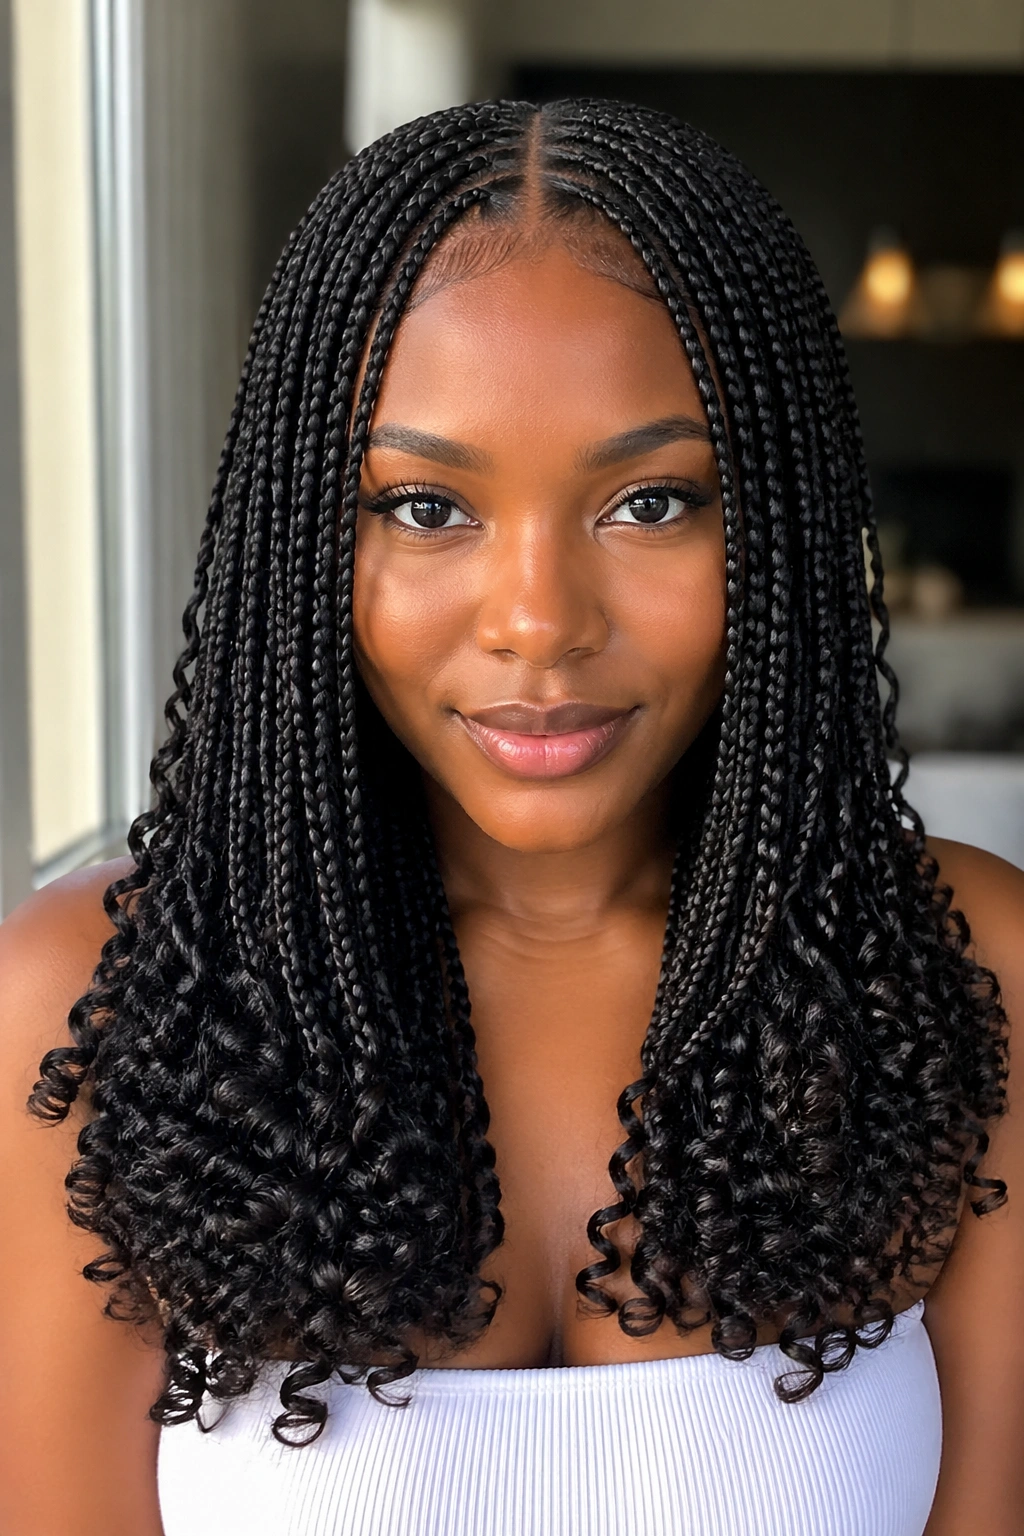
A center part makes this style look crisp fast. Both sides fall evenly, so the eye goes straight to the braid pattern, the neat roots, and the curl work at the bottom. There’s no hiding behind volume here. If the install is clean, it shows.
It’s a sharp look, but not harsh. The knotless base keeps the scalp line flatter, and the curls at the ends keep the symmetry from feeling too rigid. That contrast is the whole appeal — straight at the top, soft at the bottom.
I also like this version when the braids are small enough to create a visible grid at the scalp. You can actually see the parting work, which is satisfying in a way I can’t explain very well except to say: neat rows are a pleasure to look at.
The downside is obvious. A center part does not forgive crooked sections. If the part drifts or the rows go uneven on one side, the whole style starts to feel off. There’s nowhere to hide.
Still, when it’s done well, this is one of the cleanest ways to wear small goddess knotless braids. It looks polished with very little extra effort.
5. Deep Side Part Small Goddess Knotless Box Braids
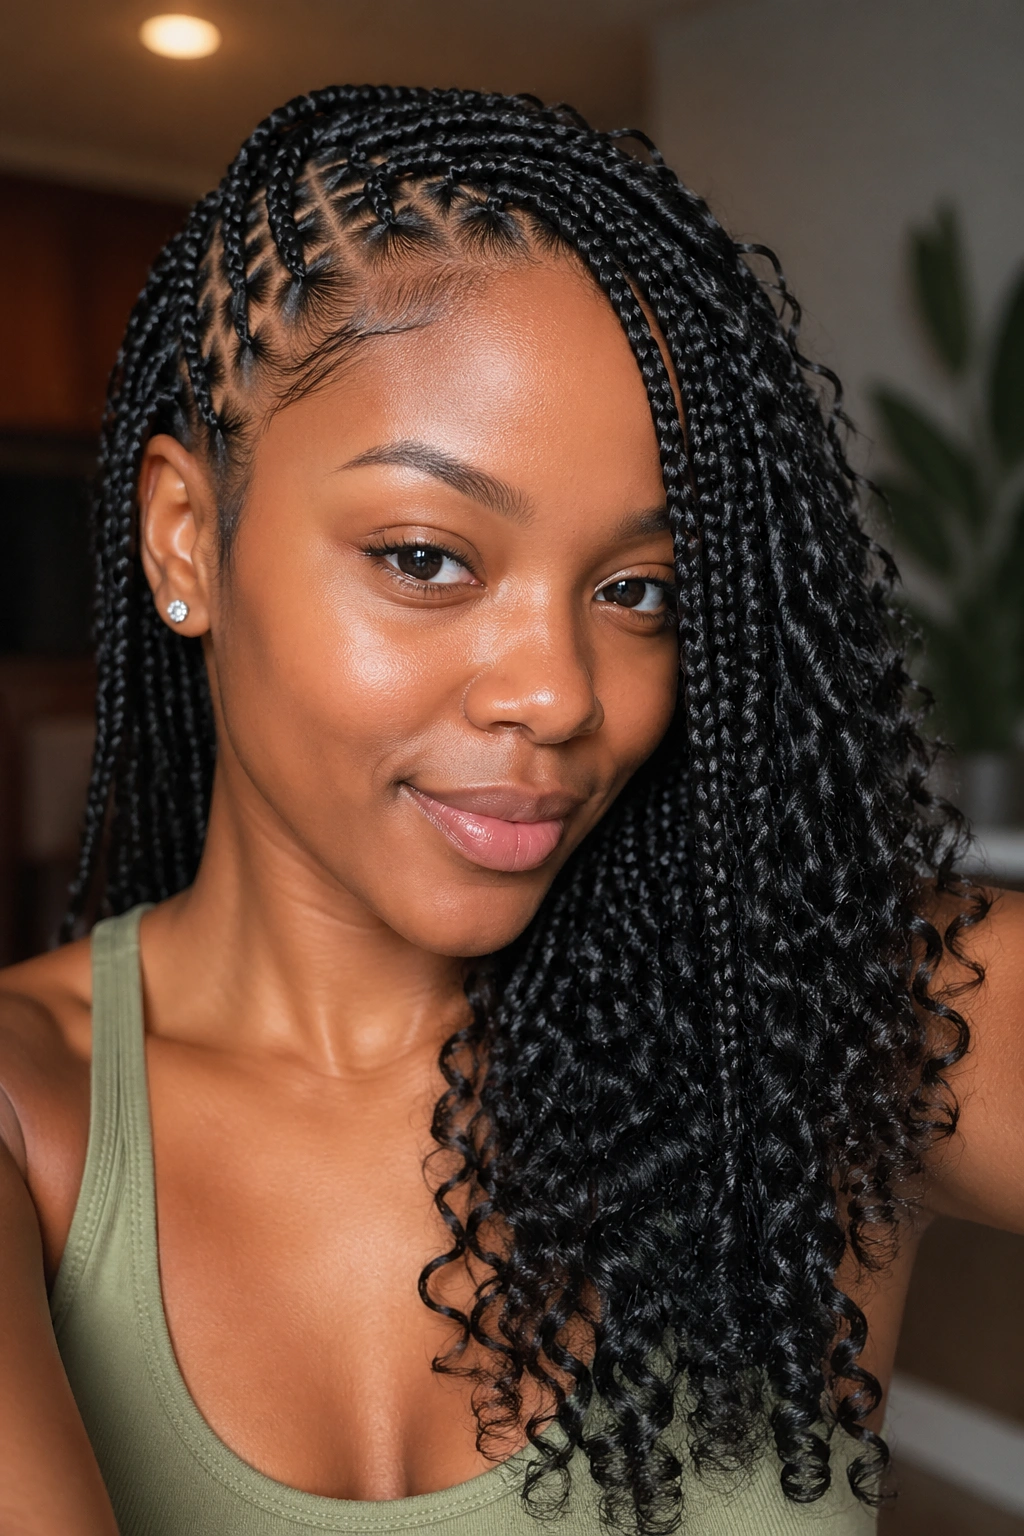
Unlike a center part, a deep side part softens the profile right away. It tilts the whole style off-axis, which makes the face look less rigid and gives the curls a chance to fall in a more dramatic sweep. The shape feels more relaxed, more casual, and a little easier on days when you do not want your hair to look too perfectly arranged.
This version is especially good if you like one side tucked behind the ear and the other side left loose. That asymmetry keeps the curls from feeling symmetrical in a stiff way. Instead, they land with movement, which is where the style gets its charm.
A deep side part can also make the front braids look fuller without adding actual bulk. That’s useful if you want a little lift near the crown but still want the braids to stay small and tidy. The diagonal line does some of that work for you.
I’d reach for this version if you wear earrings a lot. The side part gives your face more open space on one side, so hoops, drops, or a strong brow line don’t have to fight the hair.
6. Triangle-Part Small Goddess Knotless Box Braids
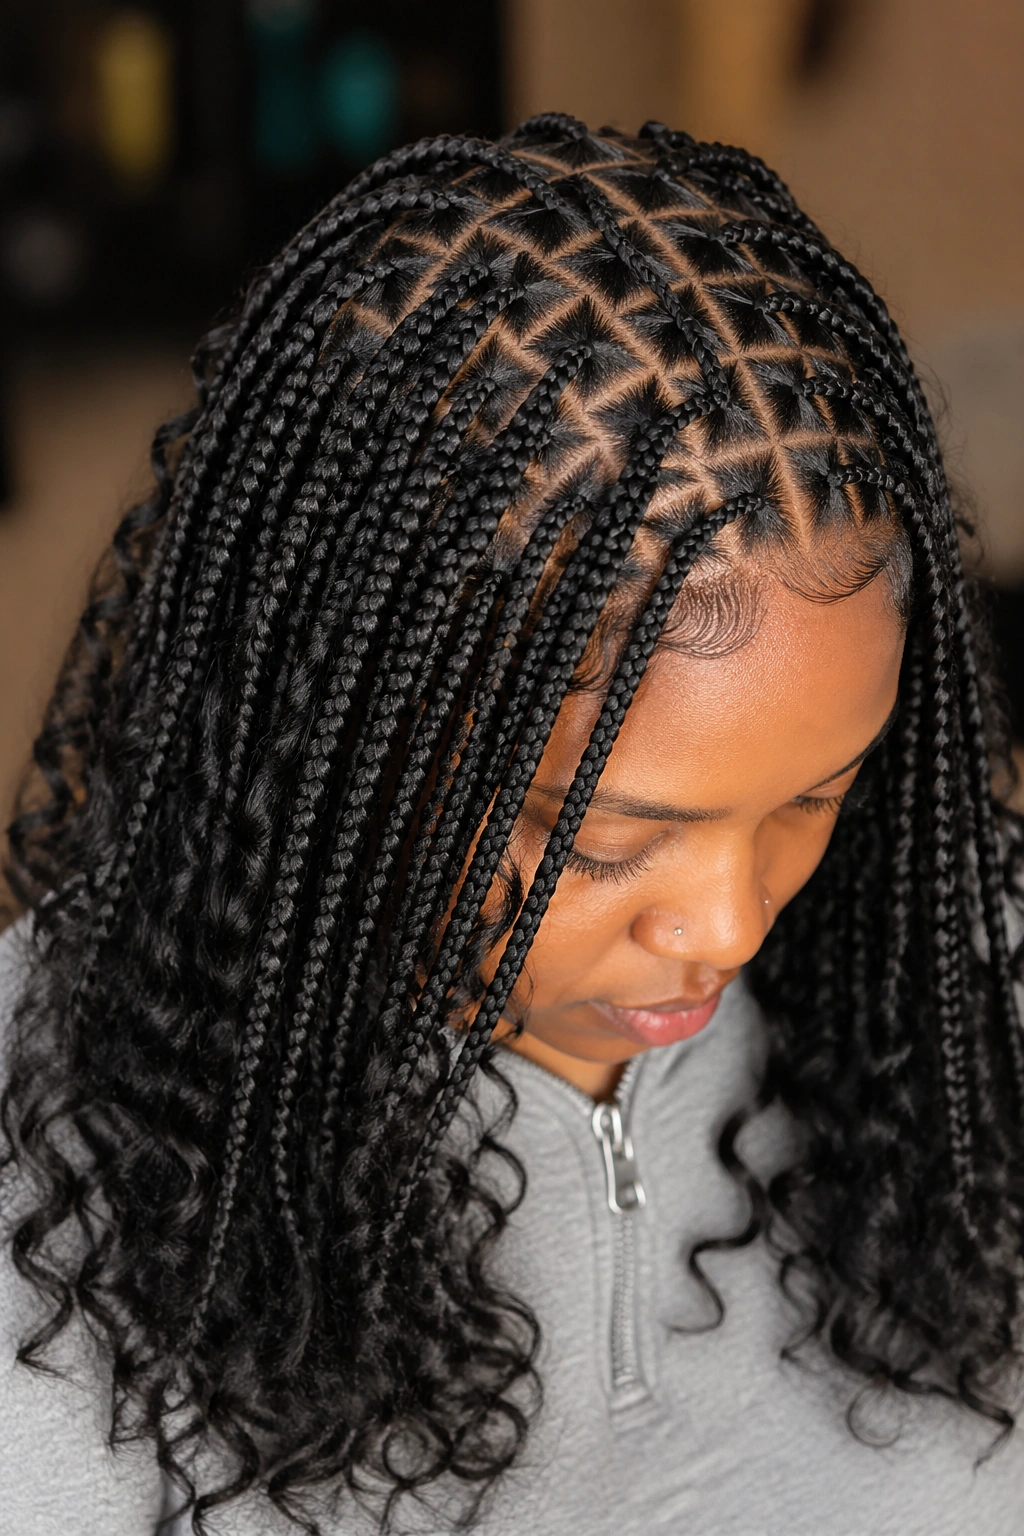
Triangle parts change the whole mood. The braid itself may be small, but the sectioning on the scalp gives the style a sharper, more graphic look. It reads as deliberate from a distance and looks even better up close, where the angles become part of the design.
What makes it different
A square part gives you a classic box braid feel. A triangle part feels a little more modern, a little more playful, and a lot more visible on the scalp. The braids still fall softly because of the curly ends, but the parting adds structure before the hair even moves.
- Best when you want the parting to stand out
- Works well with small to medium-small braid sizes
- Needs clean sectioning from crown to nape
- Looks strongest when the parts are consistent across the head
A triangle pattern does not have to be loud to be noticeable. Even subtle angles can make the install feel more styled. That’s why I like it for people who want detail without accessories.
Keep the part sizes steady. If some triangles are big and others are tight, the scalp pattern loses its rhythm fast.
7. Half-Up, Half-Down Small Goddess Braids
Half-up, half-down is the easiest way to make a braid set look styled without doing much at all. The top half pulls the hair away from the face, and the bottom half keeps all that lovely length and curl movement where it can still be seen. It’s a cheat code, and I mean that kindly.
The style works especially well with small goddess knotless braids because the small size keeps the lifted section from looking thick or awkward. Once the top is secured, the curls from the bottom half fall freely, so the whole look feels balanced instead of crowded.
I like this version when a full down style feels like too much hair around the neck. Half-up gives you air. It also lets the parting stay visible, which matters if you paid for good sectioning and want to show it off.
Use a snag-free scrunchie, a soft ribbon, or a small claw clip. Tight elastics can flatten the roots and make the top look squeezed. That’s not the goal. The top should sit softly, not look like it was wrestled into place.
8. High Ponytail Small Goddess Knotless Box Braids
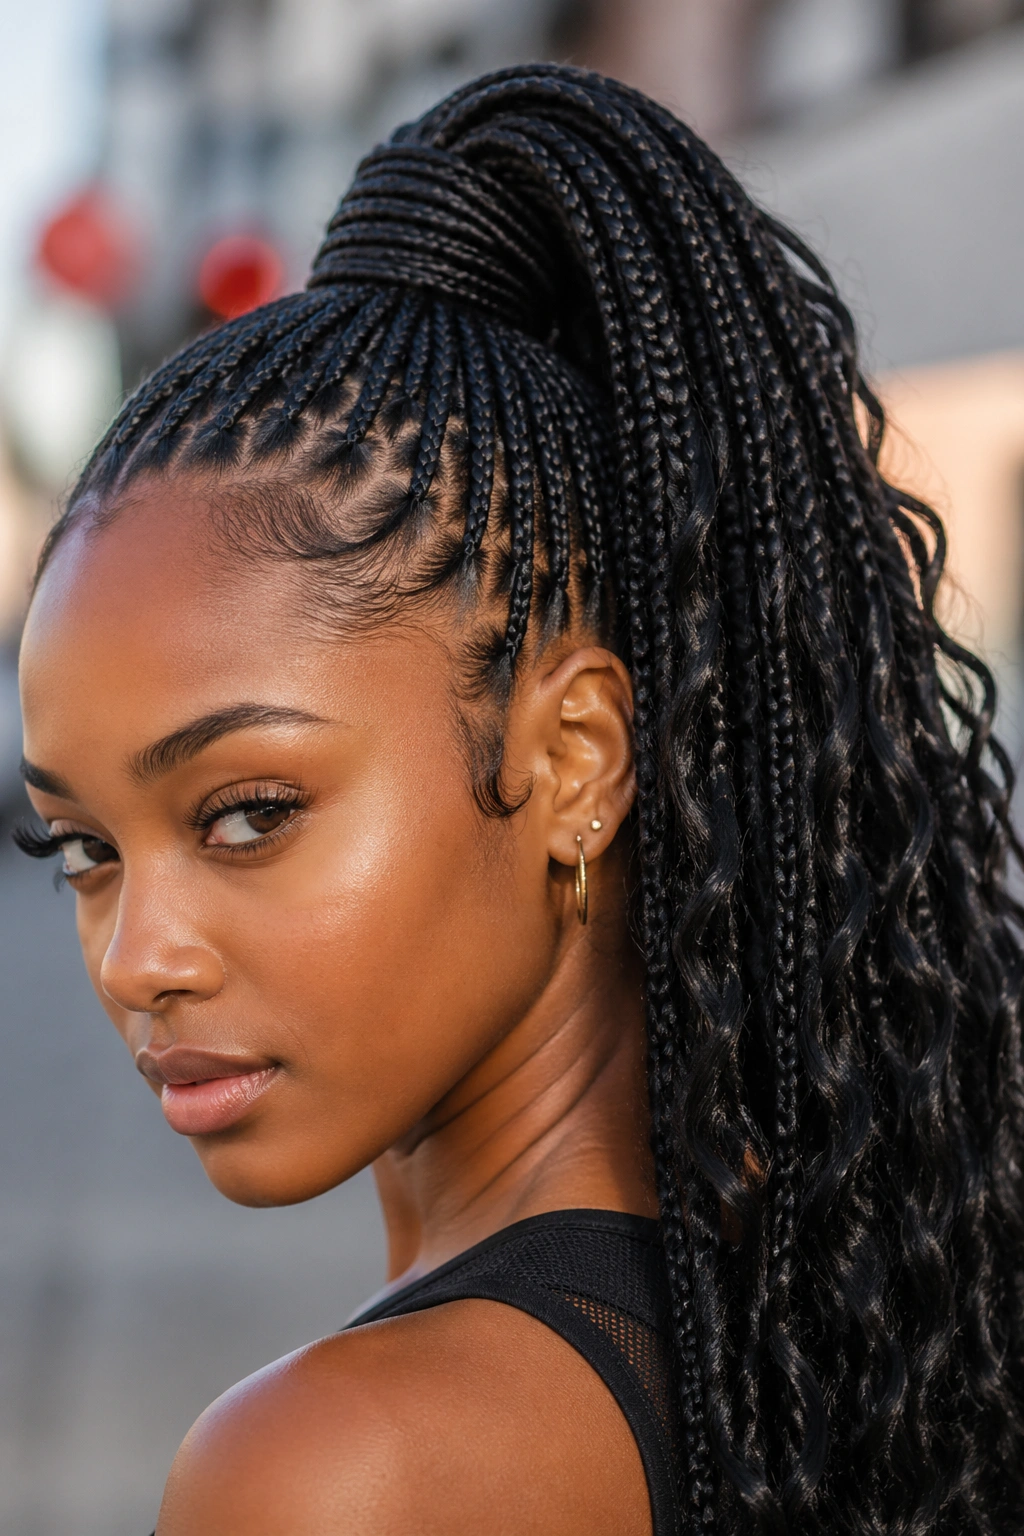
Can small braids really hold a high ponytail without looking lumpy? Yes, if the install is balanced and the roots are not overloaded. A high ponytail gives the style height, shows off the scalp work, and lets the curly ends cascade down like a tail.
This is the version that reads sporty and polished at the same time. The face opens up immediately, the jawline becomes more visible, and the curls get a chance to move in one long line instead of falling across the shoulders. It’s a strong look.
How to wear it
Pull the hair up from behind the ears first, then gather the remaining braids higher on the crown. That keeps the base from bunching at the hairline. If the ponytail sits too far forward, the roots can get stressed and the shape loses its clean line.
- Secure with a strong elastic that does not snag
- Keep the ponytail base smooth, not twisted into a knot
- Wrap one braid around the elastic if you want a neater finish
- Let the curls fall from the ponytail instead of trying to pin them flat
This style looks best when the curls are refreshed before you wear it. If the ends are too flat, the ponytail can feel a little stiff.
9. Low Bun With Loose Curly Ends
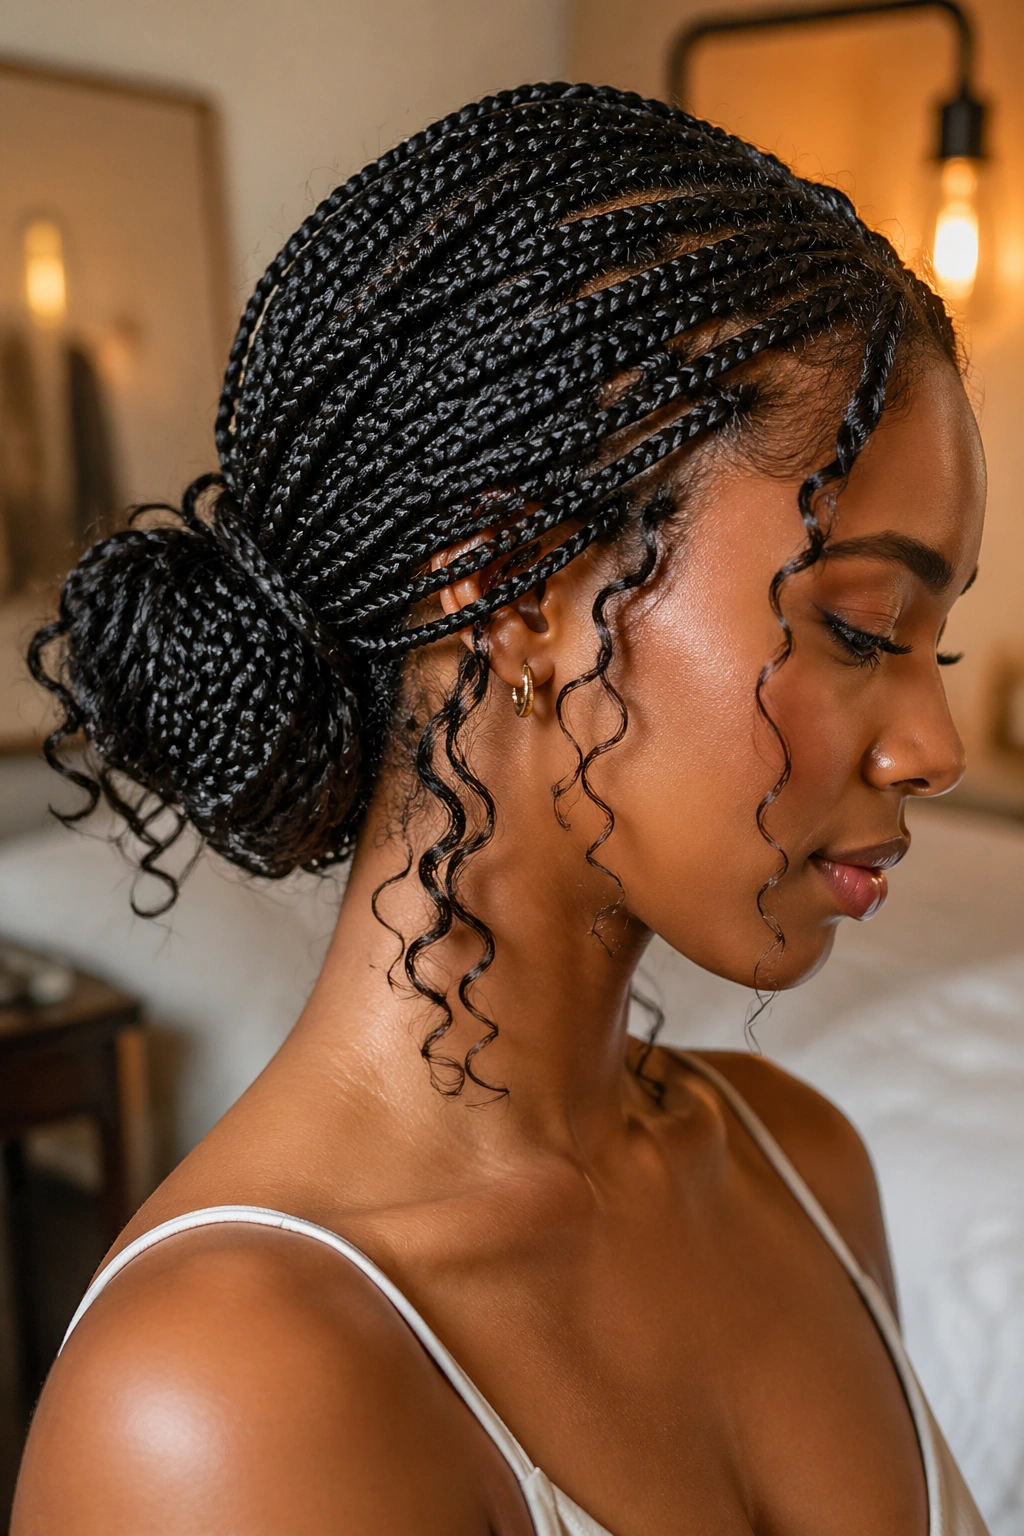
A low bun makes small goddess braids feel elegant without asking the style to do too much. It’s the version I’d pick for a long day, a dinner out, or any situation where you want the hair off your shoulders but still want the curly ends to show.
The trick is not to tuck everything in. Leave a few curls loose around the bun and near the nape so the style keeps its softness. A tight, sealed bun can look severe fast. A low bun with a few loose ends feels finished without being fussy.
The bun itself should sit near the nape, not high on the back of the head. That keeps the shape grounded and lets the braids wrap around naturally. If the bun is too high, the style starts to fight the weight of the braids, and that never ends well.
I also like this version because it shows off the neck and collarbone. That small detail makes a bigger difference than people expect. It gives the curly ends a place to land instead of crowding the face.
- Keep the bun flat and low
- Leave 4 to 6 curly pieces free near the bun
- Pin the body of the bun, not the curls
- Let a few braids wrap loosely around the base
10. Gold Cuff Accent Small Goddess Braids
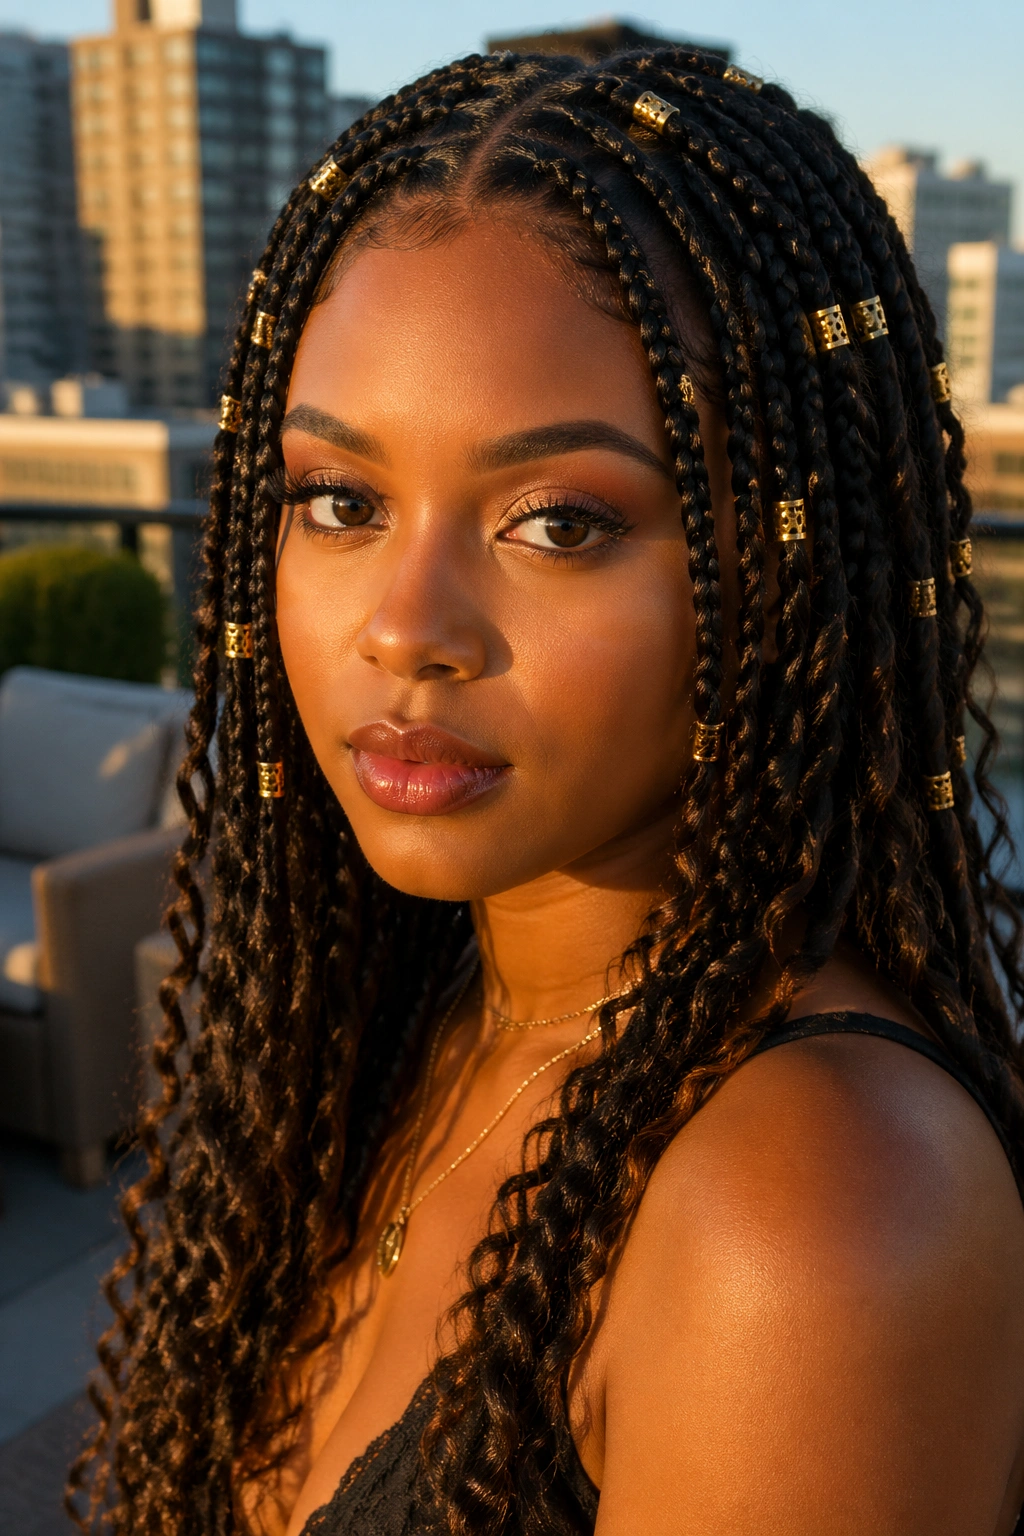
Gold cuffs are the fastest way to make small braids feel dressed up. Not louder. Just more finished. A few cuffs placed near the front or mid-length give the braid pattern a little shine, and because the braids are small, the metal details don’t overpower the style.
I prefer this on dark braids because the contrast is clean. The gold shows up without needing extra color, and the curly ends keep the look from tipping into something too stiff or formal. The whole point is contrast: neat roots, soft curls, a little metal.
The biggest mistake is overloading the head with cuffs. Too many and the style starts to look crowded, especially when the curls already have movement. Four to six cuffs is often enough on a full head of small braids. You do not need to decorate every row.
There’s also a practical side. Lightweight cuffs sit better and won’t drag the braid down. Heavier pieces can make the front pieces sag, which is annoying and avoidable. I’d rather have a few well-placed cuffs than a whole pile of clunky ones.
11. Beaded Accent Braids With Curly Ends

Unlike cuffs, beads bring sound and a little weight. That changes the mood immediately. Beads feel playful, a touch youthful, and a bit more tactile because they move and tap against each other when you walk.
This version works best when the beads stay on a few accent braids rather than the entire head. A line of beads along the front braids or on two face-framing pieces gives you the look without burying the curls under too much hardware. If every braid gets a bead, the style can start to feel noisy in the visual sense.
Wood beads read warmer. Clear beads look sharper. Small matte beads are the easiest to wear because they do not pull the braid down as much. If you want the curly ends to remain the star, place the beads above the curl zone, not right at the very tip.
That last point matters. When the bead sits too close to the curl, the ends lose their movement. The curl should still bounce freely when you turn your head.
This is a good pick if you like a style with a little personality and don’t mind the extra motion.
12. Honey Blonde Ombre Small Goddess Knotless Box Braids
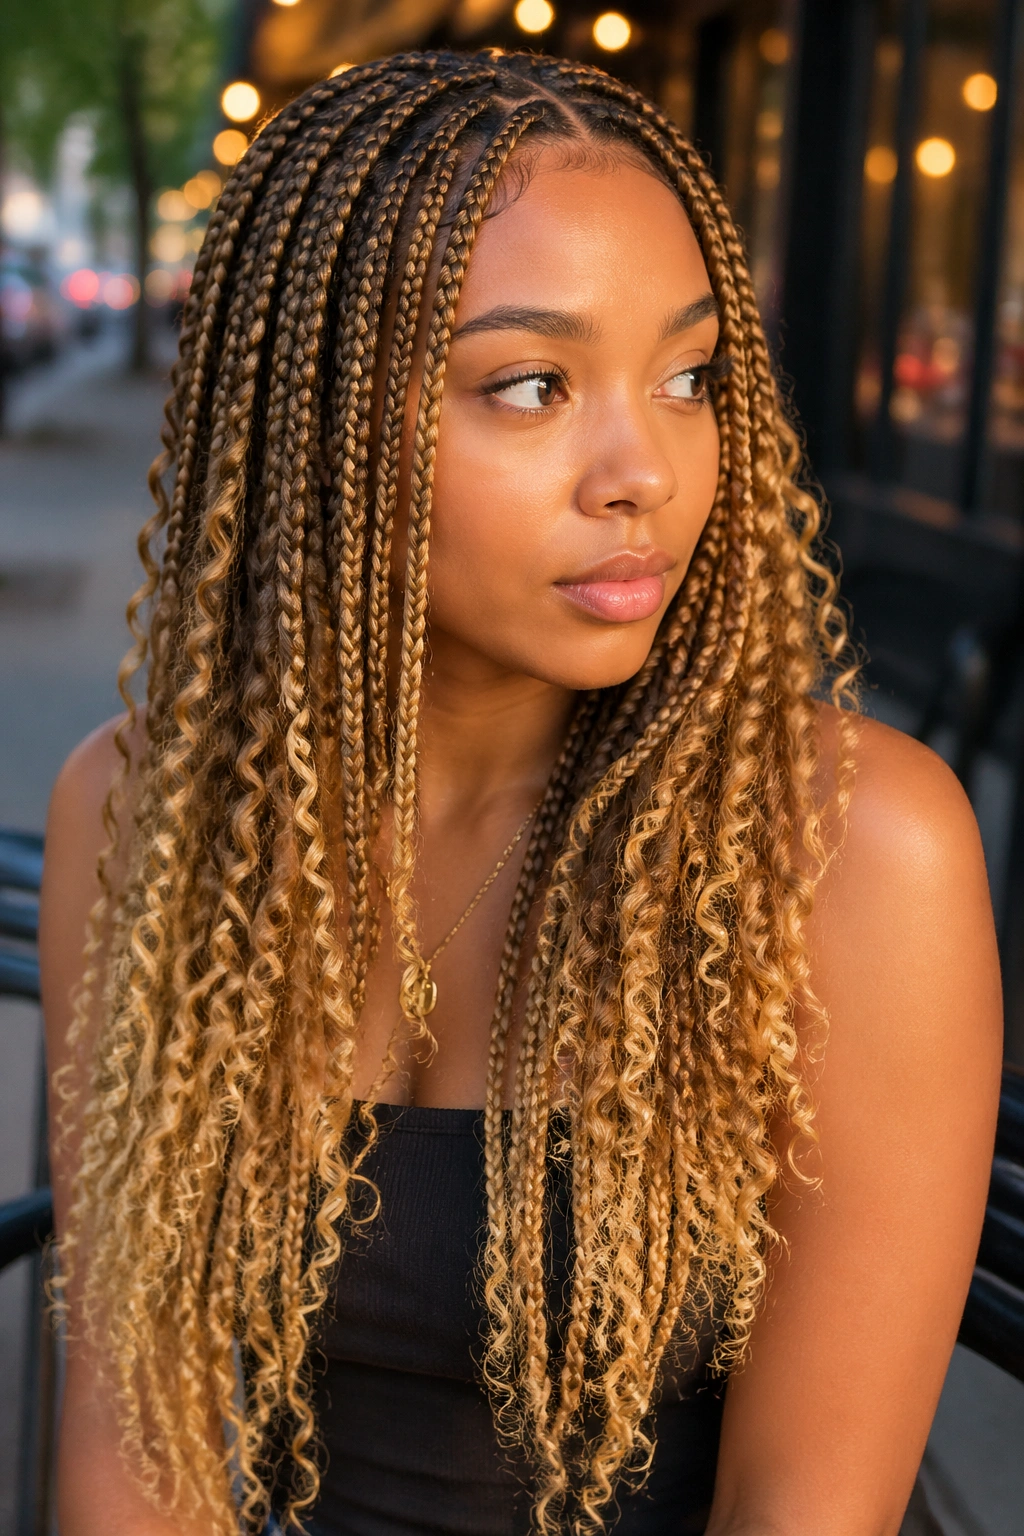
Honey blonde ombre gives small goddess knotless braids with curly ends a softer glow. The lighter ends make the curls easier to see, which is useful when you want the style to read from across the room instead of disappearing into a single dark shape.
What I like about this version is the gradient. The roots can stay deep and grounded while the mid-lengths shift into caramel, honey, or warm blonde before the curls kick in. That change in tone makes the ends look lighter and more delicate.
Why the gradient matters
A hard color break can look choppy on small braids. A gradual fade looks smoother, and the curly ends blend into the lighter tone in a way that feels natural even when the color itself is bold.
- Keep the roots darker if you want contrast
- Start the lighter shade a few inches before the ends
- Pick honey or caramel if you want warmth instead of a pale blonde finish
- Match the fade to the thickness of the braid so the color transition does not look abrupt
This is one of those styles that can look expensive even when the rest of the outfit is simple. A black tee, a plain hoodie, a crisp shirt — the braids do the talking.
If your curls are dense, choose a softer ombre. A harsh blonde line at the bottom can make the ends look choppy instead of airy.
13. Burgundy Small Goddess Knotless Box Braids
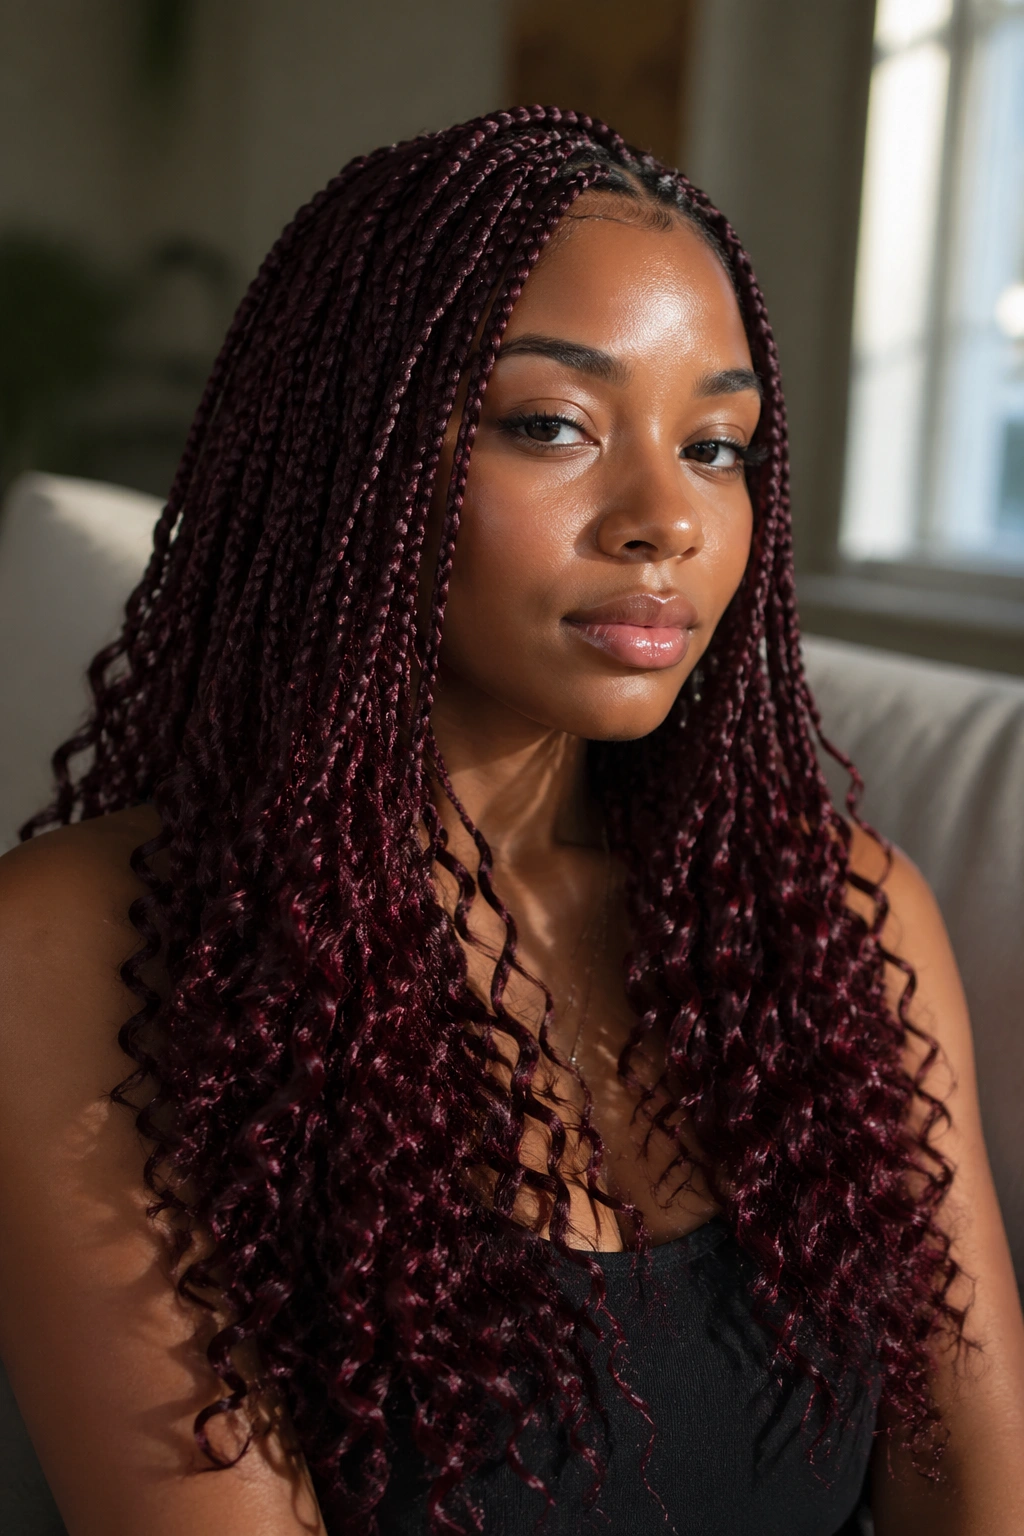
Burgundy braids have more depth than blonde and less brightness than copper, and that middle ground is exactly why they work so well. The color feels rich without shouting for attention, which suits the soft structure of knotless braids and curly ends.
I like this shade because it keeps the style interesting even when the outfit is plain. Black, cream, gray, denim — burgundy sits well with all of them. The curly ends pick up the tone in a way that makes the movement easier to see, especially when the light hits the braids from the side.
There’s also a nice trick in the way burgundy fades. On darker hair, the color can look almost wine-red at the roots and softer, browner, or deeper at the ends depending on the extension hair used. That layered look gives the style a little depth without needing a lot of extra styling.
How to wear it
Keep the parting clean and let the color do the work. Burgundy already carries a lot of visual weight, so the rest of the install should stay crisp. A messy parting can make the color look busy instead of rich.
This shade looks especially good with gold jewelry and glossy lips. Not because you need those things, but because they play nicely with the tone.
14. Tapered Bob With Curly Ends
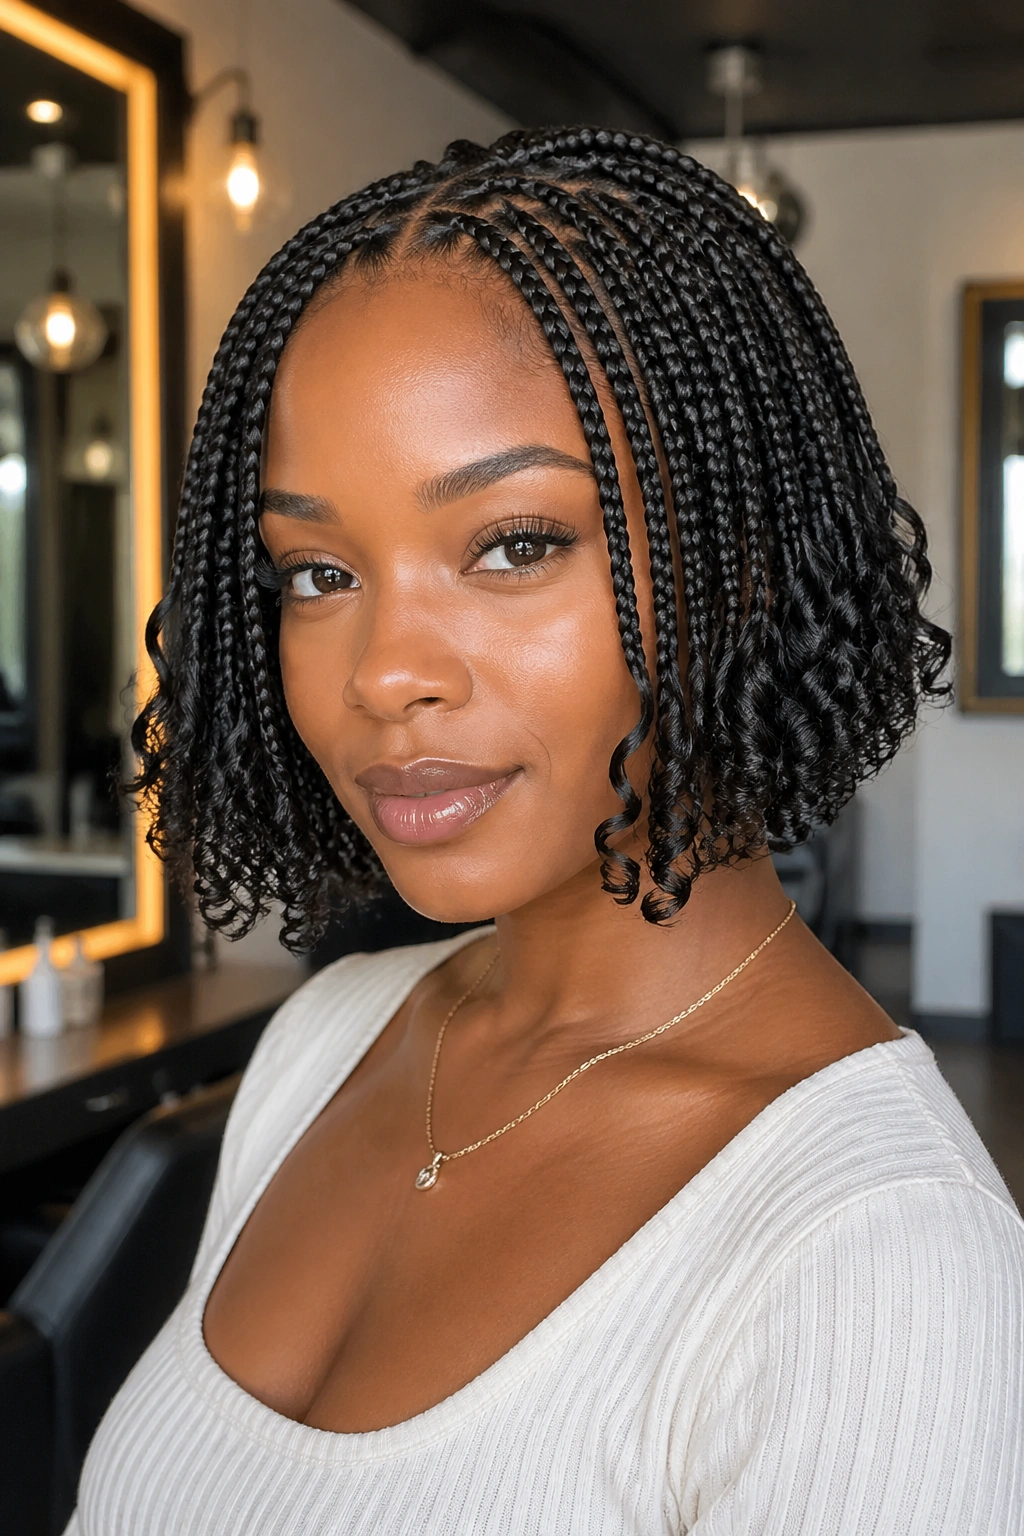
Who says small goddess braids need all that length? A tapered bob keeps the style light at the nape and slightly longer near the front, so the shape hugs the head and then opens up around the jaw.
This is a smart choice if you want the curl work to stay visible without carrying hair down your back. The ends sit near the chin or neck, which makes the bounce easy to see. The whole style feels neat, fresh, and much easier to live with on days when you don’t want braids brushing every surface you touch.
How to shape the bob
Ask for the back to hit higher than the front by a small amount, not a dramatic cut. A subtle taper is enough to create the bob shape. If the front pieces graze the collarbone while the back sits near the nape, you get movement without losing the bob silhouette.
- Keep the back slightly shorter for a clean line
- Let the front land around the jaw or collarbone
- Use smaller curls at the ends so the bounce stays tight
- Avoid making the taper too steep, or the shape turns lopsided fast
This style works well if you like structure. It also makes the scalp pattern stand out because the hair is not hanging over it all day.
15. Heart-Part and Crisscross Small Goddess Braids
When the parting is the whole point, this is the one. Heart parts and crisscross lines turn the scalp into part of the design, while the curly ends keep the style soft enough that it does not tip into looking too graphic or sharp.
Heart parts work best near the temple, crown, or one side of the head where they can be seen clearly. Crisscross patterns feel busier, so they need clean sectioning and enough negative space around them to breathe. If every inch of the scalp is packed with design, the style loses its shape. A little restraint goes a long way.
I like this option for people who want braid art, not just braids. The curls help balance the precision at the scalp, which matters. Without that soft finish, the style can start to feel hard-edged.
- Use heart shapes sparingly so they stay readable
- Keep crisscross lines crisp and even
- Leave enough space between designs and the hairline
- Keep accessories minimal so the parting remains the focus
If you want one detail to ask your braider about, ask for consistency at the parting. Not more curl. Not more length. Clean parting is what makes the whole style look intentional, and once that’s right, the curly ends can do their job without competing for attention.