Walking into a gym transformed by streamers and strobe lights requires a specific kind of confidence. It is that strange, electric middle ground between the casual energy of a Friday night football game and the high-stakes formality of prom. Homecoming is, at its heart, a celebration of movement. You are going to be jumping, spinning, and likely sweating under heavy lights, which means your hair cannot just look good in a bathroom mirror at 5:00 PM. It has to survive the night.
Over the years, I have watched enough updos collapse by the third song to know that the best styles are those that balance structural integrity with genuine personality. There is a tendency to over-complicate things, to douse the hair in so much aerosol that it becomes a helmet. But the most memorable looks—the ones that actually stand out in a sea of sequins—are those that embrace the hair’s natural behavior while adding a singular, unexpected element. Whether it is a strategically placed velvet ribbon or a braid that looks more like a piece of architecture than a hairstyle, the goal is to look like yourself, just amplified.
We often focus so much on the dress that the hair becomes an afterthought, a frantic 15-minute struggle with a curling iron before the limo arrives. That is a mistake. Your hair is the frame for your face; it dictates how your jewelry sits and how the neckline of your outfit is perceived. Choosing the right look involves more than just picking a photo from a gallery. It requires an honest assessment of your hair’s density, the humidity of your climate, and exactly how much time you are willing to spend “fixing” it in the ladies’ room.
The following styles are not just about aesthetics. They are about the physics of a good time. I have curated these options to cover the spectrum from sleek and sophisticated to messy and bohemian, ensuring there is a tactical choice for every hair texture and length. If you want to stand out, you do not need the most expensive stylist in town. You need a vision, the right grit in your hair, and a few well-placed bobby pins.
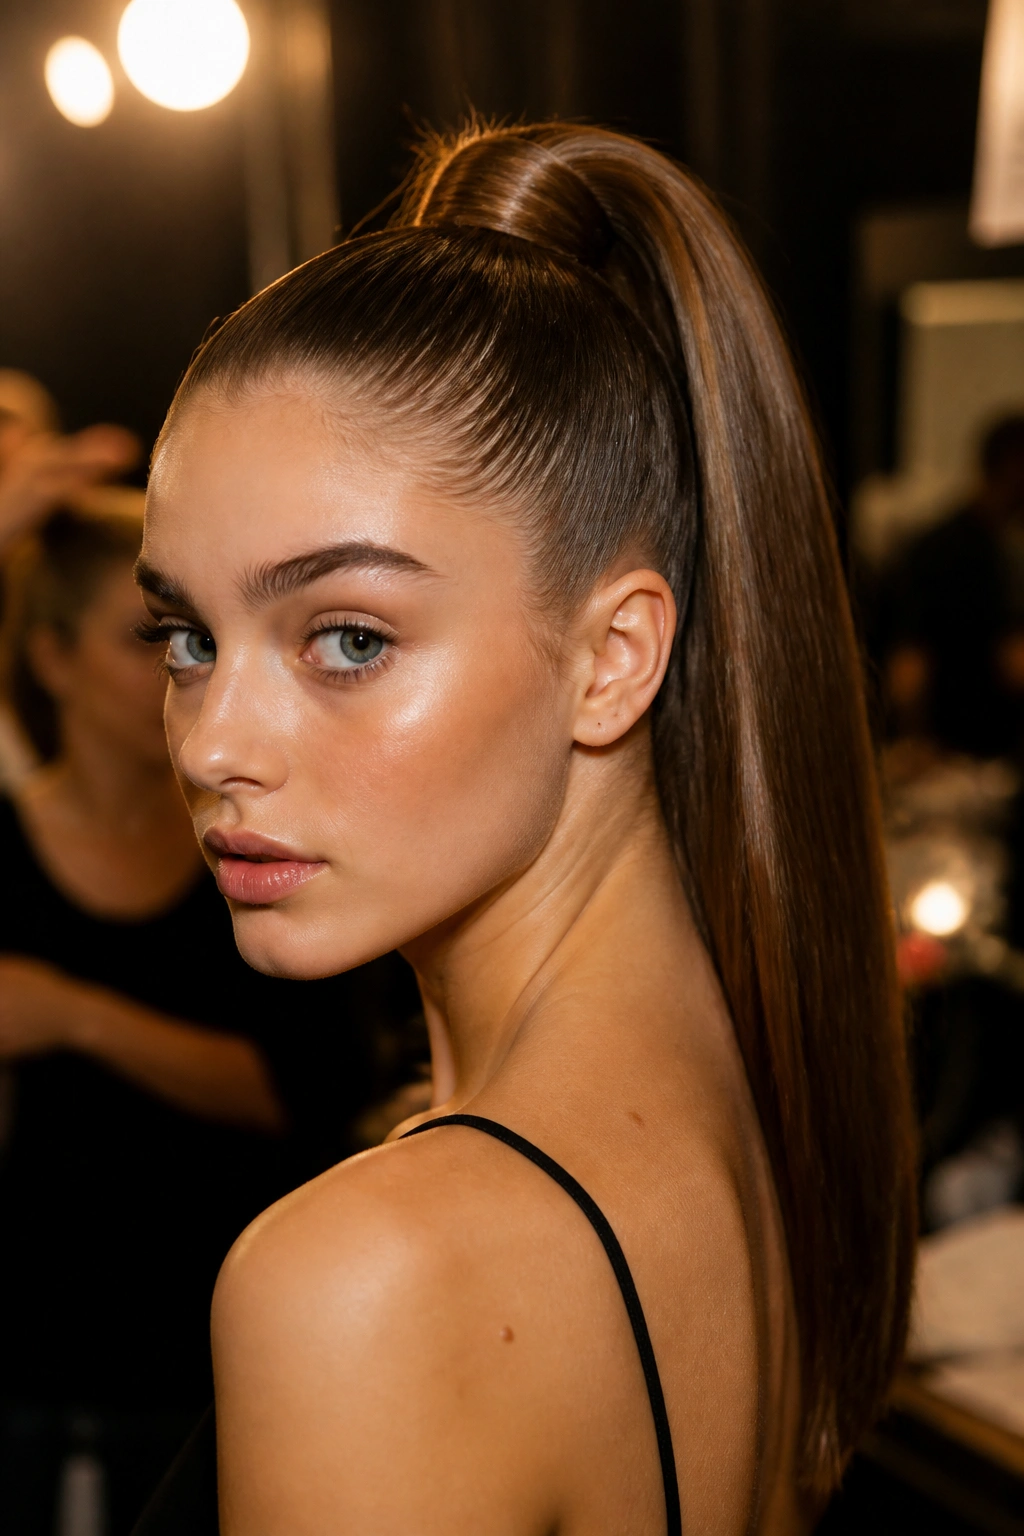
1. The Sculpted High Ponytail
There is a reason why high-fashion runways constantly return to the snatched ponytail. It acts as an instant facelift, drawing the eyes upward and highlighting the cheekbones and jawline. This is not the ponytail you wear to the gym; this is a highly polished, structural statement. To get this right, you need to focus on the “base” of the hair. Use a boar bristle brush to sweep every strand toward the crown, applying a firm-hold pomade to the sides to eliminate flyaways.
The Secret to All-Night Lift
If you find that your ponytails always sag by the end of the night, the problem is likely your hair tie. For a homecoming-worthy pony, use two elastics or a bungee-style hook. Once the hair is secured, take a small half-inch section of hair from the underside, wrap it around the base to hide the elastic, and pin it underneath with a small U-shaped pin. This creates a seamless, expensive-looking finish that masks the mechanics of the style.
Essential Tools for This Look
- Boar bristle smoothing brush
- High-shine finishing spray
- Bungee hair elastics
- Fine-tooth comb for precision
Pro tip: Spray a clean toothbrush with hairspray and use it to lay down those stubborn baby hairs along your hairline for a mirror-like finish.
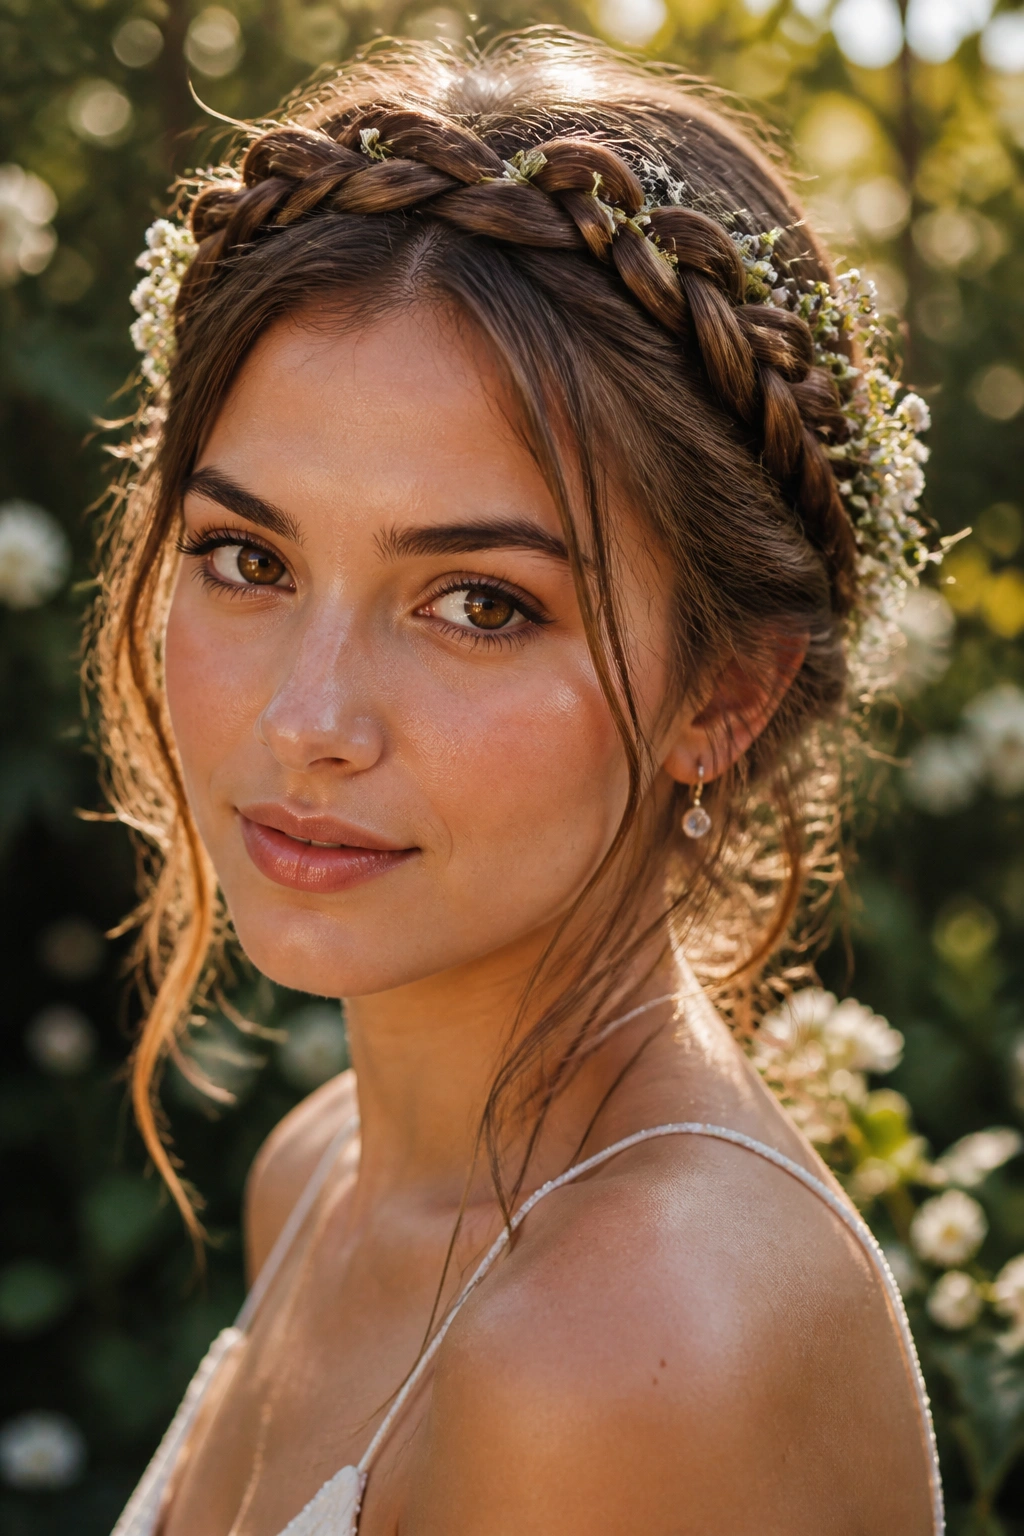
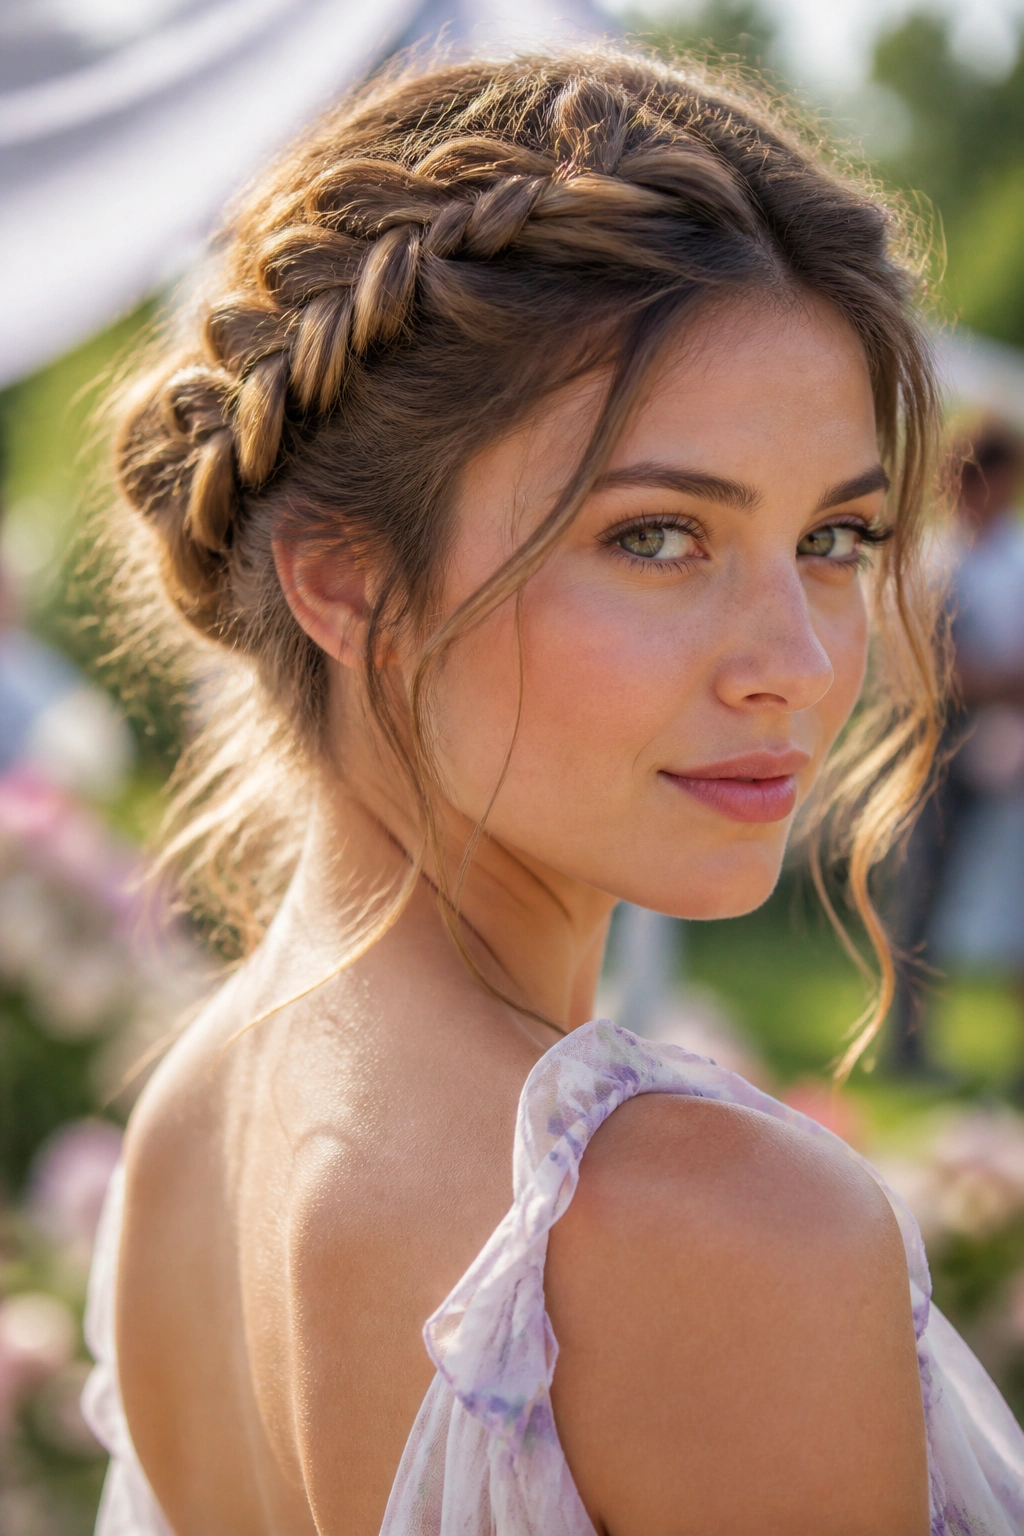
2. The Deconstructed Fishtail Halo
If your vibe is more “ethereal garden party” than “clubhouse glam,” the deconstructed fishtail halo is the move. This style works best on hair that has a bit of “dirty” texture—think second-day hair or hair prepped with plenty of dry shampoo. Unlike a traditional crown braid which can look a bit stiff, the fishtail weave offers a more intricate, delicate pattern that feels modern and effortless.
The beauty of the fishtail is that it actually looks better as it gets slightly messy. As you dance, a few wisps will naturally fall out around your ears, which only adds to the romantic appeal. Start by creating two fishtail braids on either side of your head, beginning just above the temples. Cross them over the back of your head and tuck the ends under the opposing braid, securing them with pins that match your hair color exactly.
Always pancake your braids. Once the braid is secured, use your thumbs and forefingers to gently pull at the outer loops of the weave. This widens the braid and creates the illusion of massive volume, even if you have fine hair. It turns a skinny, tight braid into a lush, floral-like crown that catches the light beautifully from every angle.
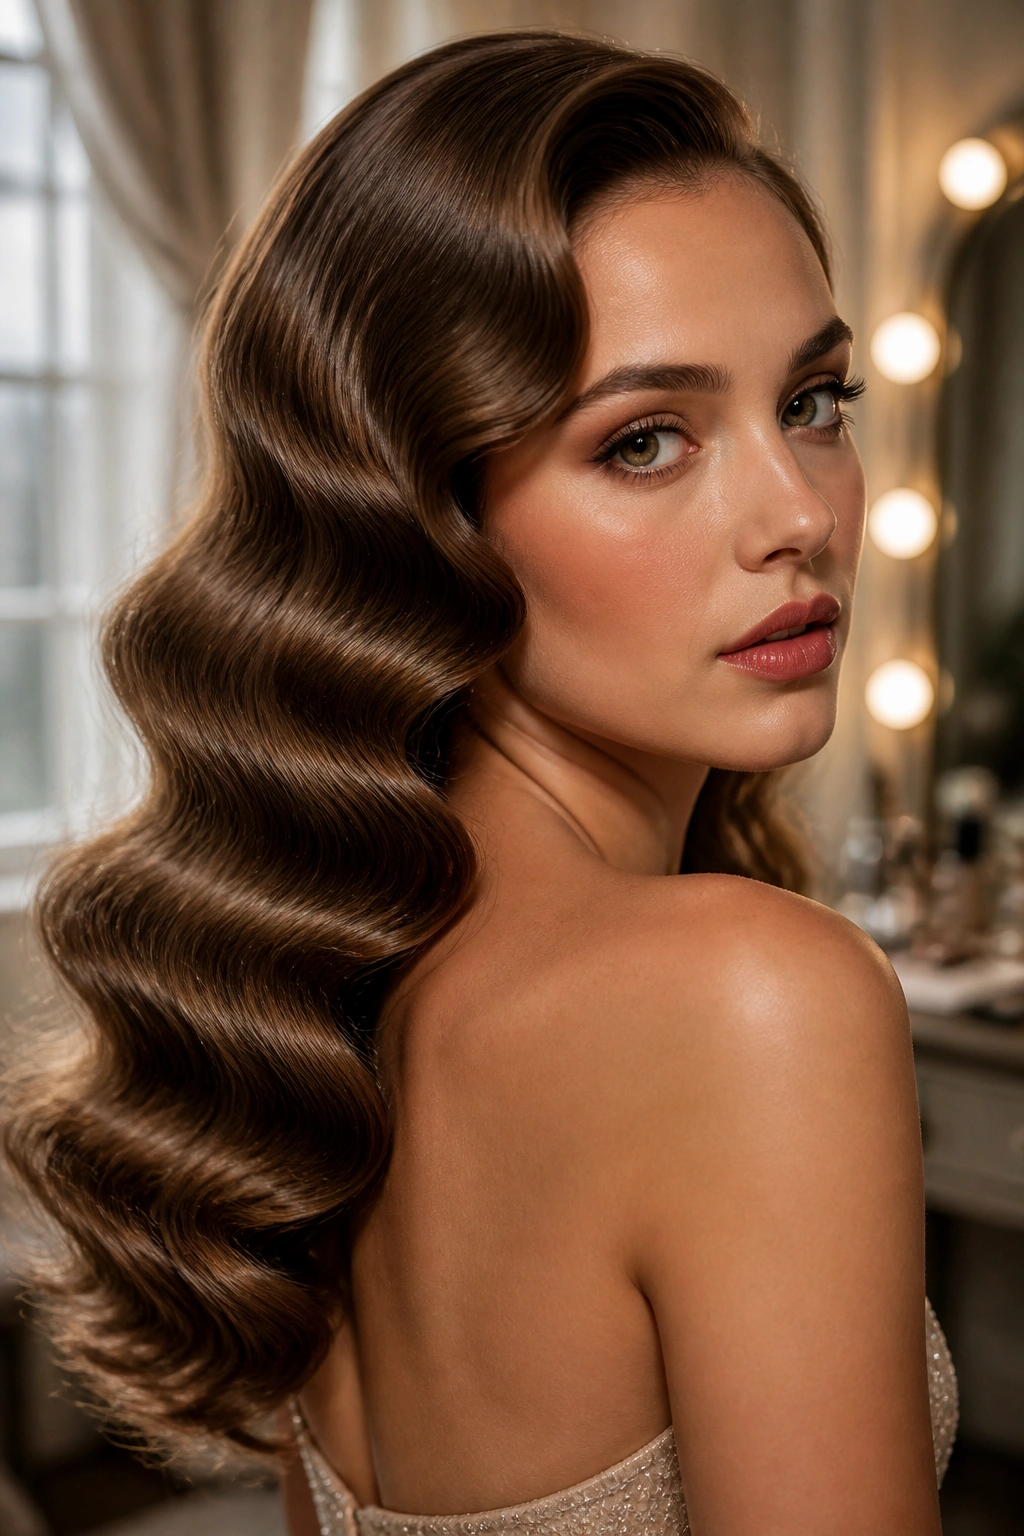
3. Vintage-Inspired S-Waves
Hollywood waves are a classic for a reason, but they require a specific technique to avoid looking like a “pageant” curl. The goal here is a continuous, fluid wave that moves as a single unit. This is a high-maintenance look that demands a solid foundation of heat protectant and setting spray. If you have a dress with a simple silhouette or a plunging neckline, these waves provide the perfect amount of old-world drama.
How to Achieve the “Uniform” Wave
- Use a 1-inch curling iron and curl all sections in the same direction.
- Pin each curl to your head while it’s still hot using a silver duckbill clip.
- Allow the hair to cool completely—at least 20 minutes—before touching it.
- Brush through the curls with a paddle brush until they “snap” together into waves.
Why does the cooling process matter? When hair is hot, the hydrogen bonds are broken, allowing it to take a new shape. If you drop the curl while it’s still warm, gravity will pull that wave out before the bonds have a chance to reform. By pinning them up, you ensure the wave stays crisp until the moment you walk out the door. Finish with a serum to add that iconic “glass hair” glow.
4. Multi-Tiered Bubble Braid
For those who want a high-impact look without the technical difficulty of a French braid, the bubble braid is a savior. It is playful, incredibly secure, and looks much more complicated than it actually is. It works particularly well for very long hair or for someone using clip-in extensions. Because the hair is secured at multiple points down the length of the ponytail, it is virtually impossible for this style to fall apart on the dance floor.
Imagine a traditional ponytail, but instead of leaving the length free, you add elastics every two or three inches. After each elastic is placed, you “poof” the section between the ties by pulling it outward. This creates a series of spherical “bubbles.” You can keep it sleek and sporty with clear elastics, or you can hide the ties with decorative gold cuffs or small velvet bows to match your dress.
This style is a favorite for those with thick, heavy hair that usually feels “too much” when left down. It keeps the hair off the neck—essential for staying cool—while still showing off the impressive length. It is also a fantastic way to hide hair that hasn’t been washed in a few days, as the tension and volume mask any flat roots.
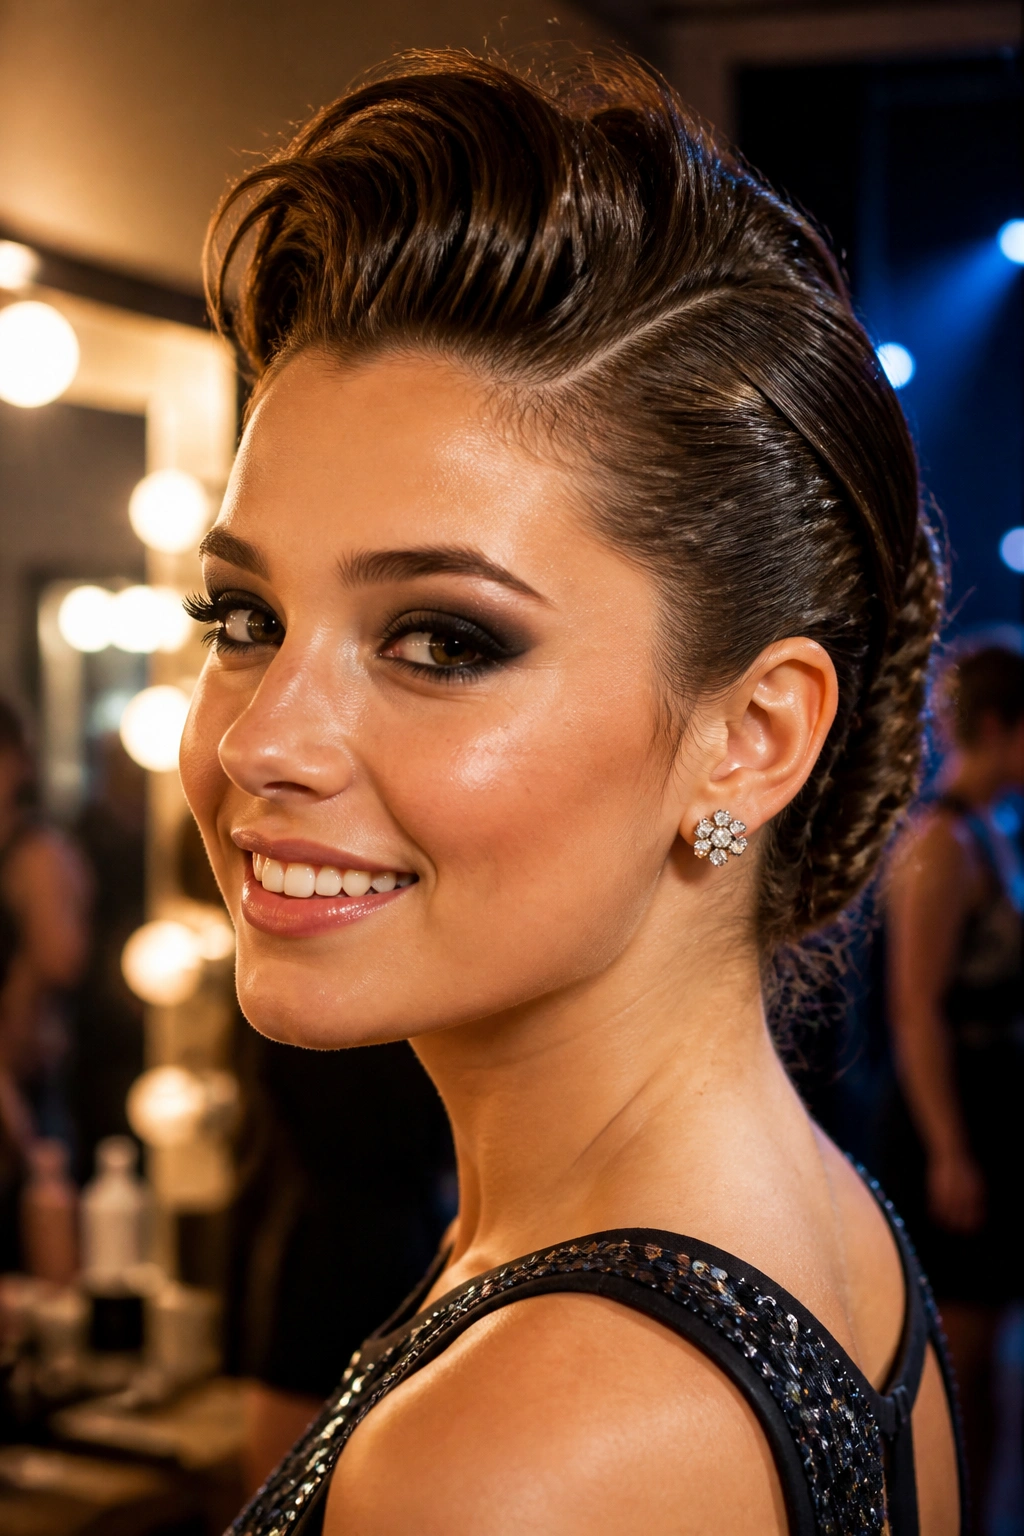
5. The Architectural Top Knot
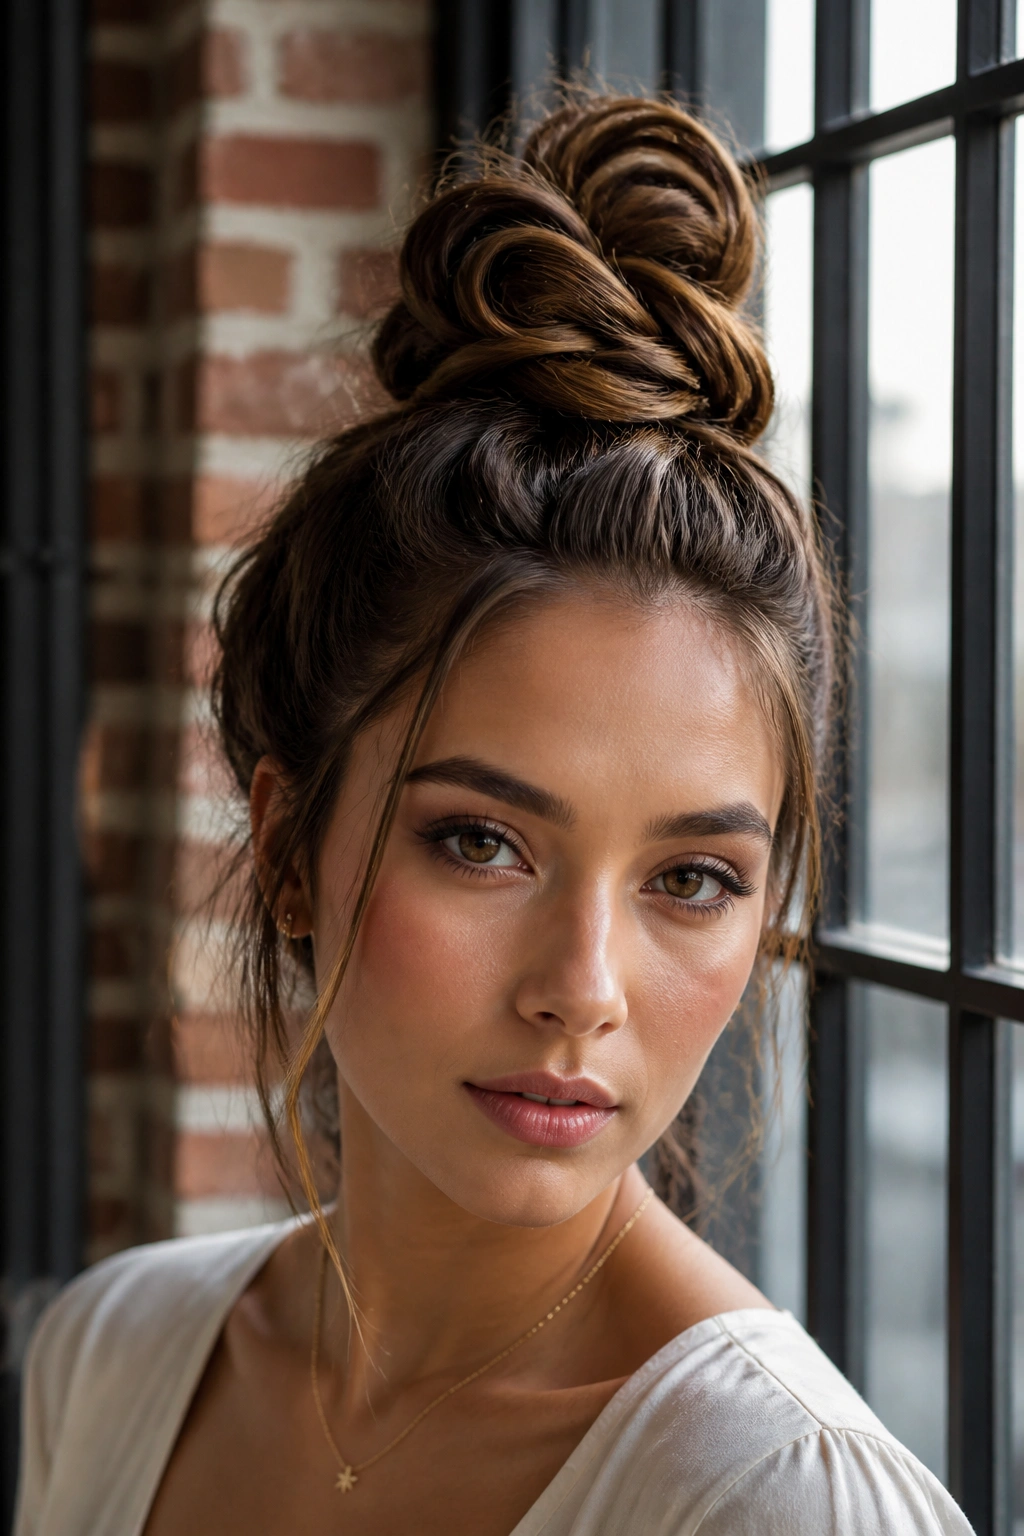
Sometimes, the most sophisticated thing you can do is get your hair entirely out of the way. An architectural top knot isn’t just a bun; it’s a statement of intentionality. It says you are here to dance and you don’t want anything distracting from your face. To make this “stand out,” avoid the “sock bun” look which can feel a bit dated. Instead, aim for a knot that has visible twists and loops.
Building the Foundation
- Flip your head upside down and gather your hair at the very top of the crown.
- Secure with a sturdy elastic.
- Divide the ponytail into two sections and twist them around each other like a rope.
- Wrap the rope around the base, but instead of tucking it tightly, allow the edges of the twist to stand out.
- Secure with large hair pins (not bobby pins) for a more secure, comfortable hold.
Why pins matter: Bobby pins work by clamping hair together, but hair pins (the U-shaped ones) work by anchoring the bun to the hair on your scalp. If you have thick hair, hair pins are the only way to ensure your bun doesn’t start leaning to one side halfway through the night.
6. Double Dutch Braided Buns
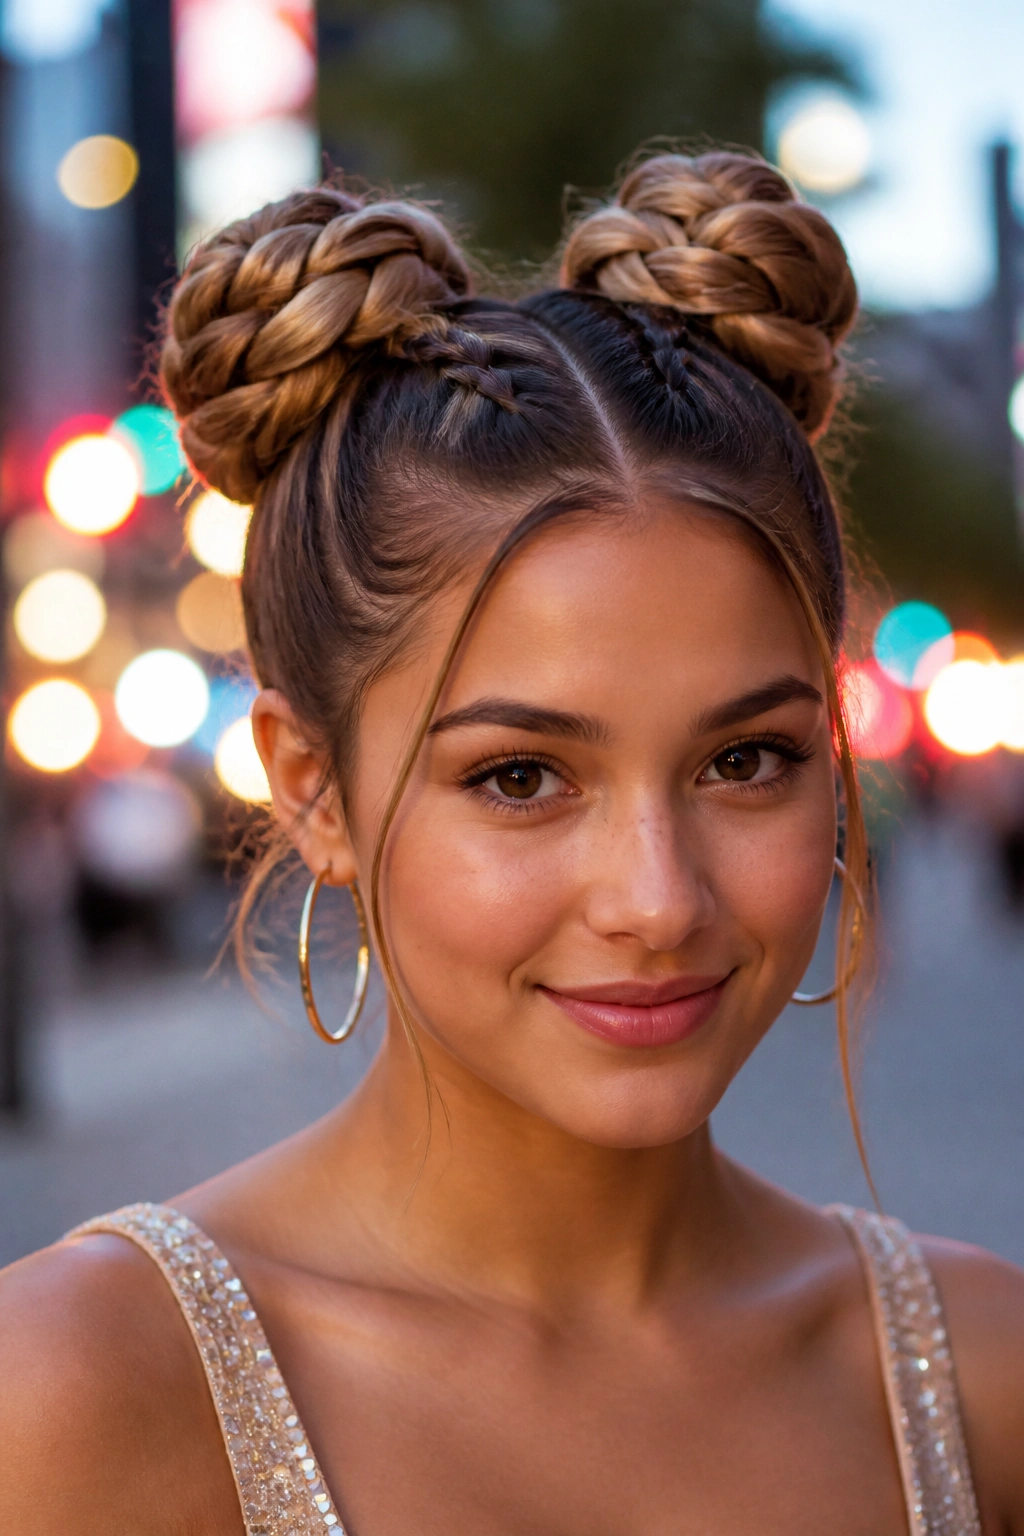
Also known as “Space Buns,” this look has evolved from a festival staple into a legitimate formal option when executed with precision. By starting with Dutch braids (where the hair is crossed under rather than over), you create a raised, 3D effect that leads the eye from the forehead back to two neat buns at the nape of the neck or the crown. It’s a symmetrical, balanced look that feels youthful and energetic.
If you choose to place the buns at the nape, you get a more “low-key” chic vibe. Placing them high on the head gives off a more “pop-star” energy. To keep it from looking like a costume, ensure your partings are perfectly straight. A metal-ended rattail comb is your best friend here. Use a tiny bit of hair wax on your fingertips as you braid to ensure every single hair is tucked into the weave, creating a crisp, clean line.
7. Sleek Middle Part with Pearl Pins
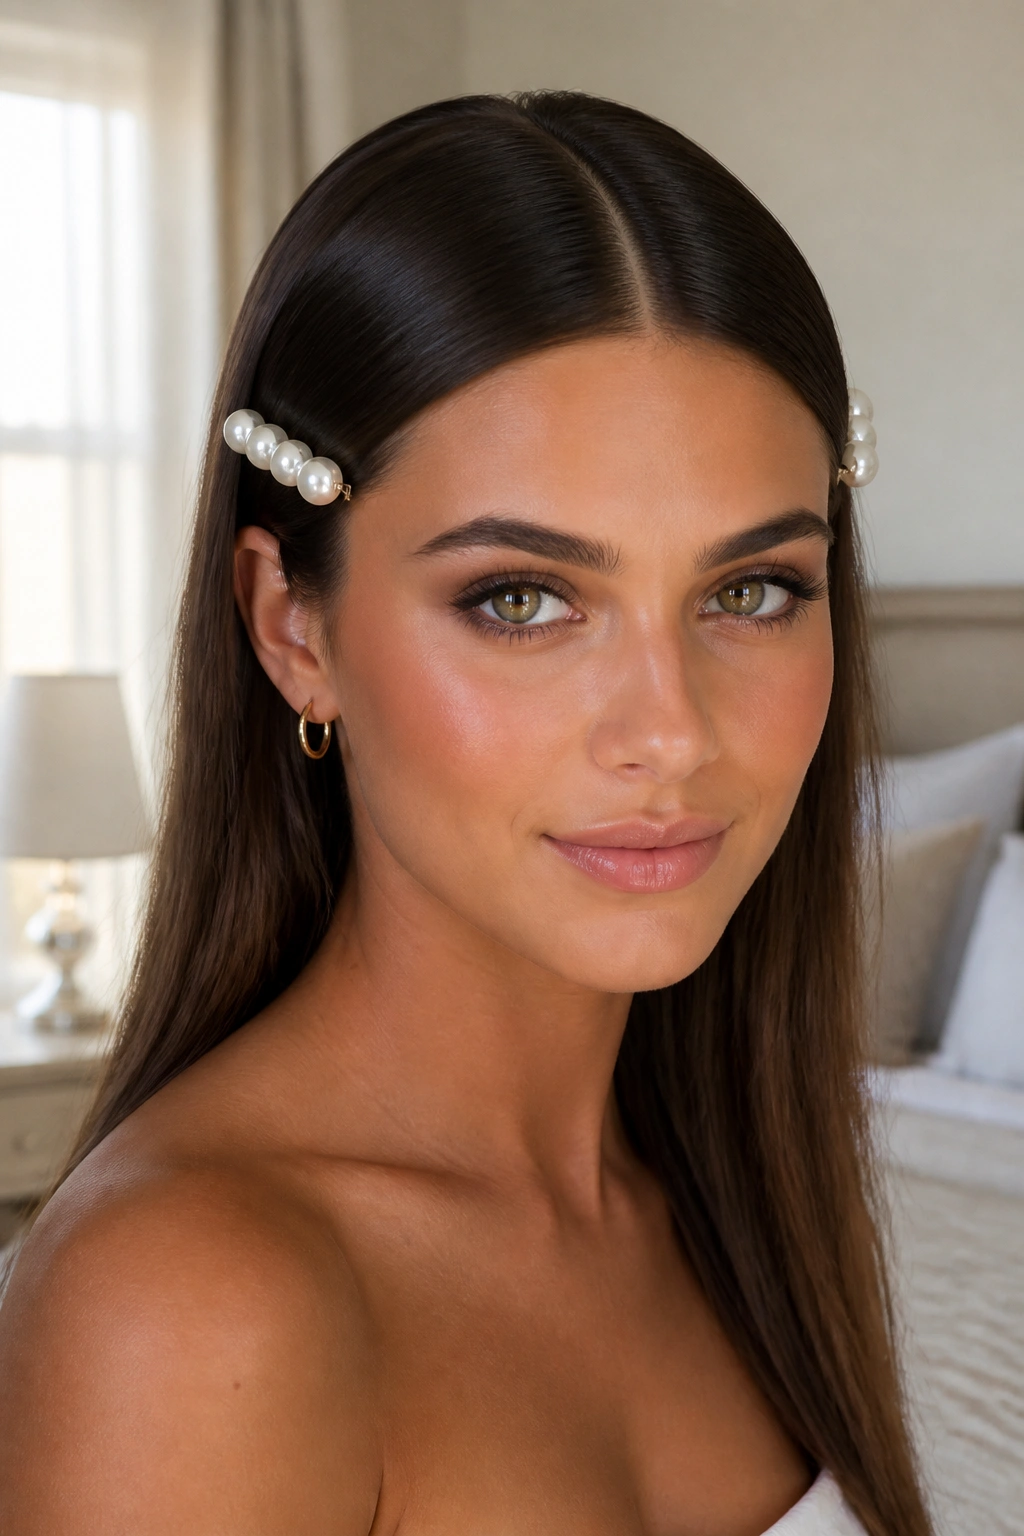
If you are wearing a dress that is already very loud—think lots of fringe, sequins, or a very intricate pattern—you want a hairstyle that acts as a palate cleanser. A dead-center part with hair tucked behind the ears is the ultimate “cool girl” move. It’s minimalist, but it doesn’t have to be boring. The addition of oversized pearl or rhinestone pins just above the ears adds a touch of “editorial” flair.
This look depends entirely on the health of the hair. You want it to look expensive. This means doing a deep-conditioning mask two nights before the event and using a high-quality flat iron. When you tuck the hair behind your ears, the pins should be placed horizontally, parallel to your jawline. This draws attention to your eyes and creates a very “clean” aesthetic that looks incredible in photos, especially close-ups.
Quick Fix for Flat Hair
If your hair tends to go limp with a middle part, spray a bit of volumizing powder at the roots right along the part. This gives it just a millimeter of lift so it doesn’t look plastered to your skull. You want “sleek,” not “oily.”
8. The Voluminous Messy Chignon
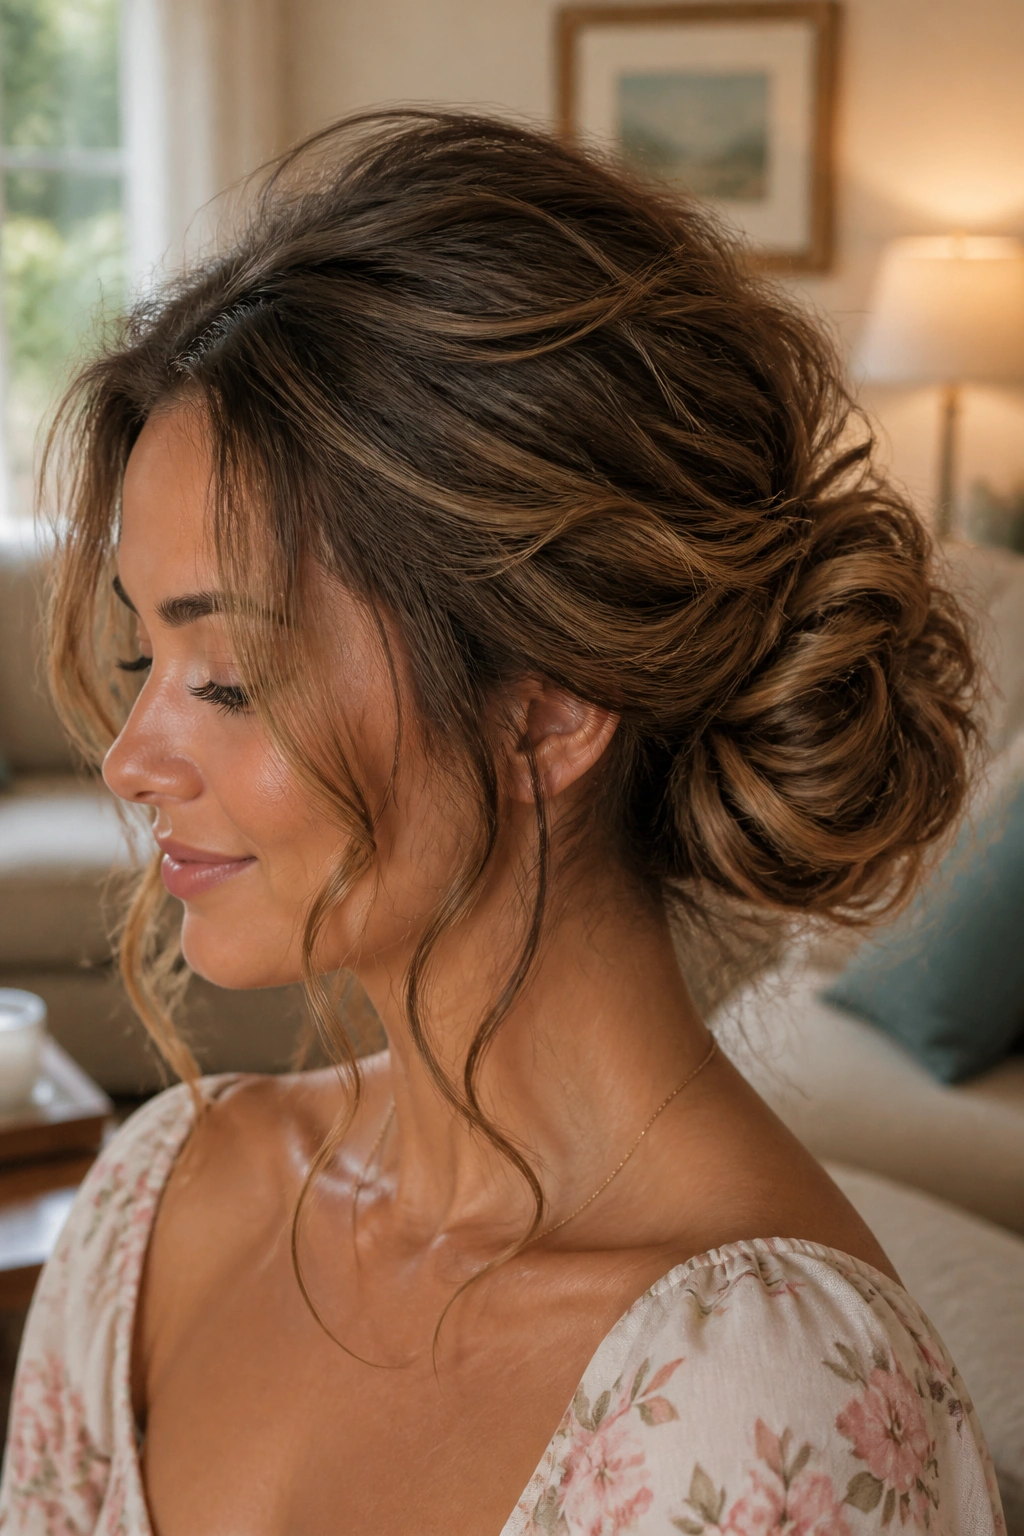
The chignon is the gold standard for formal events, but for homecoming, we want to relax it. A messy chignon is all about texture and “controlled chaos.” It should look like you put it up in five minutes, even if it actually took forty. This style is perfect for those with natural curls or waves, as it celebrates the organic shape of the hair.
Start by curling your hair with a large-barrel iron, then mist it with a sea salt spray or texturizing spray to give it some “grit.” Gather the hair loosely at the nape and twist it into a low, wide bun. The key is to leave out several face-framing pieces and a few strands around the neck. Use your fingers to gently tug at the hair at the crown of your head to create height. If it feels too tight, it’s not “messy” enough.
Why this works: It is one of the most comfortable styles to wear. There is no pulling on the scalp, and if a piece falls out while you’re dancing, it just looks like part of the design. It is the ultimate low-stress homecoming hair.
9. Cascading Waterfall Braid with Curls
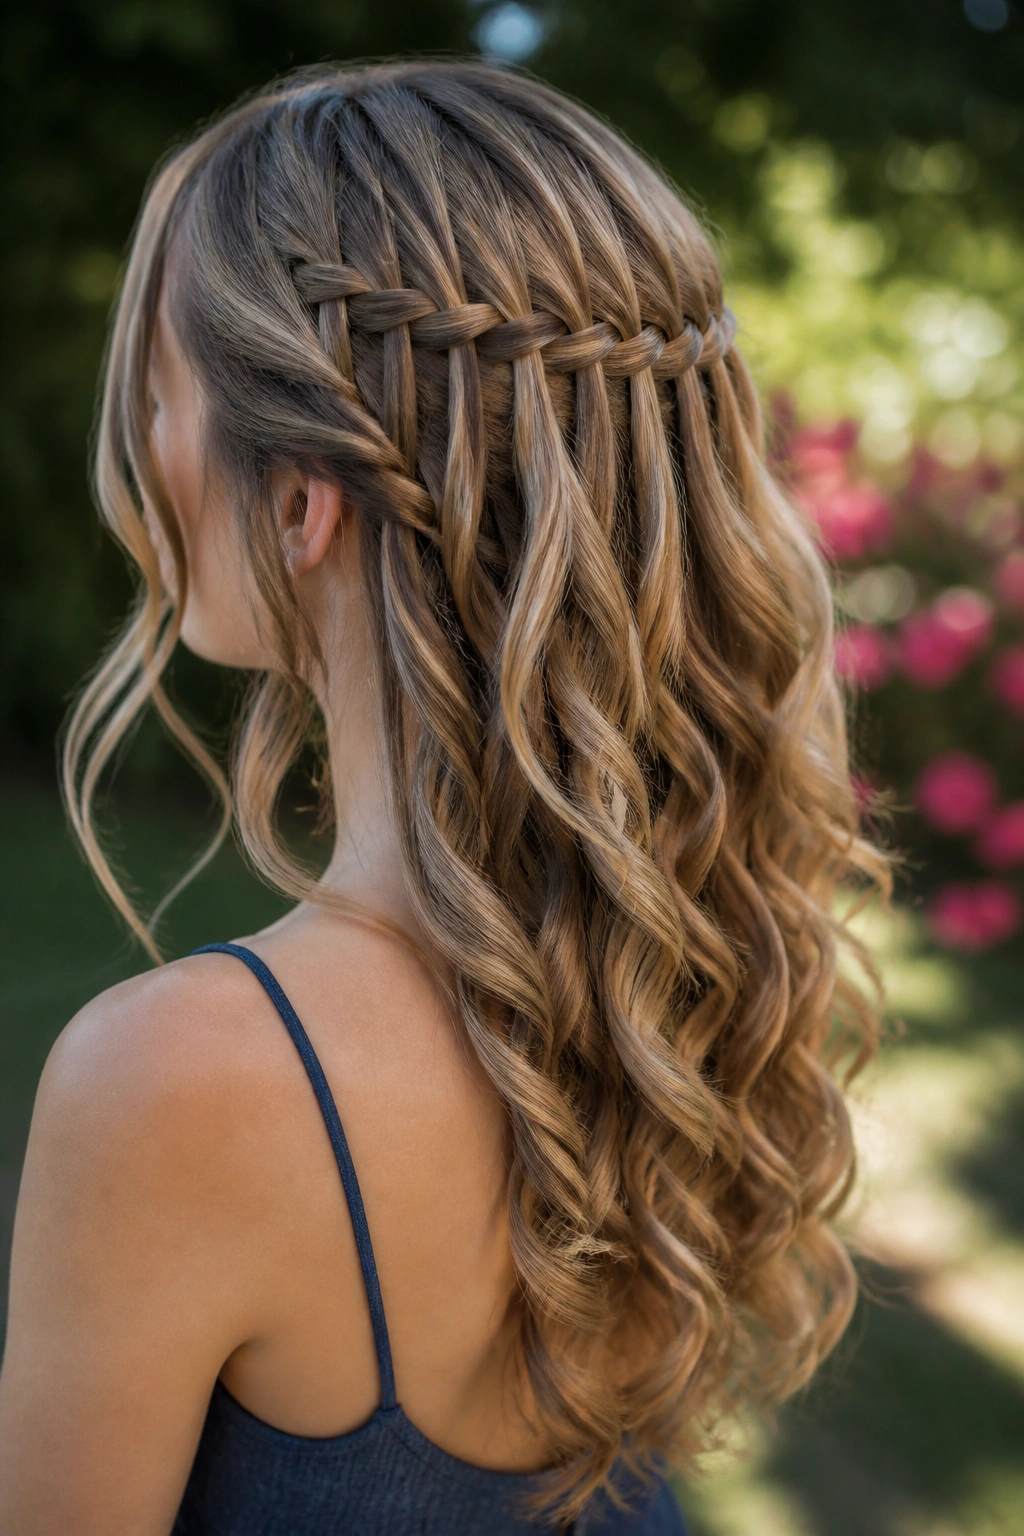
The waterfall braid is a technical marvel that looks stunning on highlighted or multi-tonal hair. It creates a horizontal “chain” across the back of the head, with strands of hair “dropping” through the braid like water. When combined with long, loose curls, it creates a multidimensional look that is both feminine and intricate.
This style is essentially a modified French braid. However, every time you take a strand from the top to cross over into the middle, you let the bottom strand fall away and pick up a new piece right next to it. This “dropped” strand is what creates the waterfall effect. Once the braid is finished, you curl all the dropped strands, along with the rest of your hair, to create a cohesive, flowing look.
Don’t forget the back: We spend so much time looking at the front of our hair in the mirror, but everyone else will be seeing the back and sides most of the night. The waterfall braid ensures that your hair looks interesting from every single angle, especially when you are walking away or dancing in a circle.
10. 90s-Style Tendrils and Butterfly Clips
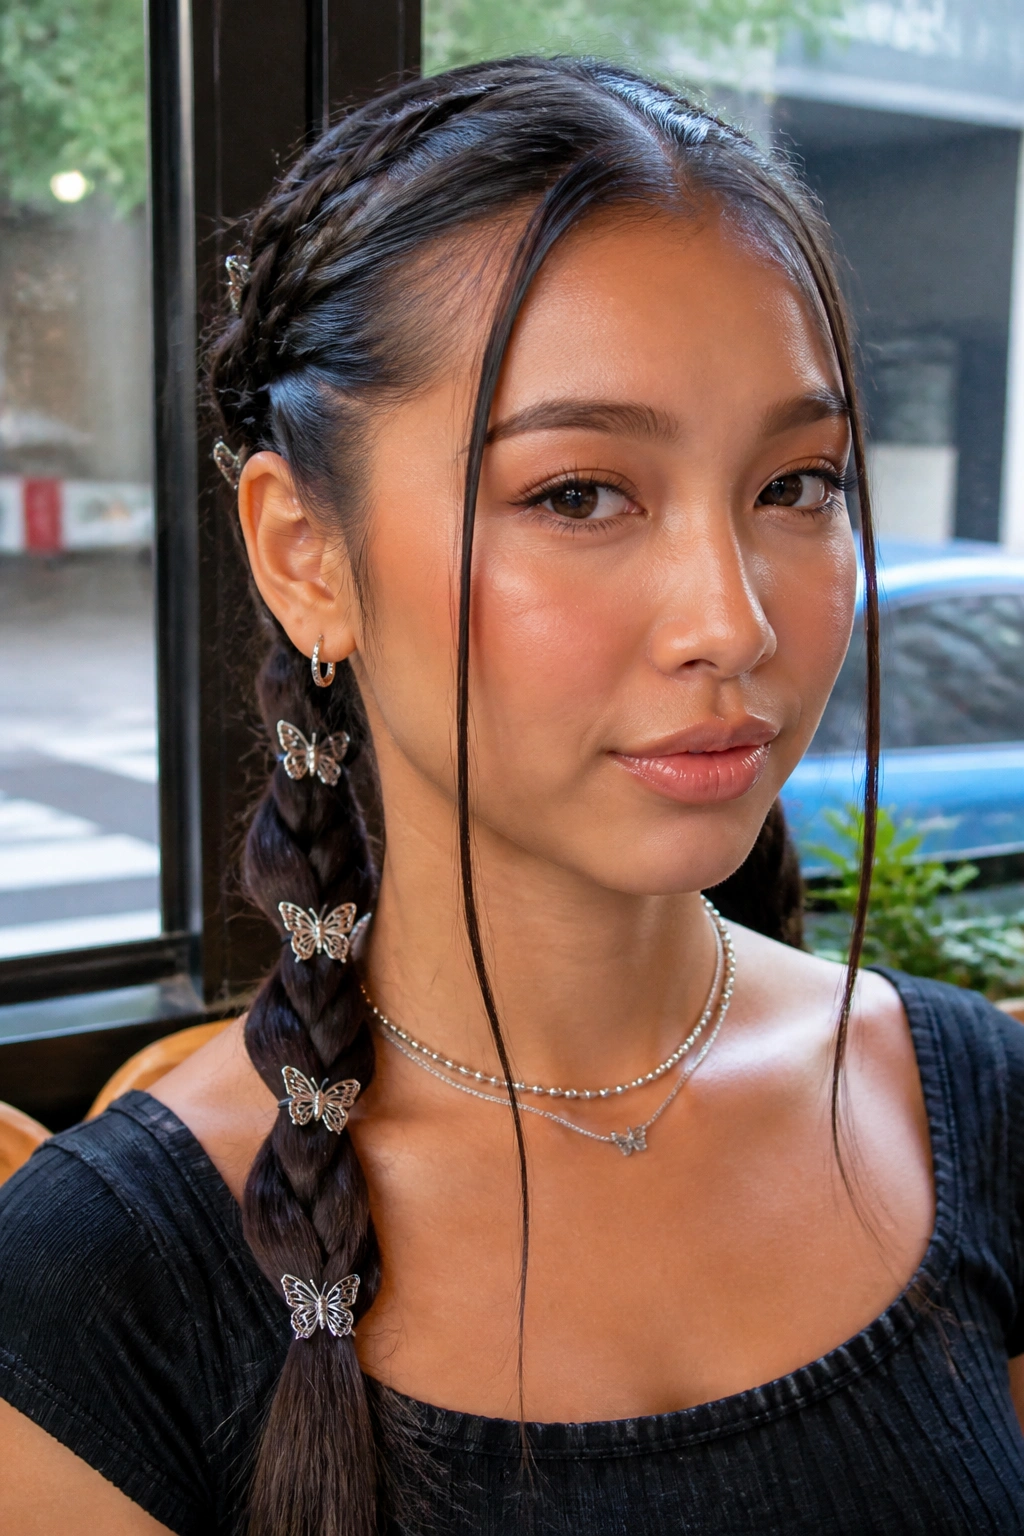
Nostalgia is a powerful force, and the late-90s aesthetic is currently enjoying a major revival in formal wear. To do this right without looking like you’re heading to a middle-school dance, you have to be selective. Think “modern retro.” This involves two very specific elements: thick, straight face-framing “tendrils” and small, high-quality hair accessories.
Pull your hair back into a medium-height bun or ponytail, but leave out two symmetrical sections at the front, about an inch wide. Use a flat iron to make these pieces pin-straight and apply a tiny amount of hair oil for shine. Then, instead of plastic butterfly clips, look for metal or resin versions that feel more like jewelry. Place them sparingly along a small side braid or use them to pull back just the very front sections of your hair.
11. The Glass-Hair Slick Back

If you have a shorter cut, like a bob or a lob, the “slick back” is your secret weapon. It is fierce, modern, and incredibly chic. The goal is to make the hair look almost wet, reflecting light like a sheet of glass. This is a bold choice that works best with a strong makeup look—think a sharp winged liner or a bold red lip.
Achieving the Wet Look (Without the Grease)
- Start with damp hair and apply a generous amount of firm-hold gel from roots to mid-lengths.
- Use a fine-tooth comb to slick the hair straight back, away from the forehead.
- Use a blow dryer with a concentrator nozzle on a low-speed, high-heat setting to “set” the gel.
- Finish with a high-shine glossing spray.
The mistake most people make is using too much oil and not enough gel. Oil will eventually soak into the hair, leaving it looking flat. Gel provides the “cast” that keeps the hair in place and maintains that shiny, reflective surface for hours.
12. Scarf-Interwoven Side Braid
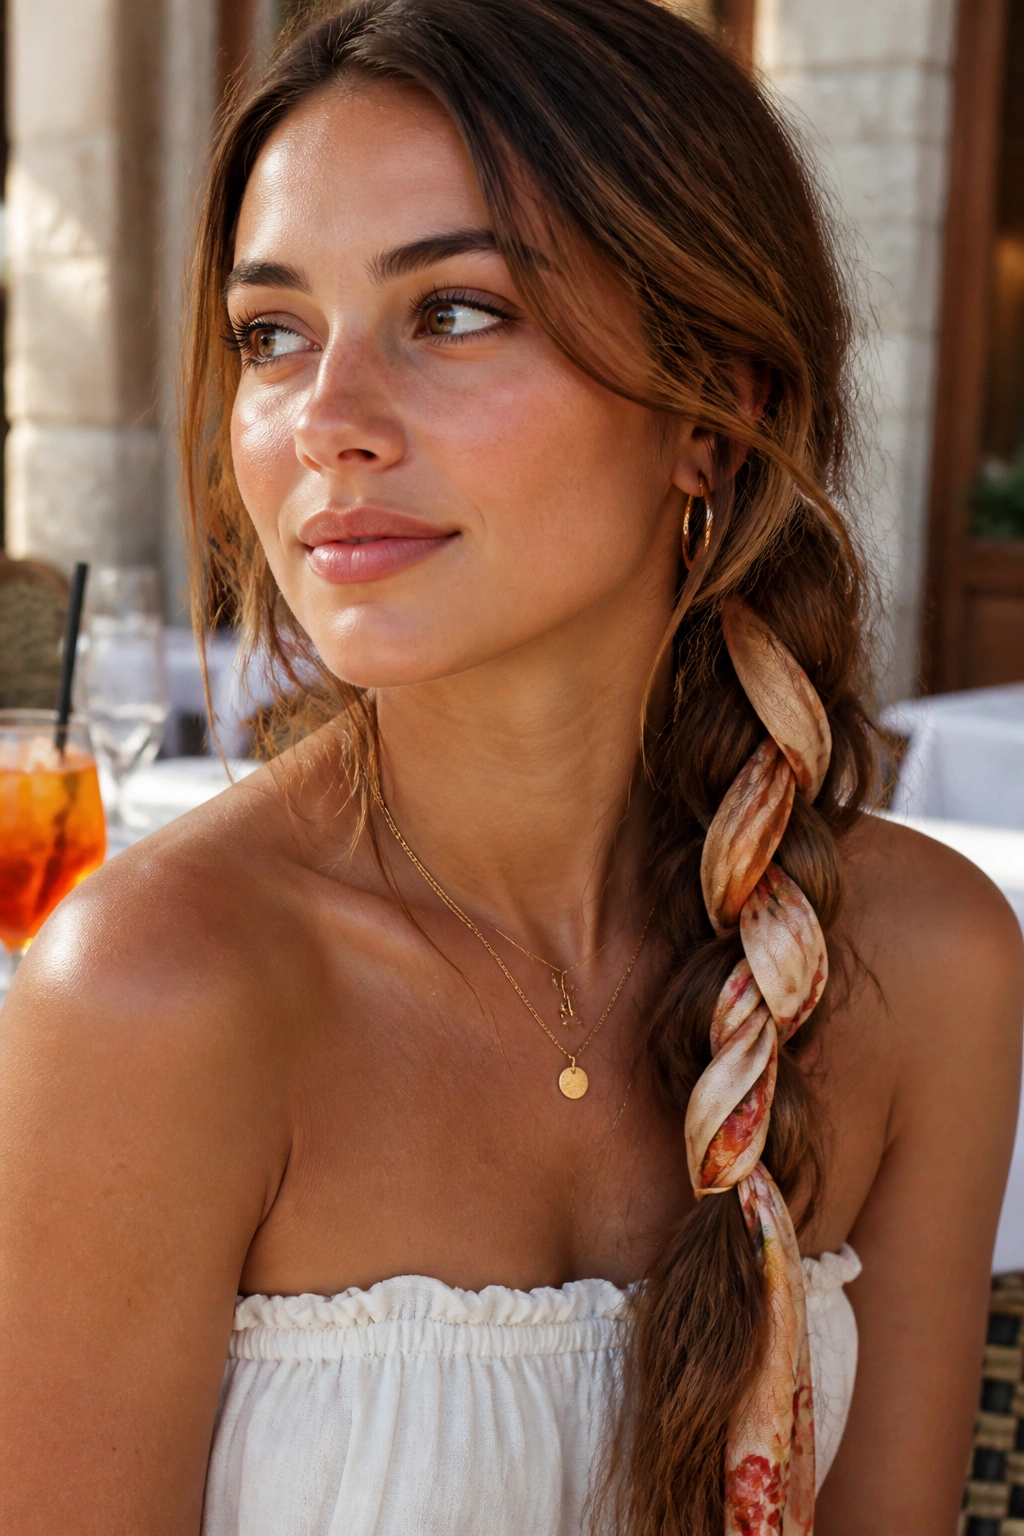
Accessories are the easiest way to make a simple style stand out. A side braid is a standard choice, but when you interweave a silk or chiffon scarf into the strands, it becomes a piece of art. Choose a scarf that matches a color in your dress or provides a sharp contrast.
Thread the scarf through the hair tie at the base of your ponytail (or anchor it with a bobby pin at the start of your braid). Treat the two ends of the scarf as one or two of the “strands” in your three-strand braid. As you weave, the fabric will pop in and out of the hair, adding color, texture, and unexpected volume. This is a brilliant trick for anyone with thinner hair, as the fabric takes up space and makes the braid look twice as thick.
13. Romantic Half-Up Rosette
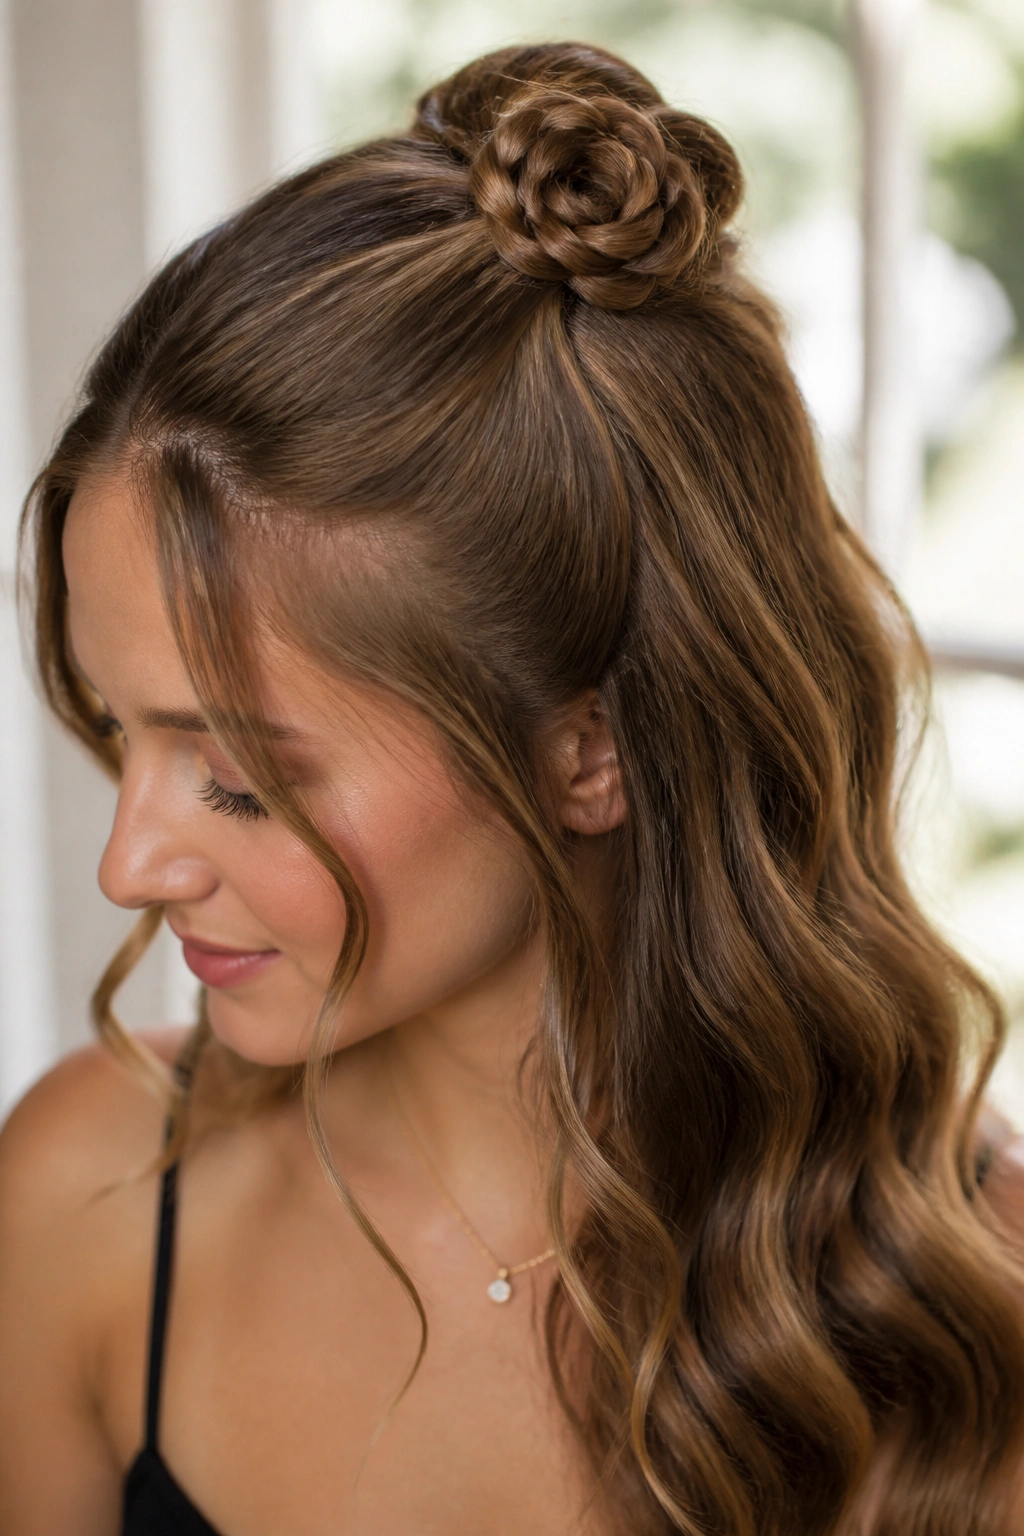
Why wear a flower when your hair is the flower? The rosette is a beautiful, sculptural technique where a small braid is coiled into a rose shape. It’s perfect for a half-up, half-down look. It keeps the hair out of your eyes while allowing you to show off your length and curls.
Create a small ponytail using only the top section of your hair. Braid that ponytail into a simple three-strand braid and secure the end with a clear elastic. Then, starting at the base, wrap the braid around itself, keeping it flat against your head. As you wrap, the loops of the braid begin to look like petals. Secure the “flower” with a few pins tucked underneath the petals so they are invisible. It’s a delicate, feminine detail that always earns compliments.
14. The Modern Retro Flip
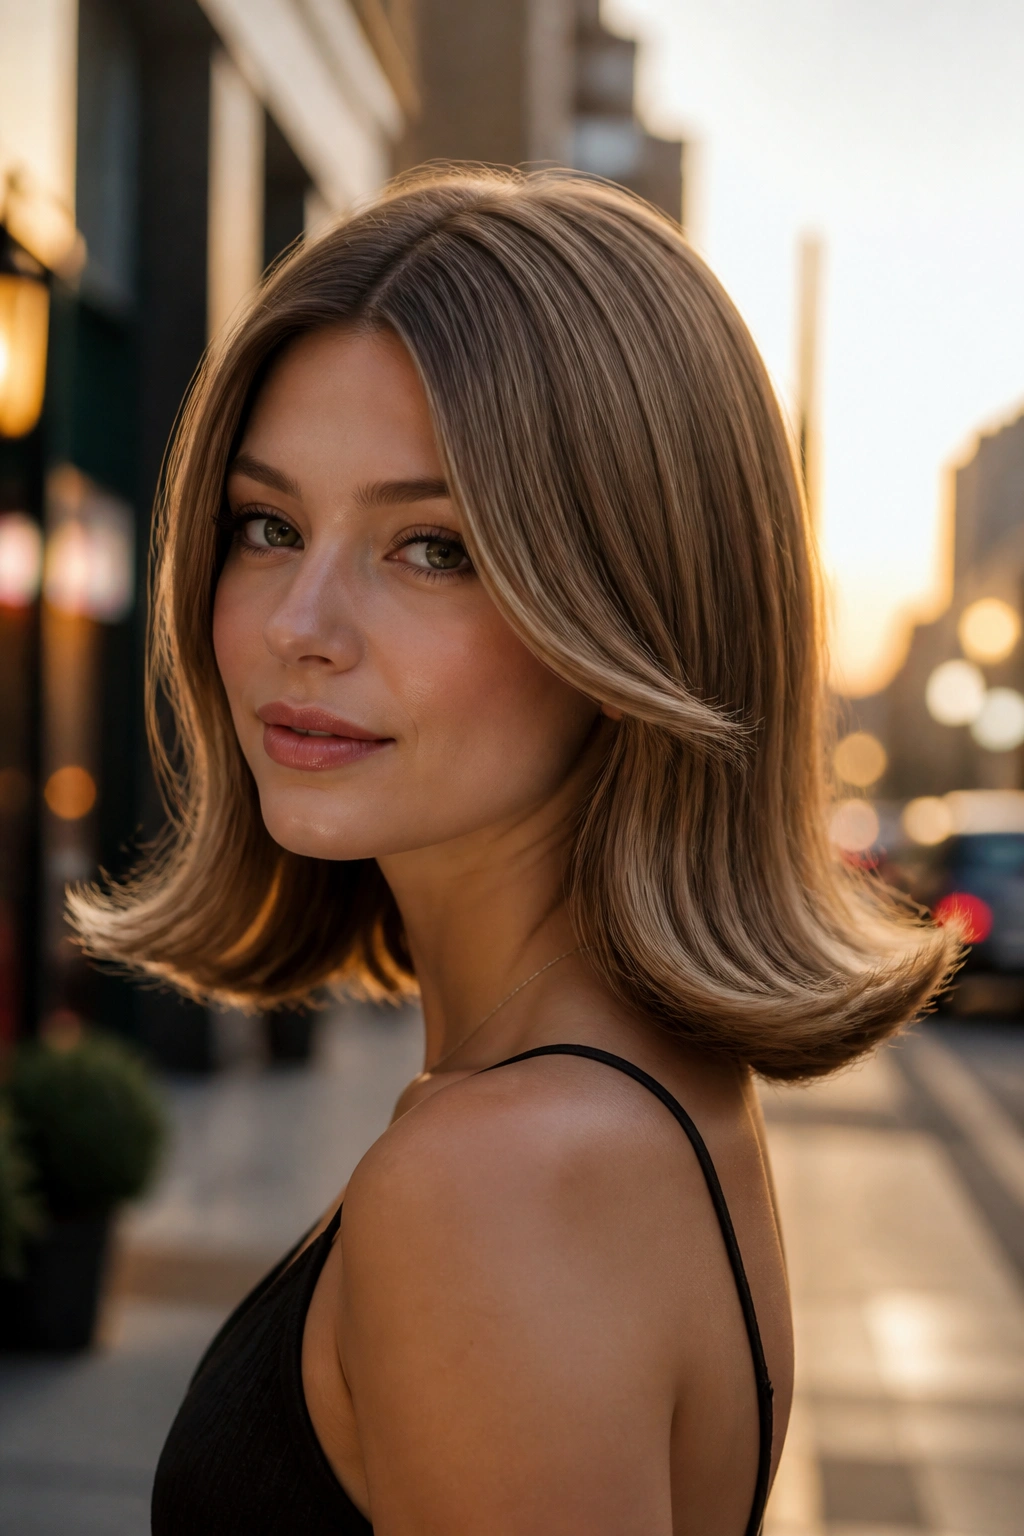
Think 60s mod meets modern minimalism. The “flip” is a style where the ends of the hair are curled outward rather than inward. It is bouncy, fun, and feels very “on-trend” for a dance. This works best on shoulder-length hair or a blunt bob.
To get a “stand out” flip, the top of the hair must be incredibly smooth. Use a round brush while blow-drying to create tension, then use a flat iron on the last two inches of the hair to flick it upward and outward. Use a heavy-duty hairspray to ensure the flip doesn’t drop. This style looks particularly great with a high-neck dress or a “mod” mini-dress.
15. Chunky Face-Framing Braids
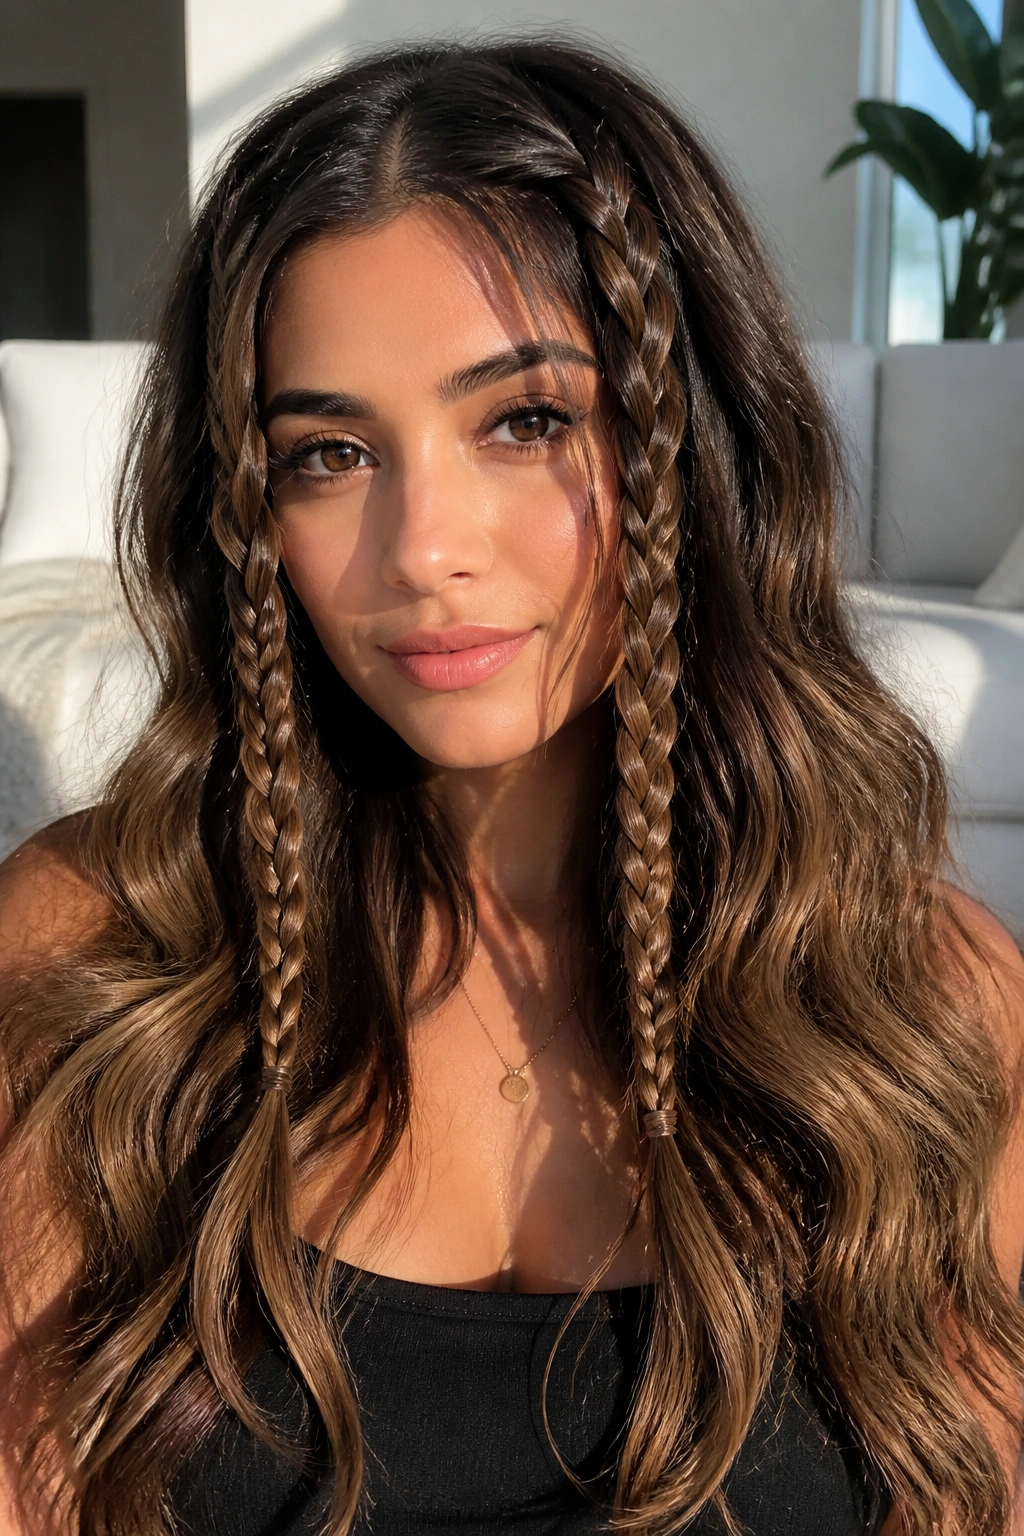
Sometimes called “baby braids,” these are two small braids right at the front of the hairline. While they were a staple of the 70s, the modern version is slightly thicker and usually paired with very voluminous, brushed-out waves. It’s a look that feels very “effortless cool.”
The trick is to braid them tightly at first, then gently “massage” the braid to loosen it up. This prevents them from looking like tight “pigtails” and makes them feel more integrated into the rest of the hair. You can even leave the ends un-tied and just use a bit of hairspray to hold the bottom of the braid—this gives it a very relaxed, bohemian feel.
16. The Embellished Velvet Ribbon Wrap
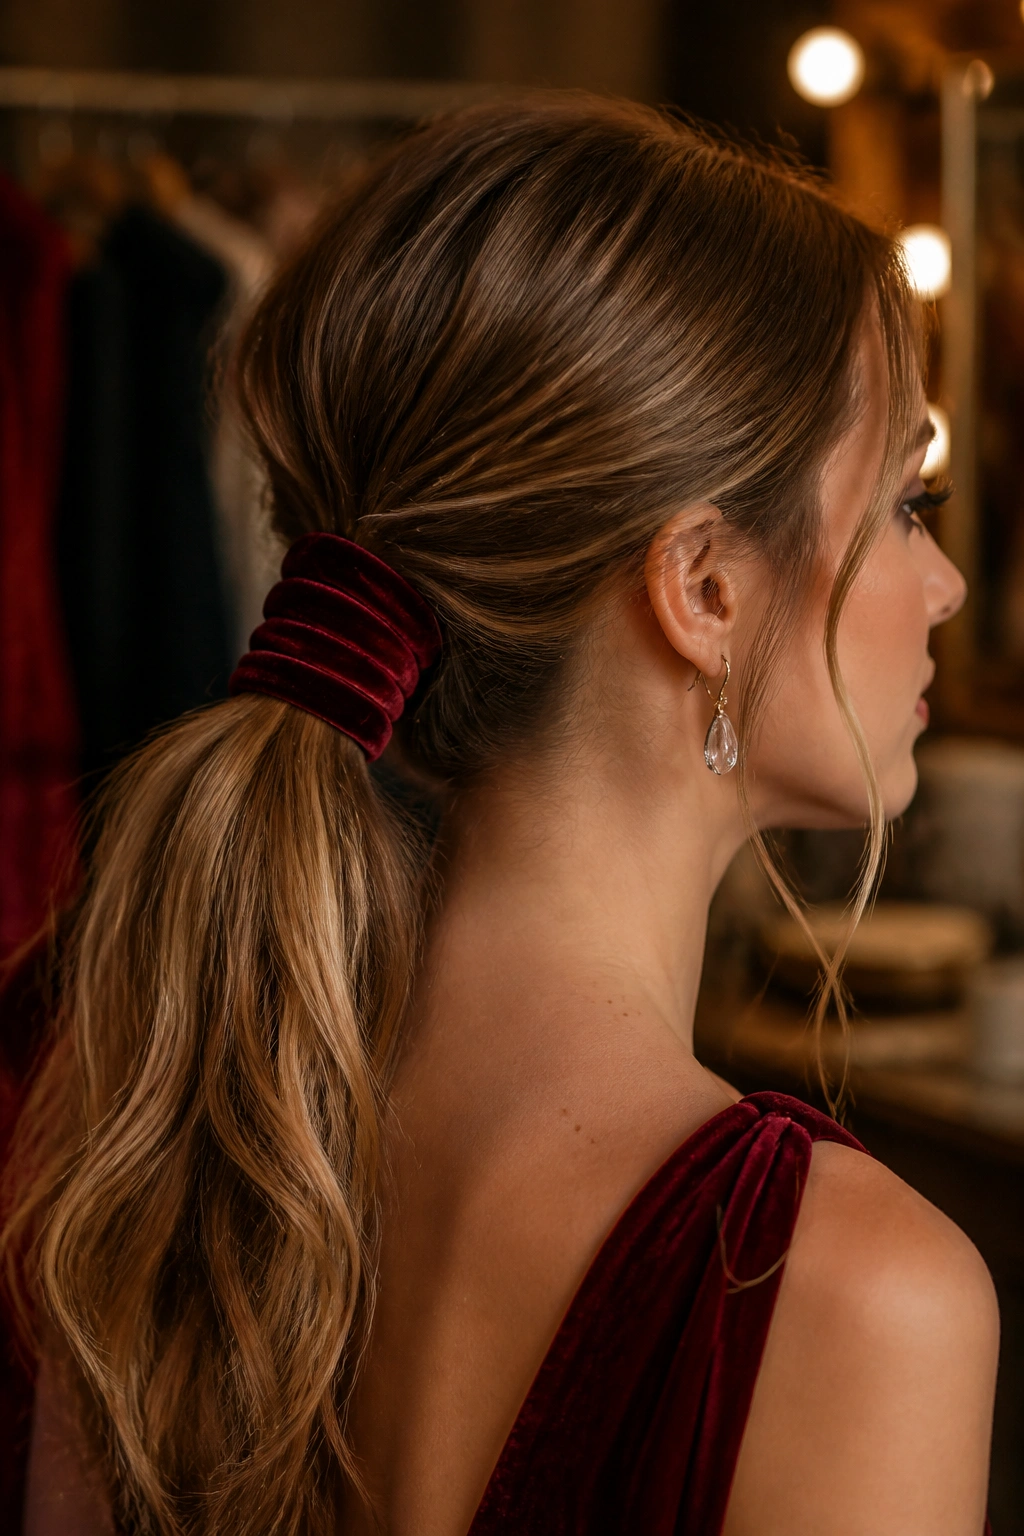
Velvet is the ultimate “rich” texture. If you are wearing a simple ponytail or a low bun, wrapping a long velvet ribbon around the base can elevate the entire look. But don’t just tie a bow; wrap the ribbon several times around the first two inches of the ponytail to create a “cuff” effect.
This adds a Victorian, slightly gothic romanticism to the look. It works incredibly well with dark hair, where a jewel-toned ribbon (like emerald, navy, or burgundy) can really pop. If you have blonde or light brown hair, a black velvet ribbon creates a stunning, sharp contrast.
17. Textured Pixie with Jewel Accents
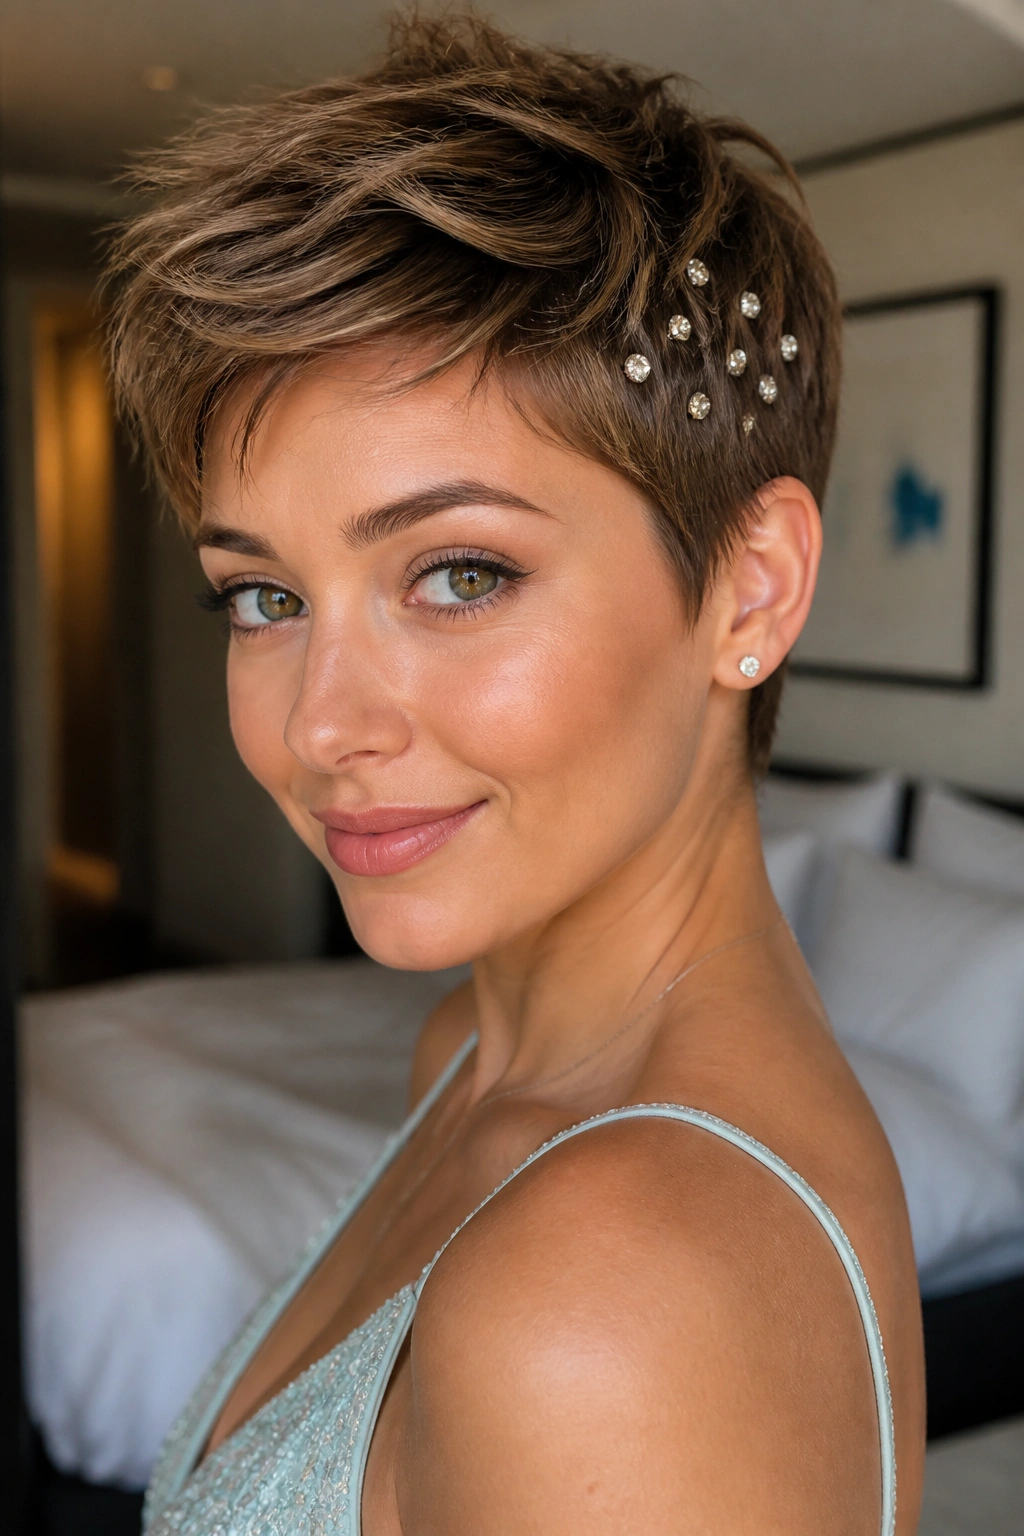
Having short hair doesn’t mean you have fewer options; it just means your options are more about texture and accessories. A textured pixie—using a pomade to create “piecey” definition—is incredibly chic. To make it homecoming-ready, add “hair jewelry.”
This can be as simple as a series of tiny rhinestone pins scattered through one side of the hair, or a delicate, thin headband that sits right at the hairline. Since there isn’t a lot of hair to work with, the “hair” itself becomes the background for the accessories. It’s a very high-fashion, “pixie-queen” vibe that stands out because it’s so different from the sea of long curls.
18. Bohemian Crown Braid
The crown braid (or milkmaid braid) is the ultimate “up and out of the way” style. It involves two braids that wrap entirely around the head, meeting at the top. It’s a sturdy, classic look that works for almost any hair type.
To make it stand out, don’t aim for perfection. Pull out some “whispy” bits around the ears and forehead. If you have some small dried flowers or even tiny gold rings, you can tuck them into the weave of the braid. This gives it a “festival-formal” look that feels very current and very personal.
19. The Deep Side-Parted Faux Hawk
For the girl who wants a bit of edge, the faux hawk is a showstopper. You don’t actually need to shave your head; you just need to use tension and styling products to create the illusion of height in the center and sleekness on the sides.
Slick back the sides of your hair very tightly, securing them with pins at the back. Then, use a curling iron and lots of backcombing to create massive volume in the center section, from your forehead to the nape of your neck. It’s a bold, punk-inspired look that feels incredibly powerful. Pair it with an ear cuff for maximum impact.
20. Soft Glam Half-Up Waves

If you can’t decide between up and down, the half-up look is your best friend. But for homecoming, we want “Soft Glam”—think red carpet volume and perfectly polished curls. The key is the “lift” at the front.
Instead of pulling the hair straight back, create a small “pompadour” or “pouf” at the forehead. This adds height and prevents the hair from looking flat in photos. Secure the top section with a beautiful clip—maybe something vintage or something with a bit of “bling”—and let the rest of the hair fall in large, soft barrels.
21. Braided Low Ponytail with Gold Cuffs
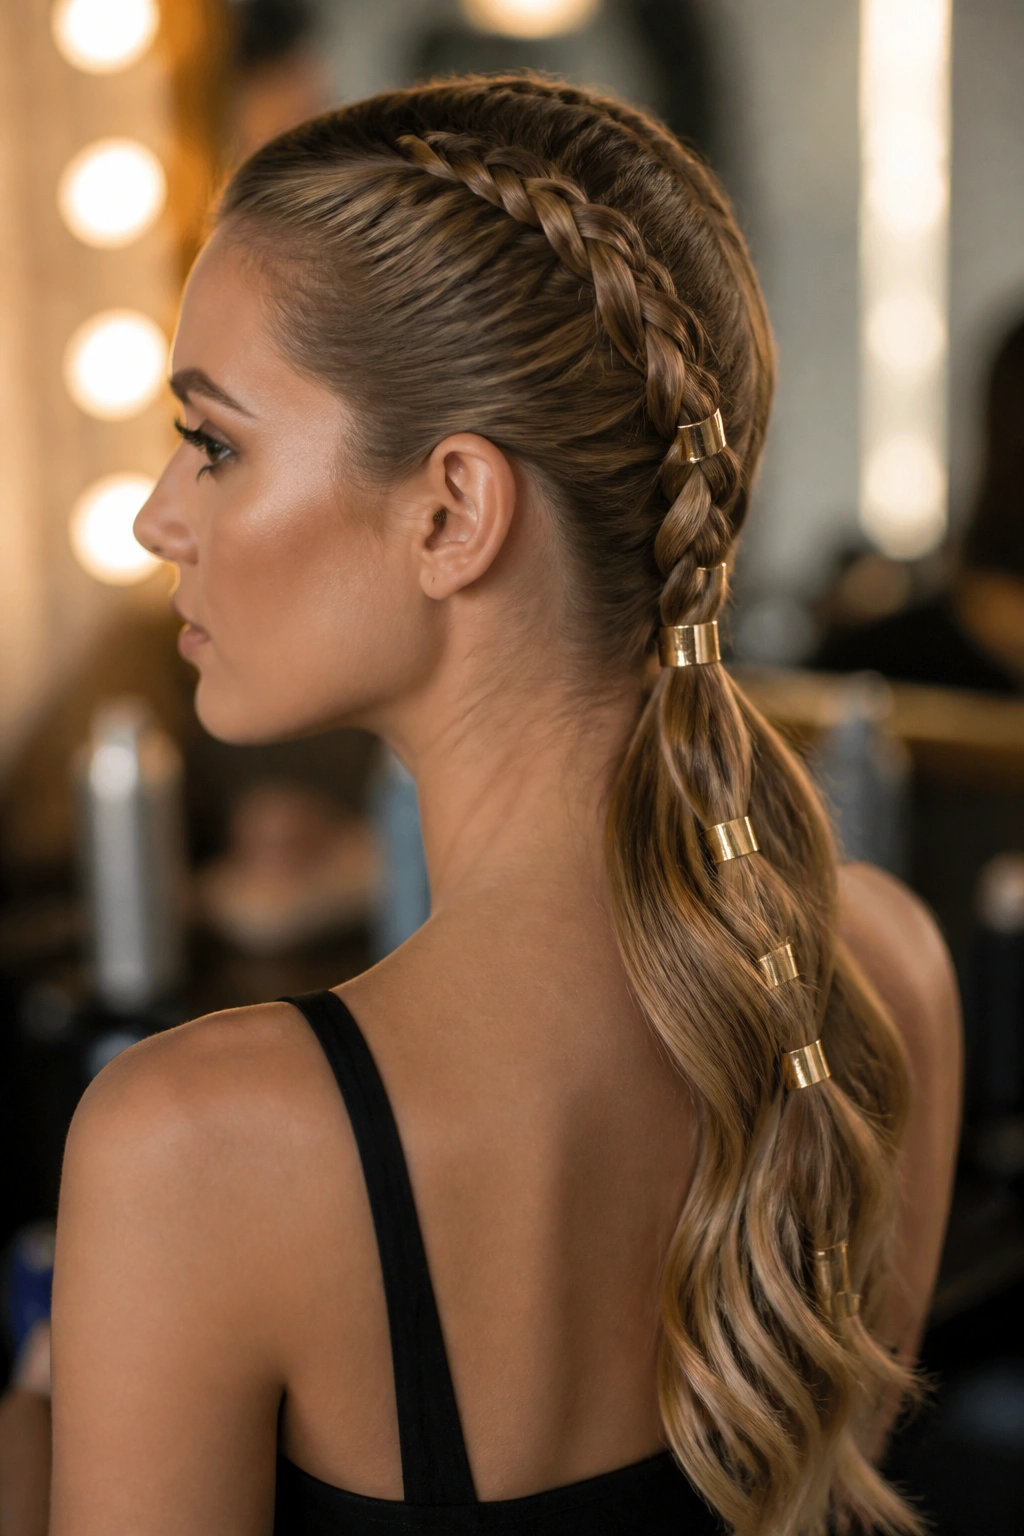
Take a standard low ponytail and add a Dutch braid down the center of the head leading into it. Then, instead of a regular hair tie, use a series of gold hair cuffs down the length of the ponytail.
This creates a “warrior princess” vibe that is both sleek and incredibly interesting to look at. The gold against the hair adds a metallic shine that catches the strobe lights on the dance floor. It’s a style that feels very modern and “high-end.”
22. The Fluffy Blowout with Curtain Bangs
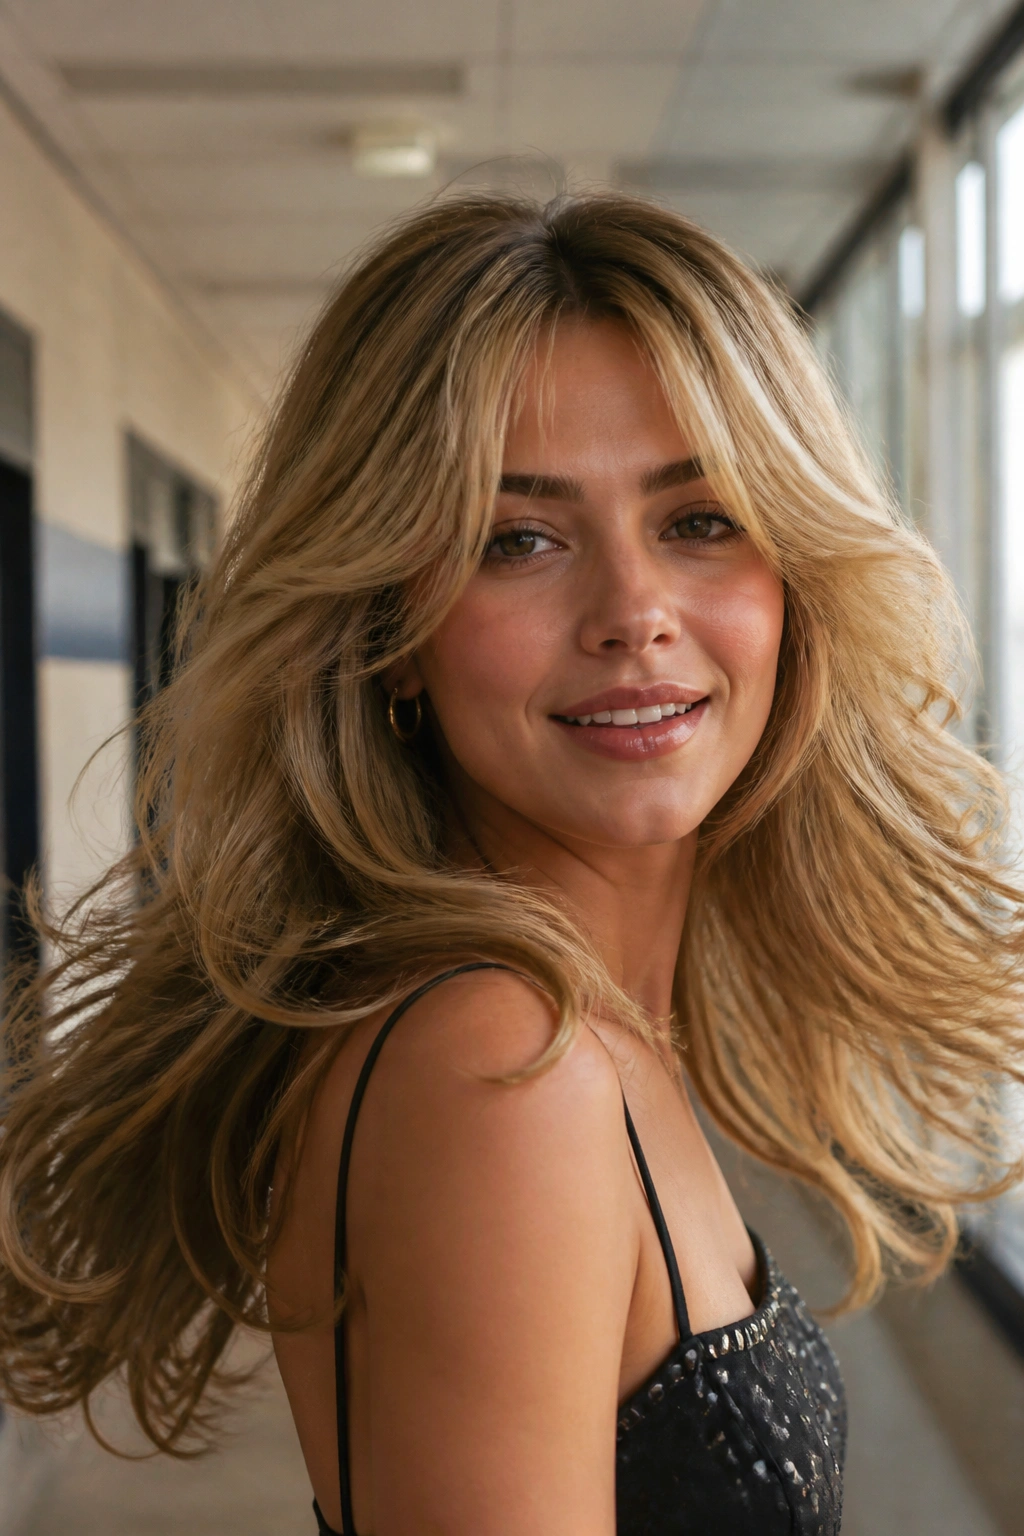
Sometimes, the most impressive thing you can do is have incredibly healthy, bouncy hair. A “fluffy” 90s-style blowout is making a massive comeback. It’s all about volume, movement, and those face-framing curtain bangs.
This look requires a lot of prep work with a round brush and velcro rollers. You want the hair to have “bounce”—when you walk, your hair should move with you. It’s a classic, “expensive-looking” style that never goes out of fashion.
23. Criss-Crossed Pinned Back Sides

This is a great option for someone who wants to keep their hair down but wants to show off their face. Take two small sections of hair from above the ears and pull them to the back. Cross them over each other and secure with pins. Then, take two more sections from just below the first ones and cross them over the first pair.
This creates a “lattice” effect at the back of the head. It’s a subtle detail, but it’s very effective. It keeps the hair from falling into your face while you’re dancing, but still allows you to have the “security blanket” of long hair around your shoulders.
24. The Twisted Rope Braid Updo

A rope braid is made by twisting two sections of hair in one direction and then wrapping them around each other in the opposite direction. This creates a thick, “rope-like” texture that is much shinier and more structural than a standard braid.
Twist your hair into a long rope braid, then coil it into a low bun at the nape of your neck. Because of the way the hair is twisted, it catches the light in a very specific way, making the bun look incredibly intricate and expensive.
25. Space Buns with Glitter Parting
If you want to be the life of the party, glitter is the answer. Space buns (two high buns on either side of the head) are fun on their own, but adding “glitter roots” takes it to the next level.
Mix a bit of hair gel with chunky cosmetic-grade glitter and apply it with a brush right along your center part. It’s a bold, playful, and incredibly festive look. Just be warned: you will be finding glitter in your shower for at least a week—but for a night like homecoming, it’s worth it.
The Pre-Game for Your Hair
The success of any of these styles starts long before you pick up a curling iron. If you try to style freshly washed hair, you are going to have a hard time. Clean hair is “slippery”—it doesn’t have the “grip” needed to hold a braid or a bun for six hours. If you can, wash your hair the day before the dance. This allows your natural oils to provide a bit of traction. If you must wash it the day of, be sure to use a texturizing spray or a light dusting of hair powder to give the hair some “tooth.”
Heat protection is also non-negotiable. You are likely going to be using high heat to ensure those curls stay put, and nothing ruins a look faster than fried, “crunchy” ends. Use a professional-grade heat protectant on every section before it touches the iron. Also, consider the “direction” of your hair. If you always part your hair on the left, try a right-sided part for the dance. This will give you instant, natural volume because the hair is being forced to lay in a direction it isn’t used to.
Finally, think about your “exit strategy.” If you’re doing a complex updo with forty bobby pins, have a plan for how you’re going to get them out without ripping your hair out at 1:00 AM. A little bit of hair oil or a detangling spray can be a lifesaver when it’s time to transition from “glam” back to “reality.”
Your Homecoming Tool Kit
You don’t need a professional salon setup, but you do need a few high-quality essentials. If you’re doing your own hair, or having a friend help, make sure you have the following on hand:
- A multi-size bobby pin pack: You need the tiny ones for fine details and the large “industrial” ones for anchoring heavy buns.
- Dry Shampoo: Not just for cleaning, but for adding massive volume at the roots.
- Creaseless clips: These are essential for holding your hair back while you do your makeup without leaving a “dent” in your style.
- A silk scrunchie: Use this while you’re getting dressed to keep your hair up without messing up the curls you just spent an hour on.
- Finishing Oil: A tiny drop on the ends makes the difference between “home-done” and “salon-finished.”
Wrapping Up

Homecoming is about more than just a photo; it’s about a feeling. It’s that moment when the music drops, the crowd jumps, and you feel entirely comfortable in your own skin. Your hair should support that feeling, not distract from it. Whether you chose a sleek, high-fashion ponytail or a glitter-dusted set of space buns, the most important “product” you can wear is confidence.
If a pin slips or a curl drops, let it go. The best homecoming memories aren’t the ones where every hair was in place; they’re the ones where you laughed so hard your updo started to wobble. Pick a style that reflects who you are, give it a good blast of hairspray, and then forget about it. You have a dance floor to get to.