A wedding guest hairstyle has a short life if it falls apart before dessert. The good ones survive a hug, a long ceremony, a windy walk from the car, and one dance floor song that turns into three.
That’s why the best wedding guest hairstyles to copy are not the flashiest ones in a vacuum. They’re the styles that sit well with a neckline, hold up under photos, and still look intentional after a few hours of sitting, standing, and probably fidgeting with your clutch. A style can look gorgeous in a mirror and still be a headache by the end of the night. I care about the second part more.
Hair texture matters here, and so does length. So does the dress. So does the weather, though nobody wants to think about that until the first humid breath hits the parking lot. A style that works on thick, shoulder-length hair can look strange on fine, waist-length hair, and vice versa. The smartest move is to pick a shape that matches your hair’s real behavior, not the fantasy version.
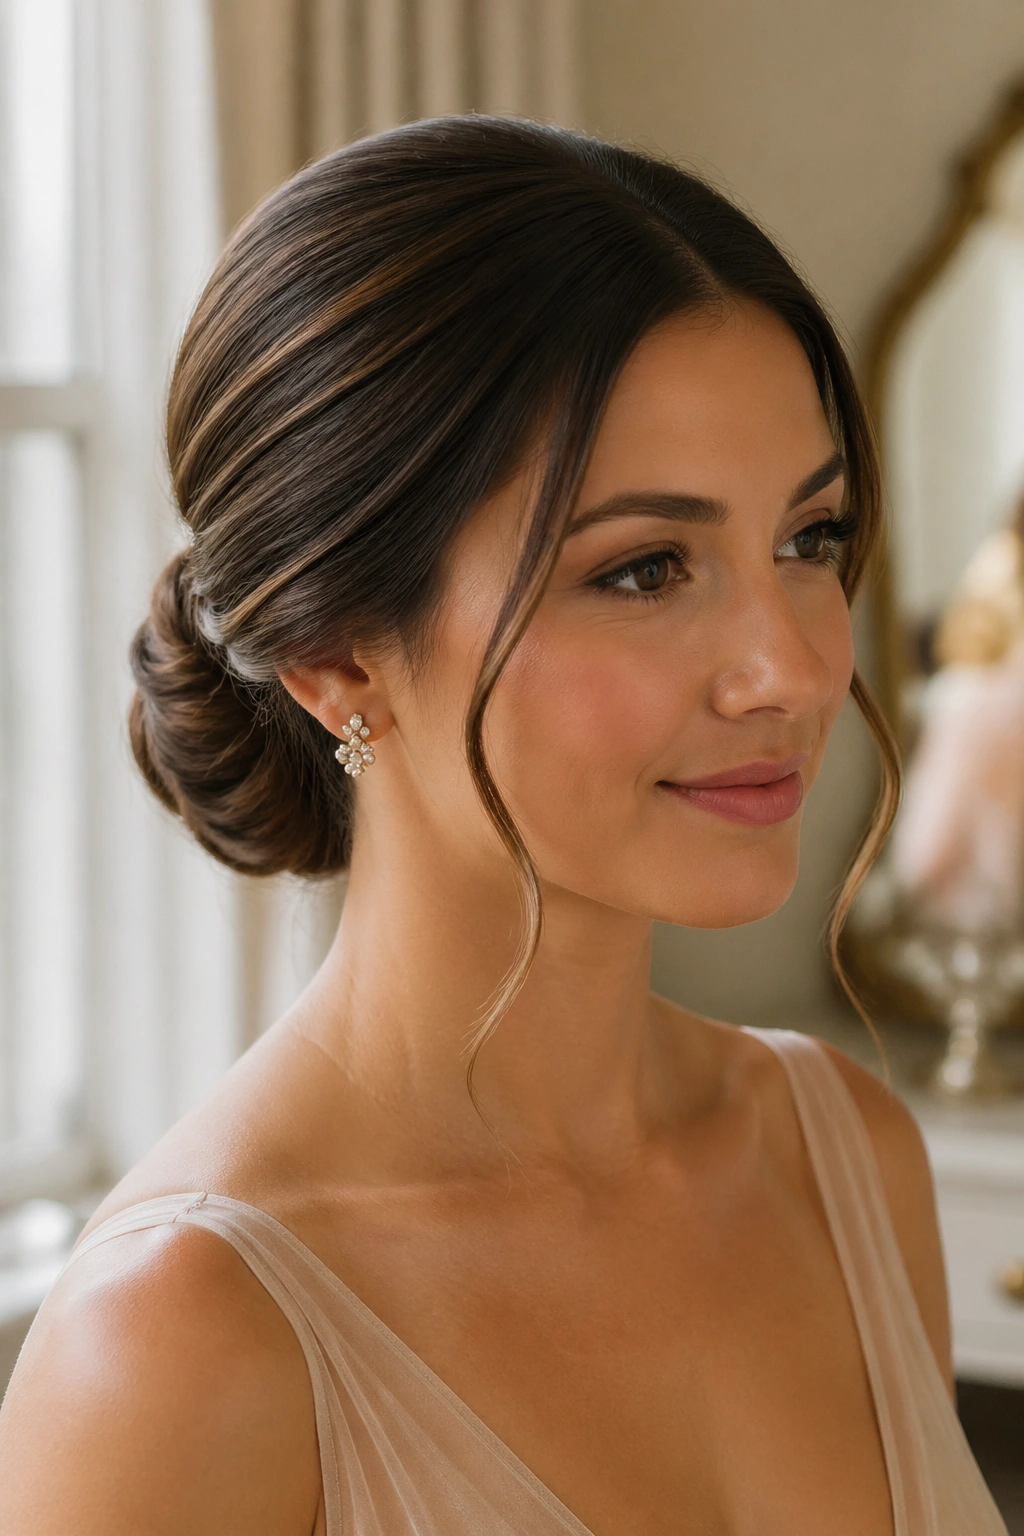
1. Polished Low Chignon
A low chignon is the kind of style that looks calm even when the rest of the day has been chaos. It sits at the nape, keeps the hair off your face, and leaves room for earrings or a bold neckline to do their thing. Clean. Quiet. Confident.
Why it works so well
The trick is in the placement. A chignon that sits too high starts to look like a prom bun from another decade. Keep it low, wrap the lengths smoothly, and pin the knot flat against the head so the shape looks deliberate from the side and the back.
Use a smoothing cream on damp hair, then blow-dry with a paddle brush until the surface feels soft and controlled. If your hair is slippery, mist the roots with a light texturizing spray before twisting. Two crossed bobby pins at the base usually hold better than four loose ones fighting each other.
A chignon works especially well with gowns that already bring drama — one-shoulder dresses, satin slips, high necks, anything with a clean line. It doesn’t steal the show. It frames it.
2. Soft Hollywood Waves for Wedding Guest Hairstyles to Copy
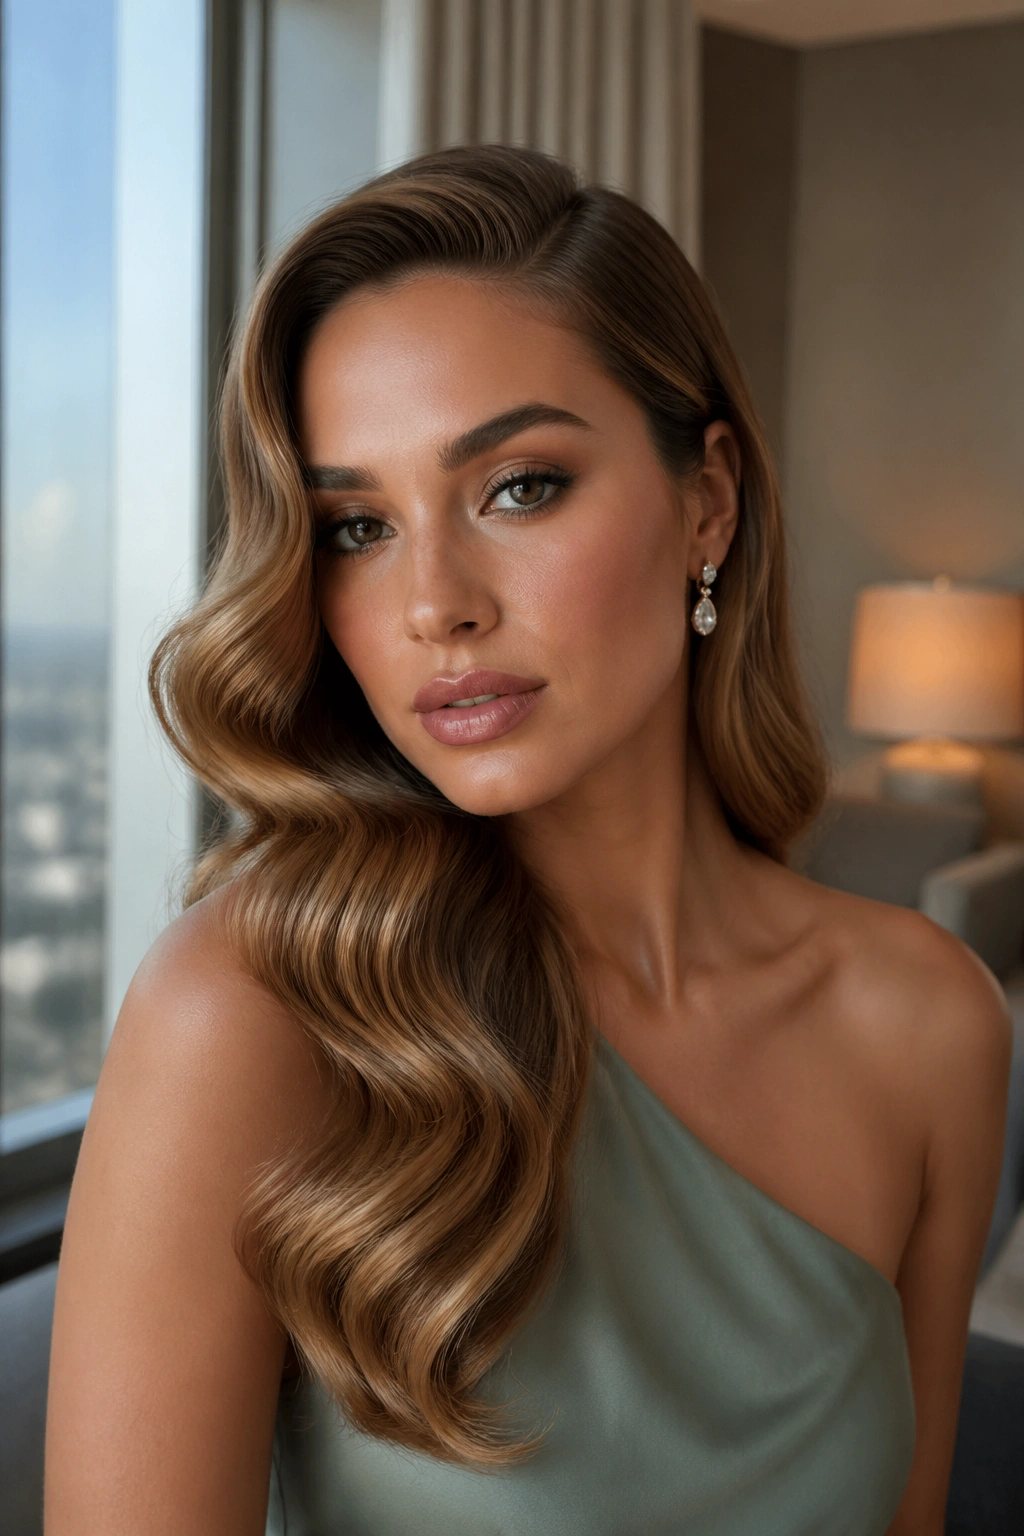
Why do these waves keep showing up at formal events? Because they have structure. Not stiff structure, either. The hair bends in one clear direction, then loosens just enough to keep the style from looking dated or overdone.
What makes them hold shape
Start with a deep side part and curl 1-inch sections away from the face using a 1 to 1¼-inch curling iron. Clip each curl while it cools. That cooling step matters more than most people think. If you brush warm curls, they collapse fast and turn into a fuzzy bend instead of a wave.
Once the curls are cool, brush them out with a soft bristle brush until the shape merges into one smooth line. Finish with shine spray, not a heavy oil. Too much oil makes the style fall flat at the crown.
How to wear them
- Best on medium to long hair.
- Strong choice for strapless or sweetheart necklines.
- Easier to refresh than a full updo.
- Works well when you want movement around the shoulders.
Do not skip the pinning step while the hair cools. That’s what keeps the waves from drooping by the first round of photos.
3. Sleek Middle-Part Low Ponytail
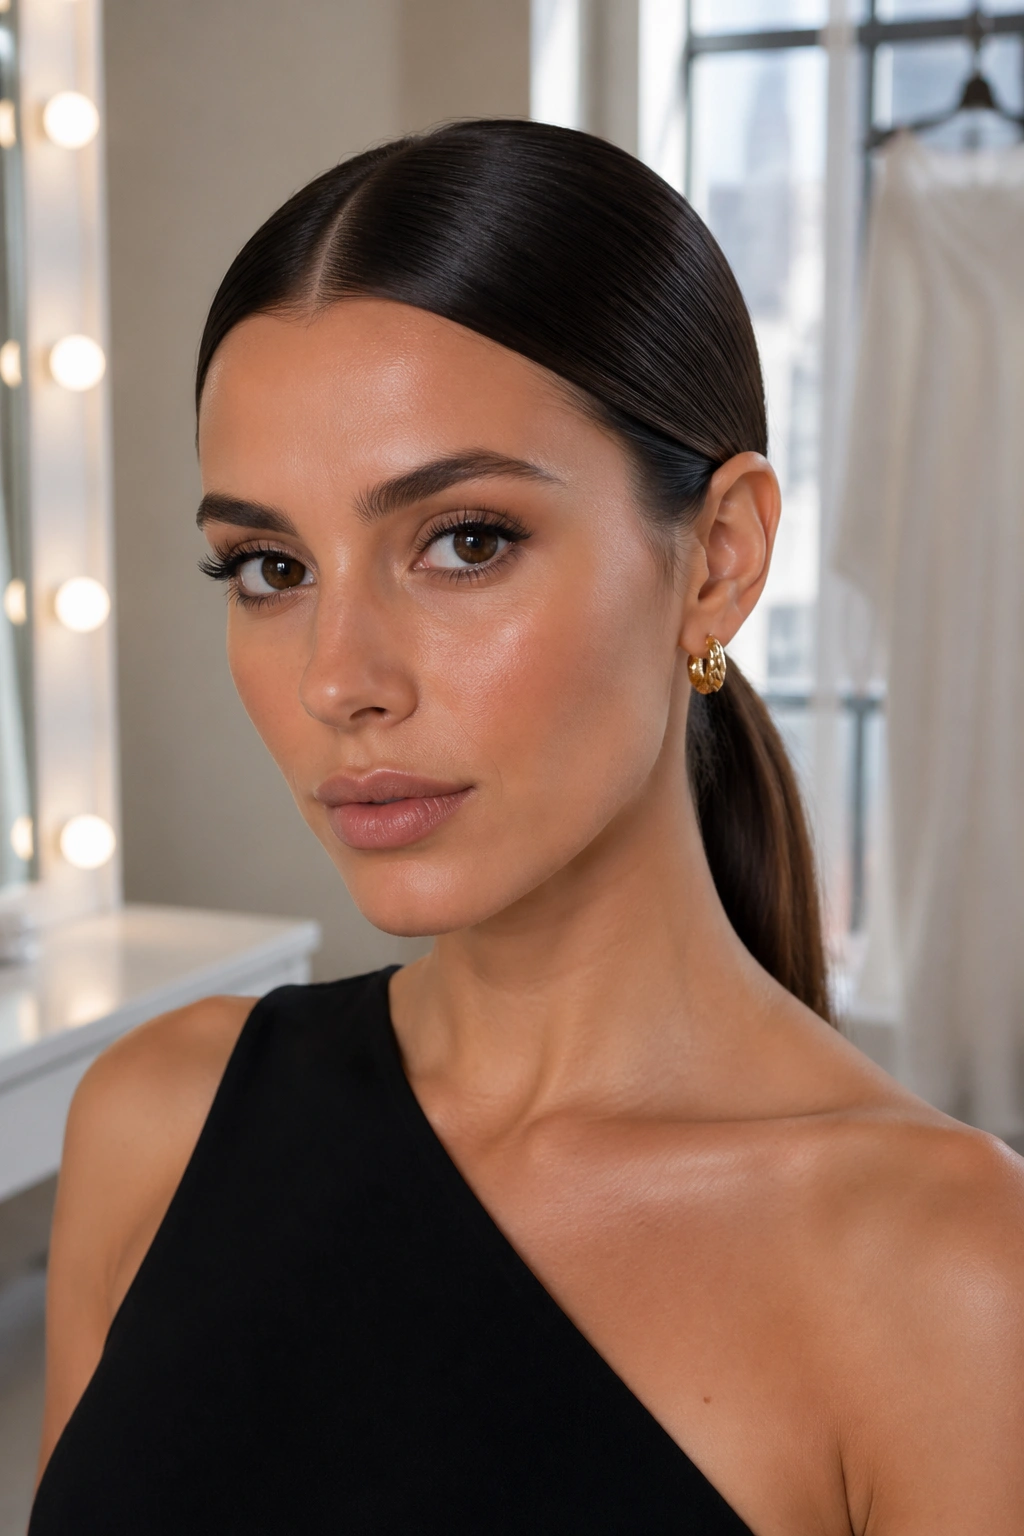
This is the hairstyle for someone who wants clean lines and zero fuss at the venue. A middle part plus a low ponytail sounds simple, but the effect is sharp when the hair is smooth, the part is precise, and the ponytail sits low and tight at the nape.
The look depends on the finish. Blow-dry with a round brush if you want a soft polish, or flat-iron the lengths if your hair tends to puff up. Then smooth a small amount of serum over the top layer only. If you put product everywhere, the ponytail starts to look greasy instead of glossy.
I like this style with statement earrings because it clears the face and doesn’t compete with anything else. It also behaves well under a veil-like hair accessory, if the wedding calls for one. A slim wrap of hair around the elastic makes the whole thing look more finished, and it takes less than a minute.
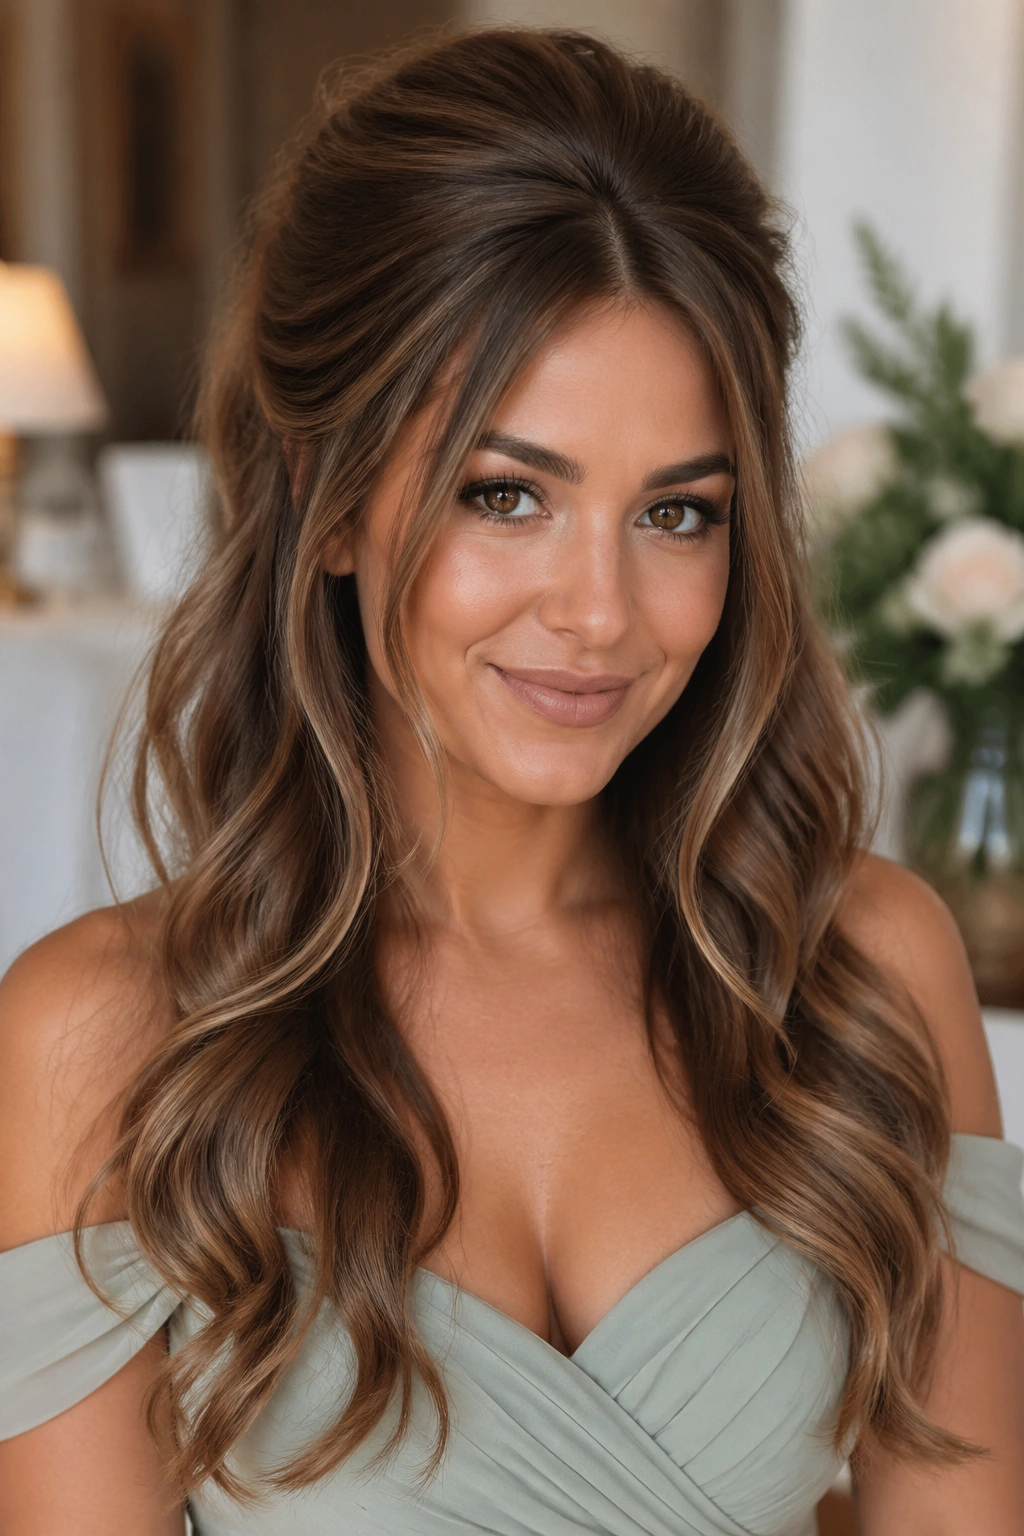
4. Braided Crown Half-Up
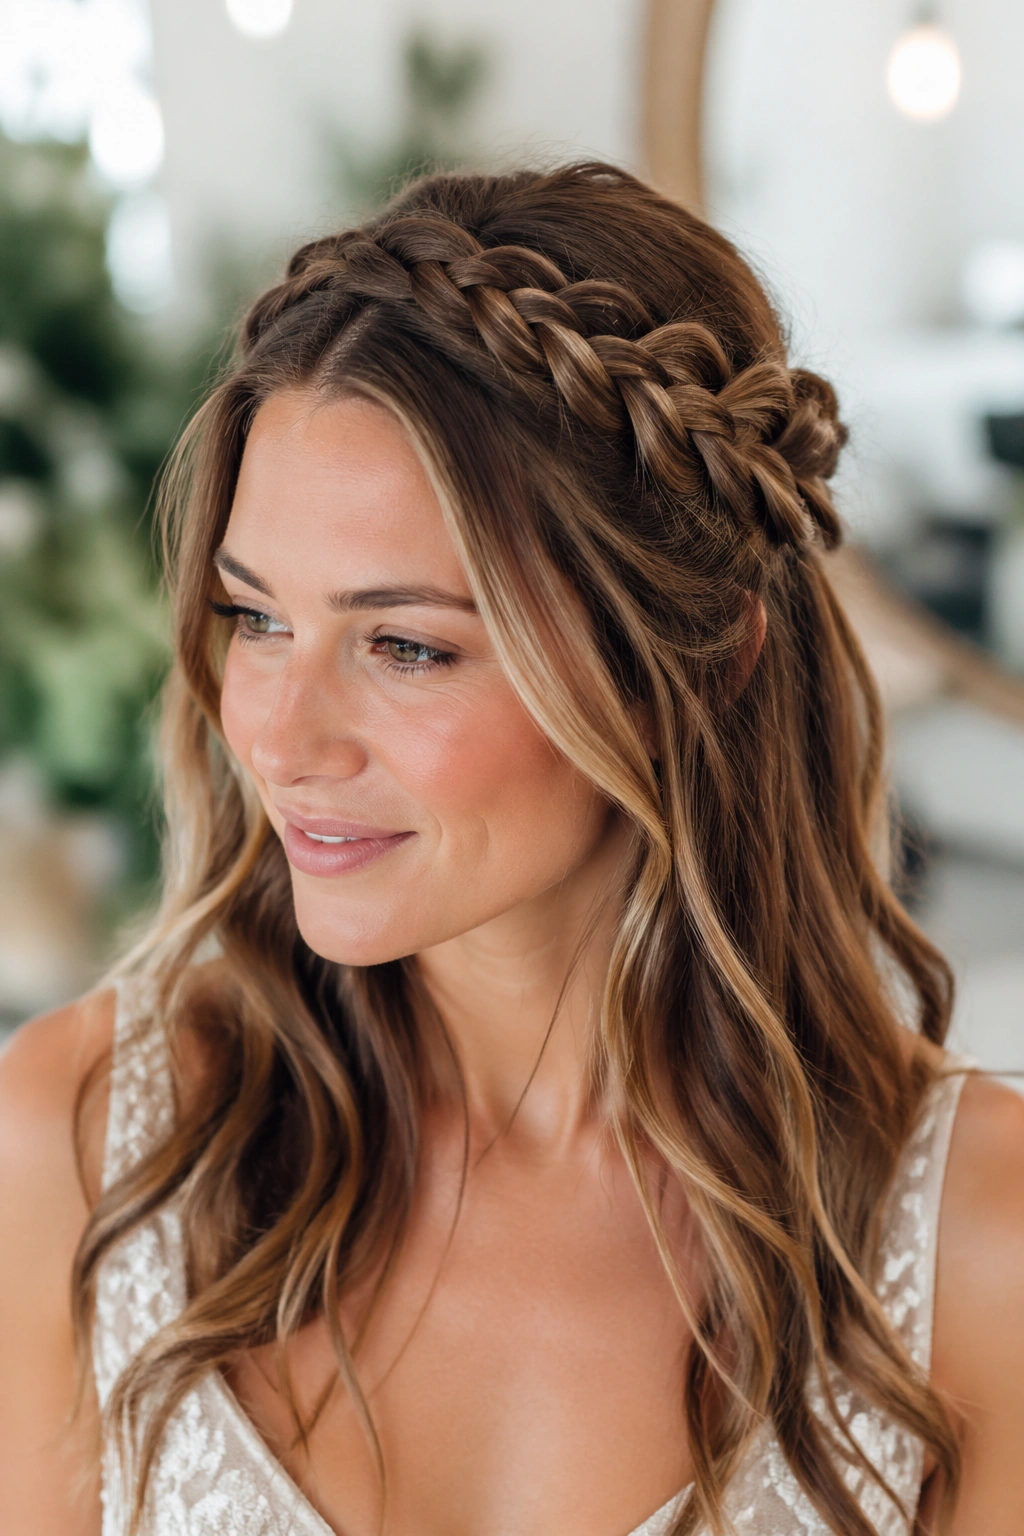
If your hair falls flat by hour three, a braided crown half-up is a very smart fix. It gives you shape around the face, keeps the front sections under control, and leaves the length visible in back so the style still feels airy.
You do not need a huge braid. In fact, a thick, bulky braid can overpower the style and make the head look crowded. Take two small sections from each temple, braid or twist them back, then pin them where they meet at the crown or just below it. The goal is a gentle frame, not a helmet.
Where this one shines
This style is especially good for hair that’s long enough to curl but not so long that a full updo feels right. It also plays nicely with floral pins or a small comb tucked into the join point.
Keep the braid soft at the edges. Pull a few strands loose near the hairline so the crown doesn’t look rigid. That tiny looseness is what keeps it from reading too schoolgirl.
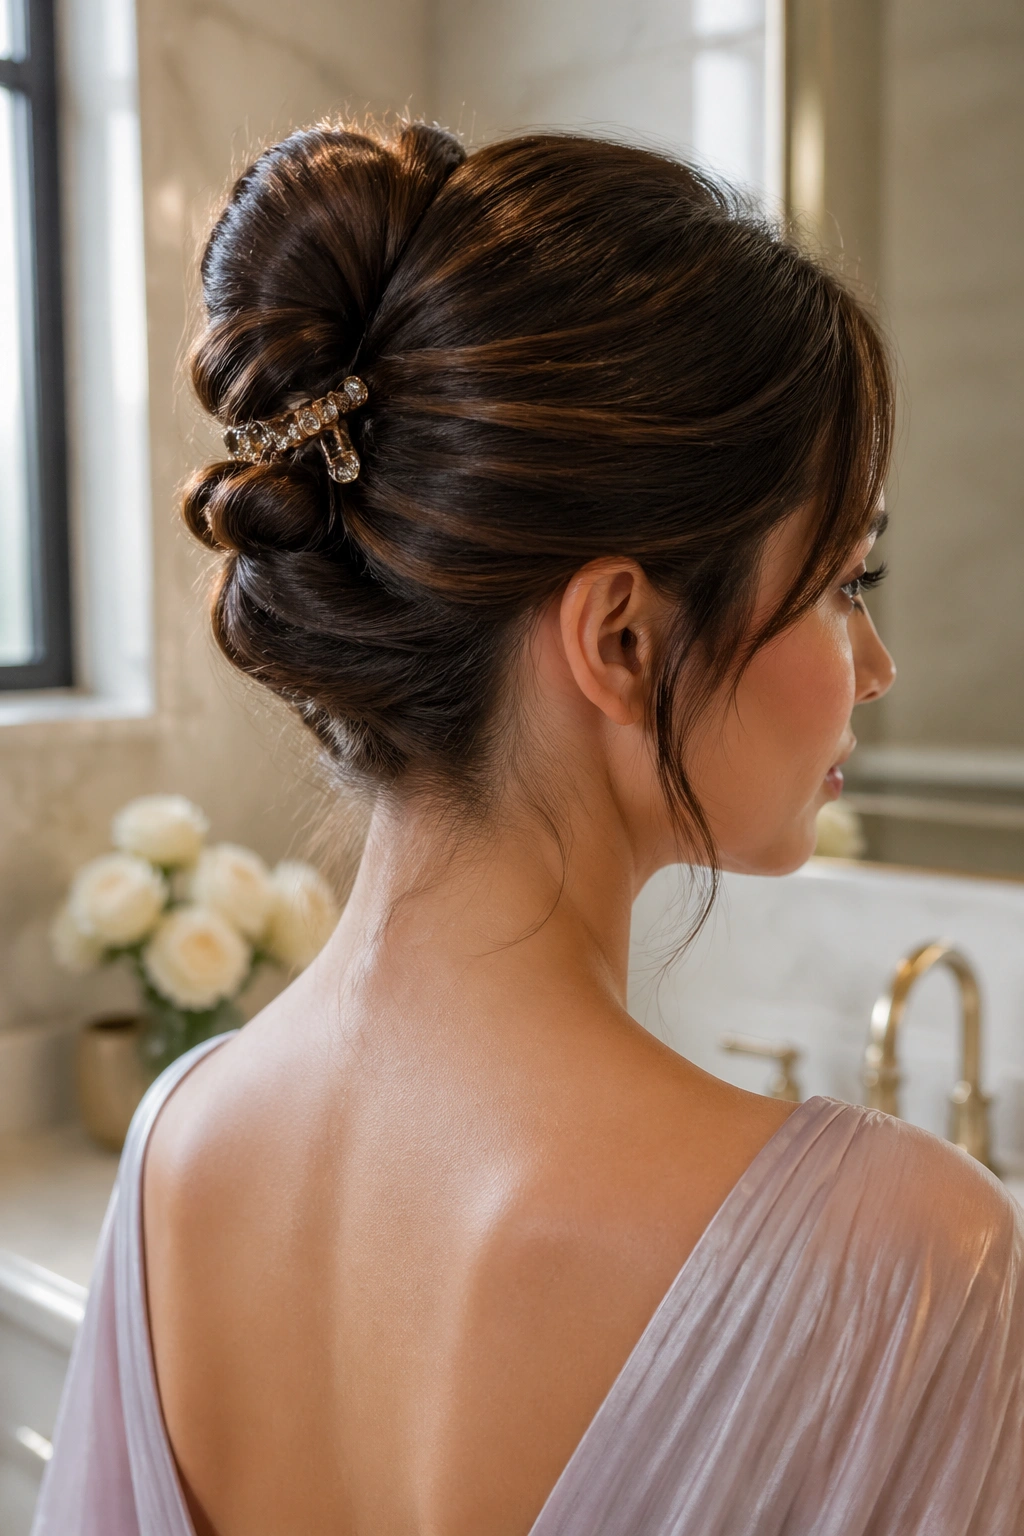
5. Old-School French Twist
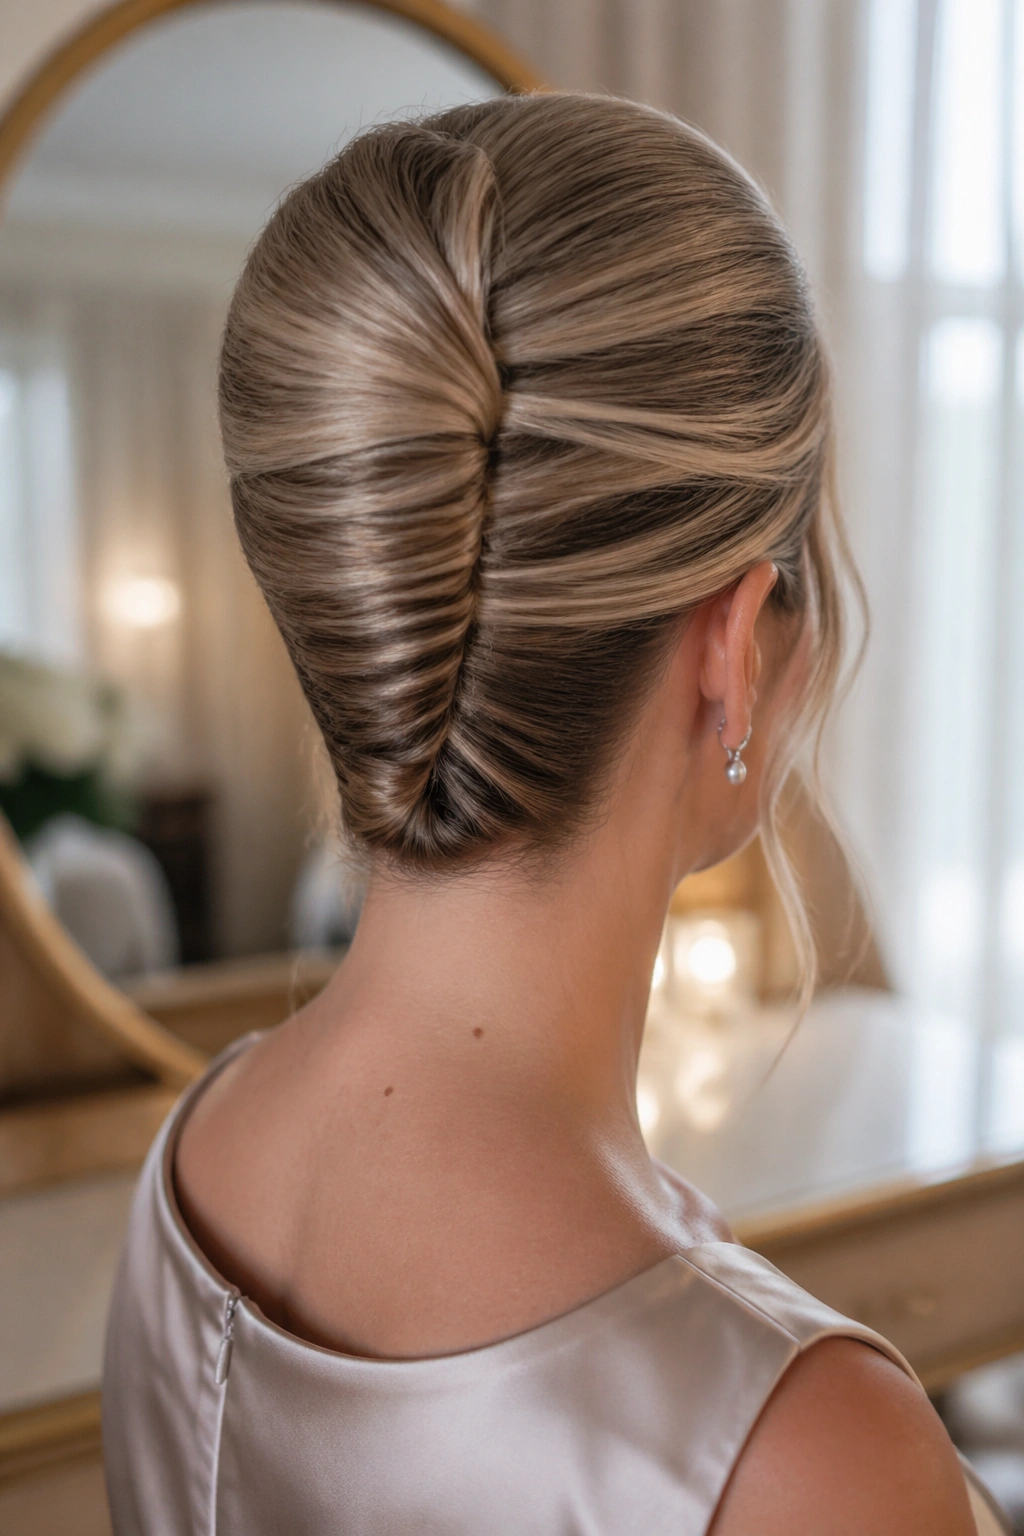
A French twist brings a little more height than a plain bun, which is exactly why it works with high necklines and structured dresses. It also has that neat back view people tend to notice in ceremony seating, which sounds minor until you see the photos later.
Unlike a low bun, the twist creates a vertical line. That changes the whole mood of the outfit. It feels more formal, less relaxed, and a little more architectural. Good if your dress already has soft fabric or a floaty skirt and you want the hair to sharpen the look.
Use a brush, a bit of mousse, and plenty of pins. Seriously, plenty. A French twist should feel secure all the way from the crown down to the tucked ends. If you can wobble it with one finger, it needs more support.
This one is especially good when you want your shoulders and neckline to stay open. It gives the earrings room to work, and it stays neat without looking frozen.
6. Glossy Blowout with Tucked Ends
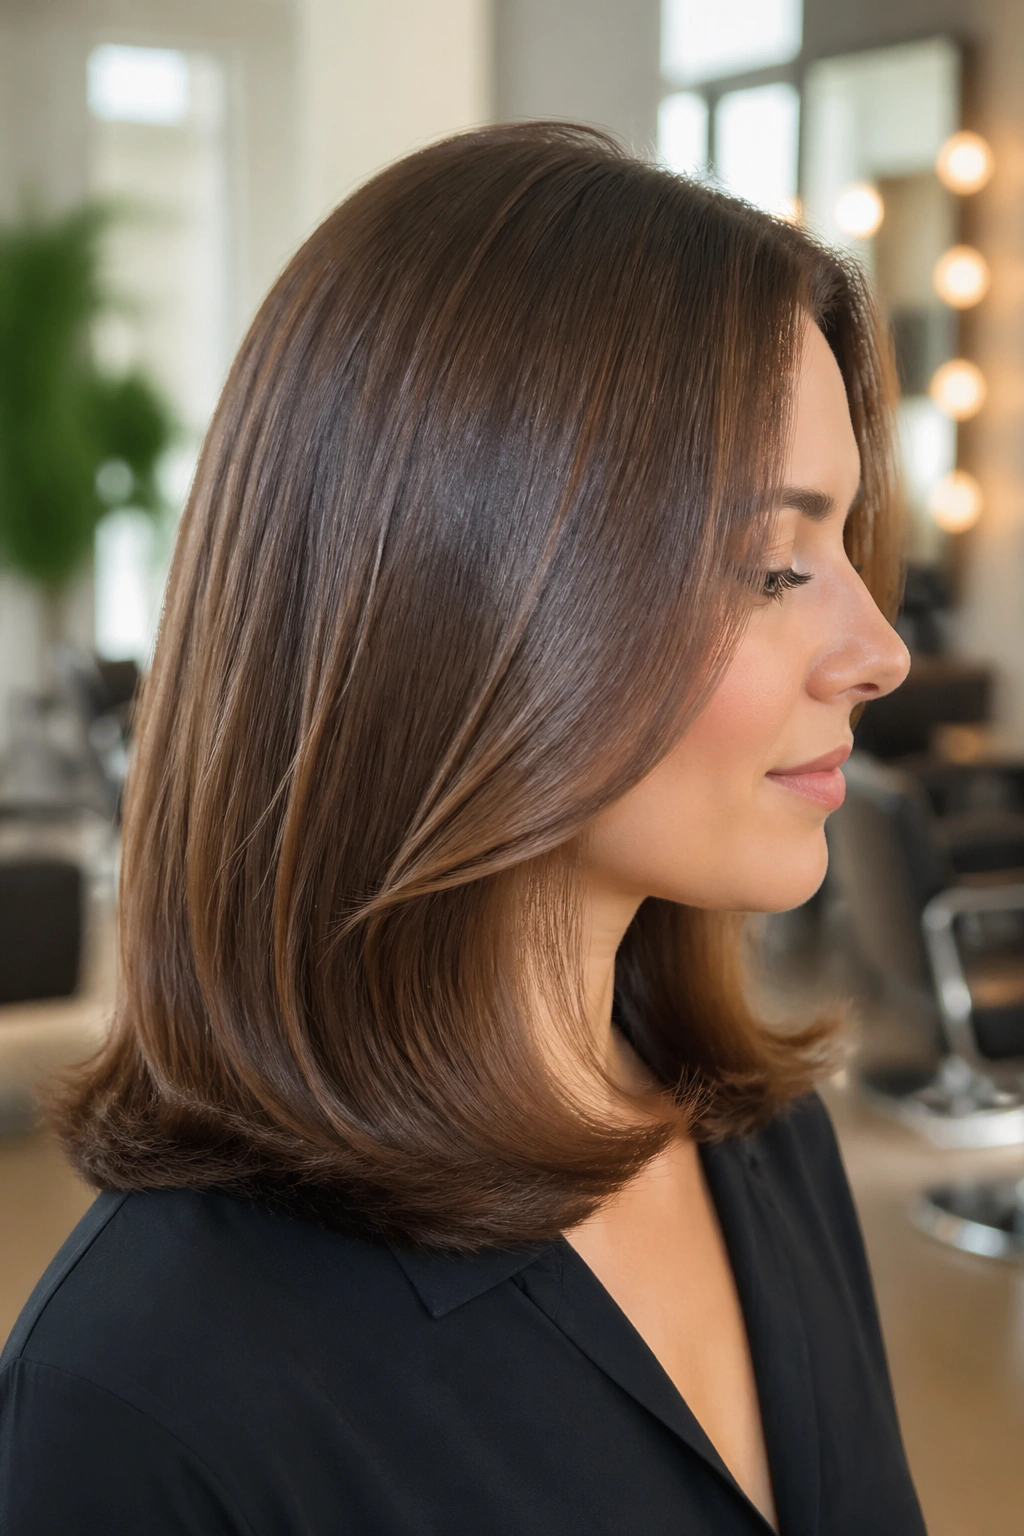
A blowout with tucked ends is one of my favorites because it looks expensive without trying to look fancy. The hair has movement, but the ends curve under just enough to keep the shape controlled. It feels soft, not fluffy.
The trick is to blow-dry with a round brush and then use a large-barrel curling iron only on the last few inches. That little bend at the ends matters. It stops the style from puffing outward and makes the finish look cleaner around the shoulders. If your hair is layered, bend the top layers under first so the shape stays unified.
Keep the surface smooth
Use a light heat protectant before styling, then finish with a small amount of shine spray from mid-length to ends. Avoid heavy oils near the roots; they flatten the lift you worked for. If your hair is fine, clip the crown for 10 minutes after blow-drying to keep the volume.
This is one of those styles that looks better from a side angle than people expect. The shape moves. The shine catches the light. And the whole thing stays comfortable for hours.
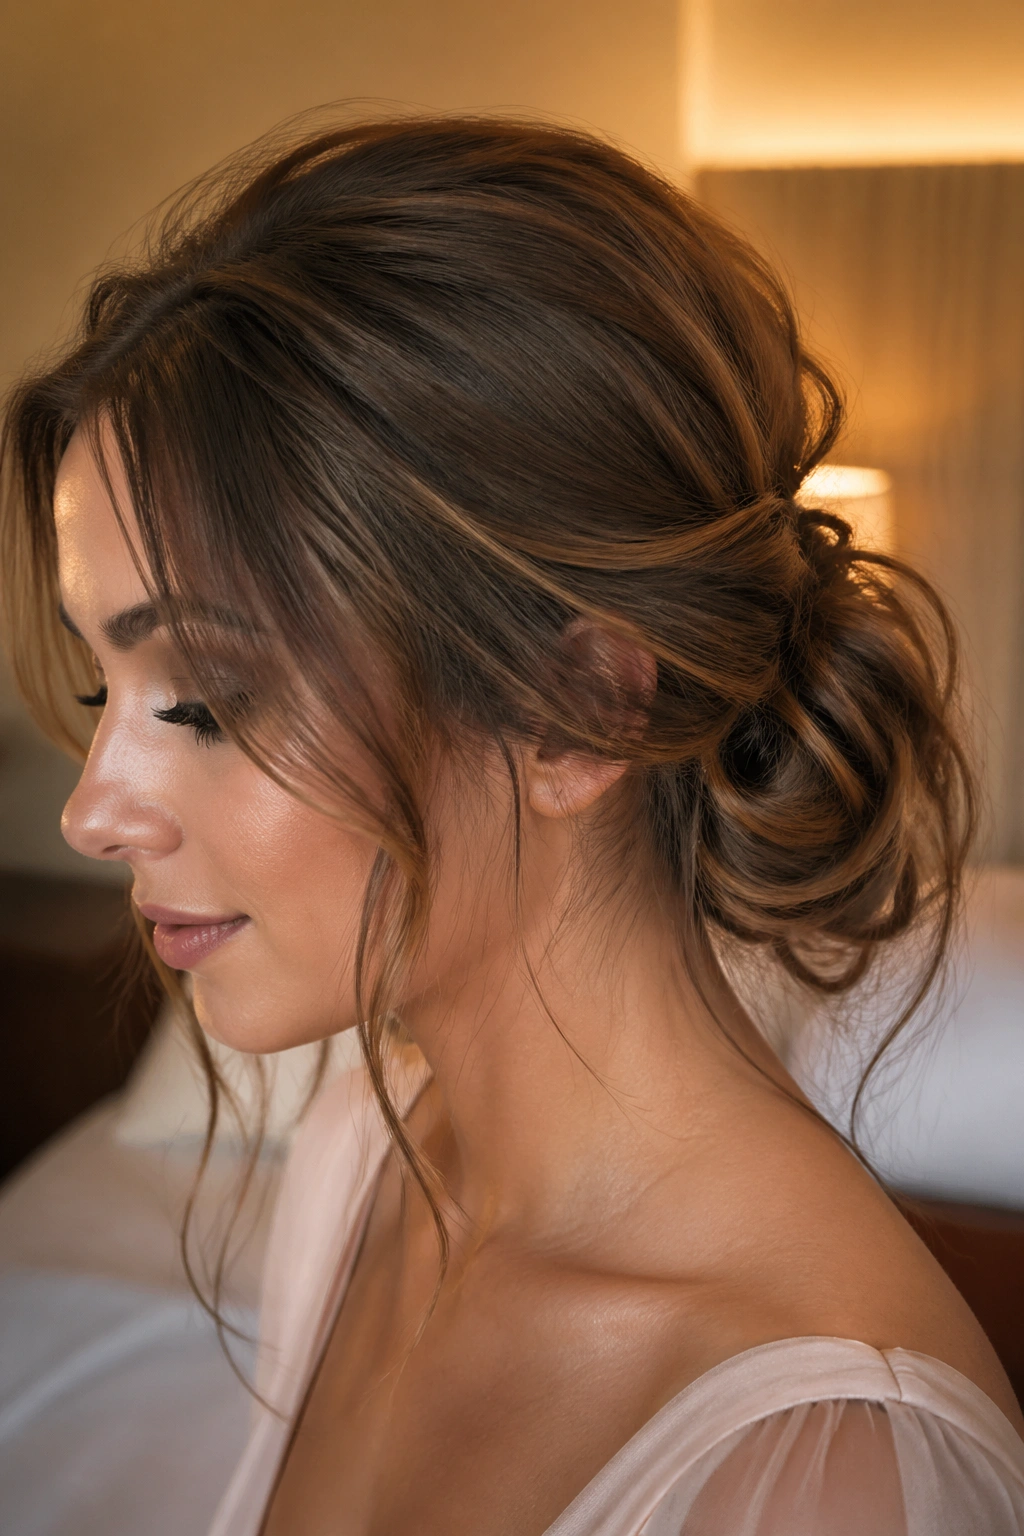
7. Textured Low Bun with Face-Framing Pieces
A textured low bun gives you the freedom of an updo without the hard edge of a slick style. It sits low, usually a bit loose, and the front pieces are left soft enough to move when you turn your head. That small movement is the difference between “done” and “overworked.”
How to keep it from looking messy
Start by adding texture spray to dry hair, especially if it was freshly washed. Clean, slippery hair can be a pain to pin. Gather it at the nape, twist it into a bun, and secure it with pins hidden under the outer layers. Then pull out two thin face-framing pieces and curl them away from the face with a 1-inch iron.
The face pieces should look soft, not stringy. If they separate too much, run a tiny bit of cream through them and smooth them with your fingers. Leave the bun itself a little imperfect. A too-tight bun can look severe fast.
This style works well with romantic dresses, but it also handles simpler silhouettes nicely. It’s a good middle ground when you want polish and ease in the same hairstyle.
8. Bubble Ponytail for Wedding Guest Hairstyles to Copy

A bubble ponytail sounds playful, and it is, but there’s a clean way to wear it for a wedding. The key is restraint. Keep the bubbles even, the sections smooth, and the elastics hidden as much as possible.
Quick styling notes
- Use clear elastics every 2 to 3 inches down the ponytail.
- Lightly puff each section between the elastics so the bubbles are round, not floppy.
- Wrap a thin strand of hair around the base to cover the first elastic.
- Work best on medium to long hair with decent density.
The style looks especially good when the dress has a modern cut or a little structure. It brings movement without needing curls everywhere. If your hair is very fine, tease each section very lightly before tugging it out. Not a lot. A little goes a long way here.
This one holds better than it looks. Once the sections are secured, the shape stays put, and the ponytail doesn’t swing around the same way a standard one does. That makes it easier to dance in, too.
9. Side-Swept Waves
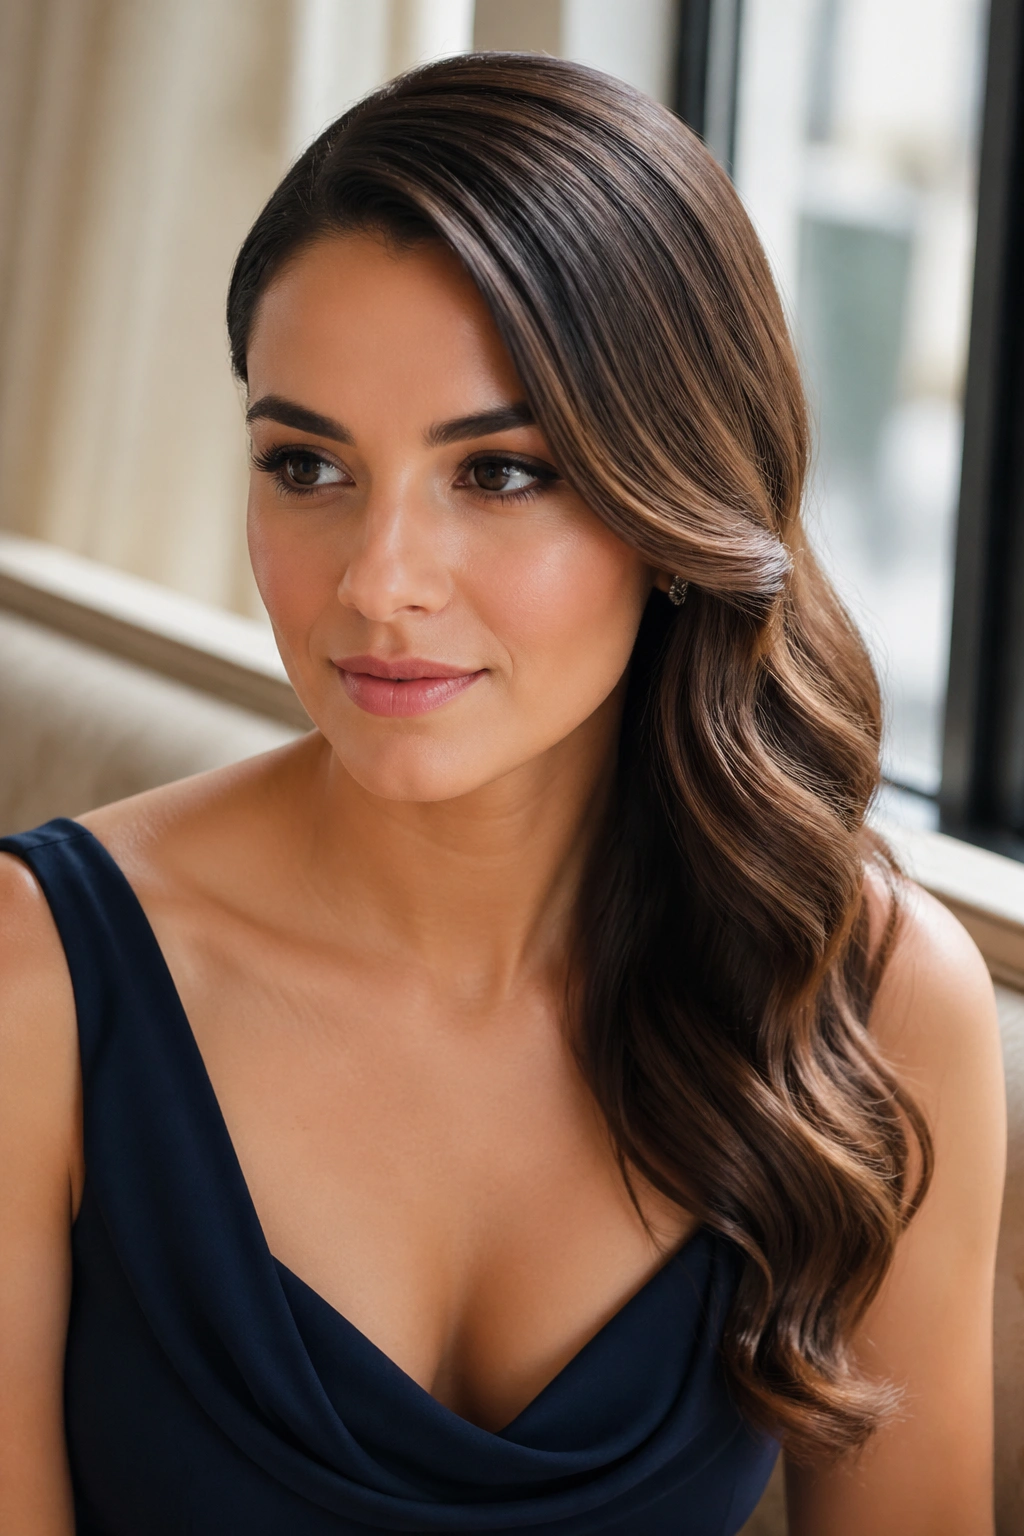
Why do side-swept waves still work when so many styles try harder? Because the asymmetry does half the styling for you. The hair falls across one shoulder, the part gives the face shape, and the whole look feels dressed up without looking stiff.
This is a strong choice for one-shoulder dresses or gowns with detail on one side. The hair doesn’t compete with the neckline. It balances it. I also like it for layered cuts, since layers help the sweep hold shape instead of dropping into one heavy curtain.
Curl the hair in sections, then brush everything to one side and pin the heavier side behind the ear with two or three hidden bobby pins. A little root lift at the crown matters here. If the top lays too flat, the style loses its shape from the front.
You can leave the ends soft or slightly brushed out. Both work. The difference is how formal you want the finish to feel.
10. Twisted Half-Up with Pearl Pins for Wedding Guest Hairstyles to Copy
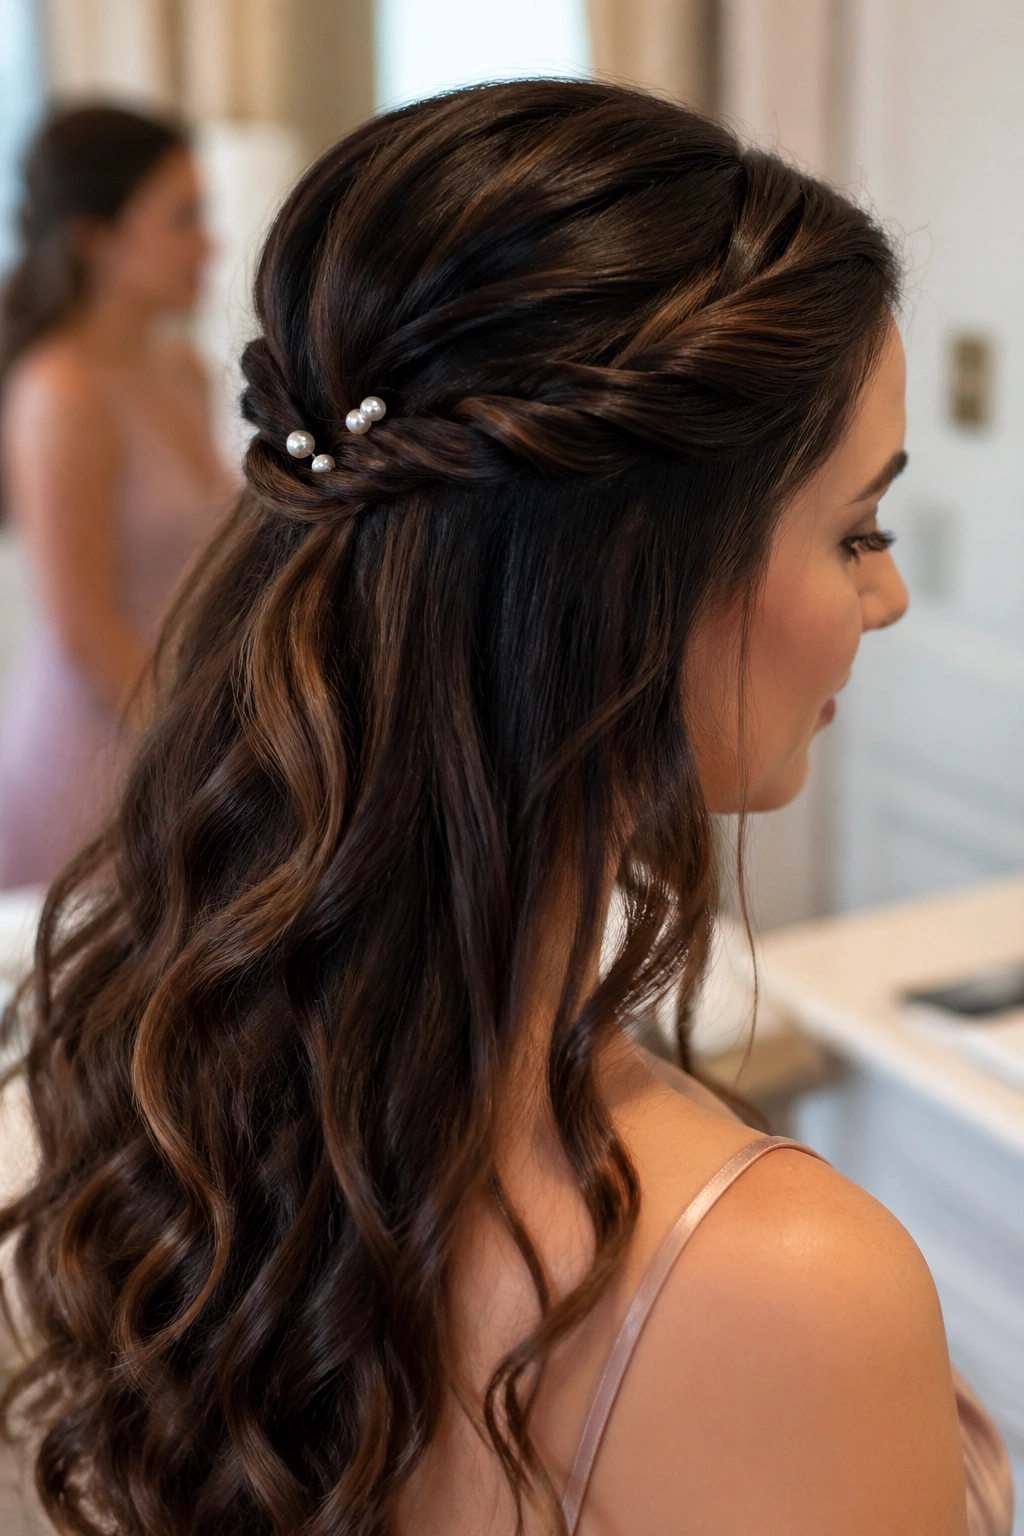
Pearl pins do a lot of work in a tiny space. They catch the eye, but they don’t shout, and that makes them useful in a half-up style where you want detail without weight.
Where to place the pins
Twist a section from each side of the head back toward the center, then secure the join point with two or three pearl pins instead of one heavy clip. Spreading the pins a little keeps the top from pulling oddly in one spot. If you have a center part, let it stay. If you prefer a slight side part, that works too.
The rest of the hair can be left in soft waves or blown out straight. Straight lengths make the pearls pop more. Wavy hair makes the look softer. Either version reads as intentional, which is the whole point.
If you wear jewelry, keep it simple. Pearl pins already bring texture near the face, so oversized earrings can start to feel crowded. A small stud or thin drop is enough.
11. Soft Curly Updo
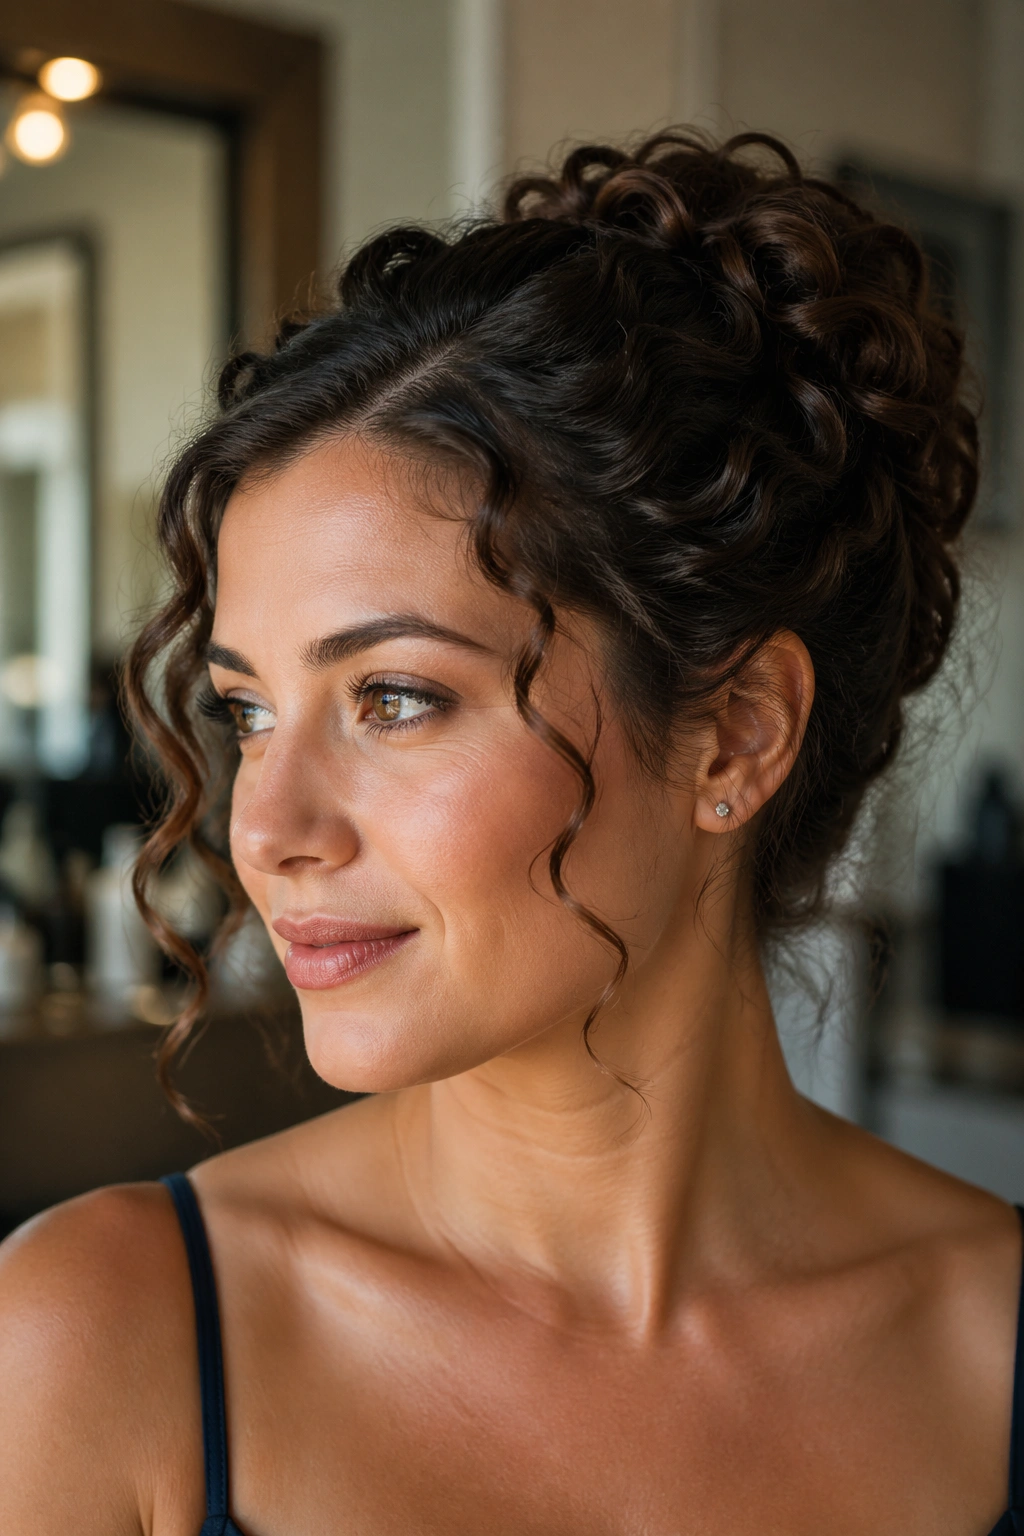
A curly updo is not the same thing as forcing curls into a bun and hoping for the best. The shape has to respect the curl pattern. Otherwise, the result gets bulky in one place and flat in another.
I’ve always liked this style for guests with naturally curly hair because it lets the texture stay visible. You can gather the curls low or mid-height, pin them in clusters, and leave a few spirals loose near the temples. That keeps the style from looking stiff. It also means the curl pattern still feels like the star.
What to avoid
- Brushing dry curls all the way through.
- Using too much gel and losing shape.
- Pulling the sides too tight at the hairline.
- Hiding every single curl under pins.
Use a leave-in conditioner first, then a curl cream or light gel. Diffuse until the curls are about 80 percent dry, then pin. The hair should feel set but not crunchy. That balance matters.
This one can be elegant, but it also feels honest. The curl pattern is visible from every angle, and that’s the part I like best.
12. Ribbon-Tied Low Pony
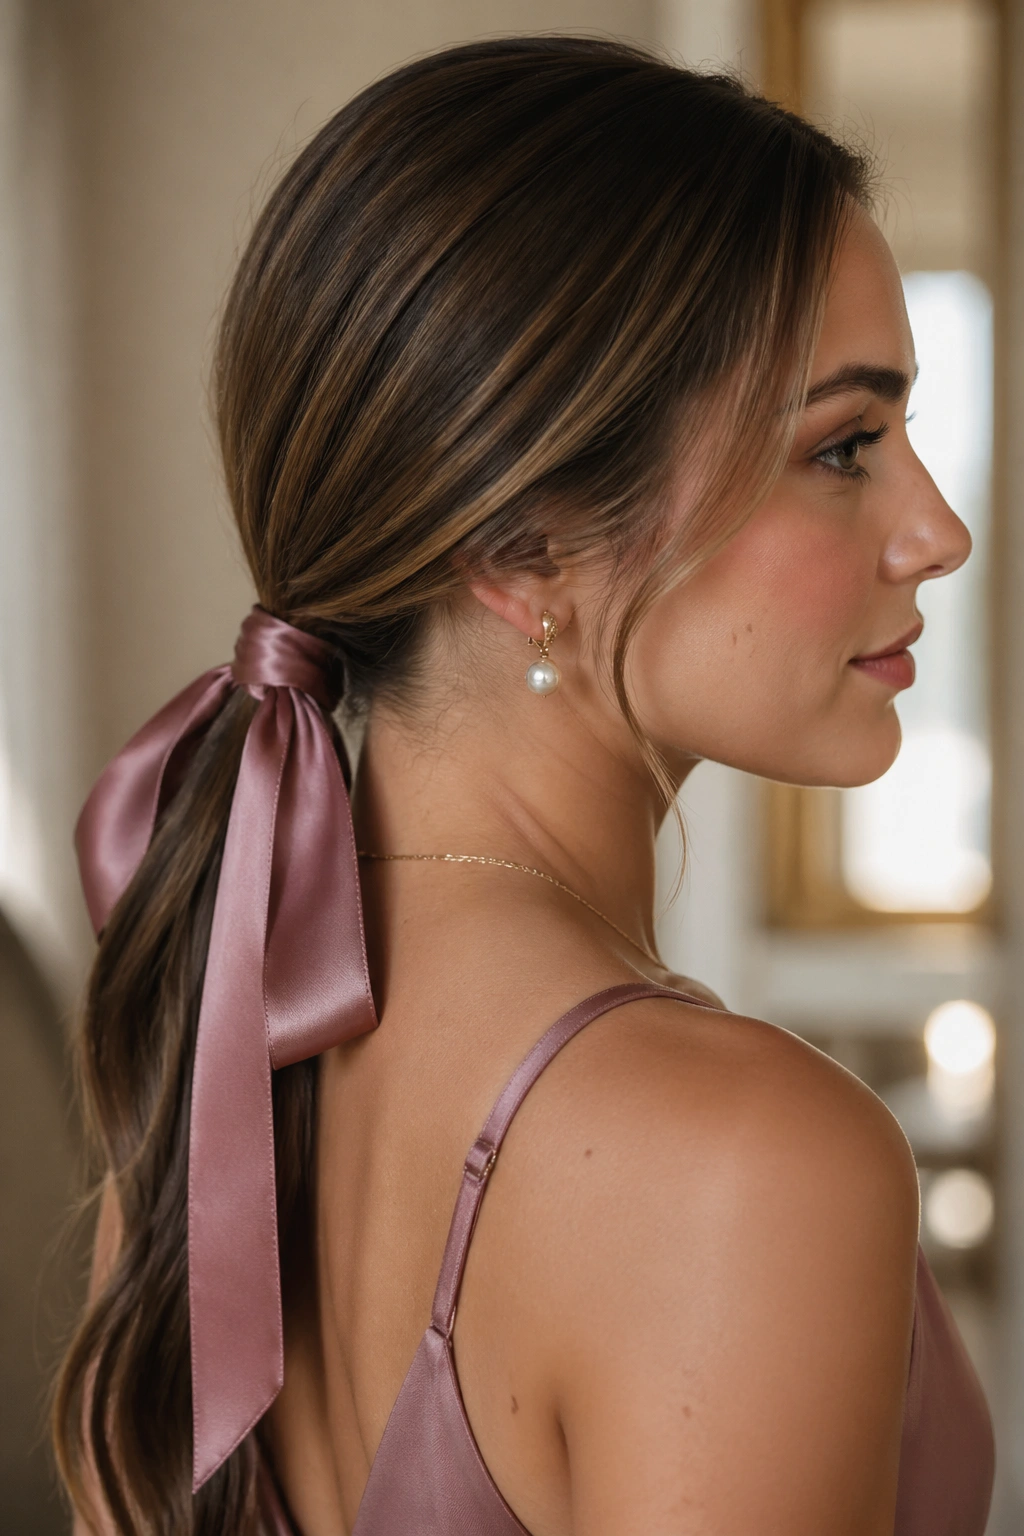
A ribbon-tied low ponytail is one of the easiest ways to make a simple style feel dressed up. The ribbon does the styling work for you. It adds color, softness, and a little movement at the base where a plain elastic would look plain.
Use a satin or silk ribbon that’s wide enough to show, usually about ½ to 1 inch. Tie it around the elastic once or twice, then let the tails fall with the ponytail. If the ribbon is too narrow, it disappears into the hair. If it’s too stiff, the whole thing can feel arts-and-crafts-ish.
This works especially well when the ponytail itself is smooth and low. You can leave the ends straight, bend them softly with a curling iron, or add one wave through the tail for texture. The ribbon gives the style a softer finish than a bare elastic ever will.
One small thing: match the ribbon’s finish to the dress. Matte ribbon reads casual. Satin reads a little dressier. That difference shows up in photos more than people expect.
13. Wet-Look Tuck Behind Ears
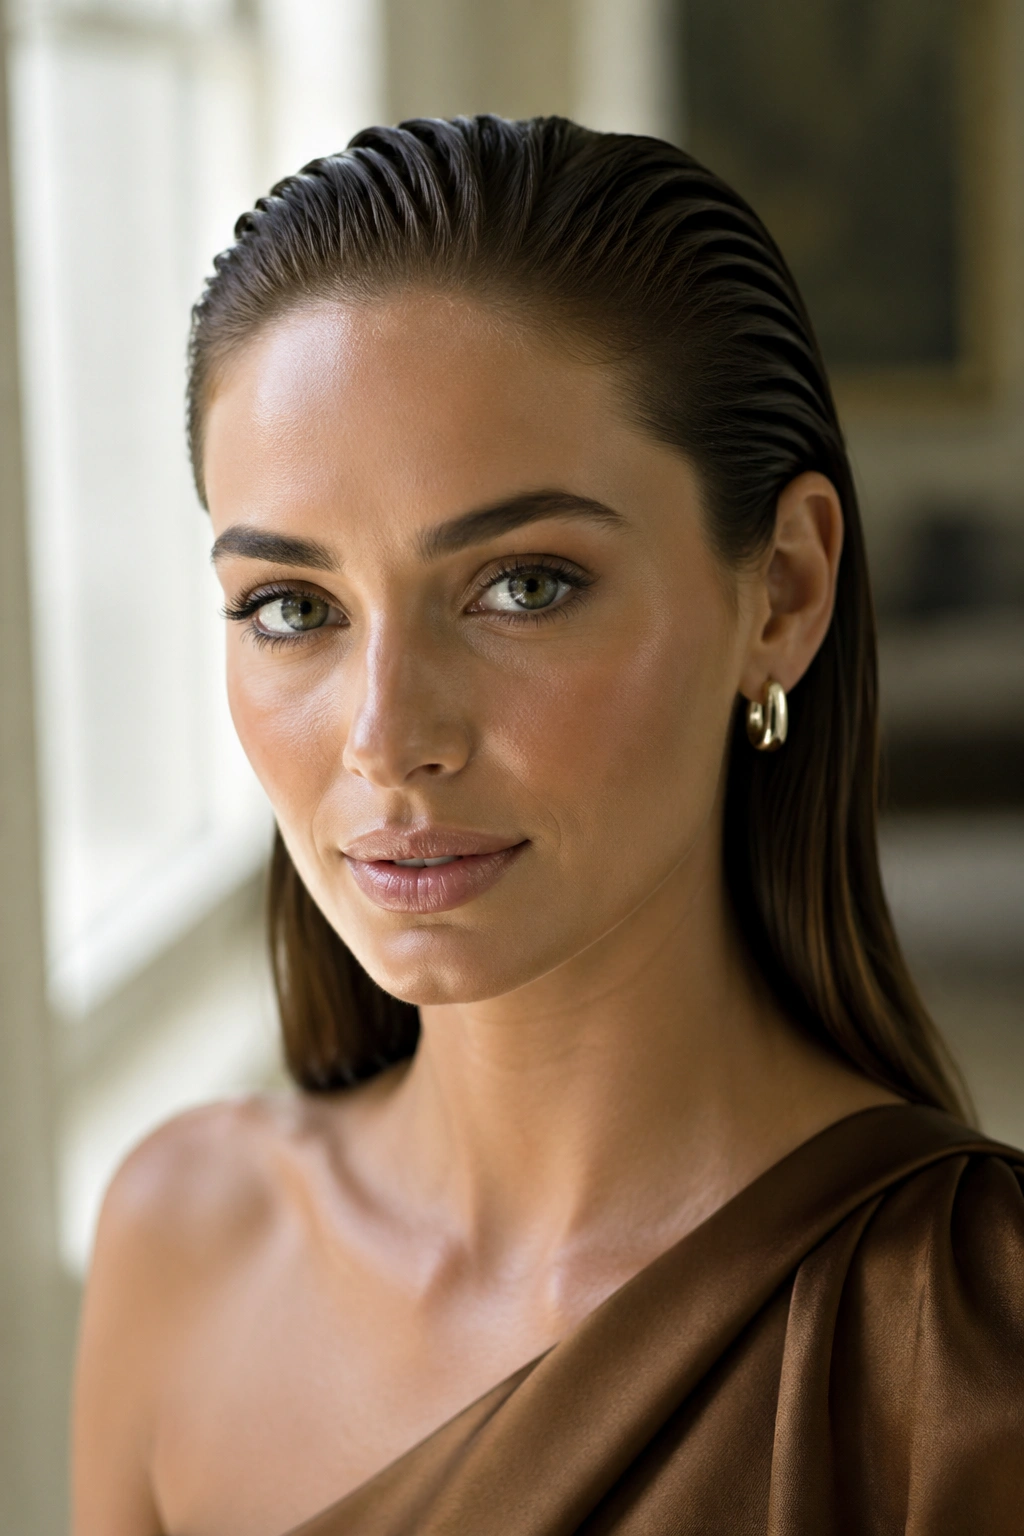
If the dress is dramatic, the hair can stay quiet. A wet-look tuck behind the ears does exactly that. It keeps everything sleek, exposes the face, and lets the outfit handle the drama.
This style works best when the hair is naturally straight or nearly straight. Apply gel or styling cream to damp hair, comb it back, and tuck the sides firmly behind the ears. The finish should look glossy and controlled, not soaked and greasy. There’s a line there, and it’s worth respecting.
I wouldn’t choose this for every wedding. Under very bright daylight, wet-look styles can lean harsh if the makeup is too heavy or the outfit is too simple. But with a clean dress, a sharp neckline, or bold earrings, it can look striking in a good way.
It’s also a smart style for short hair and bobs, which often get overlooked in wedding roundups. Shorter lengths can look even better with this kind of close, neat styling.
14. Loose Fishtail Braid for Wedding Guest Hairstyles to Copy
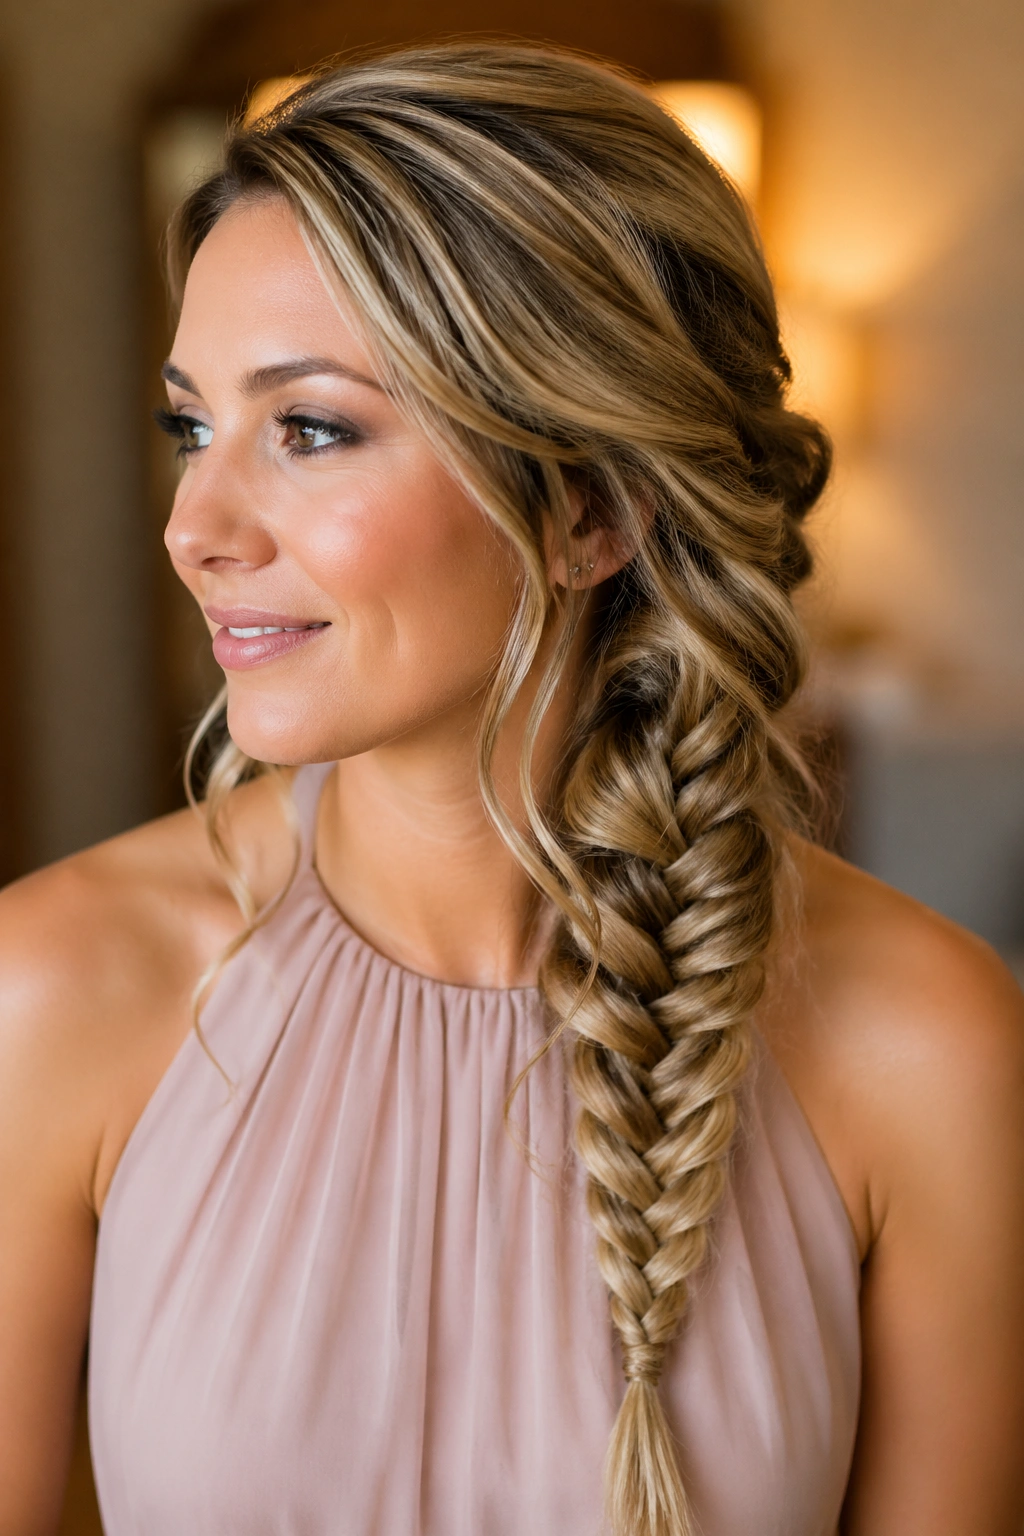
A loose fishtail braid looks intricate from a distance, which is part of why people keep reaching for it. Up close, it’s just a braid with smaller sections and a little patience. That makes it one of the more useful wedding styles if you want detail without heat.
The braid pattern that keeps it soft
Start on one side instead of dead center if you want the braid to fall over the shoulder. Keep the first few passes snug, then relax the tension once the braid is established. Pull gently at the edges after tying it off with a clear elastic. Not too much. You want width, not fuzz.
A fishtail works best when the hair has a little texture in it already. Second-day hair is easier than freshly washed hair here. A tiny mist of dry shampoo at the roots gives grip and keeps the braid from sliding out of shape.
The braid can be finished with a small pin, a ribbon, or nothing at all. I lean toward nothing if the dress already has detail. Let the braid do the talking.
15. Voluminous Half-Up Blowout
A voluminous half-up blowout is for someone who wants hair that looks full from every angle. The crown gets lift, the lengths stay loose, and the overall shape keeps a little bounce instead of going flat under a coat, a car ride, or a dance floor.
What matters most here is the roots. Tease the crown lightly with a fine-tooth comb, then smooth the top layer back without crushing the lift. If you press too hard, the volume disappears. If you tease too much, the top starts to look ratty. Somewhere between the two is the sweet spot.
How to style it
- Curl the lower sections away from the face.
- Clip the crown while it cools.
- Use 2 to 4 hidden pins to secure the back half.
- Finish with flexible hairspray, not a shell of spray.
This style is a good match for dresses with lower necklines or open shoulders. It gives shape without closing off the face. And it photographs well from the front, which matters more than people admit.
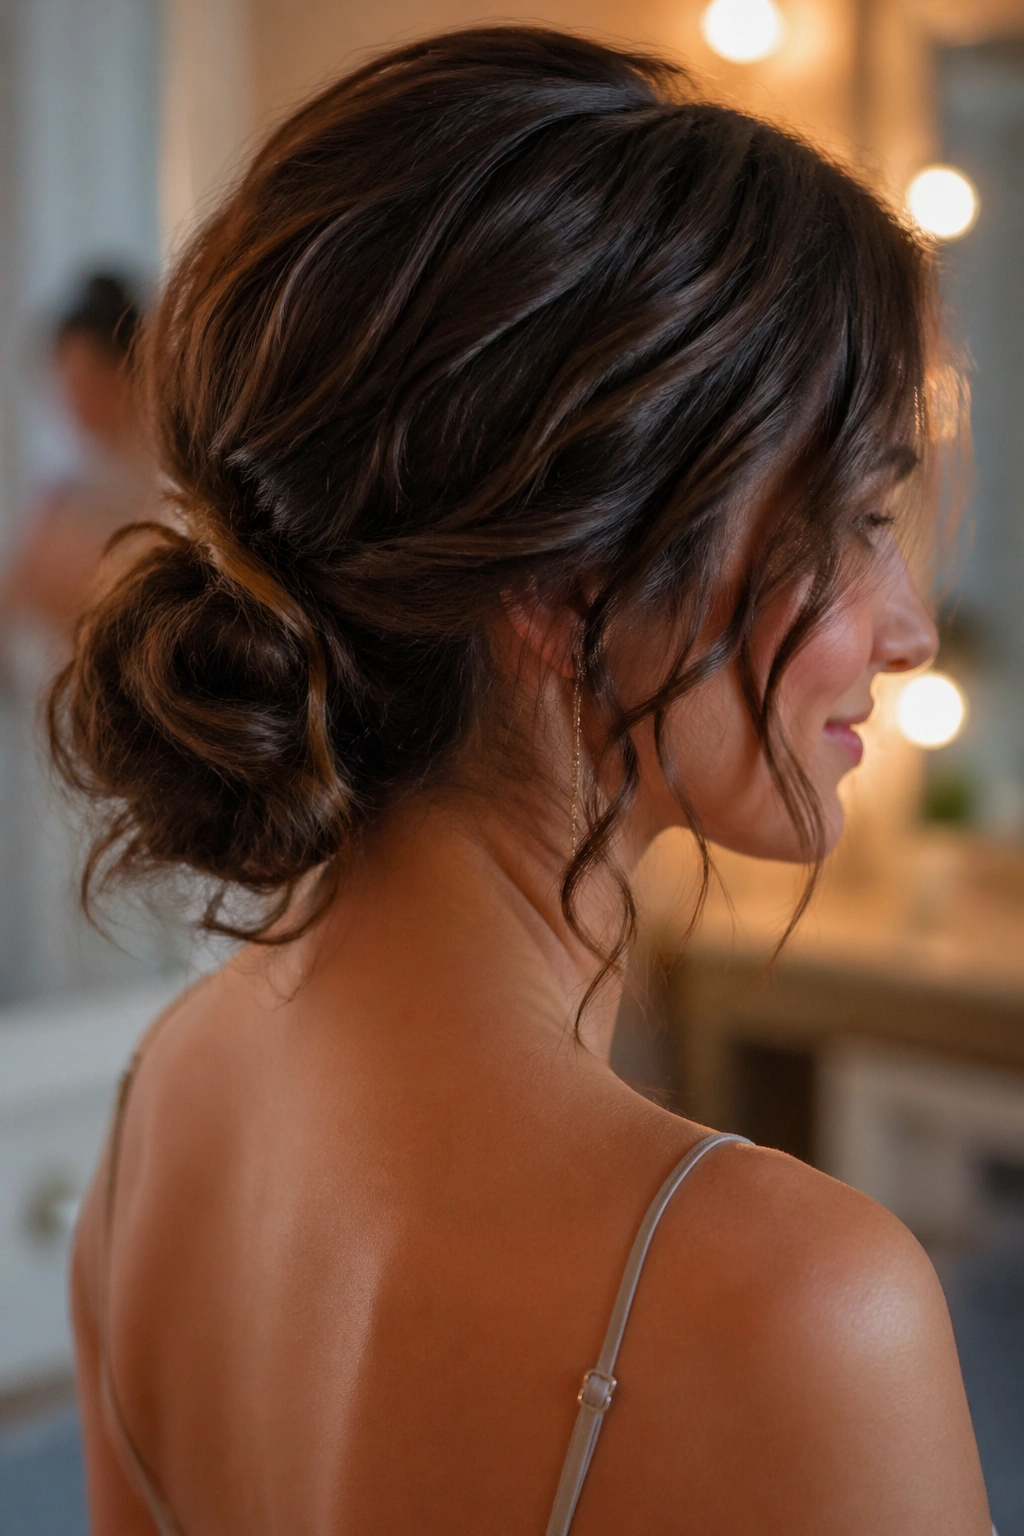
16. Romantic Messy Bun
A romantic messy bun is only romantic when it has shape. If it falls apart too much, it turns into “I ran out of time.” That’s the line to watch.
The bun should sit low or mid-low, with a soft twist and a few carefully placed loose pieces around the face and neck. Use texture spray or a light dry shampoo before gathering the hair, because a little grit makes it easier to pin and keeps the bun from sliding. Then shape the bun with your fingers instead of a brush. A brush makes the finish too neat.
Common mistakes
- Leaving the bun too sparse.
- Pulling out random pieces instead of choosing them.
- Making the front pieces too thick.
- Forgetting to pin the underside.
The best version feels lived-in but still controlled. You should see the twist and the volume from the side. If you can’t, it needs a bit more structure.
This is a strong style for softer dresses, floral prints, and anything that already has a gentle mood. It doesn’t ask for attention. It earns it.
17. Claw-Clip-Inspired Twist
A claw-clip-inspired twist is a useful one if you need a style that can be redone in a bathroom mirror without tears. It borrows the shape of a clipped-up twist, but the real structure comes from pins, so the style looks more polished than a casual clip alone.
Unlike a full formal bun, this one has a little looseness through the lengths. The hair gets gathered, twisted upward, and pinned in a way that leaves a soft fold or two visible. If you want to echo the clip aesthetic, you can still tuck a decorative clip over the pins, but I’d keep it small and clean.
This is a smart choice for guests who know they’ll be moving a lot. It’s also a decent backup if your hair has layers that refuse to stay in a neat bun. The twist gives those pieces somewhere to go.
A little root texture helps here too. Flat roots make the whole style sink. The goal is controlled lift, not volume for its own sake.
18. Barreled Side Bun
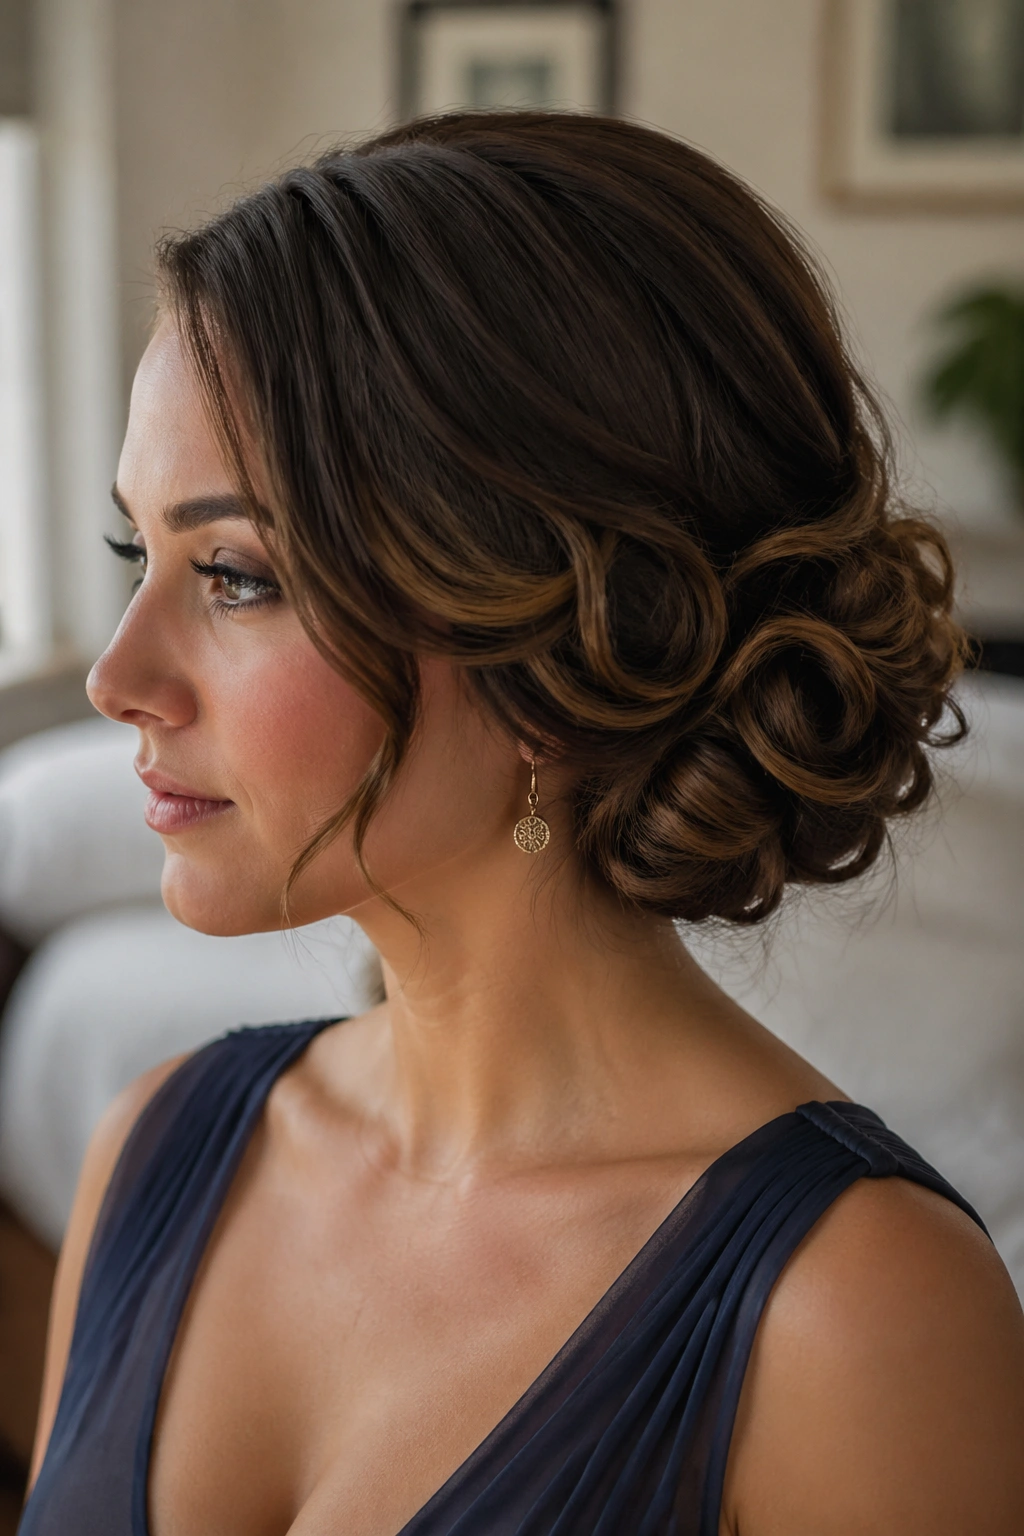
A barreled side bun has a little old-school drama in it, and I mean that in a good way. The shape sits off to one side, usually low near the jawline or just below it, and the rolled sections give the style some thickness without making it heavy.
This one works best when the hair is pre-curled in medium sections. The curls get pinned into a side bun shape, almost like little rolled panels layered on top of each other. It sounds fussy. It isn’t, once the sections are ready. The important part is arranging the rolls so the bun looks full from the front and side, not flat against the head.
I like this with dresses that have a vintage feel or a neckline that can handle a little shape near the collarbone. It also looks nice with one statement earring, since the bun sits off to one side and leaves the other ear more open.
If the hair is very long, tuck the ends under tightly so they don’t poke out. That’s the detail people notice in photos later.
19. Natural Curls with Defined Shape

Defined natural curls can be the smartest wedding hairstyle on the table if your curls already have a good pattern. The goal is not to change them. It’s to make them look fresh, shiny, and shaped on purpose.
The diffuser routine
Start with a leave-in conditioner on damp hair, then layer a curl cream or gel through sections using your fingers. Scrunch upward, but don’t overwork the curls. Diffuse on low heat and low speed until the roots are dry and the curl clumps are set. That usually leaves the hair soft enough to move, but not frizzy.
Once it’s dry, separate only the curls that need it. If you break apart every clump, the shape gets bigger, but the frizz can climb fast. A little shine serum on the ends helps, though you want to keep it off the roots.
What makes this style strong
- It honors your natural pattern.
- It holds up well through long events.
- It works with dresses that need balance, not more structure.
- It looks better when the curls are hydrated, not blown out.
This is one of the styles I trust most. It doesn’t fight the hair. That matters.
20. Sleek Top Knot
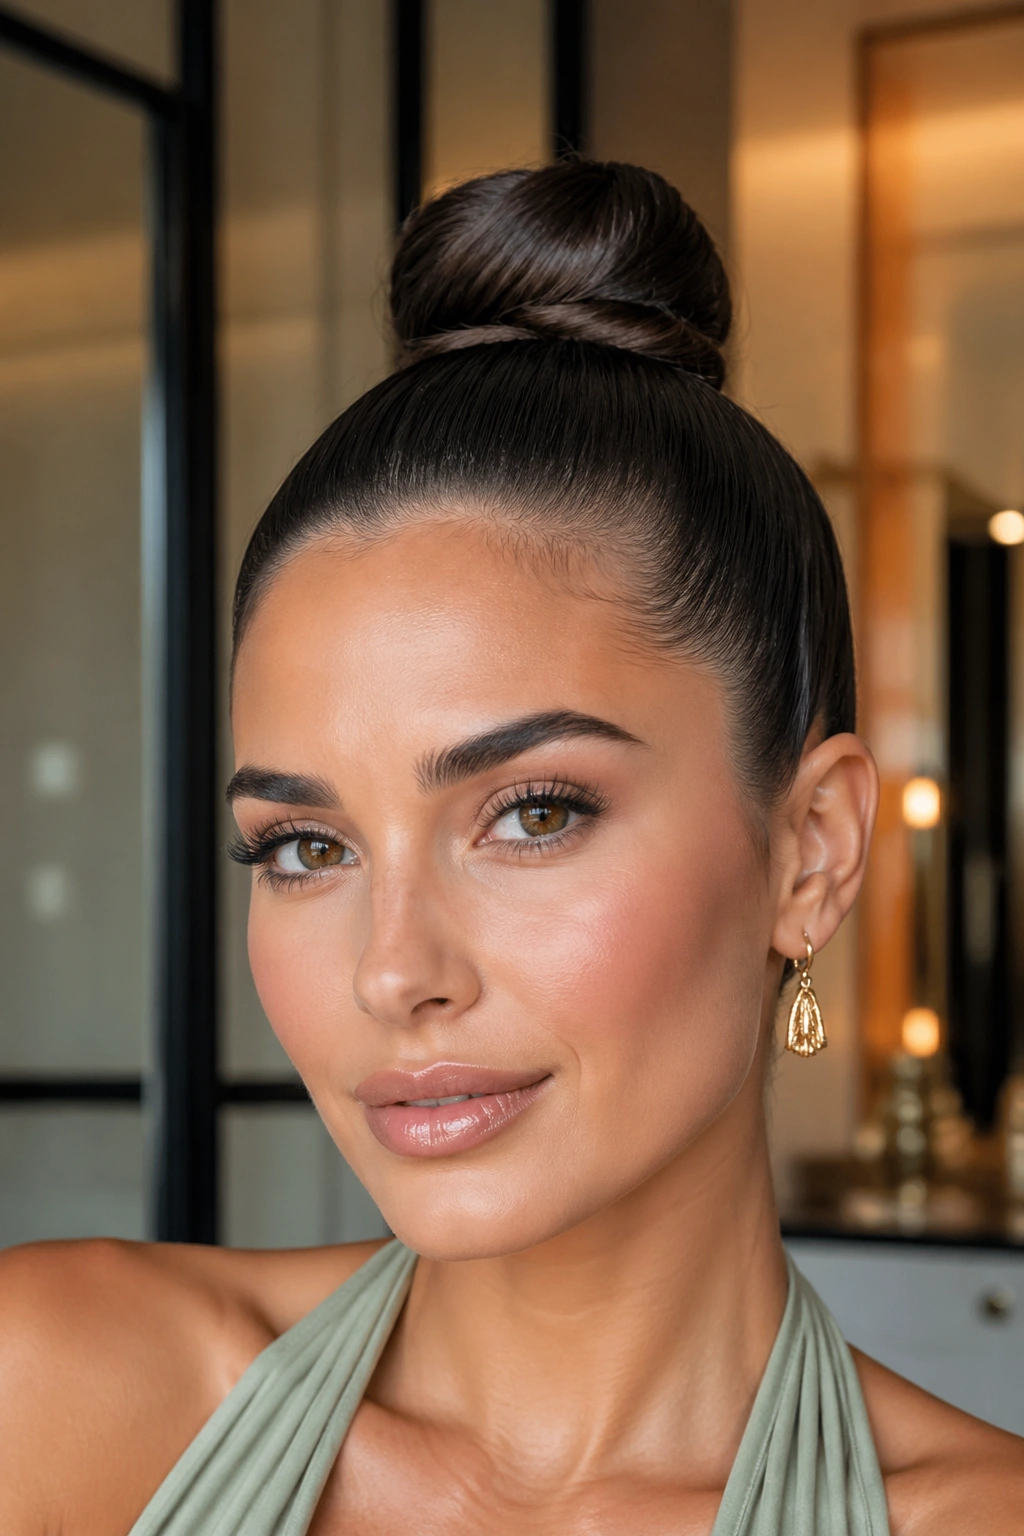
A sleek top knot is the answer when you want your face open and your hair completely out of the way. It can look sharp, a little modern, and very clean when the knot is tight, smooth, and placed at the right height.
The knot should not sit cartoonishly high. Keep it high enough to show off the jawline, but not so high that it starts to feel like a ballet rehearsal. Brush the hair upward with a little gel or smoothing cream, twist it into a knot, and pin it firmly. Use an edge brush or toothbrush at the hairline if you need to smooth flyaways.
This works especially well with high necklines, dramatic backs, and heavy earrings. It also holds up nicely if you know you’ll be warm or moving around a lot. And yes, it can be elegant. Not soft, not romantic — elegant.
If your hair is very fine, add texture spray before gathering it. If it is thick, divide the knot into two wrapped sections so the base doesn’t look bulky.
21. Low Knot with a Deep Side Part

A deep side part changes everything. Pair it with a low knot and the style suddenly has movement, even though the shape itself stays simple. That’s why this one is such a reliable wedding guest move.
The side part gives the front a little lift and shadow, which helps if your hair is fine or if the rest of the dress is plain. The knot sits low and smooth, tucked close to the nape. Leave one side a touch fuller than the other so the part stays visible from the front. That detail is small, but it keeps the style from looking flat in photos.
I’d reach for this one when I want the outfit to lead and the hair to support it. It works with a sharp suit, a column dress, even a softer floral look if you keep the finish neat. Use a light mist of flexible hairspray and a few hidden pins at the base. That’s enough. No need to overbuild it.
Final Thoughts
The easiest wedding guest hairstyle to wear is usually the one that fits your hair’s natural mood. Straight hair tends to stay happiest in sleek shapes or blown-out waves. Curly hair often looks best when the curl pattern stays visible. Thick hair can carry a braid or bun with less effort than fine hair, which sometimes needs a little extra structure to keep from falling flat.
Neckline matters more than people think. So does weather. So does whether you expect to dance. A style that looks graceful while you’re standing still should still make sense when you’re ten minutes into a conversation near the dessert table.
Pick the one that matches the dress, the texture, and the amount of time you want to spend fixing it later. That’s usually where the best result is hiding.