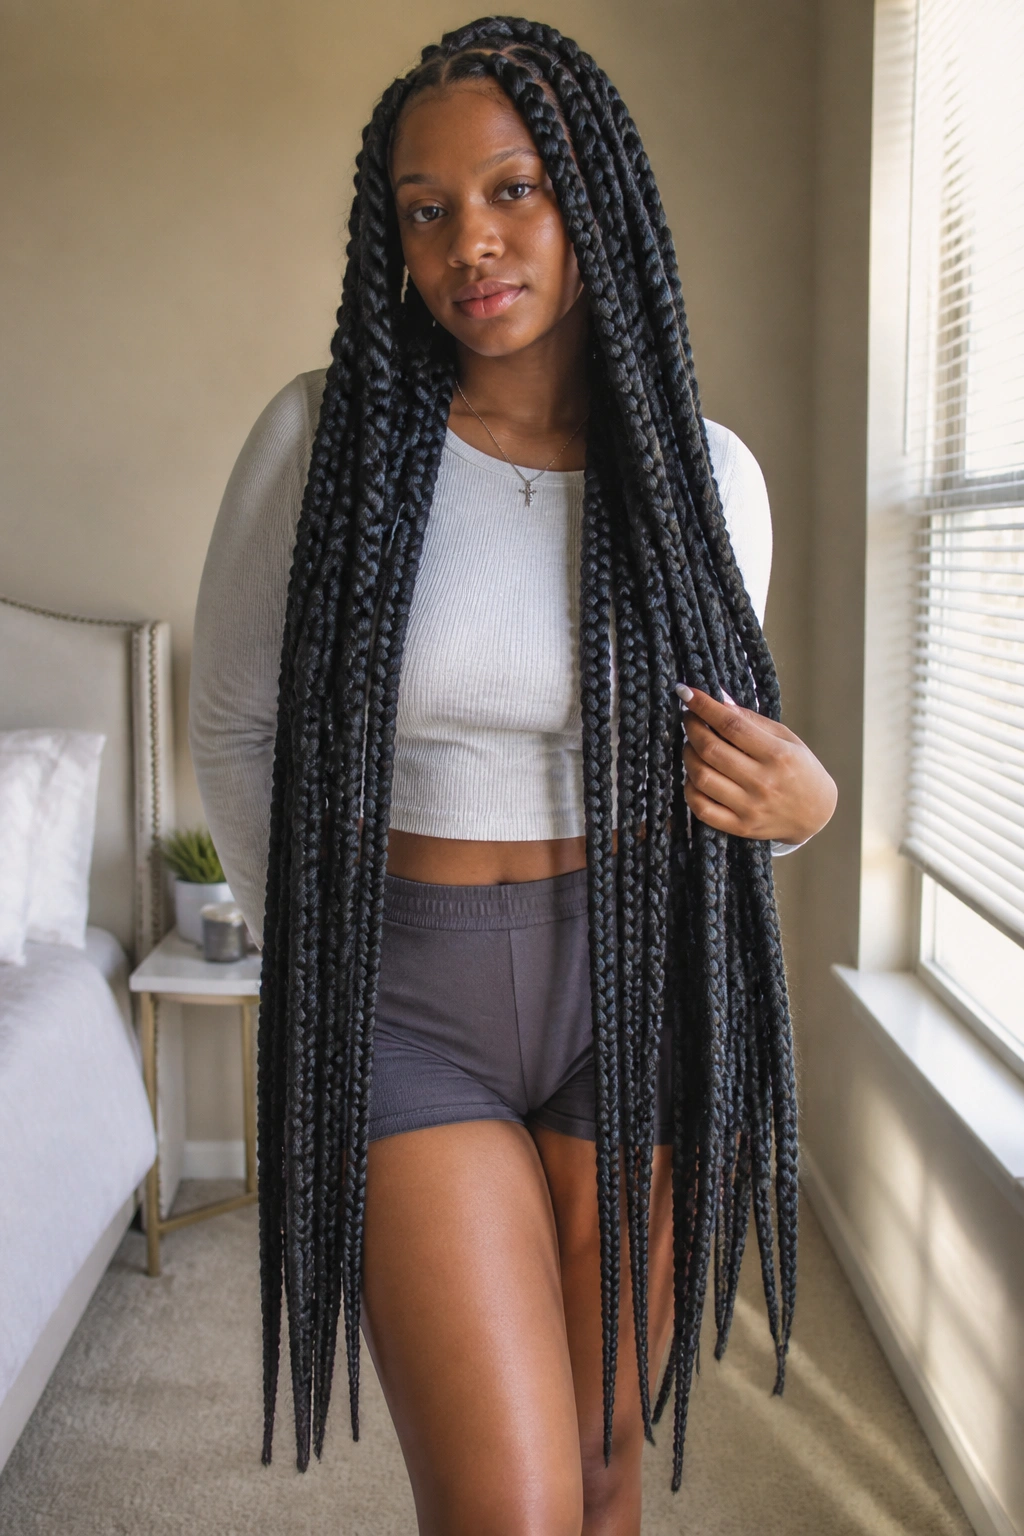
There is a specific, unmatched satisfaction that comes with hearing the rhythmic “click-clack” of waist-length box braids against your back. It is a sound that signals a transformation. For those of us with natural hair, especially in the 4C range, the decision to commit to long box braids is rarely about aesthetics alone. It is about reclaiming time, protecting delicate ends, and enjoying a level of versatility that wash-and-go styles sometimes struggle to provide. Whether you are aiming for the middle of your back or pushing the limits toward your calves, the sheer presence of long braids is a statement of patience and style.
I have spent years sitting in braiding chairs, and I have learned that the “long” part of the equation is where most people get tripped up. It is one thing to pick a color; it is quite another to manage the physical weight and the tension on your scalp. Natural hair is resilient, but it is also prone to thinning if the installation is not handled with a gentle hand. Achieving that effortless, goddess-like look requires more than just buying several packs of synthetic hair; it requires a strategy for your specific hair texture and density.
Before you even step foot into a salon or clear your schedule for a 10-hour DIY session, you have to consider the health of your foundation. Natural hair needs to be at its strongest before being tucked away for six to eight weeks. If your hair is currently brittle or if your edges are feeling a bit sparse, jumping straight into heavy, butt-length braids might do more harm than good. But when done right—with the proper sectioning and tension—long box braids become the ultimate “set it and forget it” solution that actually helps your natural hair thrive.
Over the years, I have seen these styles evolve from heavy, scalp-tugging ropes to the lightweight, knotless masterpieces we see more of today. The variety is staggering. You can play with parting shapes, texture blends, and accessory placements to make a standard style feel completely personal. In the following sections, I am breaking down the best ways to wear long box braids, focusing on how they interact with natural hair and what you need to do to keep your scalp happy throughout the process.
Preparing Your Natural Hair for the Long Haul
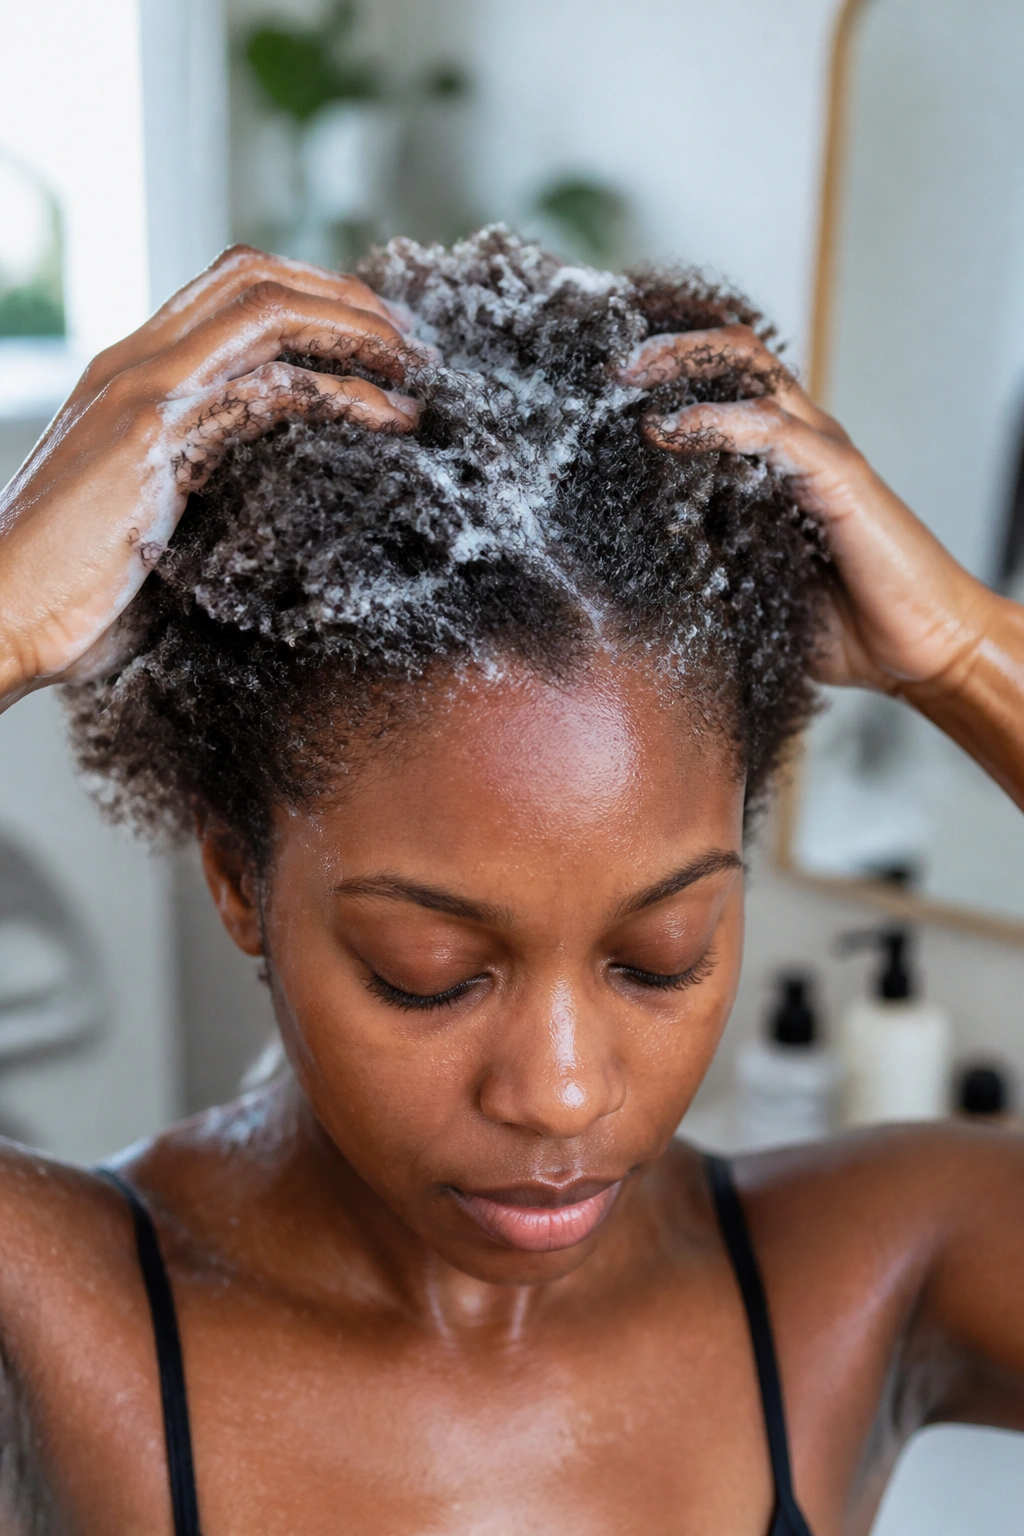
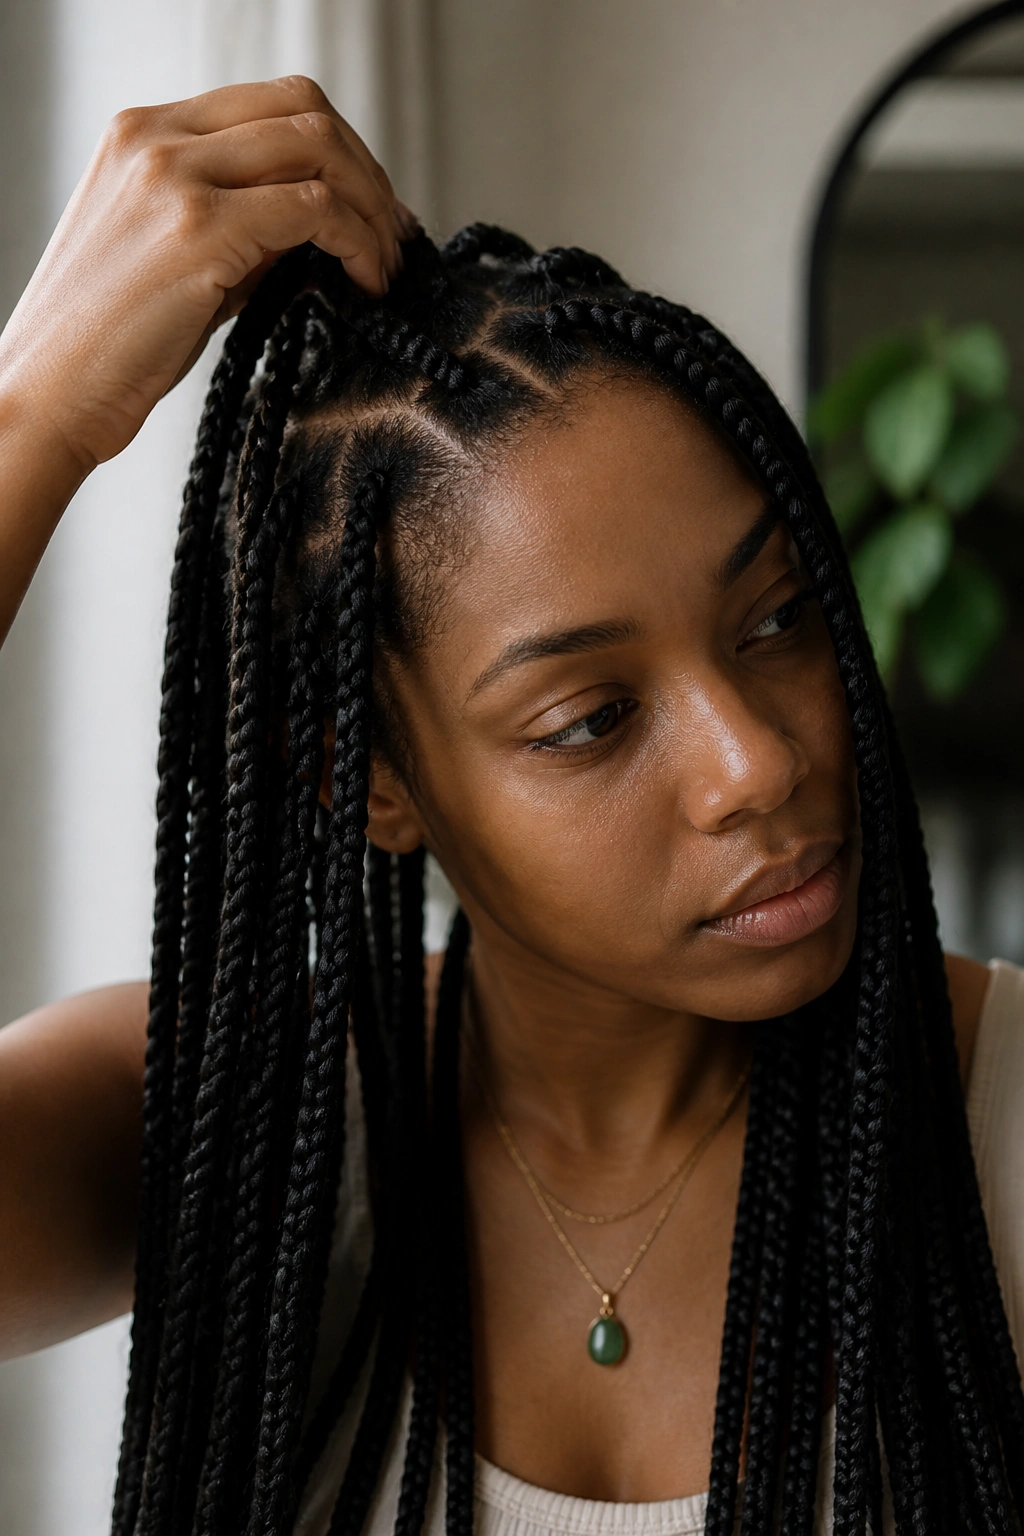
Before the first braid is even started, your hair needs a serious “reset” day. I cannot stress this enough: do not show up to a braiding appointment with hair that hasn’t been thoroughly clarified. You are about to tuck your strands away for two months. Any product buildup, lint, or excess oil trapped in the braid will lead to “braid gunk” at the roots, which is a nightmare to remove and can cause breakage during the take-down process.
Use a high-quality clarifying shampoo first, followed by a moisturizing shampoo to restore balance. But the real secret is the deep conditioner. You want a product rich in protein and moisture to fortify the hair shaft. Once your hair is clean and conditioned, most braiders prefer the hair to be stretched. While some people use the “banding method” to avoid heat, a blow-dry with a comb attachment usually provides the smoothest base for long braids. A smooth base means fewer flyaways peeking through the synthetic hair as the weeks go by.
Finally, do a light trim. I know, it feels counterintuitive to cut your hair right before you put in extensions, but those scraggly, split ends will only cause tangles inside the braid. A quick dusting of the ends ensures that when you eventually take the braids out, your hair is healthy from root to tip. Once your hair is stretched, detangled, and lightly oiled, you are ready for the chair.
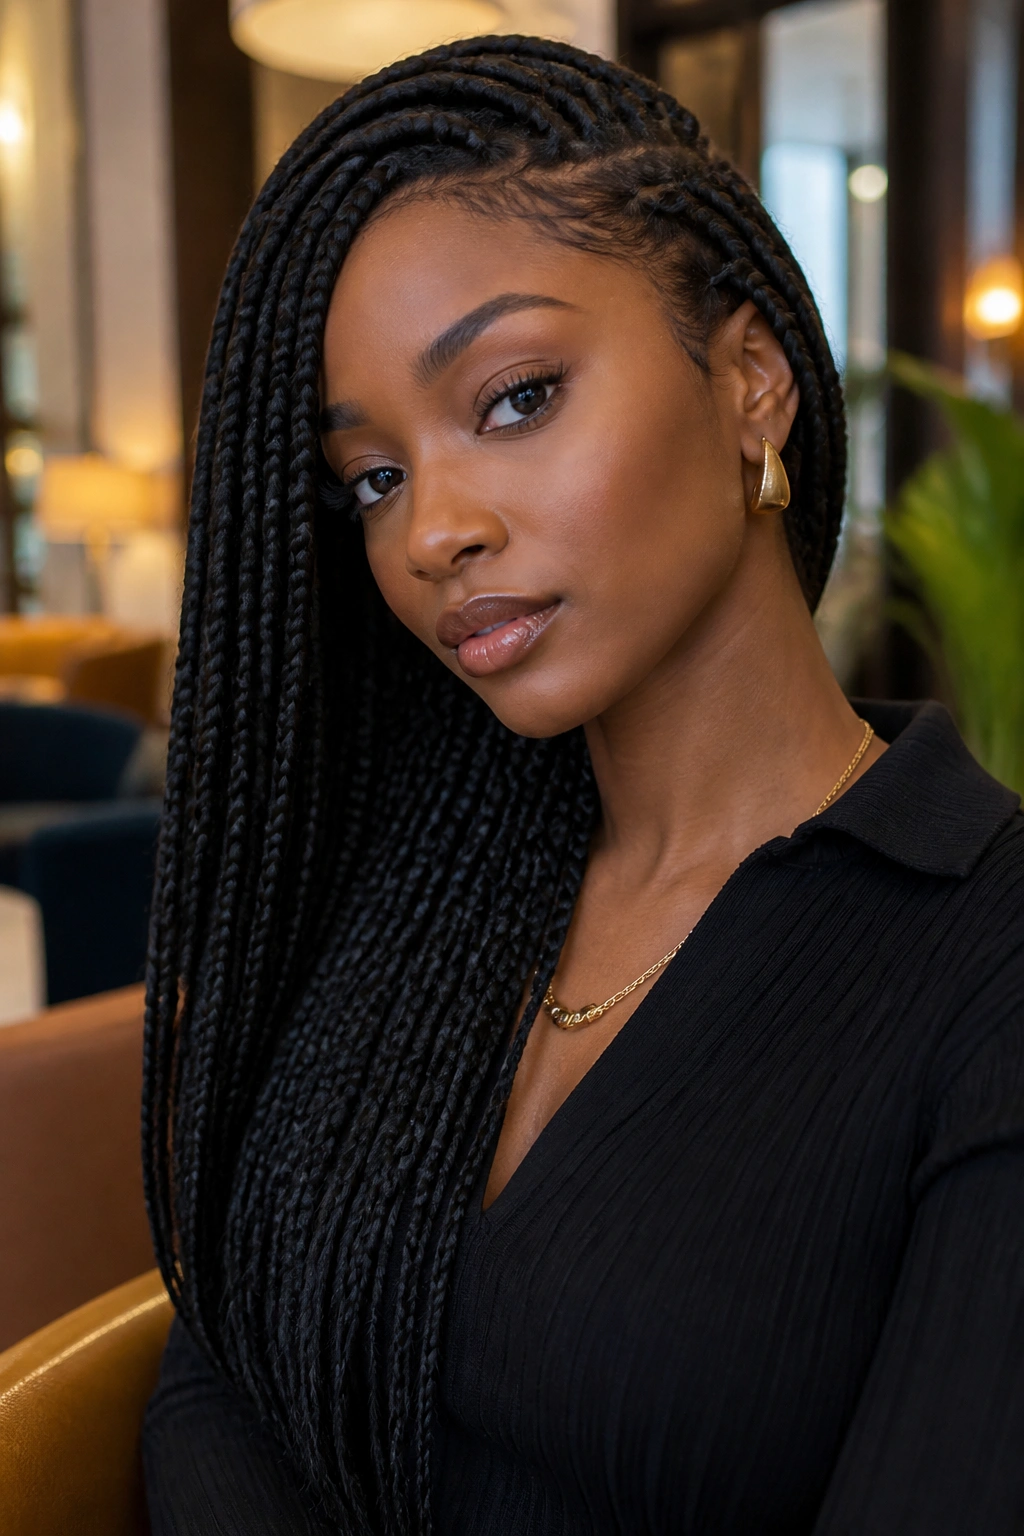
1. Classic Waist-Length Box Braids
Traditional box braids remain a staple for a reason: they offer a structured, uniform look that never feels dated. These are typically installed using the “knot” method at the base, providing a very secure grip on natural hair that might be prone to slipping.
Why They Remain a Wardrobe Essential
The classic version uses a consistent thickness from the root to the tip. This creates a dense, full-bodied look that looks incredible when left down. Because the knot at the base is visible, it gives the style a very defined, geometric appearance that many people prefer over the “growing from the scalp” look of knotless varieties.
Maintenance and Care
- Scalp Access: The square parts make it very easy to apply oil directly to the scalp.
- Longevity: This style tends to stay neat longer than knotless braids because the knot prevents the natural hair from frizzing out early.
- Tension Check: Watch the weight; waist-length traditional braids can be heavy.
- Styling: Great for high buns, though you should wait at least a week for the tension to ease.
Pro tip: If you have a sensitive scalp, soak your braiding hair in an apple cider vinegar rinse before the install to remove the alkaline coating that often causes itching.
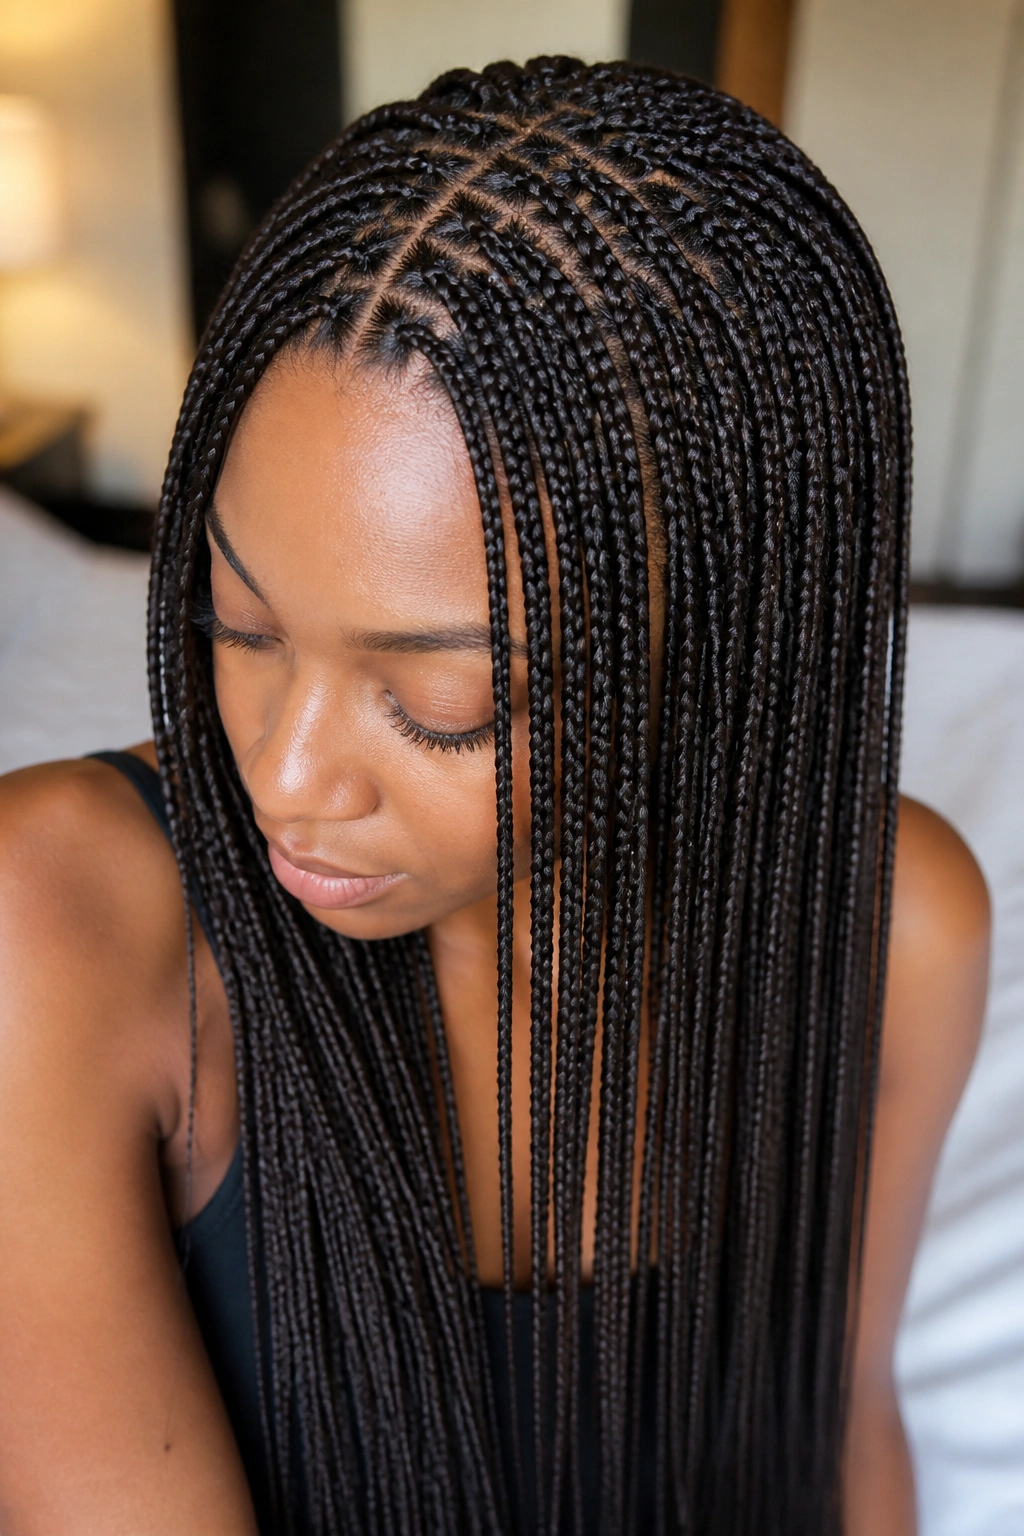
2. Knotless Long Box Braids
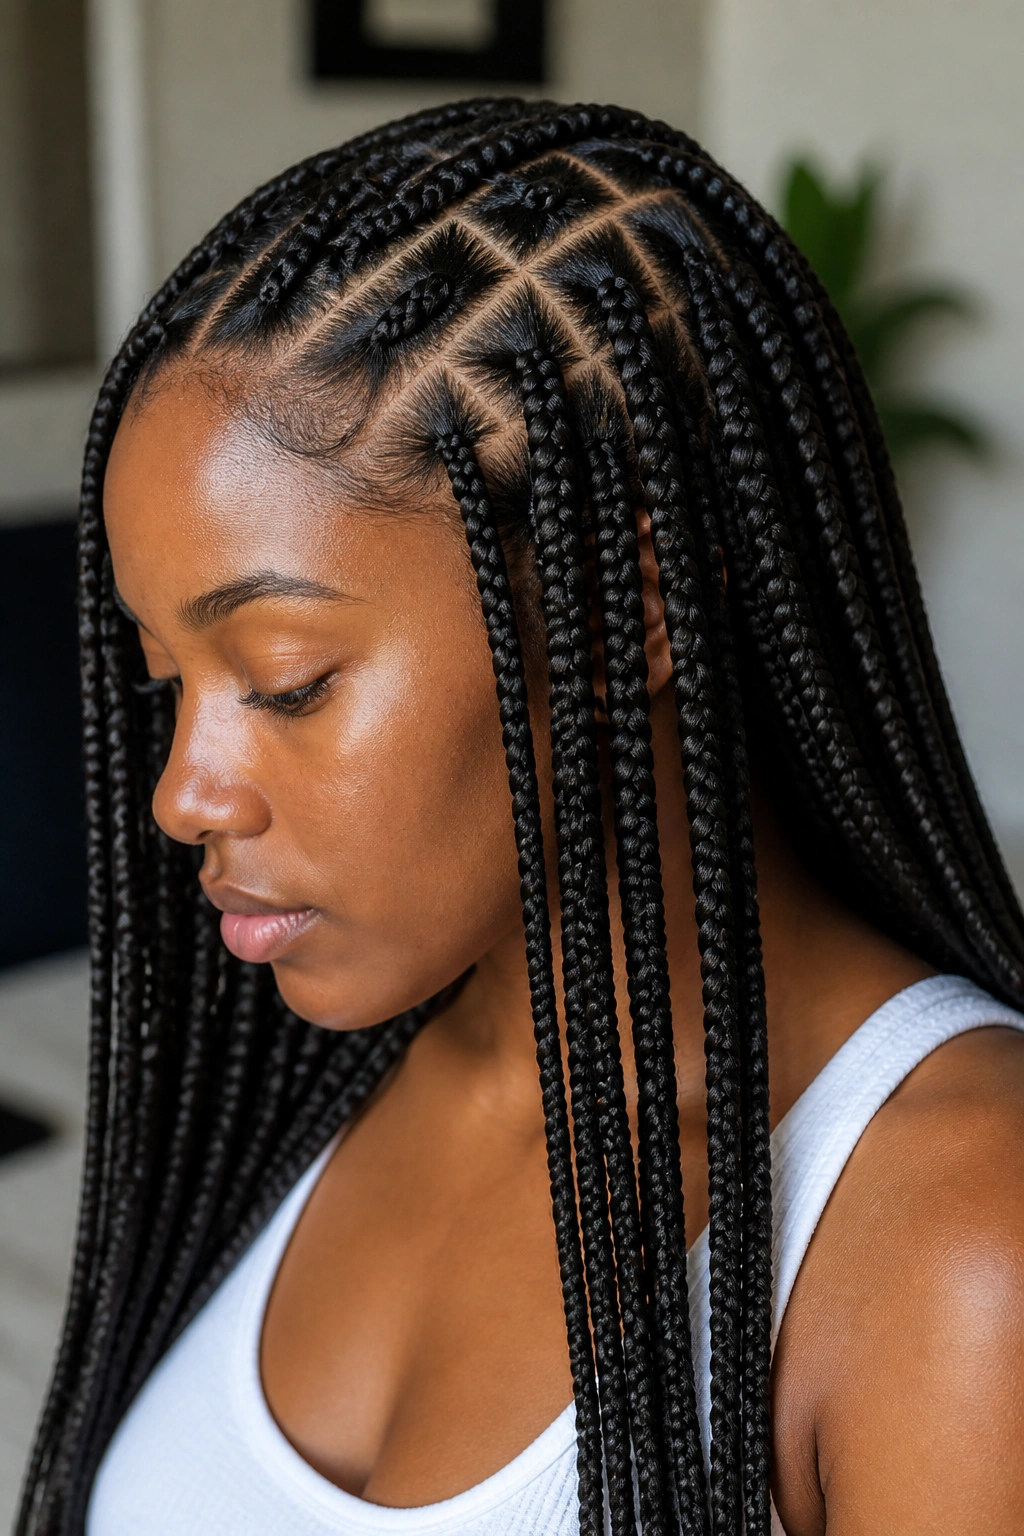
Knotless braids have changed the game for those of us who value comfort. Instead of starting with a knot of synthetic hair, the braider begins with your natural hair and gradually “feeds in” small amounts of extension hair.
This technique results in a braid that lies completely flat against the head. There is virtually zero tension upon installation, which is a blessing for your edges. You can literally pull these into a ponytail the same day they are finished without that “tight scalp” headache. They look incredibly natural, almost as if you have grown remarkably long, uniform hair overnight.
The only real downside is the time it takes to install them—expect to be in the chair for at least two extra hours. They also tend to frizz a bit faster at the roots because your natural hair is more exposed at the base. However, for the health of your hairline, the trade-off is almost always worth it.
3. Thigh-Length Jumbo Box Braids
Can you handle the weight? Jumbo braids are for the person who wants a high-impact look without spending twelve hours in a salon.
How Do They Differ in Weight Distribution?
Because the sections are larger, each braid carries more synthetic hair. This means you have fewer total braids on your head, which can actually be easier on the scalp in some cases—but only if the parts are large enough to support the weight. If a braider makes a jumbo braid on a small section of natural hair, you are asking for traction alopecia. Always ensure the part size matches the braid size.
Getting the Most Out of Jumbo Braids
- Speed: These can often be finished in under four hours.
- Statement: They look amazing with hair jewelry or thick gold cuffs.
- Wash Day: They are much easier to wash than small braids, as you can get between the parts easily.
Pro tip: Use a lightweight mousse daily to keep the “body” of the jumbo braids from getting frizzy too quickly.
4. Small Micro Box Braids
Micro braids are the marathon of the hair world. They are tiny, numerous, and take forever to install, but the result is a style that has the movement and drape of actual fabric.
I remember my first set of micro box braids; I felt like I could style them exactly like my natural hair. You can do intricate updos, side braids, and even curls that look much more natural than they do on larger braids. Because the sections are so small, the weight is distributed very evenly across the scalp, which can actually feel lighter than jumbo braids.
The challenge comes during removal. You have to be incredibly patient to avoid cutting your own hair. It is very easy to mistake a small strand of your natural hair for the extension. Always take these down when you are well-rested and have a good movie playing; rushing leads to breakage.
5. Boho Goddess Box Braids
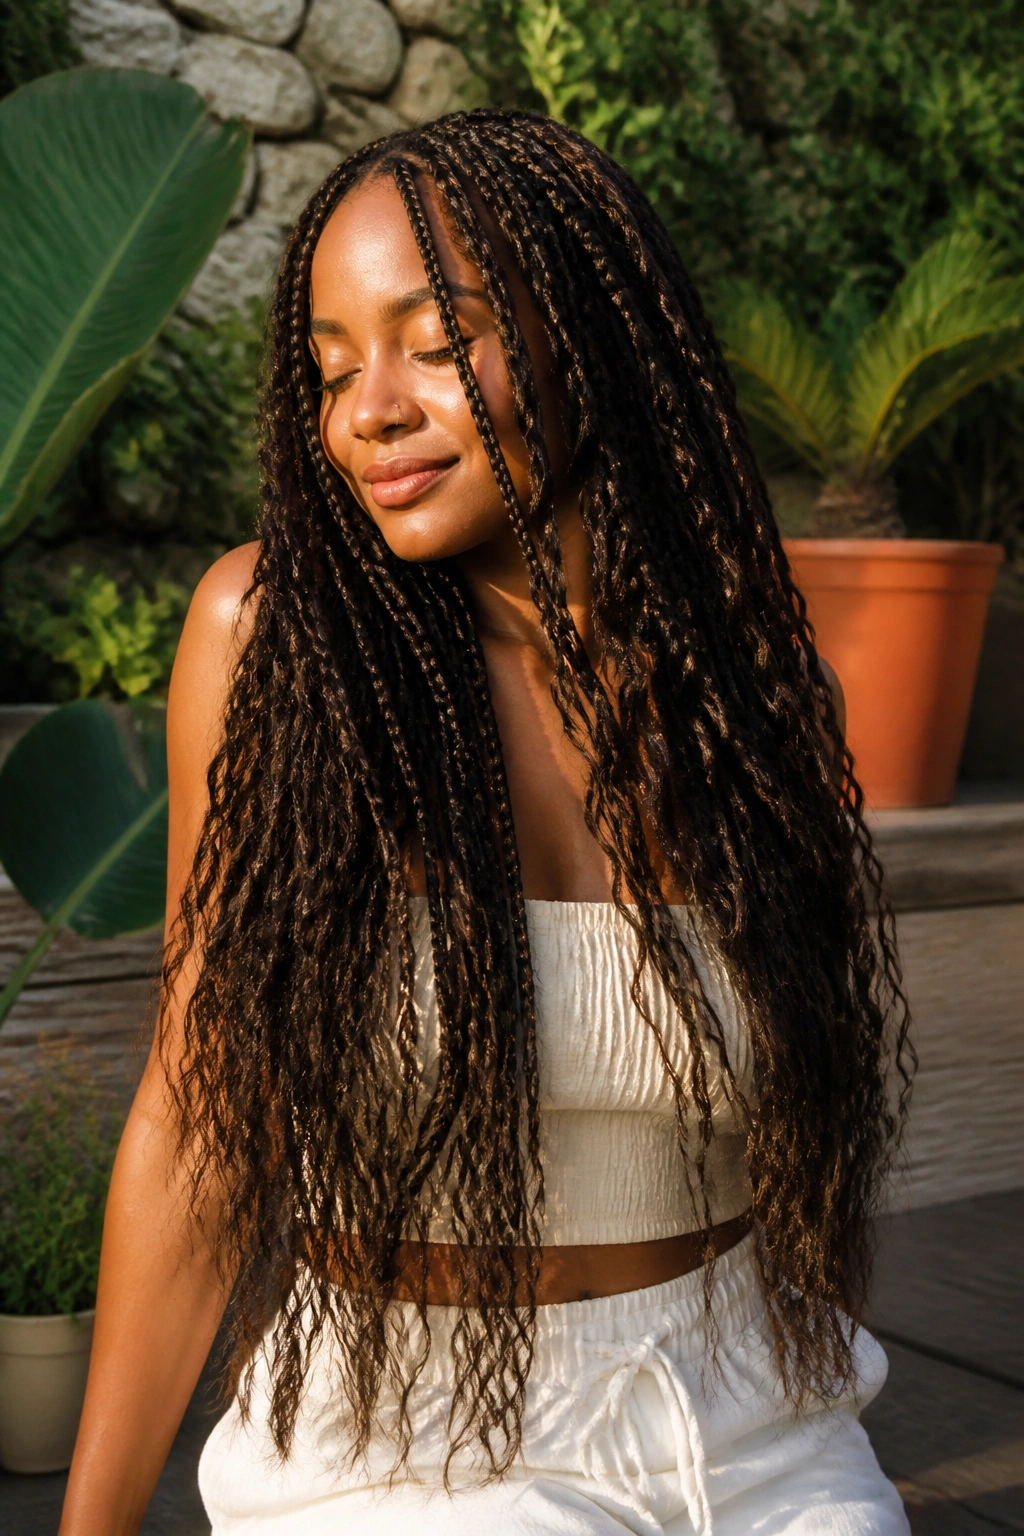
This is the “vacation hair” of your dreams. Boho braids combine the structure of box braids with loose, wavy strands of hair (either human or synthetic) left out along the length of the braid and at the ends.
The texture is the star here. It creates a voluminous, slightly messy, and romantic silhouette. On natural hair, this style is fantastic because the frizz that naturally develops over time actually blends in with the loose curls, making the style look better as it ages. It has a “lived-in” quality that is hard to replicate with neater styles.
One thing to watch out for is tangling. Those loose wavy pieces will mat if you don’t treat them right. You’ll need to run your fingers through the braids daily and maybe apply a bit of serum to the loose ends to keep them looking defined rather than like a bird’s nest.
6. Burgundy Tipped Long Braids
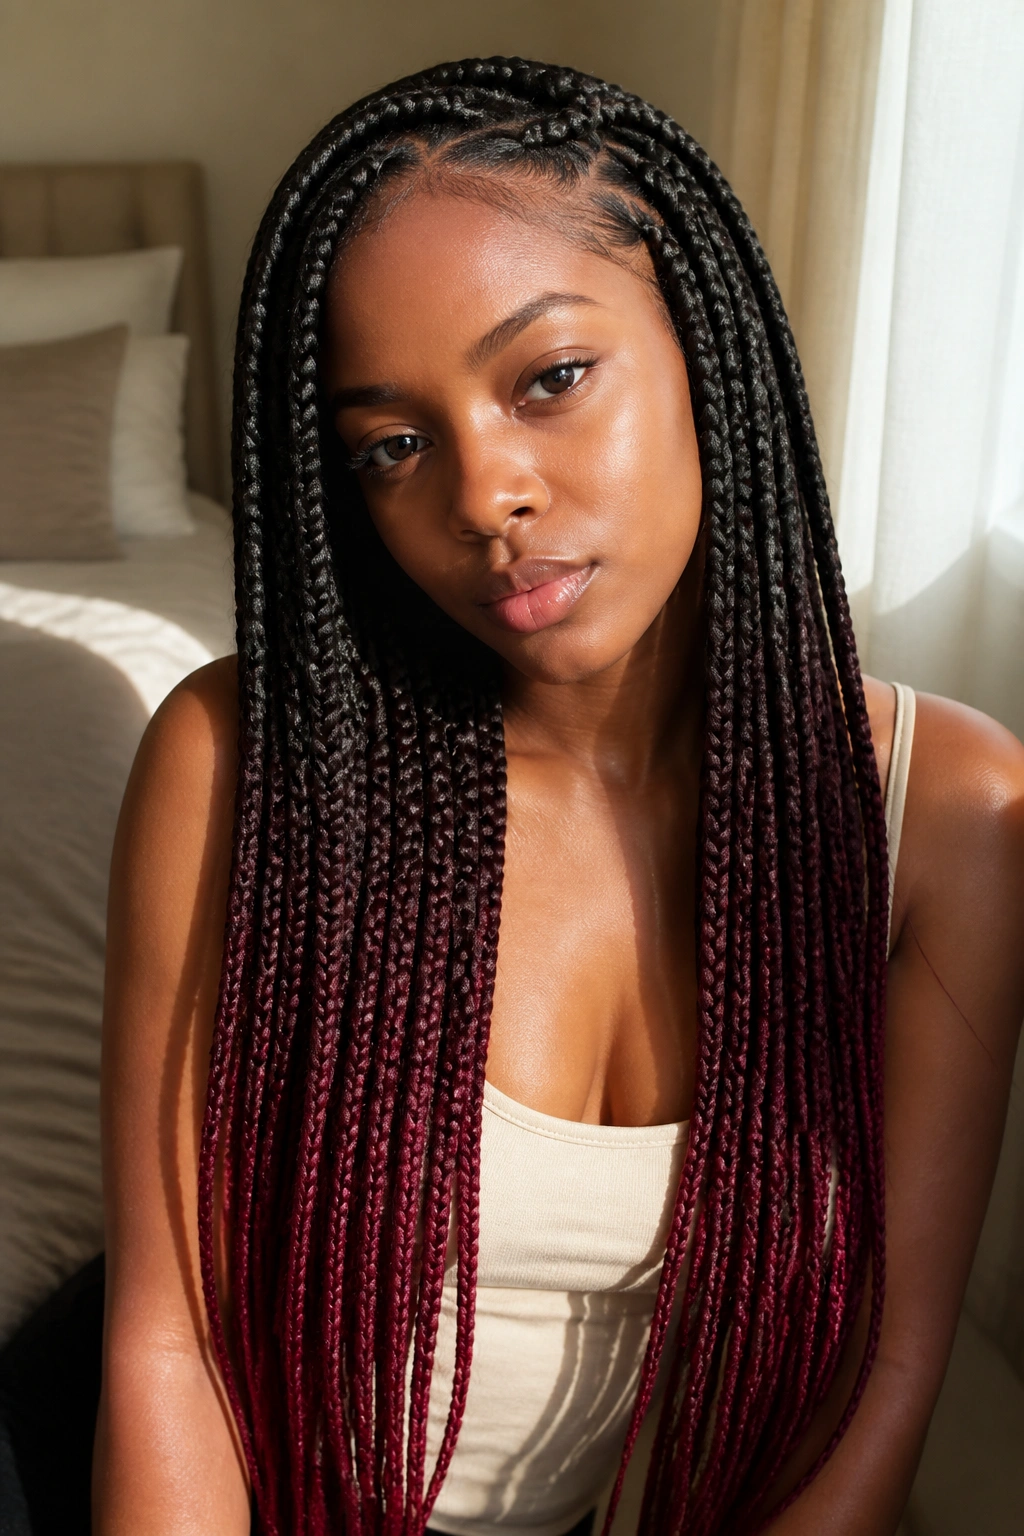
Color is one of the easiest ways to breathe life into long braids. Burgundy is a perennial favorite for natural hair because it complements almost every skin tone and offers a “pop” without being as jarring as a bright neon.
Choosing the Right Shade
Unlike a full head of color, doing just the tips or a “peek-a-boo” effect allows you to keep your roots matching your natural hair. This means as your hair grows out, the transition remains seamless. You don’t have to worry about “matching” your natural 4C roots to a bright red extension.
Comparison to Other Warm Tones
Burgundy is often more forgiving than copper or bright red. It feels sophisticated and professional while still allowing for that long-length drama. If you’re nervous about color, start with a “Number 350” (copper red) or a “Number 118” (burgundy) mixed with a “Number 1B” (off-black).
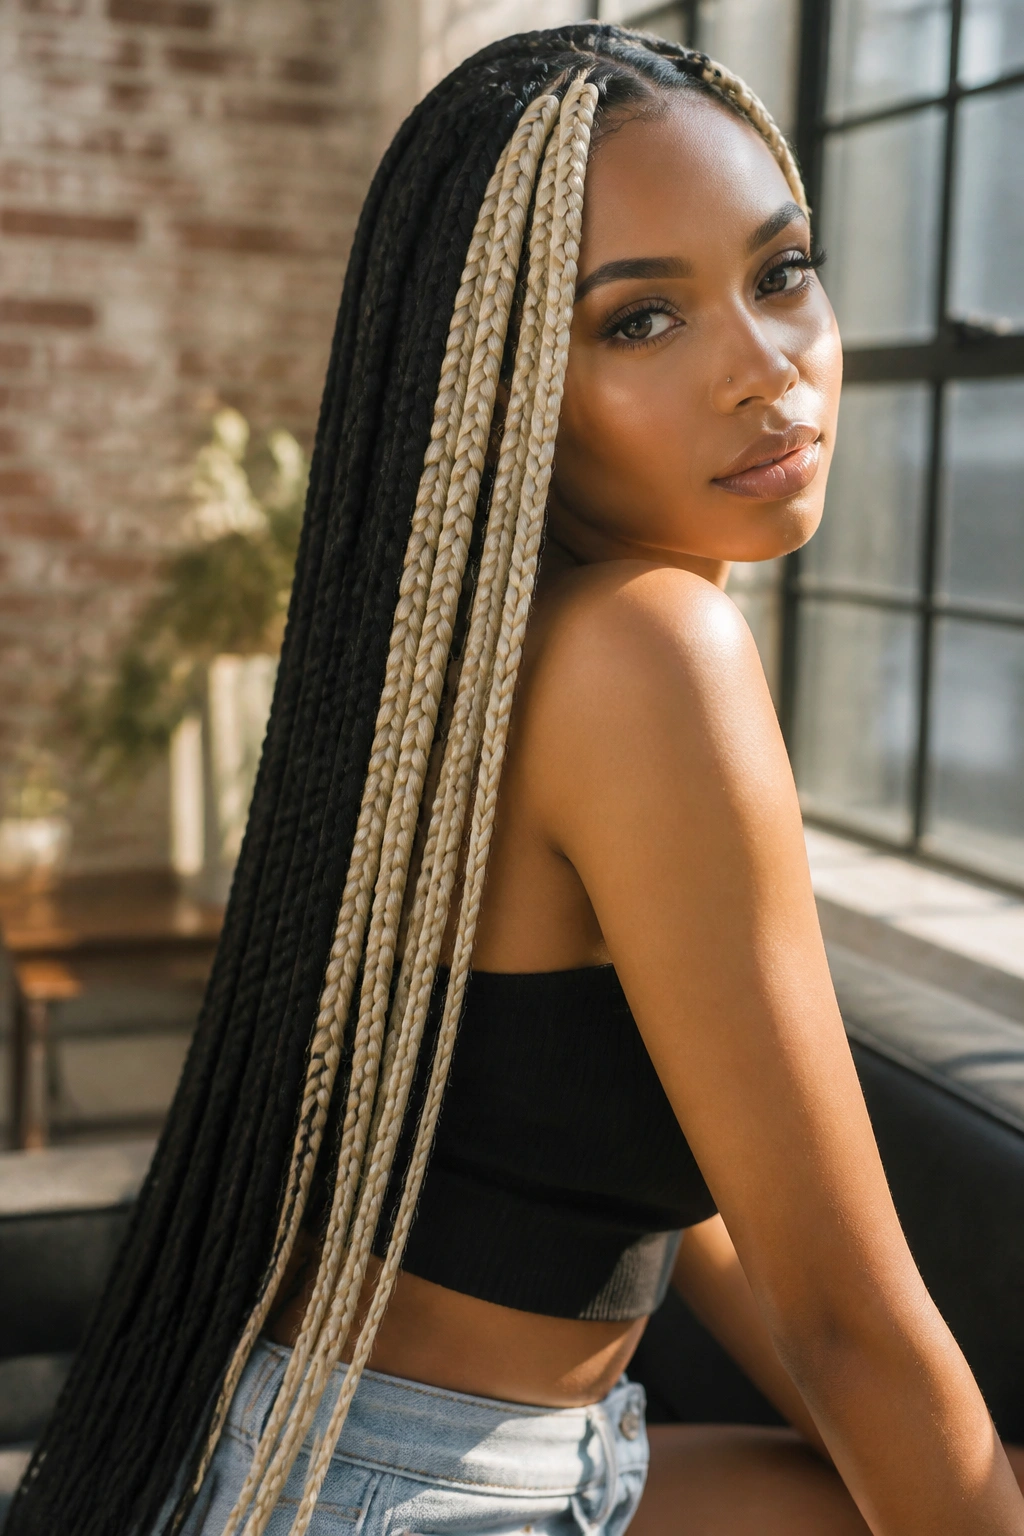
7. Ombre Honey Blonde Braids
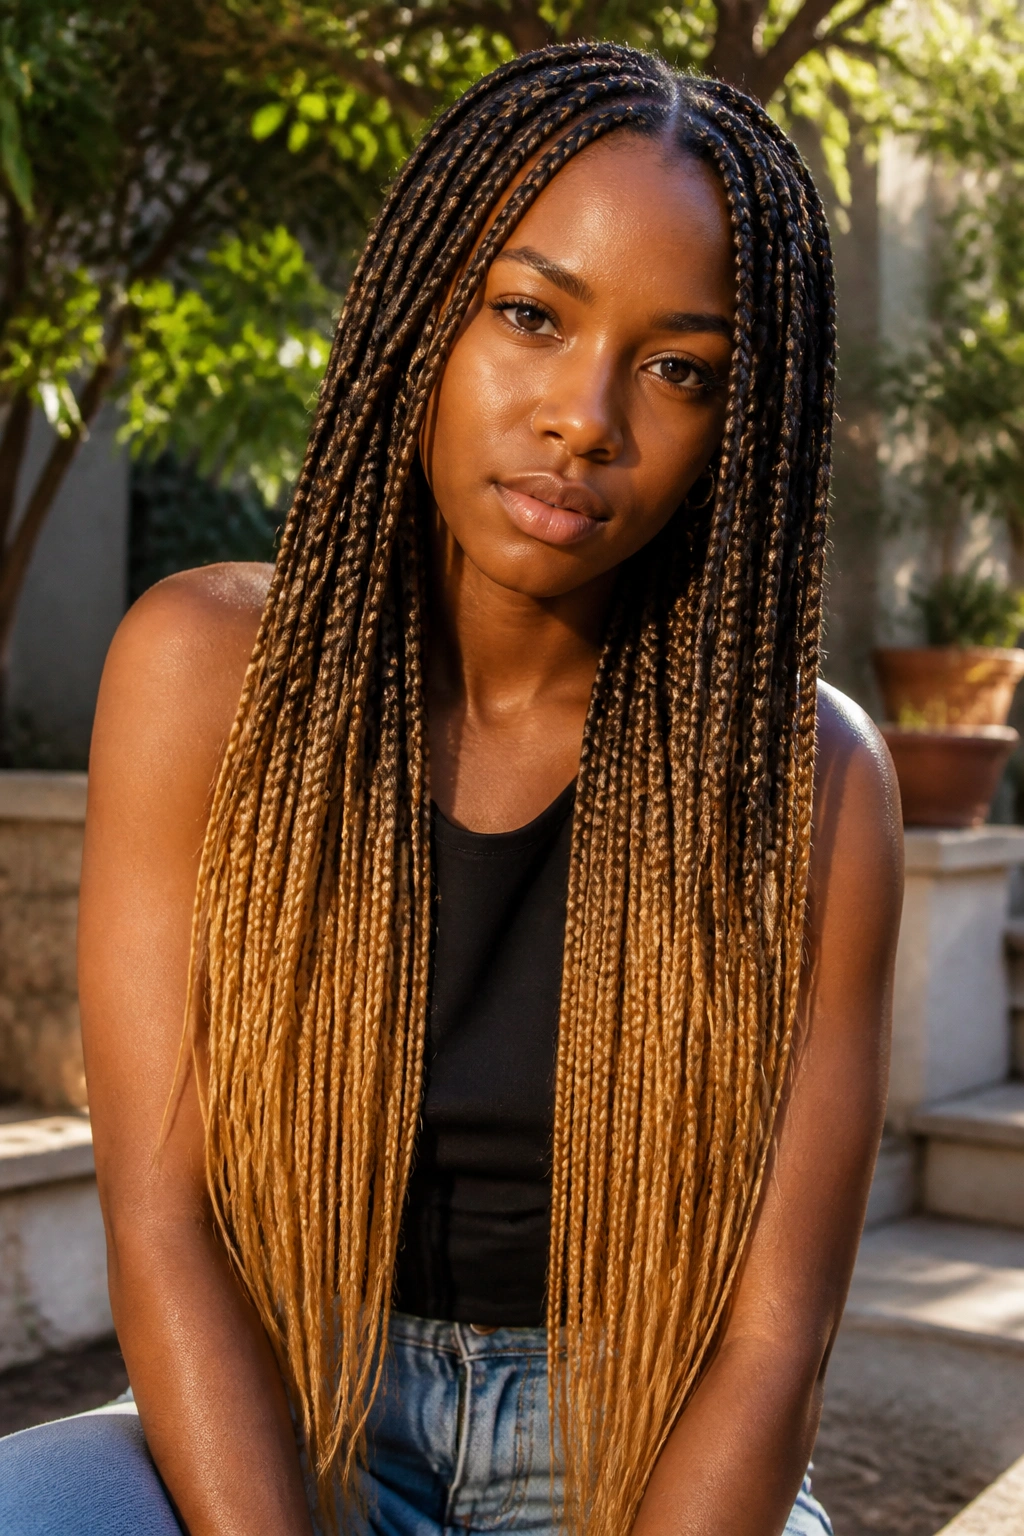
Ombre remains one of the most popular ways to wear long braids because it solves the “root problem.” By keeping the roots dark to match your natural hair and transitioning into a honey blonde toward the waist, you get the brightness you want without the maintenance of a full-color change.
Why Honey Blonde Works for Naturalistas
Honey blonde has warm undertones that prevent the hair from looking “ashy” against deeper skin tones. It provides a sun-kissed look that is incredibly flattering. When you have three feet of hair hanging down, a solid bright blonde can sometimes feel overwhelming, but an ombre transition breaks up the visual weight.
Styling the Transition
- Braid Length: Ensure the color transition happens around the jawline or shoulder for the most natural look.
- Hair Quality: Blonde synthetic hair can sometimes feel “plastic-y.” Look for “pre-stretched” hair with a softer texture.
- Contrast: The dark roots keep the look grounded and make your edges appear fuller.
Pro tip: Use a brown edge control gel instead of a clear one to help your natural edges blend perfectly with the dark roots of the ombre braids.
8. Square Parted Braids with Silver Cuffs
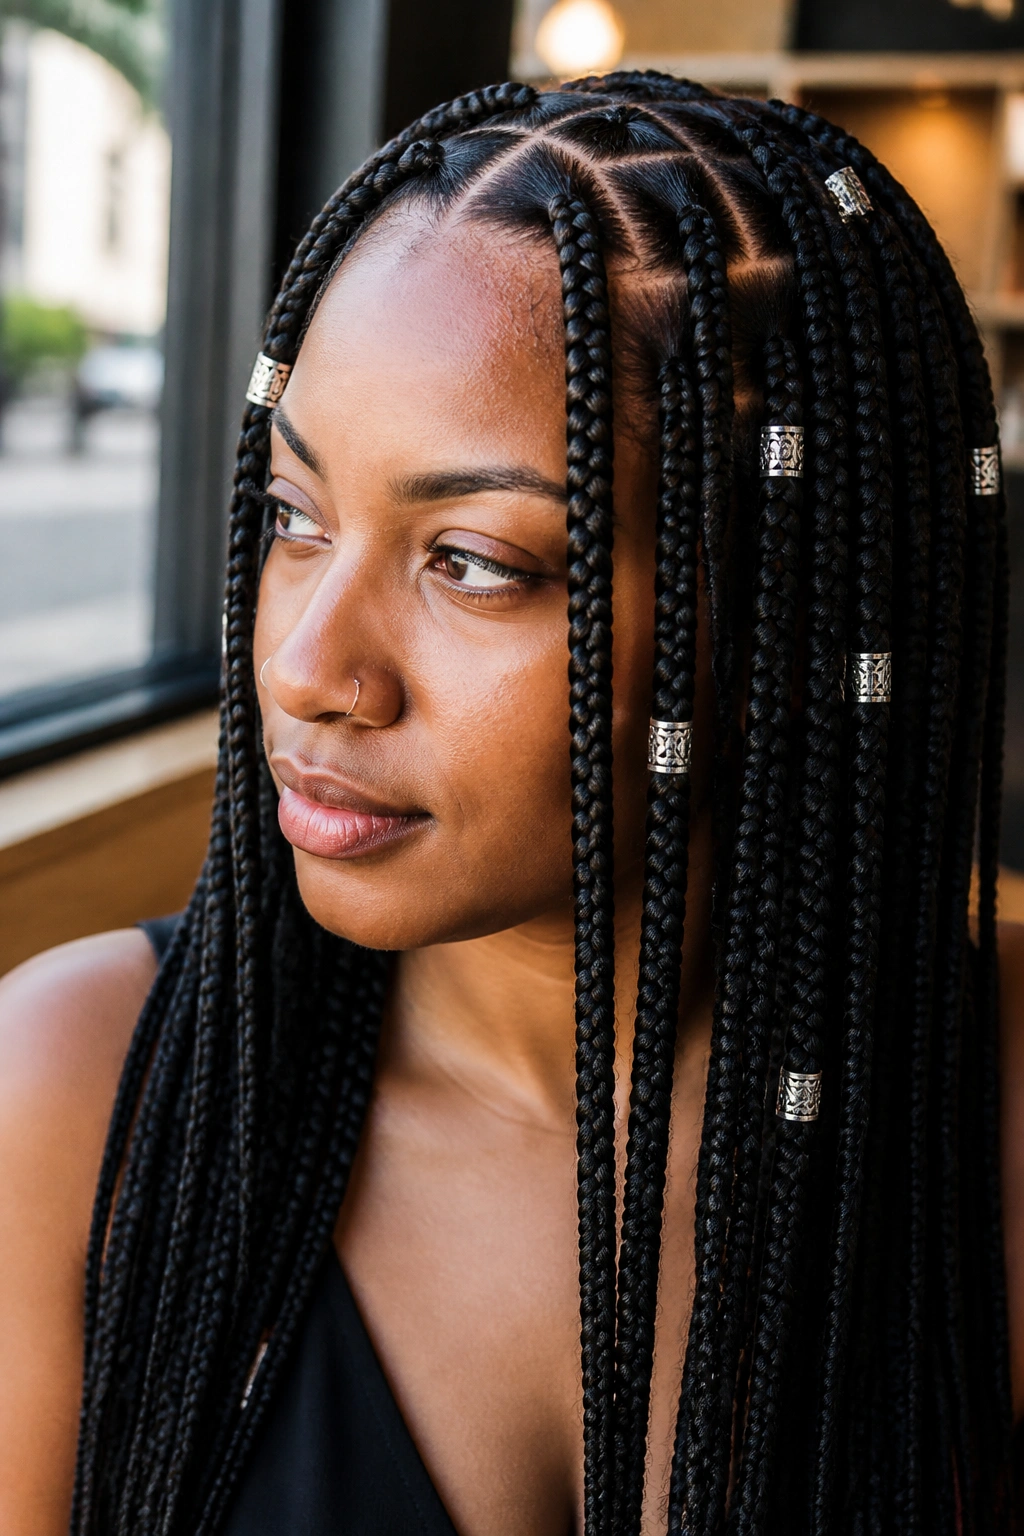
Sometimes, the beauty of long box braids is in the geometry. Clean, crisp square parts are the hallmark of a professional installation. Adding silver or gold cuffs is the easiest way to “dress up” the style for an event or just to add a bit of personality.
I’ve found that accessories work best when they are placed asymmetrically. Don’t put a cuff on every single braid; instead, scatter them. Put a few near the face to highlight your features and a few near the ends to draw attention to the length. These cuffs are “clip-on,” meaning you can move them around whenever you want.
Just be careful not to leave them in the same spot for the entire duration of the style. Moisture can sometimes get trapped under the metal, or the metal can snag the synthetic hair, causing a “frizzy” spot. Every week or so, move them up or down an inch to keep the hair underneath fresh.
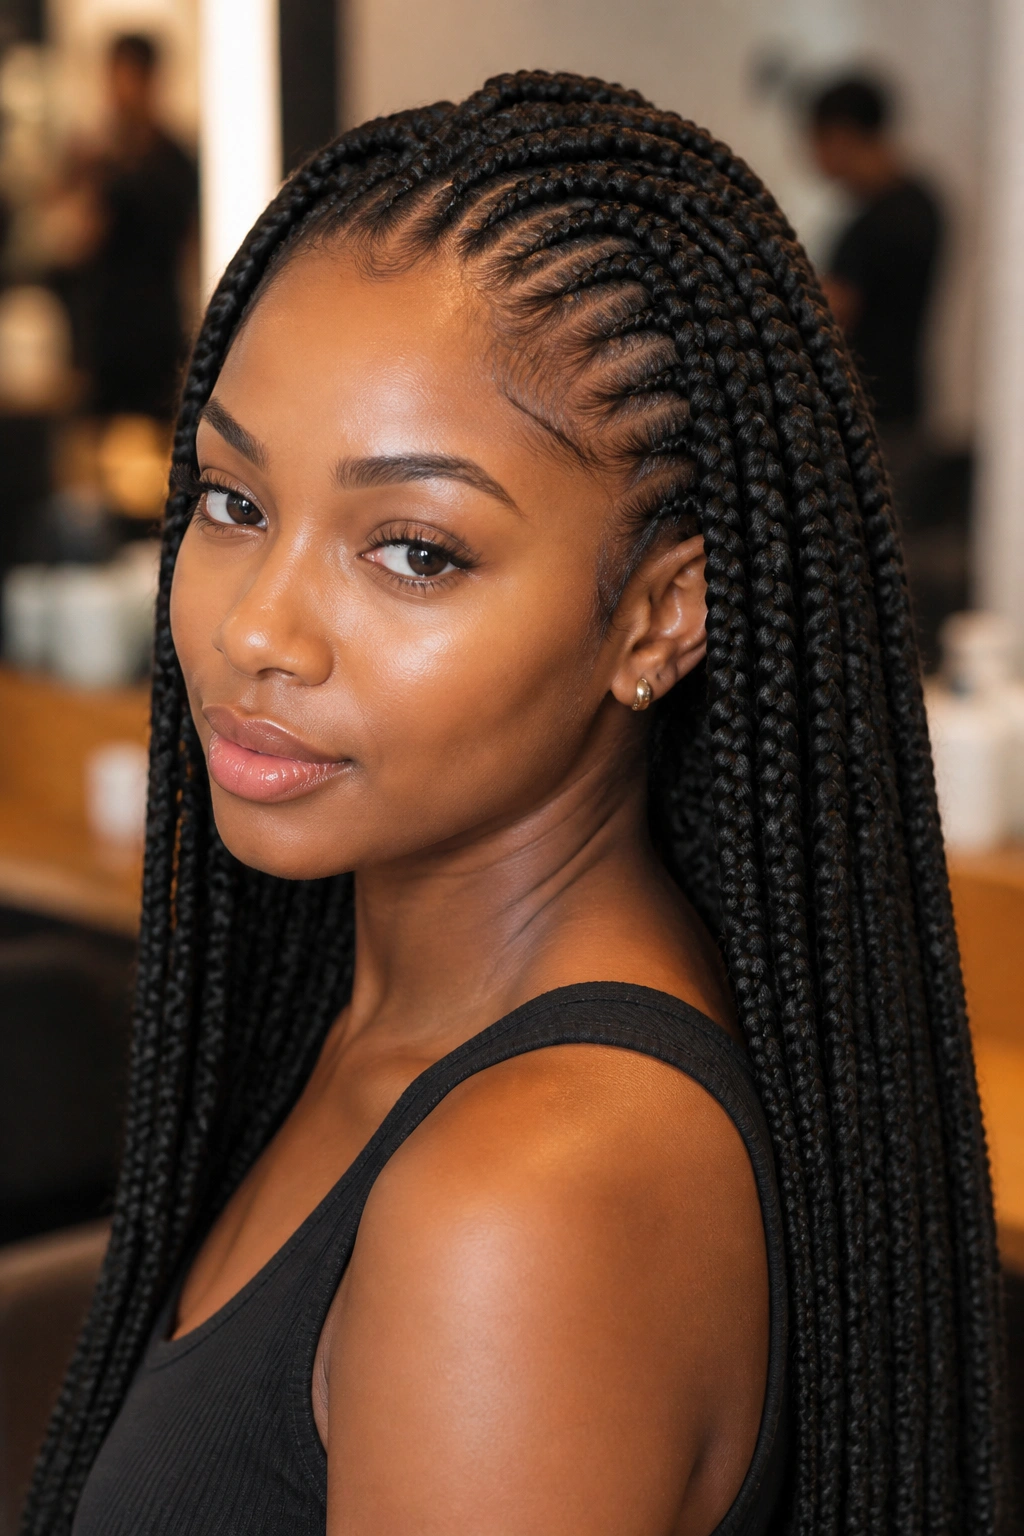
9. Triangle Parted Floor-Length Braids
If you want to move away from the traditional square grid, triangle parts are a fantastic alternative. They offer a more “mosaic” look to the scalp and can actually make the hair look fuller because the parts don’t create straight “lines” down the head.
Floor-length braids are, admittedly, a bit of a commitment. They are high-glamour and high-maintenance. You will literally be sitting on your hair, so you have to become mindful of how you move. However, for a photoshoot or a specific style era, nothing beats the drama of braids that sweep the ground.
The key to floor-length braids is using the “tapered” method. You want the braids to be thicker at the top and get progressively thinner toward the bottom. If they are the same thickness all the way down, the weight will be unbearable. Tapering ensures they remain “swishy” and manageable.
10. Curly Ends Long Box Braids
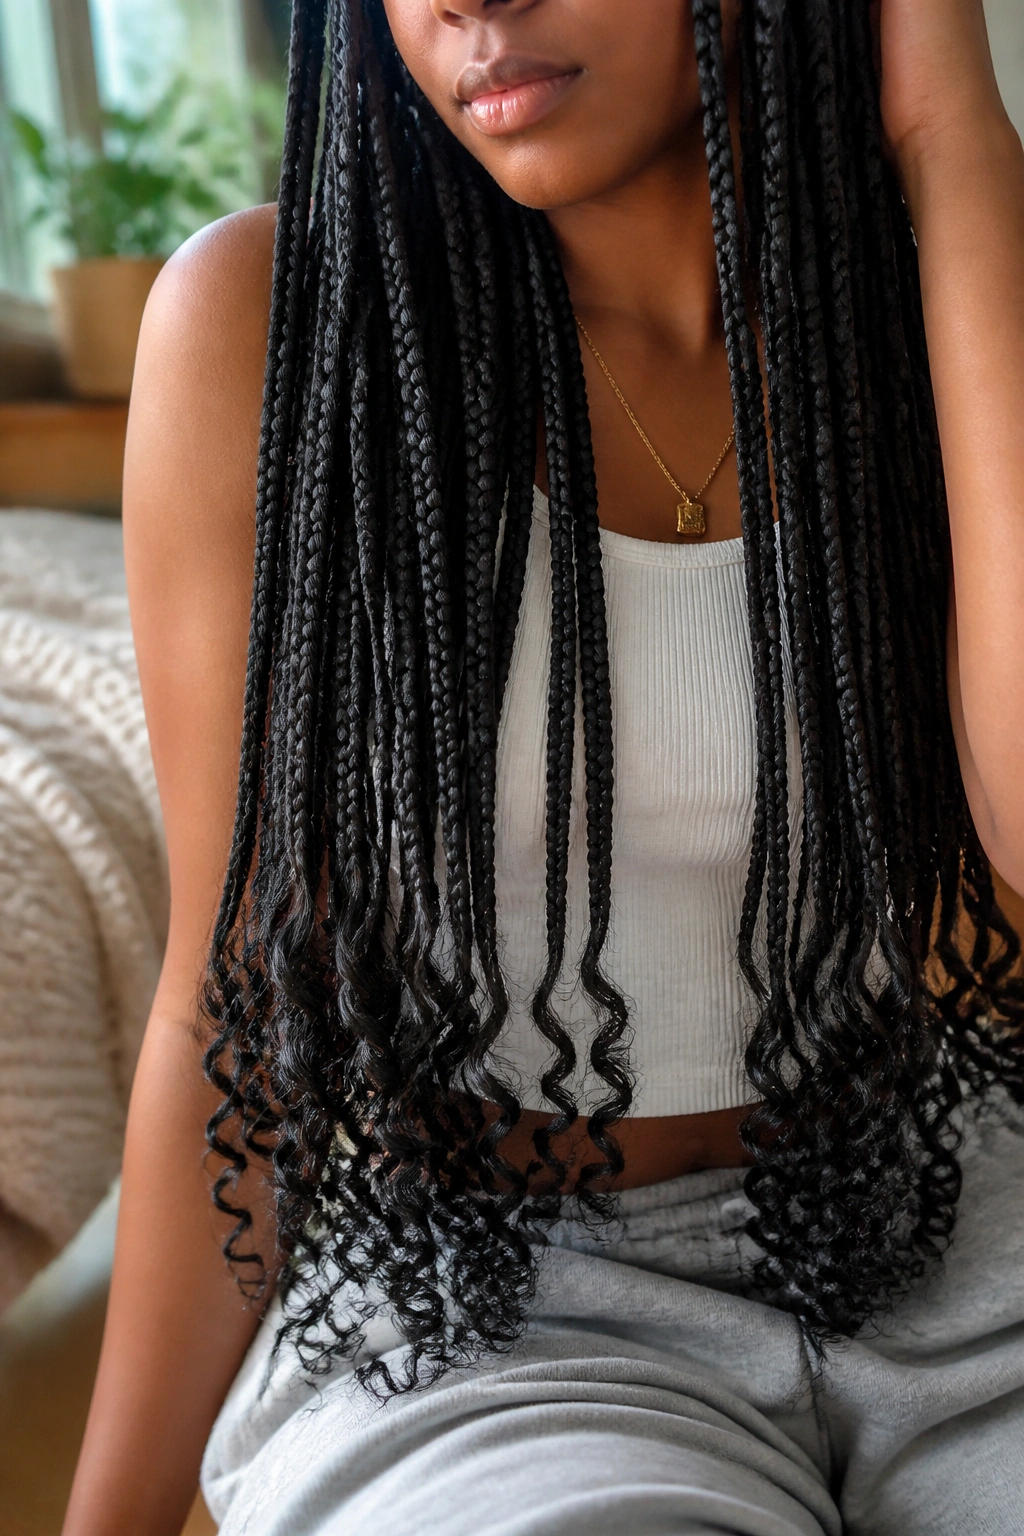
Leaving the last four to six inches of your box braids unbraided and curling them is a classic way to soften the look. It takes away the “bluntness” of the ends and adds a bit of bounce.
To achieve this, the braider usually dips the ends in hot water after wrapping them around rods. For natural hair, this is a great style because it moves away from the “stiff” look that long braids can sometimes have. The curls add a layer of femininity and playfulness.
Maintenance involves re-dipping the ends every few weeks if the curls start to go limp. You can also use large rollers at night to keep the shape. It is a bit more work than sealed, straight ends, but the visual payoff—especially when the braids are waist-length—is undeniable.
11. Mixed Texture Gypsy Braids
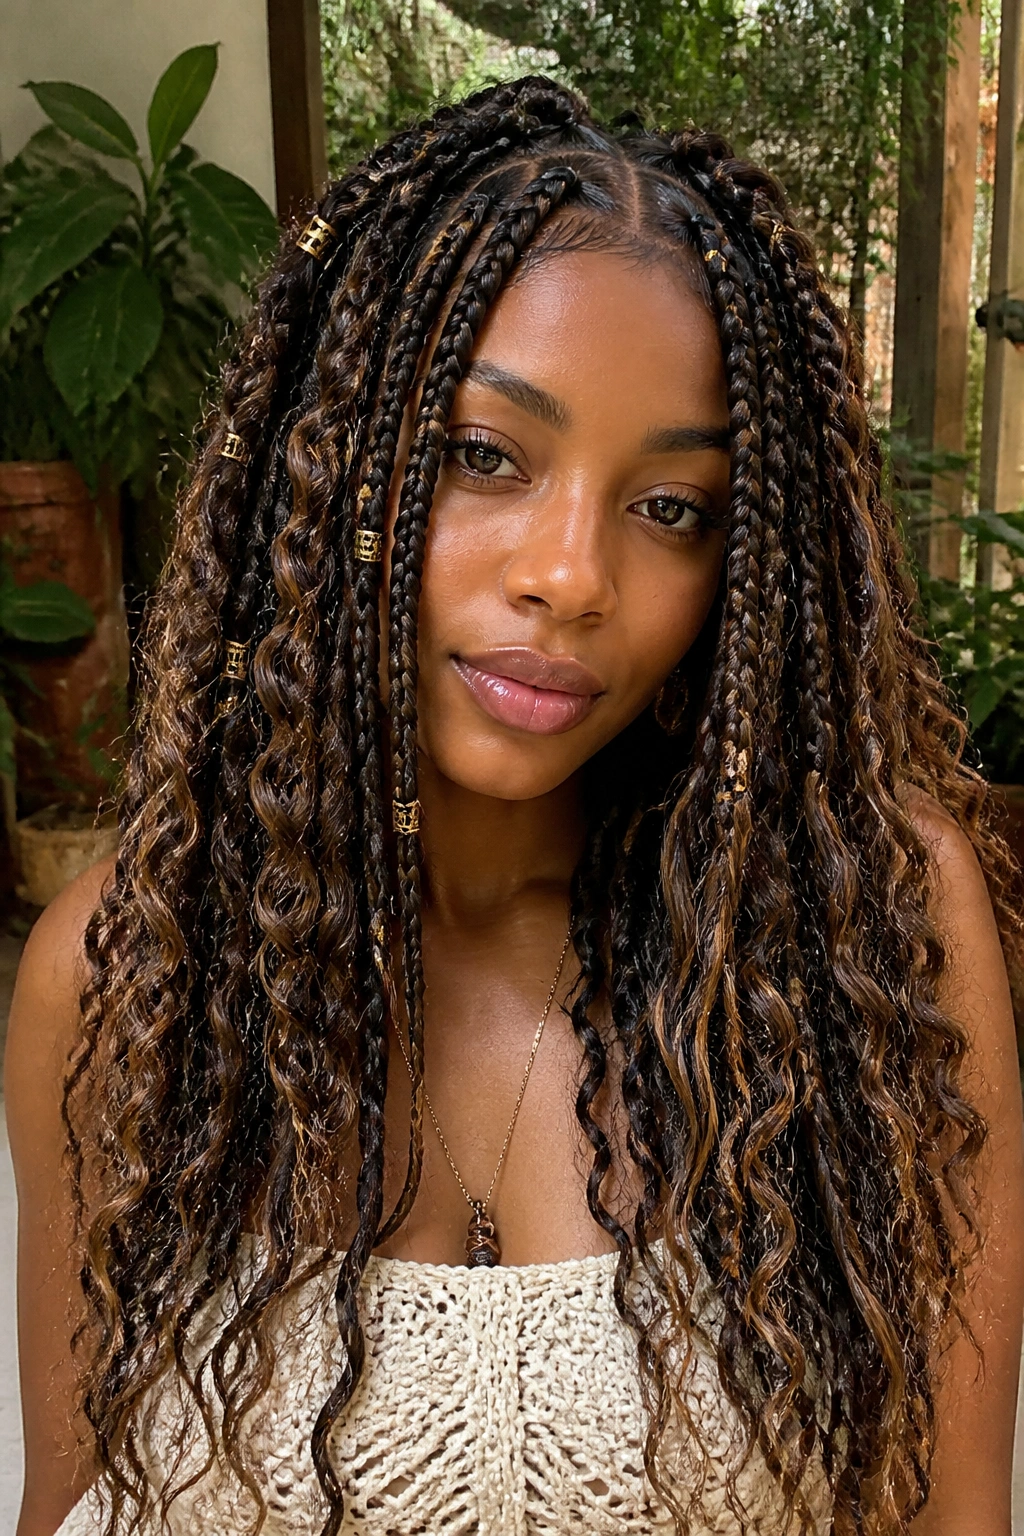
Gypsy braids take the Boho concept and turn the volume up. Instead of just a few loose strands, you incorporate different textures of hair—some wavy, some curly, some straight—throughout the style.
This creates a very “earthy” and voluminous look. For my 4C girls, this is a secret weapon. Because our hair is naturally textured, any “frizz” that escapes the braid simply adds to the gypsy aesthetic. It is the most forgiving style on this list.
You can even mix colors here. Imagine black braids with chocolate brown curly pieces mixed in. It creates a 3D effect that looks stunning in photos. Just remember that more loose hair means more potential for tangling, so keep a bottle of detangling mousse on your vanity.
12. Platinum Blonde High-Contrast Braids
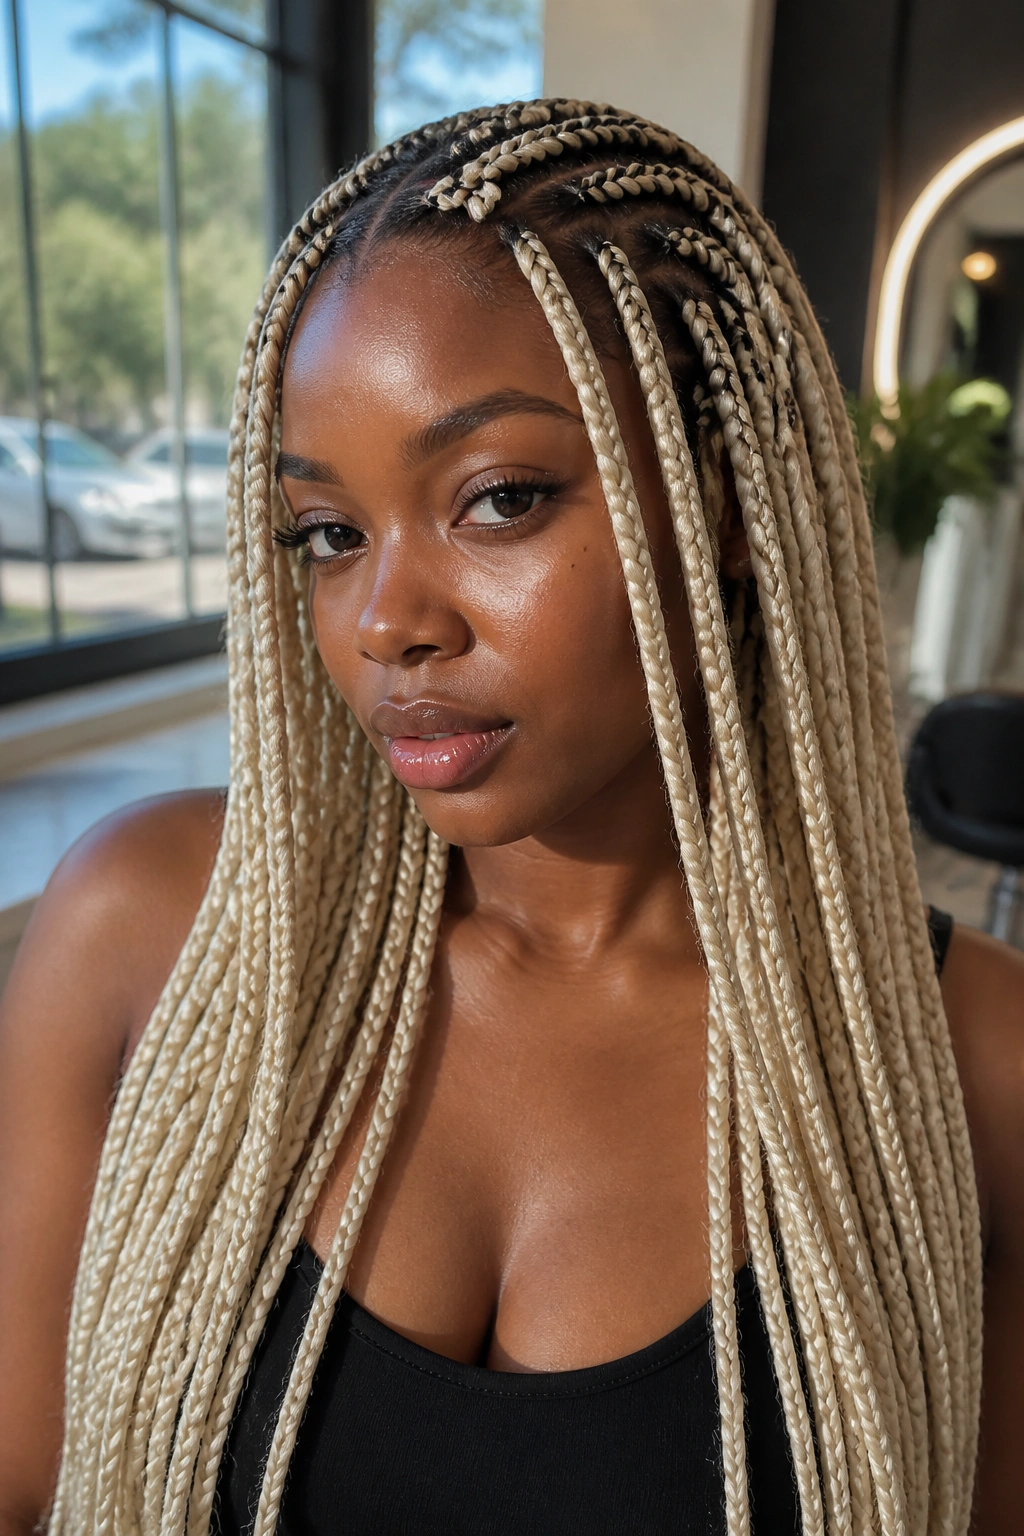
This is not for the faint of heart. Platinum blonde braids against dark natural hair create a high-contrast, edgy look that is impossible to ignore.
Managing the Visual Impact
When you go this bright, the parting becomes very visible. You want your braider to be a perfectionist. Any “crooked” parts will be highlighted by the bright blonde hair. It is a bold, “cool-girl” aesthetic that works particularly well with shorter natural hair, as there is less of your dark hair “peeking” through the blonde braid.
Comparison to Other Blondes
- Platinum: Cooler, almost white. Best for cool skin tones.
- Honey/Gold: Warmer, more “natural” looking. Best for warm skin tones.
- Contrast: Platinum shows the “braid pattern” more clearly than darker colors.
Pro tip: If your natural hair is very dark and long, consider “tucking.” This is a technique where the braider hides your natural hair inside the synthetic hair so the dark color doesn’t show through the blonde.
13. Beaded Waist-Length Braids
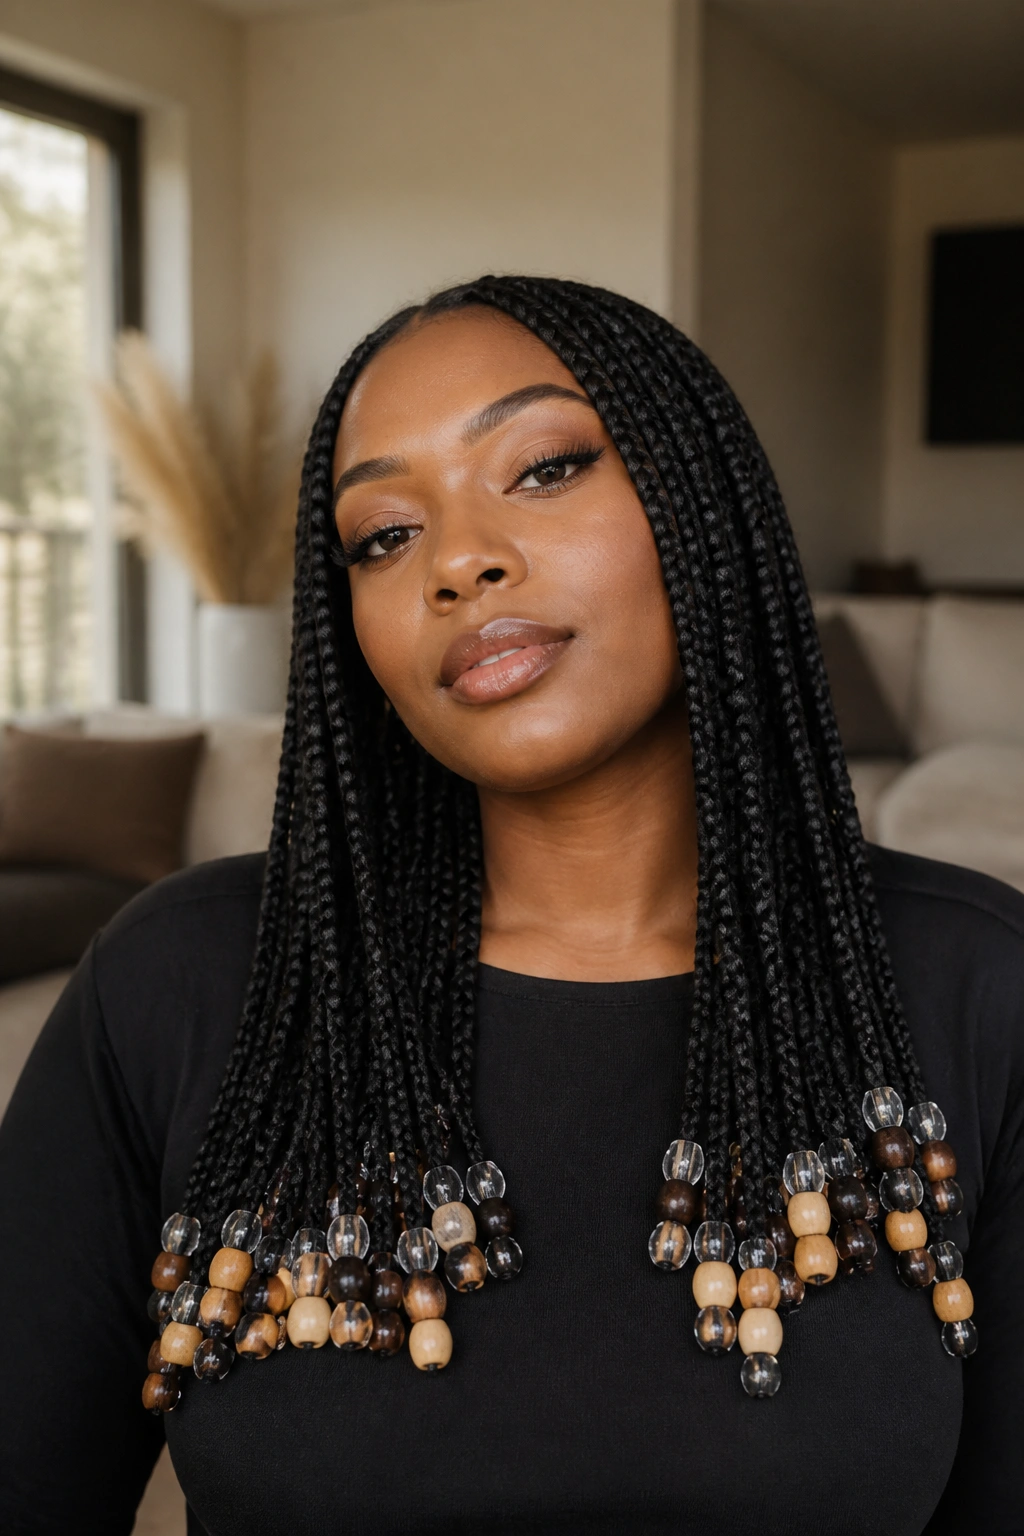
Beads aren’t just for kids. In fact, a long set of box braids finished with heavy clear or wooden beads is a sophisticated nod to traditional African hair styling.
The weight of the beads actually helps the braids hang straight, which can be very flattering. The sound they make is also a huge part of the appeal. For a grown-up look, I recommend using a monochrome palette—all white beads, all clear, or all black. It keeps the style feeling “fashion” rather than “playground.”
You’ll need a bead loader (a small plastic tool) to put these on if you’re doing it yourself, and you’ll secure them with small rubber bands. Just be mindful when you’re sleeping; a head full of beads can be a bit “bumpy.” A thick, padded scarf or a specialized braid bonnet is a must.
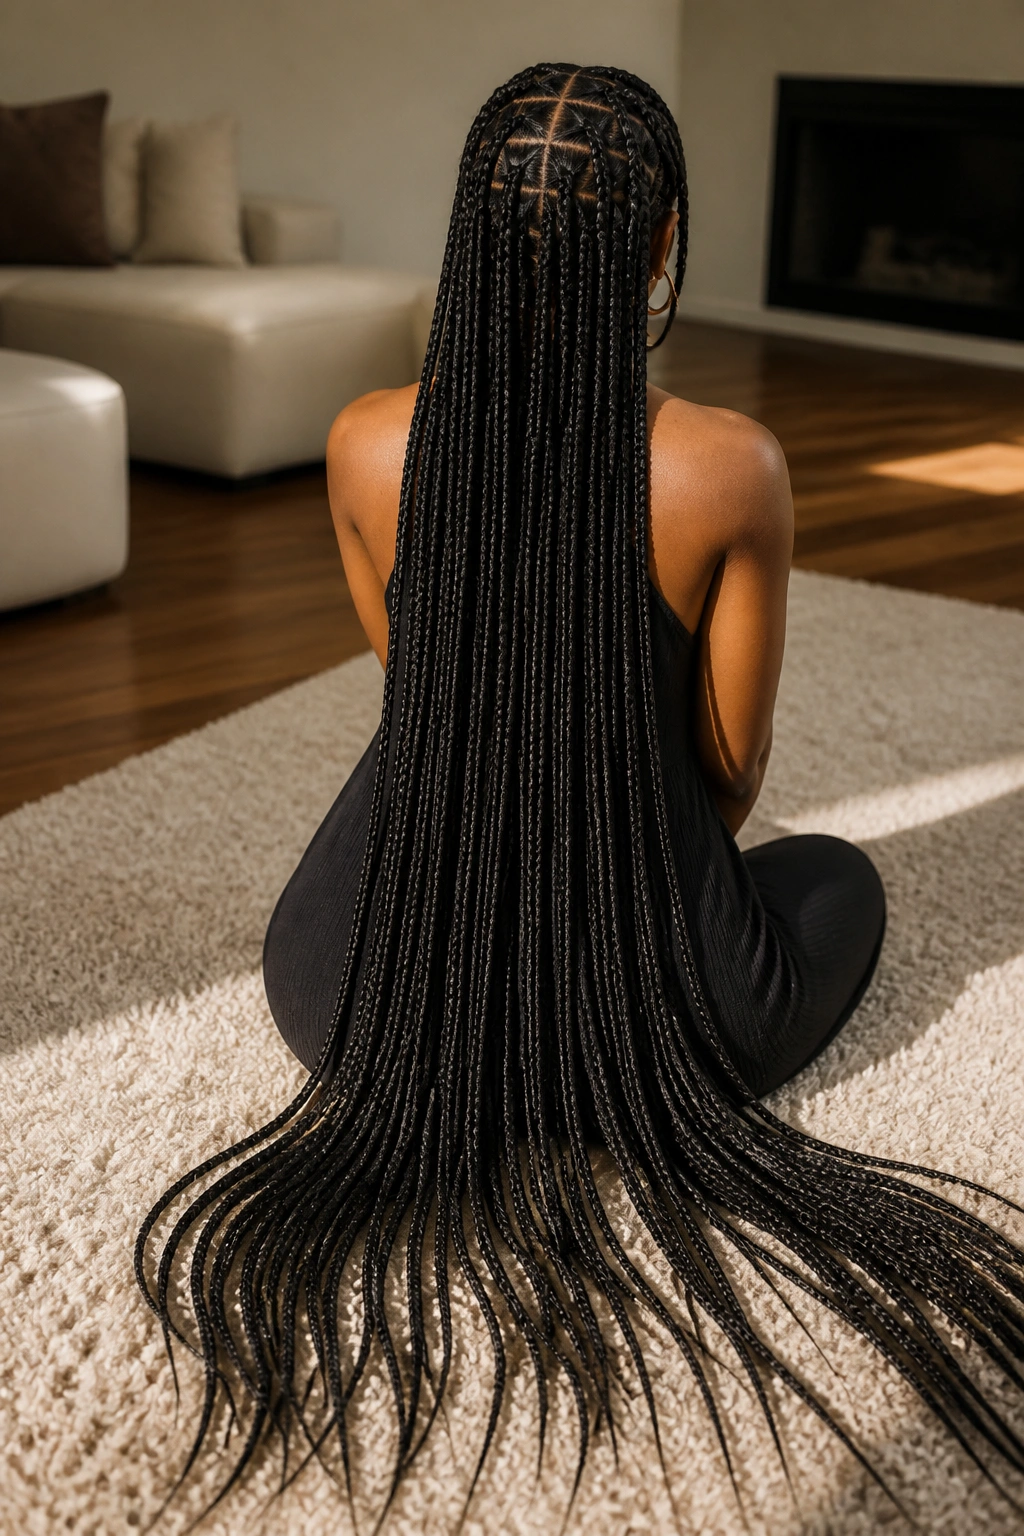
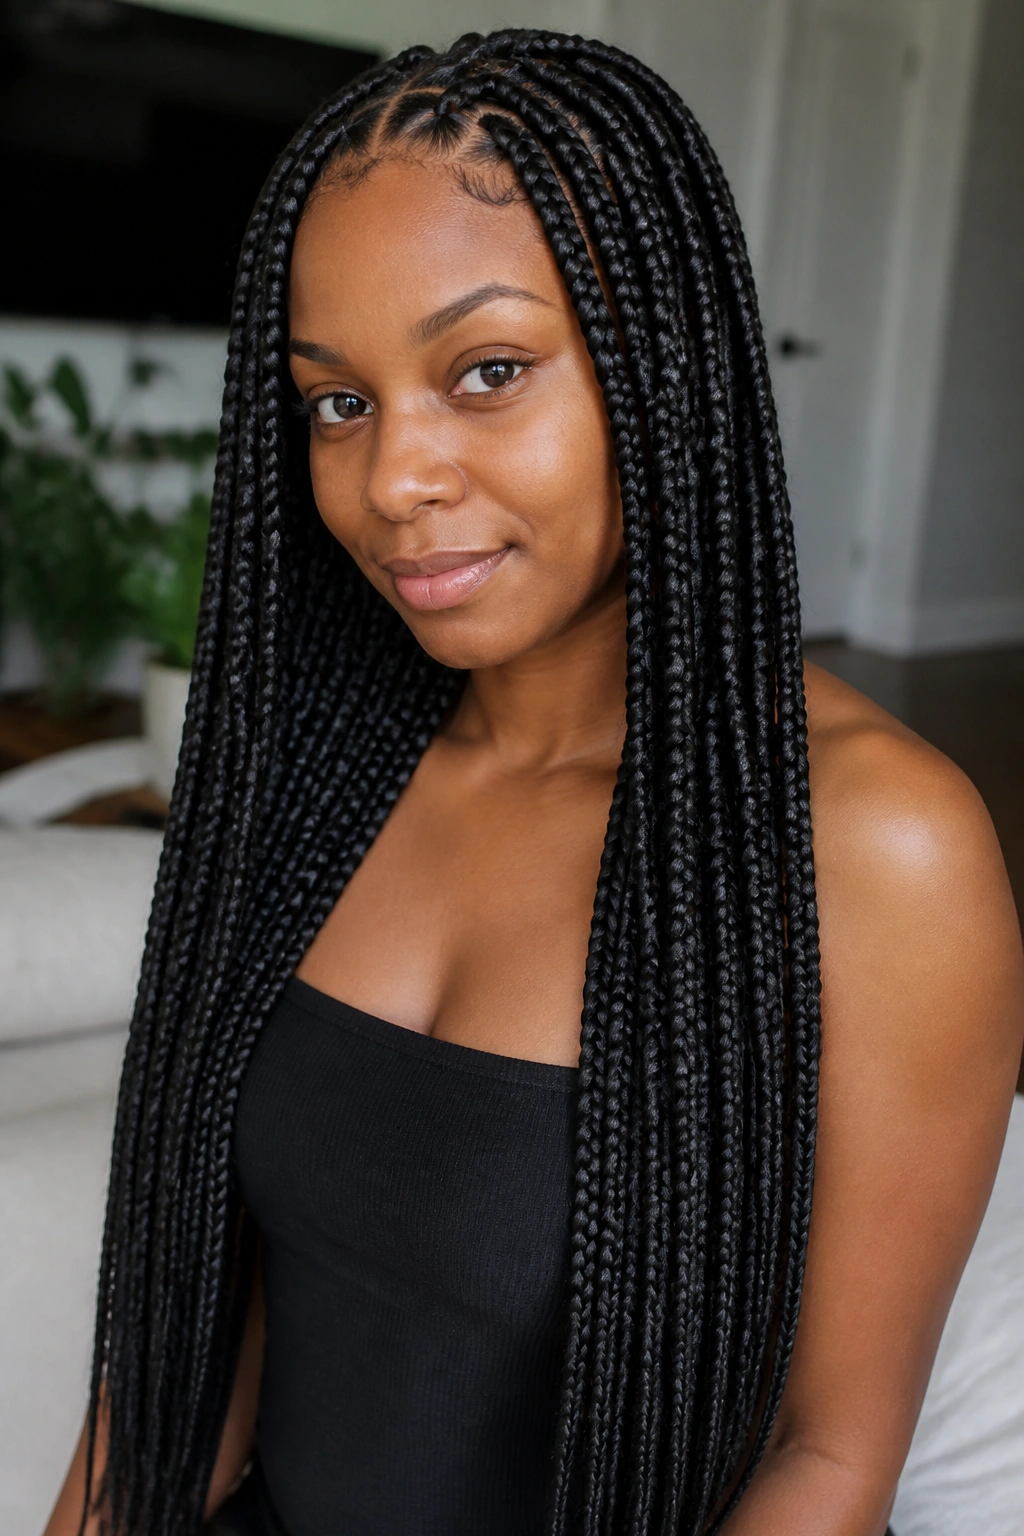
14. Jet Black Butt-Length Braids
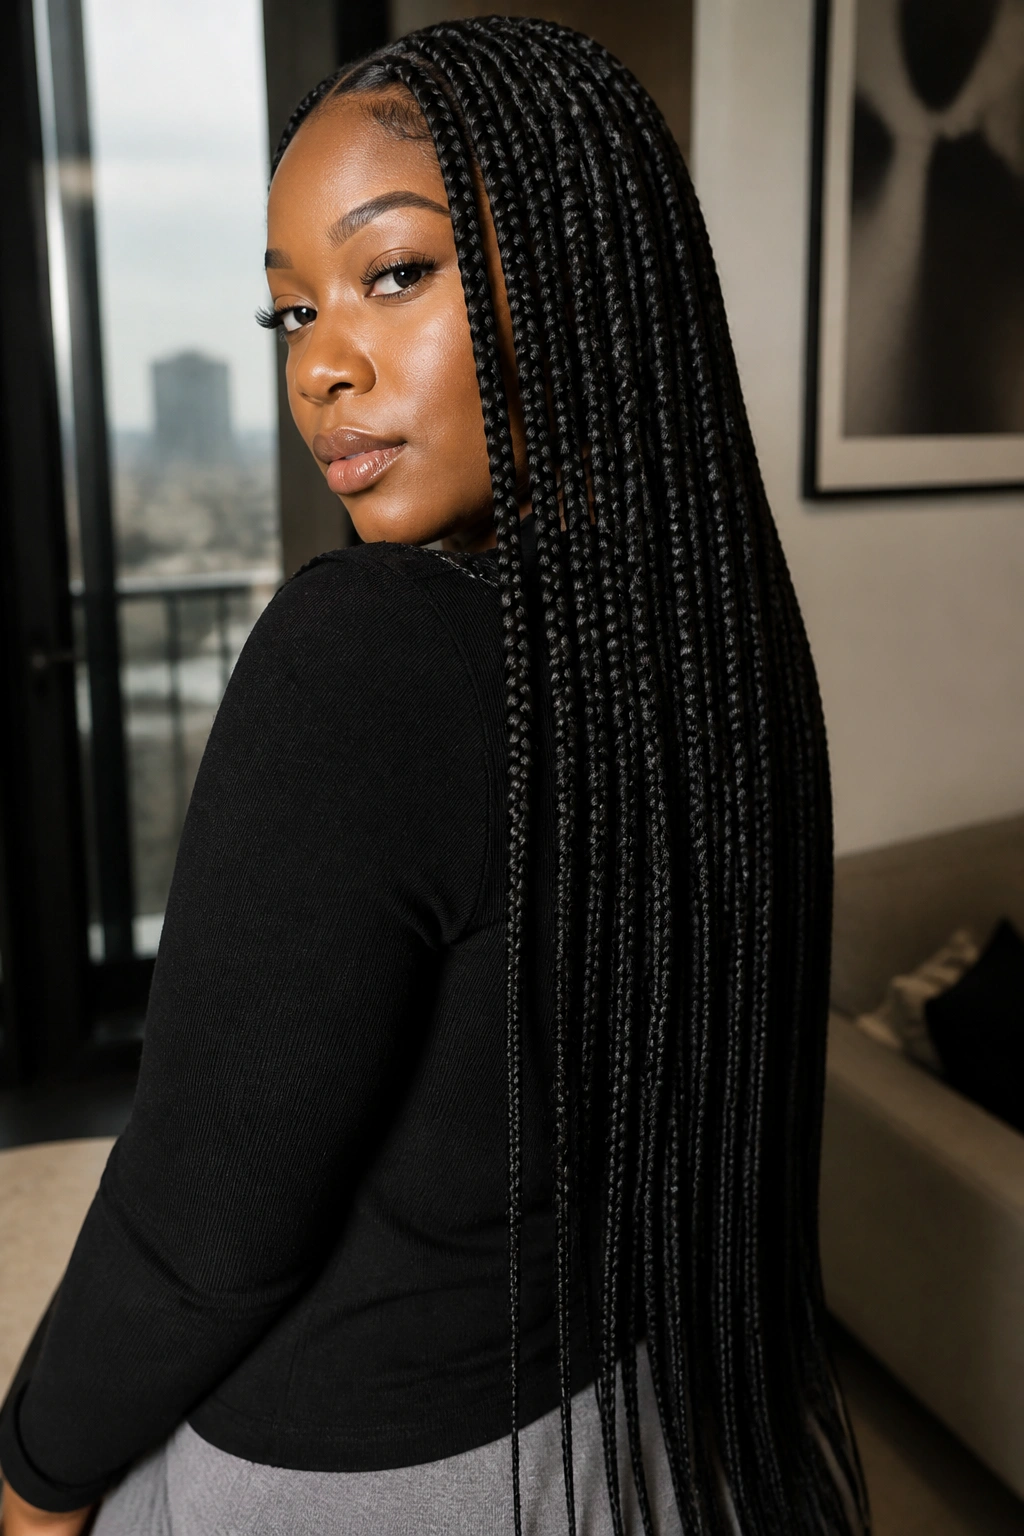
There is something incredibly powerful about simple, jet-black, super-long braids. It’s the “Cher” look, updated for the natural hair community.
While “1B” (off-black) is the most common color because it matches most natural hair, “1” (jet black) has a blue-black undertone that looks incredibly striking and “expensive.” It has a shine that off-black lacks. This style is all about the length and the sleekness.
Because there is no color to distract the eye, the quality of the braid is paramount. You want them to be smooth, frizz-free, and perfectly uniform. This is the ultimate “clean girl” aesthetic for the natural hair world. It pairs perfectly with any outfit and never clashes with your makeup.
15. Pastel Pink Accent Braids
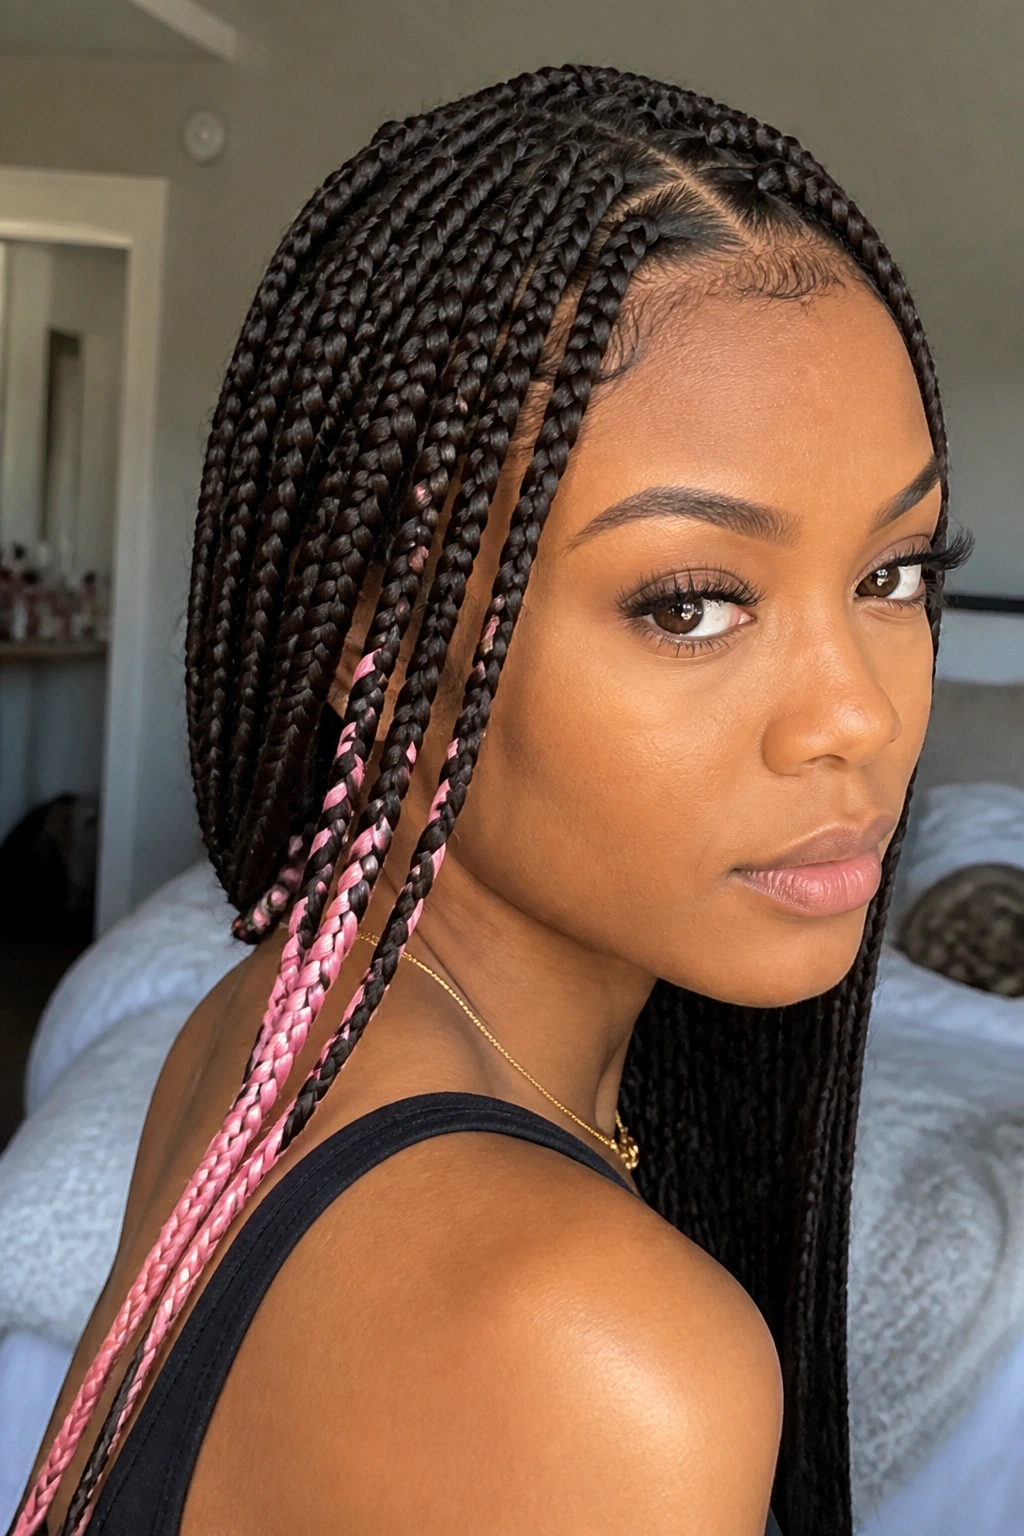
If you aren’t ready for a full head of pink, using pastel accents is a fun way to experiment with the “fantasy color” trend.
I love seeing two or three pink braids tucked away near the nape of the neck or used as “face-framers.” It’s a subtle way to show off your personality. Since you’re only using a small amount of the bright color, it doesn’t overwhelm your look.
Pink actually looks beautiful against natural dark hair. It’s a soft contrast that feels playful. If you’re feeling brave, you can even find “glow in the dark” braiding hair for that extra bit of “wow” at a concert or party.
16. Side-Swept Long Box Braids
Sometimes it’s not about the braid itself, but how you wear it. Side-swept braids involve installing the braids so they naturally want to fall over one shoulder, or simply styling them that way.
This creates a very elegant, asymmetrical silhouette. It’s a great way to show off your jawline and your earrings. For long braids, this also helps manage the weight. Instead of having the weight pulling directly back on your neck, it’s distributed differently.
To keep them swept to the side, you can use a large decorative hair pin or even braid a few of the braids together loosely at the shoulder to keep the “clump” in place. It’s a red-carpet-ready look that takes five seconds to achieve.
17. Skunk Stripe Long Braids
The “skunk stripe” or high-contrast streak is a trend that isn’t going anywhere. It usually involves a single section of a bright color (like white, blonde, or silver) against a dark base.
In box braids, this usually means one or two rows of braids on one side of the head are a completely different color. It’s a very “90s revival” look that feels modern when paired with waist-length braids. It gives you a “cool” edge without requiring a full-head commitment to a bright color.
The placement is everything. If you put the stripe right at the hairline, it will be very bold. If you hide it a layer down, it will only show when you move or style your hair in a half-up, half-down look.
18. Feed-in Long Box Braids
Feed-in braids are often confused with knotless, but the technique is slightly different and often used for the perimeter of the head. It involves adding hair in a way that the braid starts very thin and gets thicker.
For long braids, this is often used to create a “cornrow-into-box-braid” hybrid. You might have the front of your hair cornrowed into beautiful patterns that then hang loose as waist-length braids in the back. It’s a fantastic way to keep the hair out of your face while still enjoying the length.
This is a very “secure” style for natural hair. Because the front is braided down, you don’t have to worry about “laying your edges” every morning. It’s a truly low-maintenance version of the long-braid look.
Essential Scalp Care for Long Braids

The biggest mistake I see people make with long braids is ignoring their scalp because “the hair is protected.” Your scalp is still skin, and it’s still producing oil and shedding skin cells. When you add the weight of long extensions, your scalp is under more stress than usual.
You need a routine. I recommend a “scalp mist” instead of a heavy grease. Look for something with tea tree oil or peppermint to keep the itch away. Every two weeks, you should do a “dry wash.” Take a cotton ball soaked in witch hazel or a specialized braid cleanser and run it along your parts. This removes the “gunk” without frizzing up the braids.
If you do feel the need to wash your braids fully, focus only on the scalp. Put your braids in a few large loose plaits to prevent them from tangling or getting too heavy with water. Dilute your shampoo in a spray bottle so it can actually reach your scalp through the braids. Rinse thoroughly—and I mean thoroughly. Leftover soap in the middle of a long braid will cause itching and eventually a weird smell.
Managing the Weight of Long Braids
Let’s be real: three feet of synthetic hair is heavy. Especially when it’s wet. If you are not careful, that weight can lead to neck pain or, worse, thinning at the roots.
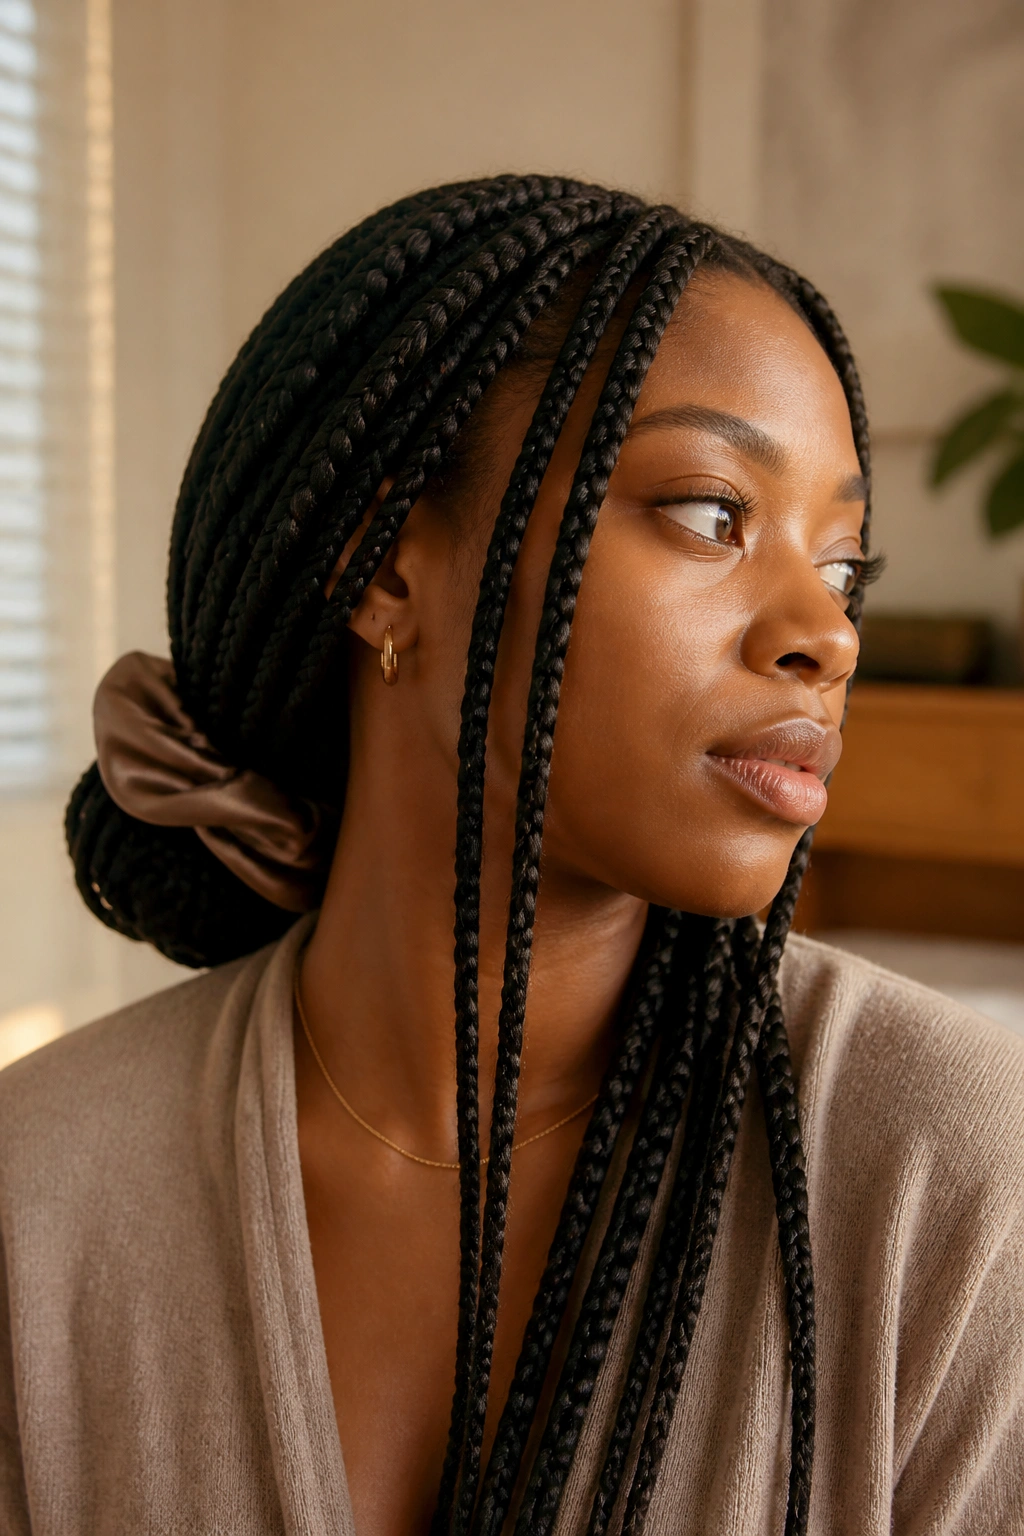
When you’re at home, try to keep the braids off your neck. I often use a large “scrunchie” (the oversized silk ones are best) to tie them in a loose, low bun. This takes the pressure off your hairline. When sleeping, do not just leave them loose. You will roll over on them, and the sudden “tug” as you move in your sleep is terrible for your edges.
Braid them into two large, loose sections and put them in a silk bonnet. If they are too long for a standard bonnet, look for a “braid tube” or a “loc sock.” These are long, silk tubes that keep the braids contained and smooth without bunching them up at the top of your head.
Nighttime Routine for Longevity
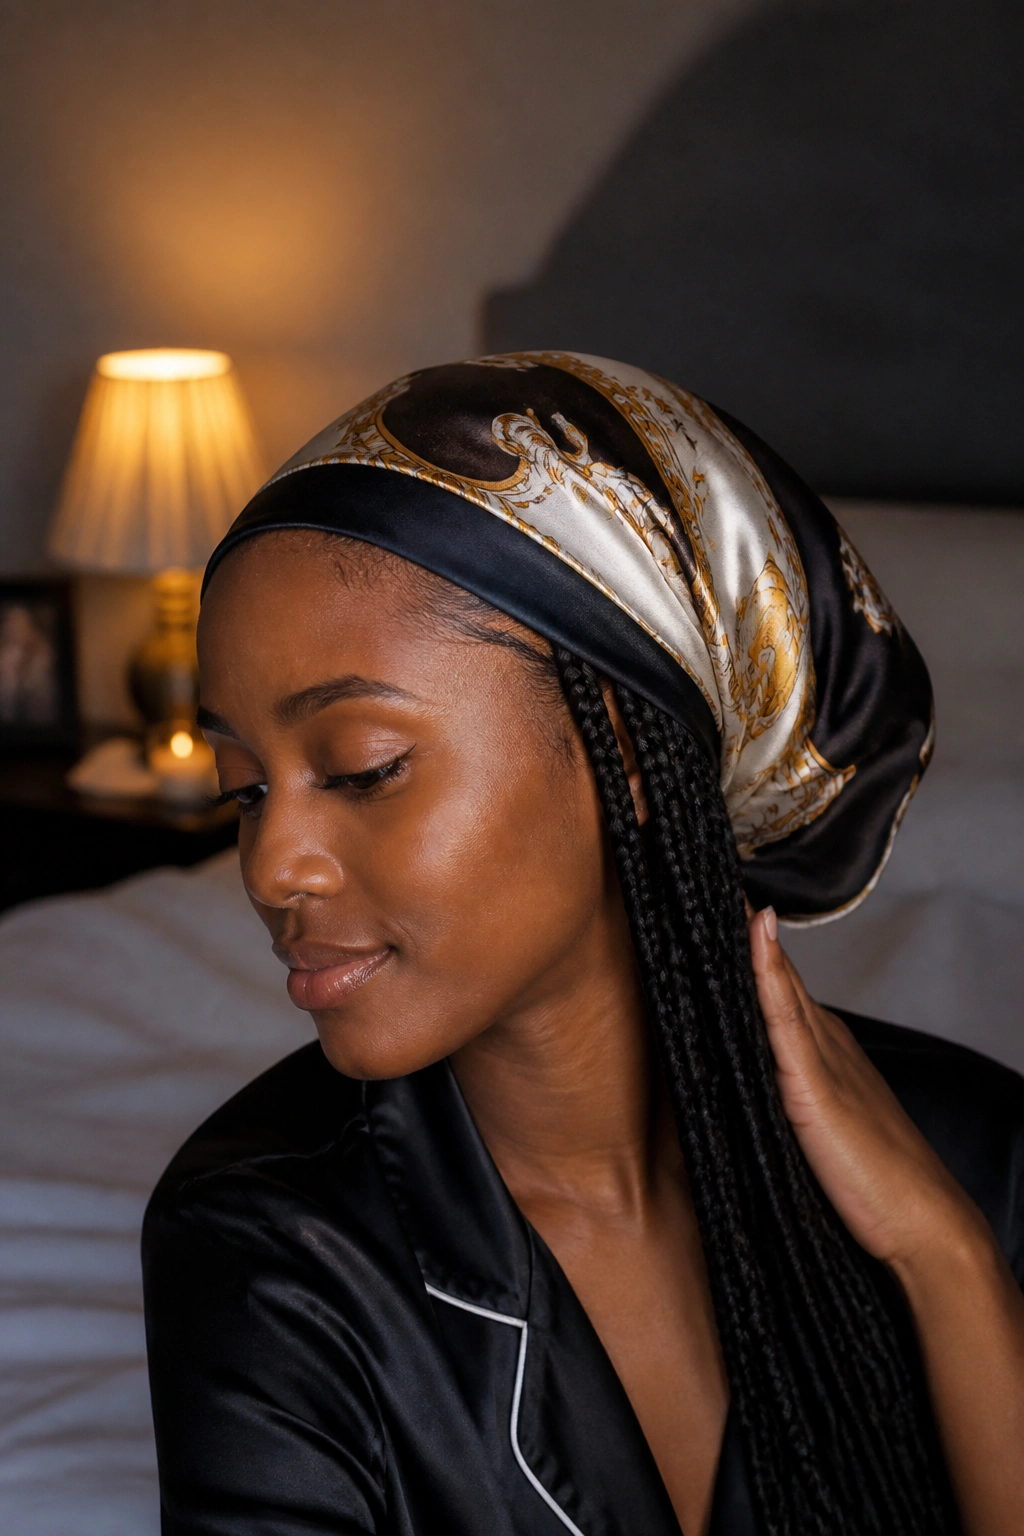
The difference between braids that look good for three weeks and braids that look good for eight weeks is what you do at 10:00 PM. Friction is the enemy of natural hair. As your 4C hair starts to grow out, it will naturally want to “fuzz” around the base of the braid.
Step 1: Lay the edges. If you use edge control, wipe off the old product with a damp cloth before bed so it doesn’t “cake” up. Step 2: Oil the scalp. A quick touch of oil keeps the skin from getting tight. Step 3: The Scarf. This is the most important part. Use a silk or satin scarf to tie down the first three inches of your hair. This keeps the roots flat and prevents the “new growth” from looking messy too soon. Step 4: The Tube. As mentioned, put the rest of the length in a silk tube or long bonnet.
This routine sounds like a lot, but it takes three minutes. It will save you from having to take your braids out early because the roots look “done.”
When to Take Them Down
I know it’s tempting to push that appointment to the ten-week mark to save money, but please, for the love of your edges, do not do it. Most stylists recommend a maximum of eight weeks for box braids on natural hair.
The reason is “matting.” As your natural hair sheds (we lose about 100 hairs a day!), those shed hairs get trapped at the root of the braid. Over time, they start to “lock” with the hair that is still attached to your head. If you leave them in too long, you’ll end up with a small “dreadlock” at the base of every braid. Removing these without causing massive breakage is nearly impossible.
When you see the braid “hanging” more than an inch away from your scalp, it is time. The weight is no longer being supported by a large section of hair; it’s being supported by just a few strands. This is how “braid baldness” happens. Be disciplined. Take them down, give your hair a deep treatment, and let your scalp breathe for at least two weeks before your next install.
Final Thoughts
Long box braids are more than just a style; they are a ritual of the natural hair community. They offer us a break from the daily labor of detangling and styling, while giving us a look that is undeniably regal. Whether you choose the sleekness of jet black waist-length braids or the bohemian whimsy of curly-ended gypsy braids, the key is always in the care of your own hair underneath.
I’ve found that the best braids aren’t the ones that look perfect on day one, but the ones that are still protecting a healthy, thriving head of natural hair on day forty-five. Take the time to find a braider who respects your hairline, invest in the right silk accessories, and don’t be afraid to play with length. After all, the “swing” of a long braid is a joy that every naturalista should experience at least once.
Remember that your hair’s health is the priority. If a style feels too heavy or too tight, speak up. No aesthetic is worth the loss of your edges. Treat your braids with care, and they will return the favor by giving you weeks of effortless, stunning confidence.