Medium box braids have one useful trait that gets ignored: they can turn into an updo without looking overworked. Long braids can feel bulky, and tiny braids can take forever to pin. Medium box braids sit in the middle, which is exactly why so many box braid updos start there.
They hold a shape without turning your head into a brick. They also give you room to play — a crown bun looks clean, a side chignon feels softer, a half-up knot can look easy even when it took a few pins and a little patience. The trick is not forcing the braids into one pose. It’s choosing a style that works with their weight and texture instead of fighting it.
That weight matters. Pull too hard at the hairline and the style starts looking tight in the wrong way; leave too much slack and the whole thing droops by lunchtime. Fresh braids, older braids, braids with a clean center part, braids with a little fuzz at the root — they all behave differently, and good styling starts with that fact, not against it.
Some updos want a glossy finish and a neat nape. Others are happier when a few braids stay loose around the face or the back. The first one worth trying is the crown bun.
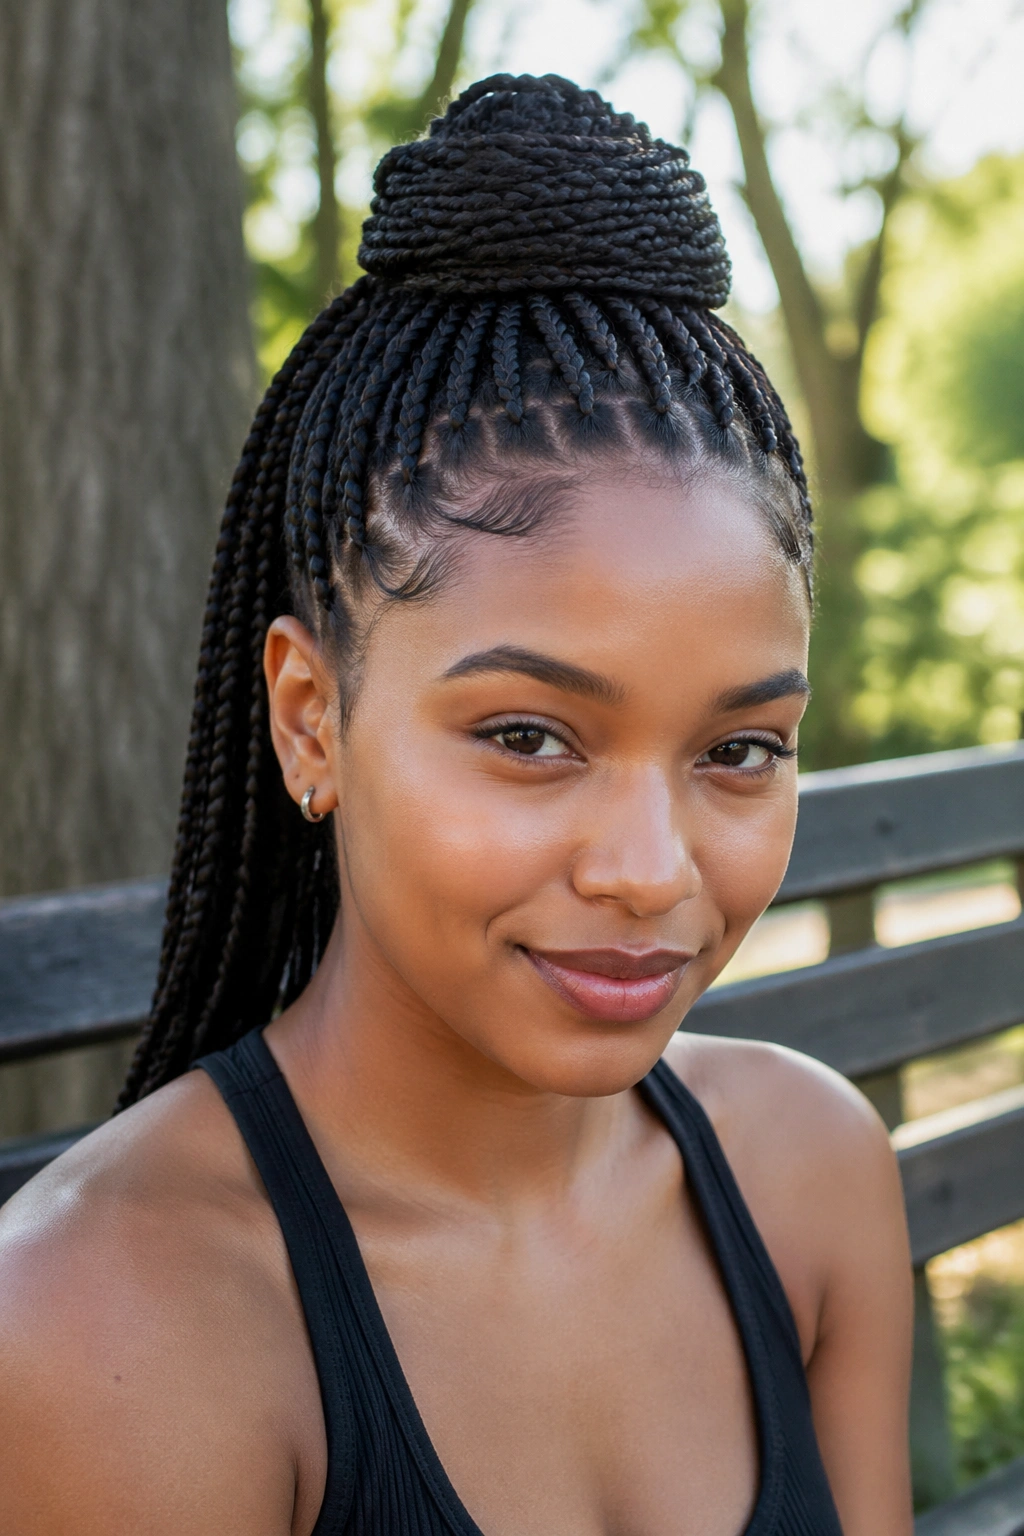
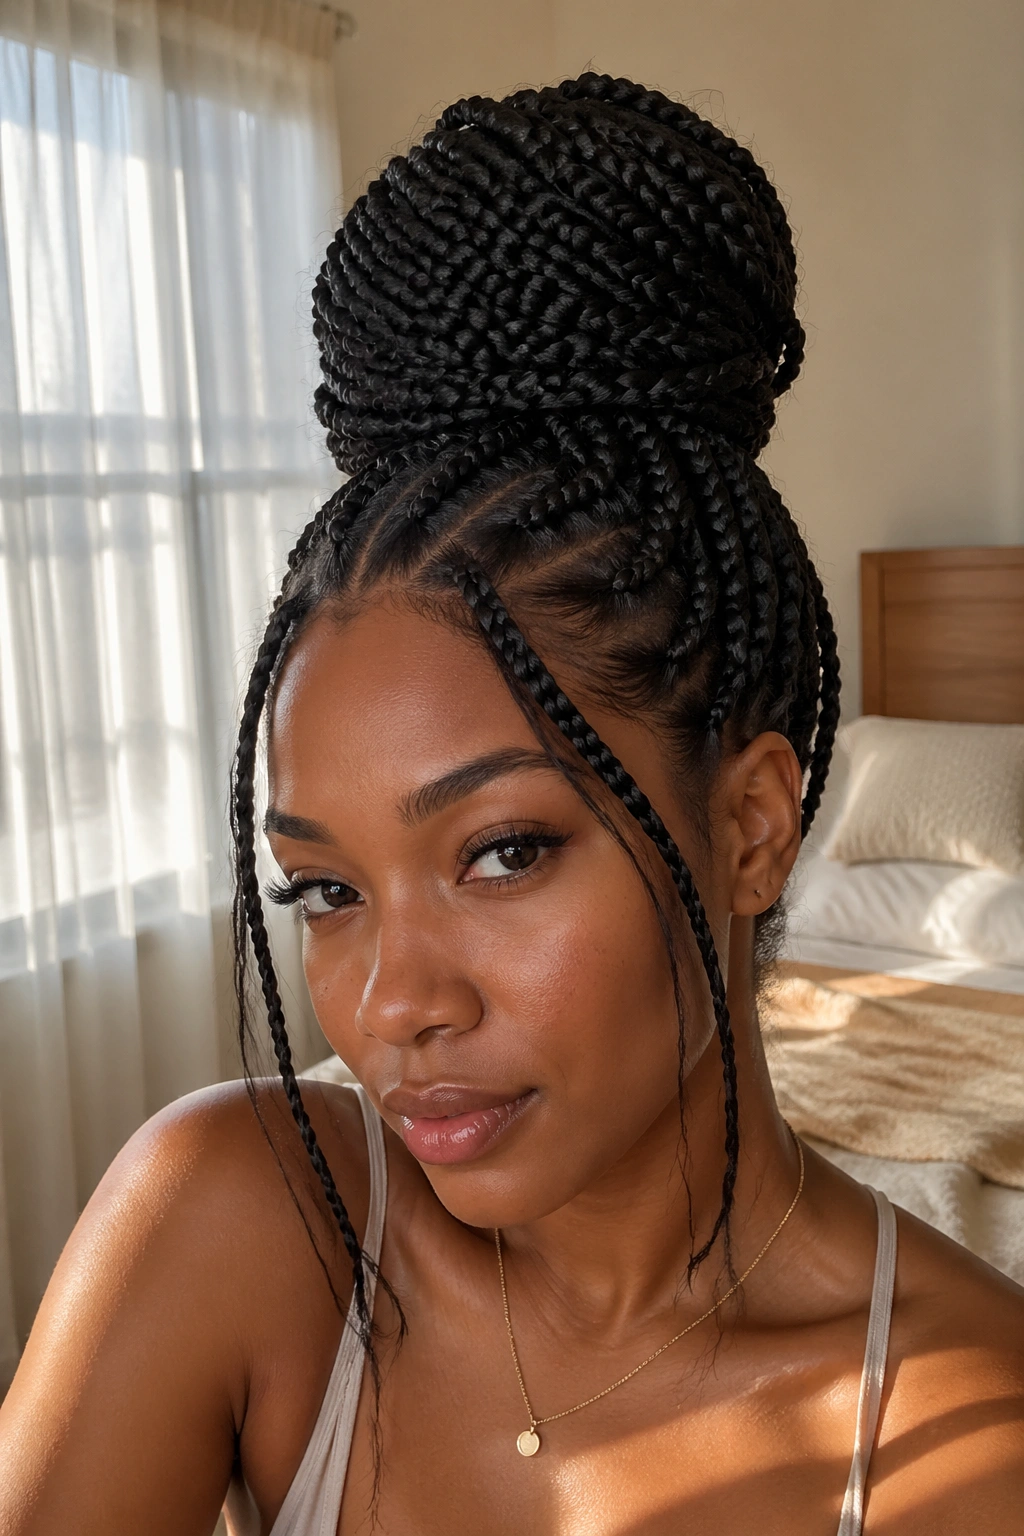
1. High Crown Bun
A high crown bun is the style I reach for when I want my medium box braids off my neck and out of the way, but I still want the shape to feel deliberate. It sits at the highest point of the head, which gives the face a clean frame and keeps the whole style from sagging into the back of the skull.
Why It Holds So Well
The braid texture helps here. Medium box braids have enough grip for pins to catch, and enough body to build a bun that doesn’t disappear into itself. Gather the braids at the crown, secure them with a snag-free elastic, twist the length once, then wrap it around the base and pin the edges into the bun as you go.
Pins matter more than product here. Use 4 to 6 U-pins if the braids are dense, and slide them in where one braid crosses another so they disappear into the weave. A soft scrunchie helps the base stay comfortable. A hard elastic can dig in fast.
- Best for: hot days, busy mornings, and outfits that need a sharp neckline.
- Tools: one elastic, 4 to 6 pins, a soft brush, a touch of edge control if you want it.
- Shape note: keep the bun slightly oval so it sits flat against the head instead of ballooning upward.
- Watch-out: don’t pull the ponytail too tight at the front; that’s where the style starts to feel wrong.
Bold tip: If your braids are fresh, place the bun a touch lower than you think. Fresh installs sit tighter at the root and usually need a little breathing room.
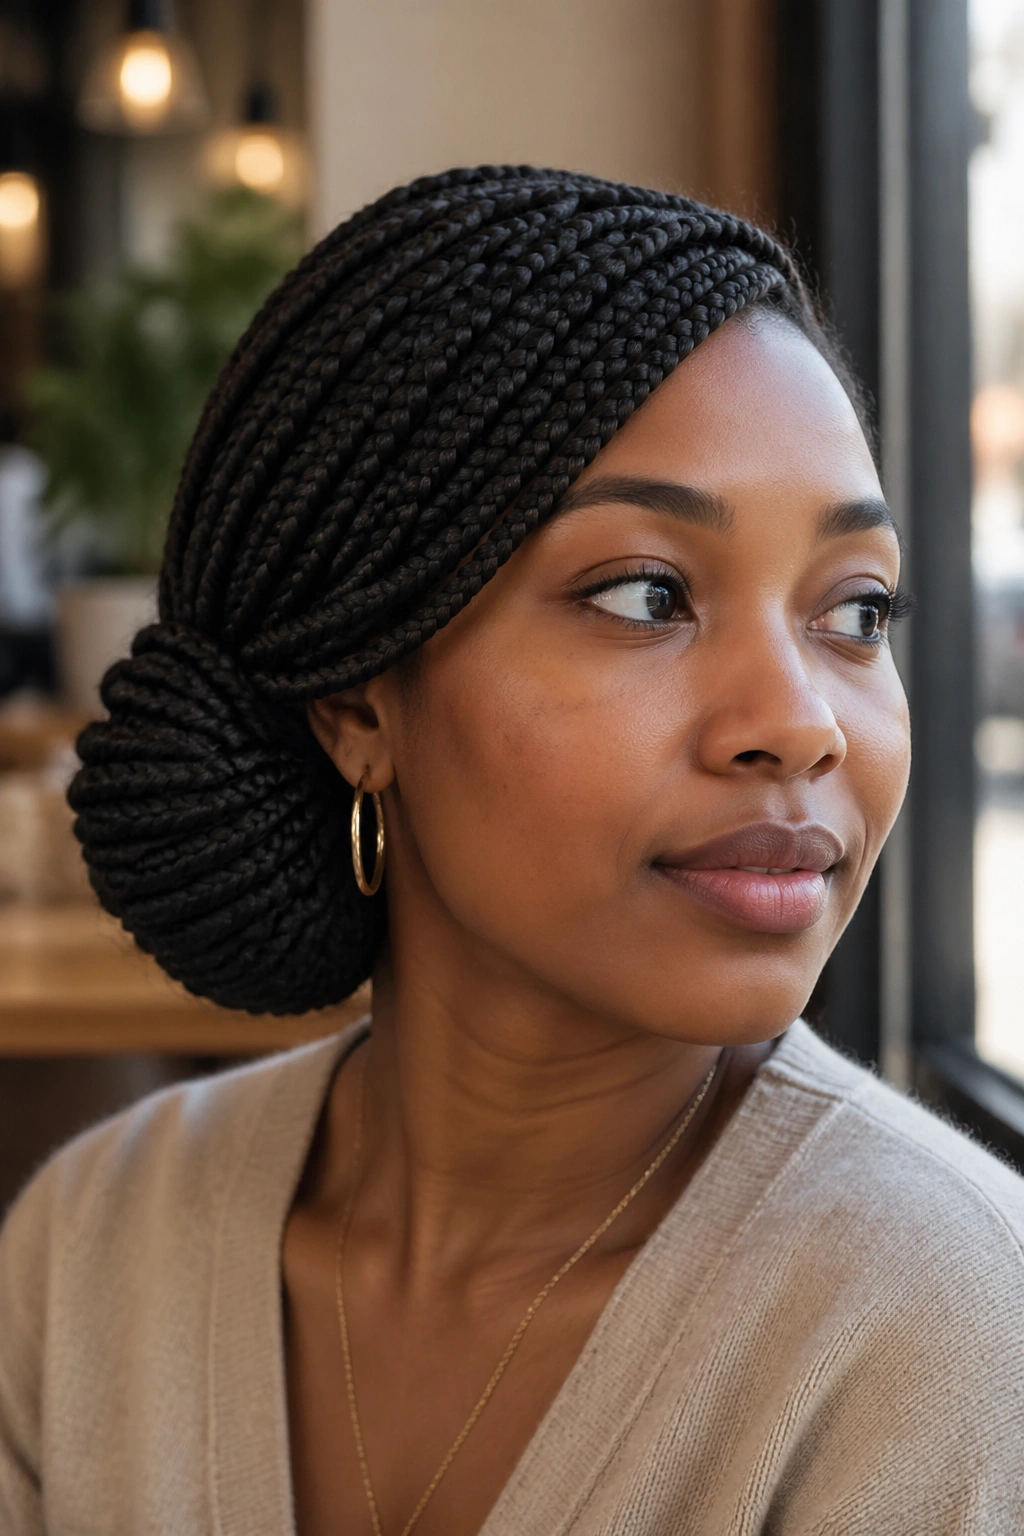
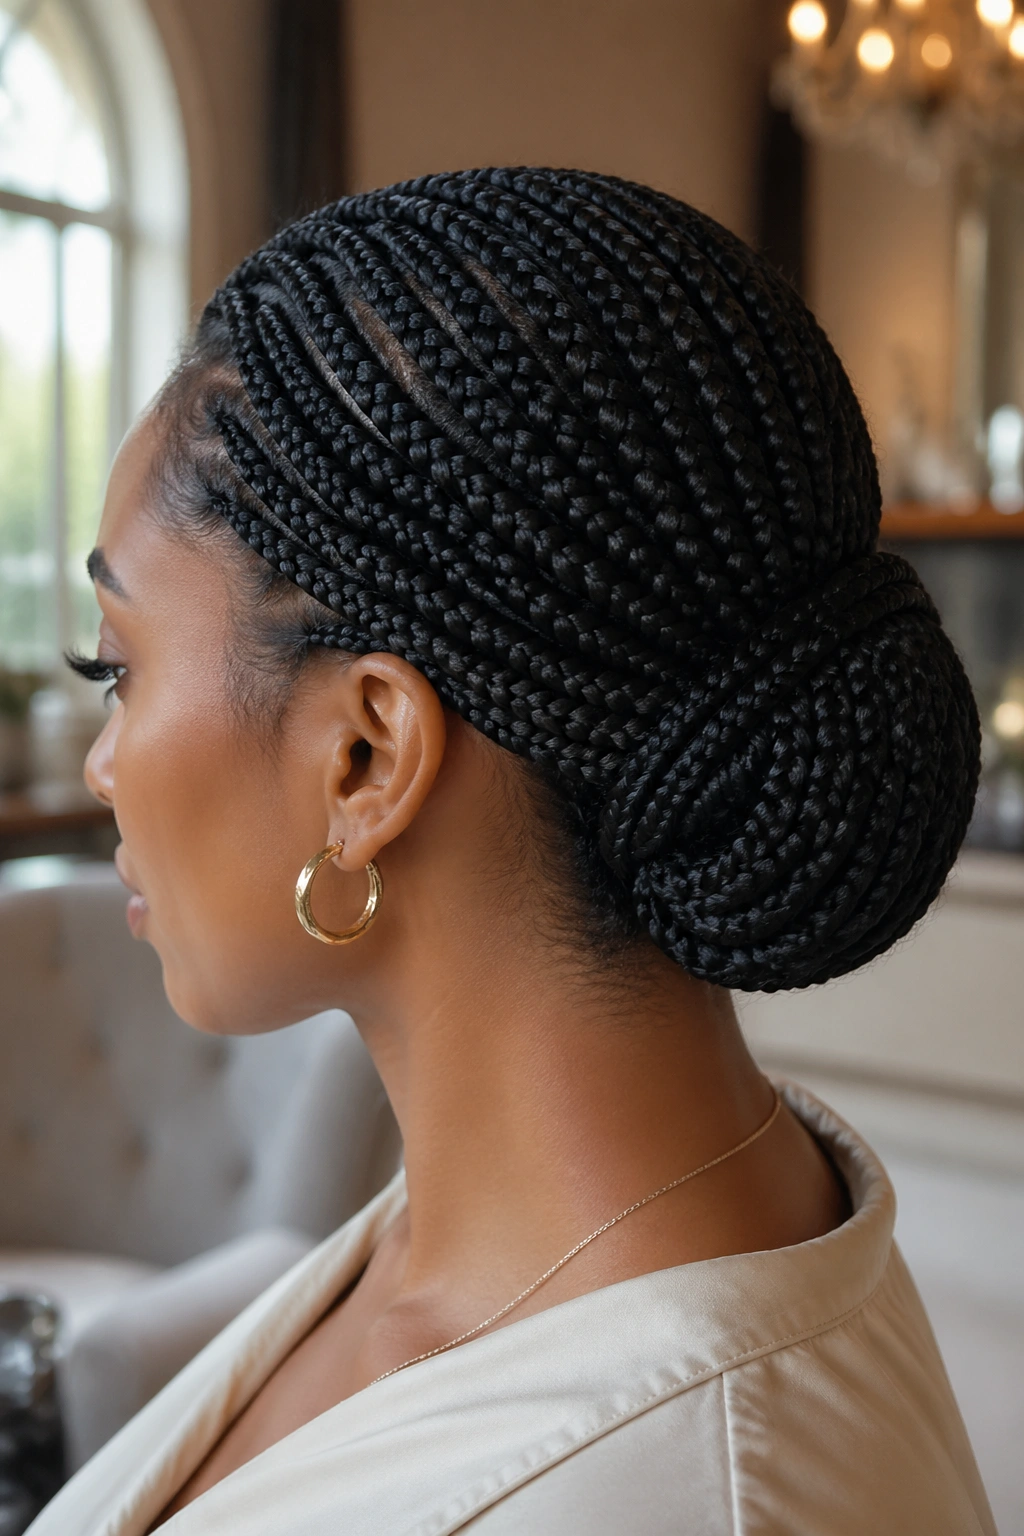
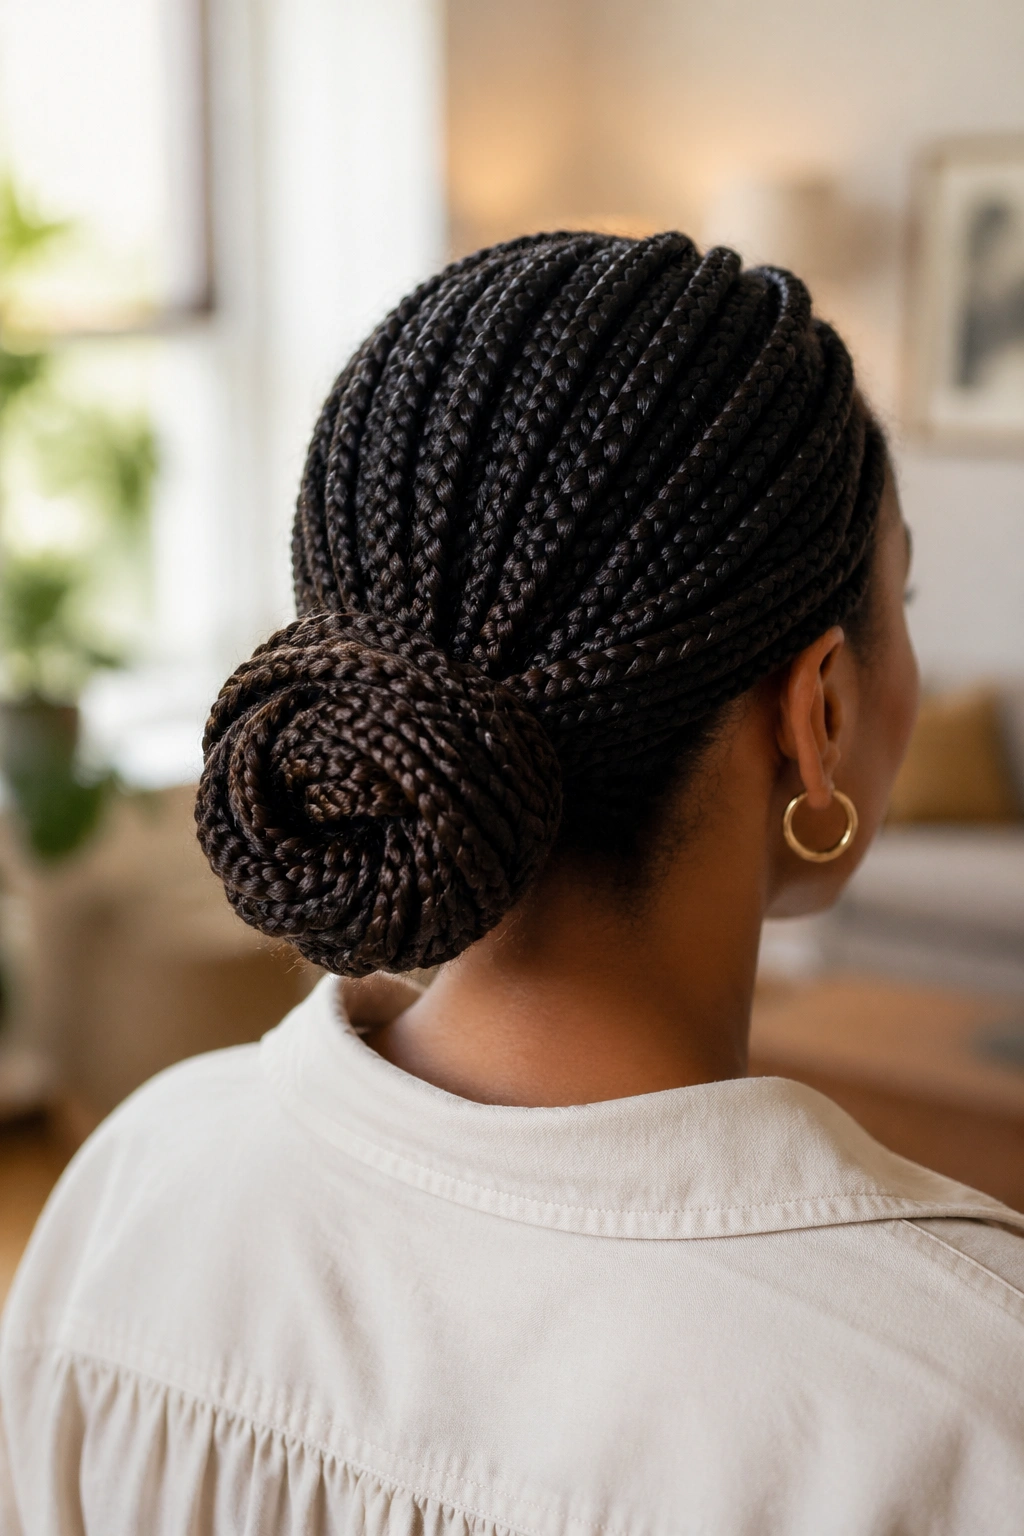
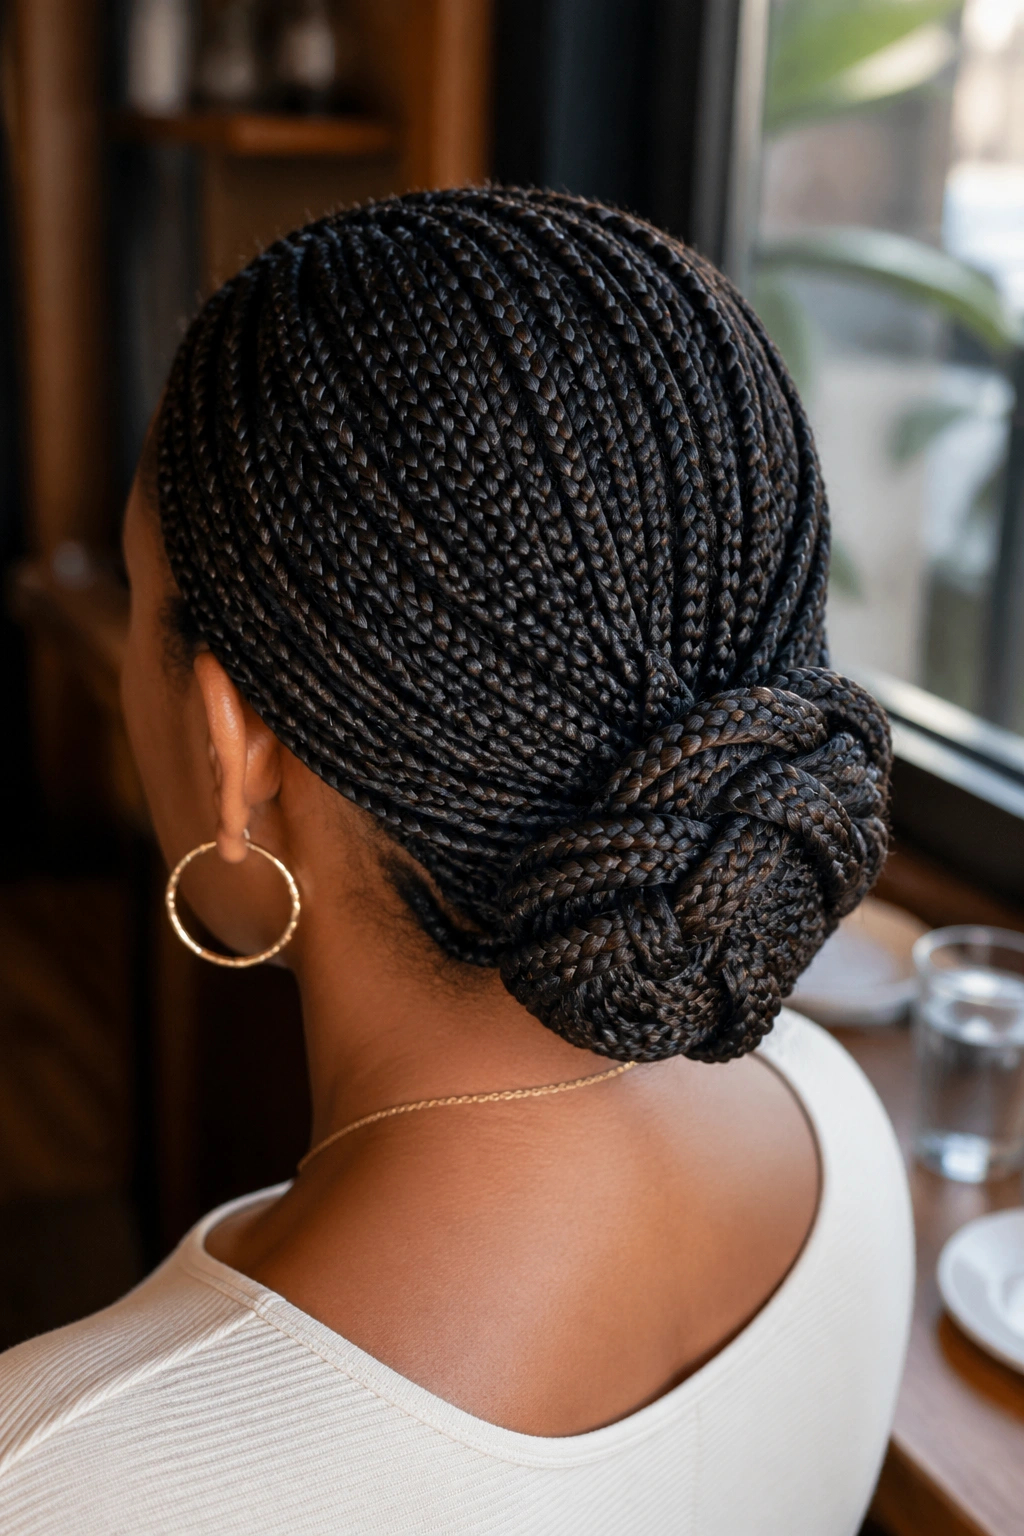
2. Low Wrapped Bun
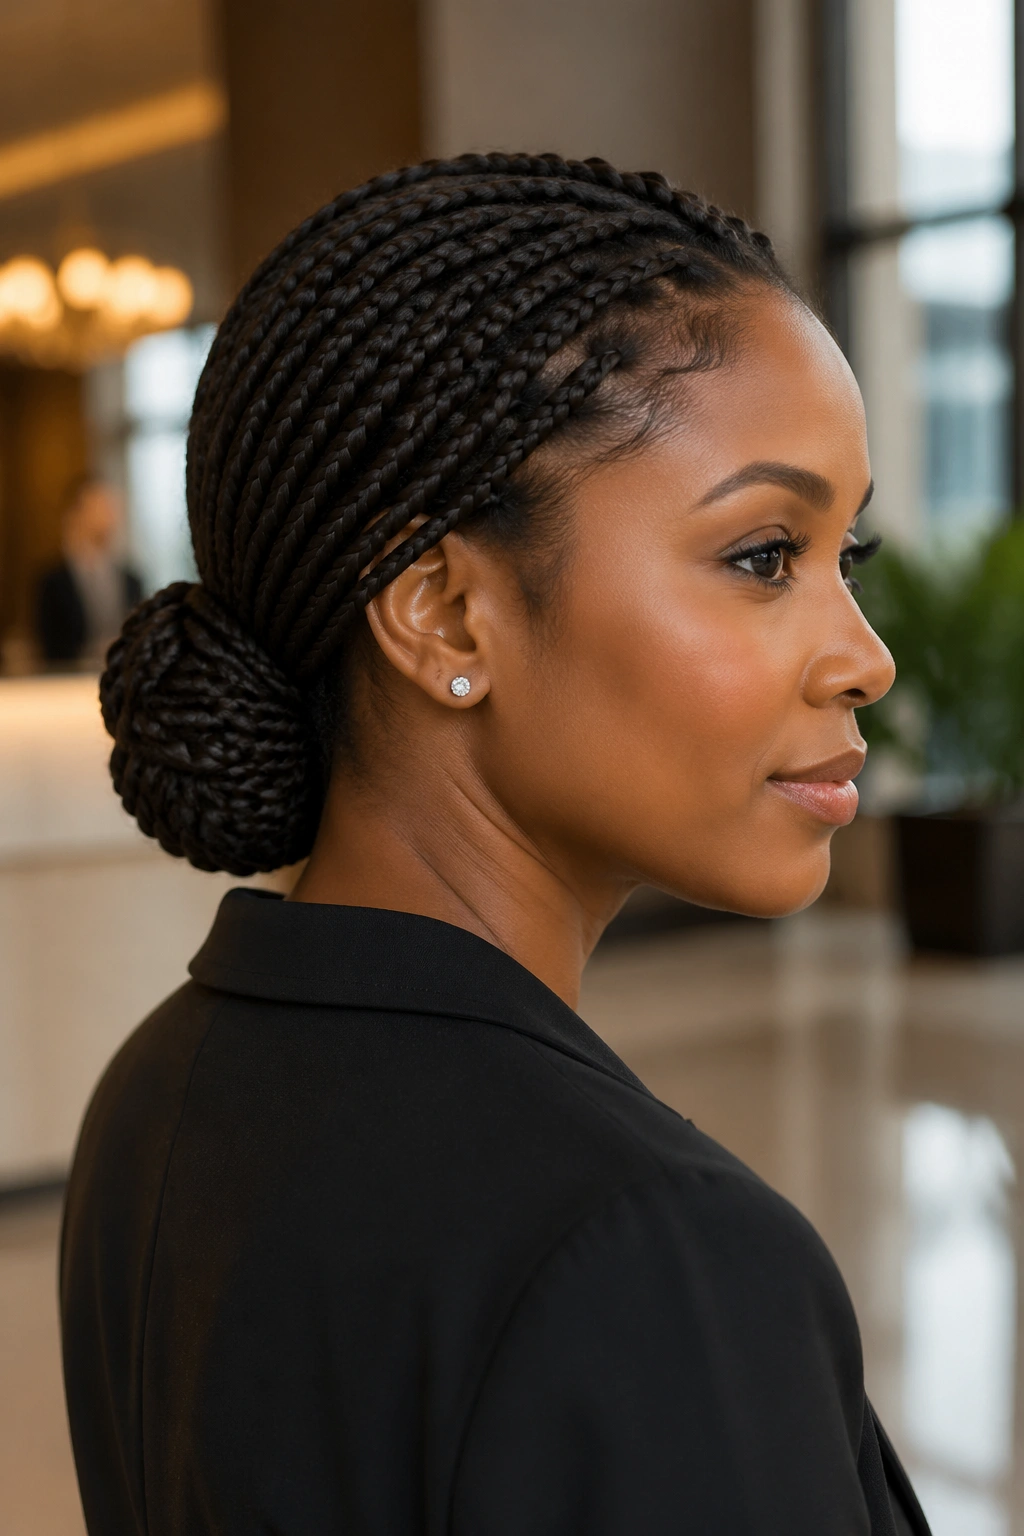
One good low bun can save an entire week of styling decisions. This version sits at the nape, which makes it feel quieter than a crown bun and easier to wear for long stretches. It’s also one of the easiest medium box braid updo styles to make look neat without a lot of fuss.
The move is simple. Pull the braids into a low ponytail, split the tail into two sections, and wrap each section around the base in opposite directions. That little cross-wrap keeps the bun from feeling flat or lopsided. Pin the ends underneath where the bun meets the scalp, not just on the outside where they can pop loose.
I like this style when I want the braids to look polished under a blazer or a simple knit top. It also sits well with hoop earrings because the bun stays low enough to show the neck and jawline. If the roots are a little fuzzy, smooth only the front half of the hairline with a tiny bit of gel on your fingertips. Too much product makes the braid pattern stiff, and that ruins the charm.
Compared with the high crown bun, this one feels steadier. Less head weight. Less drama. More staying power, which is probably why it gets repeated so often.
3. Side-Swept Bun
Want something softer than a straight-back bun? Sweep the braids over one shoulder first, then tuck the length into a side-swept bun near the jawline or just under the ear. The off-center placement changes the whole mood. Suddenly the style feels less severe and a little more intentional.
What Keeps the Sweep from Sliding
The first anchor pin goes in before the bun shape is built. Hold the braids against the side of the head and pin the base near the ear or just above it, then add two more pins across the nape so the sweep has a flat path to follow. Once the hair has that line, the bun itself becomes easier to manage.
A side-swept bun looks especially good with a side part, but it can work with a center part too if the front is kept neat. The point is the imbalance. One side gets more volume, the other side opens up the face. That asymmetry can soften a sharp outfit or balance a strong neckline.
If you want a little more edge, leave one braid hanging at the front and tuck the rest back. If you want cleaner lines, wrap the bun tighter and place the pins low enough that nothing pokes. Either way, this is one of those styles that looks more complicated than it is.
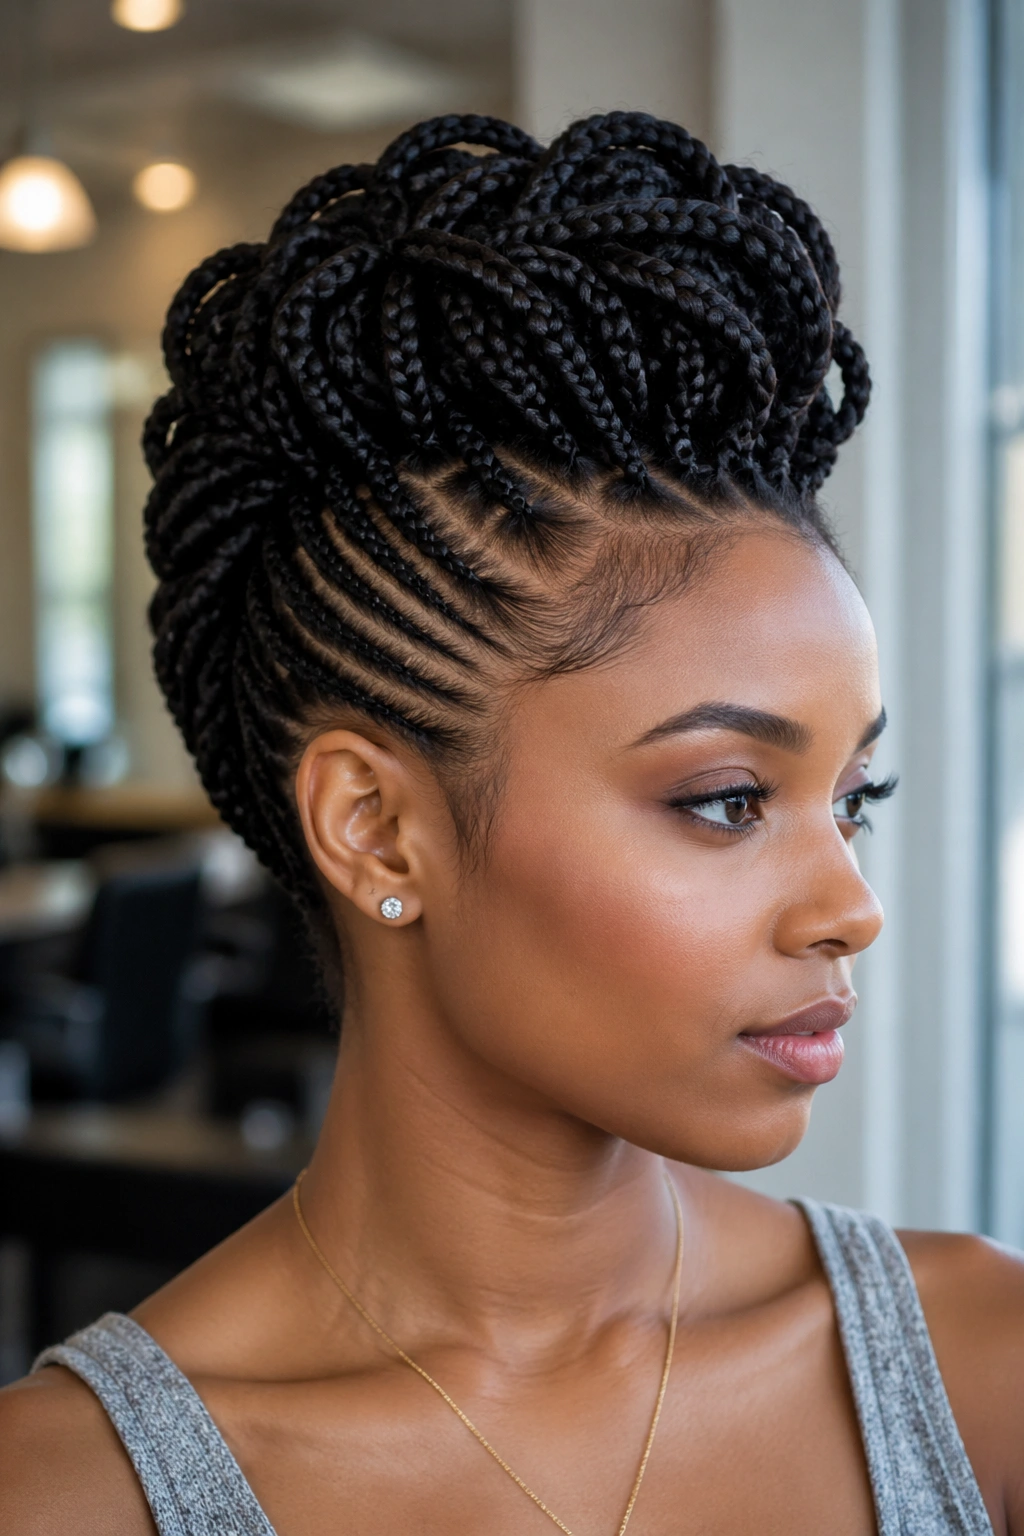
4. Halo Crown Updo
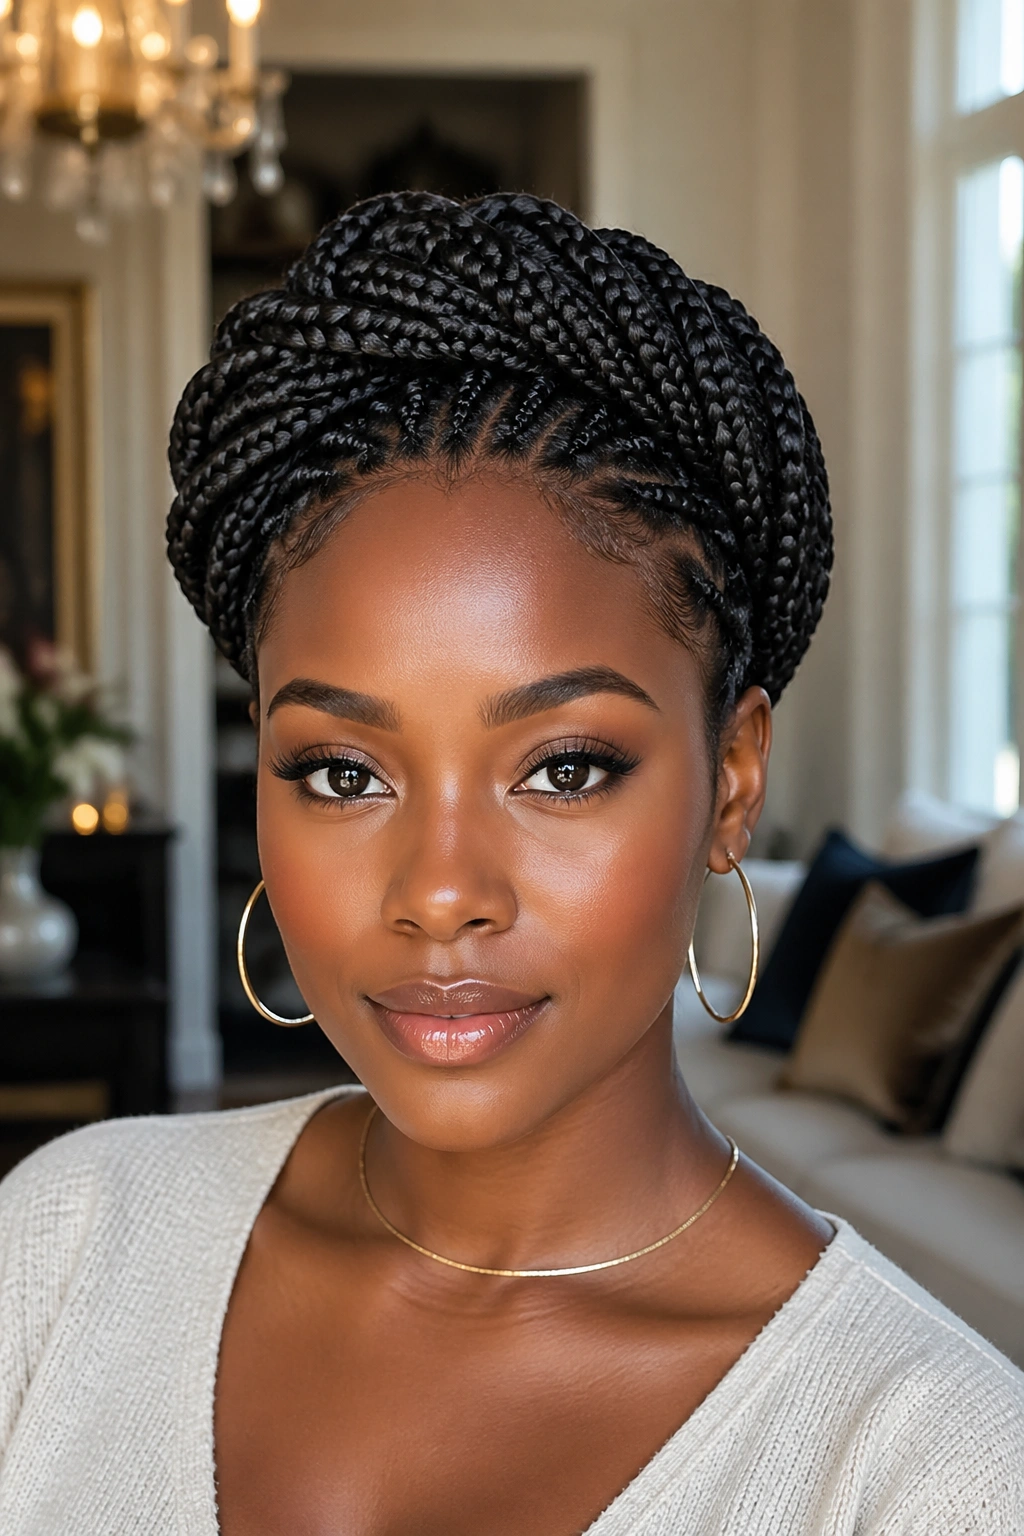
If braids keep slipping out of top knots, a halo crown updo can feel like a relief. The hair travels around the head instead of up and down, which gives the style a steady shape and keeps the weight distributed more evenly. It also creates that wrapped, crown-like frame that makes medium box braids look fuller without looking crowded.
The basic shape is a loop that follows the hairline from temple to temple. Gather the braids at one side, sweep them around the crown, and tuck the ends under the opposite side where they can be pinned beneath another braid. The trick is to keep the loop snug enough to hold its shape, but not so tight that it leaves hard lines at the hairline.
A halo style works well with neat braid ends, because the tucked sections sit closer to the head when they’re smooth. If the ends are frayed, a small cuff, a wrapped elastic, or even a few hidden pins can hide the rough spots. Gold cuffs at the temples look good here. So does a clean middle part.
- Best for: events, dresses with open necklines, and days when you want the braids to feel “done.”
- Tool loadout: 8 to 10 pins, one elastic, and a rat-tail comb for sectioning.
- Watch-out: don’t leave the loop too loose; halo styles lose their shape fast if the base wobbles.
It’s an old shape, sure. Still works.
5. Half-Up Top Knot
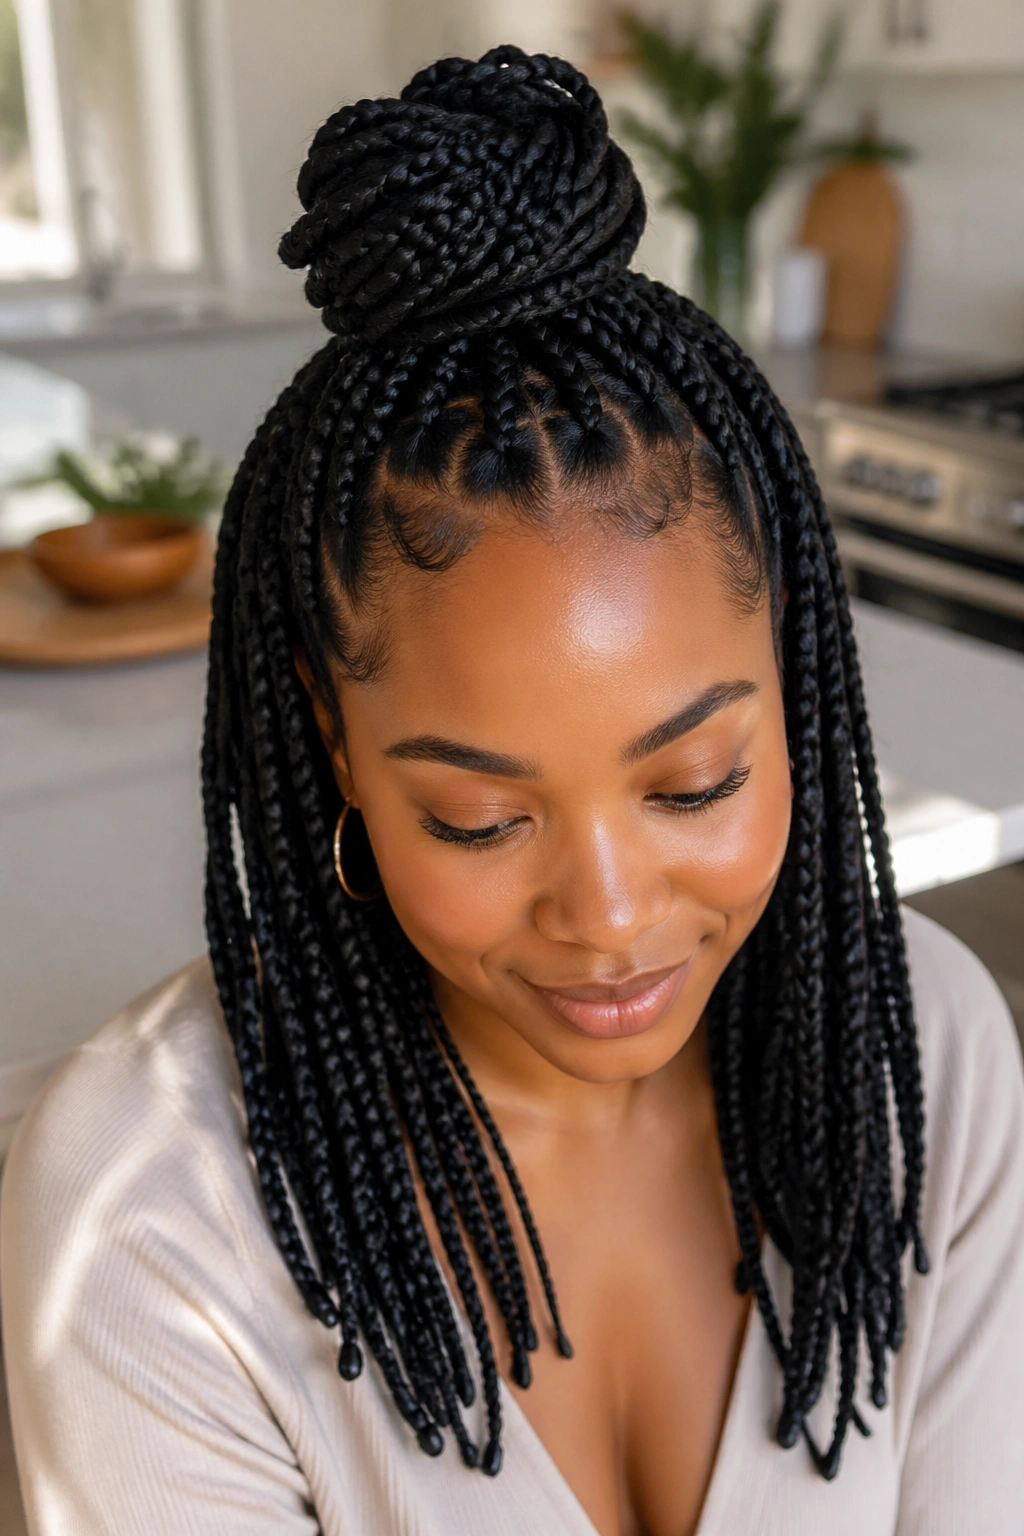
A half-up top knot is the style I recommend when the scalp wants less pressure but the face wants some lift. You keep the bottom half of the medium box braids down, which preserves movement, then gather the top section into a knot or mini bun at the crown. It feels lighter than a full updo, and that matters on days when the braids themselves already do enough.
The cleanest version starts with an ear-to-ear section. Pull only the braids above that line into a ponytail, secure them, and twist the length into a knot. You can wrap the ends around the base or let a few braid tails peek out for a looser finish. Both look good. The second option is better when the hair is a little older and the roots need camouflage.
This style is forgiving, which is part of why people keep coming back to it. The bottom half hides frizz near the scalp. The top knot gives shape. The rest of the braids can swing freely, which keeps the style from feeling too locked in. It’s one of the few updos that still feels like you’re wearing your braids, not fighting them.
One small warning: if the knot sits too far back, the style can look accidental. Keep it high enough to read as a top knot, not a half pony.
6. Braided Pony Coil
Unlike a regular ponytail, a braided pony coil doesn’t leave the ends swinging around and catching on your collar. The whole thing sits compactly, and the coil at the base gives the style a finished shape instead of that “I threw this together in the mirror” look. It’s one of my favorite practical medium box braid updos because it moves with you without coming apart.
Pull the braids into a mid-height ponytail, then wrap the length around the elastic in a wide spiral. Don’t wind it like string. Let the braid texture stay visible. That’s the part that makes it feel full. Pin the tail every few inches as you go so the coil sits close to the head and doesn’t slide outward.
This style works especially well on active days. Errands, travel, long walks, crowded commutes — it handles all of that without needing a lot of fixing. If your braids are thick, use a bungee cord or a strong snag-free tie for the base before adding pins. A single weak elastic can stretch out fast under that weight.
The look is tidy, but not stiff. That’s the charm. It feels like a real style, not a compromise.
7. Faux Mohawk Updo
A faux mohawk looks sharper on medium box braids than on straight hair. The braid ridges already create structure, so the style doesn’t need much help to look bold. You end up with a center strip of volume and smoother sides, which gives the whole head a long, lifted shape.
How to Keep the Sides Flat
Start by smoothing the side sections back toward the nape with your hands, then pin them in a line that follows the curve of the head. Use a little gel on the fingertips if the front pieces keep springing loose. A toothbrush can help with the baby hairs, but keep the product light. Heavy edge control makes the sides shiny in a way that fights the braid texture.
The center section can stay high and full. Gather it into one long ridge, or split it into two stacked loops if you want more height. The point is the silhouette. The sides stay tight; the middle does the talking.
- Best for: concerts, statement outfits, and days when subtle is not the goal.
- Works best with: medium braids that have some body at the ends.
- Pin count: expect to use 6 to 8 pins, maybe more if the braids are dense.
- Watch-out: this style needs a little time. Rushing it usually leaves the side sections crooked.
It’s not the shy option. That’s fine.
8. Double Low Buns
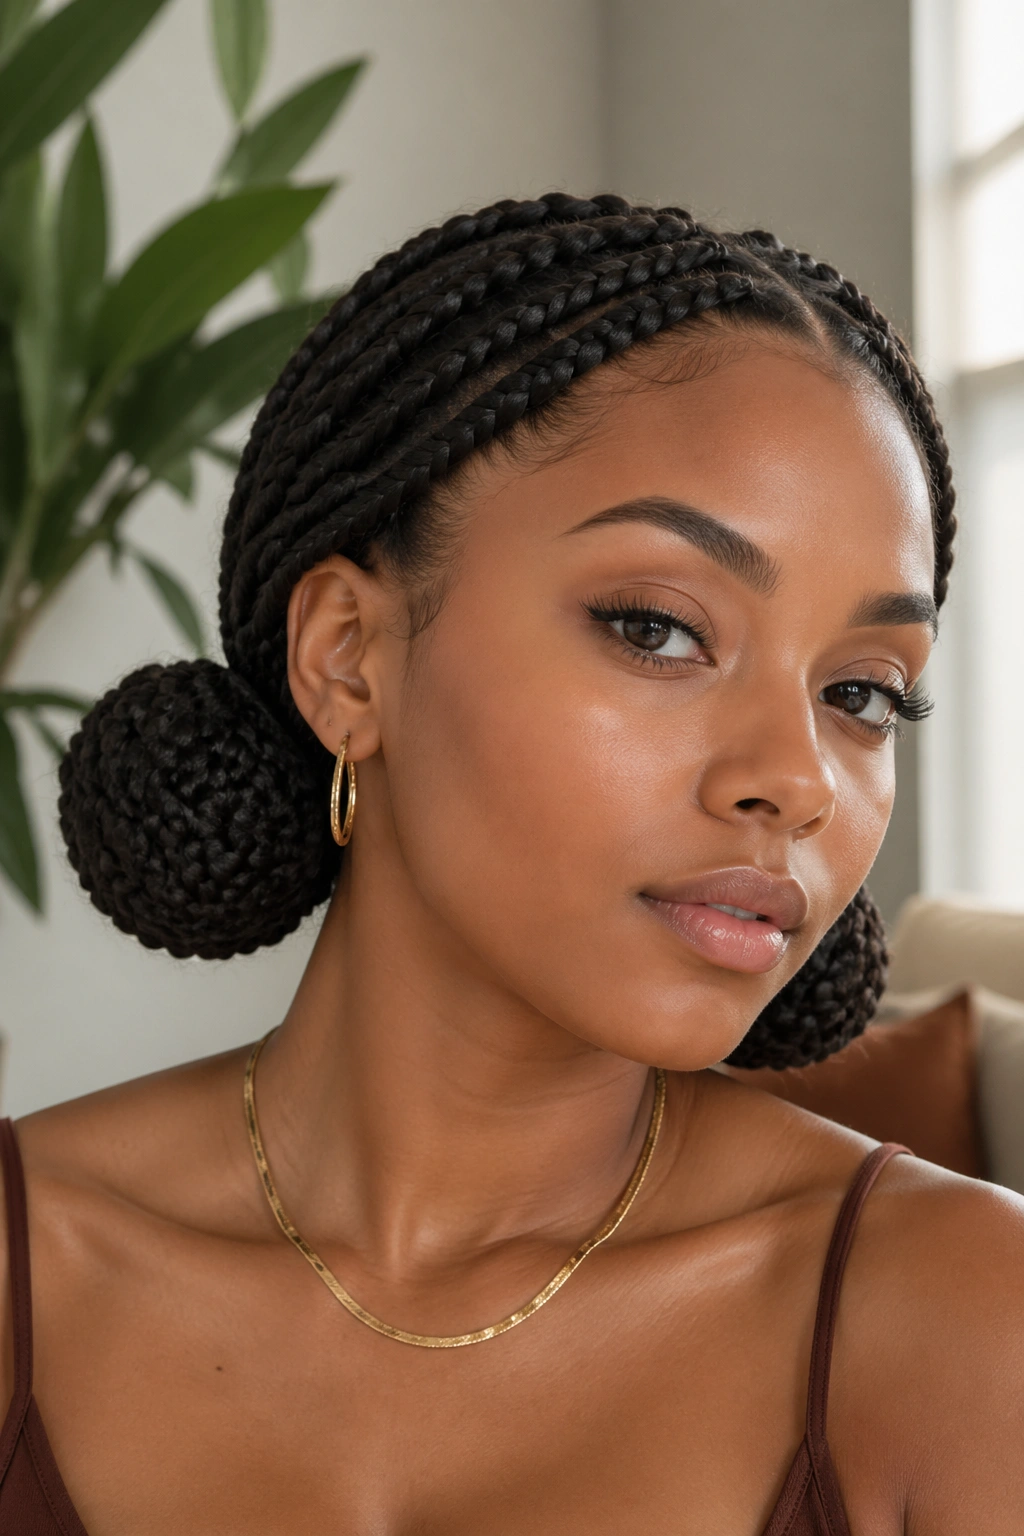
There are days when one bun feels too heavy and loose hair feels like too much. Double low buns solve that problem fast. They balance the weight across the head, which makes the style feel lighter than a single big bun even when the braids are full.
Split the braids down the middle and build two buns behind the ears or just above the nape. Keep the size even, or the whole thing starts looking lopsided. I like to make each bun about palm-sized, then flatten the outer edge a little so the buns sit close to the head instead of sticking out like knobs.
- Why it works: the weight is split in half, so each bun puts less pull on the scalp.
- Best for: thicker medium box braids that feel bulky in one knot.
- Accessory idea: ribbon ties, gold cuffs, or a simple center part.
- Watch-out: pin the buns in the same direction on both sides. Uneven pinning is what makes one side sag.
This is a neat style for casual days, but it can be dressed up easily. Tighten the buns, smooth the parts, add a pair of earrings, and it shifts from playful to polished without changing the basic structure. The shape is simple. The effect is not.
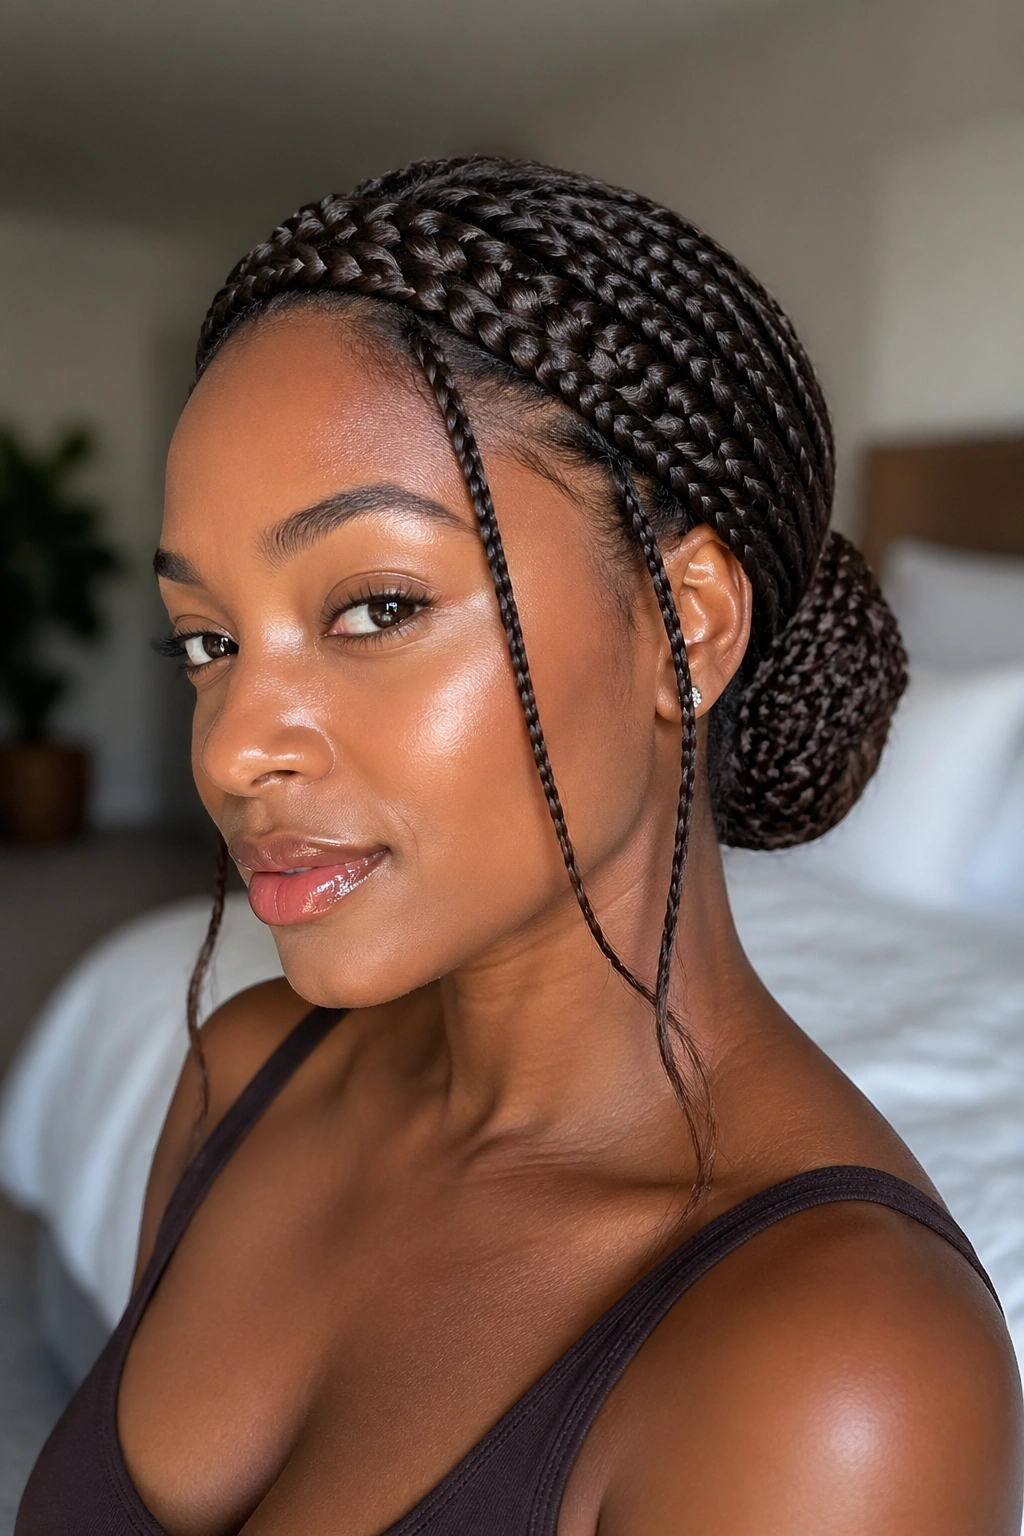
9. Nape Knot with Face-Framing Braids
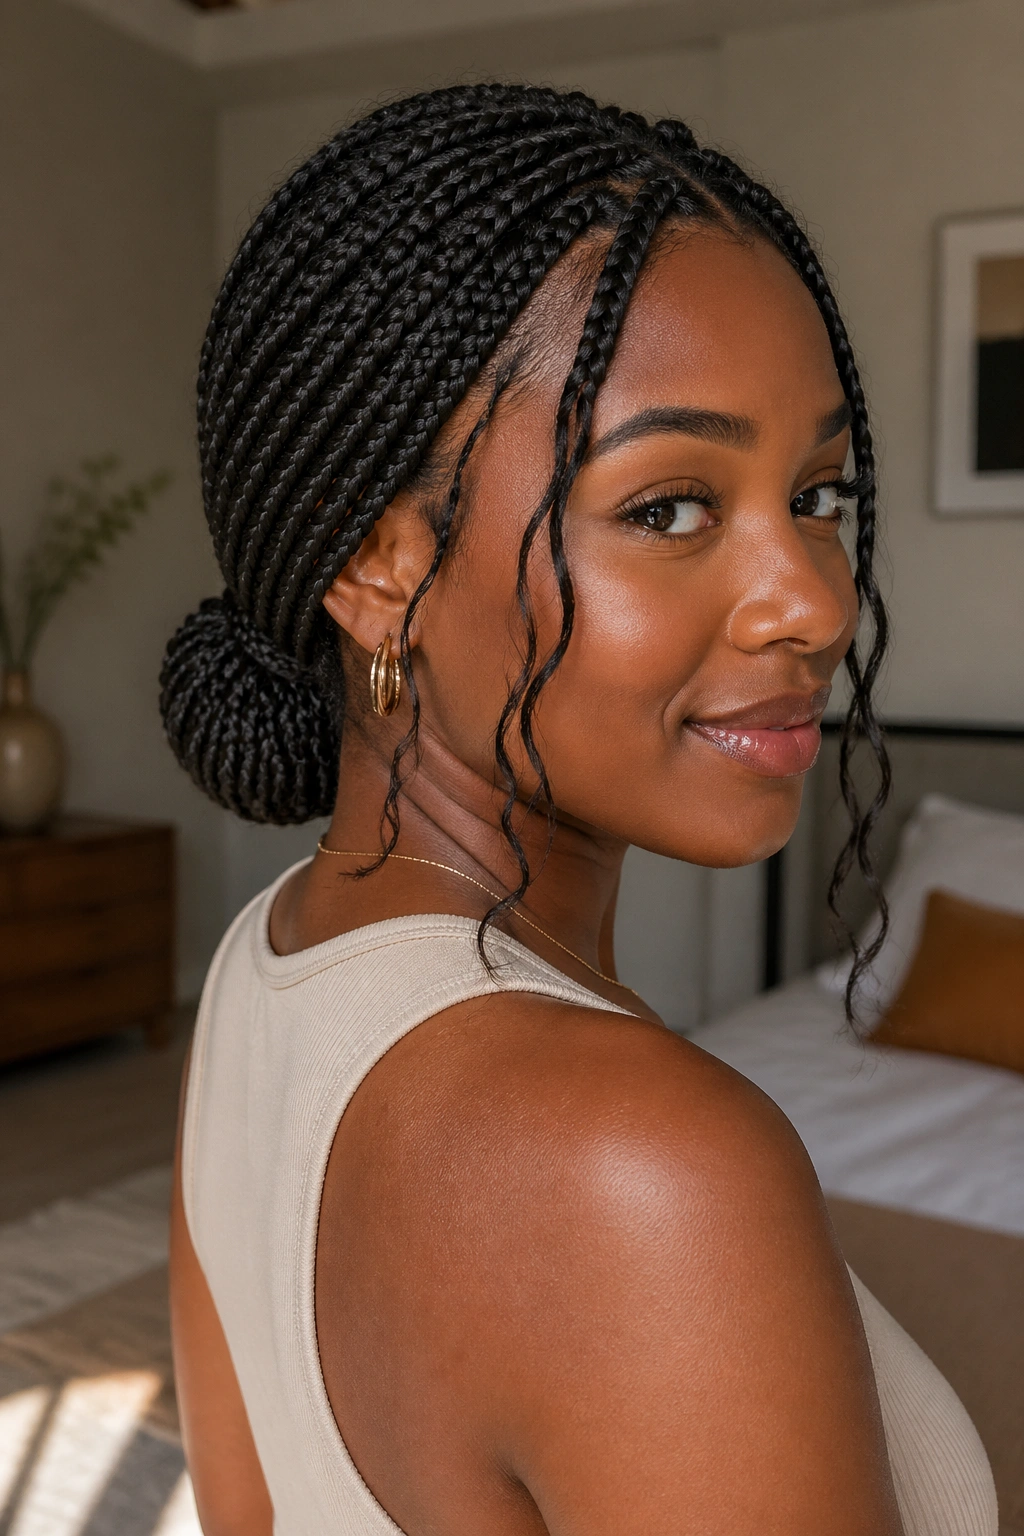
Can a low knot still feel soft? Yes — if you leave two braids in front. That’s the whole trick with this style. The knot stays anchored at the nape, but a few loose pieces at the face keep it from looking too stern.
Pull the back section into a low knot or looped bun and secure it first. Then decide how much framing you want. Two slim braids near the temples are enough for most faces. Any more than that and the front starts to feel messy instead of relaxed. The loose pieces should sit around the cheekbones or jawline, not brush your mouth every time you turn your head.
Where to Leave the Loose Pieces
The best placement is usually just outside the temples. That gives you movement near the face without blocking your features. If the braids are too short to fall naturally, pin them lightly at the back and let the ends point forward a little. That still creates softness.
This style plays well with earrings, because the open sides give the face room. It also works when you want to hide a less-than-perfect braid line at the hairline. The knot handles the structure. The face-framing braids handle the mood.
Too many loose pieces, though, and the style loses its shape. Keep it lean. That’s what makes it look deliberate.
10. Rolled Tuck Chignon
A rolled tuck feels neat in the hand before it even looks neat in the mirror. The braids fold upward and disappear into themselves, which gives the style a smooth back and a clean line at the nape. If you like polished medium box braid updos, this one earns its place.
Start with a low ponytail. Fold the lengths upward toward the base and tuck the ends under the roll until the braid tails vanish. Use U-pins rather than big bobby pins if you can; they grip the braid texture better and sit flatter against the head. Place the pins where the roll meets the scalp, not just around the outer edge.
A light mist of braid foam or a small touch of setting lotion can help the surface lie down, but do not soak the hair. Wet braids get heavy fast, and heavy braids lose shape. A satin scarf for ten minutes while you finish getting dressed can help the tuck set a little smoother.
This is the style I’d wear to something more formal, or anywhere a clean neckline matters. It does not try to be casual. That’s the point.
11. Braided Space Buns
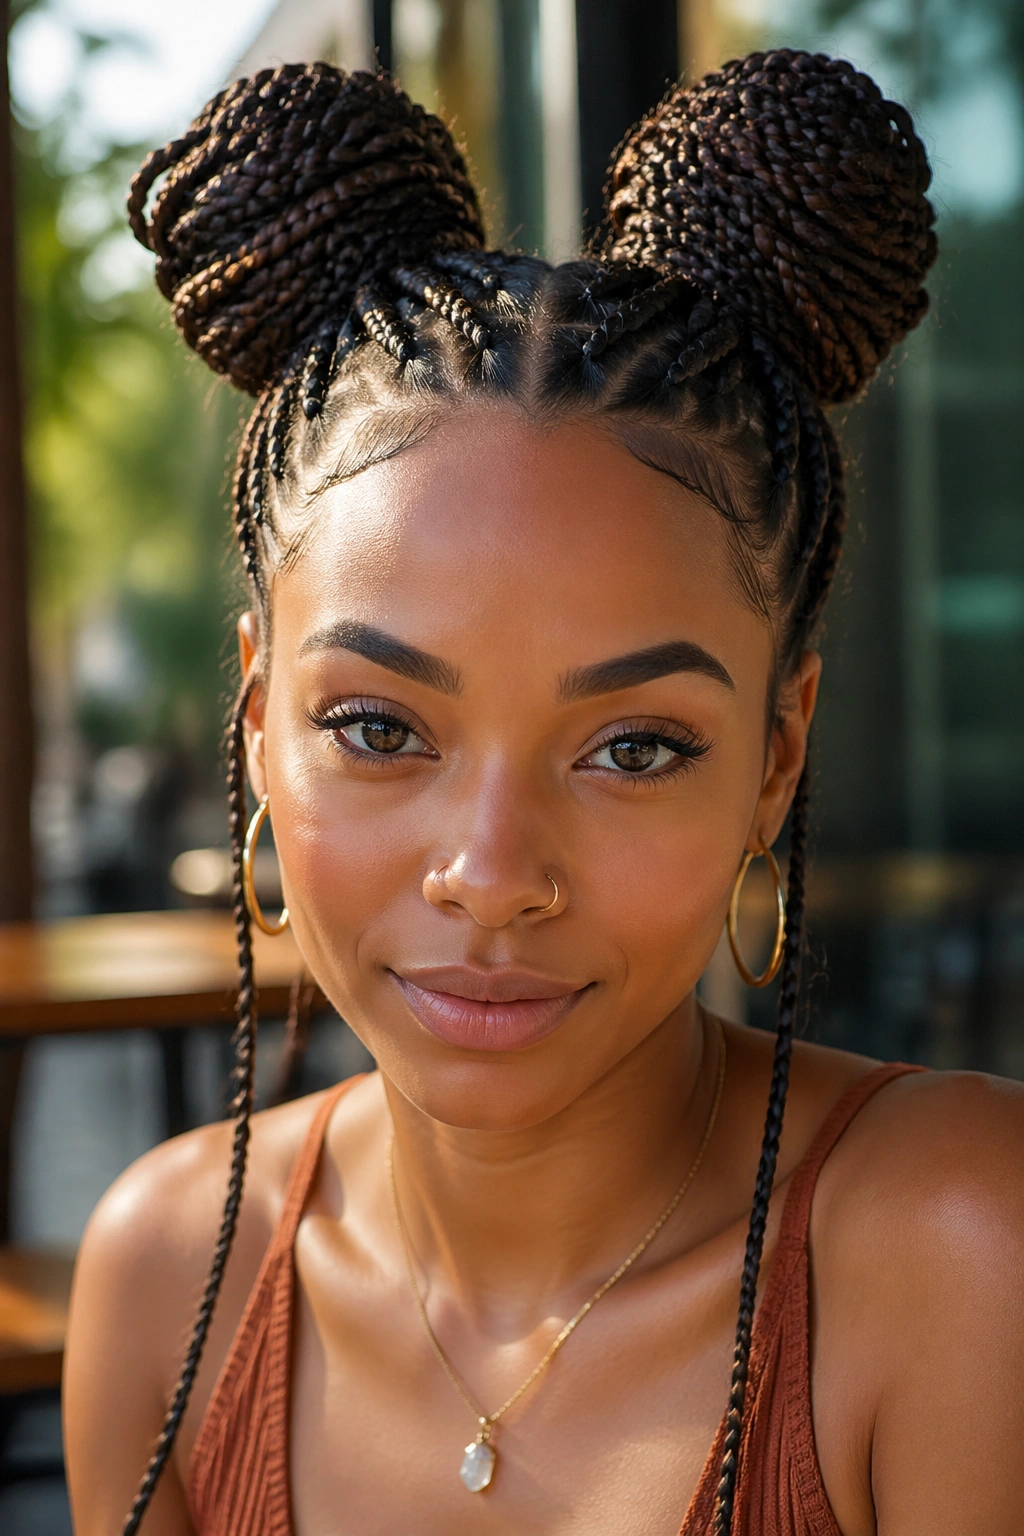
If double buns are sweet, space buns are the louder cousin. They sit higher, usually above the ears, and they make medium box braids look playful without needing a lot of extra work. The shape is a little more dramatic than a low double bun, which is exactly why it stands out.
Pull the braids into two high puffs or ponytails, one on each side, then coil each side into a compact bun. Keep them tight enough to hold but not so huge that they turn cartoonish. Medium braids already give the buns plenty of body. They do not need help getting big.
This style suits people who like a stronger silhouette. It’s also a good choice when you want the face to stay open and the neckline to stay clear. If your braids are long enough, you can wrap the tails around the bun once and pin the ends underneath. That hides the loose length and keeps the finish tidy.
Use two mirrors if you need to line the buns up. Symmetry matters here. A space bun that sits an inch higher on one side shows immediately.
12. Wrapped Side Chignon
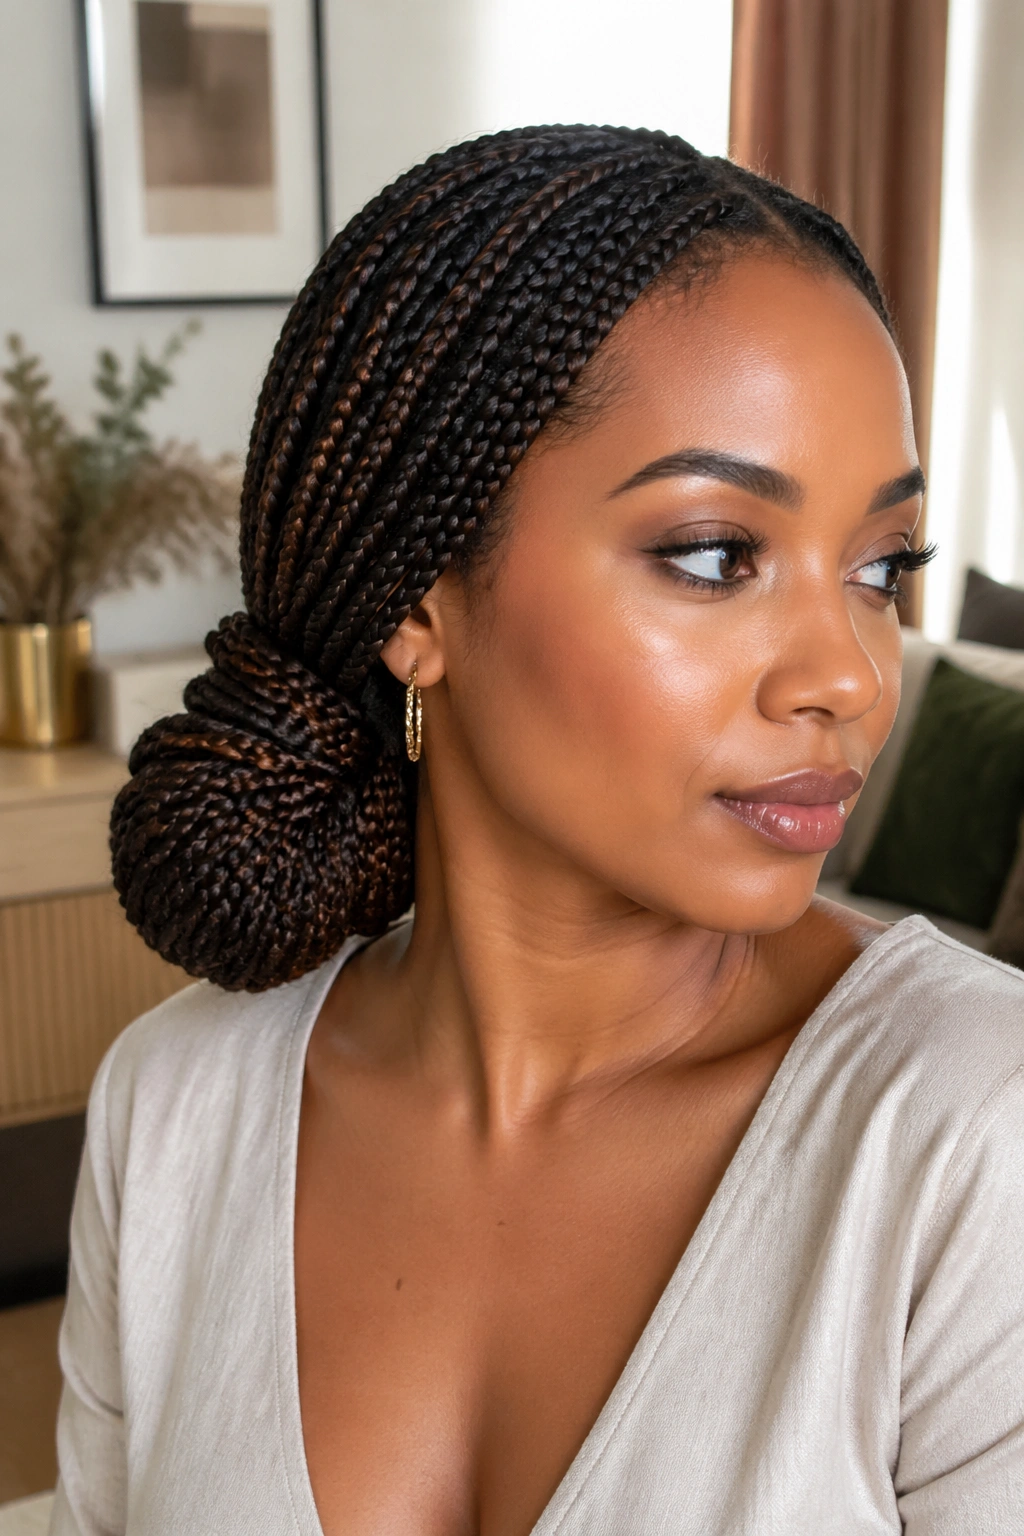
A wrapped side chignon brings the braids down toward the collarbone and holds them there in a side coil that feels a little more graceful than a basic side bun. It works especially well with off-shoulder tops, asymmetrical necklines, and outfits that already have some shape at the top. The hairstyle should echo that line, not compete with it.
Sweep the braids to one side, usually the side opposite your part, and build a low chignon just under the ear or slightly lower. Then wrap one braid around the base like a ribbon to hide the elastic and a few of the pins. That extra wrap makes the style look finished even if the rest of the braids are not perfect.
I like this one when I want the face open but not bare. It gives the neck room, shows the earrings, and keeps the bulk low enough that it does not feel top-heavy. If your braids are a little rough at the ends, this style can hide that better than a high bun can.
A decorative comb works here. So does a single metal cuff tucked near the base. Keep the rest of the styling quiet.
13. Pinned-Back Braided Headband Updo
Sometimes the best updo is one that behaves like a headband first and a bun second. This style uses a line of braids across the hairline or crown to hold the face-framing pieces back, then tucks the rest into a low roll, knot, or compact bun. It’s neat, but not severe. That balance is what makes it useful.
Shape the Band
Take a small section from each temple and guide it back across the top of the head, pinning it into a curved line that sits just above the forehead. The line should feel smooth and deliberate. If one side dips too low, the whole look gets sloppy. A couple of hidden pins under the curve usually fix it.
Hide the Ends
The remaining braids can go into a low bun at the nape or into a tucked roll. The important thing is keeping the band visible while the rest of the style stays quiet. That contrast creates the shape. It also helps disguise roots that are not perfectly fresh, since the eye goes to the band first.
This is a strong choice for windy days, busy workdays, or any time you want the front of your hair to stay put without committing to a full crown style. It’s practical, and it still feels styled.
14. Knotted Center Bun
A single knot can look cleaner than a bun. That’s the whole appeal of this style. Medium box braids have enough thickness to hold a knot shape, so the result feels sculptural instead of messy, especially when the knot sits right at the center back of the head.
Gather the braids into a mid or low ponytail, divide the tail into two thick halves, and tie them once like a simple knot. Tuck the ends under the knot and pin the tucked pieces close to the base. The knot itself should stay visible. That’s what gives the style its shape and keeps it from becoming an ordinary wrapped bun.
Do not pull the knot too tight. That’s where people lose the shape and start creating a hard lump instead of a knot. Keep the tension firm enough to hold, soft enough to keep the braid texture visible. The pins should support the knot, not crush it.
This style sits nicely between polished and casual. It works for dinner, gallery nights, or any setting where you want the braids to look styled without looking formal. A smooth center part makes it even cleaner.
15. Basket-Weave Bun
A basket-weave bun is the style I save for when I want the back of the head to look more detailed than the front. The braid pattern does the work for you. Cross, tuck, repeat, and the bun starts to look layered in a way a simple knot never can.
Split the medium box braids into three or four sections, then weave one section over another as you bring them toward the nape. Once the woven shape starts to form, coil the remaining lengths into a bun and pin them underneath. The weave should stay visible on the outer layer. If you hide every line, you lose the point.
This one takes more time than the others, and I’m not pretending otherwise. It’s a style for the days when you actually want to fuss. But it pays off because the bun looks richer and more textured than a plain wrap. If a few braids are older and frizzier, that texture blends right in here. That is part of why I like it.
Use a few cuffs or a slim wrapped braid to hide any obvious joins. The bun should feel woven, not packed. Leave the shape a little airy. That keeps the detail from getting lost.
Final Thoughts
Medium box braid updos work best when the base does the heavy lifting. Once the anchor is solid, the rest becomes shape, balance, and deciding how much braid you want to show.
Small tools make a big difference. A satin scarf, a few U-pins, a snag-free elastic, and a brush for the hairline can turn a style that falls apart into one that lasts through a full day without much fuss.
If you want the easiest rule to remember, use this one: match the updo to the weight of your braids, not the other way around. Low buns and tucked styles tend to be kinder to the scalp, while higher shapes work better when the braids are fresh and the base is secure.